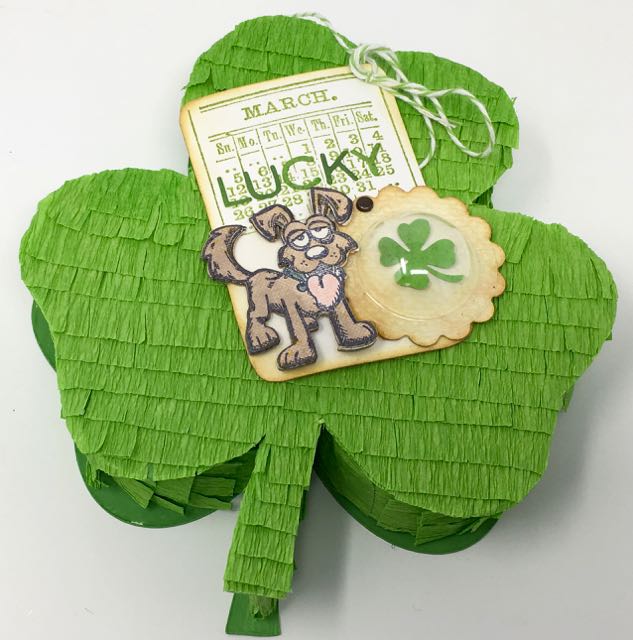
Here is another craft for the 14 Days of Spring Crafts series - the Shamrock Candy Box. You can make this fun, unique Shamrock candy box for St. Patrick's Day with these simple materials - cardboard, hot glue, paint and crepe paper.
The free pattern is in the Paper Glitter Glue library and the instructions are listed below.
So let's get started on this fun paper craft for St. Patrick's Day.
This post contains some affiliate links for your convenience. Click here to read my full disclosure policy.
Materials to make the Shamrock Candy Box
- Cardboard - Design No. 46
- Hot glue
- Gesso
- Paint - Distress Paint Mowed Lawn
- PVA glue
- Crepe Paper
- Embellishments:
- March calendar stamp - Stamper's Anonymous
- Mini-Crazy Dog stamp - Stamper's Anonymous
- EK Success Scallop punch
- Ranger Wendy Vecchi Archival Ink Leaf Green
- Tim Holtz Dimensional Domes - Sizzix Accessory
- Tim Holtz Four Leaf Clover Punch
- Candy
Outline to make the Shamrock Candy Box
- Download the Shamrock Candy Box pattern - Design No. 46 - from the Paper Glitter Glue library
- Cut out the pattern
- Curve the cardboard strips for the sides
- Apply hot glue to one section of shamrock at a time
- Glue cardboard to each section of the shamrock
- Make sure the top shamrock sides are larger than the bottom shamrock sides
- Paint with gesso
- Paint green
- Cut strips of crepe paper, then cut for fringe
- Apply crepe paper
- Add embellishments if desired
First Download the pattern for the Shamrock Candy Box
The shamrock pattern is available for free in the library. All you have to do is click on the library link which is kind of like the front door to the library. Then click the link within that page to take you to the password-protected page of the library. Type in the password and then access the library. I add each pattern in chronological order with the most recent addition at the top.
If you don't have the password, just subscribe to my newsletter and I will send you the password right away on your screen and as an email. You can subscribe with the form below.
The pattern is stored as a compressed zip file, first you have to unzip it so you can see what is in the folder. Here's how to unzip it on a PC and here is how to unzip a file on a Mac. The pattern is available as a PDF and an SVG file for those of you with an automatic cutting machine like a Cricut.
Cut out the Shamrock pattern

Pattern pieces for the Shamrock Candy box
Use the PDF file if you are cutting out the pattern by hand.
I have added a score line on each shamrock to show you where to apply the hot glue when you glue the sides on the candy box. Don't actually score these lines.
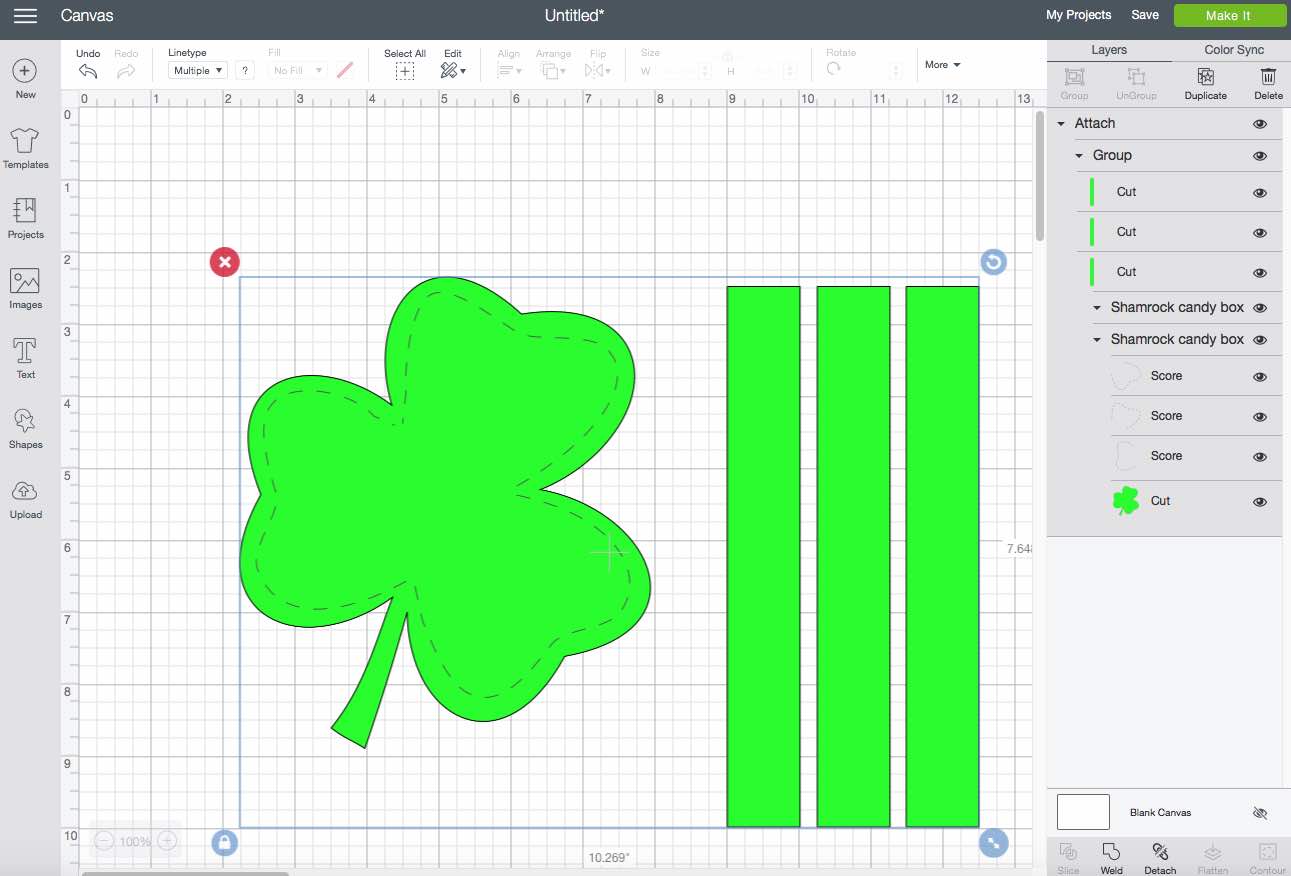
If you are cutting out the pattern with a machine like a Cricut, here is what it looks like on the Design Space software. Here is the top pattern piece of the shamrock showing the score line marked scoring. I have a Cricut Explore Air which doesn't score very deeply, but it does score enough for me to see the line so it helps as a marker.
And here is the bottom piece showing the scored line as a guide line for the hot glue. See how the score line on the bottom pattern is inset so much more than on the top pattern. That is to make sure that the top will fit over the bottom.
Curve the cardboard for the sides of the Shamrock leaflets
Now gently curve the cardboard to the shape of each leaf of the shamrock. I leave the cardboard pieces a little long so I can trim them to size as I hot glue them to the top and bottom pieces.
Apply hot glue to one section of shamrock at a time
Now hot glue each strip to each leaflet of the shamrock one at a time. When you glue on the top piece try to glue on the outer side of the score line. Then on the bottom piece try to glue on the inside of the score line.
Also glue a folded strip of cardboard on the top piece stem for support. That area is too small to put a piece on the both the top and bottom pieces. Just glue it on the top piece.
Glue cardboard to each section of the shamrock
Make sure the top shamrock side fits over the bottom shamrock.
Prime your treat box with gesso
After you glue the sides on then you can prime your shamrock candy box with gesso so the paint will adhere better.
Paint green
Well, I painted my shamrock green - Mowed Lawn Distress paint green. You could choose a different color if you choose. I chose this color because it matches my crepe paper pretty well.
Cut strips of crepe paper, then cut for fringe for the piñata effect on the candy box
If you want your shamrock to mimic the look of a piñata, then cut 1 inch strips of crepe paper and then cut fringe into the strips like I did on the Valentine Piñata Candy Box.
Apply crepe paper
Apply the crepe paper just like on the Valentine Piñata Candy Box. On the front of the shamrock, start at the bottom of the shamrock and add crepe paper strips starting at the bottom. On each side, start at the bottom of each leaflet and glue each successive strip of fringed crepe paper on top of the one below.
Add St. Patrick's Day embellishments
Now if you want to add a tag to the front of your Shamrock treat box, poke a small hole on the edge so you can string some baker's twine through the hole for the hole. Stamp a St. Patrick's Day sentiment or die cuts on a tag. I chose to make a little lucky clover dome with a smiley dog and a lucky word on the March Calendar stamp. I found some green baker's twine to attach the tag.
So this is a fun and different craft for St. Patrick's Day. I hope you try it.
Let me know if you have any questions. You can email me at [email protected] or leave a comment.
Be sure to pin this to your favorite Pinterest board.
Lucy
And please feel free to pin to your favorite crafty board so you remember where you saw this post.
Ya'll take care.
Lucy


Leave a Reply