 I have always loved cornstarch and baking soda ornaments that I've seen on Pinterest. Specifically what I like about the cornstarch dough is it's inexpensive and that it dries to a bright white color compared to salt and flour dough. So I decided to make ornaments from this recipe using various Stampers Anonymous Tim Holtz Christmas stamps. The cornstarch dough recipe is easy. But I found other challenges which you will see below.
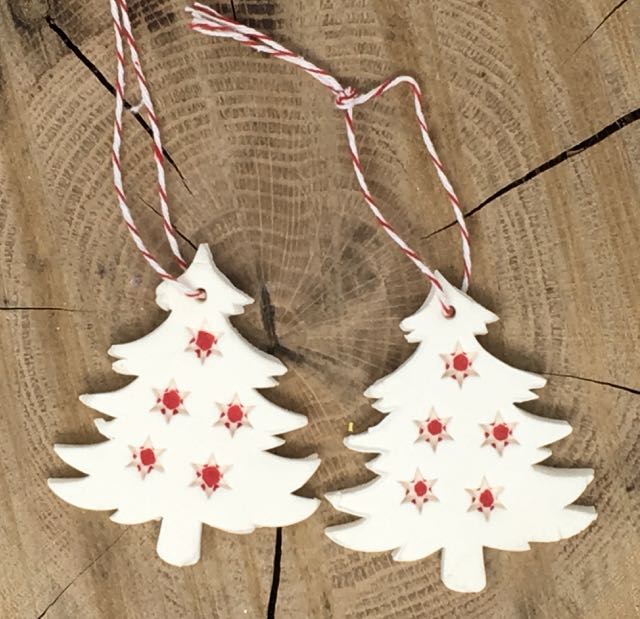
First let me start off by telling you about the ornaments you see above that I made about several years ago. Both of these Christmas tree ornaments were stamped from the cornstarch dough with a spring-loaded cookie cutter that makes a star impression on the tree. These ornaments have lasted for more than 5 years without any kind of sealant. That they have lasted so well motivated me to make more cornstarch dough ornaments. And since I love Stampers Anonymous Tim Holtz stamps, I decided to use them on my dough.
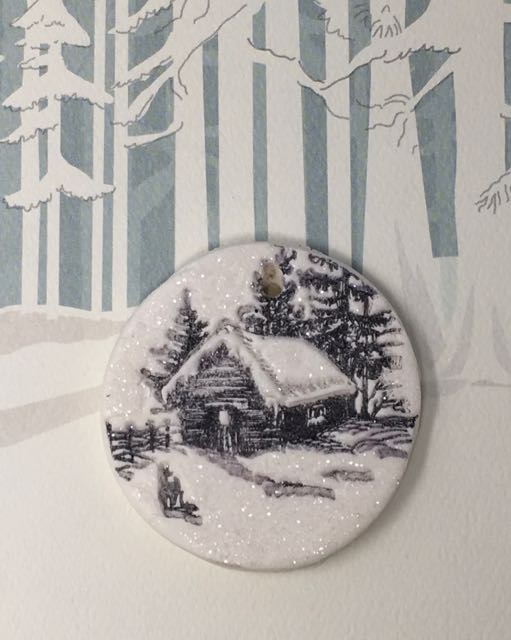
My favorite cornstarch dough ornament made with the Stampers Anonymous Tim Holtz stamp called Holiday Drawings
This post contains some affiliate links for your convenience. Click here to read my full disclosure policy.
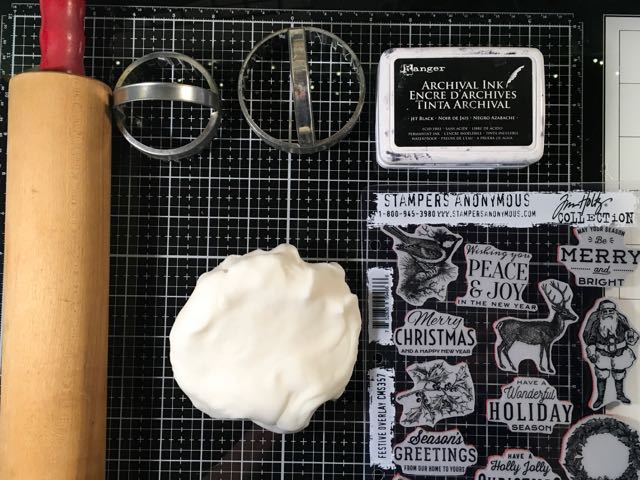
Here are the materials required for making these Cornstarch dough ornaments:
- Cornstarch
- Baking Soda
- Water
- Rolling pin
- Nonstick mat
- Cookie Cutters
- Dowels (very useful to roll out dough evenly)
- Stamps with simple design:
- Permanent ink for stamping like this Archival Ink
- Glitter - I love this glitter from Tim Holtz
- Glue to adhere glitter
This ornament worked pretty well.
This cornstarch ornament worked out ok, too.
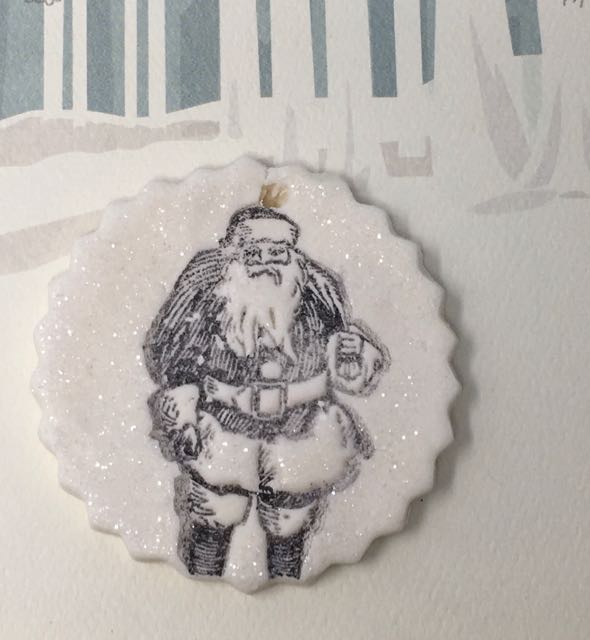
The Santa's not bad either.
Instructions for making Cornstarch and baking soda dough:
Mix together in a medium sized pan:
½ cup cornstarch
1 cup baking soda
¾ cup water
Stir constantly over medium heat. I have an electric stove so it took a little while to get the dough to the proper consistency - about 5-10 minutes. The videos I watched where the dough was cooked on a gas stove took only a 2-3 minutes, but my stove took longer. The instructions always say to stir until it is the consistency of mashed potatoes. To me that seems a little vague because people make mashed potatoes differently. Some people make very creamy mashed potatoes. I think a better description is to keep stirring until the dough pulls away from the side of the pan.
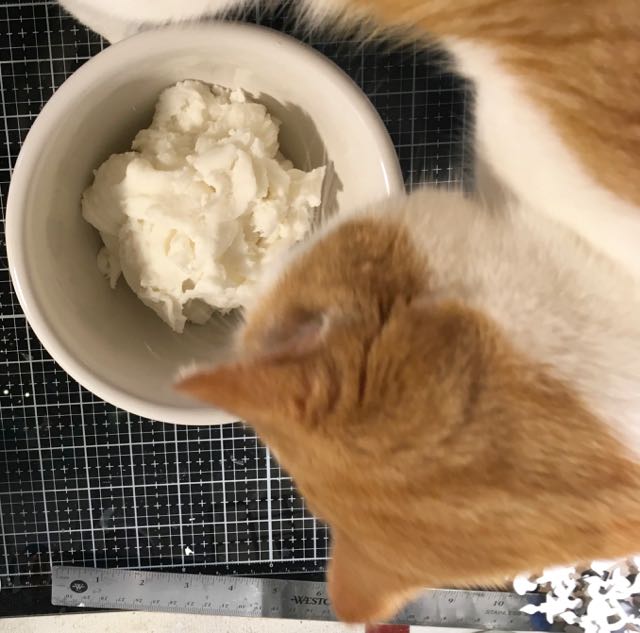
This is the way the dough should look when it is at the right texture (except omit Bill the cat).
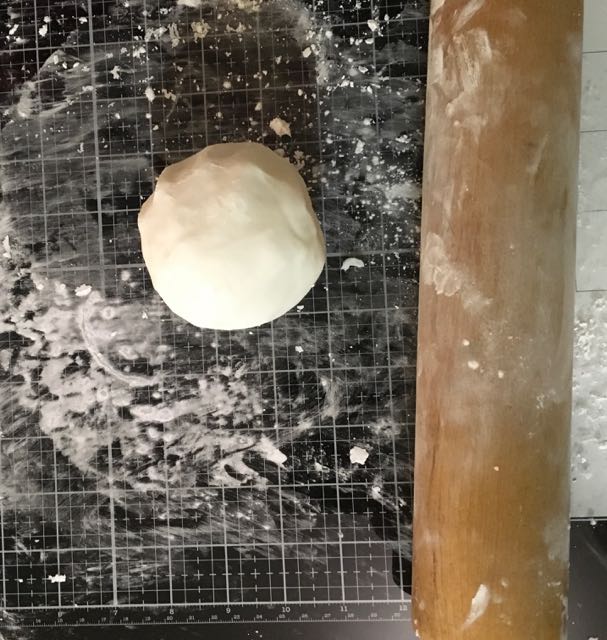
Once you get to that stage, put the dough in a glass bowl and cover with a damp cloth and let the dough cool until it is cool enough to handle. It doesn't really take very long. Knead it just a little bit to make a smooth ball.
Cooled cornstarch dough ready to roll
How to roll out the cornstarch dough
To roll out the dough you need to roll it out on a non-stick mat. I used my Tim Holtz Glass Mat because it's the perfect size and easy to clean. I did dust it with cornstarch first. That is critical.
Dust your non-stick surface with cornstarch before you roll out the dough
One thing I did not do was roll it out evenly. For the stamping to work on the ornament, you need the dough to be the same thickness throughout. There is an easy way to do this, but I didn't do it because I thought I could roll it out evenly. I was wrong.
The best way to ensure that your dough is the same thickness is to tape 2 dowels ¼ inch thick to the glass mat about 8 inches apart and roll the dough between the dowels. Then you guarantee that the dough is ¼ inch thick. Another option is to use rolling pin spacers on the rolling pin itself. Either of those methods will work.
Next challenge - cut out the shape
For the ornaments I tried 2 or 3 different cookie cutters - a scalloped edge one, a plain circle and a plain square. I found the plain circle worked best because when I cut the dough I could rotate the circle a little bit and loosen it from the surrounding dough easier. They all worked, but I made more successful ornaments with the plain circle (which was really a Tim Holtz Mason Jar lid).
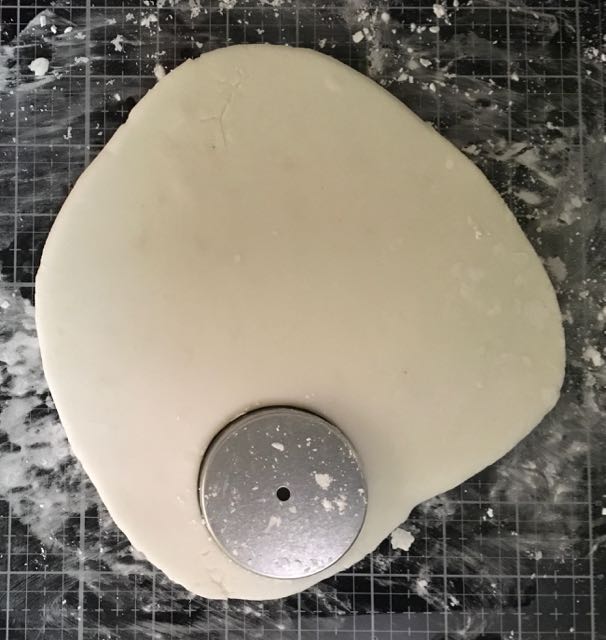
Cut out your ornaments with your cookie cutter or Mason jar lid even
The ornaments that I made years ago were made with a spring-loaded stamp in the center of the cookie cutter. That worked really well for cutting and stamping at the same time. There are a lot of cookie cutters available in this style.

Cut out dough for the cornstarch ornaments. Notice that some of the cut outs are uneven.
How to stamp the ornaments
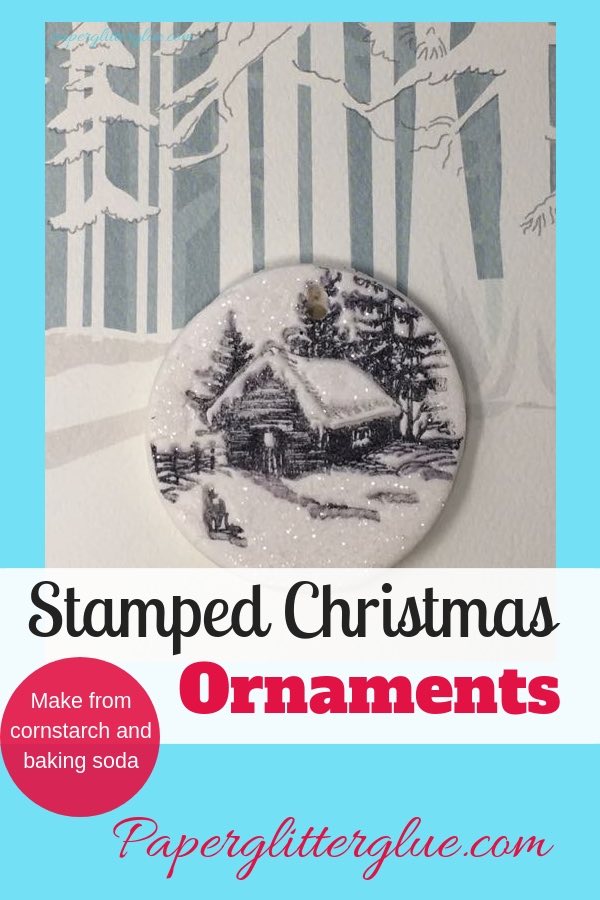
First choose a simple design for your stamping. That is crucial to your success. But my best ornament really wasn't a simple design - I don't know why it worked so well. That's the cabin from the Stampers Anonymous Holiday Drawings stamp set by Tim Holtz. I really wanted the bird on a branch on the Tim Holtz Festive Overlay stamp set to work, but I never could stamp it right.
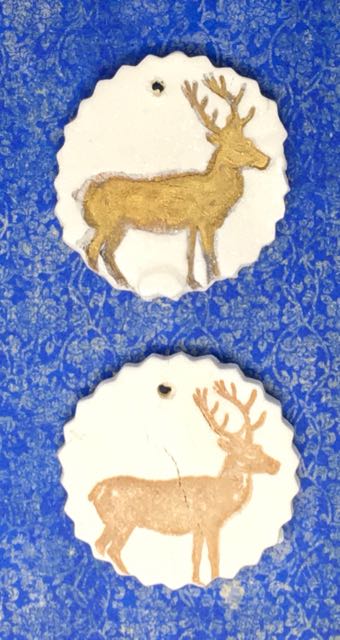
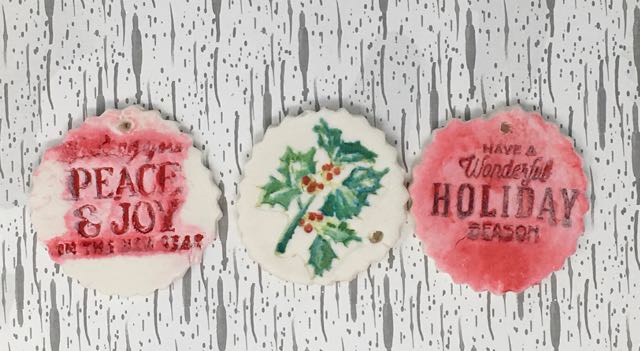
After you choose your stamps, you need to decide what color ink you are going to use. My best ornaments worked with a permanent black ink. I wish I had a good permanent gold ink for stamping, but I didn't have one when I made the ornaments. You can see the gold stamp ornament on the deer ornament on the bottom. It just wasn't gold enough. I tried painting one of the deer, but I wasn't really happy with that one either.
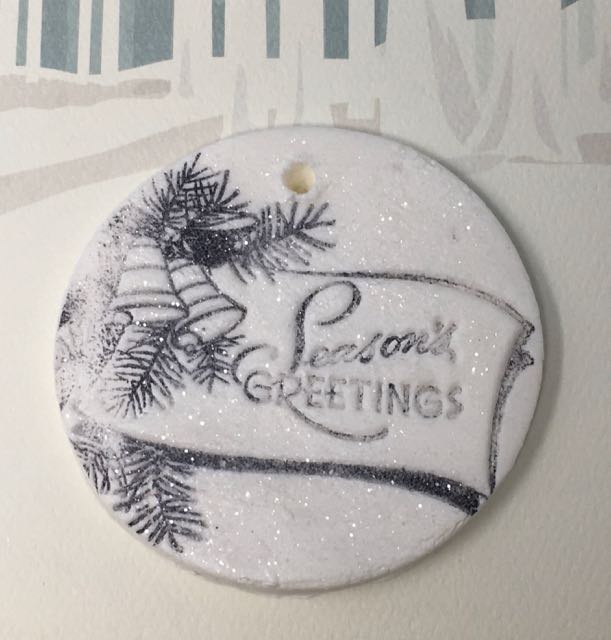
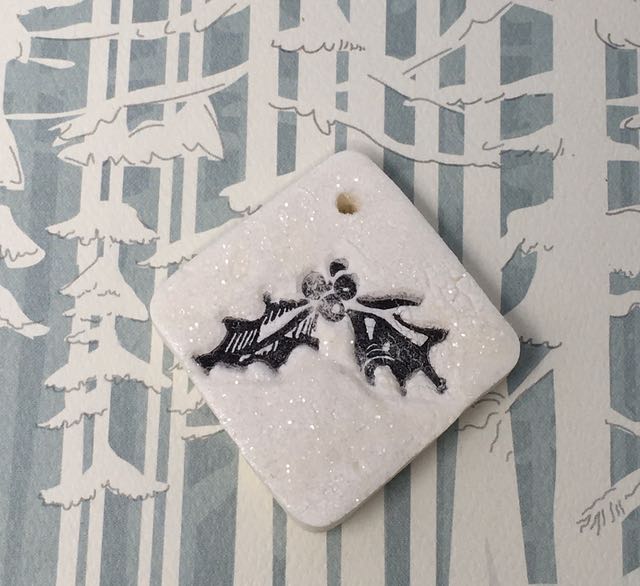
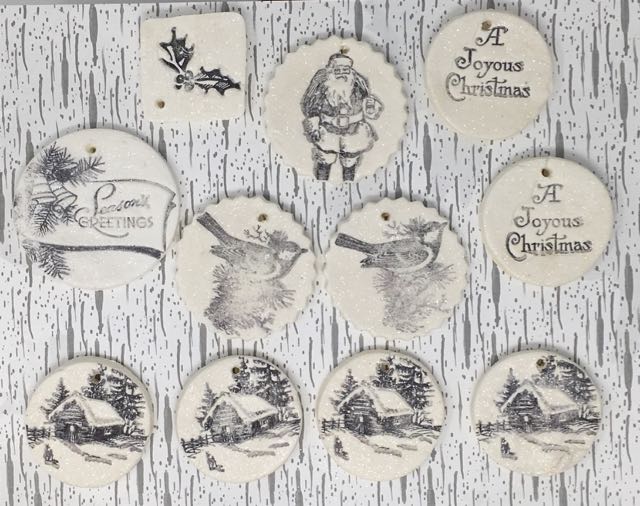
Cornstarch dough ornaments stamped with Stampers Anonymous Christmas stamps
Now dry the ornaments
All the instructions that I read on the internet suggested turning on your oven to its lowest setting - 170 degrees for me and bake for about an hour. Turn them at the halfway point. Personally, I think they would dry better if you could dry them at a lower temperature than that, but that's as low as my oven would go. Some of the ornaments curled a little bit because the top side dried faster.
Depending on the thickness of your ornaments, you may need to bake them longer. You can tell when they are done when they are hard to the touch and don't dent if you press your nail into the ornament.
Decorating the Cornstarch dough Ornaments
On the ornaments that looked ok, I painted the raised part of the design with a dilute glue - Mod Podge, in this case and then glittered with Rock Candy Glitter. I like the effect especially on the the little cabin ornament.
On others I tried painting them with some dilute paint so it would soak into the indentations - not successful. I am kind of embarrassed to show you my failures, but in the spirit of crafting honesty, you can see them one of the photos below where I go over my crafting goofs in this project.
Problems I had Making these Ornaments
All right so here are some of the more successful ornaments. I'm going to go over some of the issues I had making the ornaments.
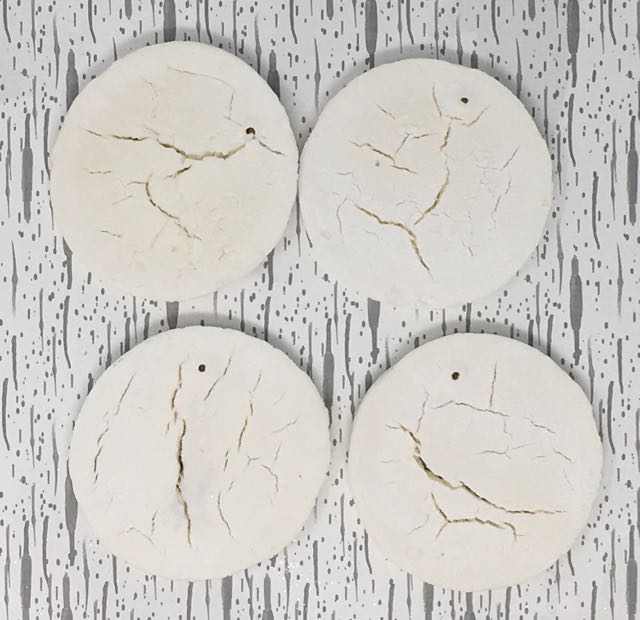
Various cornstarch dough ornaments - some successful, some not so much
-
Number one is that the dough has to be rolled evenly for you to stamp correctly. I didn't pay enough attention to that.
-
Choose a simple design. For some reason the little cabin worked pretty well even though it's not really a simple design. I think it worked because the depth of the design was about the same throughout the stamp.
-
The bird did not work because the delicate parts of the design were probably more shallow and I didn't stamp deep enough. I stamped a number of those birds and never got it to work.
-
Be careful drying your ornaments, sometimes they will crack all the way through which will cause them to break. In other words, dry them slowly.
-
The ornaments are porous and absorb paint readily. If you are going to paint them, use a thick layer of paint. My experiment where I tried to use dilute paint to highlight the words didn't work as you can see below.
Paint is absorbed through the dough.
Conclusion - Would I make more of these ornaments?
Yes, absolutely. But I would make them again with these changes.
- Simple outline shape - the plain circle worked the best
- Roll the dough so that it is a consistent depth throughout. I'll use the dowel technique.
- Only use stamps with a simple design.
- Buy some other color permanent inks to experiment with. I would like a really nice gold.
I hope you have had a nice start to the new year. I do hope 2019 will be a great year for you - for all of us.
Take care.
Lucy
How to make stamped Cornstarch ornaments including the challenges stamping on this dough
Diane
Lucy these are fantastic! I just bought Tim Holtz little cabin last night! I was looking for some ideas and theses came up ...what a great idea! I never used the corn starch dough but I am definitely going to try it. I am also trying to decide on one of your houses to try. Now I need to get back in my craft room been away so long. Thanks again and I hope your brother is feeling better!
Lucy
Thank you, Diane. You have to experiment a bit with the dough. And you will throw away some of the ornaments, but the ones that work are pretty cute.
Bon
Lucy, thank you so much for including the problems you encountered. I am having problems restoring some Putz houses. They were pretty far gone when I started them, but I learned what pitfalls to avoid. I'm not so much worried about keeping their value, but they have good memories for me.
Janet
Love these, want to try doing this when I can find some time...LOL The cabin is my favorite but I also love the Seasons Greetings, holly and Santa. Great instructions, thank you!
Sara Emily Barker
Lucy, this is a really cool idea, and I love your results, especially the cabin. I'm surprised at how well that turned out, considering the intricacy of the stamp. Your post is exceptionally helpful and you seemed to cover all the bases for those that want to give this a try. I made salt dough ornaments back in my teens, and I just threw the last of them out. I'm happy to see Bill liked to get involved--just like Roger. Happy New Year!
Dianne C Stucki
Those are really cute.
I wonder...would putting them into a dehydrator work?
Lucy
I think that would work better than an oven. Sounds like a great idea.
Janet
Great idea!!!
Lori Souter
these are so cool! thank you for sharing the good and the bad! I just love them! Do you think air drying would work or do you have to bake them?
Happy NEw Year!
Lucy
I do think air drying would work. The problem for me is that we are having a seriously rainy winter and the air around here just isn't that dry. If I had a fireplace (that worked) or a wood stove, I think it would be perfect for drying the ornaments. You could just set them near the fireplace or stove and let that dry them out.
Maggie Taylor
Thank you so much for these instructions. I intend to try to copy them. You made everything very clear...user friendly I believe is the correct term.
It is people like you who make we crafters aspire to better things! Thank you
Lucy
Maggie, thank you so much. Your comment helps me. Sometime I feel like I include too much detail, but I hope that it helps people. User friendly - that is very nice. Thank you.
Helen J Roberts
I really love this idea. I have made plaster ornaments in the past using candy molds but I think this dough will work even better. I think the paint on the holly looks fine. Love the softened look. Thank you for sharing a great idea!
Lucy
Helen, thank you so much for your comment. I think it helps to experiment when you make something like this.
maria
My favorite are the Santa and house ornaments. Very ncie. Have you ever considered fimo clay?
Lucy
Maria, I have used Sculpey before. That's what I use to make my pumpkins for Halloween houses. The thing I like about the cornstarch ornaments is that anyone can make them from inexpensive, easily obtained materials. But I do think you are on to something because Fimo and Sculpey clays would be much firmer and would probably stamp much better. I will try it sometime. Thank you.