Halloween Paper Crafting Whenever Inspiration Strikes
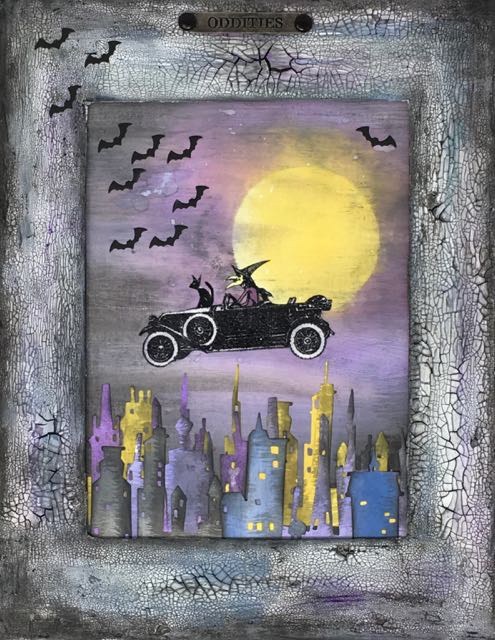
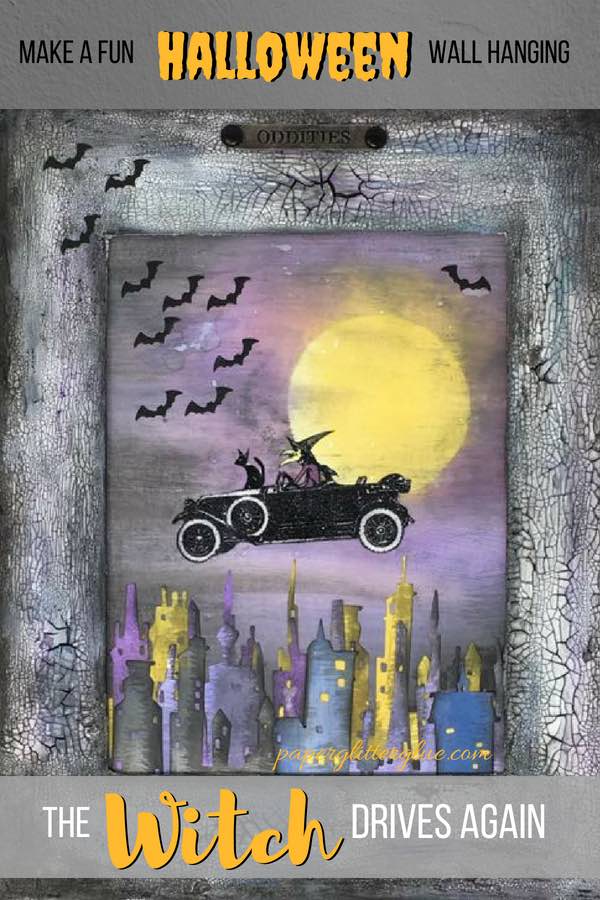
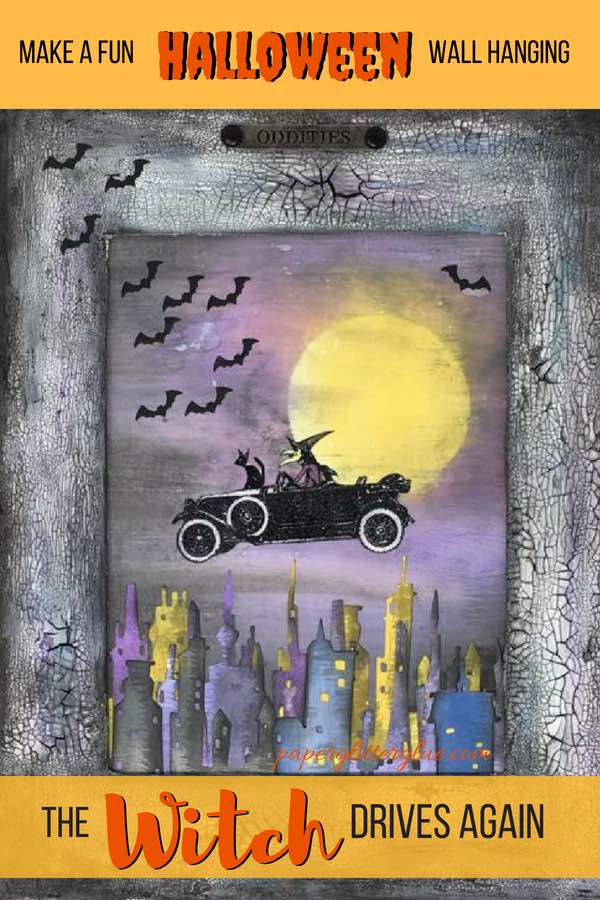
The Halloween wall hanging called the Witch Rides Again - Showing Off her New Ride
I love to make any variety of Halloween paper crafts. It doesn't matter what time of year it is, if I get Halloween inspiration - I'm going to make something spooky or haunted or funny and a little bit creepy, but not too creepy. This wall hanging (but it could easily be a card)- The Witch Drives Again - is inspired by a similar wall hanging I made last year called "Grumpy Back Seat Driver." I made it with numerous Tim Holtz products that came out that year. It remains one of my very favorite Halloween paper crafting projects so I wanted to make a sister project to go along with it.
Oh, the other inspiration is from Frilly and Funky challenge - Planes, Trains, and Automobiles. My Halloween vintage auto-driving witch rides just in time to enter this challenge.
This post contains some affiliate links for your convenience. Click here to read my full disclosure policy.
The Witch Drives Again - Showing Off her New Ride
This wall hanging is officially called "The Witch Drives Again - Showing Off Her New Ride" made with the Tim Holtz' Vintage Auto stamps from Stampers Anonymous (CMS265) and the Haunted House set (CMS308) that includes the smug-looking witch riding on her broom with her cat.
To figure out which vintage automobile would provide the best ride for my witch, I fussy cut several automobiles and put the witch in the driver's seat to see where she fit the best. You can see the various automobiles that I stamped and fussy cut. Let me just say that cutting out vintage cars and the witch is not easy. Vintage cars are not aerodynamic - they have all these funny pieces of trim sticking out. The witch and her cat have funny pieces sticking out too. I'm going to use the Halloween trick-or-treat kids in another project.
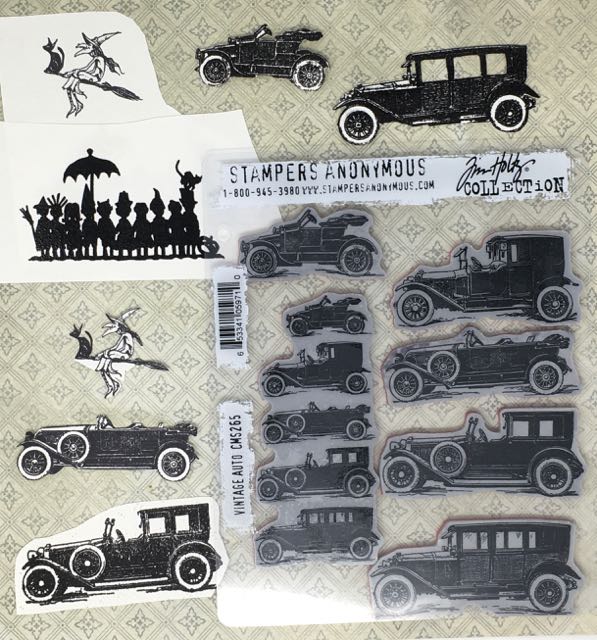
Stamped images of the Halloween elements for Witch Drives Again Wall Hanging
Outside of fussy cutting the stamped images, one of the most challenging things was that I misplaced my favorite Halloween purple - Wilted Violet Distress Oxide ink right before I needed it. I was trying to organize my Distress Oxide inks and I put it in a new basket and temporarily lost it. It's found now, but I needed it earlier.
Making the Witch Drives Again
I neglected to take photos during the process of making this wall hanging so I'll just briefly outline the steps in making it. Here's a summary of the steps:
- Make a frame for the wall hanging
- Distress the frame
- Background for the Witch Drives Again
- Stamp and emboss the Witch, cut out
- Stamp and emboss the vintage automobile, cut out
- Color watercolor paper with various shades of Distress Oxides for buildings, cut out
- Cut out bats
- Arrange Halloween elements on the background
- Glue background to the distressed frame
Now I'll go over these steps a bit
Make A Frame for the Halloween Wall Hanging
Obviously when the witch rides again, she needs a distressed frame. The frame is the same size as the background 8.5 x 11 inches. Both the frame and the background consist of 2 layers of cardboard glued together. The frame itself has a rectangle cut out large enough to give my witch room to maneuver. First I applied black gesso to the frame because I planned to layer crackle paste on top. I smeared a pretty thick layer of crackle paste on with my finger. I like the way the black shows through the crackles. After the crackle paste was dry, then the distressing began. I painted some Black Soot around the edge, then Stormy Sky, then Dusty Concord. At first it seemed too light so I just kept adding more color and more Black Soot paint. I may add still more later.
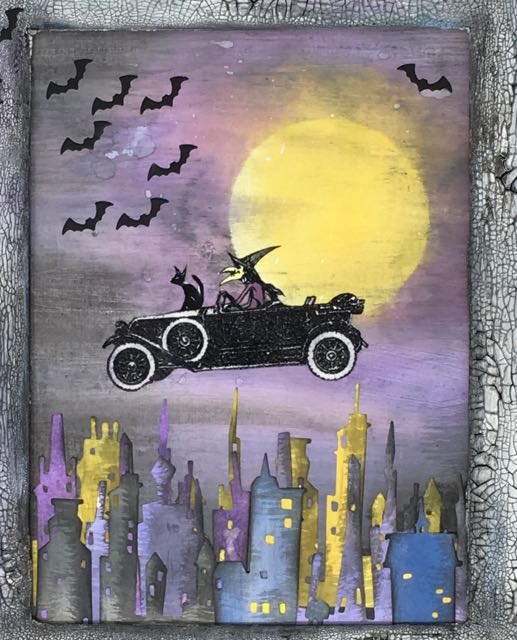
Make the Background for the Witch Rides Again
When I made the Grumpy Back Seat Driver, it was the first time I had ever masked off a moon for the background. And I haven't done it since so I tried to remember how I did it. I think I did a few things better this time.
First, applied Mustard Seed Distress Oxide in a circular pattern to make the moon. Then I cut out a circle the size of the moon. Just holding the circular mask down I edged around it with my lighter colors of the sky, mostly Shaded Lilac Distress Oxide, I think. I also used Stormy Sky and Dusty Concord. Then I picked up the mask and lightly streaked over it with Black Soot ink. I kept adding darker colors around the background edge trying to make it streaky like when you see those wispy cirrus clouds in the sky at night.
Stamp the Witch
Close-up of the Witch Drives Again
The witch driver was stamped with Archival black ink and then stamped again with embossing ink. I used clear embossing powder to give a little shine to my witch. Also the embossing gives more dimension to the witch and her cat so they were easier to color and to cut out. She needed green skin so I chose my favorite creepy-green skin color - Twisted Citron, of course. I had trouble deciding on the dress color because I had temporarily lost my Wilted Violet Distress Oxide so I used the Dusty Concord.
I fussy cut out the witch and her cat giving her a bit of haircut to simplify the cutting process. Her ride is next.
Stamp the Vintage Automobile for the Witch
Following the same process as for the witch, the vintage auto was stamped and embossed. I did stamp a number of cars because I needed to know which one she fit in the best. Probably some savvy reader can look at this vintage auto and tell you what kind of car it, but I cannot. To me, it's just a cool-looking old timey automobile. A cool-looking old timey automobile that is hard to fussy cut, that is.
Color Watercolor Paper for the Cityscape Buildings
Using the Distress Oxide inks, I colored some watercolor paper before I cut out the city buildings. Each piece was first distressed with Black Soot paint watered down a bit, then inked with Black Soot on the edge. I made lots of extra buildings because I know I will use them again and I wanted to play around with the arrangement of the city below the witch.
Bats - Always Need Bats
To me, the sky look a little barren without some bats flying around so I used the bat die from the Halloween Mixed Media set to make a number of bats. I just cut them out of black cardstock - no fancy painting or distressing needed for the bats.
Arrange Halloween Elements on the Background
Playtime - this is where you play around with the placement of your decorative elements. First I glued the witch and her car in place because that would determine where the buildings could go. I wish I had offset her a little bit more to the right side, not so centered, in other words.
I lightly outlined the location of the frame on the background to determine the placement of the buildings. Since I had made lots of extra buildings, I played around with the placement finally deciding on the current arrangement. I glued them down with regular glue and dabbed away any excess that oozed out.
Glue the Frame to the Background
Before the frame was attached, I added an "Oddities" word band at the top because it needed something. Then I glued the frame and the background together. To keep the edges from popping open I used binder clips to hold it until the glue was secure. I waited to glue the bats down because I wanted them to extend to the frame.
If you are going to make a card, no need to make a frame. Just glue the witch and other elements to a decorative back paper that will function as a card.
Lessons Learned?
You know I can't help but go over what I learned from this process. Since the Witch Drives Again is just for fun, though I will sell it for the Habitat for Humanity Fundraiser, I don't obsess over it, like I do my little Halloween houses. But that doesn't mean I don't learn from it. Here are a few things I learned or would do differently:
- Smaller moon
- Better arrangement of the bats. I want them to look like a streaming cloud of bats, they never look right to me. It's something I'll keep playing with.
- Offset the witch - she's too centered.
- Make the frame more interesting visually
That's it for today. Like I mentioned earlier, I am going to enter this Halloween project in the Frilly and Funkie challenge. Just in time because it ends today.
I hope you are enjoying your summer. It goes by too fast, doesn't it? Take care.
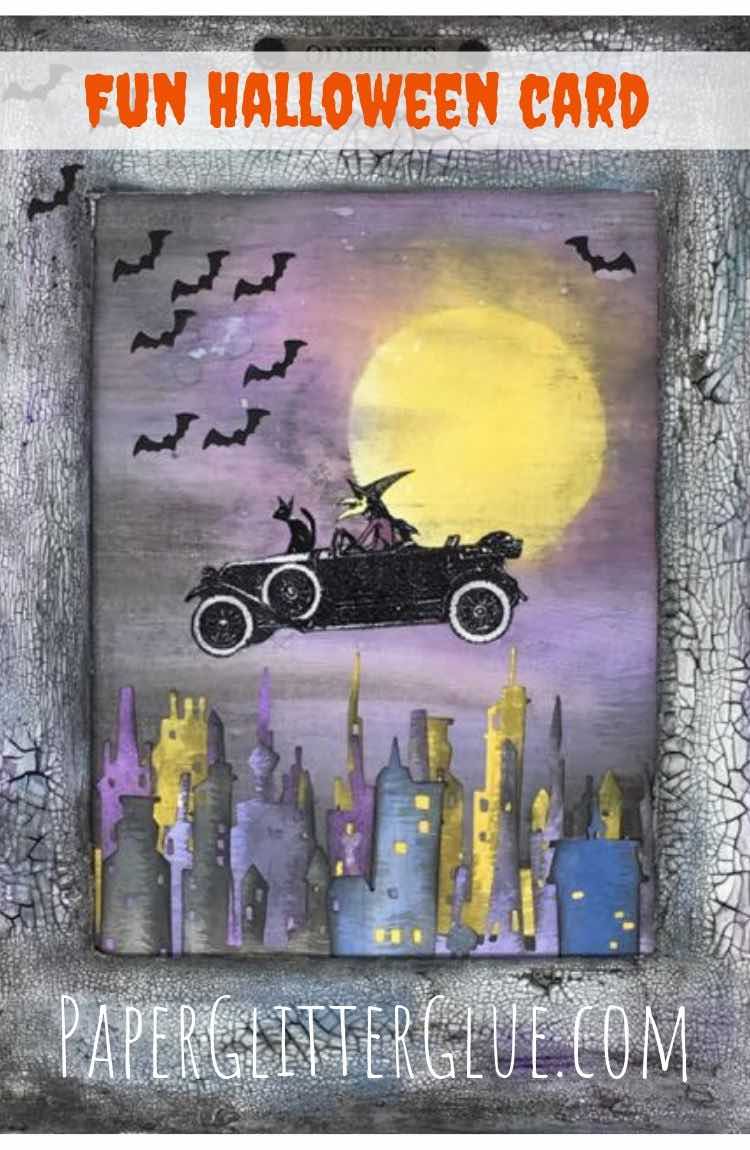
Follow paper glitter glue on Pinterest and pin to your favorite Halloween Craft board
Pin to your favorite crafty Halloween Pinterest board
Charlene Dahlberg
Love this project!! Can you tell me what witch stamp you used ?? I would love to try something like this
Thanks so much
Charlene
Lucy
Charlene, The witch stamp is from a Tim Holtz stamp by Stampers Anonymous called Haunted House CMS 308. It was released last year. It is a great stamp set. I thought I answered you yesterday, but apparently it didn't go through. I would love to see your project when you get done.
Sara Emily Barker
I'm thrilled to see your Witch Drives Again canvas take WINNER at Frilly and Funkie! So well deserved! Hugs!
Nancy Yoder
Seeing this fun, crazy witch ...driving a vintage auto, made me do double sommersautlts!,,, amazing original design! Thank you so much for the inspiration.
Lucy
Thank you, Nancy. I am so glad you like it. This witch just lends herself to driving a car. Her face is so perfect for doing something funky like driving instead of flying a broom. I can't take credit for that part.
Holly M.
We are always our own worst critic. I think your art piece is perfect, and absolutely fabulous. Wouldn't change a thing. I'm a Halloween gal all the way, and this really tickles my fancy. Thanks for the great tutorial.
Barb Turpin
Congratulations on winning the Frilly and Funkie challenge! Your creation is amazing, so well done and so darn cute!
Sara Emily Barker
I had to come over for another peek! How incredibly FUN!
Cec
Super fun take on the challenge. Love that big moon and your witch's ride is way more fun that a broom. Thanks for joining us at Frilly and Funkie.
Hugs!
Cec
stampersuzz
This gave me a chuckle! Very fun and clever! The colors and design are wonderful and of course the witch fabulous!
Thanks for playing along in the Frilly and Funkie "Planes, Trains, and Automobiles" Challenge!
Lyla Larimore
This is ADORABLE!!!
Now, I'm not one for Halloween as my fave holiday (July 4th is), but I was born an October pumpkin, & we happen to enjoy having loads of kids TorT & always overdid the holiday for our own 2 Sons (who now each have a Wife that LOVES "A Nightmare Before Christmas" more than 'normal ppl'... along with all the horror movies they actually celebrate everytime the 13th falls on a Friday. *eyeroll*
Both our Girls would LOVE this whimsically crafted beauty!!!
Yours is yet the 3rd entry I've seen now on F&F who took this Challenge completely out of the usual "craft box" idea. I LOVE IT!!!
Lucy
Thank you, Lyla. Your comment makes me very happy. I was worried that I wasn't going to get it done in time. I had a little house with a pattern I had to get done before I could get to work on the witch so I just squeaked in the nick of time. I'm going to check out the other entries to see who you are referring to.
Sara Emily Barker
PS Your moon is FABULOUS!
Lucy
Thank you, Sara Emily. I am learning.
Sara Emily Barker
Wow, Lucy, I think I may just have to visit the HFH when this goes on the auction block! I love this JUST the way you made it! the colors and that crackle are GLORIOUS! I think the frame needs no further embellishment. What a fun take on our Planes, Trains, and Automobiles Challenge! I'm so pleased you shared this with us at Frilly and Funkie!
On a personal note, I couldn't locate my Picket Fence Distress ink this weekend. I still have yet to find it. Glad you found WV. Sending hugs!
Lucy
The funny thing about the first one I did - Grumpy Back Seat Driver is that when one of my co-workers saw it. She quickly grabbed it and said I want that piece. She likes my houses, but she really liked this piece. I have one more in mind for this concept called "Are we there yet?" I'm sure you can guess what that means.
ann barnes
I really love the colors that you’ve used to make this. I think the frame with all the crackle adds absolutely enough interest to showcase you awesome composition! This is super!