They've arrived - the Tim Holtz Sizzix Impresslits Embossing Folders have arrived!
These are the incredible embossing folders with an embedded die that cuts the design as it is embossed. Tim's 3-D Impresslits look like vintage Dresden trims - amazing. I immediately put them to work right after the mail was delivered. The perfect project is sitting on my craft table right now.
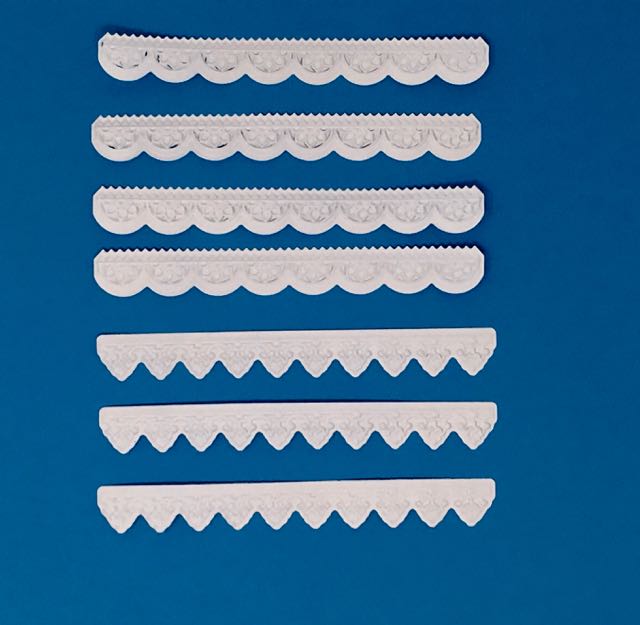
Comparison strips from the Tim Holtz Sizzix Impresslits embossing folder and dies all rolled into one
I was trying to nap this afternoon because my sleep cycle is messed up from working weird shifts in the ER. But when I heard the mail truck go by, I woke up right away because I hoped the new impresslits would be on that truck. And they were.
Tim Holtz posted a video on the best way to use them which had a few surprises for me. He says to lightly mist the paper before you place it in the folder. That was news to me. He even did this on the Idea-ology metallic paper. Good to know. The other thing he emphasized was running the Impresslit through the machine 3 times to get the incredible embossing detail. And finally, because you are running the paper through the machine 3 times, he suggested taping the folder with washi tape so the paper doesn't move.
This post contains some affiliate links for your convenience. Click here to read my full disclosure policy.
Here is my experiment with the new Sizzix Impresslits:
Start out with a relatively heavy weight paper that will hold the design nicely. Standard card stock that you can buy at an office supply store or a craft store is 65#, but you can also get 110# paper pretty easily. If I am going to paint or ink or stain my paper I like to use either watercolor paper or mixed media paper. I love how it takes the colors. (I also like to use up the watercolor pads because the cardboard on the back is so nice and thick - it's a secondary bonus for a cardboard connoisseur.)
This particular paper is 98# paper which you can see in the bottom right hand corner.

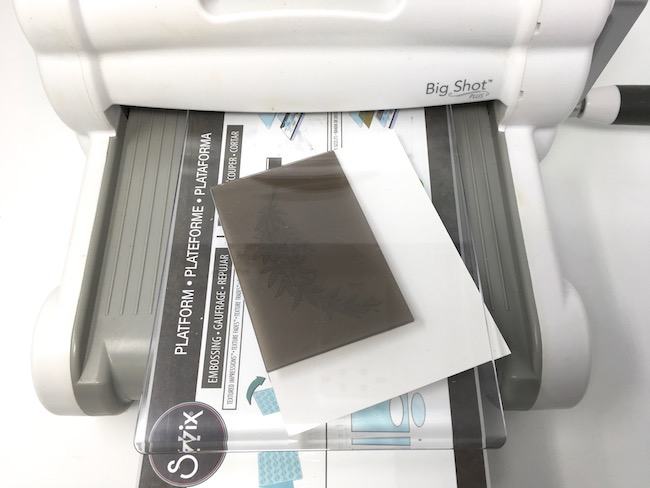
These are the supplies I used for the Sizzix Impresslits experiment - a mixed media paper 98# weight and my favorite painter's tape - FrogTape because it comes off so easily
For tape, I love painter's tape because it can be used over and over and is removed so easily. Washi tape is precious to me so I don't use it for holding things down. I just hate to waste it that way while I have no emotional attachment to the painter's tape.

The photo shows how I taped the Sizzix Impresslits to hold the paper firmly. I also leave the tape on to re-use it later.
I cut the paper to the width of the Impresslits that I used - 1.5 inches and lightly misted them with water just like Tim said. Then I experimented with how many times to run the paper through the machine. You can see the paper below when I used the Mini-Provincial and the Mini-Scallop dies. Each strip is labeled with how many times it was run through the machine.
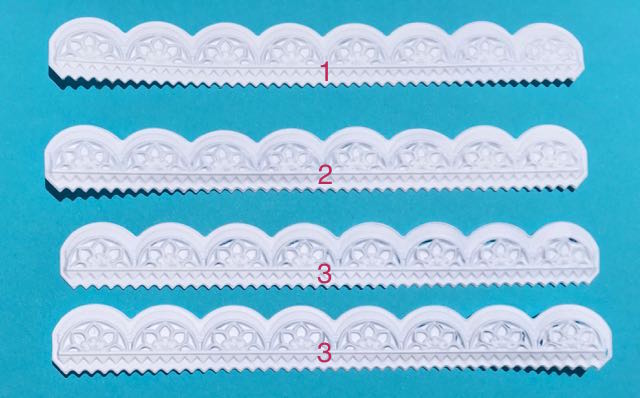
Tim Holtz Mini Provincial Impresslit

This Impresslit embossing folder is called Mini Provincial and I can tell it is going to be one of my very favorite dies of all time.
Even with my iPad photos I think you can see that the detail on the Mini Provincial die cut strips is more prominent on the paper that went through my die cutting machine more than once. The little dots below the design are hard to see on the strip that went through the machine only 1 time. The difference between 2-3 times is not nearly as evident.
Tim Holtz Mini Scallop Impresslit
Now for the experiment with the Mini Scallop die.
This Impresslit die is the Mini Scallop embossing folder. It makes a wonderful rosette strip with incredible detail.
The depth of detail on the Mini Scallop Impresslit is quite amazing. The embossing folder did cause the 98# paper to tear when I ran it through 3 times. Two lower paper strips show the areas where the paper tore. But see the amazing detail of the half rosettes? Stunning. Perhaps a thicker paper wouldn't tear and would still hold the incredible detail. That's a future experiment.
The strip with 2 passes has good detail and no tears. The strip made with just one pass loses a lot of detail.
And the conclusion of this experiment with the Impresslits: 2 passes through the die cutting machine for this paper. And yes, do spritz the paper lightly with water. But the bottom line - you have to experiment with whatever paper weight you use.
I know you will have fun with this variation on die cutting. Really, being able to make your own Dresden trims and medallions and rosettes is huge. I can't wait to work them into my projects.
Craft tip: Angle your Impresslit on the cutting platform so that when it goes through your cutting machine, it won't clunk so much. This way the die enters the machine more gradually.
And here is a brief video I made using my Sizzix Big Shot with a 3-D Impresslits die.
I used metallic card stock for this video.
I hope this helps you with these incredible 3-D embossing folders with the die built it. The Impresslits are truly impressive.
Here's another blog post about showing how I made a roof on one of my houses with the Impresslits.
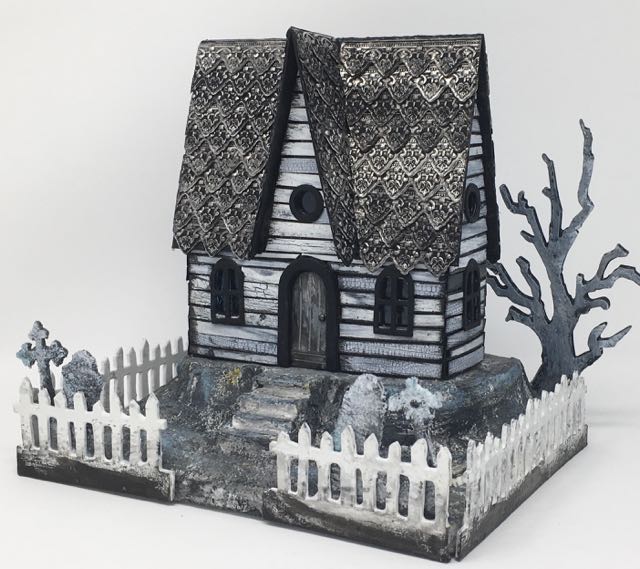
The finished Haunted Halloween House with its Silver Roof made from metallic embossed strips

Joyce
I just bought a sizzix big shot. It is not the new grey and white one. It is one of the green ones. I bought my first 3 d folder and I am having to turn the handle with more pressure and I am afraid I am going to break it so I have not yet ran it completely thru the machine. Iam placing the folder directly on top of the platform as instructed and then placing one pad over the folder. Will I risk breaking this machine if I run it all the way through?
Lucy
I just got some new impresslits yesterday. I will try them out on my Big Shot and add some photos later today, OK?
Lucy
Joyce, I updated the post with a video even. I hope you saw the post and that it helps you.
Laney
Your posts involving Sizzix and dies usually make me want one of these machines, but this - this is really beautiful and how much fun would this be on little houses??!! I am thinking of so many ways to use these. I also like this paper. It takes a variety of media well.
Sara Emily Barker
Thank you for the experiment. That's the paper I use more often than not, and ha, ha, for the same reason that it has an added chipboard bonus! I usually spray my paper with any folder, but for these it's a must if you don't want to tear it. I haven't ordered the impresslits yet, having spent all my craft $ on the folders. These are high on the wish list. Hugs!
Mary W
Oh what fun you are having! I'm green and I can't wait to see them on one of your houses.
Mary