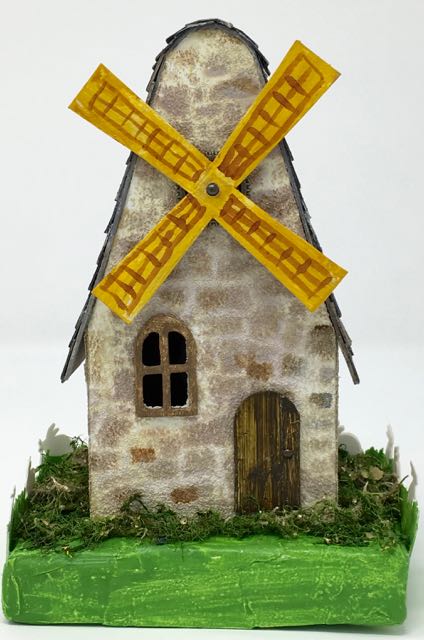
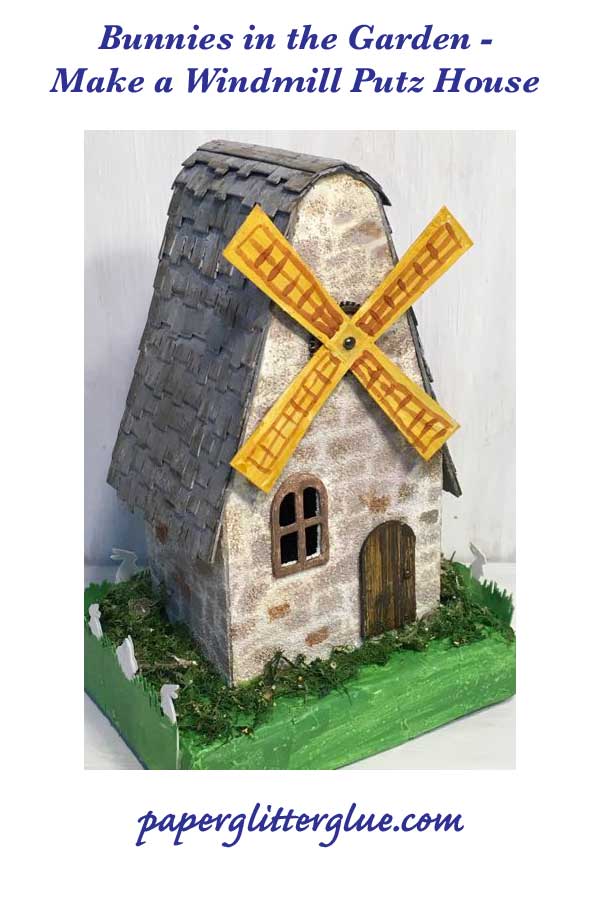
Springtime Windmill Putz House - the Miller's Place (or Bunnies in the Garden)

Spring Season Putz House called "Bunnies in the Garden Springtime at the Miller's Place"
I am always experimenting with different shapes for glitter houses or Putz houses. I made a house 2 years ago based on the shape of Candy Corn because I had never seen a house based on this concept. Below is my favorite. It sits on a round base where the top that comes off to put treats inside. My first attempt at polymer candy decorates the base.
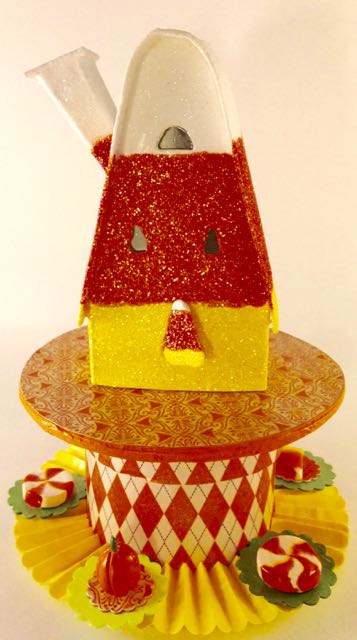
Later, I wondered if this shape could be modified into a different house - what about a windmill? Since Spring is on the way, I modified the house to look Springy with bunnies in the garden. That also fits with the theme of this week's Simon Says Stamp Challenge "In My Garden" though the bunnies are in the Miller's garden. That is the house at the top of the page - Bunnies in the Garden, Springtime at the Miller's place.
How to Make the Windmill House
- Cut out the shape of the house from cardboard
- Paint the house, then stencil the stone surface
- Glue the house together and adhere the roof and shingles
- Make the base to support the house
- Glue the house to the base and make the decorative border
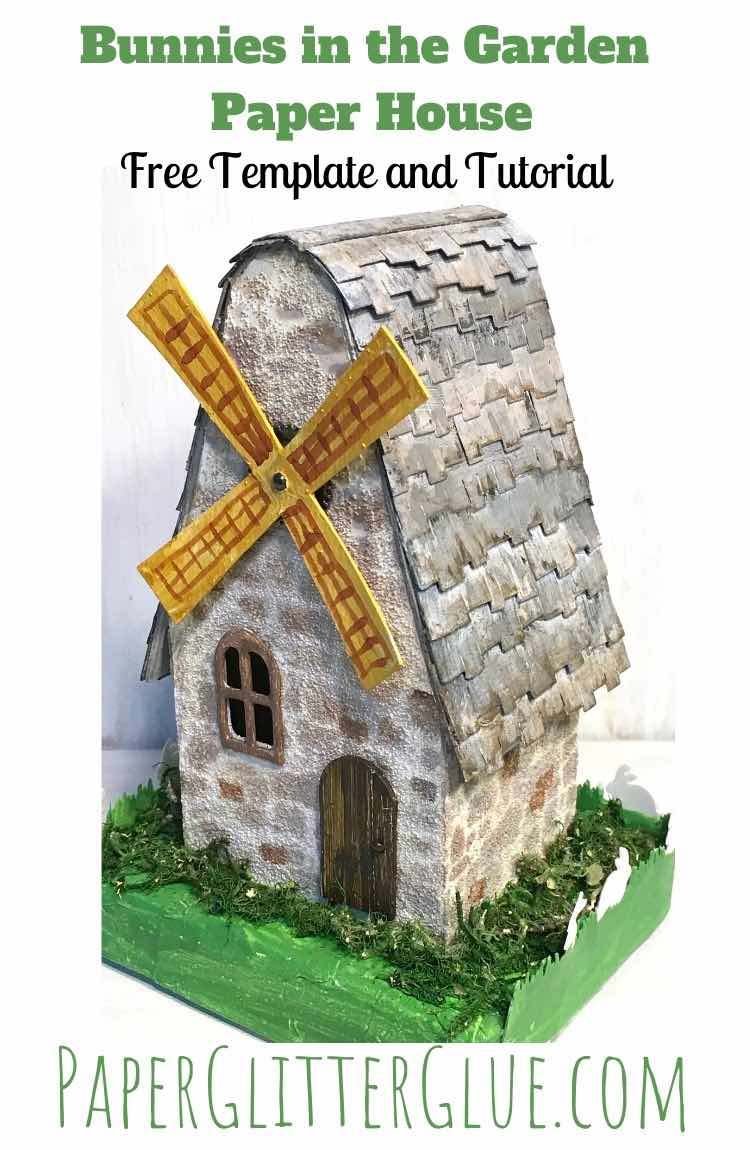
There are number of fun features that go into making this little house - the overall shape with the rounded roofline, the stenciled stone surface, the rotating windmill blades, the shake shingles on the roof, and of course, the little bunnies in the garden. The overall shape is the most important feature.
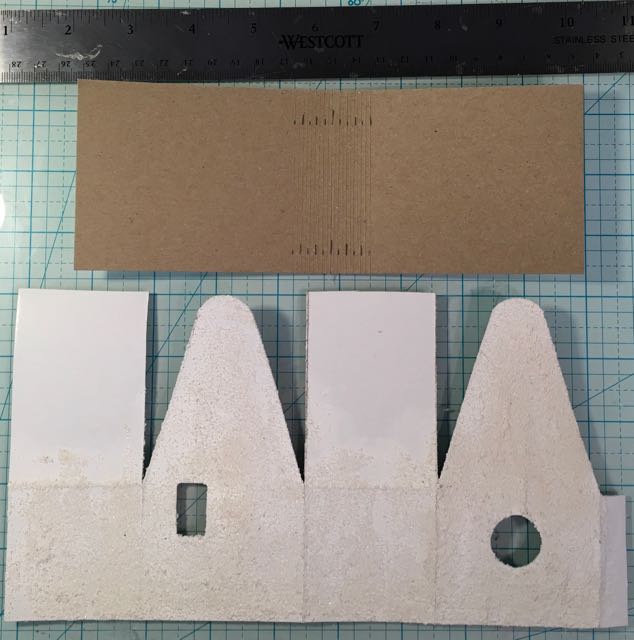
Cardboard pattern for the Miller's Place house. Notice how the roof is gently scored to allow it to bend around the curve at the roofline of the little house. I have a pattern for this house available in my free library as design no. 3 in the March 2018 section.
1. Make the shape of the house
The overall shape makes a unique house that works pretty well as a windmill, though I think the windmill blades need to be larger. When you cut out a house like this it is very important to make sure that the front and back curves match. If these sides don't match, then wonkiness rears its mismatched head. I managed to cut these out so they are very symmetrical and the roof fits on nicely.
You can get a windmill blade pattern in the library as well. My Dutch Windmill pattern is design no. 134 in the Paper Glitter Glue library. It has a good windmill blade on it.
I only cut out one window on the front because I didn't want a window behind the windmill blades. Also, make the door from a piece of cardboard and glue it on. If you don't have to cut out a door so that light shines through it, don't cut it out. The cardboard house becomes a little less structurally sound if you have a cut at the bottom of the house.
I always include the hole in the back as a tribute to old fashioned Putz houses that used the hole for lighting. It's just a habit.
2. Paint the house and stencil the stone surface
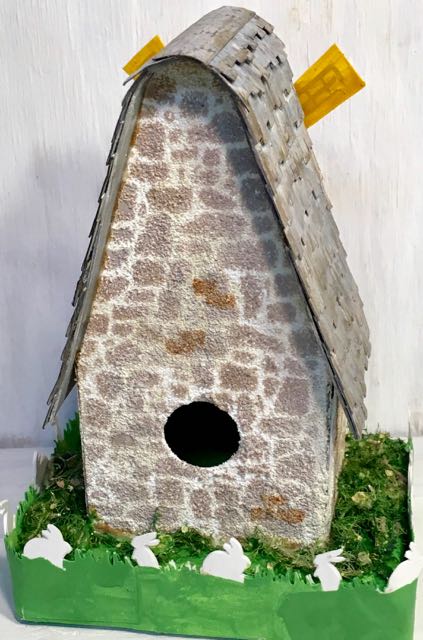
The first stones I drew bled through the stenciled stones. I thought they looked ok for a little contrast. For some reason I always stencil better on the back than the front. I try to paint the glued seam to disguise it as seen on the right side.
Paint the with white gesso for the first layer then paint with gesso mixed with Antique Linen Distress Paint and sand for the second layer. The sand gives the house a lovely texture that is perfect to mimic a stone surface.
I made this stone surface just as I did the Stone Stenciled Clock House. Before gluing the house together, I used the Tim Holtz mini stone stencil by Stampers Anonymous to stencil the surface with various shades of brown and grey. I used the Distress Oxides - Walnut Stain, Frayed Burlap and Hickory Smoke.
I did try to draw some stones first with Distress pens, but they didn't look right so I painted over them. The paint bled through the gesso which I left because I kind of liked the effect. There were some places where I didn't stencil effectively and you couldn't see the distinction between the individual stones so I painted more obvious mortar lines with Antique Linen distress paint.
3. Glue the house together and adhere the roof and shingles
Staggered rooftop pieces were painted and distressed, then glued to the roof.
After the stenciling, the house was glued together where the tab is located in the back.
To make the roof fit on the curve
In order to make the roof curve to fit the pattern, the underside of the cardboard at the roofline was lightly scored in parallel lines to make it more flexible. Then I used my thumbs to bend the cardboard in a U-shape to fit the shape of the house.
Use lots of glue to hold the roof on
I apply liberal amounts of Aileen's Fast Grab glue to the edge of the house and then situate the roof piece on the house. Finally, use painter's tape to hold the roof in place while the glue dries.
After you glue the house together, glue the window shape on the window opening and glue the door on.
Roof Shingles from Tim Holtz Village Dwelling Die
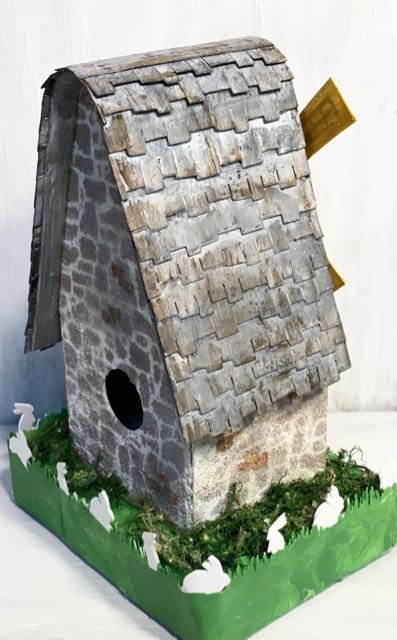
I made the roof shingles from a Tim Holtz Village dwelling die, but you can just cut them freehand if you want. I painted the roof pieces with Hickory Smoke distress paint and distressed each piece with various brown distress oxides to give more dimension.
Apply the roof shingles to the curved windmill roof
Start at the bottom of the roof and layer each row of shingles until you get to the curved top of the roof. Then gently curve the last couple of layers with your fingers. At the top I left a small gap where each side of shingles almost touched almost touched at the top. Then I curved a piece of a painted cardboard on the top as the ridge cap. That's an easy to complete the roof.
Miller's Place - The windmill blade rotates on a small brad in the center. An Idea-ology gear glued on the house provides a stable base for the brad.
If you want the windmill blade to really rotate, poke a small hole in top part of the house where the blade is to be centered. Very Important point - make sure the front edge of the roof doesn't extend past the edge of the house so the windmill blades can rotate. I used a small brad that was long enough to go through all the layers of cardboard and allow the windmill to rotate.
Oh yes, put the windmill blade in place while you can still reach inside the house to open up the legs of the tiny brad.
And finally you need to realize this important fact - that if you have a moving part on your little house, children will play with it. They will play with the little house no matter what, but a moving part makes it even more compelling to a child.
4. Make the base for the Miller's Place Windmill House
5. Glue the house to the base and make the border
I use Aleene's Fast Grab glue to glue the house to the base. I dyed some moss with Mowed Lawn Distress Spray stain and glued that around the house to add some texture. Another really fun part is making the bunnies in the garden from an old Martha Stewart edge punch by punching 3 strips and gluing them together. I painted the grass (moss) around the bunnies with Mowed Lawn distress paint and then adhered it to the sides of the base.
And that's it - the Bunnies in the Garden Springtime Putz House - a fun project for this time of year. I will be sharing this project with the Simon Says Stamp Monday Challenge "In My Garden". I hope you enjoyed reading about the process and can take some inspiration from it.
Feel free to pin to your favorite Pinterest board.
What do you think about this Candy Corn shape as a windmill house? I will be posting another Candy Corn house in the future so you can compare the designs. Thank you for reading.
Roxanne
Lucy, you have the heart and soul of a teacher! Your vision is clear, your directions are so great! And your imagination is contagious. Thank you for this wonderful design. I love it! I'll be trying the SVG on my Cricut using chipboard. Additionally, I think I may cut the walls out in heavy cardstock, then use Tim Holtz's embossing stamp in cobblestone. Can't wait to try it!
Lucy
Roxanne,
I am happy you are inspired by this house. I remember how excited I was when I made it, but then I started thinking that it wasn't really that good. But your words make me re-evaluate.
When you use the embossing stamp (embossing folder?) cut the pieces apart before you emboss. That's because they will shrink slightly and will fit better as individual walls. You might have a tiny edge that shows up around each piece. Just paint the edges of the base house with the color of the mortar for the stone. Then it will blend it. I hope to see your creation.
And thank you for the kind words. Lucy
Lucy
Anne, I am trying to start a new blog on the same topics so I haven't worked on getting followers on this blog. I post about once a week if you are interested and want to stop by. I will let you know when I get my new blog going. I love making little houses and am happy to share what I learn. Thank you for your comments.
Anne
I am so intrigued by your creations. How can I follow you? I don't see the option, only email subscription.
Sara Barker
Lucy you are a genius! What fabulous work on these projects! Hugs!
Emma Williams
What a fabulous project, this is amazing and I love how you've created such fantastic detail and texture on the walls and roof! Thank you so much for sharing and for playing along with us over on the Simon Says Stamp Monday Challenge Blog... x