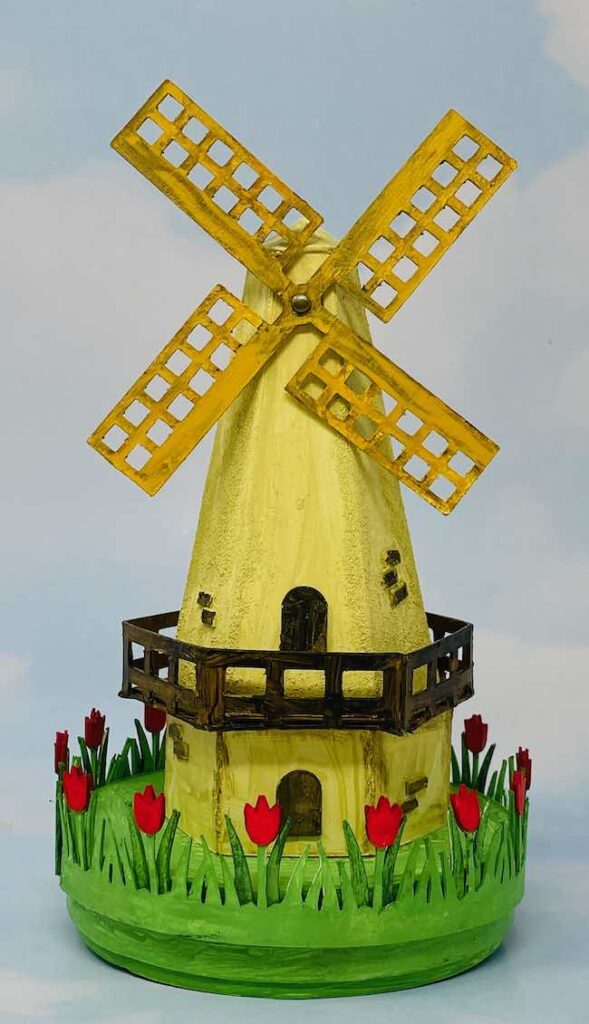
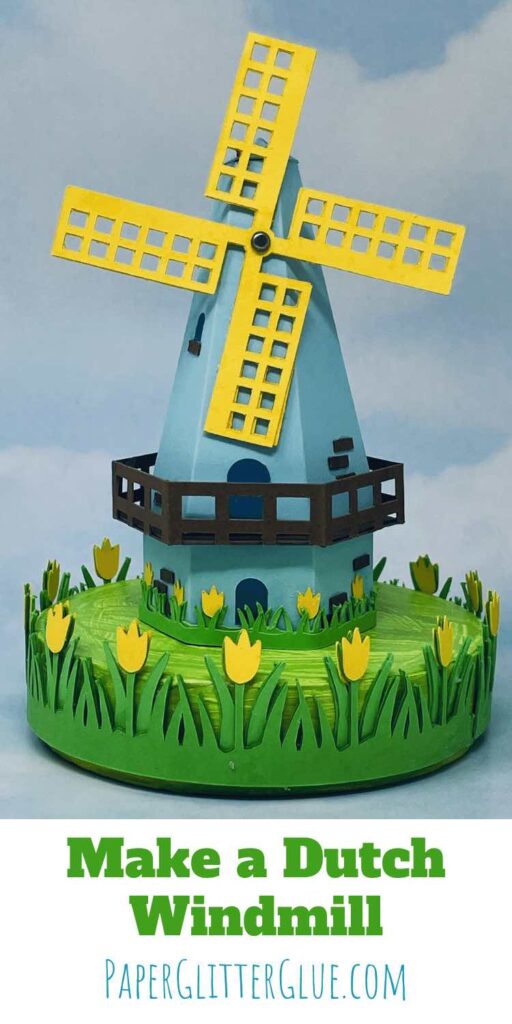
LEARN TO MAKE THIS AMAZING DUTCH PAPER WINDMILL COMPLETELY OUT OF CARD STOCK (OR CARDBOARD)!
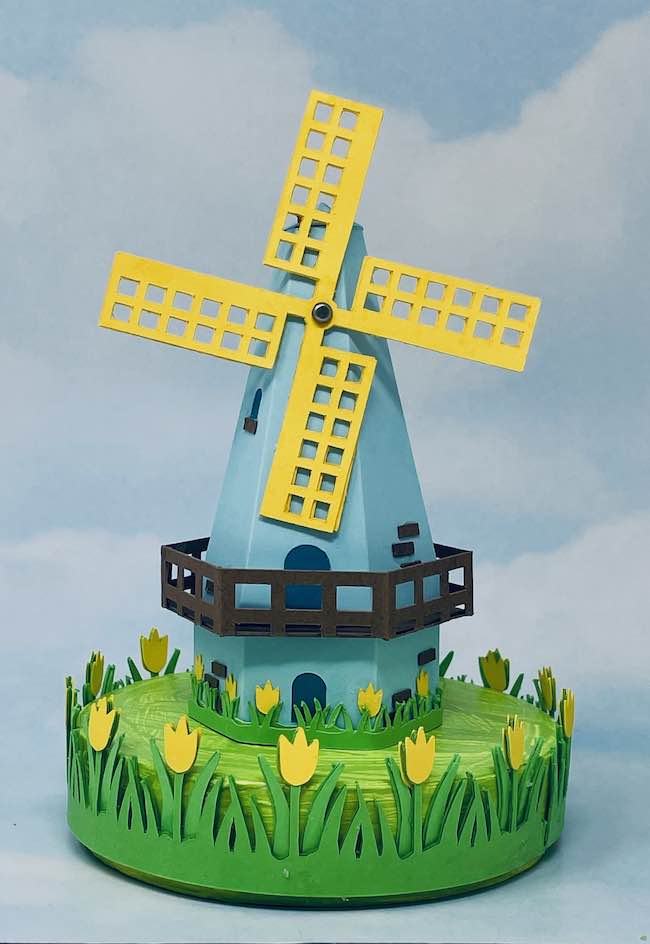
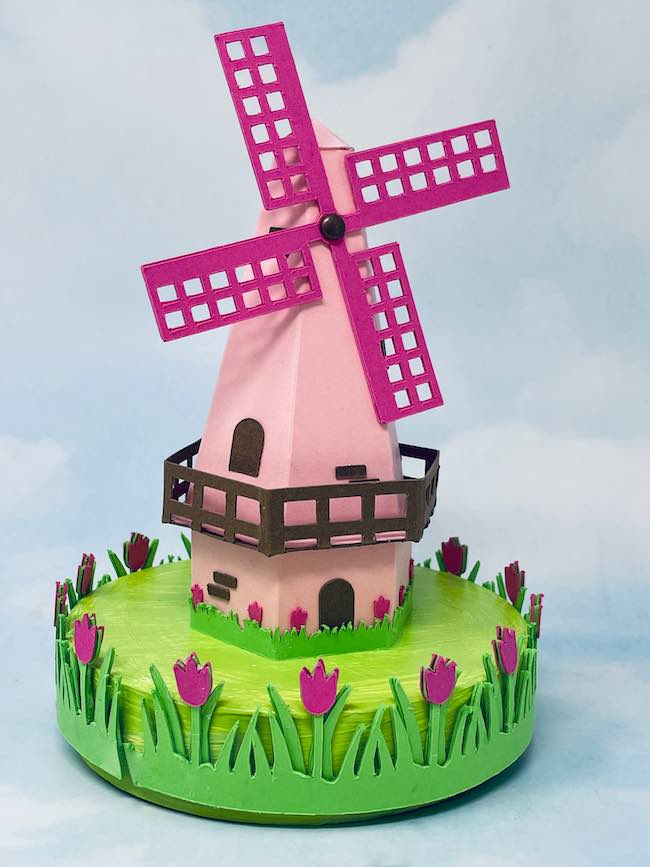
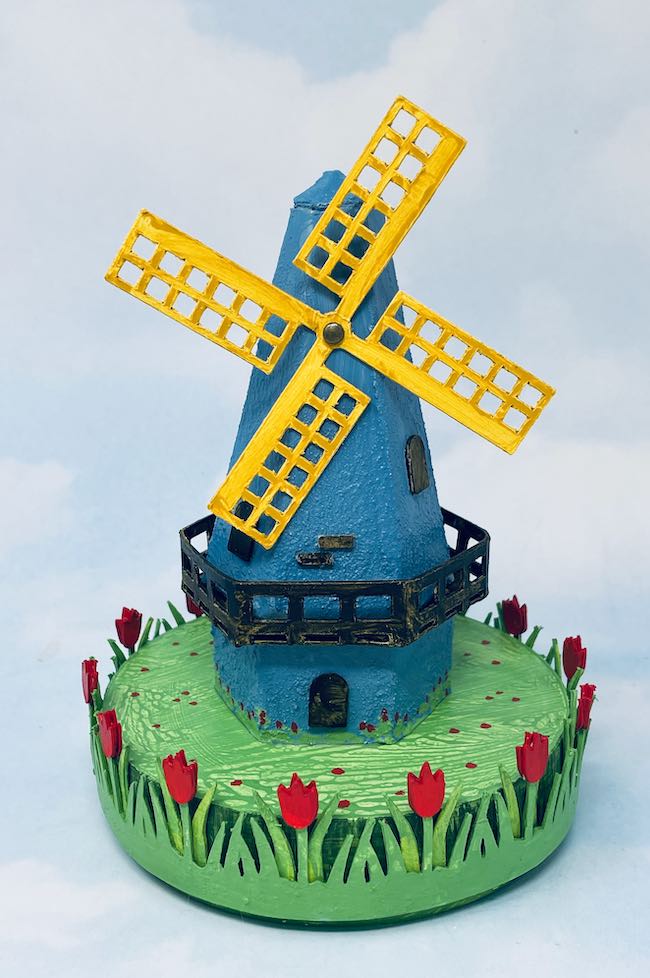
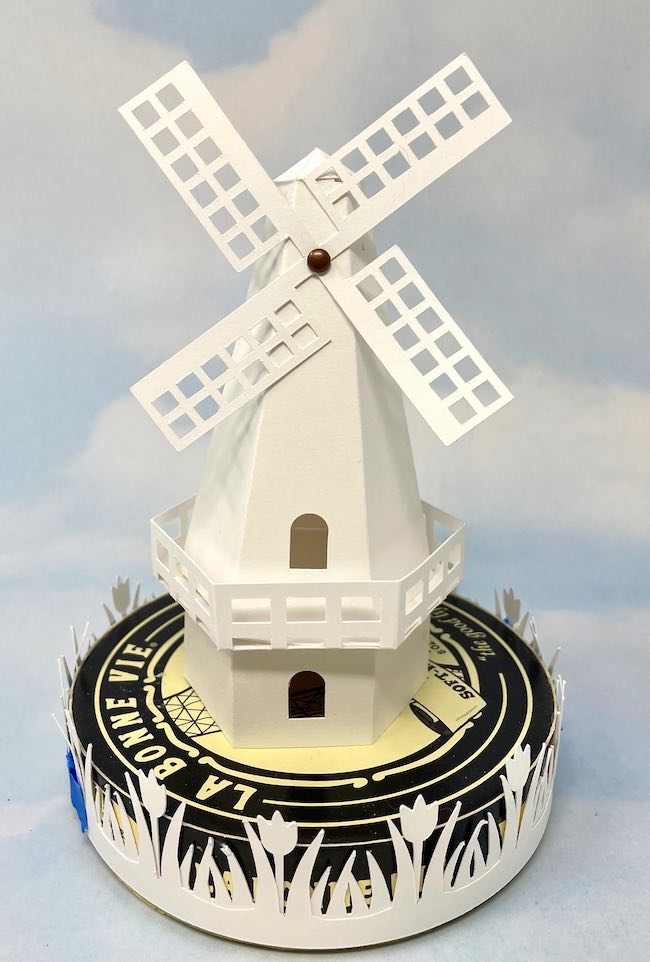
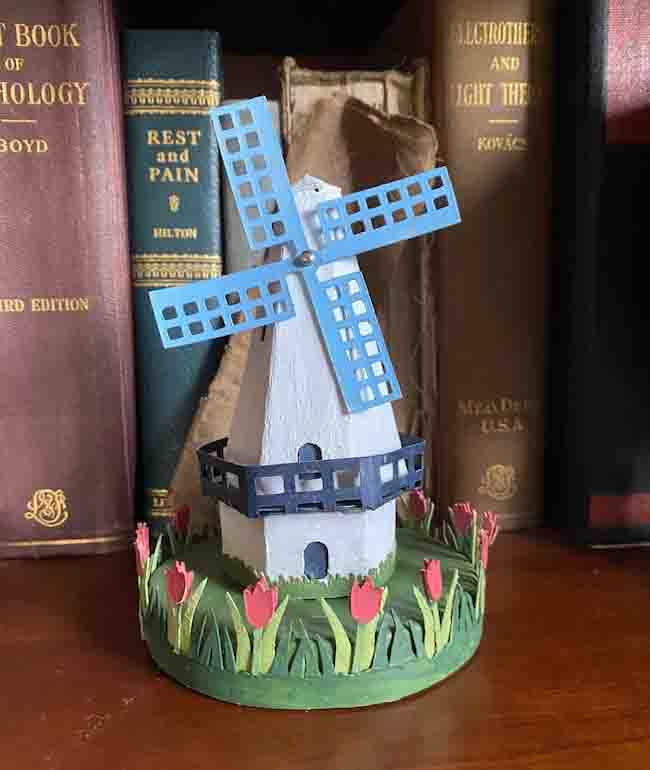
3D papercrafts are my favorite craft, and this Dutch paper windmill is one of my cutest crafts ever. The paper windmill is so much fun — everyone is amazed when they find out that it is made entirely from cardstock! But certainly you can make a sturdier version with cardboard and paint it with your favorite colors.
Be sure to subscribe to my newsletter to keep up will all my crafty news. Also I include the password to my FREE Paper Glitter Glue library right away when you subscribe. Just use the form below. You should get an email right away.
And won't the miniature windmill would look fantastic next to one of the Amsterdam houses? This adorable 3D papercraft adds a magical touch to your home decor or party table centerpiece!
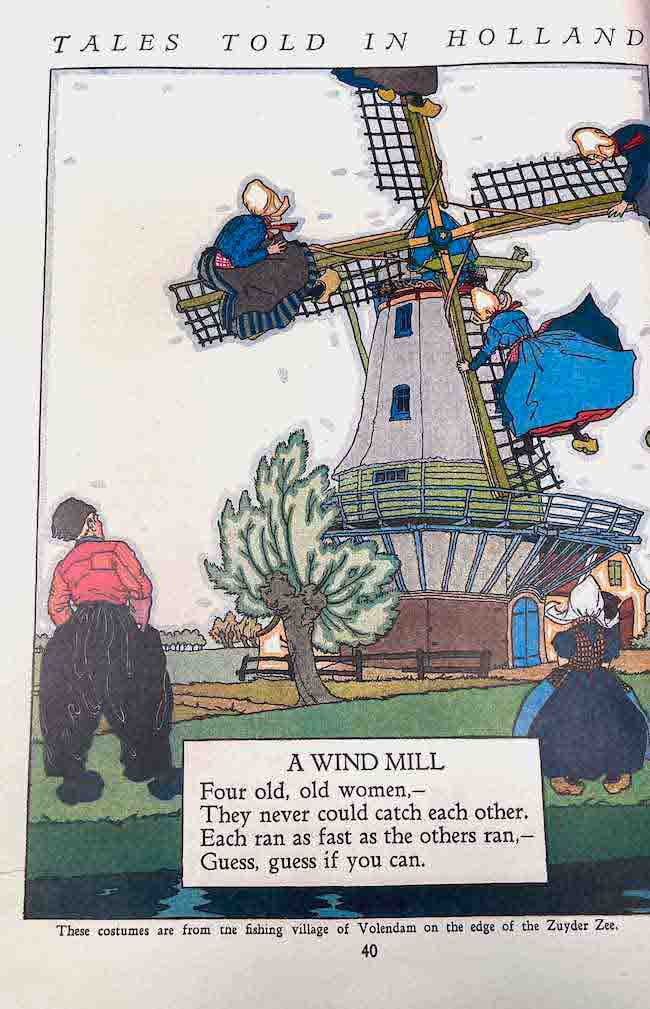
In order to make the windmill, I studied numerous online photos like these from the Holland.com website. Finally, I came up with a version that looks like a classic Dutch windmill and is easy to make. Oh, and this windmill illustration from one of my childhood books called "Tales Told in Holland" helped as well.
So let’s dive right into how to create this masterpiece 3D papercraft using cardstock and glue.
This post contains some affiliate links for your convenience. Click here to read my full disclosure policy.
What materials do you need to make the Dutch Paper Windmill - Design No. 134?
- Cardboard or cardstock - I call it a paper windmill which means it can be made from either card stock or cardboard
- Paint for cardboard versions - Tim Holtz Distress Paints are the brand I love, but here is a less expensive set of paints
- Grit paste for cardboard versions
- Glue - Bearly Art Glue, or Aleene's Tacky Glue
- Round cheese box or other small round box like one of these
- Small Brad
- 140# watercolor paper or card stock for tulip border
- Windmill Pattern from the Paper Glitter Glue Library - Design No. 134 - in the March 2022 section of the library
Instructions to make the Dutch Paper Windmill
- Download the free pattern - Design No. 134 - from the Paper Glitter Glue library
- Cut out the pattern in your favorite materials
- If using a Cricut cutting machine, here's how to upload and use the SVG file to cut out your pattern
- Assemble the basic parts to the windmill - the main body, the walkway, the base, and the windmill blades
- Glue the windmill parts together and add the spinning windmill
- Make the decorative base with the tulip border
- Glue the windmill to the decorative base
For more details about the assembly of the windmill, read more below.
And here is the video showing you how to construct the little windmill.
1. Download the free pattern from Paper Glitter Glue library - Design No. 134
The paper windmill design is in the free Paper Glitter Glue library in the March 2022 section - design number 134. To access the library, just type in the password on the library password page. If you don't have the password, you can get it for free, by subscribing to my Paper Glitter Glue craft newsletter with the form below.
The windmill pattern is available in 2 formats - a printable PDF format and as an SVG format for cutting machines like the Cricut Maker or Cricut Explore Air 2 or the Silhouette Cameo.
2. Cut out the pattern in your favorite materials
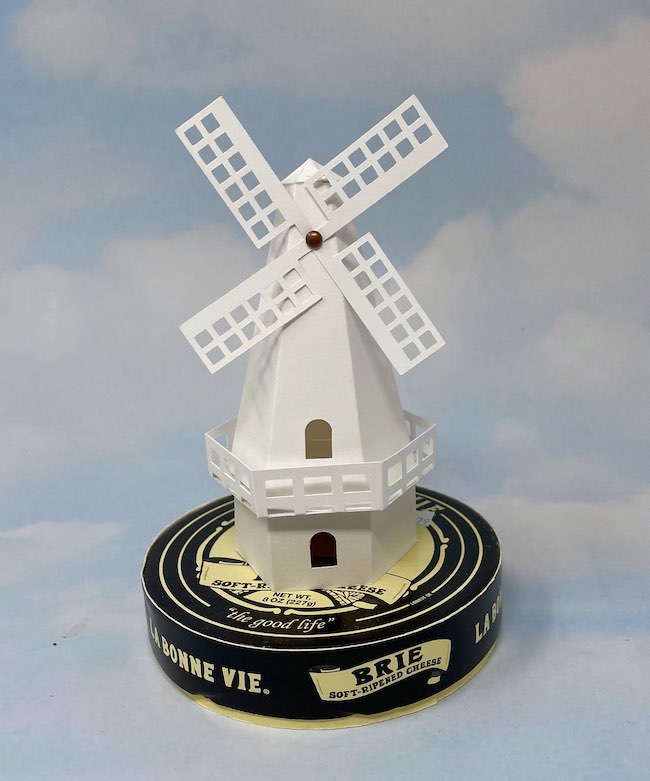
For this project, I made several prototypes in both card stock and cardboard. If you want to make the easiest version, use card stock. If you want to make a sturdier, more realistic Dutch windmill, then use cardboard.
You can use either 65# or #110 card stock or cardboard. My favorite cardboard is 30# cardboard like this from Amazon, but cereal box cardboard, poster board cardboard works just as well.
In the photo below, you can see the 65# card stock makes a good paper windmill.
Choose Materials for the Large Decorative Tulip Border
To make the decorative tulip border, use any card stock. But if you want to paint your border, use heavy watercolor paper. I used 140# watercolor paper when I painted the paper. And to make the large tulip border sturdy, glue two layers together. Otherwise, your tulips wilt rather quickly.
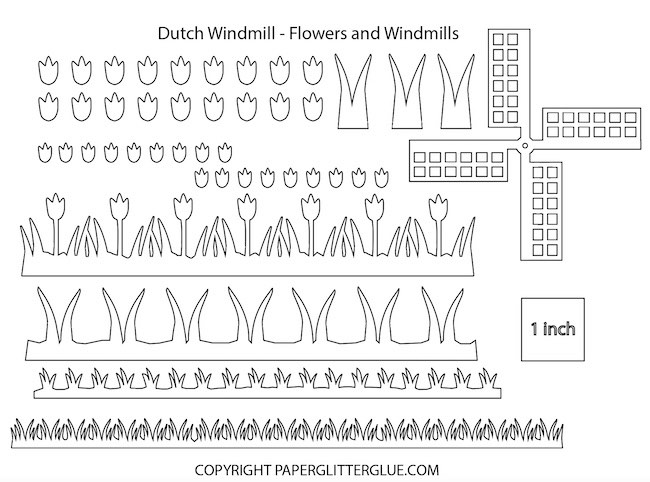
If you cut out the decorative border by hand, I would try find a tulip punch such as this to make it easier to cut. Also I would just cut the leaves randomly with scissors rather than follow a pattern.
Make the tiny tulip border
If you want a tiny border around your windmill, be sure to use 65# card card stock because it cuts so much easier.
And if you cut it the tiny tulip border by hand, just cut a strip of green card stock randomly to mimic grass.
3. If using a Cricut cutting machine, here's how to upload and use the SVG file to cut out your pattern
First, choose the Dutch Windmill pattern from the downloaded files in the Dutch Windmill folder. Upload to Cricut's Design Space.
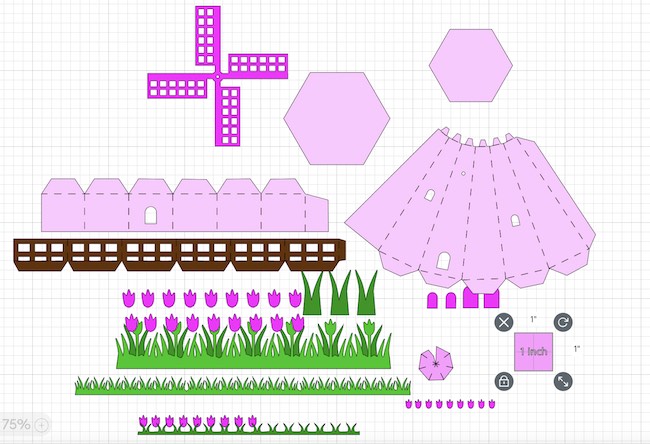
To make it more convenient for you, everything you need is included in one pattern. That means the tulip border (including both the large and small versions) along with every part of the windmill are all on the same SVG pattern.
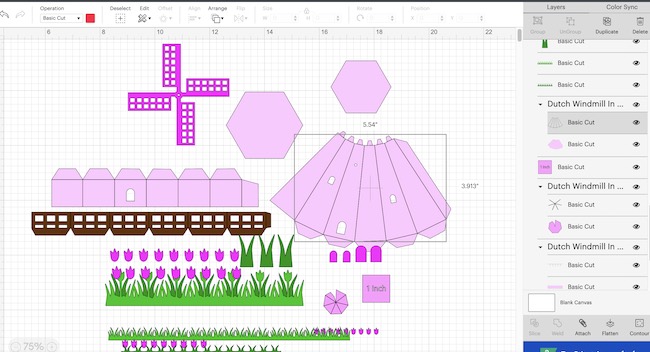
In addition, you find it easier, I've made a color SVG version to help you separate out the colors into mats easier if you use card stock for the windmill. See all the score lines in the Cricut Design Space below.
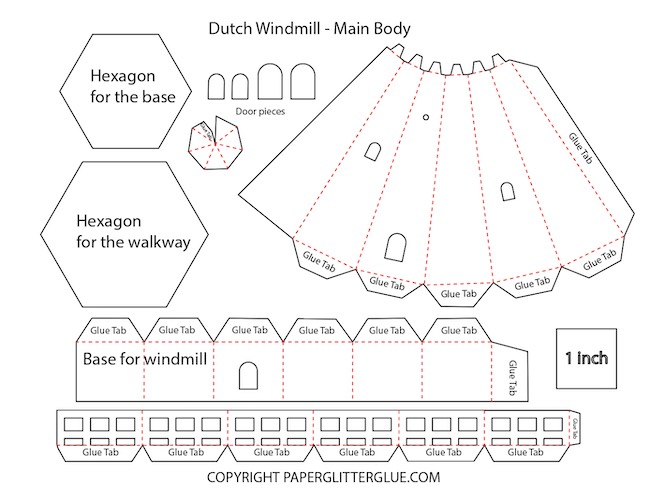
In the pattern, please note that there are 4 pieces with score lines:
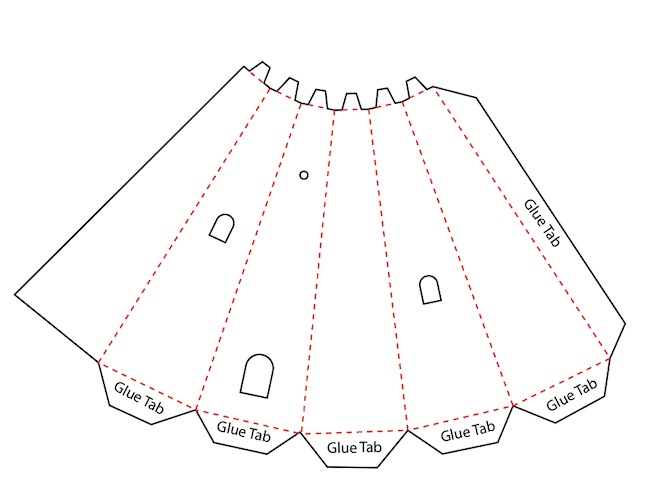
- Main windmill body
- Top of the windmill
- Walkway for the windmill
- Windmill base
The score lines are grouped with the piece they belong to. So first select the score lines, go to the operations menu in the left upper corner of Design Space and select score. Then go back to the pattern piece and select the piece AND the set of score lines and click attach (lower right corner of Cricut's Design Space). That way Design Space understands
Do that for all 4 pattern pieces that have score lines. See the example below.
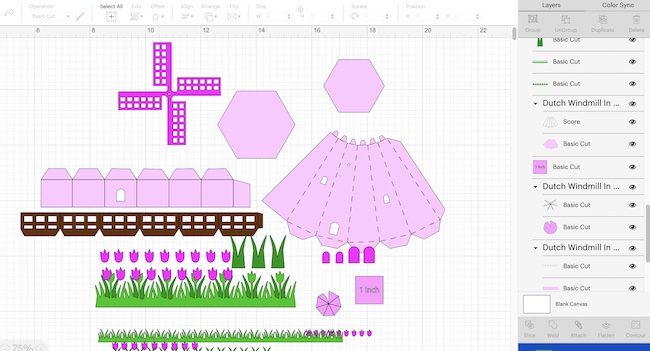
First, select the score lines.
Under the operations menu in the left upper side of Design Space, choose SCORE to change the set of lines into score lines.
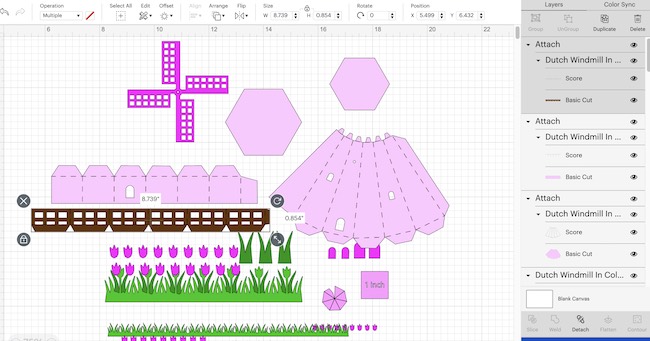
Finally, attached the score lines to the piece it belongs to.
4. Now assemble the Dutch paper windmill
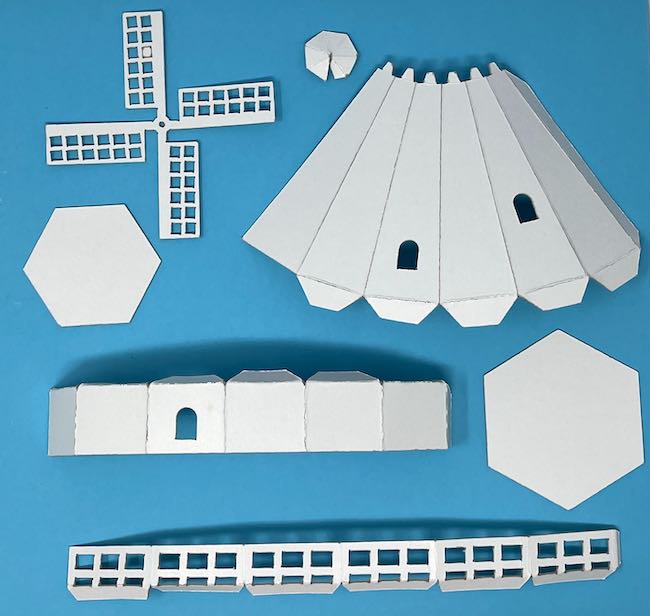
See the windmill pieces below.
Now assemble the components with score lines.
First, assemble the main body of the windmill
For this step, you have a few options. You can glue the doors on top of the windmill (the outside surface) or you can glue them to the back of the windmill.
I like the idea of gluing the doors to the back of the windmill so they are recessed and give a little more dimension.
And the other important tip is to make sure the door on the front does not interfere with the spinning windmill blade. So be sure to glue it far enough down that it won't hit the windmill blade when it spins.
If you like the stones for a little more decoration on your windmill, use the cuts outs from the walkway and apply randomly to the surface of the windmill. Again, be sure the stones don't interfere with the spinning windmill blade.
I wouldn't put any stones on the side with the spinning blade to avoid that problem. Well, you can see I did put them on the wrong side on the example below and the blades hit the stones. Lesson learned.
After you glue on the decorations on windmill body, fold along the score lines before you glue the body together. I use a metal straight edge to help make sure my score lines fold correctly.
I usually paint the cardboard pieces after assembly of each piece. It's easier to paint each section before assembling the entire windmill together.
Next, assemble the base of the windmill
Just as we did with the windmill body, apply the door and any decorative stones to the base before you glue it together. You can rotate the base so that the door on the windmill body and the door on the base line up any way you want.
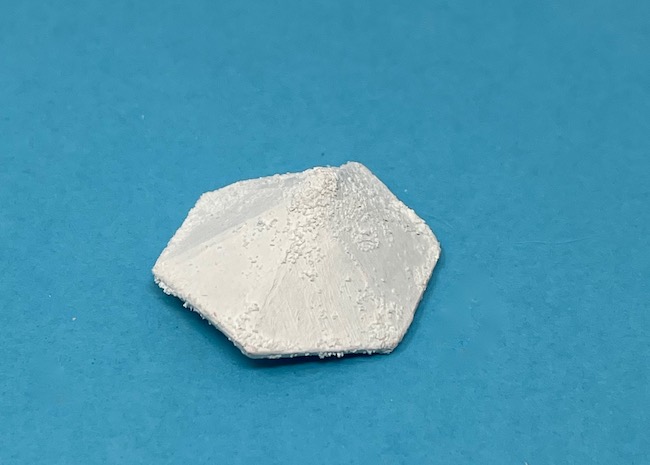
Now, to make the base easier to assemble I included a hexagon correctly sized for the windmill base. Here's how you glue it together.
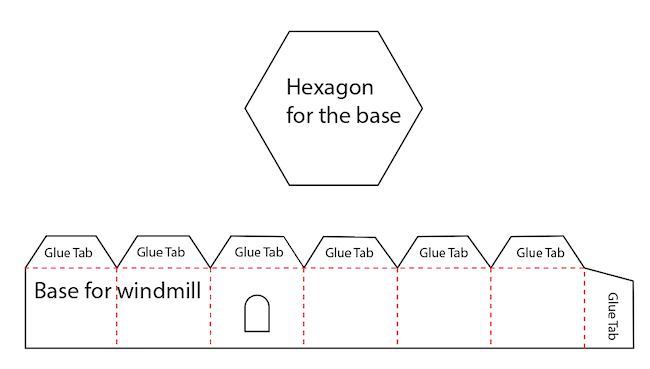
Remember to fold along all the score lines before you assemble this piece.
First, apply glue to the glue tab and adhere the glue tab to the other side of the base.
Here's how the base looks when glued together.
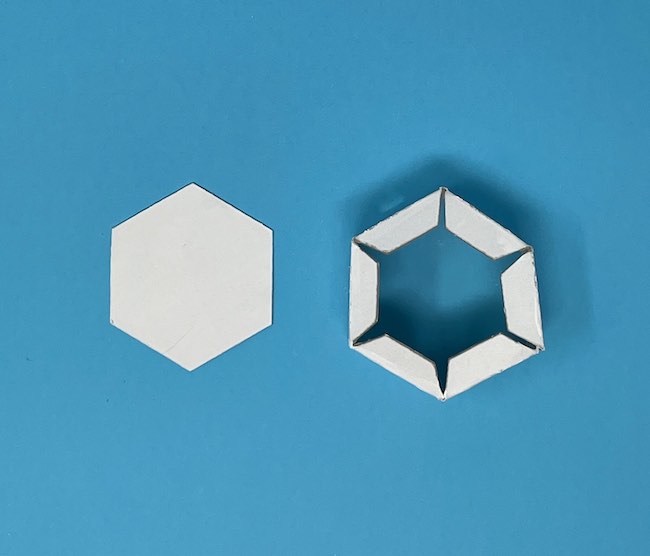
And finally, glue the hexagon inside the base. I believe you will find that it helps tremendously to make the hexagon shape.
Remember the hexagon forms the TOP of the base. That is important when you glue the base to the walkway.

If you want a tiny tulip border it is probably easiest to add it now. But please note that the final tiny leaf border is a slightly different (better) design that is much easier to cut out in 65# card stock.
Next, assemble the windmill walkway
I think the walkway is such a fun detail on the windmill. You make it pretty much the same way as you made the base. Use the larger hexagon in pattern for the walkway.
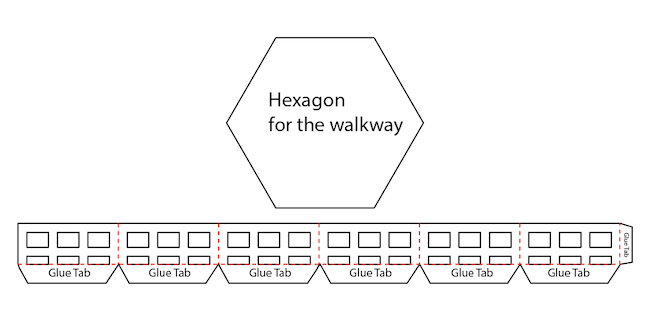
So apply glue to the side glue tab and assemble the walkaway. Then glue the hexagon inside the walkway.
Finally, assemble the windmill top
This funky little piece is only difficult to assemble because the piece is tiny. Again, fold along the score lines before you assemble the top piece.
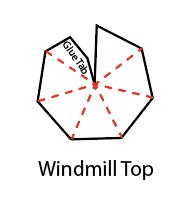
And here is the completed windmill top coated with grit paste.
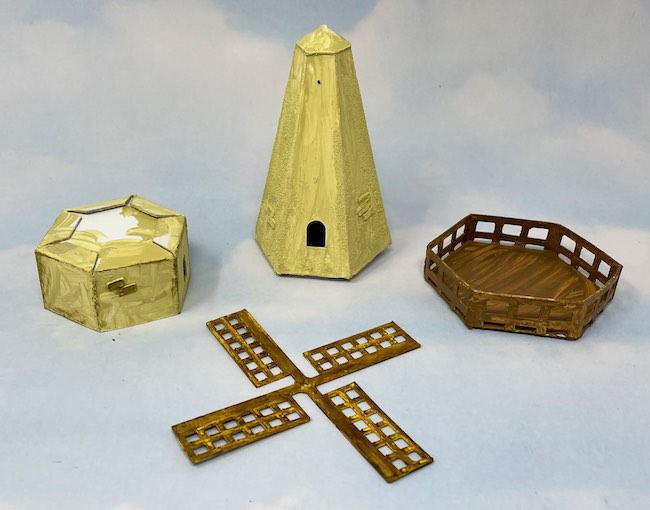
Completed sections of the windmill
Finally, here are the components of the windmill.
Make the windmill blades
In order to make the windmill blades sturdier, I always glue two windmill card stock layers together. Otherwise, the blades get bent too easily. But I found that one layer of cardboard is fine.
5. Assemble the Dutch paper windmill and add the spinning windmill blades
Here's the order I use to assemble the windmill:
- Glue the top to the windmill body
- Insert the windmill blades using a brad so the blade can spin
- Glue the windmill base to the walkway
- Center the windmill body on the walkway and base pieces
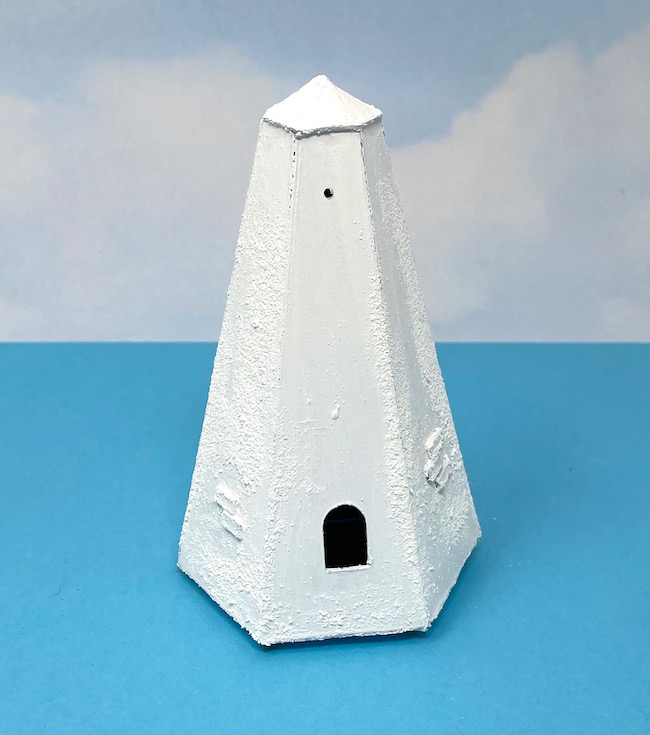
First, glue the top to the windmill body
Simply apply glue to the tabs on the top of the windmill and some to the edges of the windmill top and adhere the top to the windmill body.
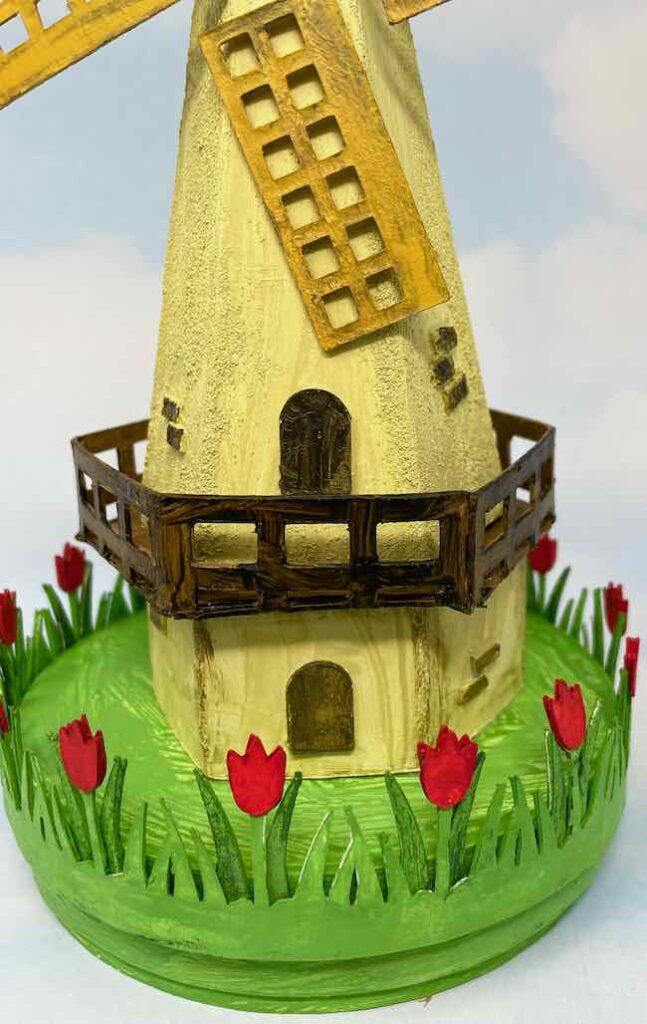
In the example below, I coated the windmill with grit paste to give more texture. After that, paint was applied.
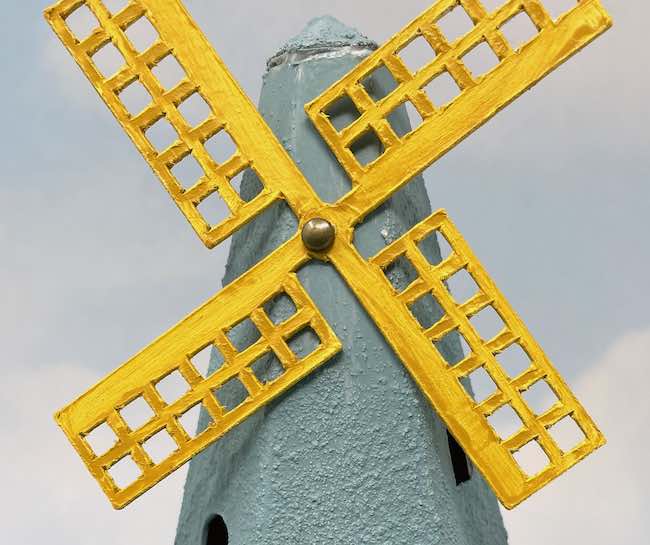
Insert the windmill blades using a brad so the blade can spin
So the next challenge is deciding when to put in the windmill blades. It needs to be done before you glue the walkway and base to the windmill.
That's because you have to reach inside the main windmill body to insert the brad and separate the two metal extensions of the brad.
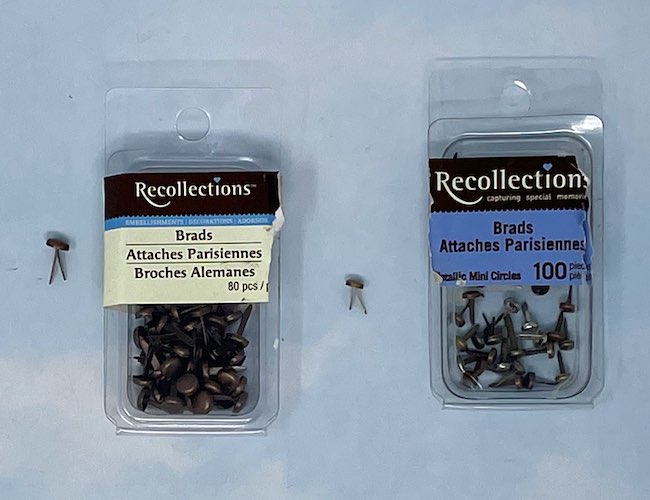
The smaller the brad, the harder it is to separate the two metal pieces of the brad. My favorite ones are these little tiny brads, but they are seriously challenging to insert.
Here's a comparison of the two brad sizes. I ended up using the larger brads.
Insert the brad through the hole on the windmill and then the body of the windmill. After that step, turn the windmill body upside down and with your finger or a narrow tool like your craft knife separate the the brad's metal extensions. Don't flatten them too tightly or the windmill won't spin very well.
Glue the windmill base to the walkway
Apply a thick layer of glue to the top of the base and the center bottom of the walkway. Remember that the top of the base means that the hexagon goes on top.
Next, apply some pressure to adhere these two pieces together.
Center the windmill body on the walkway and base pieces
Finally, apply a thick layer of glue to the bottom glue tabs, then center the windmill body and adhere it to the walkway base.
Before we glue the windmill to the base, let's complete the decorative tulip border.
6. Make the decorative base with the tulip border for your Dutch windmill
When I first designed the windmill, I had trouble figuring out what base to use and how to decorate it. Then it occurred to me that a row of tulips is the perfect finish for a Dutch windmill.
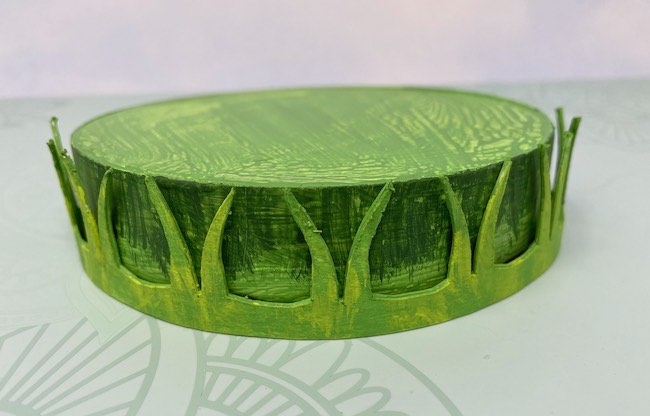
Use a round box for the base
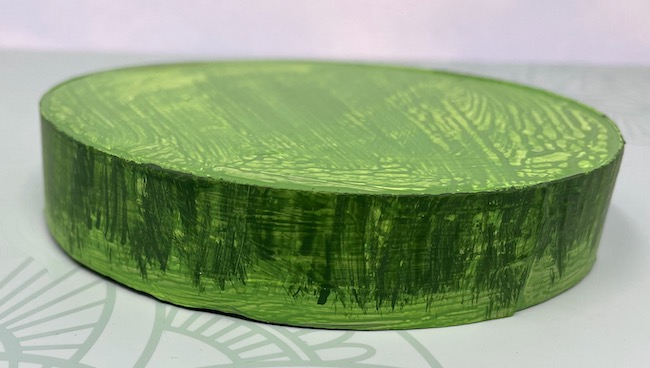
For the main base, I used a small cheese box.
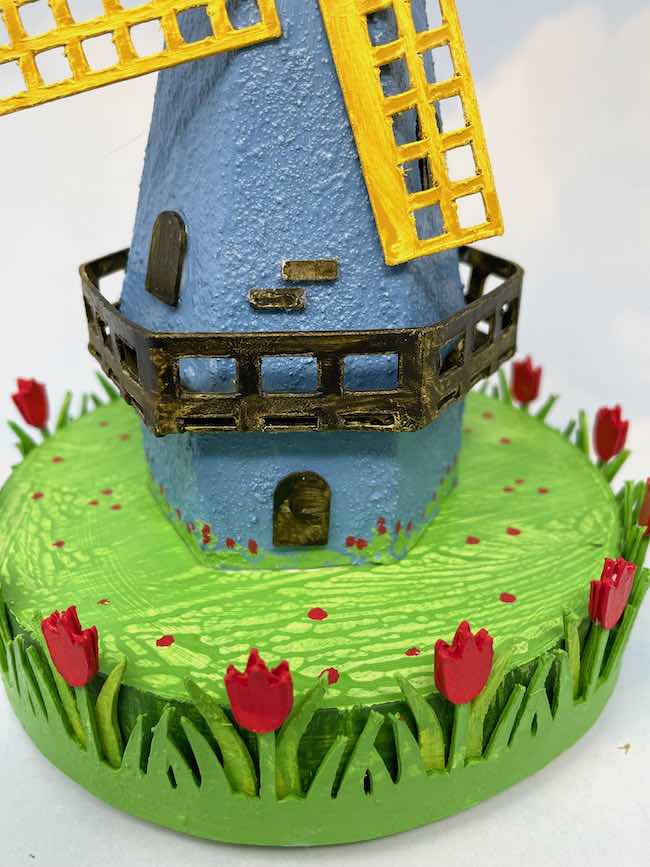
If you choose, you can cover the top of the cheese box with card stock, but I like to prime and paint it. The edge is painted a slightly darker color to give dimension behind the tulip leaves.
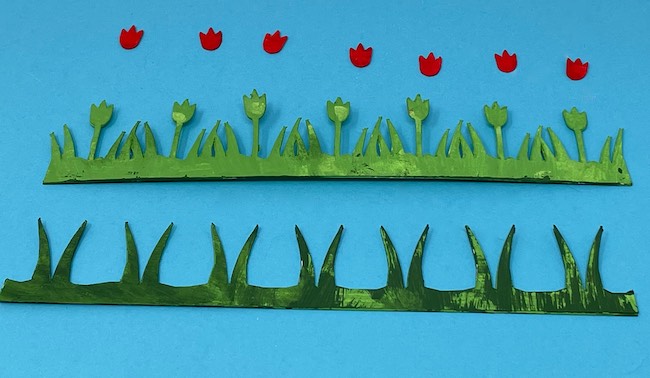
Make the large tulip border
To make the tulip border, use either card stock or watercolor paper. I made two versions - one made with painted watercolor paper and the other with card stock.
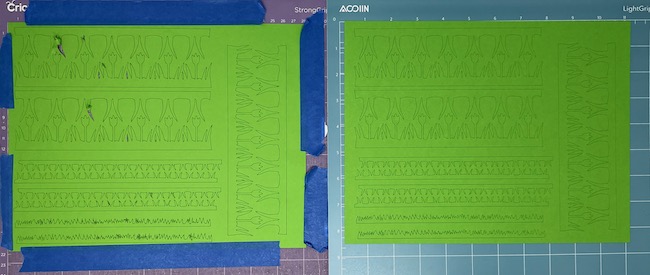
Here's an important tip - when cutting a detailed pattern like the tulip border with your Cricut, be sure to use a sticky mat and cut the border on the Cardboard for intricate cuts selection.
In the photo below, the 65# card stock cut on the left was cut with a mat that is not very sticky. The card stock on the right was cut using a brand new sticky mat. It cuts so much better.
Generally, I run the mat through twice to make sure the card stock is cut completely even with a new mat.
Glue 2-3 layers together to make the large tulip border stronger. Then glue colored tulips on both sides of the tulip.
In the photo below, you see the 3 different components of the tulip border. Both strips are composed of 2-3 layers of paper. These particular pieces are made from painted watercolor paper.
I like the darker leaves in the back so I adhere that layer first to the cheese box. Before you glue the leaves to the edge of the box, gently curve the paper so that it will fit around the curved box better.
Next, adhere the tulip layer on top of the background leaves. Because each strip is curved, it is hard to center the tulips exactly. Center the one in the middle and then don't worry about the rest being slightly off center
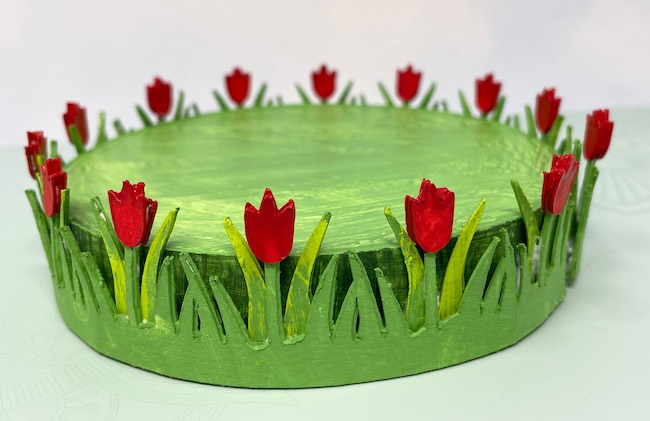
Fortunately, for the cheese boxes I had on hand, two strips of tulips encircled the box, but depending on the size of your round bases, you may need to make more than 2 strips. Also in the pattern is a section of spare leaves if you need some.
7. Glue the Dutch paper windmill to the circular base
Finally, all you have to do is glue the bottom of the windmill to the circular base. Simply apply a thick bead of glue to the bottom of the windmill and center it in your circular base.
And you are done! You have made the cutest Dutch paper windmill. You can decorate it for any season. Also don't forget about the Amsterdam houses because they go with the windmill so well.
Remember to pin this to your favorite Pinterest board so you can find it later
Here is one of the windmills from Katherine who made it from the pattern. Isn't it cute? I love to see when projects made from my patterns. It makes me very happy. Thank you for sharing, Katherine.
Linda
Where do I find the template for the windmill blades?
I do not have a cricut.
Lucy
Linda, I'm sorry, but I just found this question. I am actually traveling in the Netherlands right now. I will figure it out and send you the information.
Lucy
Linda Sundblad
I was unable to find the pattern for the windmill blades. Can you tell me where to find it?
Swapnil Mahadik
Nice work
MonaLisa
That is so cute and perfect for spring! Thank you, Lucy!
Lucy
I figured it was time to make a windmill because people have asked for one for years. And the windmill surrounded by tulips does say spring to me.
Thank you so much. I am so glad you like it.
Lucy
Katherine
Super excited to make this! Thanks so much, Lucy!
Lucy
I am so happy to hear that you like it. Please send me a photo when you make the windmill.
Lucy
Katherine
I finally finished it! Thanks so much, it was a lot of fun!
Lucy
That is adorable. Red tulips just make any project, don't they? I am going to put your photo in the post so people can see it easier. It's wonderful. Thank you so much for sharing.
Lucy
cecelia
I just want to leave a message of thanks for writing out the directions for the Windmill. I realize we all learn differently and I really appreciate written directions with pictures. Thank you for your time and talents.
Lucy
Cecelia,
I am right with you. I would almost always rather read directions than watch a video. But like you said, we all learn in different ways so I am trying to post more videos and get better at explaining how to make things because that helps people, too.
Thank you for your kind words. I hope you will make the windmill. I would love to see your creations.