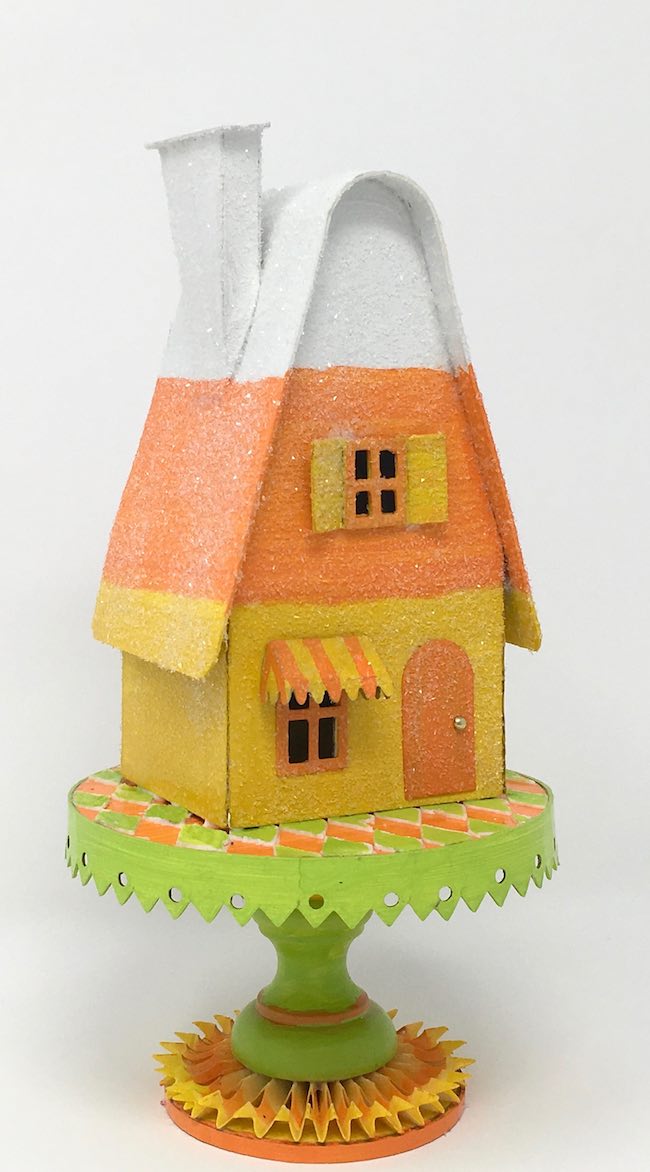
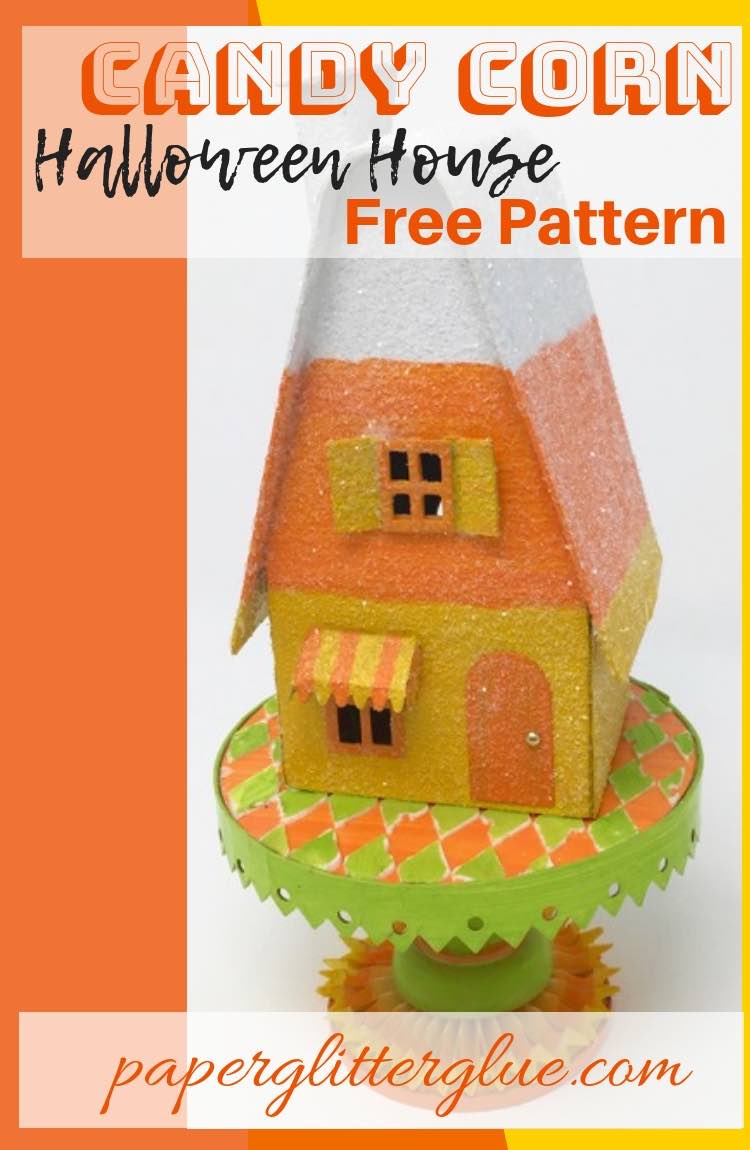
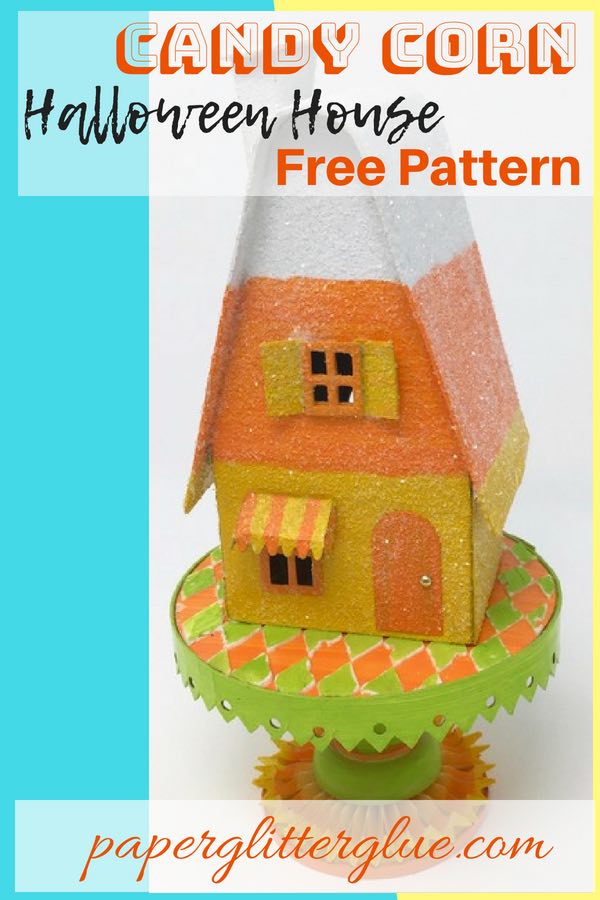
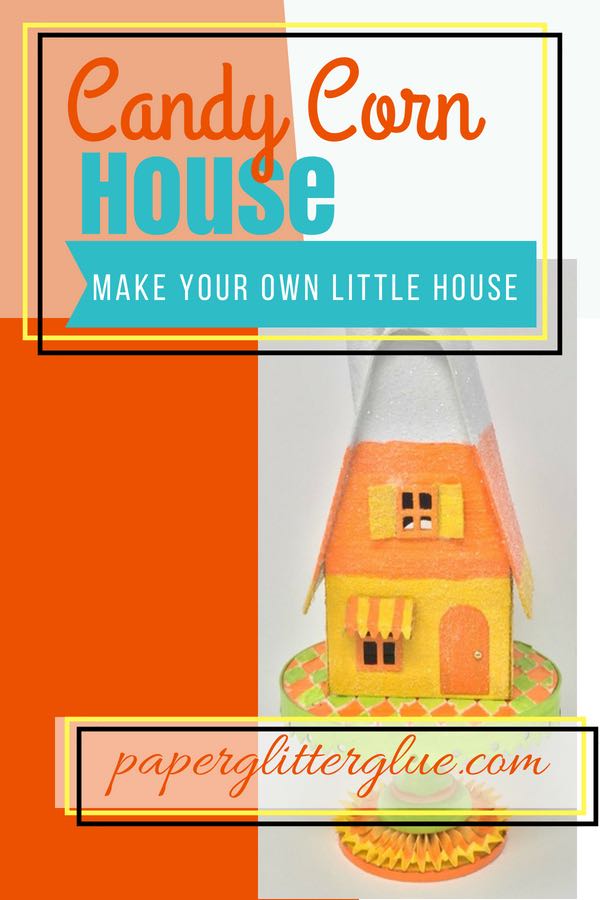
I mentioned on the Candy Corn Putz House Preview post that I was inspired to make this Candy Corn Halloween house because it is such an iconic shape for Halloween. You can read more about the history of Candy Corn here.
This Putz house is designed as a house that a child would love - a whimsical, colorful house, not spooky at all. The pattern is in the Paper Glitter Glue library as design no. 139.
Other Candy Corn paper houses can be seen in these previous posts:
The pattern to this little house is now available at my Paper Glitter Glue library here. Just subscribe to my newsletter to get the password to my free Paper Glitter Glue library.
This post contains some affiliate links for your convenience. Click here to read my full disclosure policy.
MATERIALS for the Candy Corn Halloween House:
- Cardboard or heavy cardstock or watercolor paper
- Aleene’s Fast Grab Glue or similar glue
- Cutting machine - I used my Cricut Maker
- Metal-edged ruler
- Craft knife with an 11 blade if cutting by hand
- Gesso
- Paint colors of your choice - I used the Fossilized Amber Distress paint, Carved Pumpkin, and Twisted Citron.
- Decorative elements - Stampers Anonymous Harlequin Stencil, Ranger Texture Paste, Vignette Finials
STEPS FOR MAKING YOUR LITTLE HALLOWEEN CANDY CORN PUTZ HOUSE
Briefly, these are the steps in making this cardboard house:
- Download the pattern - Design No. 139 - from the paperglitterglue.com library.
- Cut out the pattern with your cutting machine
- Copy the pattern for the Candy Corn Putz House onto cardboard if cutting by hand
- Score the fold lines before you cut out your pattern
- Cut out the pattern
- Cut out the window openings
- Cut out roof, chimney
- Prime and paint your pieces if using cardboard
- Glue house together along the glue tab in the back
- Glue roof flaps together for supporting the candy corn gables
- Adhere the roof to house by applying glue to the edges of the candy corn house
- Glue chimney to roof
- Make base, prime and paint
- Glue house to base and add embellishments
Detailed Instructions for making the Candy Corn Putz house
Here's how the pattern looks in Cricut Design Space
Here's a list of the pieces in the pattern:
1. Main body of the Candy Corn House
2. Roof piece for the house
3. Bottom insert to help keep the house square
4. Window options, door, and awning
5. Crooked chimney and chimney top
6. Side overlay pieces for the Candy Corn colors
7. Roof overlay pieces for the Candy Corn colors
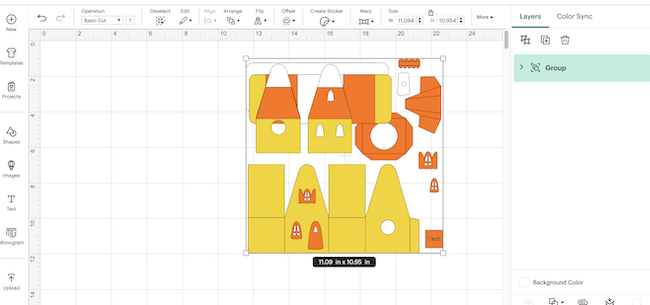
Be sure to ungroup the design and designate the score lines as score lines and attach.
Generally it is easier to see and understand the pieces in the PDF files included in the file because you can add labels to the PDF files.

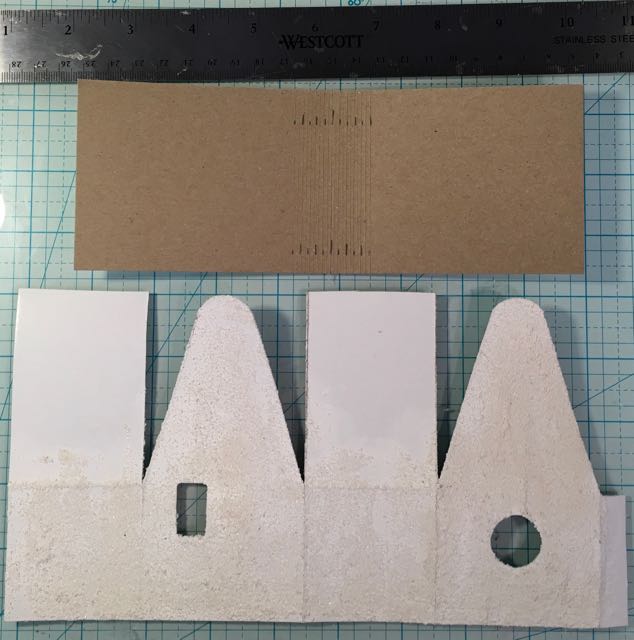
If cutting by hand, trace the pattern onto your cardboard


The pattern itself is very simple – it is a basic gable house with a rounded top at the roofline. I often make my patterns so they fit on an 8.5 x 11 piece of paper and cardboard which makes a nice-sized Putz house. You may shrink or enlarge your pattern to whatever size you want depending on your sources of paper and size of cardboard.
-
Score the fold lines before you cut out your pattern
Once you have the pattern copied, score along the fold lines BEFORE you cut it out. It is so much easier to score before you cut because you have a bigger area to hold on to.
-
Cut out the pattern
My favorite material is a relatively thin cardboard like the kind you find on the back of a paper pad. It's easy to cut and easy to fold. You can use cereal box cardboard as well. Some putz-makers use cardstock for their houses, but I prefer my houses to be sturdier than that. When you are starting out, though, cardstock is easy to work with. But it just doesn't make the most durable houses.
-
Cut out the window openings
You can choose exactly where you want the windows and what kind of windows you want - circular, square or rectangular. You can also choose the location. The only important thing to remember is that if you cut out material near the sides, the house is more likely to bend there. That's why I don't cut out a doorway all the way at the bottom. The house will flex too much if you do that.
-
Prime and paint the house
I always prime my cardboard houses with gesso (gesso is a white paint which prepares your cardboard to hold onto paint better). Paint with the Candy Corn colors of your choosing. Here are some suggestions for Candy Corn Colors for every season:

You also have the option to paint your little house after you glue it together. That is totally up to you. It doesn't really matter on this house.
If you have painted your house at this point, you can also glue on the door and window frames while the pattern is still flat.
I've noted before that I use window dies for almost all of my window frames. I just don’t like cutting out windows, but I know a lot of putz makers who happily cut them out, but I just would rather use window dies. The window dies for the Candy Corn Putz house are from Tim Holtz’ Village dwelling series.
- Cut out roof, chimney and prime
For the roof, rather than cutting out the pattern you can cut out a 3 x 8 inch rectangle and trim to the size you want.
When you paint the roof be sure to prime the underside edges that will form the overhangs on the roofline. Save the final painting until you have glued the roof on the house so you can match the painted lines on the body of the Candy Corn house.
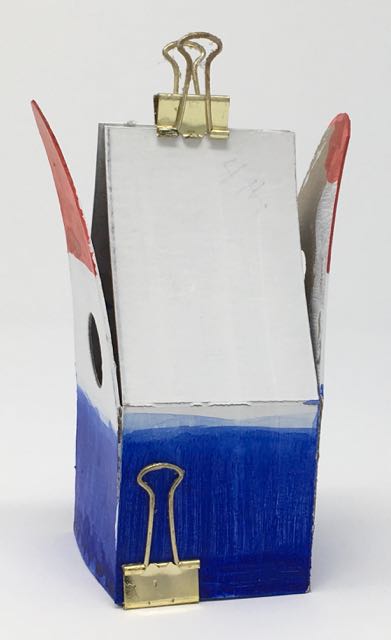
- Glue house together along tab in the back
The little tab on the right side of the pattern is the glue tab. I apply a thick layer of glue and let it get just a little tacky and then adhere the back and side together.
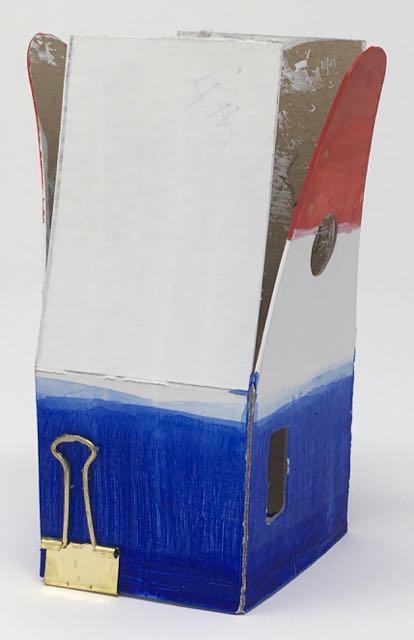
Binder clips are a great help in holding the glued sides together.
- Glue roof flaps together for supporting the candy corn gables
The roof flaps function as the "under roof" and give support to the house so it holds its shape better. Glue the edge of the roof flaps to the each gable. You can glue the flaps together behind the candy corn gables for support or if you are capable of gluing without messing up the front and back of the house you can glue right on the edge of the roof flaps just a little bit behind behind the edge of the gables. It's a better way to do it, but a little tricky. I usually just glue the roof flaps waybehind the gables.
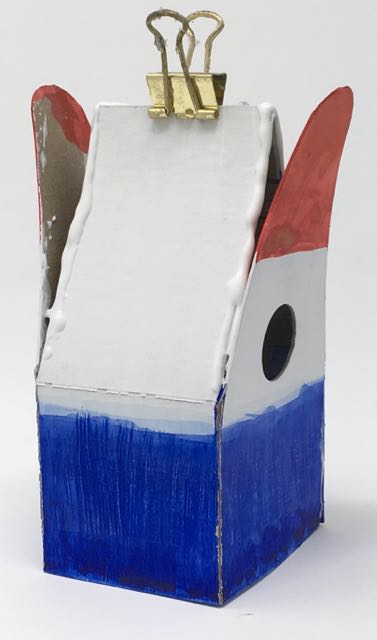
- Gently curve the roof so you can adhere it to the house
- Glue roof to house
Be sure the candy corn house structure is dry before you glue on the roof. If you use the Aleene’s Quick Dry glue you do not have to wait nearly as long because this glue is pretty thick. Smear glue on the gable edges and the top of the side walls, but try to use too much because it will leak out around the roofline. You can get the tip of your craft knife or stencil to scrape off the excess glue.
Center the roof over the house (equal overhangs on each side, front and back). Painter’s tape might come in handy here, but normally I hold the roof in place until I am sure it has adhered. Keep watching to make sure you haven’t made the roof slide forward or backward too much. It's hard to get it perfect and truthfully I don't ever get it perfect.
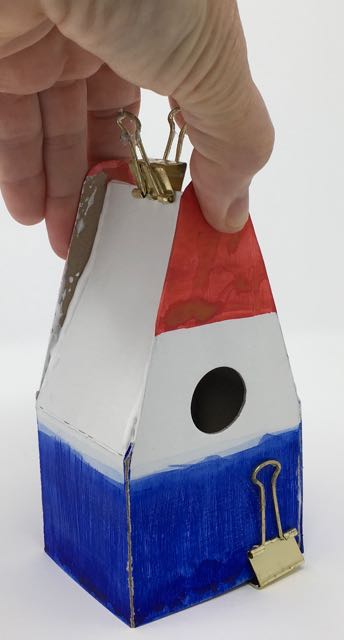
- Glue chimney to roof
Glue the chimney to the roof. I generally hold the chimney in place because it's hard to use tape on an angle. After the roof and chimney are glued on, now paint the matching colors on the roof.
- Make base, prime and paint
Choose what kind of base you would like. I think a whimsical, kind of funky house needs a whimsical, kind of funky base so I made a base with a finial and 2 circles. You can use a ribbon roll and decorate that for the base.
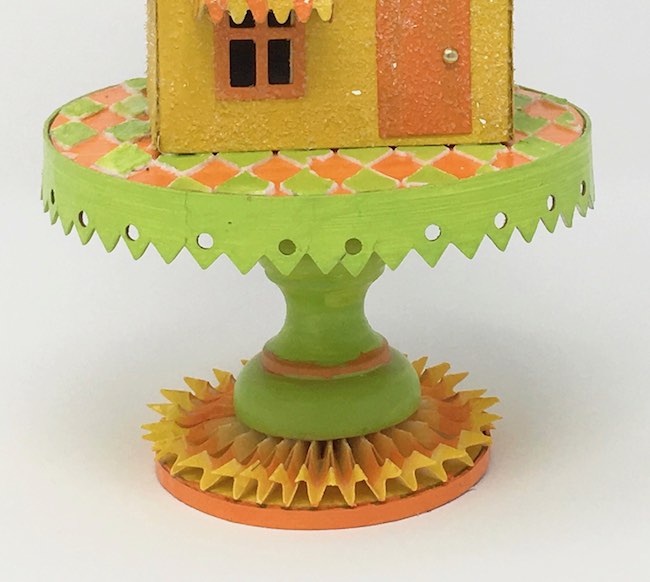
- Glue Candy Corn house to base and add embellishments
Once you have the base completed, glue the house to the base, then it's time for embellishments. Really on this house itself, the only decoration I did to the house after the paint and windows, was covering it with a fine German glass glitter. It's hard to see how sparkly it is in my photographs, but the glass glitter worked really well in adding sparkle without covering up the paint colors.
So that's how you make the Candy Corn Putz House
Please let me know if you make it. You can even join the Paper Glitter Glue Facebook group and share it there.
Have a great crafting day.
Lucy
Ronda K Loyer
I just love your candy corn house!
I think the glitter "makes" the house, great idea! These would make such a cute village scene. You could put trees, pumpkins and maybe light up street lamps mingled between the houses.
Your very generous to share your patterns as I know they are a lot of work for you. Thanks,
Ronda
Lucy
Ronda,
Thank you for such kind words. I agree with you in that you could make an entire fanciful village of these little houses.
Lucy
Tyna
How much would it cost for me to have one made and sent to me? I love the house and the design, and all the colors.
Lucy
Tyna, I kind of sell my little houses, but usually as an October fundraiser for my local Habitat for Humanity. There are a couple of reasons that I don't sell them on Etsy - one, they take me forever and you just can't charge enough for your time and two, I don't like to make the same thing over and over. But the weird thing is that this particular house did not sell last year. Email me at [email protected].
Mary W
Haven't made it yet but wanted to add THANK YOU for the pattern and tech library. I've referenced it a few times and seem to learn something each time or I forget so the library helps me again. I can adjust or modify a pattern but just haven't been able to make my own from scratch so your patterns are a lifesaver.
Mary
Mary
Thank you! I think I will need to make one or . . . soon. They are sooooo cute! Definitely more than one so I'll be able to have one for myself.