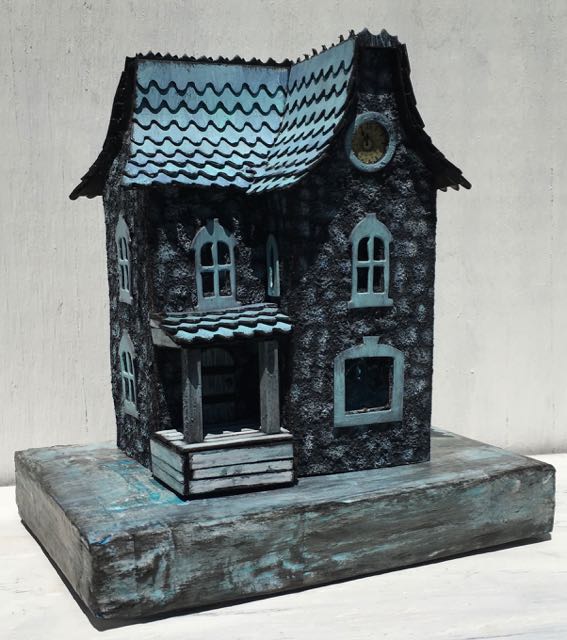
I like the pattern for the Davenport house so much that I made another one. This one is called the Lady Davenport's Halloween House. The surface is made using a different stone stencil technique from the one I used on the Irish Stone Cottage. It consists of sanded paint stenciled with a stone pattern in a light color and each individual stone painted with different colors.
You can find the pattern for this house as Design No. 95 in the November 2020 sections of the Paper Glitter Glue library. Be sure to subscribe to get the free pattern.
The tutorial to make this house pattern is in the post - Giving Thanks - A Thanksgiving Putz House.

The Lady Davenport Halloween House at Twilight
Below I'll describe some of the steps to create this Halloween House.
Davenport Paper Pattern Template
Lady Davenport uses the same pattern as that of the Davenport Green house. The porch is constructed a little differently otherwise the house is the same. I hope to develop a simplified version of pattern for this house in the future. I will let you know when I get it done.
Make the Stone Surface
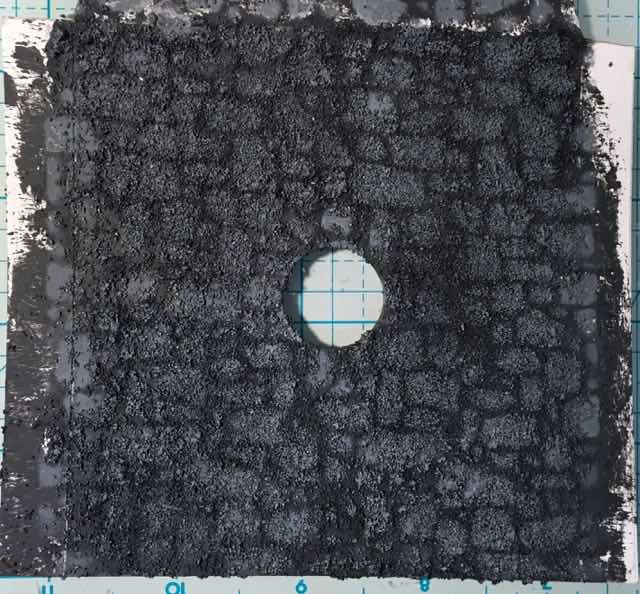
Stones stenciled with a light colored ink (Tim Holtz Iced Spruce Distress Oxide ink) on sanded dark grey paint on Lady Davenport's backside. I put too much sand in the paint so it was somewhat difficult to stencil on this surface.
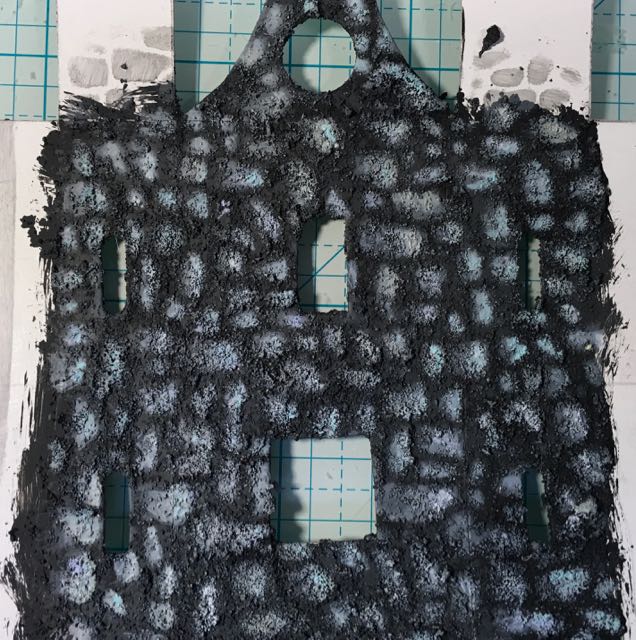
Lighter paint added to the stenciled stones on the front gable addition of the house. I used several Tim Holtz distress paints for this house - Weathered Wood, Tumbled Glass, Faded Jeans, and Broken China.
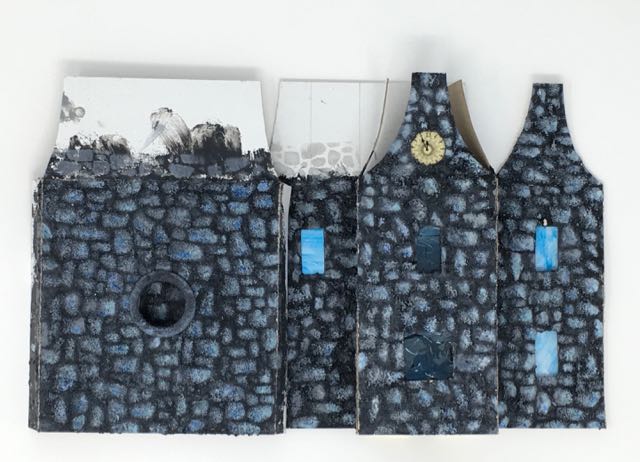
Stone surface painted on the Lady Davenport House. You may notice that the stenciling on the back and the right side of the house is more distinct. I think it is a direct result of how much sand was in the paint. The paint on the front had much more sand in it so it was very rough and didn't take the ink stencil very well. Blue alcohol ink colors the windows.
I used the same stencil (Tim Holtz Mini-Layering Stencil #28) as on the Irish Stone Cottage, just in a different way. The stones on certain areas have more distinct borders than others. I believe this is because some areas have more heavily sanded paint and were rougher. It was more difficult to stencil these areas. Overall, I still like effect very much. To me, it looks like old stonework that has eroded over time.
Construction of the Lady Davenport House
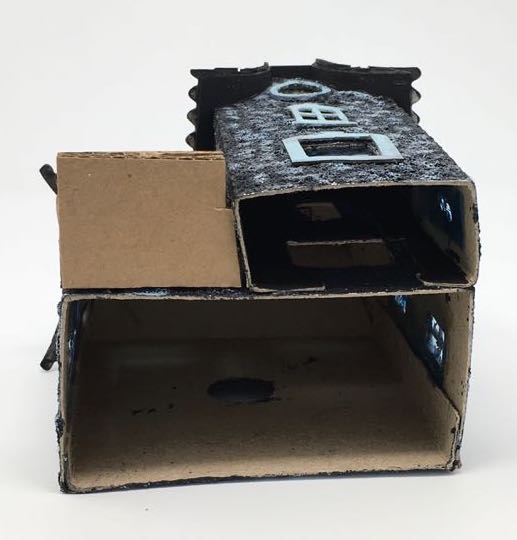
The house is constructed exactly like the Davenport Green house. The basic structure of the house consists of the front and 2 curved gable sides. The back piece has tabs on each side that are glued just inside the side gables. After that glue dries, then the front gable extension is added to the right side.
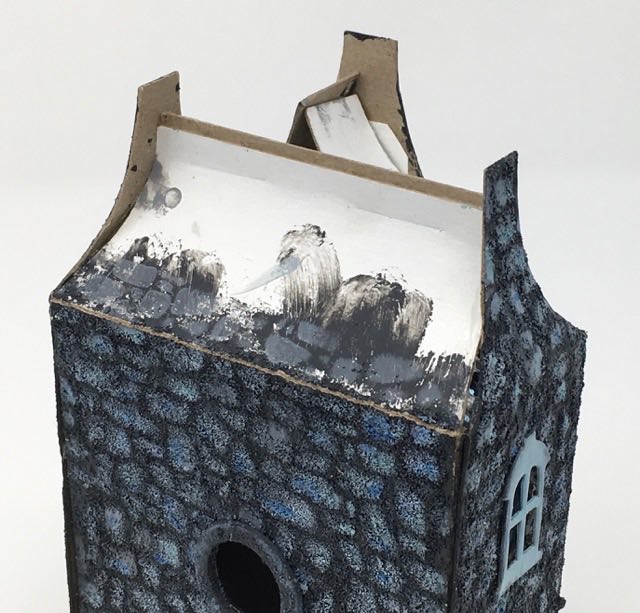
Close-up showing how the back piece fits inside each of the side gables. Also it shows the under roof flaps glued together.
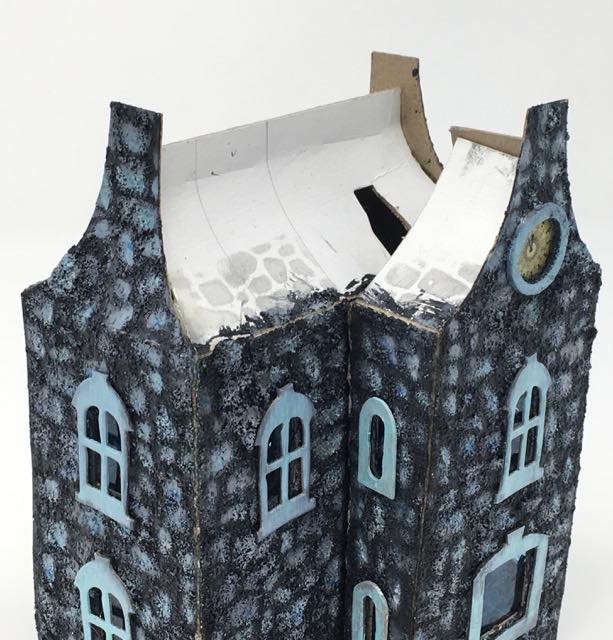
This view shows the under roof glued together and the front gable addition added. The cut out section on the under roof allows a bit of light to the clock at the top of the gable.
The windows are from my very favorite Tim Holtz house window from the Village Manor die. I just think they are perfect for these Halloween houses. The little windows on the sides of the front addition were cut out by hand. I don't have a die for them. The front picture window was also hand cut - very unusual for me. This window has a surprise inside which I will show you in another post.
Add the Roof

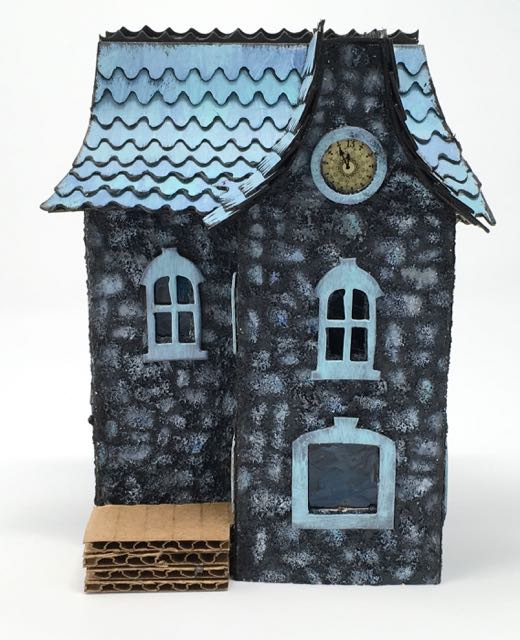
Lady Davenport house with the main part of the roof glued on. The flying nun looking thing in the front is the roof for the front gable addition.
The curved main roof functions as an under roof as well because shingles cover the entire roof. It gives the house structural support as well. Always paint the overhang so it won't be just naked cardboard visible under the edges of the roof. I curve the roof by gently bending it with my thumbs, just do a little at a time to make it fit the curve of the gables.
Roofing Trim Mistakes

Close-up of the shingles on Lady Davenport's roof
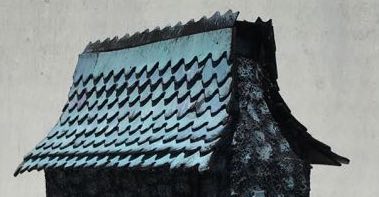
Back roofline of the Lady's house
I chose these two views because you need to know what I did wrong so you can avoid these problems on your own 3D paper houses. The tops of each of these rooflines have a strip of scalloped trim and I did not glue them on correctly. On the front gable the left side is much higher than the right. When I applied the glue it was correct, but then I turned my head or got distracted and the trim slid down and the glue had already set before I knew it.
A similar problem occurred on the trim on the back of the house - I glued the trim to the top row of the shingles and as the glue dried the trim leaned to the front of the house.
My typical response to these construction errors is that it's a Halloween house and perfection doesn't matter, wonky is ok for a Halloween house. That might be true, but it's not the way I intend to construct my little houses. Just thought I would be honest about my mistakes. And here is my attempt to correct the worst mistake on the front gable. I added a little crown to the front of the gable.
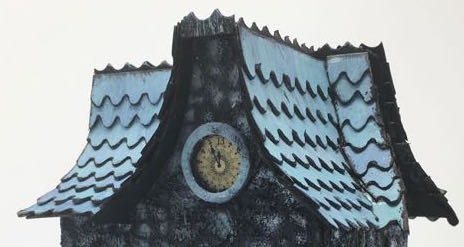
This view shows the little crown added to obscure the worst of my roof trim mistakes.
Adding the Porch
Test fitting the layers of cardboard for the porch on the Lady's house. No crown covering up the front gable trim error as yet.
Below you can see how the house itself is not exactly square and that the gable is glued on crooked. I think I scored the sides wrong so that the left side is not equal to the right side. These mistakes bother me a little bit, but not a lot because the structure of the house as a whole looks ok.
Bottom view of test fitting the cardboard for the porch. More mistakes, but these are less noticeable to my eye when the house is viewed in its entirety. The house itself is not as square as I would like and the front gable addition was glued on a little crooked. That's why the porch is shaped funny.
Now add the base
Front view of the house before the fence detail was added
My cardboard base is made just like the one in this post on how you add LED tea lights to the base. I chose these neutral blues and grey colors for the base because I just think it works for this particular house.
Fence for the Lady's House
The fence is a modified version of Tim Holtz Thinlit die - Gothic Gate. I cut those extra sections off to improve the proportion for this particular house.
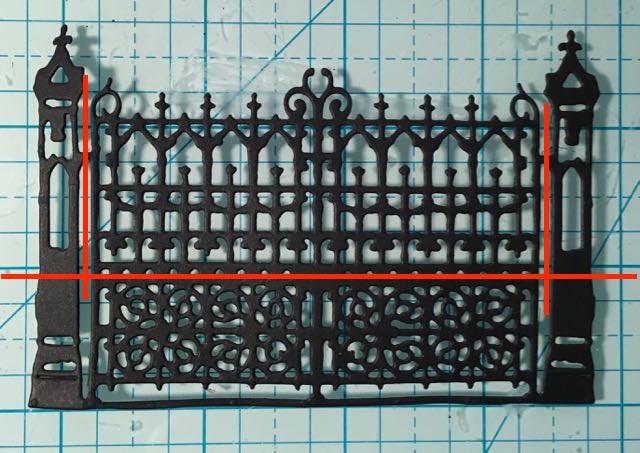
Tim Holtz Gothic Gate die used for the fencing around Lady Davenport's House. I'm saving the extra pieces for future paper houses.

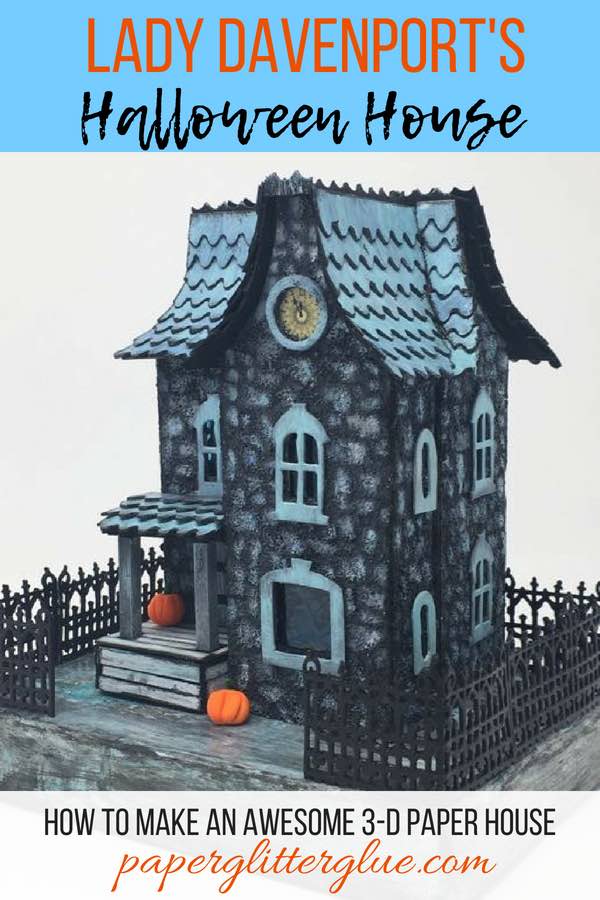
Lady Davenport's House completed - even with pumpkins.
My opinion about the fencing is that it really completes the house and functions as a frame for the house. I think it also shows up better because of the lighter neutral colors in the base.
Happily, I have TWO online challenges I can enter this little paper Putz house in - both are Simon Says Stamp challenges and both are "Stencil It" for their Monday and Wednesday challenge. Since the fundamental decorative element of the house is a stencil, I am able to submit this project. I love these challenges.
I hope you enjoyed reading about this paper house project. What do you think of the Lady's house? Would you like a pattern of this house? The roof curves are challenging, but I have an idea on how to make them easier. As always, I make these mistakes so you don't have to.
Thank you for reading. I hope to see again soon.
P.S. There is a surprise inside. This post has SO MANY photos I'll post photos of the surprise in a separate blog post.
Oh, and feel free to pin photos from this post to your favorite Pinterest board.

Mary W
Thank you for all the great tips you used and also the problems that arise, it helps me learn so much. I loved the fence that I had to buy the die so your tips will help so much. I had wondered how much fuss was involved with the stencil and paint and sand and have never been brave enough to try, now I think I'll give it a go.
Mary
butterfly
This is a fantastic spooky house - straight out of a horror film or Scooby Doo! Love the railings.
Alison x
Lucy
Alison, the fence railings worked out really nicely. I just cut off the bottoms of the Gothic gate die cuts. Straight out of Scooby Doo - that's funny. Thank you.
Tracy
This is just WOW the stonework looks so real. Such an amazing project.
Thanks for sharing with us at Simon Says Stamp Wednesday Challenge Blog. Have a great day x
Lucy
Thank you, Tracy. I love to make the little houses and it's always fun to figure out what kind of finish to make for the house.
Jennifer Miner
Love this house! Your modification of the fencing makes it the perfect scale for your house. Love the colors and the shape of the roof.
Lucy
Jennifer, I love this Gothic gate die though it requires some work to make it sturdy enough for the little houses. Are you making any houses at this time?
Thank you for stopping by. Lucy
Meihsia Liu
Love your fantastic creation! Such an awesome design! Thank you so much for sharing with us at Simon Says Stamp Monday Challenge. 🙂
Lucy
Thank you, Meihsha. I love the Simon Says Stamp challenges. Whenever I have a project that fits I always share.