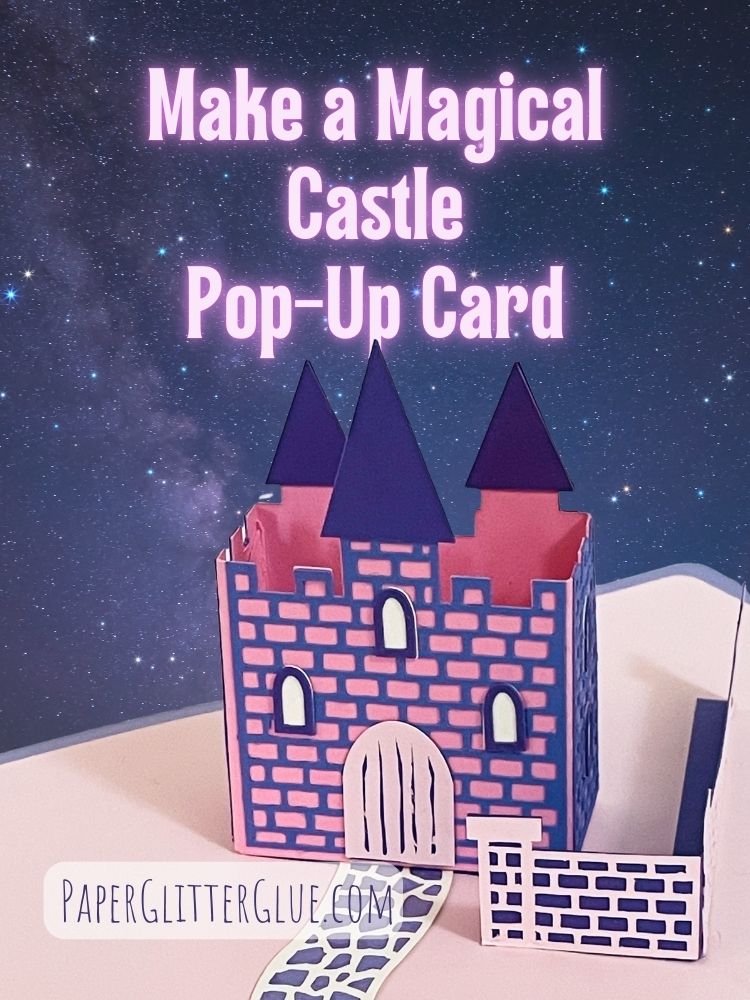
If you loved making the Easy Castle Pop-Up Card (Design No. 141), you'll be thrilled to explore even more castle card designs! I’ve created two exciting new Castle Card Pop-Up Card variations for you to try. Be sure to subscribe with the form below to get these free files.
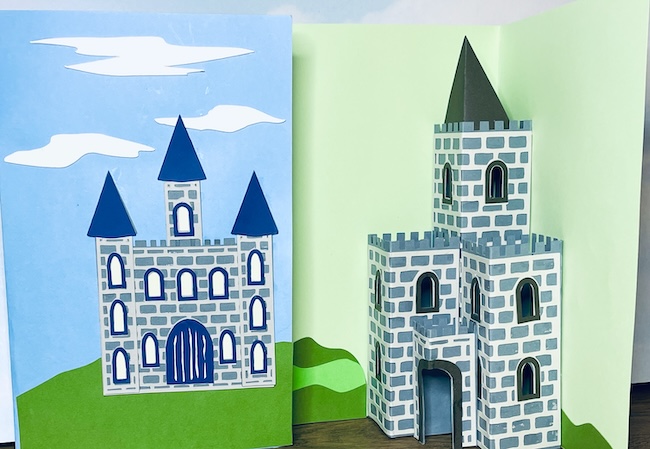
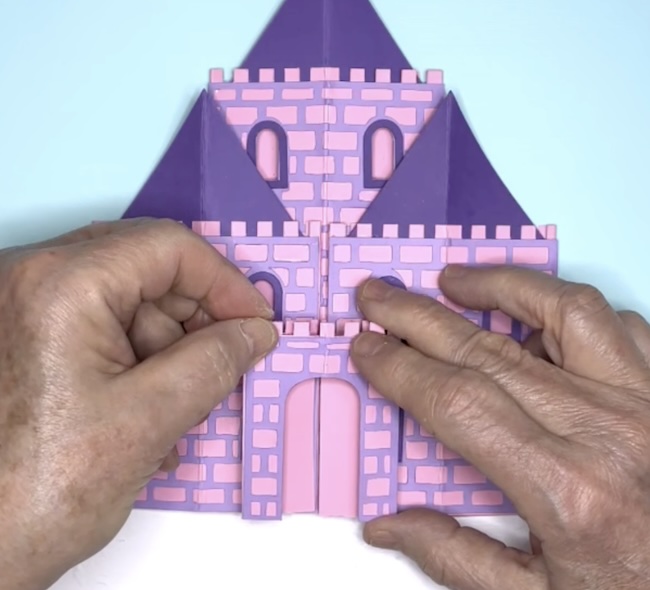
The first is the Freestanding Castle Pop-Up Card, which stands upright in the center of the card when opened, creating a striking display.
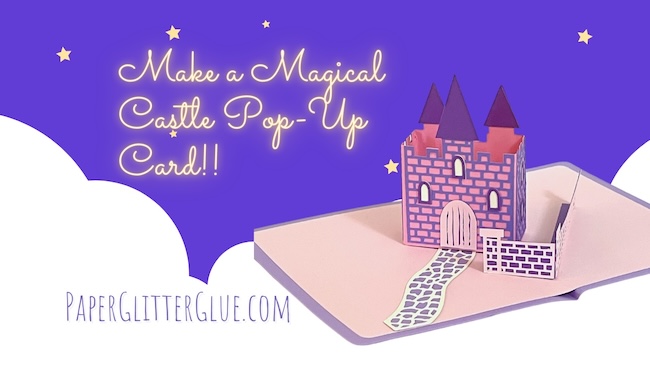
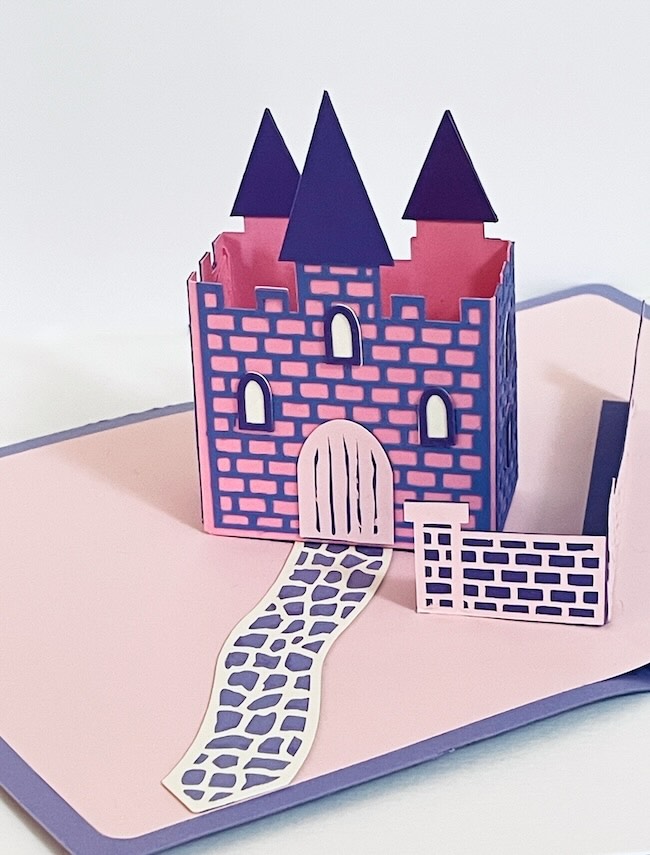
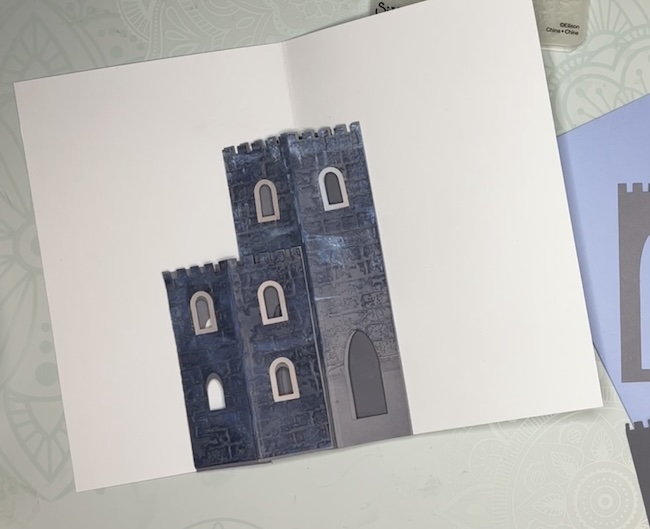
The second is the Triple Tower Castle Pop-Up Card, a majestic design with three tower structures.
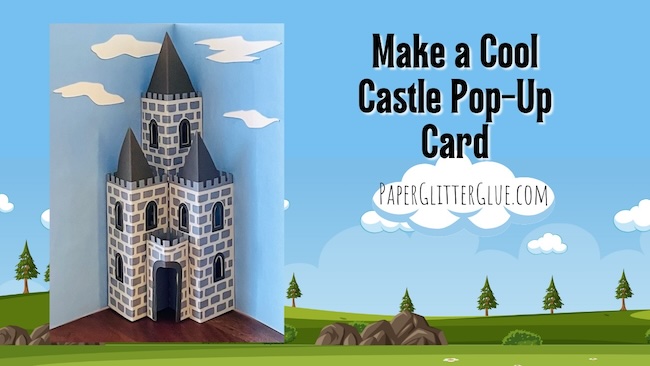
Both designs add a touch of magic to your papercrafting projects and are perfect for sending to loved ones or showcasing your creativity.
Designs No. 185 and 186 in the Paper Glitter Glue Library
These are designs No. 185 and 186 in the free Paper Glitter Glue library. First I'll include the instructions for making the Freestanding Castle Pop-Up card followed by the Triple Tower Castle Pop-Up Card.
This post contains some affiliate links for your convenience. Click here to read my full disclosure policy.
Materials to Make These Castle Pop-Up Card Variations
- Castle Pop-up Card SVG files Triple Tower Castle Card SVG or PDF Pattern - Designs 185 and 186 in the Paper Glitter Glue Library
- Cricut Maker or Cricut Explore Air or other cutting machine
- Standard grip cutting mat
- Contrasting colors of 65# card stock 8.5" x 11"
- Background cardstock
- PVA Glue - I like Bearly Art Glue
- Embossing folder - optional
- Distress Inks - optional
- Cricut Pen - optional
Instructions to Make the Freestanding Castle Pop-Up Card - Design No. 185
Let's start off with the freestanding castle pop-up card.
Here's a YouTube live for making this card.
1. Upload the SVG Pattern
Upload the Castle Pop-Up Card SVG pattern (Design No. 185) to your Cricut Maker or other cutting machine. The free pattern is available in the Paper Glitter Glue library.
To get access to the Paper Glitter Glue library, simply go to this page and click the big orange button which takes you to the password page.
If you don't have the password, just subscribe to my newsletter and you will get the password right away.
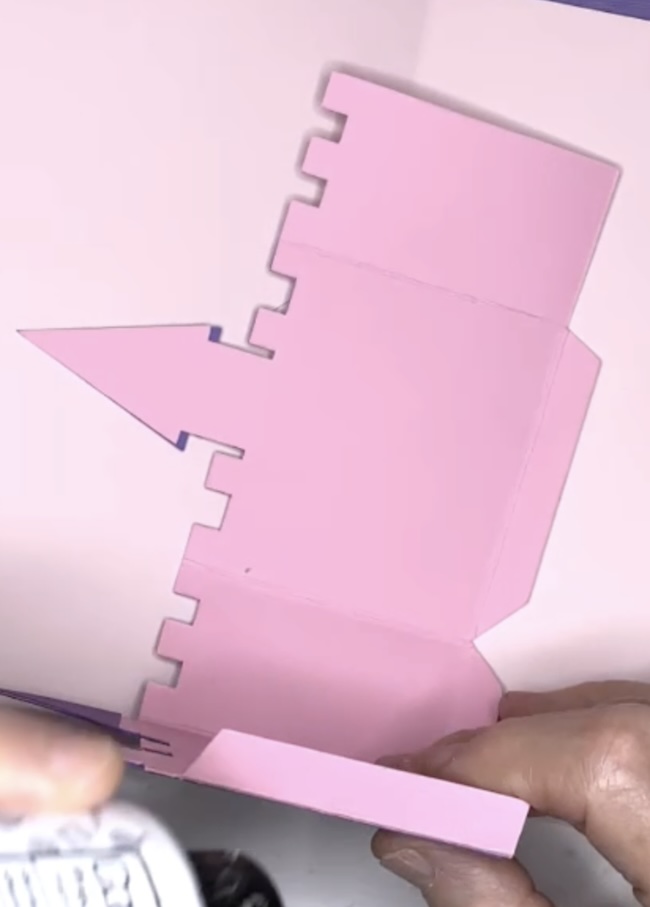
2. Cut Out the Pieces
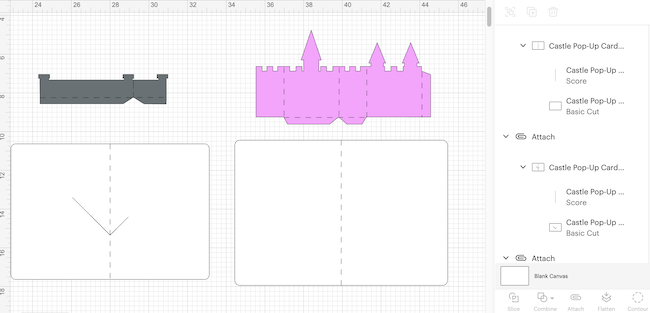
Cut all pieces for the freestanding Castle Pop-Up Card using your chosen method. It is important for you to designate the score lines in pattern and attach them to the appropriate pieces. The photo below shows how the scored pieces appear in Cricut Design Space.
3. Prepare the Base
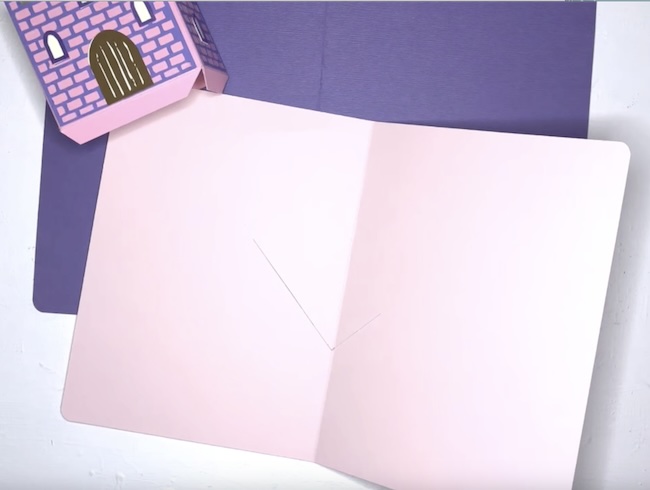
Fold the background piece (the card base) along the score line to form the inner card base.
4. Fold the Castle Pieces
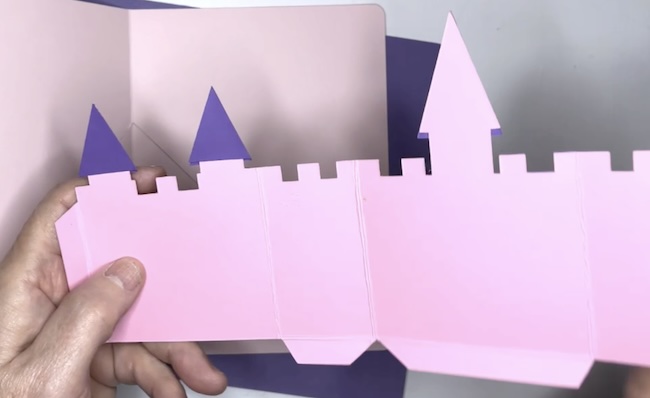
Crease all castle pieces with score lines. Do the same for the stone wall as well.
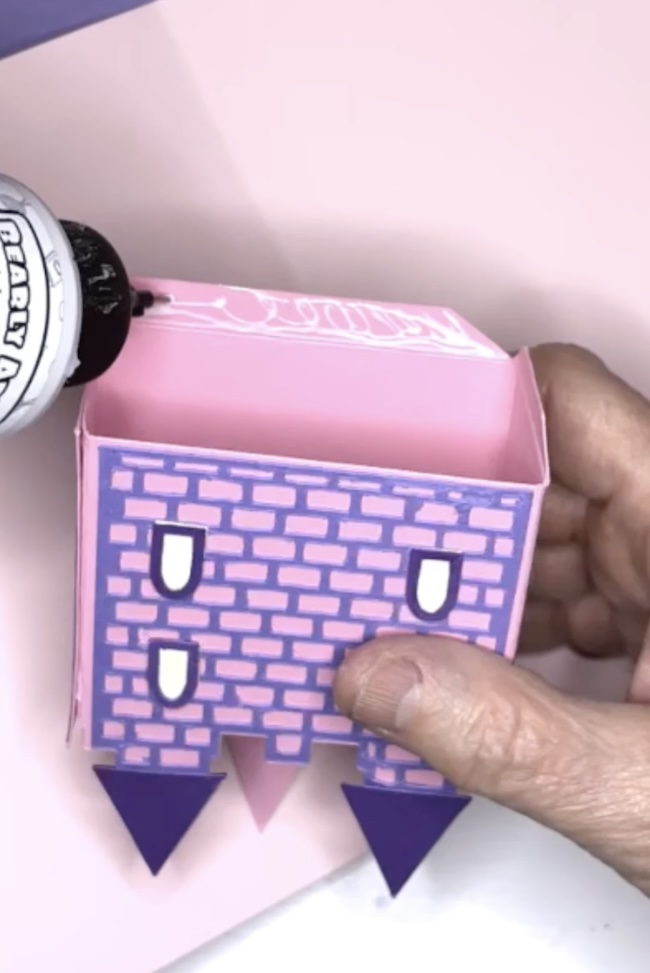
5. Decorate the Castle Pieces
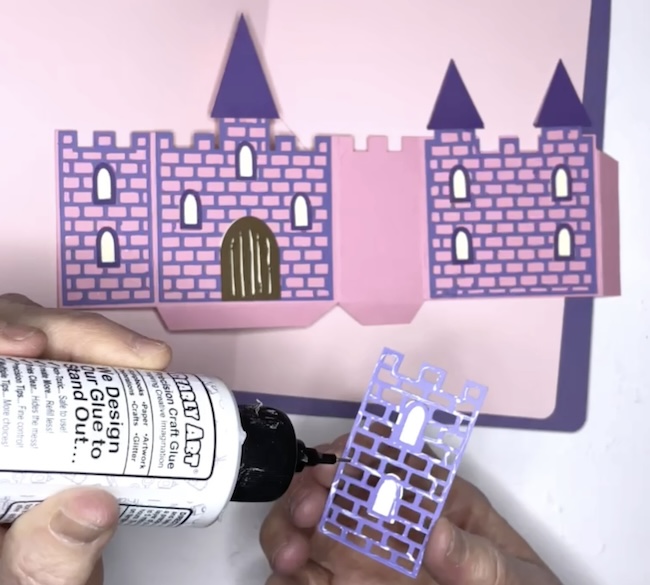
Glue the stone overlay, windows, drawbridge door, and steeples onto the main body of the castle. Also add the stone overlay to the wall and the pathway.
6. Assemble the Castle
Glue the castle together along the side glue tab.
Be sure that your house can fold flat because it has to fold flat within the card.

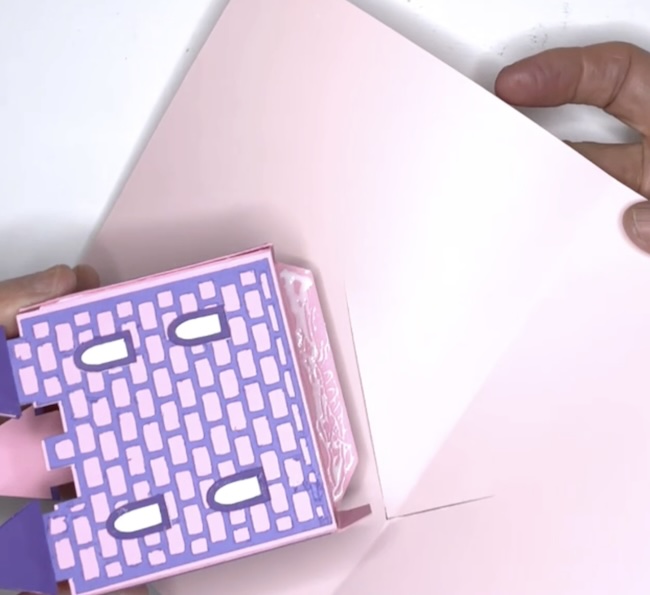
7. Apply the Castle to the Card base
Apply glue to the longer tab on bottom of the castle and slide it into the longer slot of the castle base. Next, apply glue to the other glue tab at the bottom of the castle and slide ii into the other slot on the card base.
Close the card and apply pressure to secure the tabs to the card base.
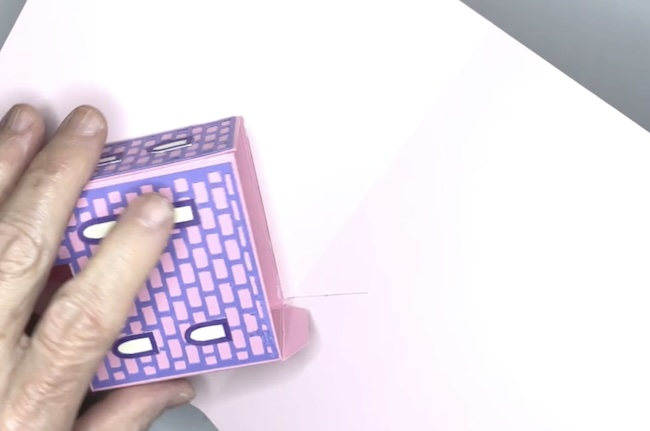
The photo slows the tab completely inserted.
Here's the second tab shown on the back of the card.
8. Add Final Decorations
Add the pathway to the front of the castle centering it with the drawbridge door.
To add the stone wall apply glue to the bottom of the glue tabs on the stone wall pieces and adhere to the card base in front of the castle. Be sure glue the angled V-shape along the center line of the card base.
Embellish the front of the card with clouds, hills, a mini castle or other decorations as desired.
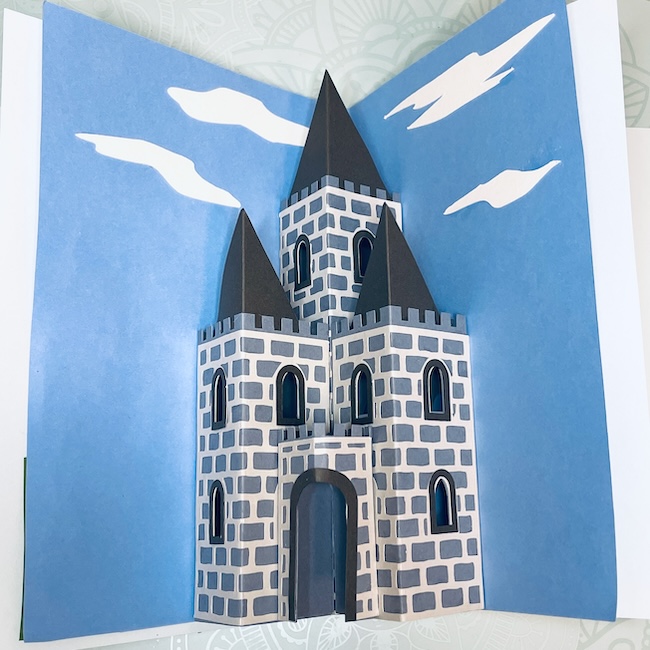
Instructions to Make the Triple Tower Castle Pop-Up Card - Design No. 186
Here is the YouTube live for making this Castle Card variation.
Let's make our second Castle Card Variation - the Triple Tower Castle Pop-Up card
Here's an outline of the steps to make the Triple Tower Castle Card.
- Upload the Castle Pop-Up Card SVG pattern to your Cricut Maker or other cutting machine. It’s design no. 186 in the Paper Glitter Glue library.
- Mimic the stone surface
- Cut out the pieces for the Triple Tower Castle Pop-Up Card.
- Prepare the base.
- Fold the castle pieces along the score lines.
- Decorate the castle pieces.
top of the towers, glue in place before assembly. - Assemble the central tower.
- Attach the side towers.
- Glue the center doorway in place.
- Add the final decorations.
1. Upload the SVG Pattern for the Triple Tower Castle Pop-Up Card
Upload the Castle Pop-Up Card SVG pattern (Design No. 186) to your Cricut Maker or other cutting machine. The free pattern is available in the Paper Glitter Glue library.
To get access to the Paper Glitter Glue library, go to this library page and click the big orange button which will take you to the password page. Then add the password to the form and poof! you will be taken to the library itself.
If you don't have the password, just subscribe to my newsletter and you will get the password right away. Here's the form to subscribe.
2. Mimic the Stone Effect
Before you get started cutting out the pattern, choose how to create a stone effect for the castle pieces:
- Use the cut-out mortar overlay.
- Emboss with an embossing folder.
- Draw stones on the pieces with the stone stencil.
- If drawing stones, prepare two 8.5” x 11” cardstock pieces with the stone pattern before cutting.
Here are examples of the 3 surfaces starting with the stone overlay version.
Next, check out the embossed version. I used a Tim Holtz stone embossing folder to get the stone effect.

Finally, you can use the stone stencil included in the Triple Tower Castle Pop-Up card to draw a stone surface on your caste.
3. Cut Out the Pieces
Cut all pieces for the Triple Tower Castle Pop-Up Card using your chosen method. Remember to select the score lines for each piece and attach that score line to the piece it is grouped with.
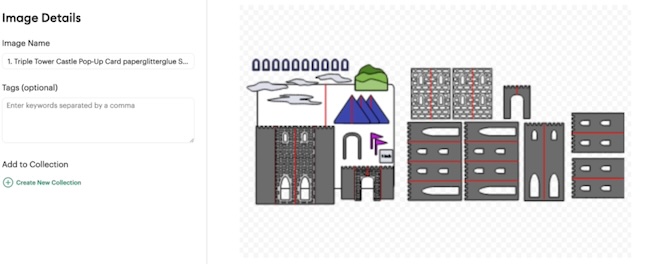
As you can see, there are a number of pieces with score lines.
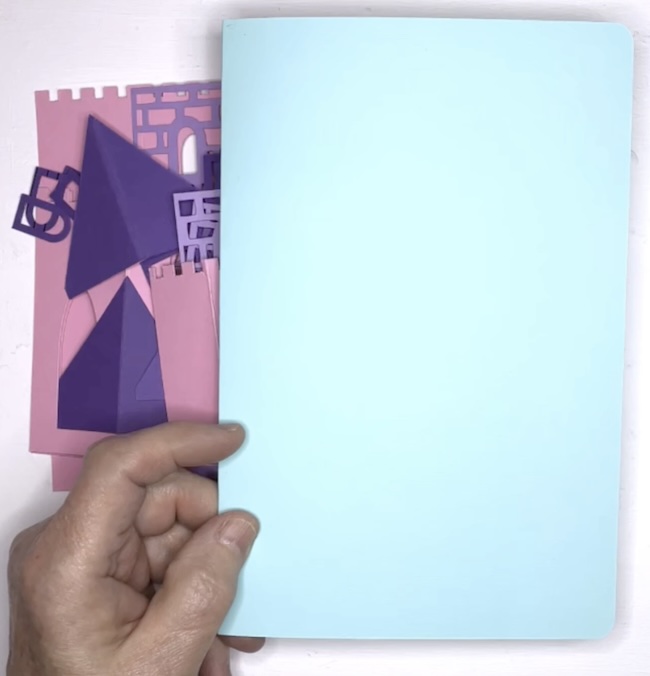
4. Prepare the Base
Fold the background piece (the card base) along the score line to form the card base.
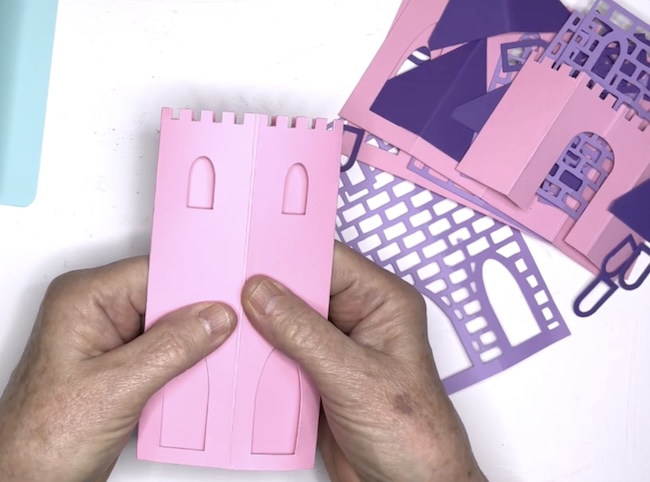
5. Fold the Castle Pieces
Crease all castle pieces with score lines along the score lines. You need them to be well-creased whenever you make a pop-up card.
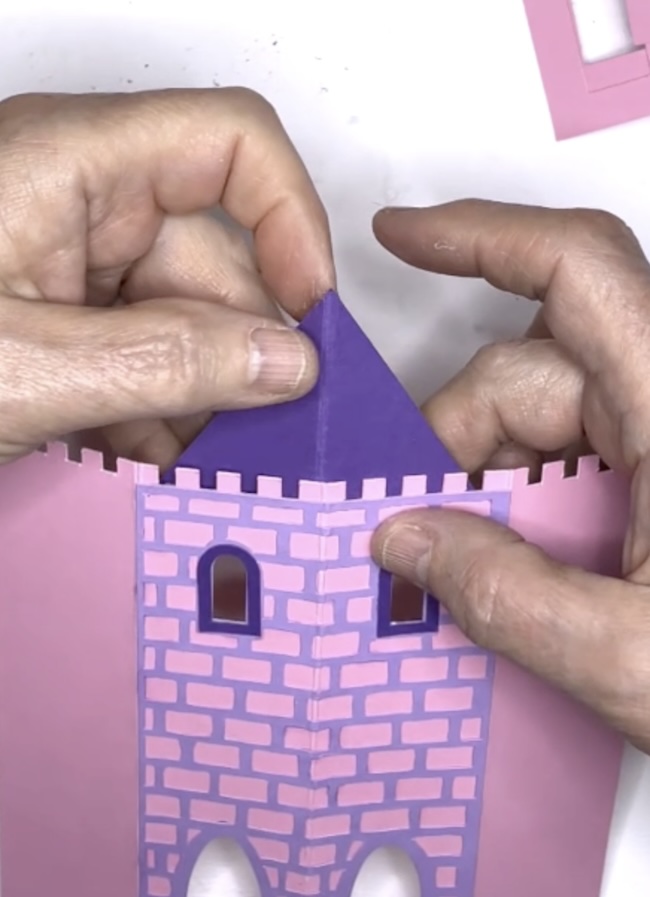
6. Decorate the Castle Pieces
Glue the stone overlay onto the castle walls, or emboss them if desired.

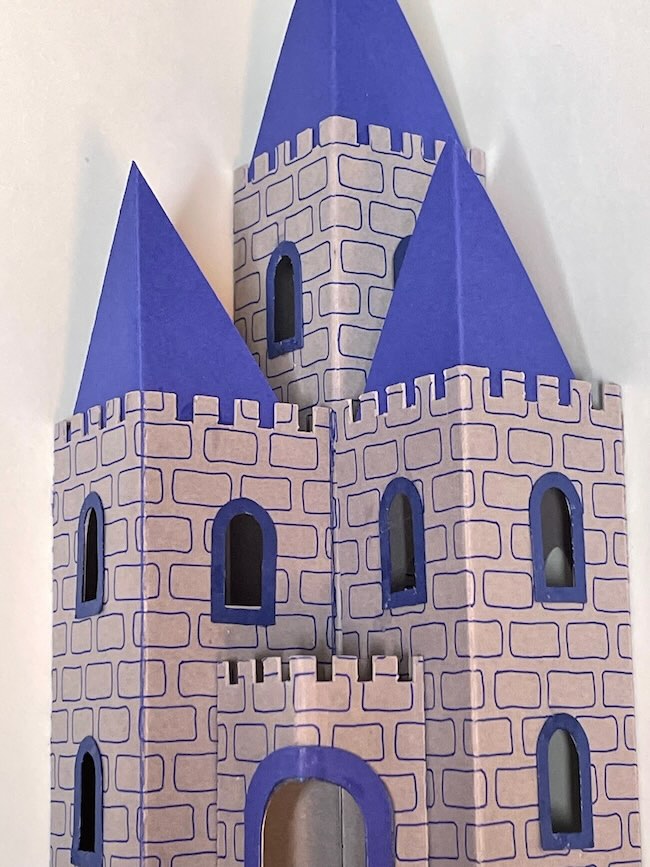
If adding steeples to the towers, glue them in place before assembling the card.
7. Assemble the Central Tower
- Fold the two side flaps of the tall central tower to the back.
- Apply glue to the back of these flaps.

- Align the tall tower along the center score line inside the base card and press to secure.

- Ensure the center tower folds flat when the card is closed.
8. Attach the Side Towers
- Glue one side tower to one half of the central tower and the background card.
- Repeat for the other side tower, attaching it to the opposite half of the central tower and the background card.
- Confirm that both side towers fold flat when the card is closed.
9. Add the Center Doorway
Glue the center doorway piece across both central towers, ensuring it folds flat when the card is closed.
10. Add Final Decorations
- Embellish the card with clouds, hills, or other decorations as desired.
- Decorate the front of the card for added charm.

11. Share Your Creation
Your Castle Pop-Up Cards are ready to delight! Send them to someone special and bring a smiles to their faces.
Leave a Reply