
LEARN HOW TO MAKE THE CHRISTMAS COTTAGE CANDY BOX
Want to learn how to make a cute candy box (or gift box) out of card stock? This is a perfect little house to make for the Christmas season. And you know what? It's easy and so festive - perfect for gift giving and decor.
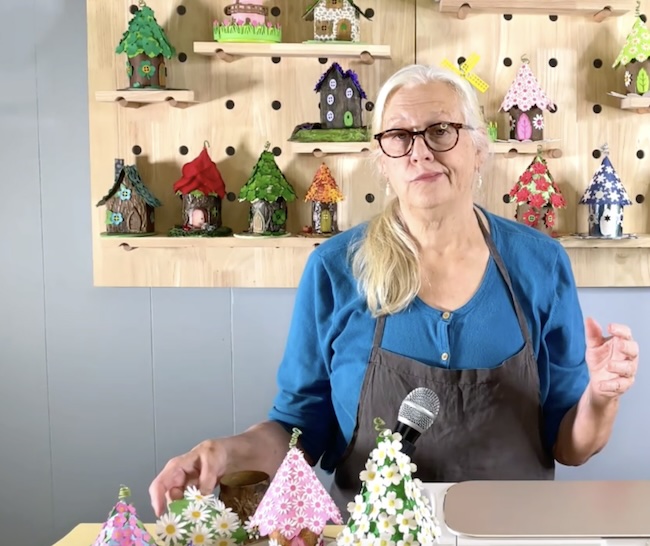
Watch this video to learn how to make the Christmas Cottage Candy Box on my Paper Glitter Glue YouTube channel! And be sure to subscribe to my channel so you know when I post a cool new paper craft project.
This post contains some affiliate links for your convenience. That means if you make a purchase after clicking an affiliate link, I will earn a small commission but it won’t cost you a penny more. Click here to read my full disclosure policy.
MATERIALS TO MAKE THE CHRISTMAS COTTAGE CANDY BOX
- Cardstock - I prefer 110# card stock for the structure of houses like this, but 65# cardstock will work. Lightweight cardstock works well for the intricate cuts on the poinsettia flowers.
- Cardboard - You can use cardboard for this house if you like. It will make a much stronger candy box. 22 point cardboard is what I often use.
- Watercolor paper is can be used for the house and the flowers
- Gesso primer to prime your cardboard if painting your house
- Optional, paints for cardboard or watercolor
- Stickles for the center of the poinsettias
- Glue options - Quick Dry Tacky Glue for the structure of the cardboard house or Bearly Art Glue for gluing card stock
- A way to cut out the pieces, I use my Cricut Maker to cut out all the pieces, but you can use other cutting machines work. The house is a bit too tall to make with the Cricut Joy.
DIRECTIONS FOR MAKING THE CHRISTMAS COTTAGE CANDY BOX
Step 1 - Prepare Your Pieces for the Candy Box
- Download the free Christmas Cottage Candy Box pattern from the Paper Glitter Glue library - Design No. 180
- Cut out the pattern for the house along with the flowers
- If using cardboard, prime and paint your house pieces
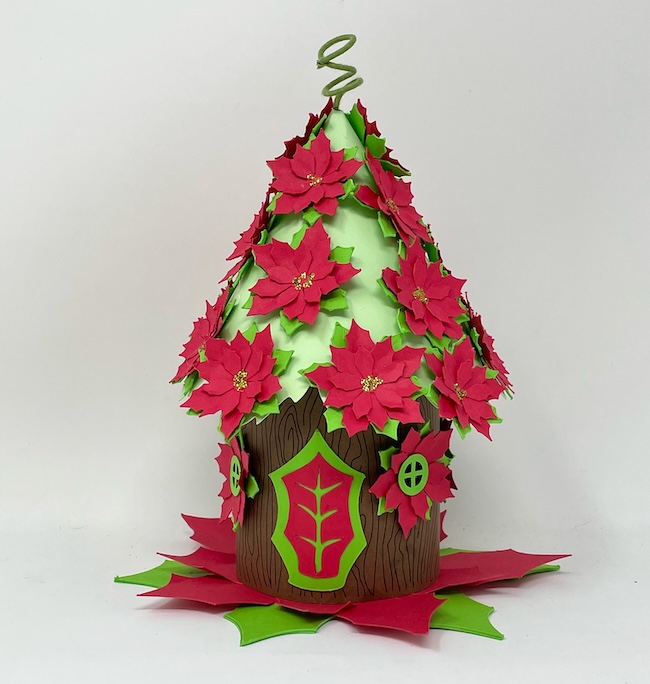
- Assemble the tiny poinsettias starting with the bottom leaf layer, then the flower petals
This is a Fairy House showing the same poinsettias on the roof.
Step 2 - Assemble the Christmas Cottage
- Glue on windows and the door onto the main house structure
- Make the house structure
- Make the candy box insert
- Adhere the roof to the house BEFORE you glue the poinsettias to the roof
- Glue poinsettias to the roof (or the decoration of your choice)
Step 3 - Fill the candy box and share!
- Fill the candy box insert with candy
- Insert the candy box into the bottom of the Christmas cottage
- Share your candy box with someone you love
For more details, see below. Here's the video showing you how to make the Christmas Cottage Candy Box.
Step 1 - Prepare Your Pieces for the Candy Box
1. Download the Christmas Cottage Candy Box Pattern - Design No. 180
This pattern for the Christmas Cottage Candy Box is free in the Paper Glitter Glue library. The files are available in 2 formats - SVG cut files for cutting machines like the Cricut Maker or Cricut Explore and PDF files you can print out. It's Design No. 180 in the library.
The password is at the bottom of every email I send if you have subscribed to my newsletter.
But if you don't have the password, just subscribe with the form below and I will send you the password to the Paper Glitter Glue library right away. Please know I will never send you any spam. You can unsubscribe at any time.
Important: The pattern files are stored in a zipped format. That means that they are compressed so they can be easily downloaded. If you need help unzipping the files, these instructions will help.
- Here's how to unzip a folder using an iPad or iPhone.
- To learn how to unzip a folder using a Windows computer, click here.
- To learn how to unzip a folder with an Android device, click here.
- To learn how to unzip a folder using a Mac, click here.
2. Cut out the pattern for the house along with the flower pieces
I used my Cricut Maker to cut out all the pieces. Fortunately, the only score lines you need to be aware of are:
- score lines on the main body of the house
- one score line on the roof piece
- score lines on the optional chimney
- score lines on the candy box insert.
Be sure designate each of those sets of lines as score and attach to the piece it is grouped with.
3. If using cardboard, prime and paint your house pieces
For this house I used cardstock, but it is certainly an easy pattern to make out of cardboard.
4. Assemble the poinsettia flowers if that is what you want for your decor
Starting with the 6 petal leaf piece, glue the 3 sets of flower petals on top with just a dab of glue. When dry, add a dab of stickles glitter glue in the center.
These flower petals are not perfectly symmetrical because the real poinsettia flower isn't perfectly symmetrical. So don't go crazy trying to line them up perfectly.
Step 2 - Assemble the Christmas Cottage Structure
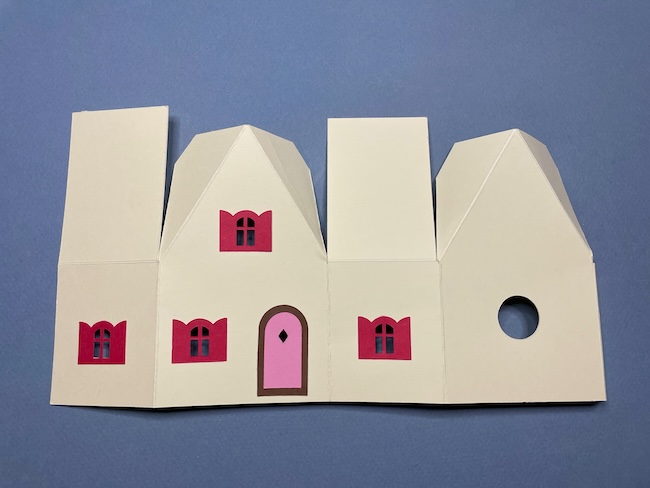
1. Glue on windows and the door onto the main house structure
First, fold along all the score lines.
Generally, I glue the windows and door the miniature house structures before I assemble the house. It's just so much easier to place them at this stage.
2. Make the house structure
Apply glue to the side glue tab and adhere it to the opposite side of the house. Next, glue the roof tabs to the roof flaps to complete the structure of the Christmas cottage.
3. Make the candy box insert
The half-moon shaped cutouts are to allow you to remove the insert from the house easily. Without them it is a struggle.
Fold along all the score lines on the candy box insert.
Construct the insert by applying glue to the side glue tab and adhering it to the opposite to make a rectangular box shape. Note this important tip: Make sure the glue tab goes INSIDE the box, otherwise your candy box won't insert into the house very easily.
Next apply glue to the tabs on the base of the insert and slide it into place to form the bottom of the candy box.
4. Adhere the roof to the house BEFORE you glue the poinsettias to the roof
For this step, you need to glue the roof to the house before you decorate it because it is challenging to get it to adhere when you have a bunch of little poinsettias covering the entire roof.
5. Glue the miniature poinsettias to the roof of the Christmas Cottage
Once the roof is firmly adhered to the house, glue the tiny poinsettias to the roof (or the decoration of your choice).
Step 3 - Share Your Christmas Cottage Candy Box!
1. Fill your candy box insert with candy or tiny treats
It won't hold a lot of candy which is probably a good thing, but it will hold enough to convey your affection with someone.
2. Insert the candy box into the bottom of the Christmas cottage
The candy box should fit snugly in the bottom of the cottage. To remove it, just apply some pressure with your finger in the back opening of the cottage.
3. Share your candy box with someone you love
In fact, I would love to see what you make. Please share your creation with me in the Paper Glitter Glue Facebook group, or on other crafty Facebook groups, on Instagram (be sure to tag me @LucyF7) or email me so I can see your little house.
Questions?
Remember if you have any questions or problems making this little house, just email me - [email protected]. I will be glad to help if I can.
Leave a Reply