Learn How to Make These Adorably Cute Chalkboard Halloween Ornaments Out of Black Cardstock

I'm making lots of Halloween crafts now because it's Halloween season - one of my favorite paper crafting seasons. When I purchased these great Halloween stamps from Stampers Anonymous, I knew they would be perfect to make my own Chalkboard Halloween Ornaments some accented with a little stitching.
Table of Contents
If you have some stamps with an open area, they make the best chalkboard ornaments. Here's what you need to make these ornaments.
This post contains some affiliate links for your convenience. Click here to read my full disclosure policy.
Materials to Make the DIY Halloween Chalkboard Ornaments
- Black cardstock - at least 65# cardstock, but 110# cardstock is better
- Optional - use other colors of cardstock for accents
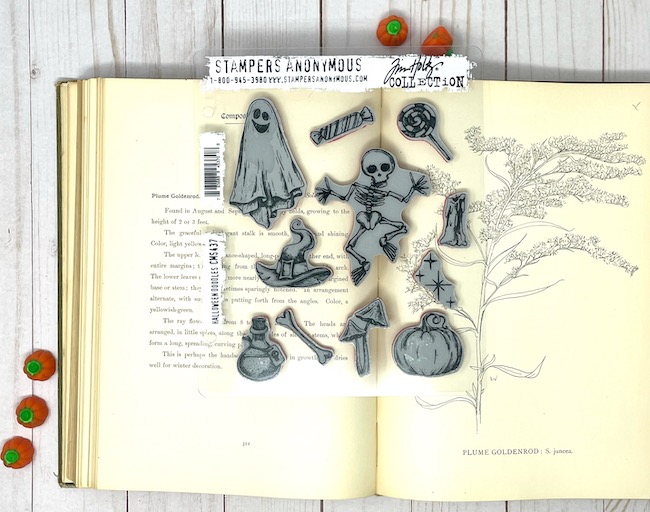
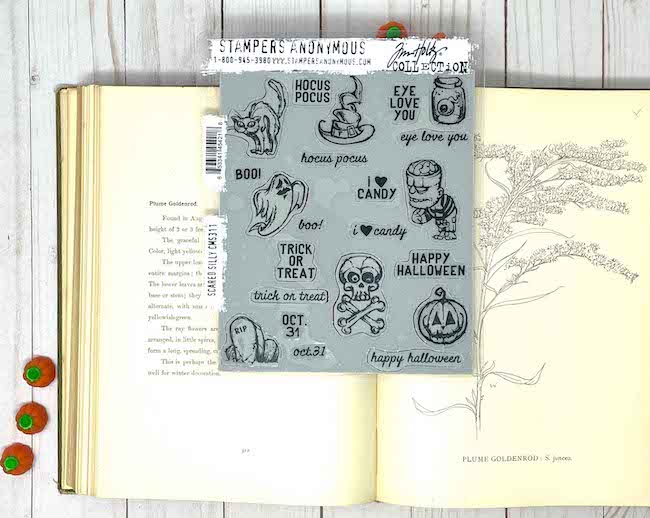
- Stamps - these are the two different ones I used from Stampers Anonymous
- Stamp platform
- Frosted Crystal Embossing Glaze
- Embossing Ink
- Heat Tool
- White chalk
- Baker's Twine
- Hole punch
- Nested dies for the shapes
- Die cutting machine
- Scissors to fussy cut some of the images
- Sewing machine - any kind will work
- Glue - a lightweight glue works for this project - Art Glitter Glue or Tacky Glue
Steps to Make the DIY Chalkboard Halloween Ornaments
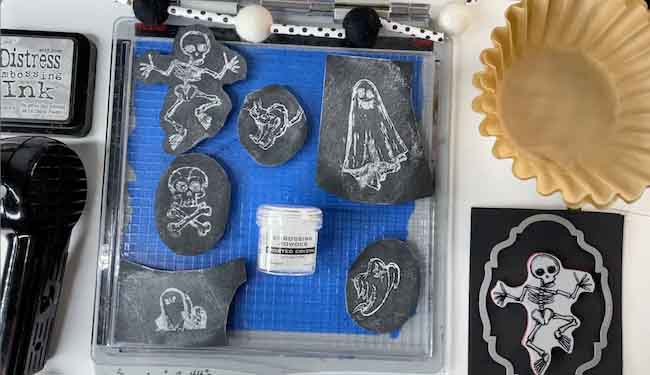
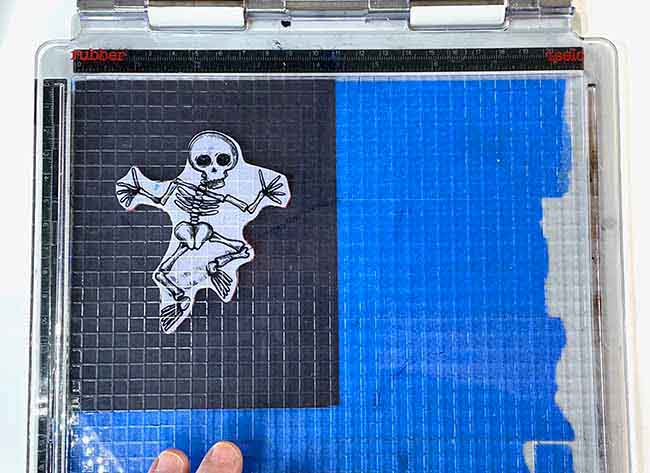
- Stamp black cardstock with your chosen images with embossing ink
- Sprinkle with Frosted Crystal embossing powder
- Heat the Frosted Crystal embossing powder just until it is a matte color
- Color with white chalk, then brush off the excess with your fingers
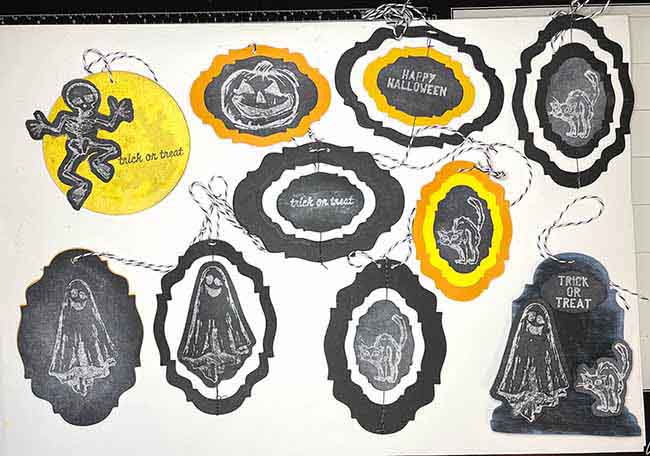
- Cut out shapes to make ornaments
- Glue the shapes together to make them stronger
- For the spinning ornaments, sew the sections together so the middle part spins
- Glue the chalkboard ornaments to the spinning section in the middle
- Punch a hole to thread the baker's twine for hanging ornaments
For a detailed description about how to make the Chalkboard Halloween Ornaments, read the detailed instructions below.
Chalkboard Technique for Paper Crafts - Video
Subscribe to the Paper Glitter Glue Newsletter
And remember to subscribe to my Paper Glitter Glue newsletter to keep up with all the cool paper crafts coming up on my blog.
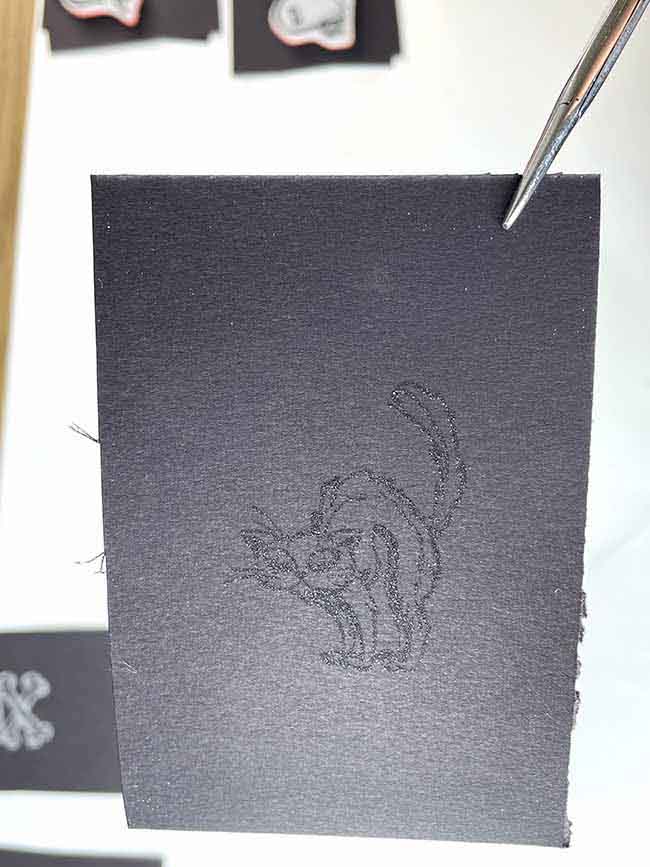
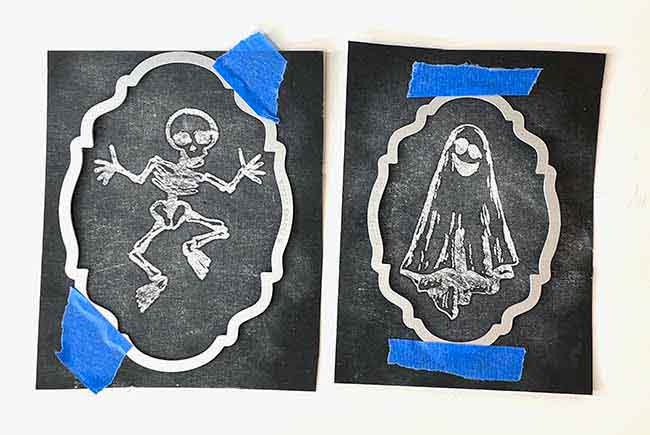
Stamp black cardstock with your chosen image with embossing ink
First, choose a stamp that has a lot of open space that works well to allow the "chalkboard" to show through. Years ago, I learned the chalkboard technique from Tim Holtz. I had tried it in the past, but I didn't really get it until now.
These stamps are just perfect for this technique because they have negative space in the middle of the stamp.
Obviously, black cardstock is the perfect background for making a chalkboard.
To make sure that the embossing ink makes a good impression, I use a stamping platform. You don't have to, but it helps me.
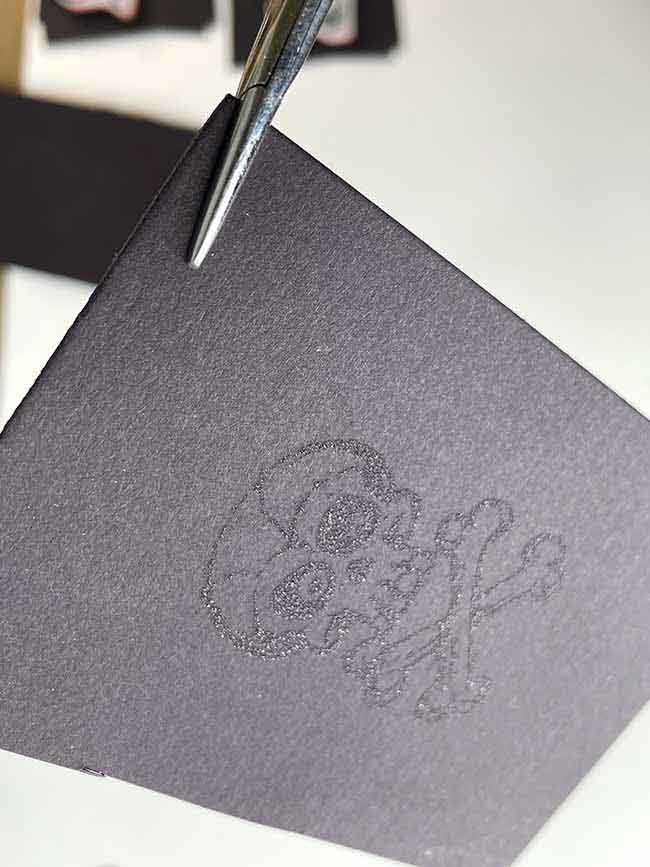
Sprinkle the stamped impression with Frosted Crystal Embossing Powder
Why Frosted Crystal embossing powder? Will other embossing powders work? I don't really know. But in Tim Holtz' tutorial, he says that Frosted Crystal embossing powder has a lower melting point so it doesn't require as much heat. In addition, it retains a crystal type structure when it is not heated too much so it's perfect for making texture that chalk will stick to on the black cardstock.
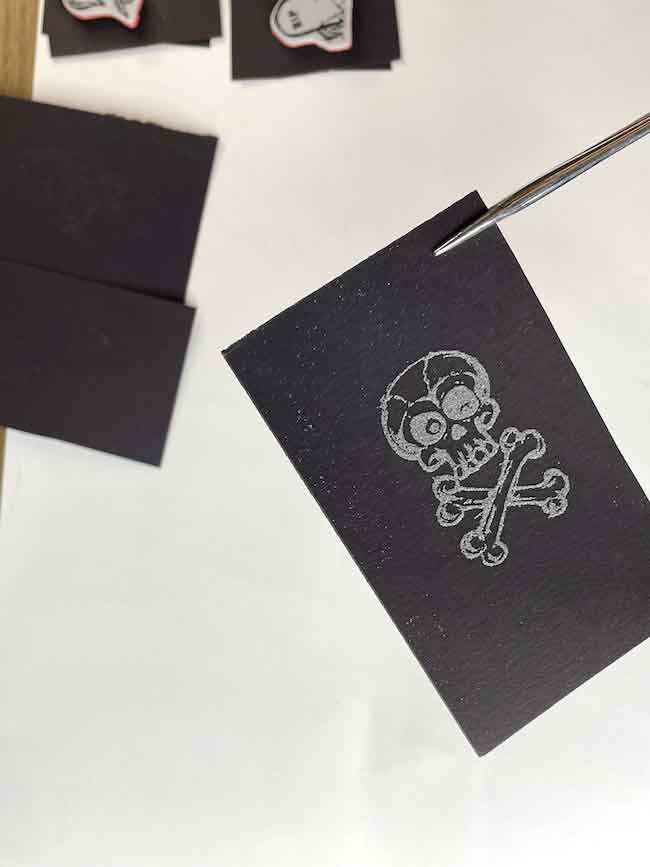
Above see how the image looks after the embossing powder has been applied, but before the heat has been applied.
Heat the Frosted Crystal Embossing Powder just until it is a matte color
Now, here is the tricky step. The main thing to remember is to heat the Frosted Crystal embossing powder just until it turns into a matte color, not really shiny as you normally do. And it still works even if you still see a few crystals present.
Here is an additional view of how the stamped image looks after using the heat tool.
For this step, I used Ranger's Heat tool because it doesn't get as hot as a regular embossing tool and it is easier to control.
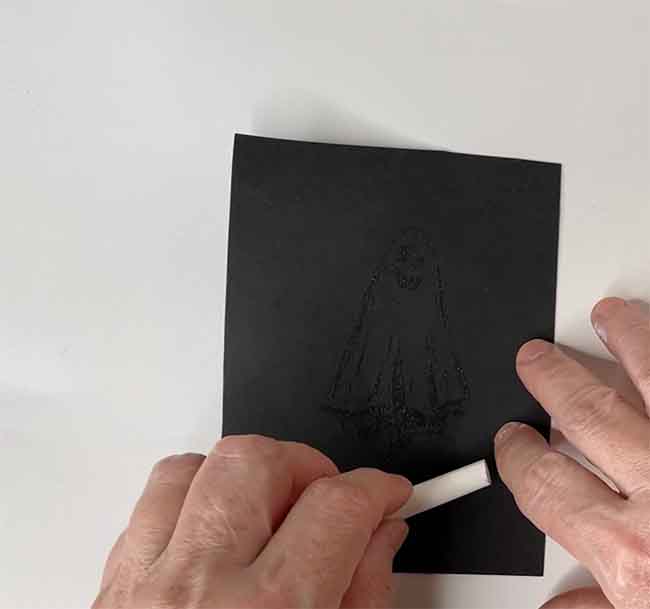
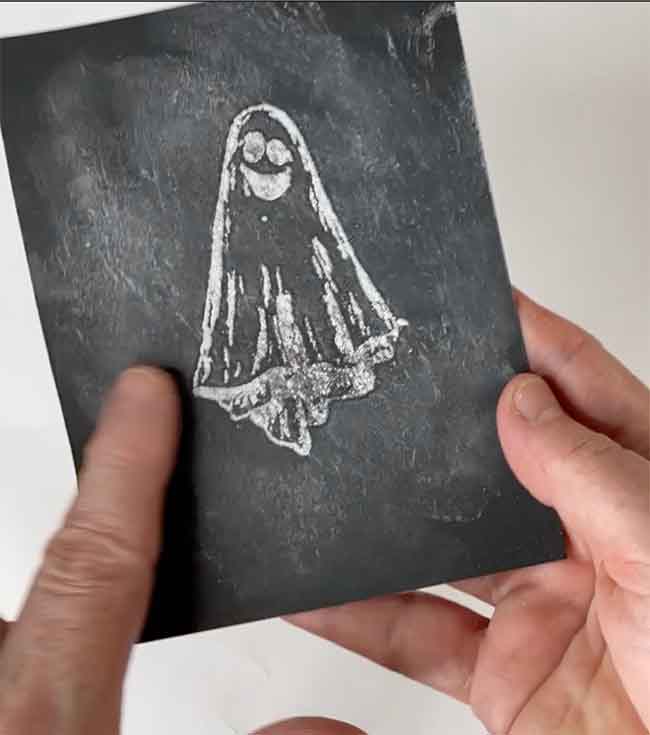
Color with white chalk, then brush off the excess with your fingers
After the embossing powder has cooled, color the stamped image with white chalk. Then brush the cardstock off with your fingers. That way some of the chalk sticks to the cardstock and the stamped image.
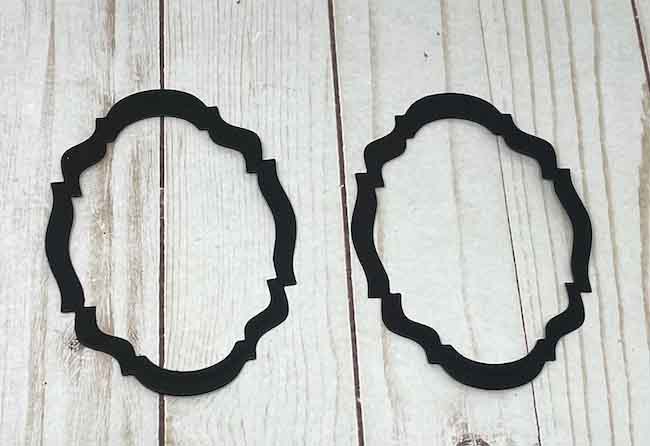
Cut out the shapes with dies
Next, cut out the ornaments into shapes. You can fussy cut around the stamped images if you like. I did that with some of my images.
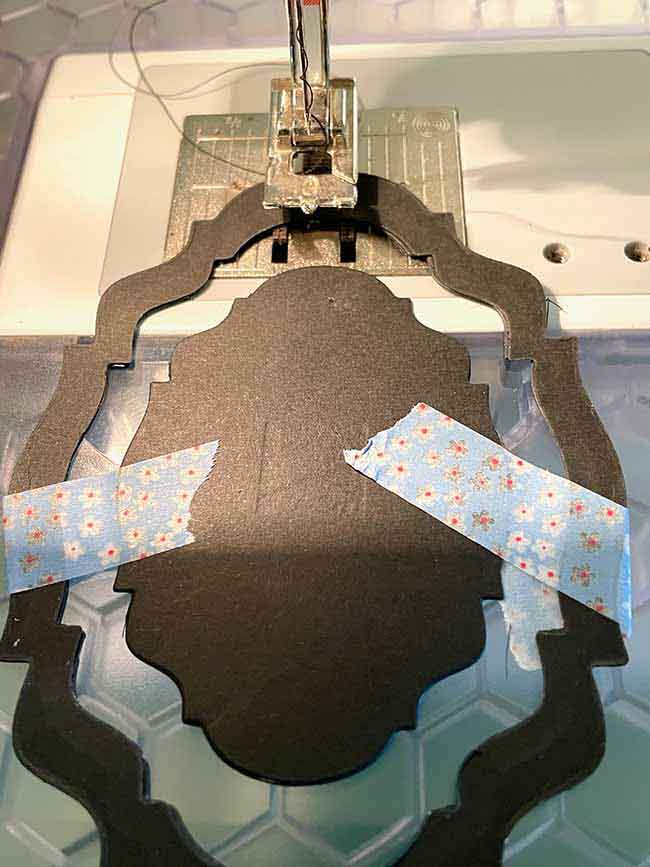
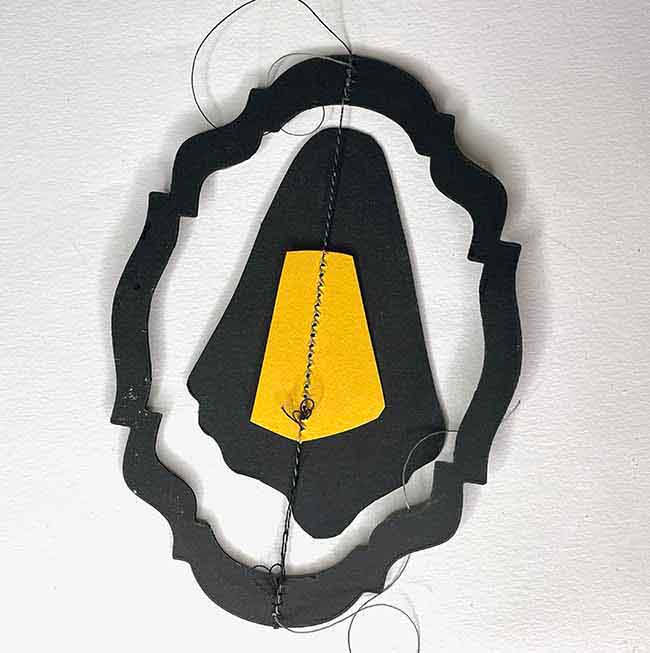
For the framework of the spinning ornaments, use the shaped dies. Then tape them together to make the frame for the ornaments with the spinner section in the middle. As shown in the photo below I used washi tape to hold the dies in place.
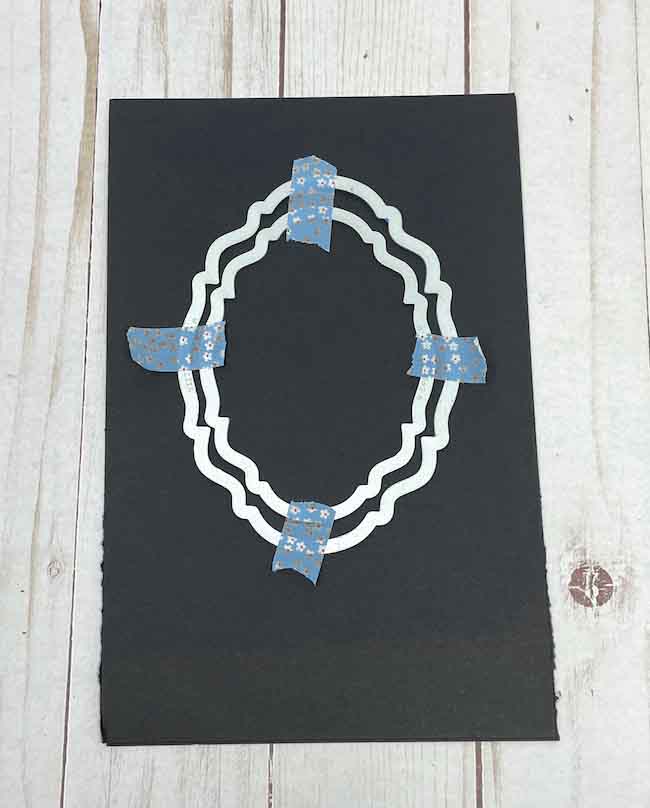
By taping the shaped dies together, you can make a number of frames the same size as seen below.
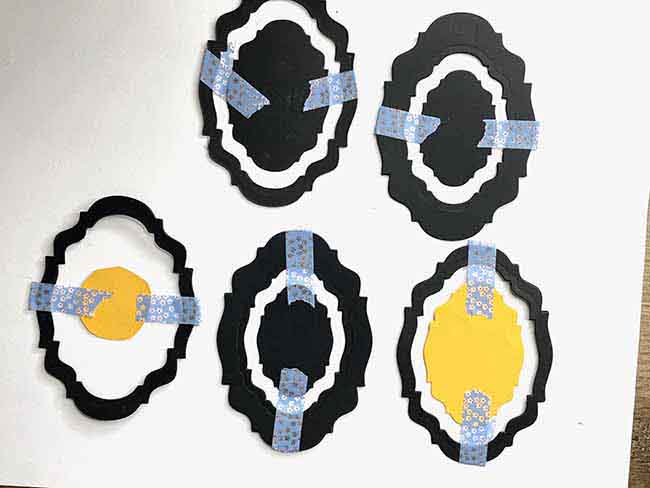
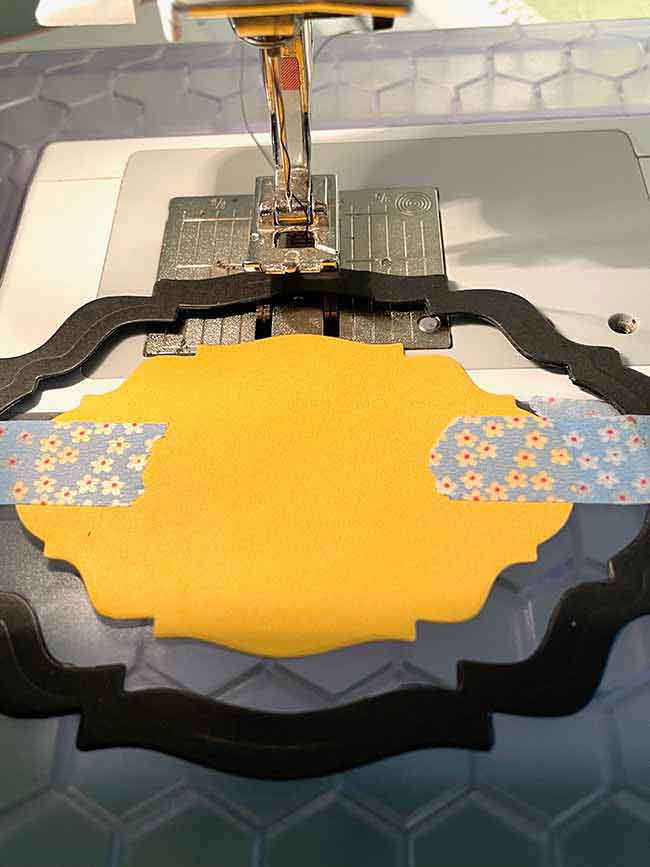
Cut out some smaller shapes to fit in the middle so you can make spinning ornaments.
Glue these two shapes together before you sew the spinning shape in the middle.
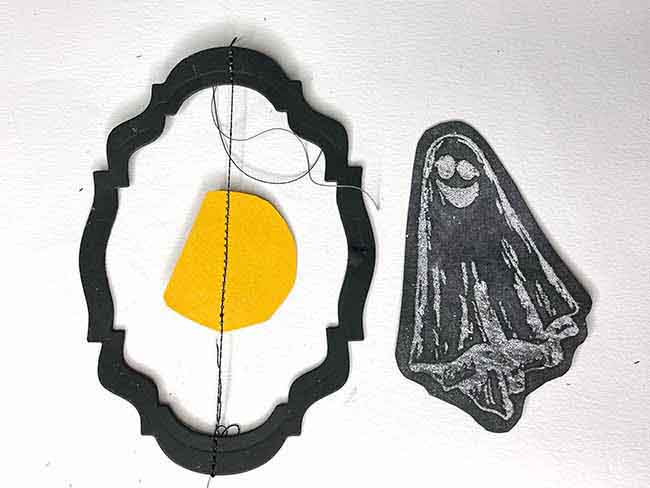
For the spinning ornaments, sew the sections together so the middle section can spin
I love making interactive cards and projects. To do this, tape the cardstock sections together with washi tape and sew across both pieces with your sewing machine.
Use a fairly long stitch because it tears the paper less.
Secure the thread at both ends by tying each end into a knot.
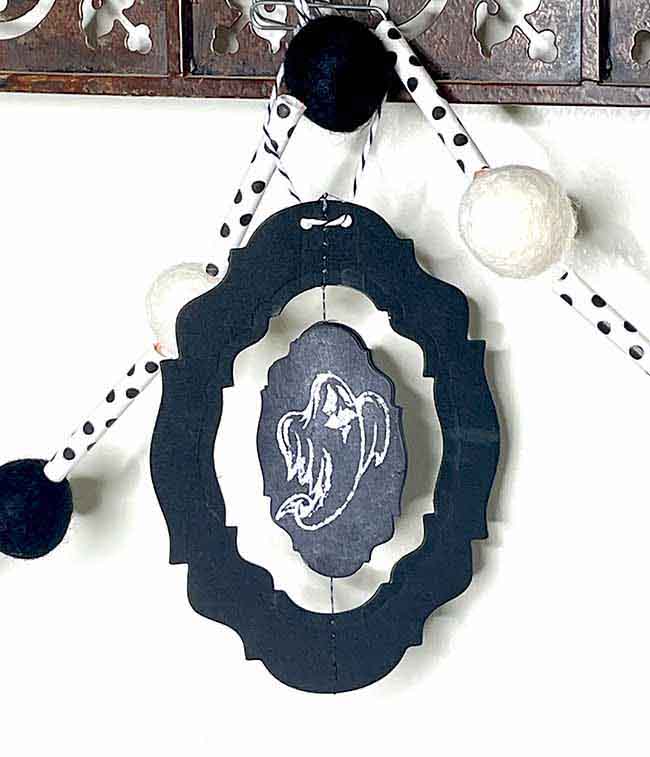
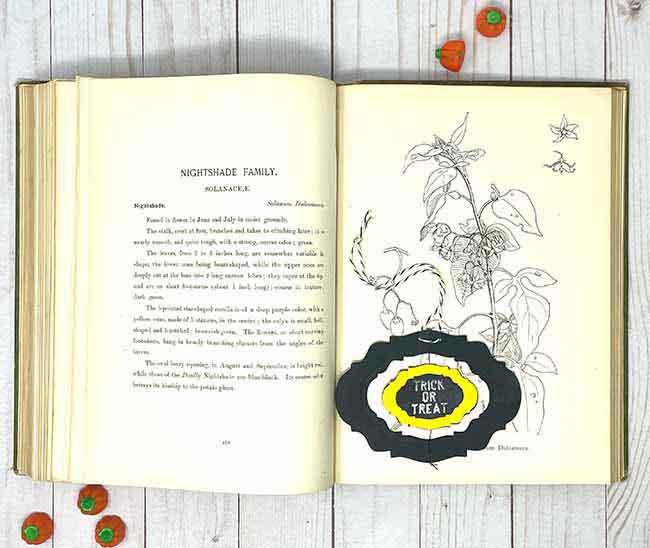
Glue the chalkboard cut outs to the middle section of the ornament
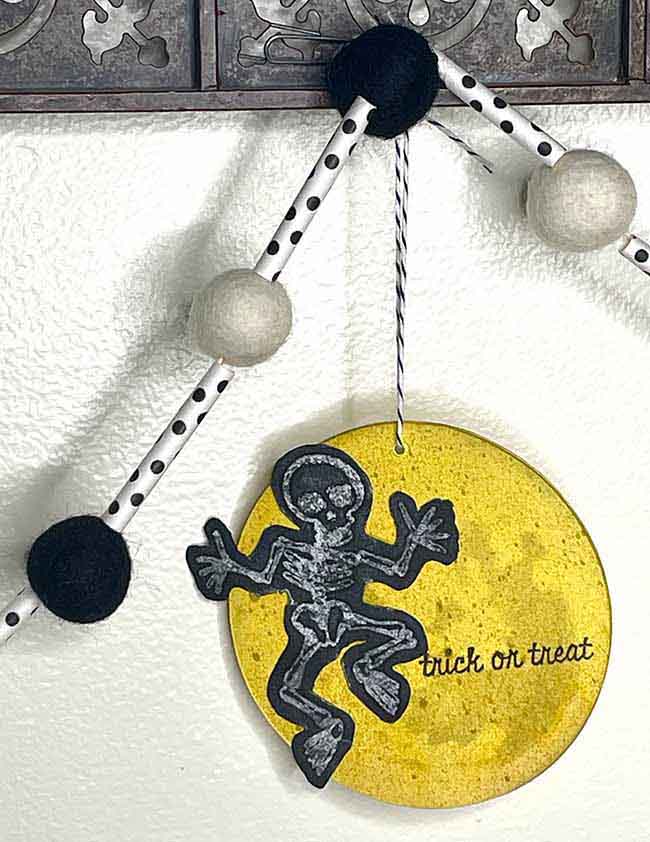
Next, glue the chalkboard cut out to the middle spinning section of the ornament. Make sure that there is enough room for the cut out to spin.
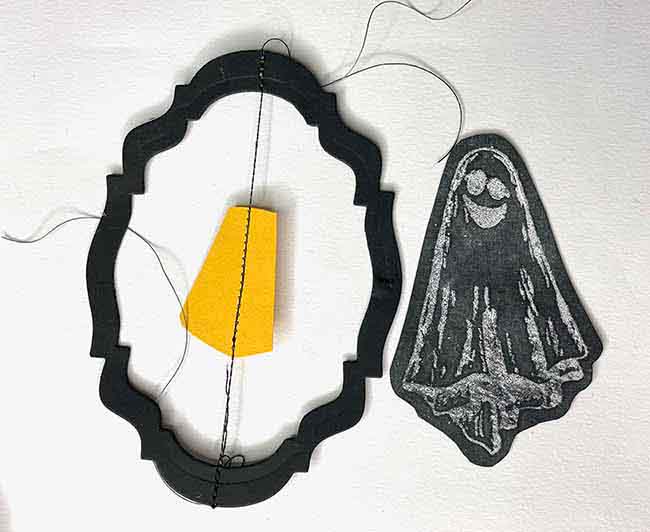
Then glue an additional image to the back to cover up the support piece.
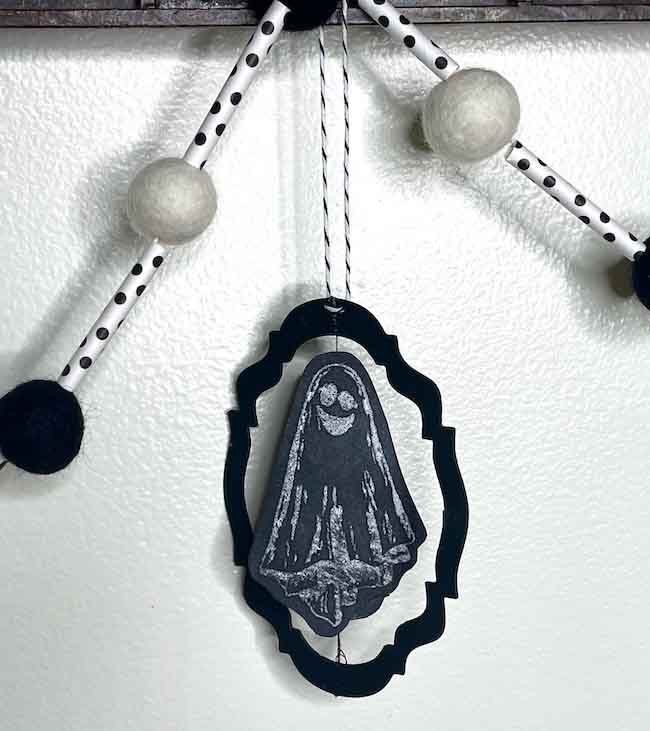
Punch a hole in the top of the ornament
When you punch a hole in the top of the ornament, be sure that you don't punch it through the thread. That way it won't unravel. I punched two holes on either side of the thread in the center.
You can use string or ribbon to hang your Halloween Chalkboard Ornaments, but I really like baker's twine.
Tie a knot in the baker's twine.
Pin to Your Favorite Pinterest Board
Always pin this to your favorite Pinterest board to remember the Halloween Chalkboard Ornaments.
Online Craft Challenges
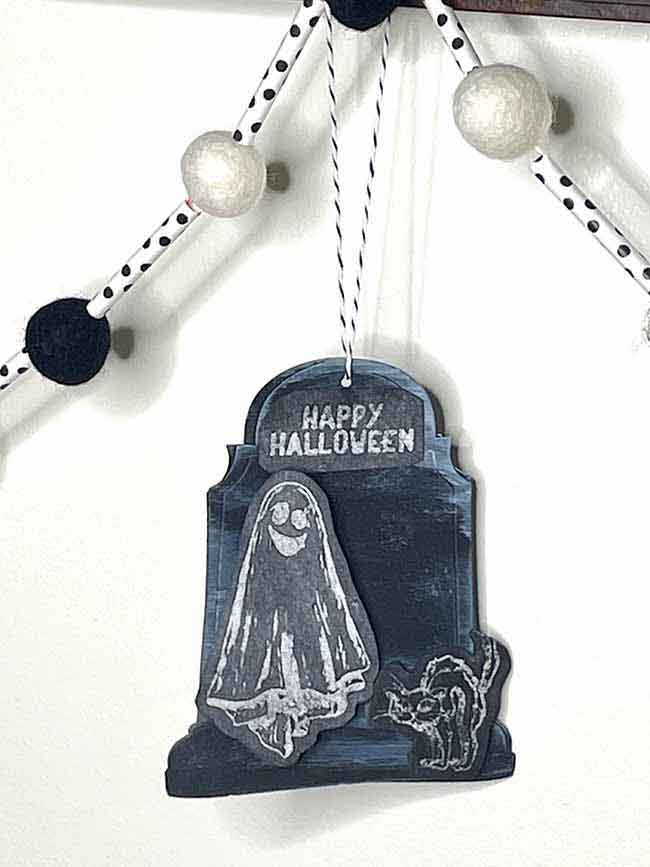
I am entering this craft project in two online challenges. First, I am entering the Simon Says Stamp Monday Challenge with a theme of "Touchy Feely" in which you are supposed to add some texture. I think all of the ornaments have texture with the Frosted Crystal Embossing Powder covered with chalk, but the best one is the Smiling Ghost in front the tombstone. That one has pieces of cardboard behind the elements to make them pop and have more textures. You can see my entry here.
And the second entry is in the Frilly and Funkie challenge "Chalk It Up". In fact, that is why I thought of doing the ornaments this way so I could use the chalkboard technique.
Share Your Projects with me
If you make the Halloween Chalkboard Ornaments, I would love to see them. You can post them in my Facebook group or email me at [email protected].
Thank you for reading.
Lucy
YVONNE TUCKER
I LOVE THE CHALK EFFECT, WUSH U HAD THE PATTERN,
Jenny Marples
My you have been busy Lucy! These are such wonderful Halloween ornaments and a great use of this chalkboard look technique. Thank you for joining in with the challenge at The Funkie Junkie Boutique blog.
Lucy
Jenny,
Thank you so much. Yes, I have been busy. This time of year is when people tend to find my projects. So I am trying to come up with lots of new crafts for everyone.
I am so glad you like the chalkboard ornaments. I had a lot of fun making them.
Lucy
Sara Emily Barker
What great little ornaments and they spin! How cool is that little ghostie! I love the chalkboard technique you used! Hope all is well and you are enjoying your Halloween crafting! Hugs!
Lucy
Sara Emily,
It is so nice to hear from you. I am so glad you like my little ornaments. I am doing very well - crafting up a storm.
Thank you for your kind words.
Lucy
Laura Gilhuly
These are great!! A a fabulous tutorial! Thank you for joining us at The Funkie Junkie Boutique!!
Janna Ketchum
Super cute idea! Love the ghost. Thank you for joining the Funkie Junkie Challenge!
~Janna DT member
Lucy
Thank you, Janna.
Misty Valestin
I love your crafts.
The haunted dollhouse link is connected to the ornament link.
Fyi
Lucy
Misty,
Here is the correct link to the Haunted Dollhouse. Thank you for letting me know.
Misty Valestin
Thank you