Earlier in the year, I participated in a really fun online Dollhouse workshop. (It's not being offered at this time though.) When I thought of how I was going to make my dollhouse I tried to make a cute one. Really, I tried to imagine making a dollhouse with cute colors and decor. I promise I tried, but when it came down to it, I had to make a Halloween dollhouse because it was the only design that inspired me. And that is what lead me to this DIY Halloween Dollhouse.
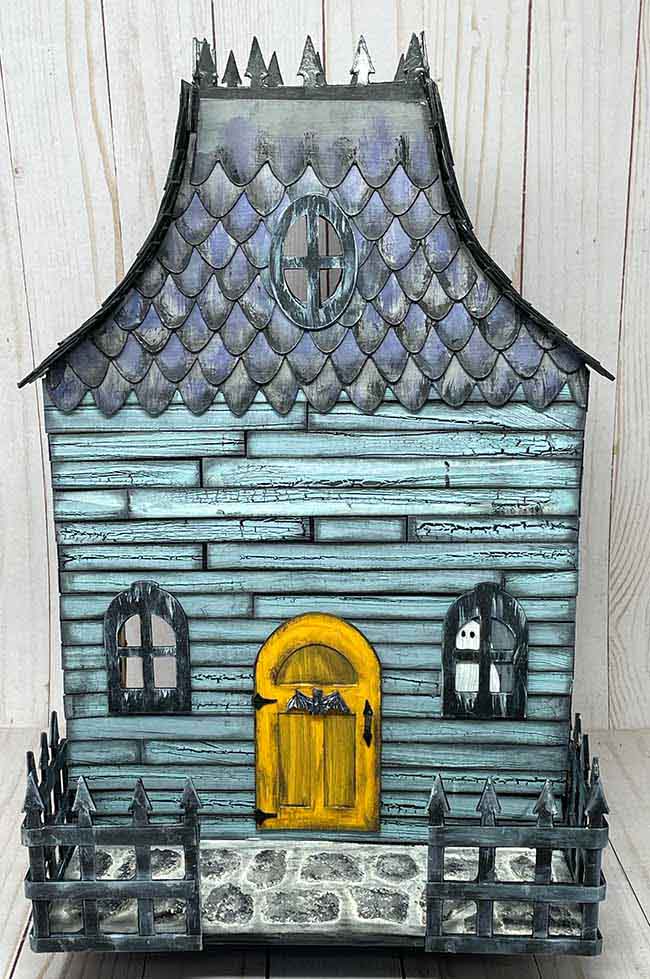
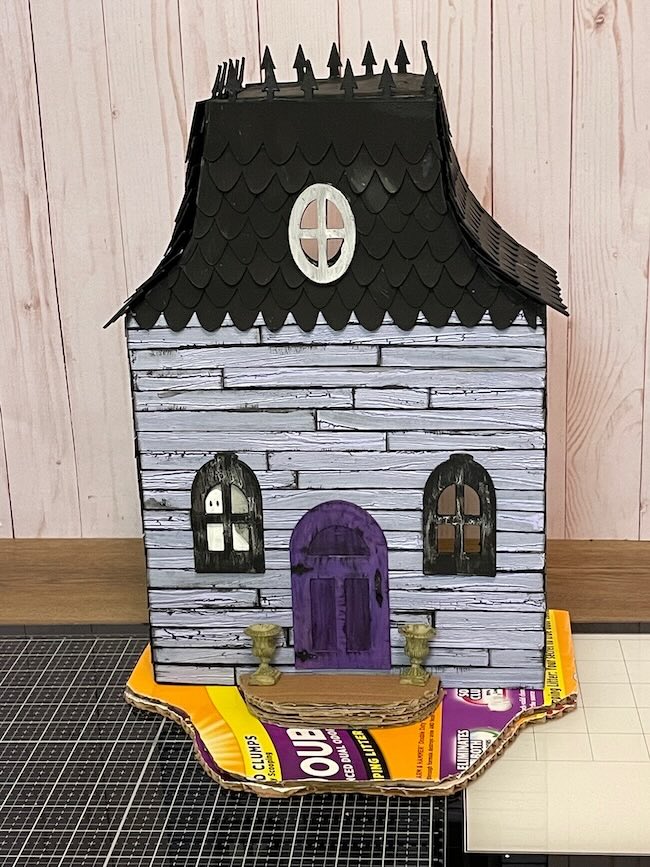
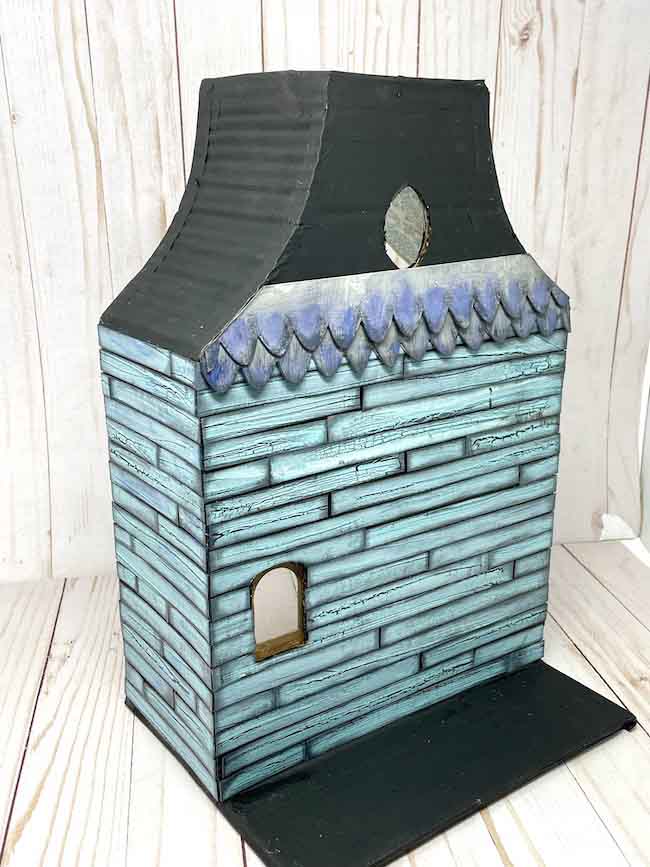
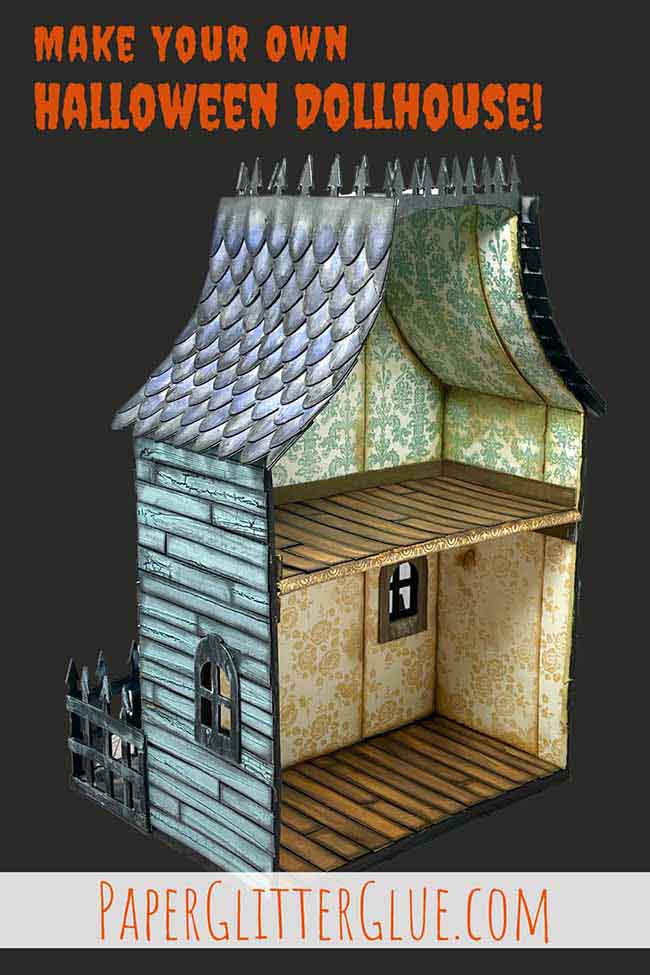
So here is my version - the DIY Halloween dollhouse. It is actually based on a recycled pasta box design - the Recycled Halloween Manor - I made a little while back. I just love the shape of this house. It's not too complicated to make, but still works well as a Halloween design.
Alright, so you are probably asking yourself how hard it is to make a dollhouse from scratch. Truthfully, it is somewhat time-consuming, but not hard. There are a number of steps that take time, but I consider them fun so I don't mind the time involved. I hope you won't either.

If you want to speed up the process you can do what is called "trash-bashing" where you take a child's old plastic dollhouse and paint it with Halloween colors for an instant Halloween dollhouse. A lot of people find them discarded or recycle the ones from their own kids so the process saves time and money.
Still, my version of the haunted dollhouse is inexpensive because it's made from simple crafting materials - recycled cardboard, glue, and paint. Here's a more detailed list of supplies to make your own haunted Halloween dollhouse.
Be sure to subscribe to get my newsletter. You'll also get the pasword to my free library. This free pattern is Design No. 124.
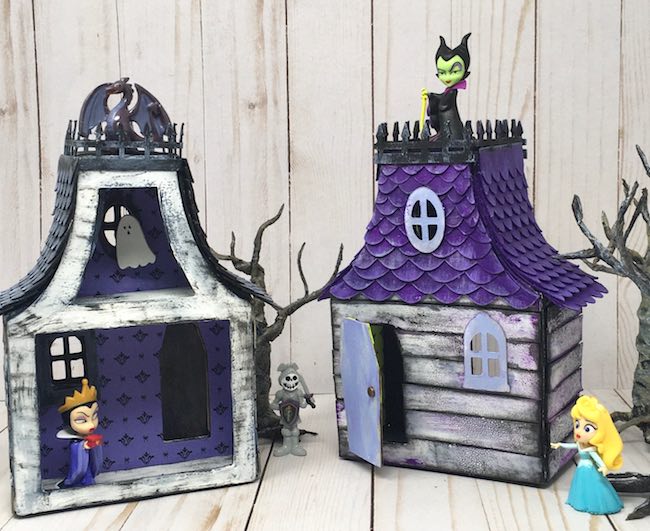
Here's variation with a simpler roof which is included in the pattern.

This post contains some affiliate links for your convenience. Click here to read my full disclosure policy.
Table of Contents
Supplies to make the DIY Halloween Dollhouse
- Corrugated cardboard for the body of the Halloween Dollhouse
- Thinner cardboard for smaller pieces like the fencing and the shingles
- Masking tape
- Gesso primer
- Paint colors in perfect Halloween shades
- Patterns for the, door, windows, shingles, and fence - Design No. 124
- Pattern for the roof outline of the house
- Stencil for the patio rock
- A way to cut materials - I used my Cricut for most of the intricate designs - the door and windows, for example
- Craft knife - I like this ergonomic one
- Glue - Fast Grab or Quick Dry Tacky Glue work very well
- Optional:
- Papers for wallpaper
- Background stamp for wallpaper
- Ink or embossing powder for wallpaper
- Other Halloween decor or figures
- Ink for distressing

Steps to Make the DIY Halloween Dollhouse
- Make decisions about the size and shape of the house - Design No. 124 in the free Paper Glitter Glue library
- Cut out the front, sides, floors
- Tape and prime the edges of the cardboard
- Decide on wallpaper or not (wallpaper is easier to install before assembly)
- Optional - If you choose wallpaper, apply before before assembly
- Assemble the house
- Add the roof
- Glue the second story floor in place
- Touch up edges of house with primer
- Add shingles and wood siding, if desired
- Glue on windows and other adornments on the outside
- Add flooring
- Decorate the inside
- Share your creativity
So that's the overview of how to make your own haunted dollhouse. Of course, since you can make so many variations you may have to vary how you construct your own dollhouse - that's why this is just an overview of how to make one based upon the houses I've made.
Here's a link to the video about making the DIY Haunted Halloween dollhouse.
For more explanation of the specific steps, read below.
Subscribe for get the free pattern for DIY Halloween Dollhouse - Design No. 124
Subscribe to my newsletter to get access to the free Paper Glitter Glue library. I'll send you the password right away when you subscribe.
In the September 2021 section of the Paper Glitter Glue library (Design No. 124), this free file includes patterns for:
- Outline of two DIY Halloween Dollhouse Roof Shapes
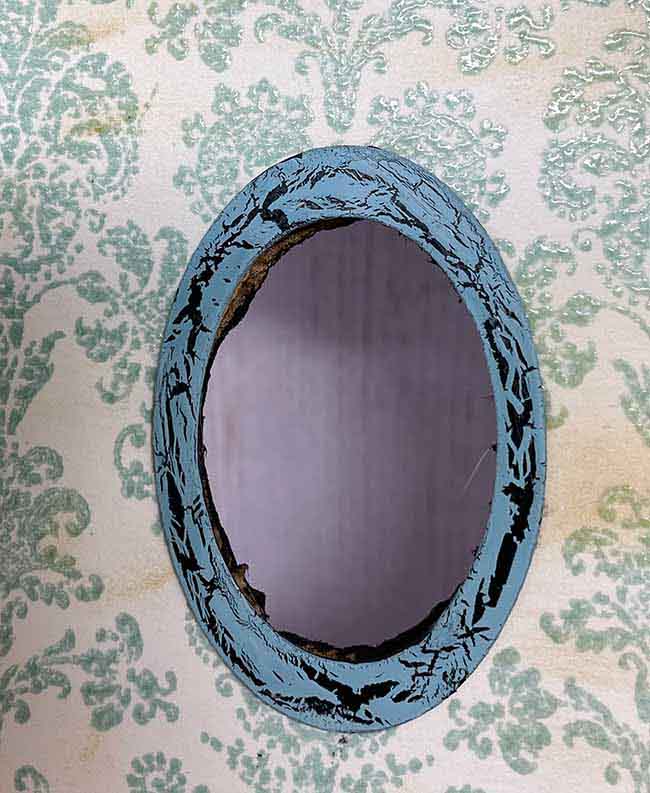
- Door and window shapes - Two door pattern options, outside with window panes, inside window frames, and a mirror shape
- Shingles and railing
- One fence
- Tombstones
The folder contains both printable PDF files as well as SVG patterns for your cutting machine like a Cricut or Silhouette or a Scan N Cut.
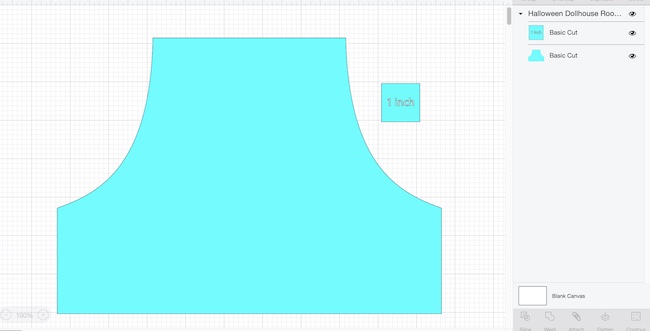
Here's how the shape of the arched roof line looks in Cricut Design Space. I suggest that you cut the pattern out by hand because it is easy. Also if you use corrugated cardboard, you pretty much have to cut it out by hand.
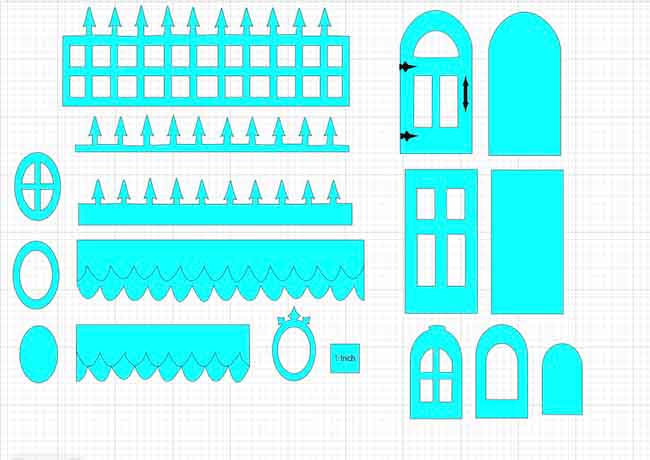
And here are the windows and other pieces of trim for the house - all in one SVG file.
First, decide on the size and shape of your Halloween dollhouse
Before you get started, make some design decisions about how you want your house to look.
Decide on the shape of your haunted dollhouse
Any house shape can be turned into a Halloween house. What makes it scream Halloween is the color and decor. But having said that, I do think there are some shapes that fit best with Halloween and the shape I've chosen is just one example. Mostly we think of Victorian houses as having the perfect shape for Halloween houses.
I have two roof shapes in the pattern. One is a very simple gable shape and the other is an arched shape. The simple gable shape is much easier to construct.
What about the size of your dollhouse?
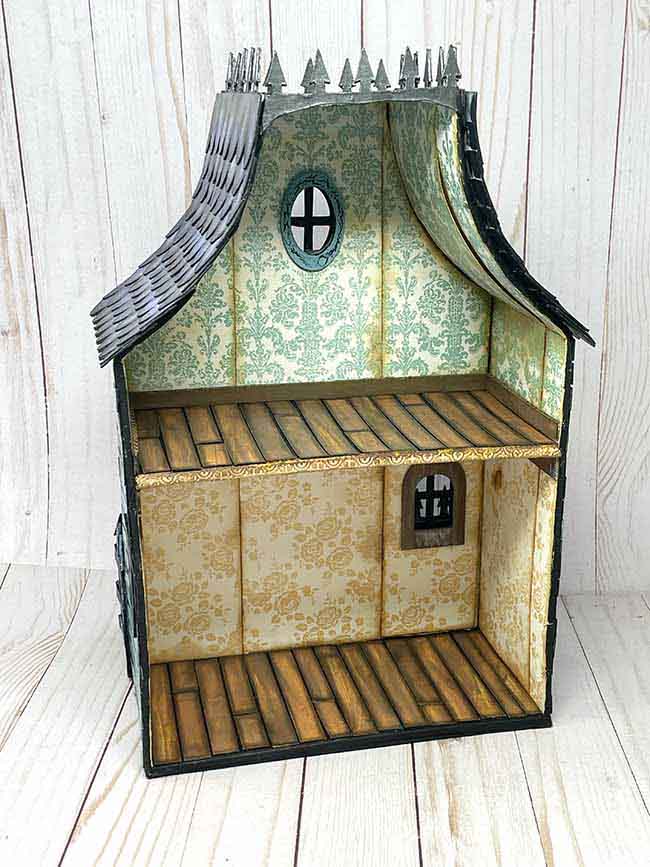
You have to take into account the size of your dollhouse because of space limitations in your own real home. That's why I did not make mine very big. It's big enough to be fun, but not too big to store easily. My house is 10 inches wide, 15 inches tall, and 5 inches deep. With the front patio it is 8.5 inches deep at the base. The side piece is about 17 inches tall when you take into account the curve.
Do you want one story or two?
Also, decide if you want just one floor (which is much easier to make) or if you want a second story. With the curved roofline I used, the second floor is kind of cramped, but you could turn it into a spooky attic if you want. Just think about how much space you need for your design.
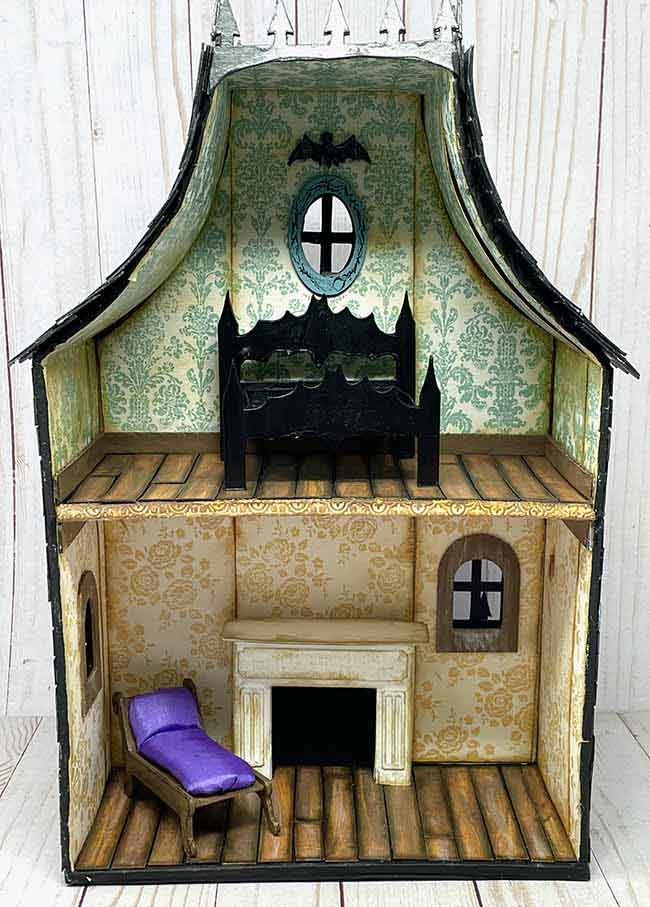
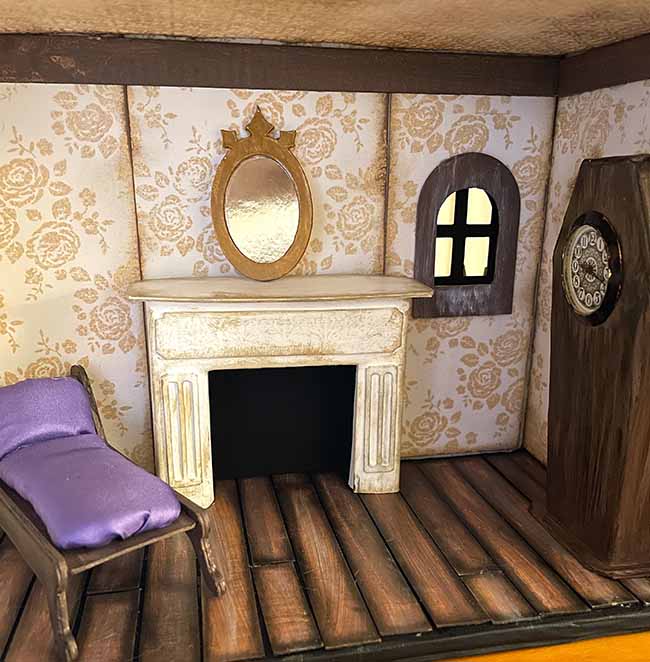
For my house, I knew I wanted a bedroom upstairs so I had to make sure there was enough room for the bat wing bed.
Consider window and door placement
One challenge with windows and the door is that they affect how much space you have inside. That's why I didn't cut out a door opening inside my house. I needed that space for my fireplace which I wanted centered in my room. You may want a door opening, but think about how you want the inside to look before you cut out windows and the door. Three of my windows have cutouts through the wall, but two do not.
Add a patio or spooky landscaping
I knew I wanted an entrance to my little house so I made a patio on the front. That added 3 inches to the depth of the house. A graveyard might be fun as well. Maybe you could make it is an add-on or use individual gravestones that you can make or purchase.
One thing I am really excited about is a paper mache tree I've made. I'll get the tutorial up as soon as I can.
Get the DIY Halloween Dollhouse pattern in the Paper Glitter Glue Library Design No 124 in the September 2021 section
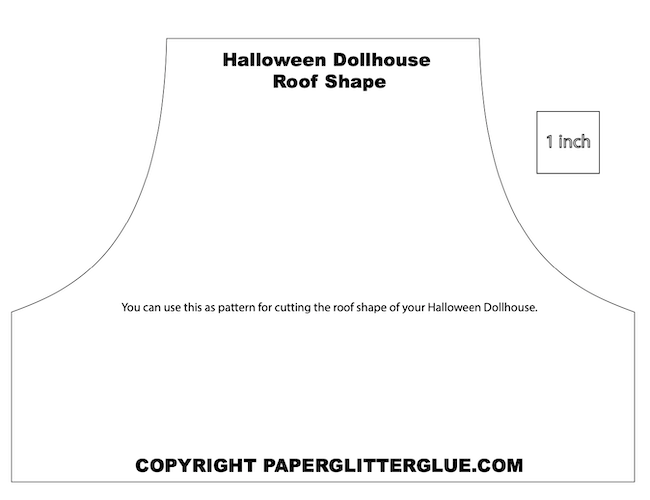
In the Paper Glitter Glue library, there is a pattern for the main roof shape of the dollhouse. It's available as a printable PDF pattern and an SVG pattern for use with cutting machines. Enlarge it as much as you like. Use it as a starting point or not.
The corrugated cardboard I used is too thick to run through my Cricut so I just cut the pattern out by hand. That was not difficult, though. Don't let that stop you if you are used to cutting things out with your cutting machine.
To access the library, just subscribe with the form below so you can get my newsletter to keep you informed about my crafts. You will get the password to access the library right away.
Cut out the front, sides, base, and roof pieces
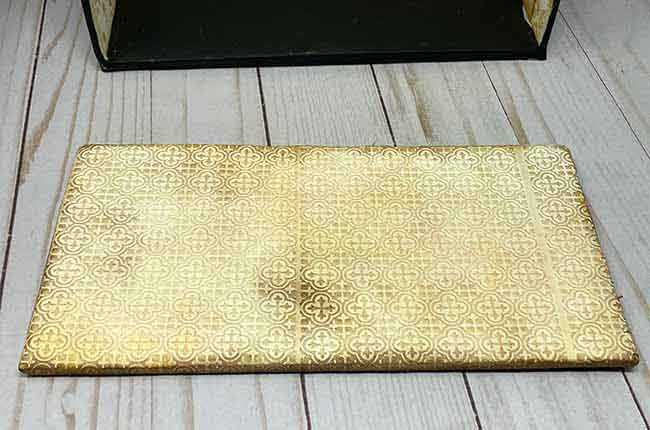
Once you have decided on the shape and size of your house, cut these pieces out of sturdy corrugated cardboard. Corrugated cardboard can be very sturdy, but there are times it can be flimsy so pick cardboard that can hold its shape well. Another option is to glue two layers of cardboard together.
Coated cardboard like what I used for the base of the house shown below works well, too.
When you cut out window openings, make the cutout section slightly smaller than the exterior of the window frame, but slightly larger than the interior of the window frame. I hope that makes sense. That way the corrugated cardboard edges won't show through the window.
In the pattern below, there is a template for the window cutout so you can cut the window opening out at the right size.

Just to make it a little easier for you if you want to make a house the same size as mine. Here are the dimensions of the cut pieces:
- Front piece - 10 inches wide and 15 inches tall. The central portion at the roof is 5 inches across.
- Side pieces - 5 inches deep and about 17 inches tall. I didn't measure it exactly because it is already taped down along the curve.
- Floor - 10 inches wide and 4.75 inches deep - make it slightly less than 5 inches so it doesn't project beyond the side pieces
- Base - 10 inches wide and 8.5 inches deep - you can choose to make it bigger if you want more room for "landscaping" like fences, tombstones, pumpkins, trees, etc.
Apply tape to the edges of the cardboard, prime
Since the edges of the cardboard will be visible at least on the back of the house (the open section of the dollhouse), cover that edge up with masking tape and then use a primer on the edge. And as this is a Halloween dollhouse, I use black primer. Primer (gesso) sticks so well even to the tape.
Do the same for the window and floor edges.
Now decide if you want wallpaper or not
Just a heads up here. It's important to decide about wallpaper before you assemble the house because it is so much easier to apply it if you do that BEFORE assembly. You can do it afterwards, but it's much more fiddly.
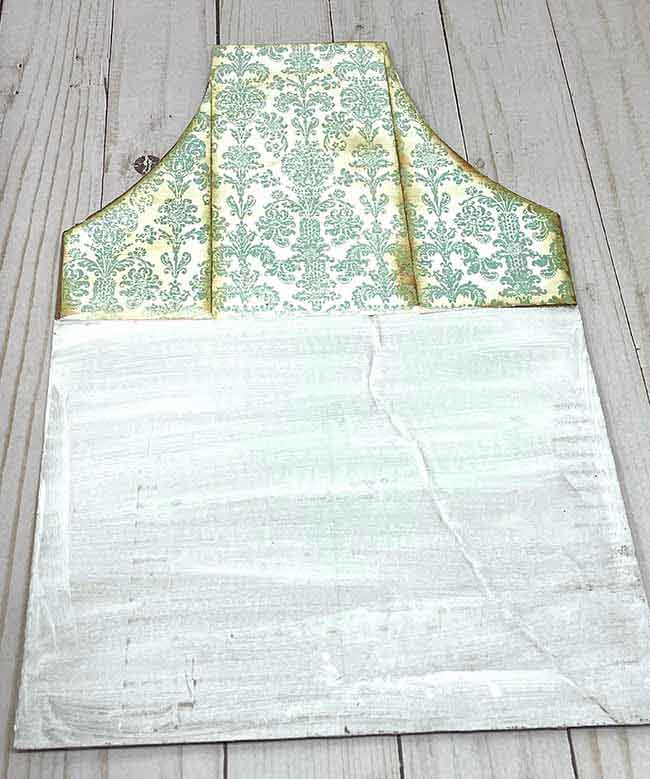
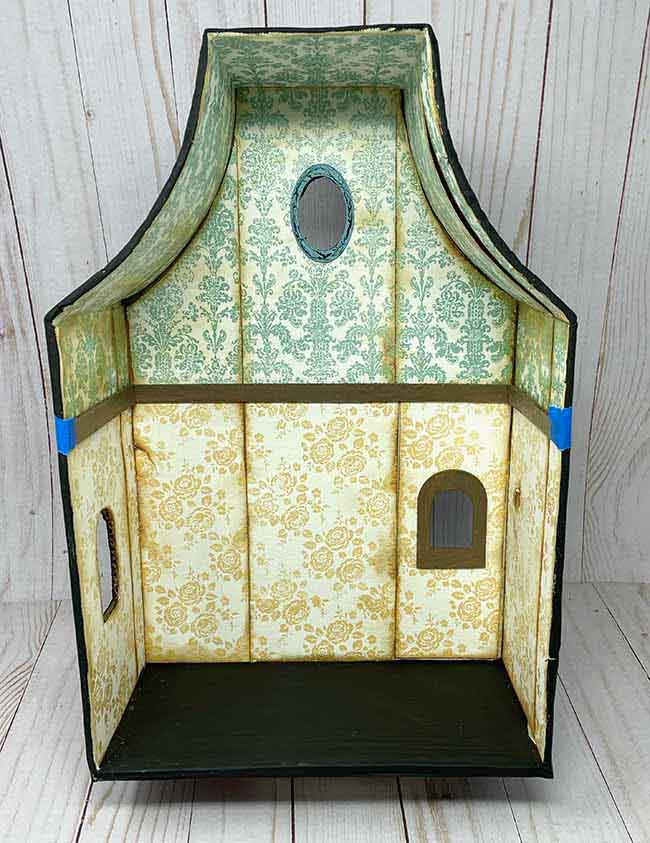
You can paint a design on your interior walls or use scrapbook paper or any other kind of paper. Using patterned paper is probably the easiest.
Optional - if you choose wallpaper, apply before assembly
Especially for a curved roof like the one here, it is much easier to apply the wallpaper first. You can glue it on before or after you cut out the windows or door. Do whatever you consider easiest - cutting a window in the wallpaper after you have already cut out the window section in cardboard, or cut them both together. It doesn't matter much. If you cut the window or door opening correctly, it will not show even if you have rough edges.

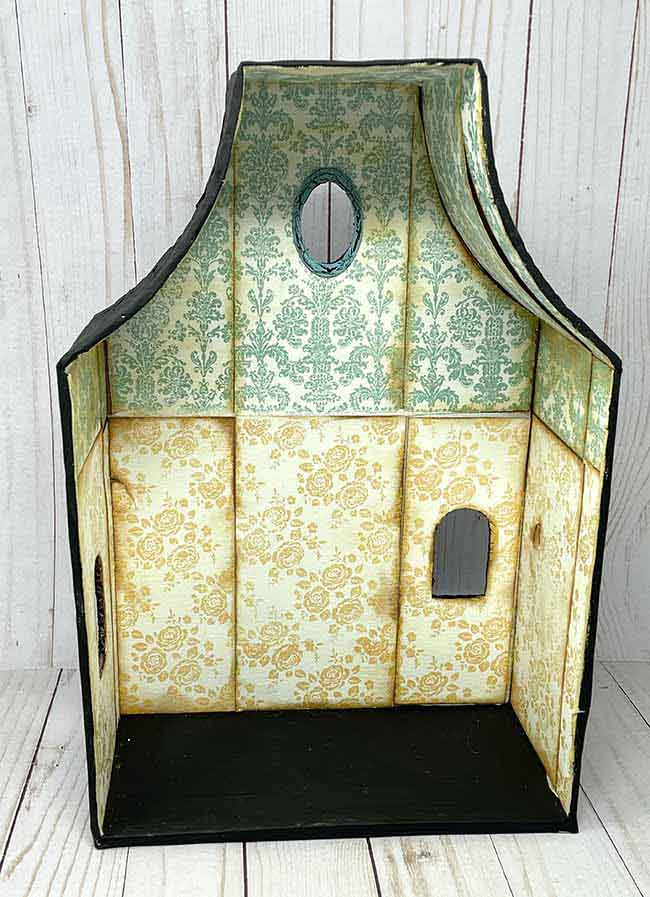
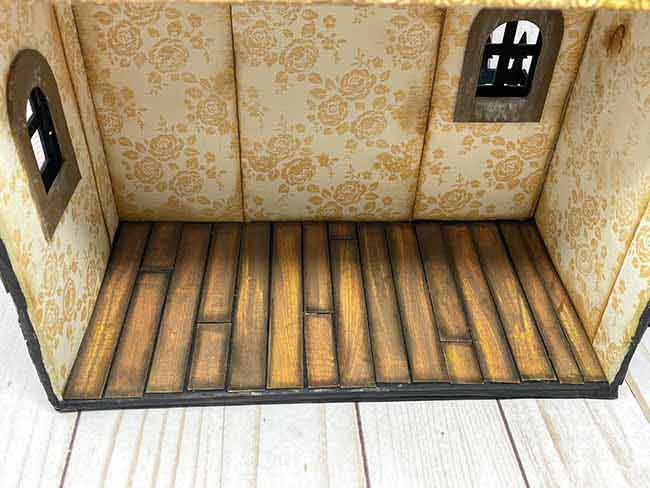
Also, if you want to apply a specific floor covering from a patterned paper then do that now as well. I added strips of cardboard painted like wood for the flooring so I waited until the house was assembled before adding my flooring.
For the first floor ceiling, I used an embossing folder on watercolor paper to make the ceiling look like ceiling tiles. It's a fun detail.
Next step, assemble the Halloween dollhouse
Now you see your house come together and get a better idea of how it looks. Using masking tape, tape the front pieces to the side pieces. Leave enough flexibility in the tape to form a 90 degree angle.
Tape the floor to the front and sides.
Add the roof on the dollhouse structure
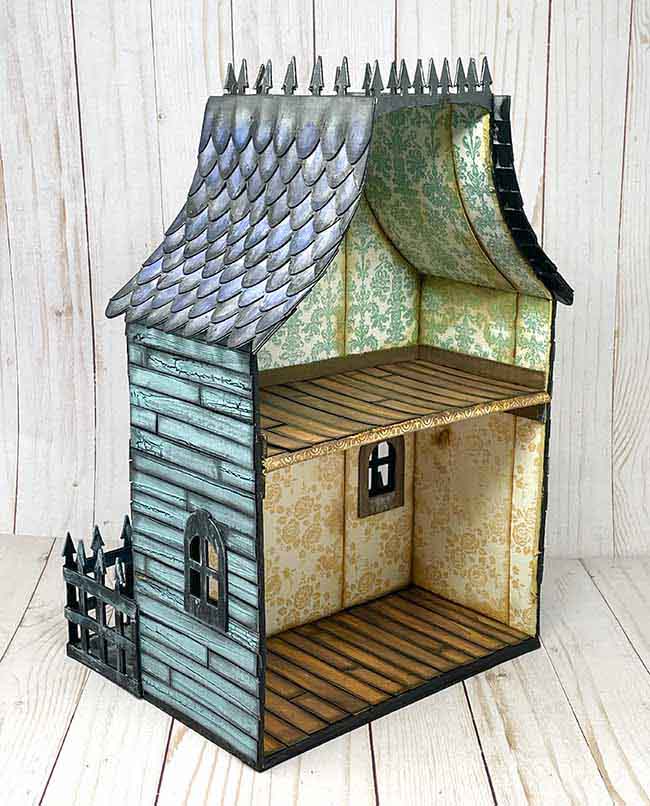
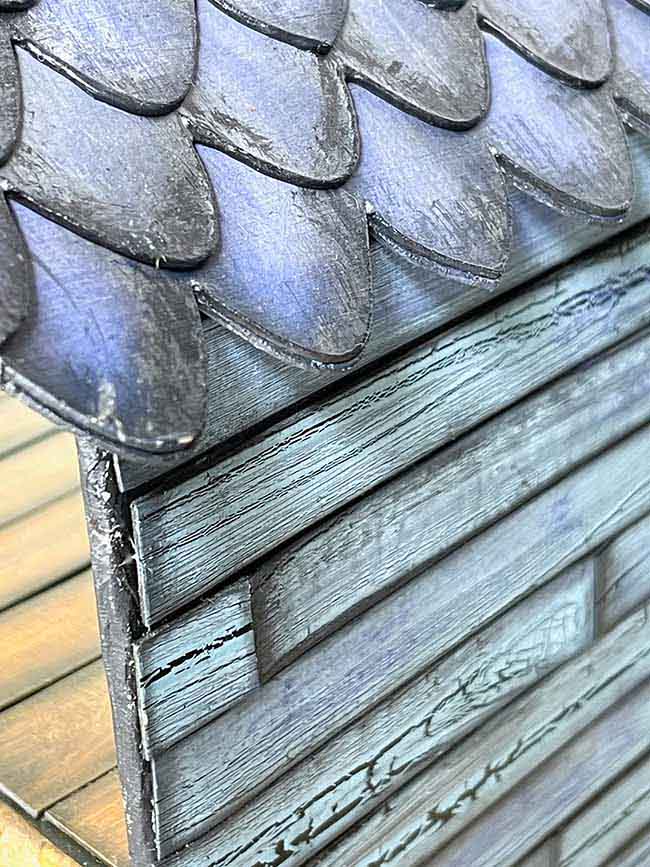
On my Halloween dollhouse, applying the curved roof pieces can be a little tricky. To make it easier to curve, I used cardboard with the corrugations horizontal. That makes it so much easier for the cardboard to conform to the shape of the curve.
See the corrugations on the side of the roof below.
After the curved pieces are securely glued, glue a rectangular piece on top of the house to form the top.
Glue the second floor in place
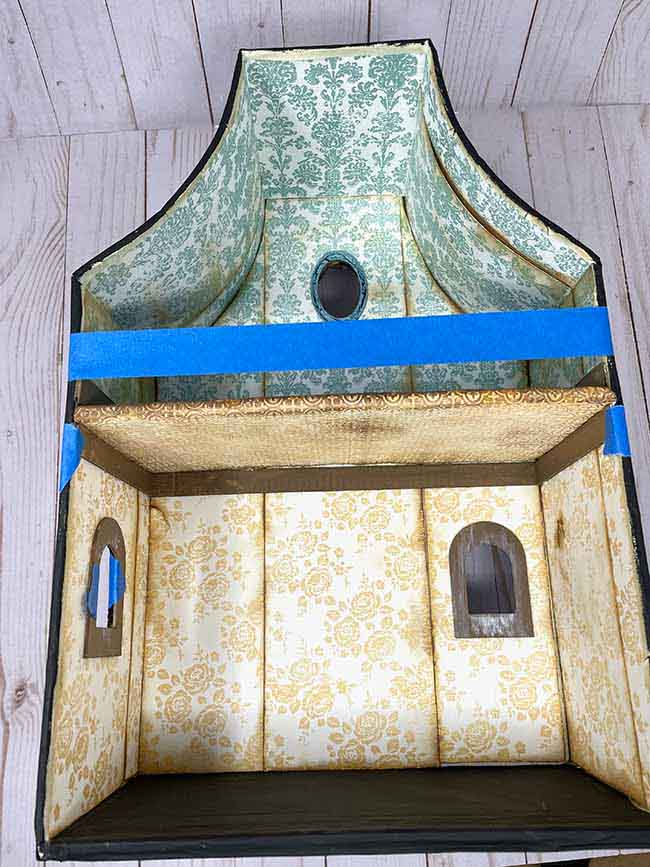
Use a strip of thick cardboard to hold the second floor in place. I painted mine with paint to look like molding as the support on the bottom of the second floor and baseboards on top. That covers up any raw edges. Glue the bottom supports in place before you add the floor and the baseboard trim. Apply glue all around the floor piece to help make it secure.
When you make a little house out of cardboard, sometimes the sides splay outward during the construction. If that happens and your second floor doesn't fit - like the walls have spread out too much, then get a piece of painter's tape to pull the sides inward. I had to do that on my dollhouse.
Touch up edges of dollhouse with primer, if needed
Now that the house is constructed, you may see that the edges need some touching up. You don't want the masking tape to be obvious so paint any exposed edges black.
If you have already applied wallpaper or other wall covering, use painter's tape to protect those areas when painting.
Add shingles and wood siding, if desired
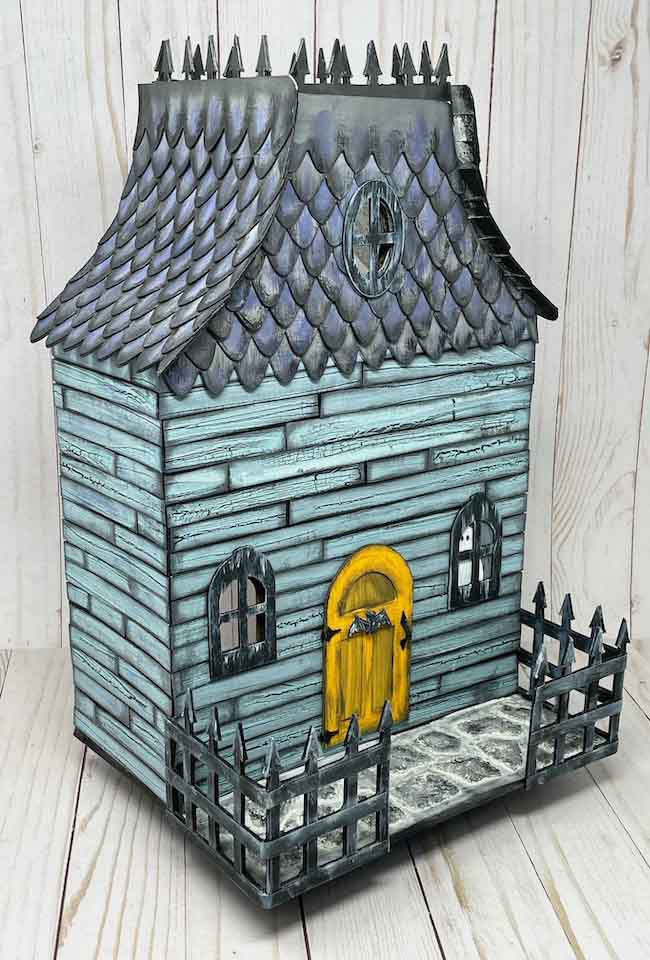
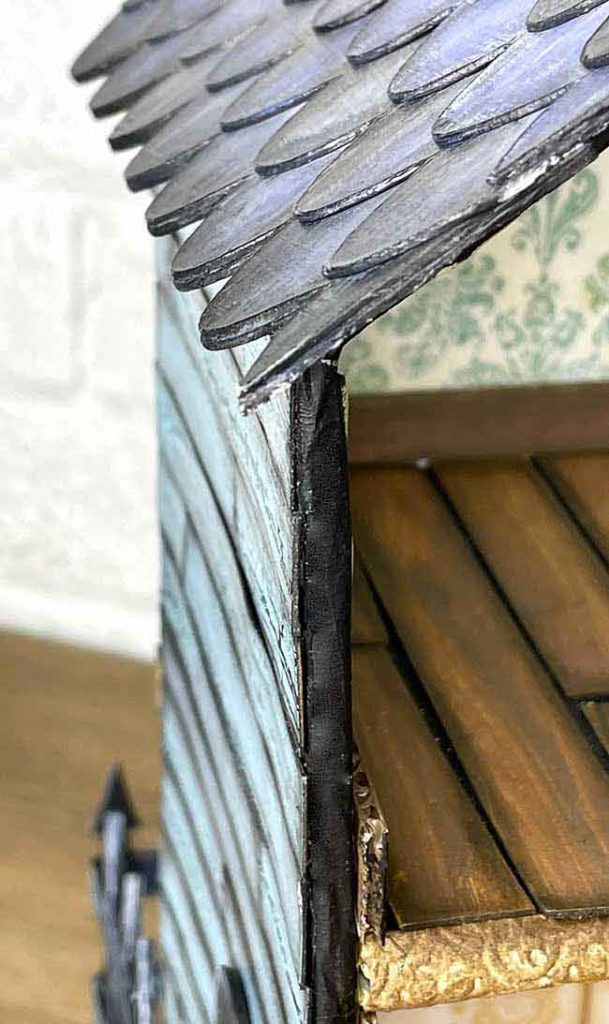
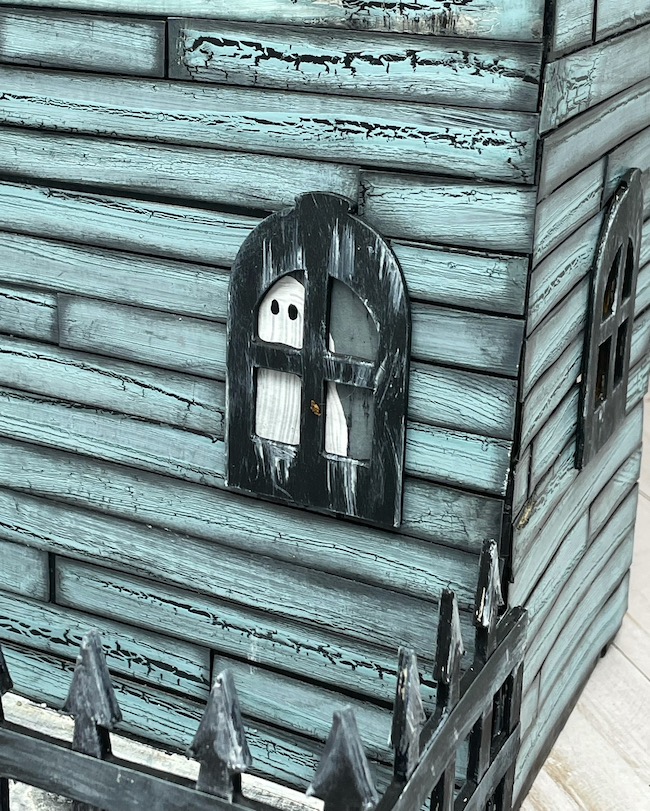
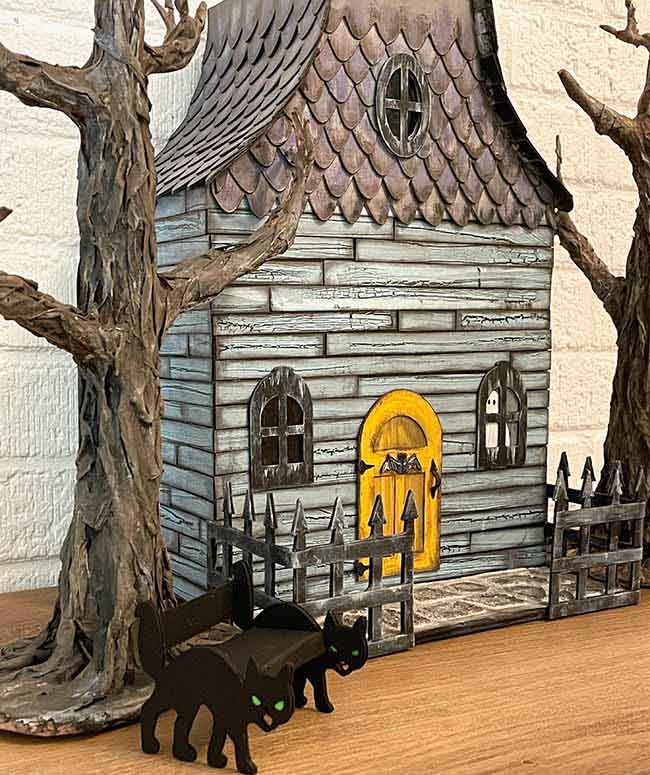
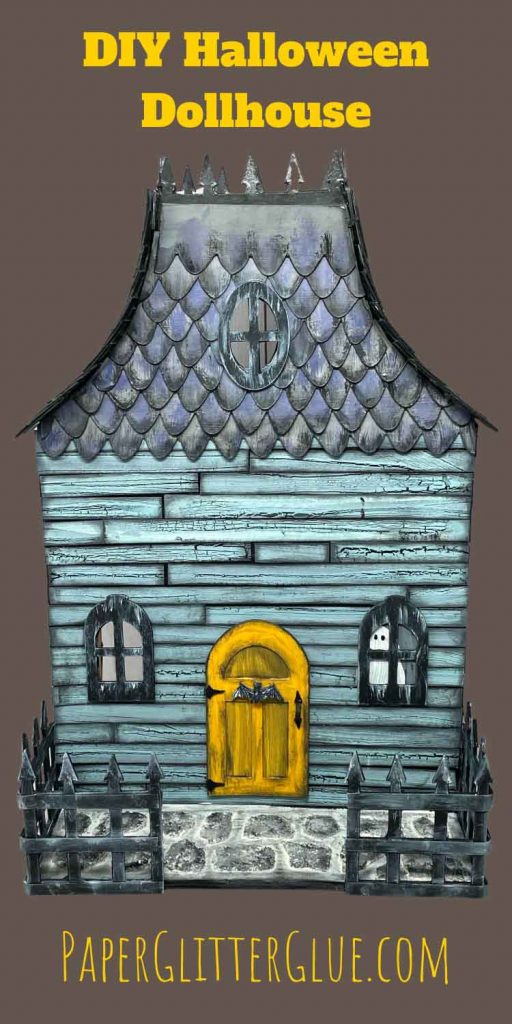
Once you have the structure of your Halloween dollhouse done, you can add more details like shingles and siding. For my dollhouse, I made some crackle painted wood siding using this technique. Of course, my Halloween house needs distressed shingles.
On the first starting strip of shingles, I glued two strips together. That's because this is a vulnerable area - a place where cardboard tends to get bent since it overhangs the edge of the roof.
The pattern includes two sets of staggered shingles, a long set which you can use on the front of the house if desired and a shorter set that fits a roof 6 inches wide. That gives you ½ inch overhang on each side of the roof. If you altered the pattern, then just stretch the pattern out to fit how wide your roof is.
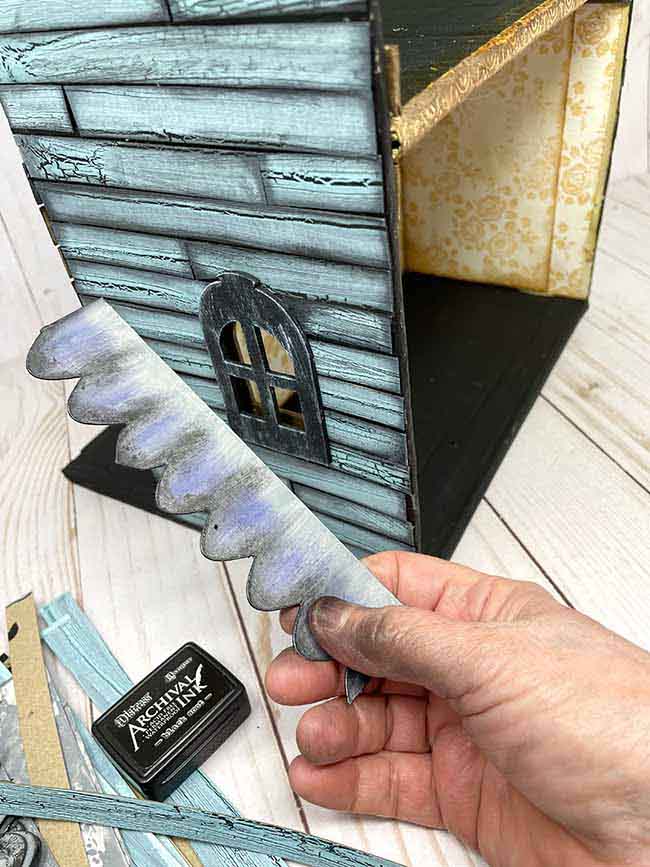
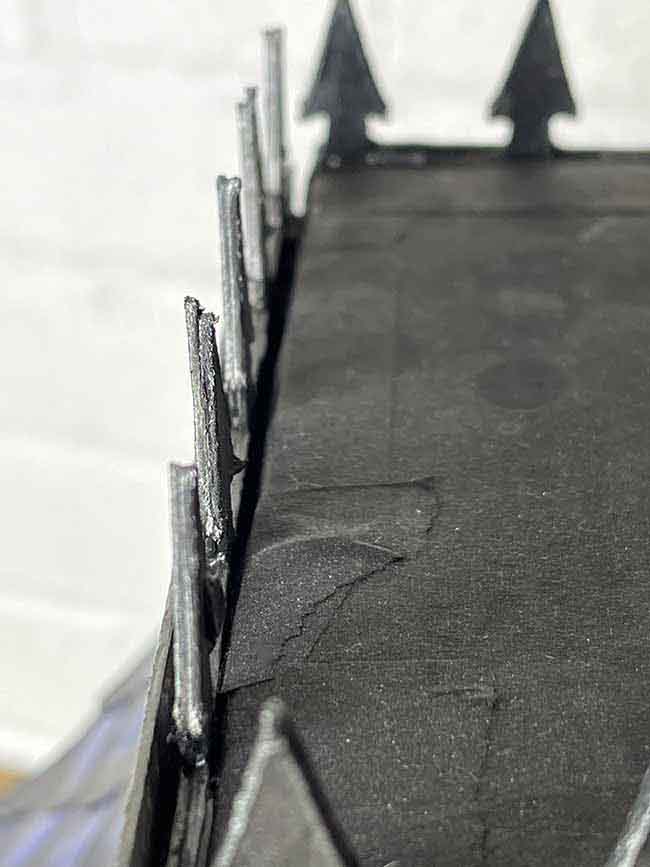
On the photo below you can see how I cut the railing so it would fit the front better. But you can also see how I used a binder's clip to help hold the shingles in place while the glue dried.
If you would like to add a railing around the roof of your house, glue that in place before you glue the shingles in place. I like to use 2 layers of cardboard to make fences and railing. The pointy ends tend to get bent easily if you don't.
Glue on the door and windows and other trim to your DIY Halloween Dollhouse
Glue the door and window trim to the outside of the house after the siding is completed. On the door pattern, there are optional hinges and a handle if you would like to use them.
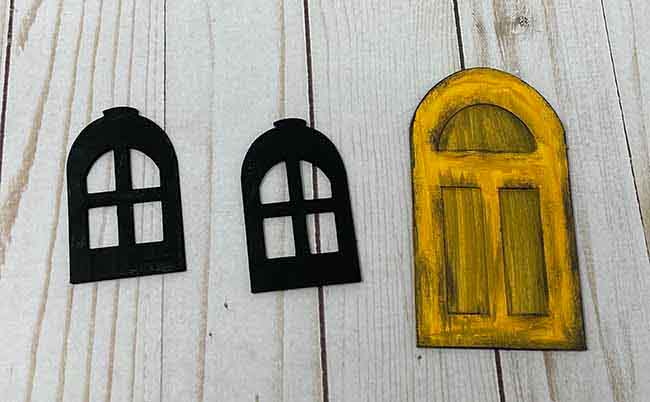
Also use the inside window frames where needed.
One of the false windows in front has a ghost painted on a piece of paper which is glued to the back of the window. Just an idea for you.
Add flooring
For this house, I painted cardboard to look like wood flooring and glued the individual pieces on the floor.
Finally, decorate your little Halloween Dollhouse
Now, you get to use whatever else you like for the furniture of your very own DIY Halloween Dollhouse.
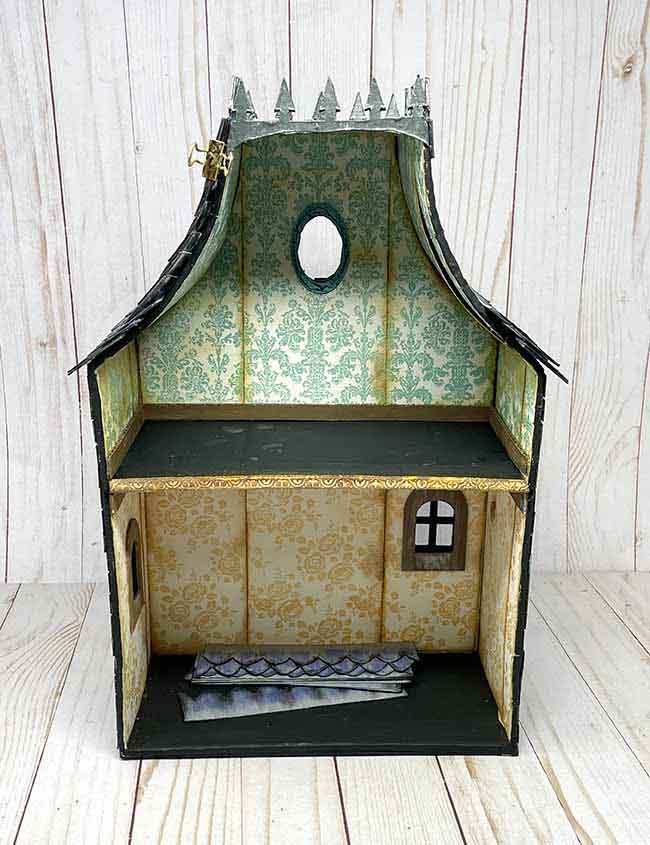
The photo below shows the Halloween dollhouse with the simple gable roof. I used the offcuts from making the shingles to frame the back part of the attic. It's one of my favorite details.

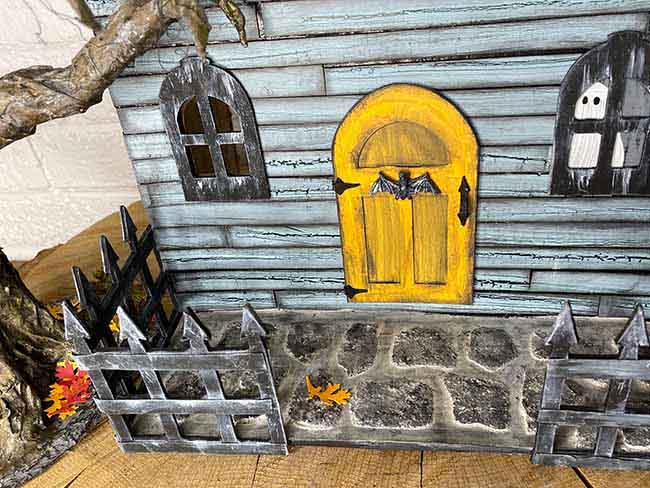
Here's a good view of the front patio.
Related links to help you make the Halloween Dollhouse
I have several additions for the dollhouse. Some are still in the works, I'll add links as I finish them:
- Cat Bench
- Miniature Haunted Clock (that really works)
- Fireplace
- Bat Wing Bed
- Chaise Lounge
- Spooky Paper Mache Tree
- Stencil a Patio
- Make Dollhouse Wallpaper
- Spider Web Rug
And that is how you make the DIY Halloween Dollhouse. I hope you will try it as I'm sure you will have fun making it.
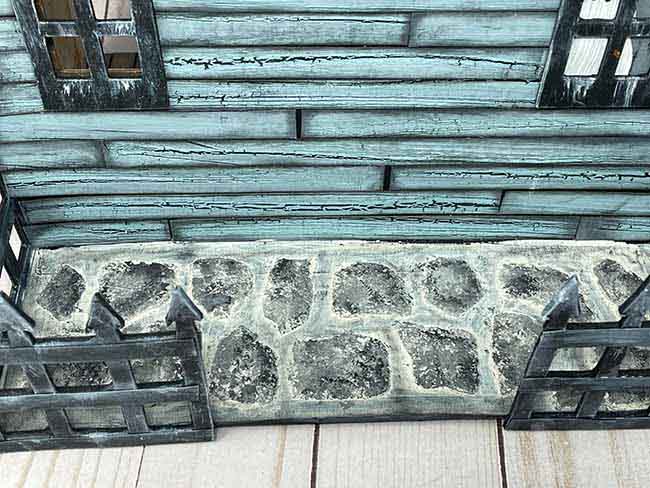
Also I entered an online craft challenge - Simon Says Stamp Monday Challenge for "Fun With Stencils" September 13, 2021. The only stencil is the stone work on the front patio.
Lucy
Save this to Pinterest so you can remember where you found this tutorial!
Shirl Lundstrom
So adorable in a spooky way! How did you make that cool bat bed?
Lucy
Yes, I made the bat wing bed. I need to make a tiny mattress and bed cover, then write up the tutorial. I will get it done.
Lucy
Beulah Bee
Love it (congrats on the Simon shout-out)!
Lucy
Thank you so much. I didn't even realize that they recognized my little house. Thank you for telling me.
Lucy