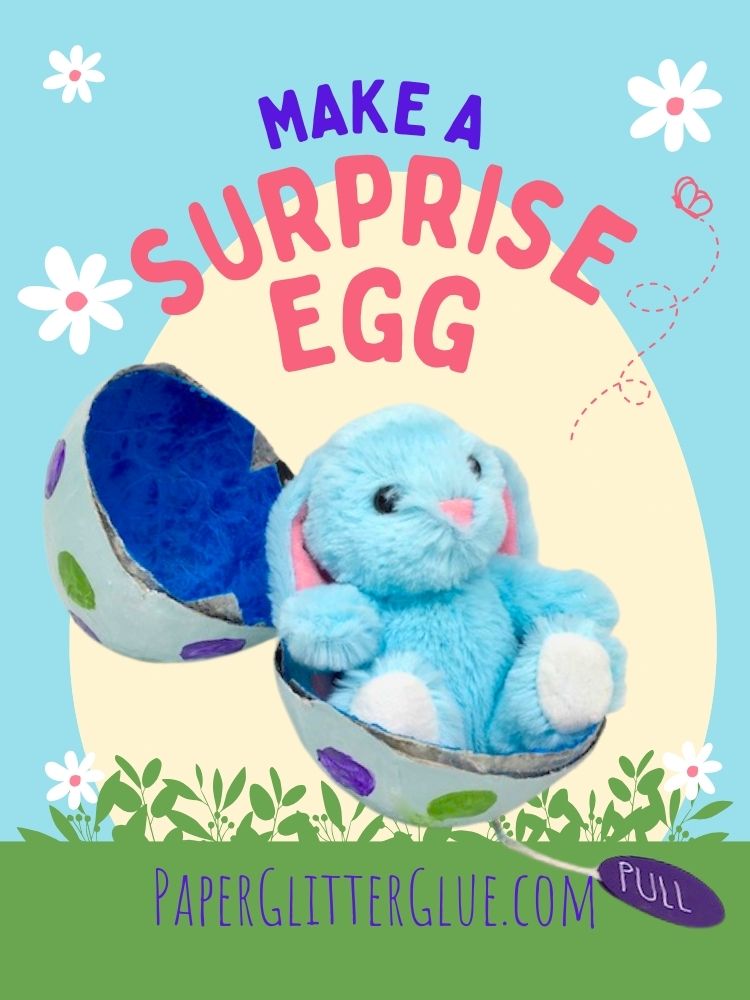
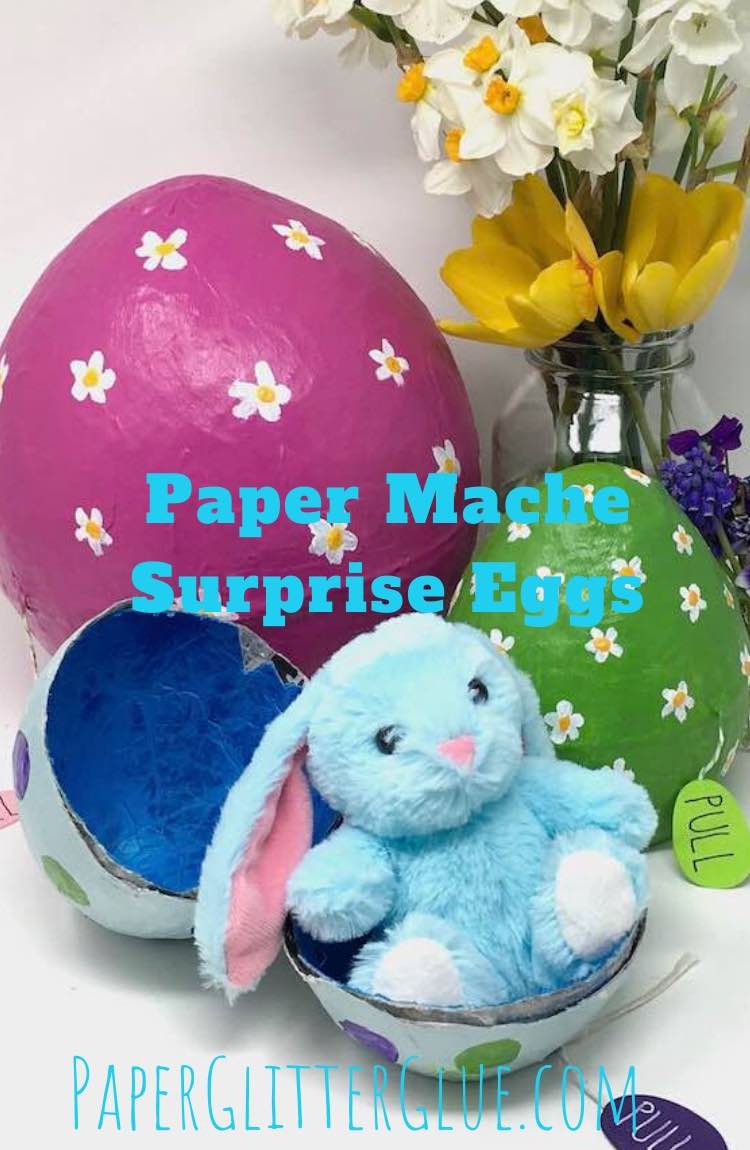
How to Make a DIY Paper Mache Surprise Egg with a toy inside
The paper mache surprise egg is perfect for Easter. Keep the kids busy with this great craft. And the good thing is you only need a few materials - just a balloon, glue, and paper. Then paint the egg and fill with the cutest little toys and a few treats. Any child will be delighted to find this surprise waiting for them.

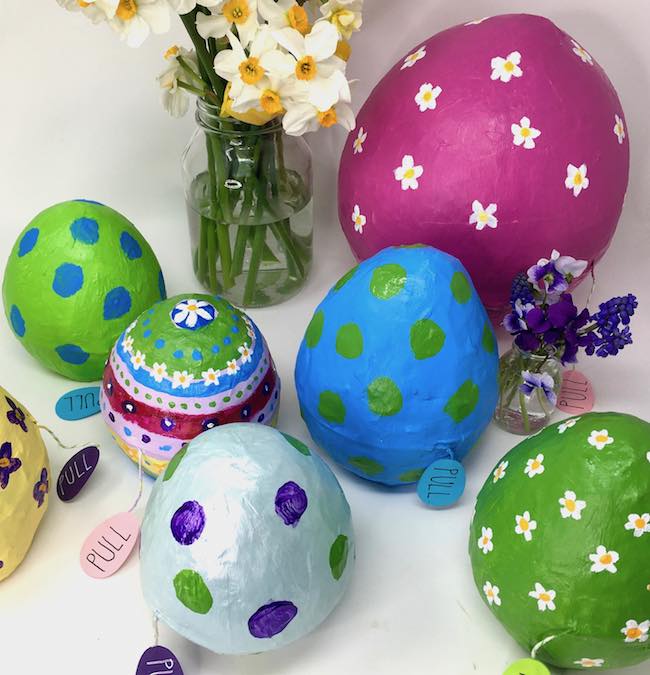
Here are some Easter treats - Paper Mache Surprise eggs and mandala Easter egg boxes as well.
So if you want to know how to make a paper mache egg you can fill with treats - here is the detailed tutorial.
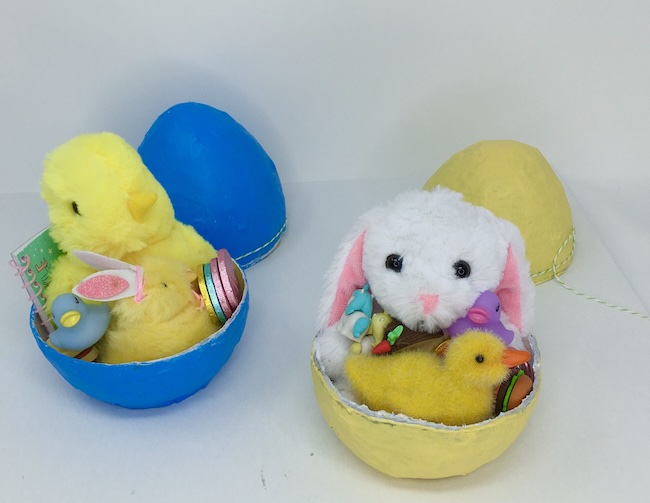
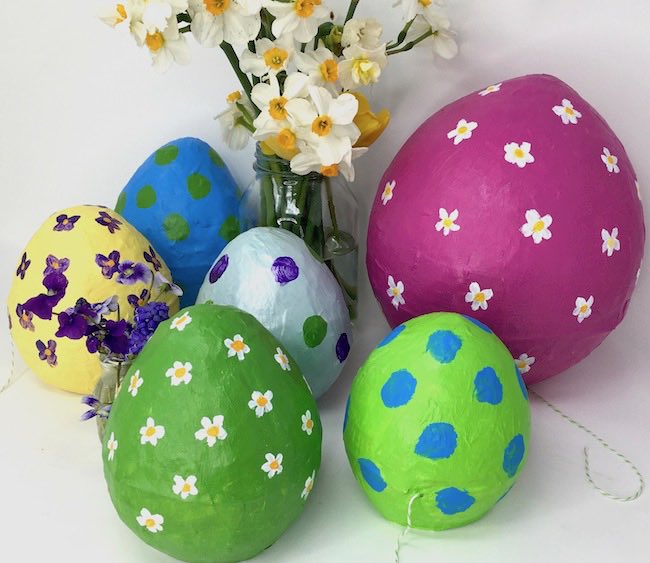
Here are some stuffed animals revealed on test eggs. Aren't they adorable?
A few tips on making the Paper Mache Surprise Eggs
Briefly, I'd like to tell you a few things I discovered as I made a multitude of paper mache Easter eggs. First, they are somewhat time-consuming. And I thought about that in the context of making them with kids. It occurred to me that perhaps kids would be more invested in making them if they made their egg for someone else. Maybe they could make a paper mache egg as an Easter surprise for a friend. That way if your child got tired of making the egg, the motivation of making it for someone else would push them to finish it. Also this is an excellent time to share and do things for others.
In terms of the time involved, if you use a dilute white glue, you need at least 6 hours between layers for drying time. Probably 24 hours is best for the first layer. Subsequent layers tend to dry faster. So factor that time in when you decide to make these fun paper egg surprises.
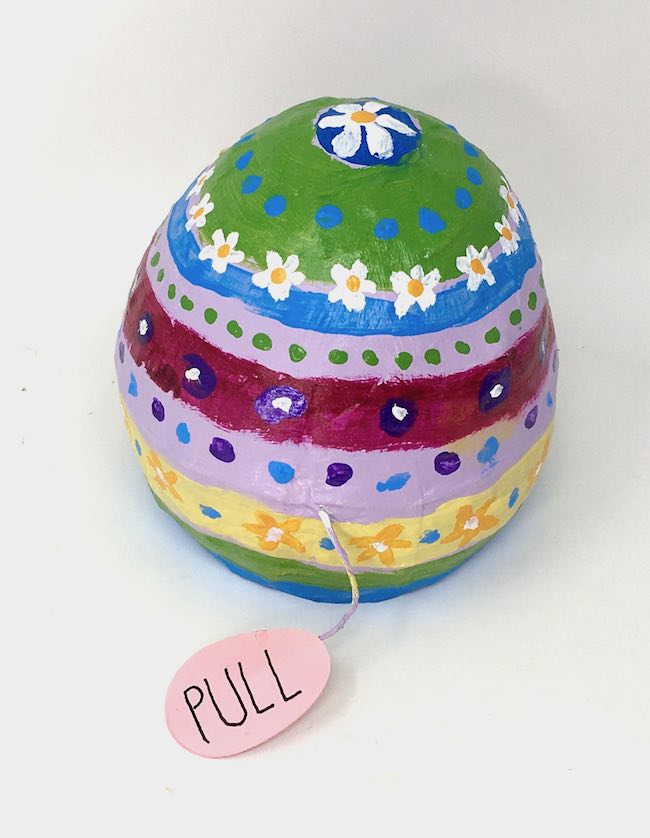
The other thing is that DIY paper mache eggs are not going to look perfect. That is part of their charm. I painted one egg (the primitive-looking one in the photo above) over and over trying to "fix" it. There was no fixing it without repainting the whole thing, but you know, I think someone would still find it fun. I just quit worrying about it.
Here's how you make the Surprise Eggs:
This post contains some affiliate links for your convenience. Click here to read my full disclosure policy.
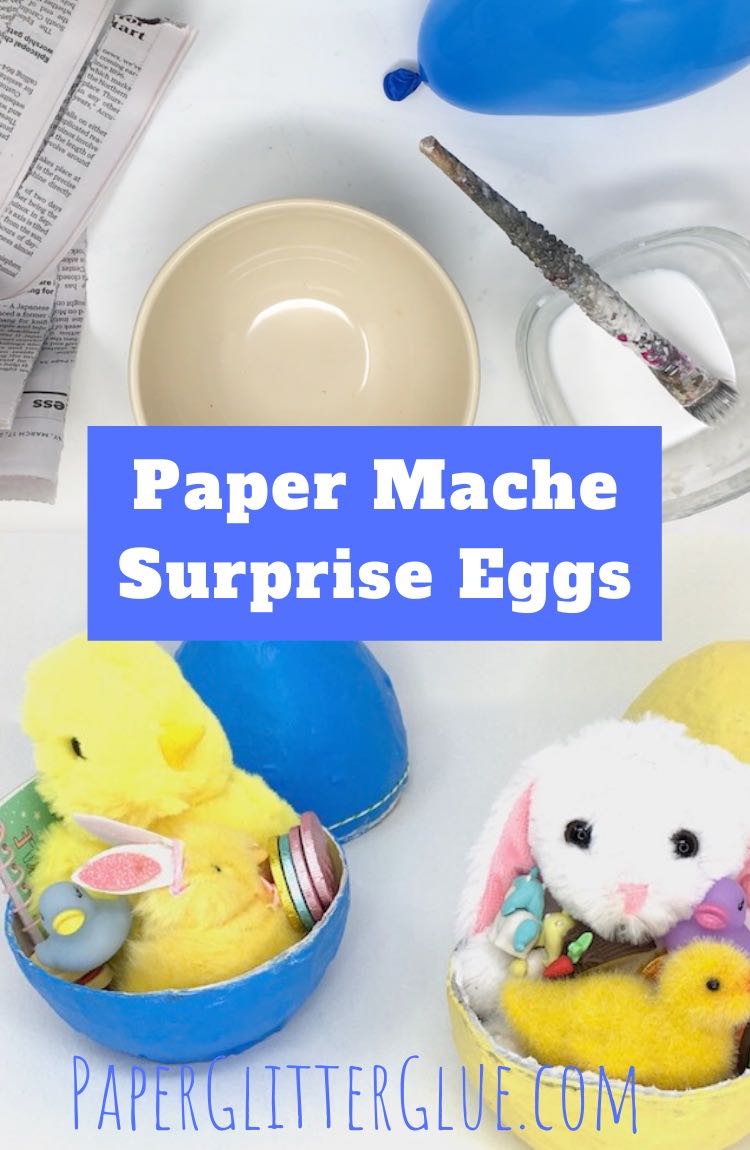
Materials to make the Paper Mache Eggs:
- Balloons - I used water balloons from the dollar store which the best place to get them if you can
- White PVA glue - Diluted Mod Podge
- Paper - strips of newspaper work well
- Paint and primer - acrylic paints, I used Martha Stewart paints on a lot of the eggs
- String - yarn or baker's twine
- Gifts to fill the Surprise egg - inexpensive stuffed animals work well
Directions to make the Paper Mache Surprise Eggs:
- Make the paper mache egg
- Make a flat base for egg
- Cut your paper mache egg into 2 pieces
- Prime and paint the base coat
- Glue the pull string to the outside of the egg
- Stuff the surprise egg with treats
- Seal the egg
- Paint and decorate your surprise paper mache egg
Now let's go into a little more detail on how to make this DIY Paper Mache Egg with a Surprise inside. Here's a video on how I made the paper mache surprise egg.
Make your paper mache egg
So first, make your paper mache egg. This is the most time-consuming step. Generally, if you are using white PVA glue like diluted Elmer's Glue-All or Mod Podge, it takes at least 6 hours to dry. I used a fan to help speed the drying time. You can't use heat because it will pop the balloon. Even putting it outside in the sun can cause expansion and ruin the egg as it expands and contracts.
If you use a flour and water paste as your glue, you really do have wait 24 hours between coats. Otherwise, you will get mold on the inside layers of the egg and it won't be usable.
Have all the supplies ready because your hands are going to get sticky and it's hard to tear paper when your hands are covered with glue.
I use this paper mache set-up:
- Bowl with diluted glue and old paint brush
- Small bowl with water to rinse glue off
- Torn newspaper strips
- Balloon in larger bowl so it doesn't escape
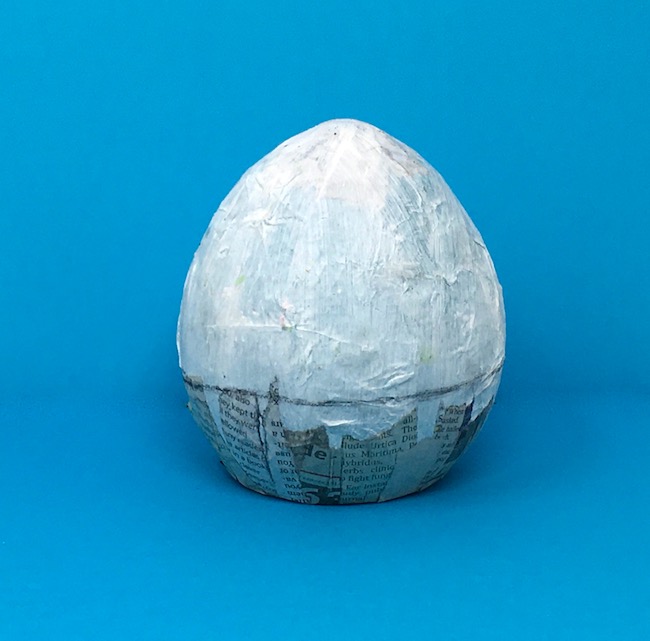
Now tear lots of paper strips. Strips are much easier to apply. In addition, I've found that newspaper works best because it tears in strips so easily. Also it seems to dry fast too. If your egg is about 5 inches tall, I make my strips slightly shorter than that. And if the strips are very wide, they don't mold around the egg as well. So just remember that. Really though, you can't mess up. It's paper mache, after all.
Next, paint the egg with some glue and apply the paper strips. Smooth down as you go. Work your way around the egg until it is completely covered. IF the paper sticks to your hands too much, dip your fingers in the water bowl.
Finally, let the first layer dry. You may find it takes longer for you, but with a fan blowing on the egg, it takes about 6 hours for my first layer to dry.
How many layers of paper?
Well, that depends on how strong you want the egg to be. For these eggs I added about 4-5 layers of paper. These eggs are pretty strong. For a piñata, something you are going to whack and destroy 3 layers is fine.
After you have applied all your layers and the egg is dry, it's time to move to the next step - making the egg so it can stand up.
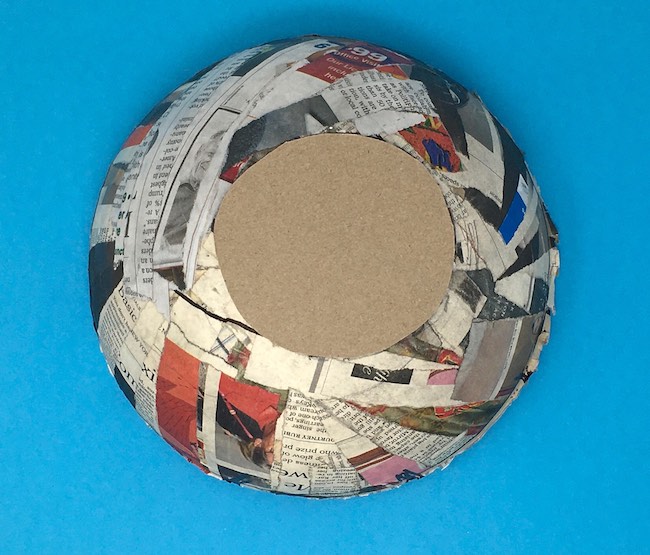
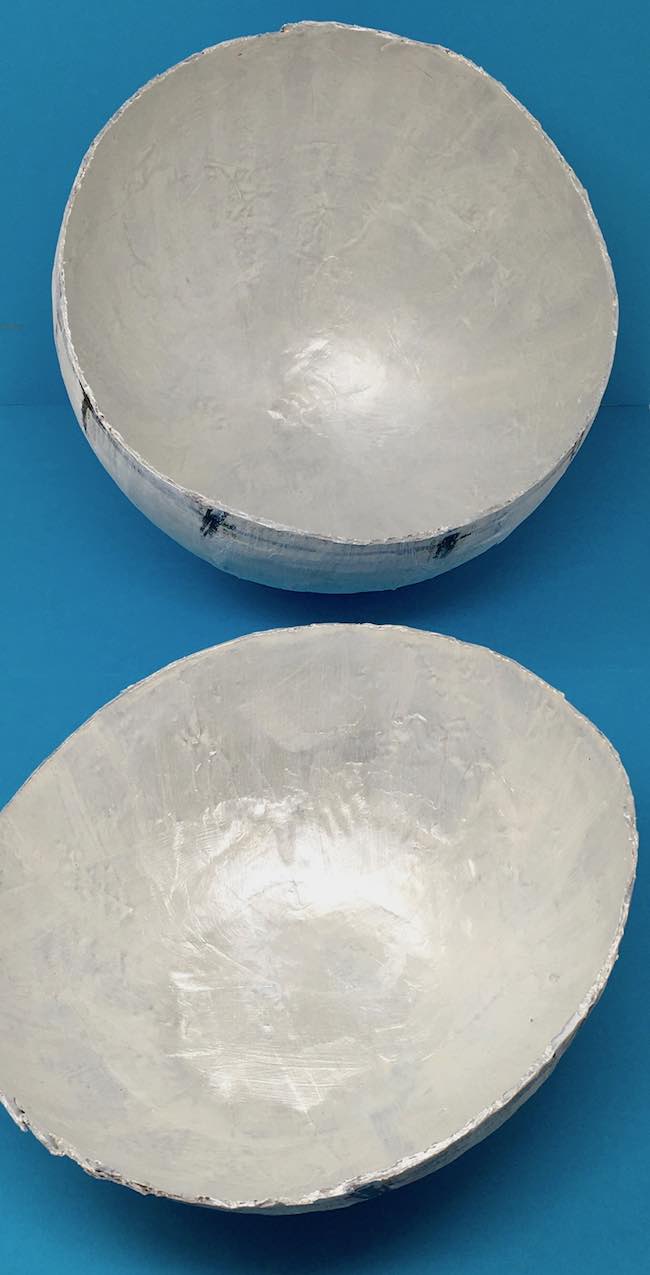
Next make a flat base for your egg
Look at your paper mache egg and cut a disc off the bottom. Sometimes it is hard to determine where to make the cut. After making a number of surprise eggs, I realized it doesn't matter much. Basically all you are trying to do is provide a flat base so your egg can stand up.
Use a craft knife to make this cut. But be sure to be careful and cut in a direction away from yourself. Craft knives are notorious for causing crafters to bleed. For this step, I would not let a child do the cutting.
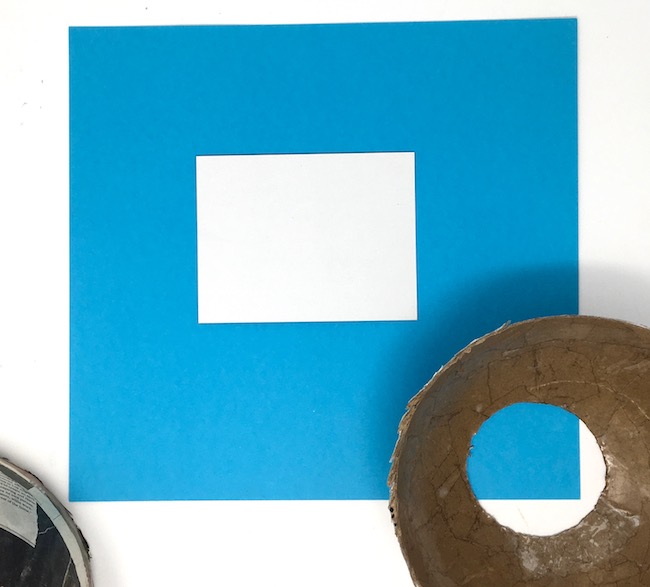
Next, cut out a cardboard circle big enough to cover the hole at the base. Then apply newspaper strips to adhere the flat cardboard base to the egg.
And here is another cardboard circle added and temporarily secured with masking tape.
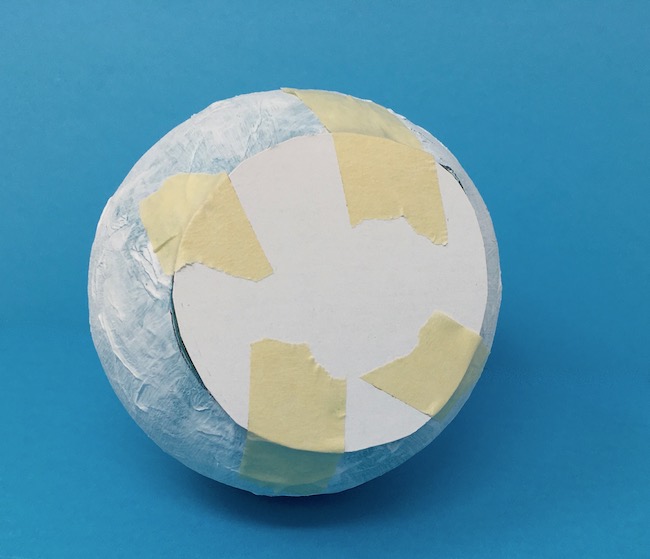
To complete the base, secure the cardboard circle to the bottom with paper mache strips. You can see that on the photo in the next section.
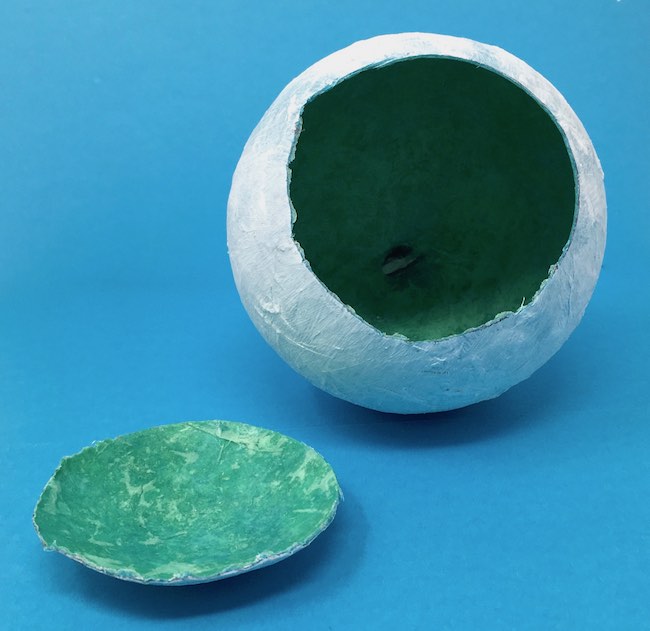
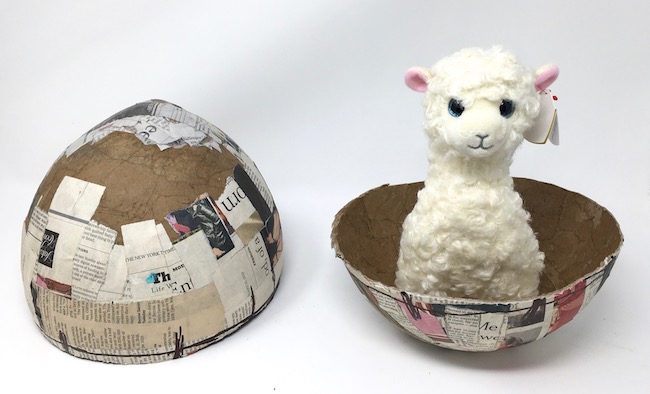
Now, cut the paper mache egg into two pieces
Again, this is a step that is slightly dangerous because you have to use the craft knife. First draw a line around the egg that's pretty straight. That's one reason I make the flat base first - so you can rotate the egg and draw a fairly straight line.
Below you can see the pencil line for my cut around the egg.
Once I cut the egg into 2 pieces, apply paper mache strips inside the egg to reinforce the the cardboard circle as the base. I don't have a photo of that step.
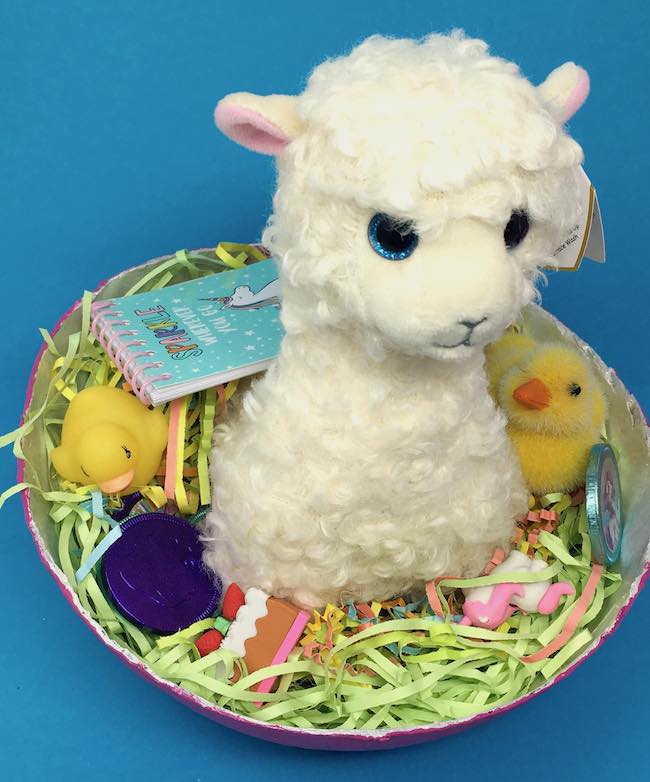
Finally, here is a photo of the 2 pieces of the large egg with the llama inside. Yes, she fits! Notice I left the Beanie baby tag on as instructed by my Facebook friends.
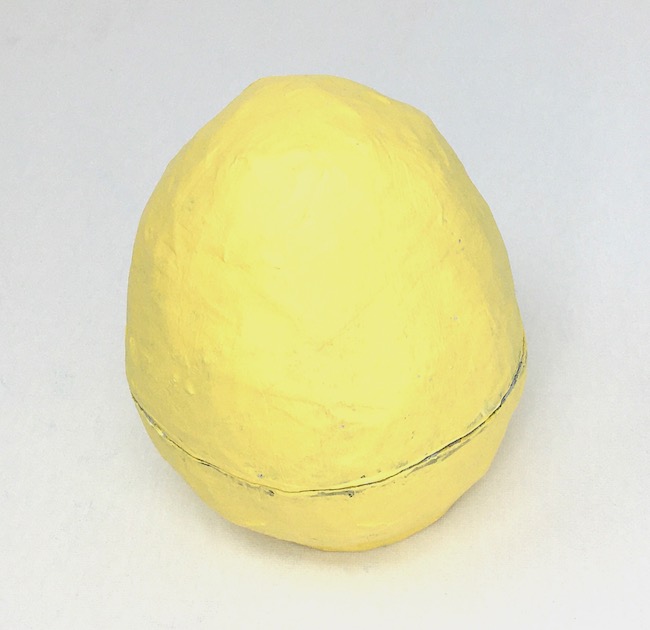
Next, prime and paint your egg
Now prime and paint your egg. First, prime the egg inside and out to cover the paper strips. Also sometimes the paper is dark and if you prime first, your paint will cover much better.

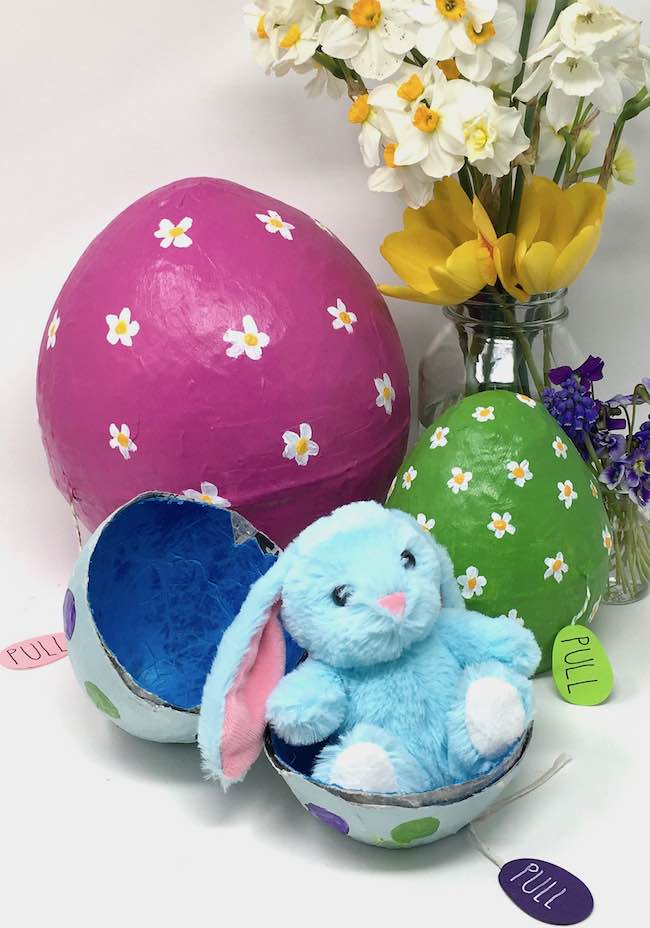
Then paint the egg your chosen color. For the insides of my paper mache eggs, I chose a beautiful Mother of Pearl color from Martha Stewart. See how nice it looks inside the large egg.
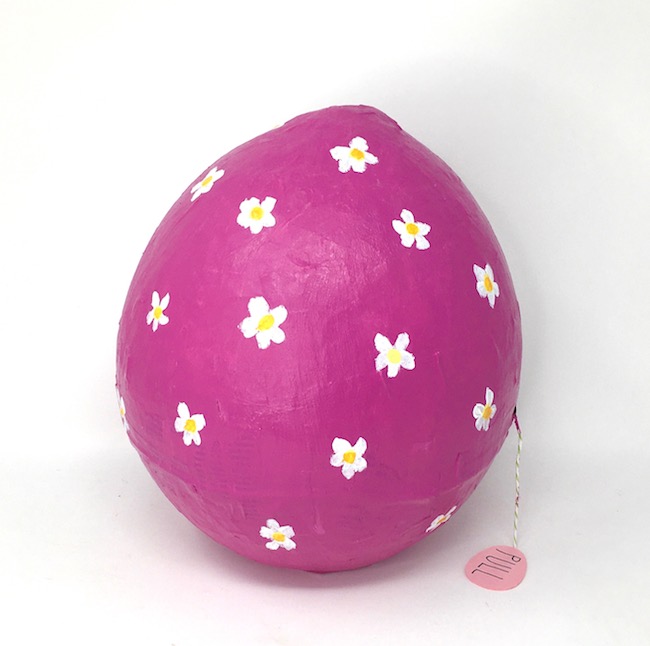
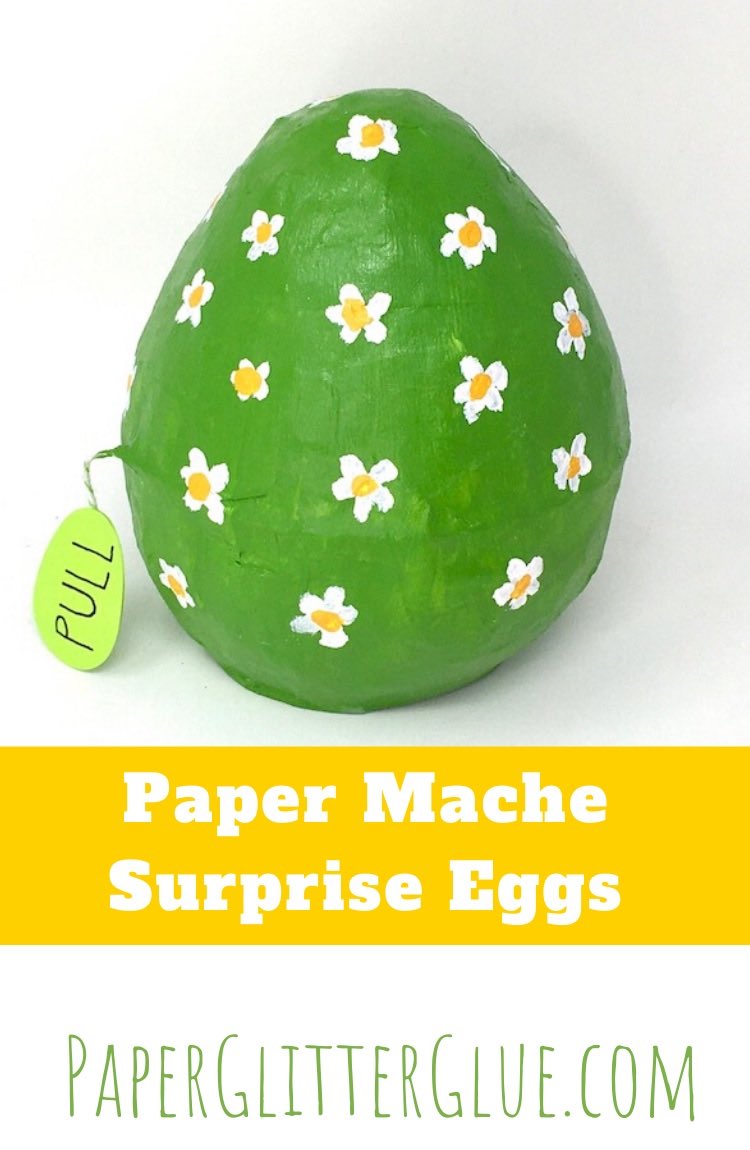
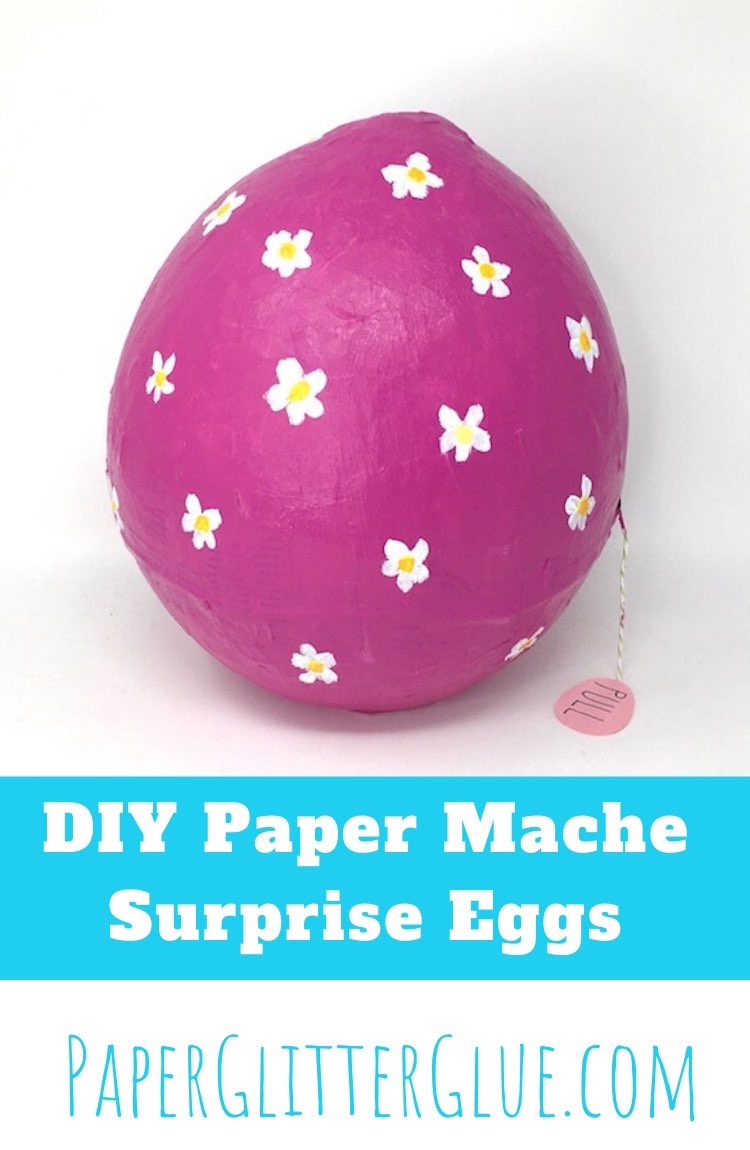
After priming the egg, paint the outside color. I chose Spring-like colors for these eggs.
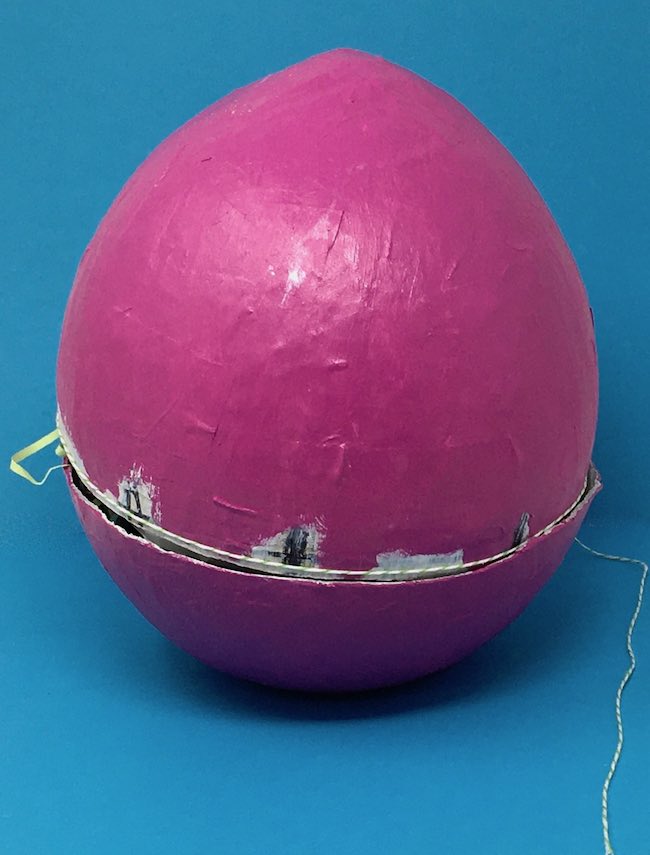
Next step, glue the pull string on the outside of the egg
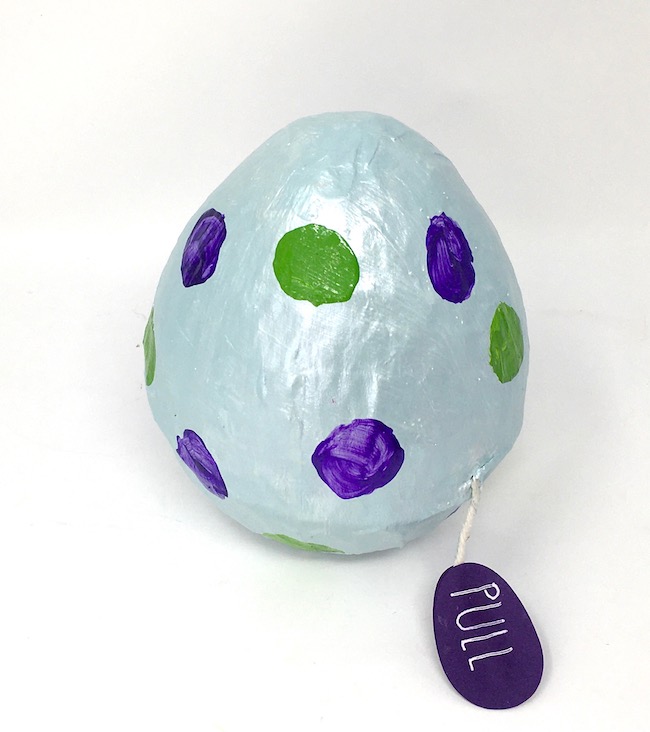
For this step, just use regular glue by running a bead of glue around the edge of the egg near the cut line. Then apply the string. For the experimental egg I used yarn which made a pretty big lump on the side of the egg so I switched to baker's twine after that.
Leave enough string hanging down to glue on a pull tab.
Now remember to fill the egg before you seal it up
I almost made this mistake - sealing the egg before I added the gift inside. The llama fit perfectly in the big egg. For the smaller eggs, the little stuffed animals are 5 inches tall and fit with just a little smushing.

Seal the Eggs!
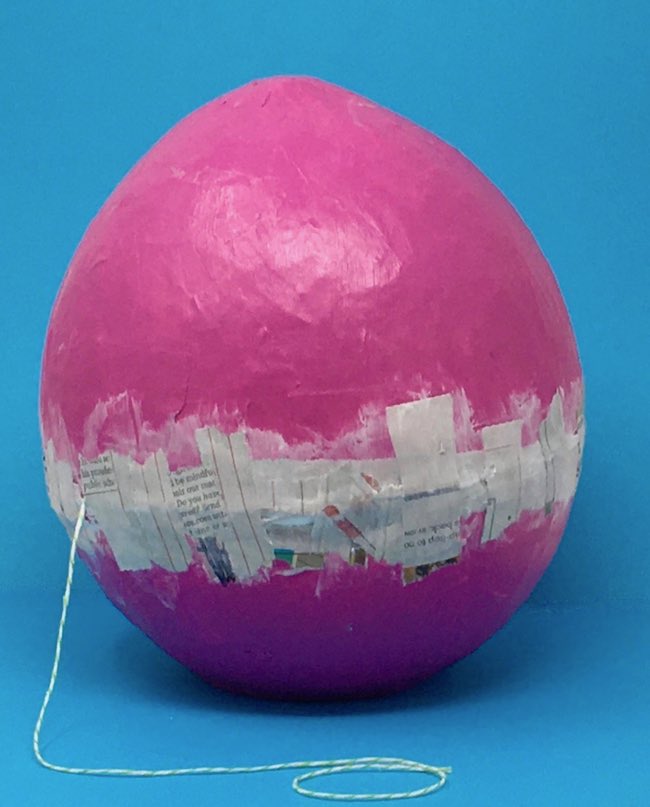
Once the eggs are filled with treats, you can seal them. Match up the edges of the egg and then apply a few small pieces of masking tape to hold the pieces together. Then you seal them just like you make the egg itself. Cover the edges with paper mache. You will have to repaint the outside of the egg at the seam.
Finally, paint and decorate your egg
Paper mache surprise eggs before the pull tags have been added.
Add a pull tag. I've included some egg shaped tags as pull tags in the Paper Glitter Glue library.
To get access to the library, just subscribe to my newsletter with the form below and you will get the password immediately.
There are 2 sheets of Easter egg cutouts in the library. The egg cutouts are in 2 formats - PDF for printing and SVG files for electronic cutting machines like the Cricut.
I used the small version to make the tags. I wrote PULL on the tag. Glue two tags together on the end of baker's twine to make the pull tag.
The one below is kind of primitive, but it was an experiment.

So let's get messy with paper mache, glue, and paints to make these fun Surprise eggs.
Questions? Email me at [email protected]. Join my private Facebook group for more inspiration and where you can share your paper crafts there.
millie
Where is the Sign In button. I don't want to sed my address every time.
Lucy
Are you asking about the library - here's the direct link to the library where you add your password. But the link is always at the top of the blog in the menu where it says Paper Glitter Glue library.
Penny Fowler
You are a wonder! I've been crafting a while, but my stuff is shambles compared to yours. Thank you so very much for the easy to understand instructions. Everything you offer is great!
Laney
Great tutorial! The one you describe as "primitive' is my favorite! I'm sure the kids in your neighborhood will love these.
Lucy
Thank you, Laney. I am trying to learn to paint so I experimented more with the primitive egg. The thing to do is to experiment - that's how we learn, isn't it?
Bianca Mitchell
I love all your creations but these eggs are extra good, thank-you for creating them and for the (as always) excellent instructions for making them!