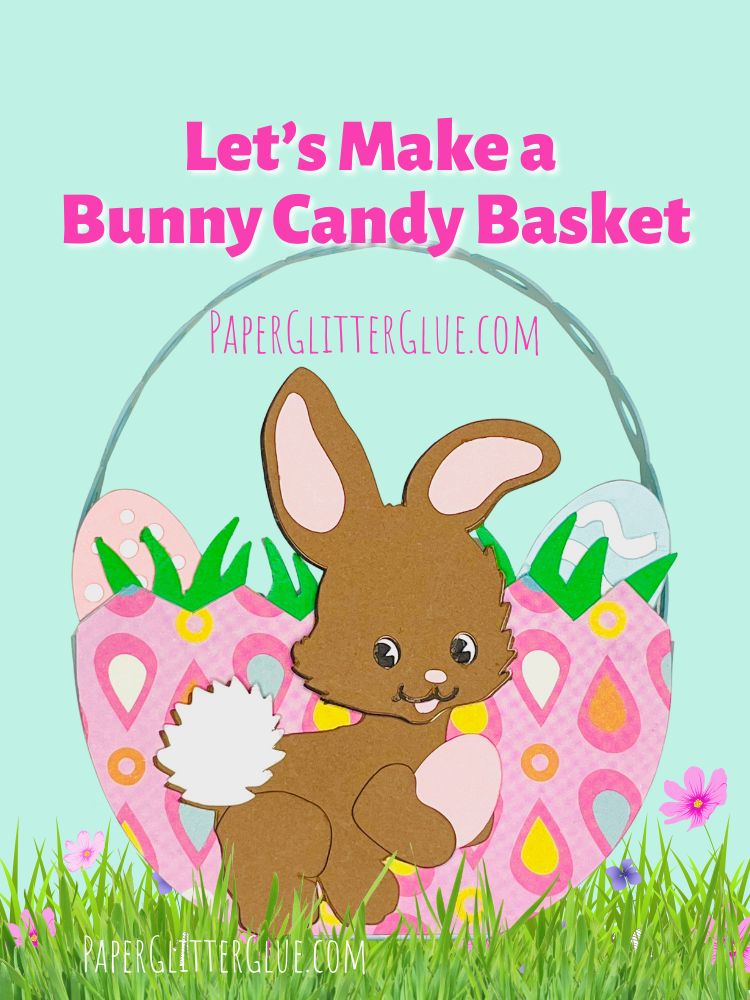
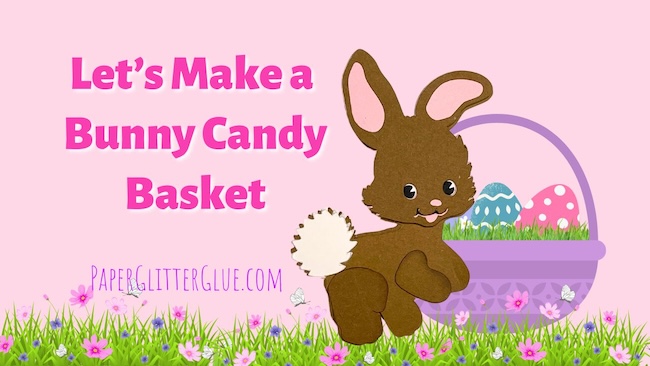
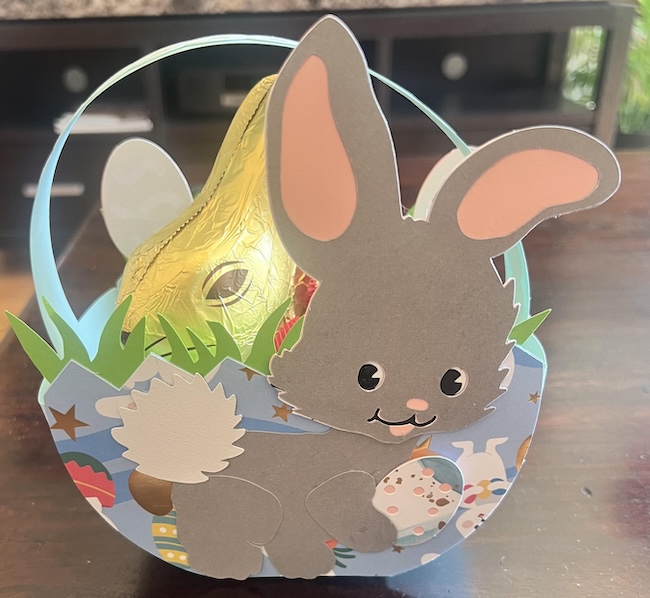
Hop into spring crafting with this adorable Bunny Basket that you can easily make with card stock. The layered bunny design is inspired by vintage Easter graphics. In this tutorial, we’ll create the layered bunny out of card stock, perfect for using as a sweet springtime decoration or to decorate the tiny basket.
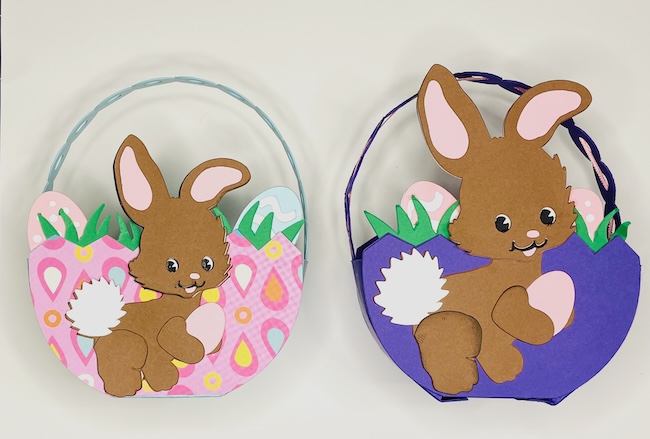
The basket is a whimsical cracked egg, but you can use the woven pattern from the Spring Candy Basket file (no. 151) if you like that design better.
Fill your little bunny’s basket with decorative cutout eggs included in the pattern, candy, tiny flowers, or tiny treats to spread some handmade springtime joy.
This post contains some affiliate links for your convenience. Click here to read my full disclosure policy.
Materials to Make the Bunny Candy Basket
- Cardstock - 65# cardstock like this works best (65# is equivalent to 176 gsm)
- Glue - Bearly Art Glue is my favorite
- Cutting machine:
- Cricut Maker
- Cricut Explore Air 2 or
- Cricut Explore Air 3
- Cricut Joy Xtra
- Cricut Joy
- Fine point blade
- Scoring Stylus or Scoring Wheel
- If using Cricut Joy or Cricut Joy Xtra, you need the foil tip for scoring
- Light Grip Mat or Standard Grip Mat
- Fine point blade
- Paper grass
Subscribe to get my Paper Glitter Glue Newsletter (if you haven't already)
I will send you the password to the library right after you subscribe so you immediately get the pattern. The Bunny Candy Basket is Design No. 188 in the Free Paper Glitter Glue library.
Please know that I will never send you any spam and you can unsubscribe at any time.
How to Make the Bunny Candy Basket - Free Pattern - Design No. 188
1. Download the Bunny Candy Basket SVG file - Design No. 188 - in the Paper Glitter Glue library.
2. Cut out the pieces with your cutting machine.
3. Assemble and glue together the layers of the bunny figure.
4. Assemble the basket by gluing the side pieces to the base basket, then glue the handle on. I'll go over the details below.
5. Glue the adorable little bunny to the front of the basket.
6. Fill with paper grass and candy or other treats!
Here's the link to my YouTube Live video where I show you how to make the Bunny Candy Basket.
For more details, read on.
1. Download the Bunny Candy Basket pattern- Design No. 188
To get the files for the Bunny Candy Basket, go to the Paper Glitter Glue library:
1. Click the big orange button on the library page. That takes you the password page.
2. Type in the password and then the library will open. The Bunny Candy basket file is Design No. 188 in the April 2025 section of the library.
Remember if you don't have the password, simply subscribe to my Paper Glitter Glue newsletter and you will get the password to unlock library the right away.
My design files are available in 2 formats - SVG cut files for cutting machines and printable PDF files.
If you need help learning how to unzip your files, see these instructions:
- Here's how to unzip a folder using an iPad or iPhone.
- To learn how to unzip a folder using a Windows computer, click here.
- To learn how to unzip a folder with an Android device, click here.
- To learn how to unzip a folder using a Mac, click here.
2. Next cut out the pieces for the candy basket
You can use 65#-110# card stock for the basket. As you know these patterns are much easier to cut out with a cutting machine like a Cricut or Silhouette.
Please note that the smaller bunny is about the smallest size that you can make the bunny because of the fine details in the eye and mouth. Of course, you can enlarge it as much as you want.
Here's how the file looks when uploaded to Cricut Design Space.
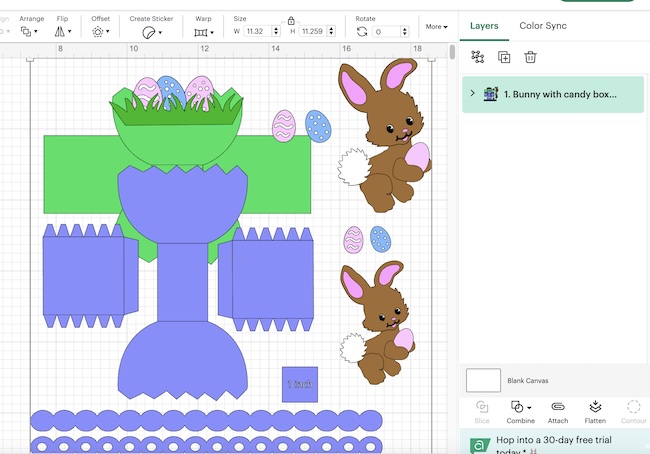
In order to cut out the file with a cutting machine, it is important to identify and designate score lines on the basket piece.
First ungroup the design.
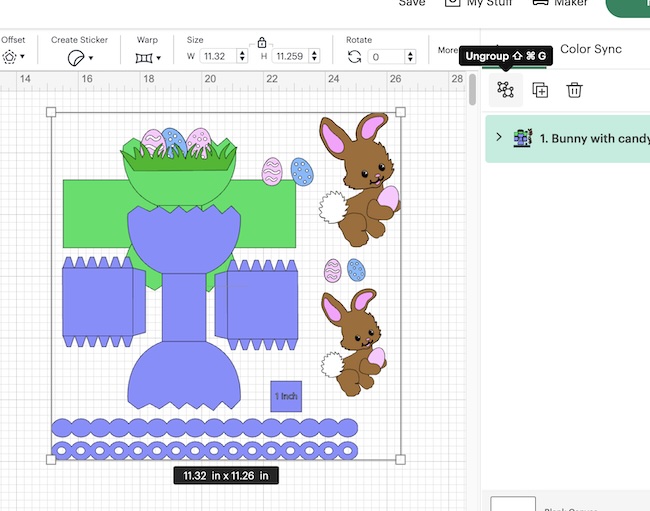
Delete the one inch square when you know the file has uploaded at the correct size. When you click on the one inch square it will show the size as 1 inch by 1 inch.
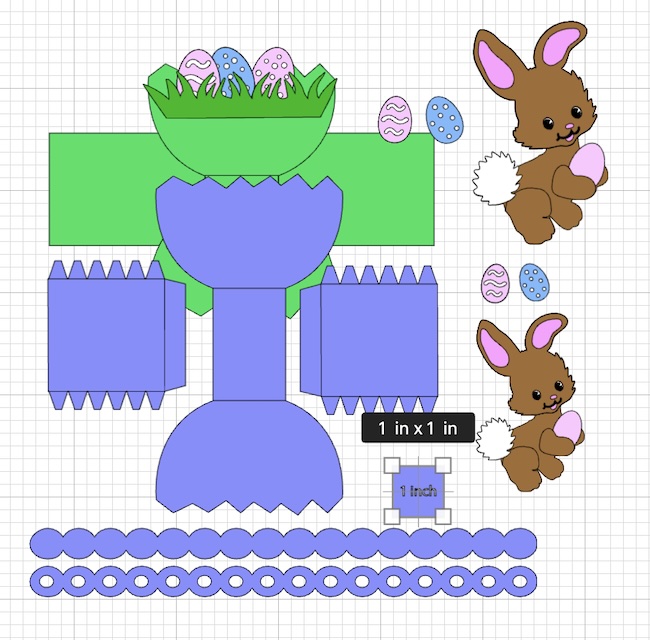
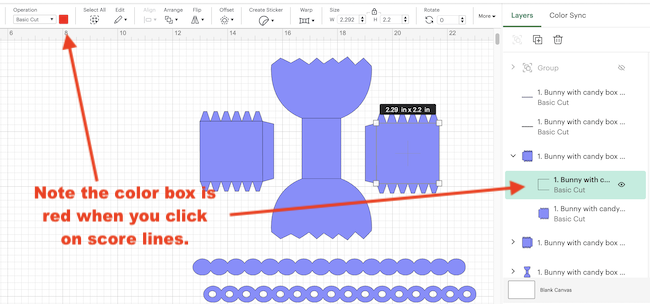
Now, select the score lines. You can see them on the candy box pieces that are drawn as lines. Each set of score lines is grouped with the piece it belongs to.
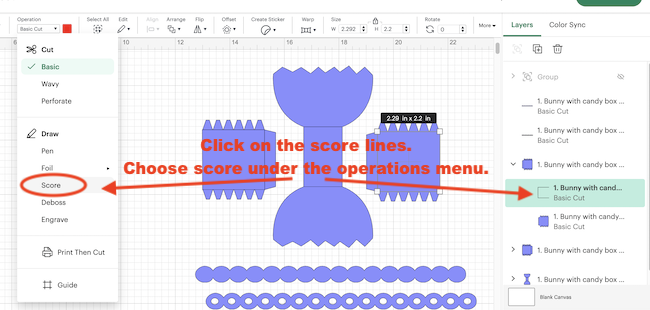
When you click on the piece these lines are grouped with, you will see the set of lines. Next, click on those lines you will notice that the color box is red towards the top left of Cricut Design Space. I always draw score lines in red to help you know that these lines are intended as score lines.
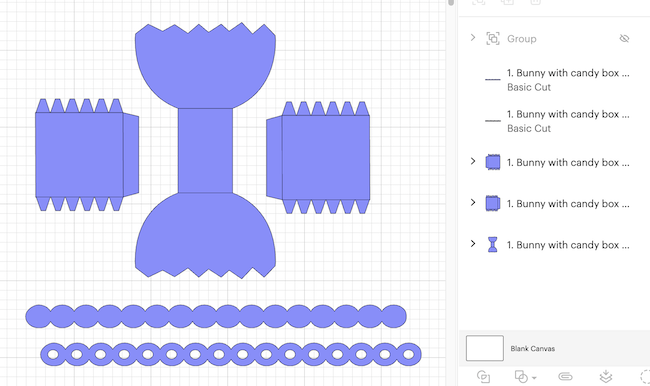
Under the operations menu, scroll down and choose score. Now these lines will show up as dashed lines.
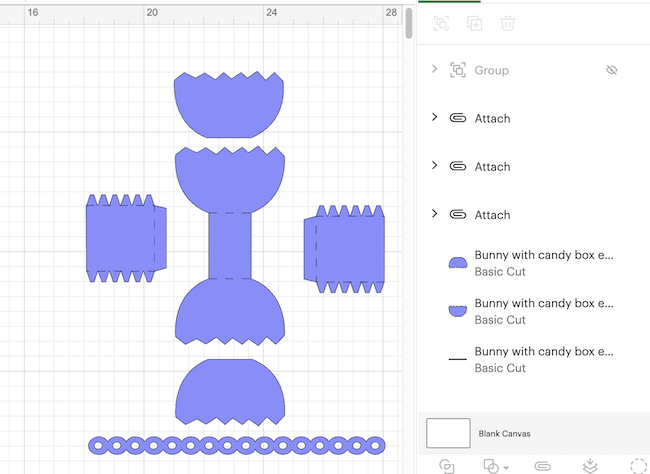
Select the each basket piece so you can attach the score lines to your piece as shown in the photo below. The attach button is on the lower right hand side of the screen.
Now you can cut out the design on your machine.
Once all the pieces are cut out, you can assemble your cute card stock bunny and the basket.
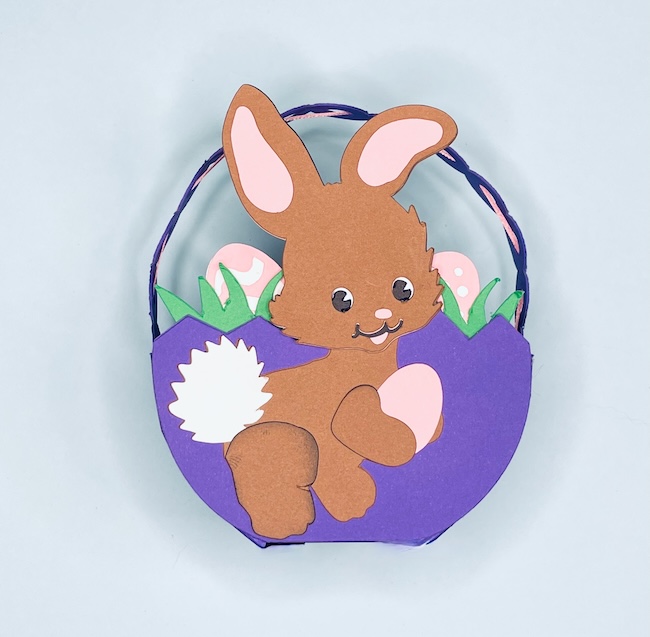
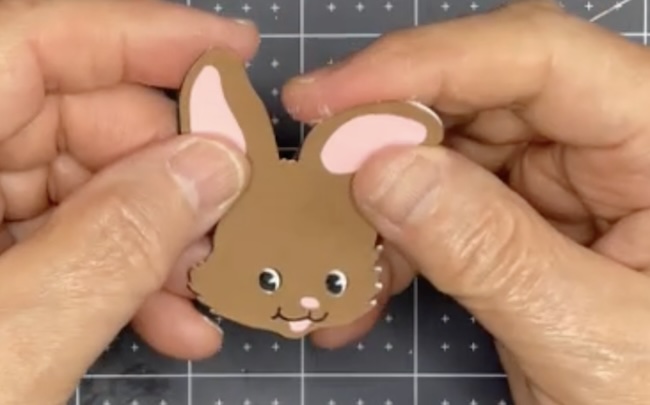
3. Assemble the Bunny Figure
Glue the bunny layers together. I've tried to minimize the small pieces that you have to glue on to make it easier to construct. You can see the layers in the PDF files.
There are 4 layers to make the head of the bunny - a top brown layer, a pink layer to provide the coloring for the ears, nose, and mouth, a black layer for the mouth and the eyes and a white layer for the whites of the eyes.
Here are the layers to make the bunny with Cricut Design Space

You can apply glue to the back of the top layer of the bunny face and adhere it to the pink layer.

Next apply glue to the back of the pink layer and adhere to the black layer which makes the eyes and a line around the mouth.
Finally, to complete the face, apply glue to the back of the black layer and adhere to the white layer. That layer provides the whites of the eyes.
Next adhere the face to the body of the bunny. I cut out 2 layers of the bunny body to make him or her more sturdy.
You can edge the lower leg and the arm with a dark brown ink to make them stand out better.
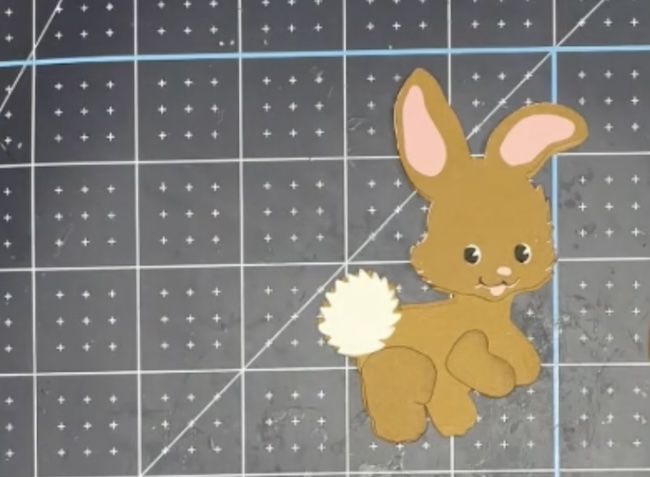
Glue the leg in place, add the bunny tail (or use a pom pom if you like), then glue an egg in the bunny's hand (?paw), and glue the other arm on top.
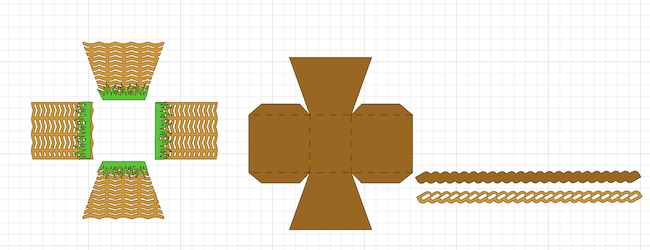
4. Make the Egg-Shaped Candy Basket
The first step is to fold along the basket score lines.
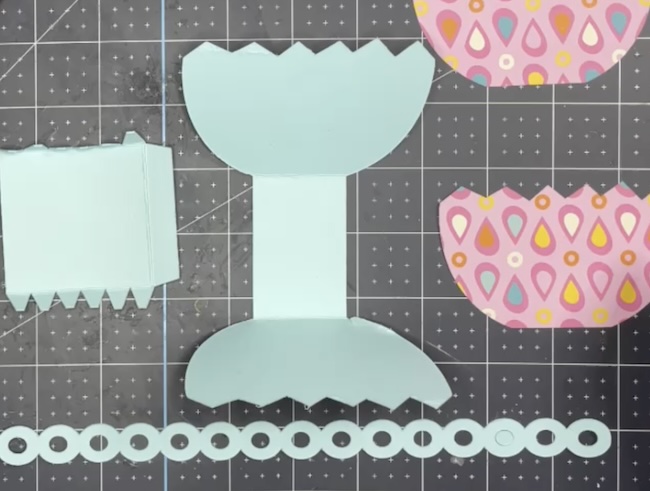
Assemble the basket by gluing the side pieces to the curved sides of the basket
First, gently curve the side pieces of the basket. Fold along all the score lines.
Apply glue to the bottom glue tab and adhere to the bottom of the basket.
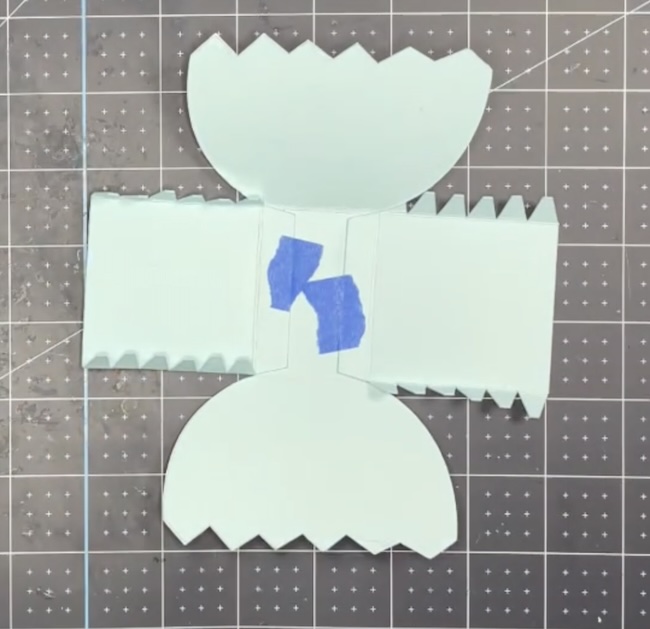
Next apply glue to the side tabs and adhere them to the sides of the egg-shaped basket. This is the only fiddly step, just gradually bend the side tab to the curved edge of the basket.

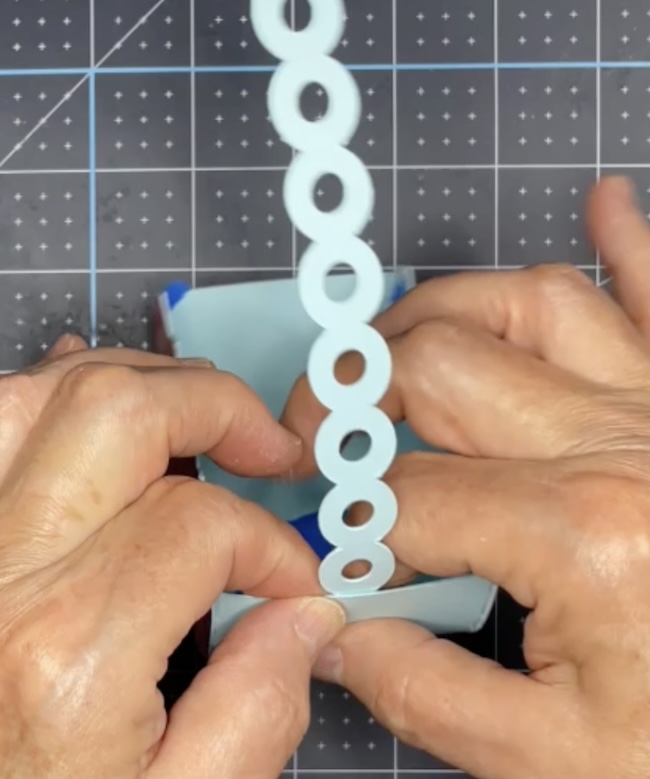
If you want two layers for your basket handle, glue the solid background to the handle with the cutouts. It does make the handle stronger if you do that. You can also thread a ribbon through the cutouts if you like.
Glue the handle to the basket
Ease the handle into a curved shape. Glue it to the inside of the basket.
Adhere the grass pieces to the inside top of the basket
Glue the grass piece behind the top of the egg basket. Add paper eggs if you like.
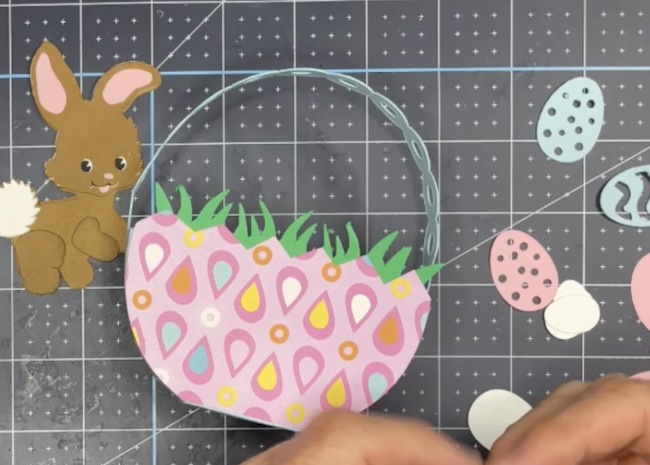
If desired, glue a decorative overlay to the basket. That is included in the pattern as well.
There is a different basket design in the Spring Candy Baskets - Design No. 151 in the Paper Glitter Glue library if you want to use that one.
5. Glue the layered Bunny figure in front of the basket
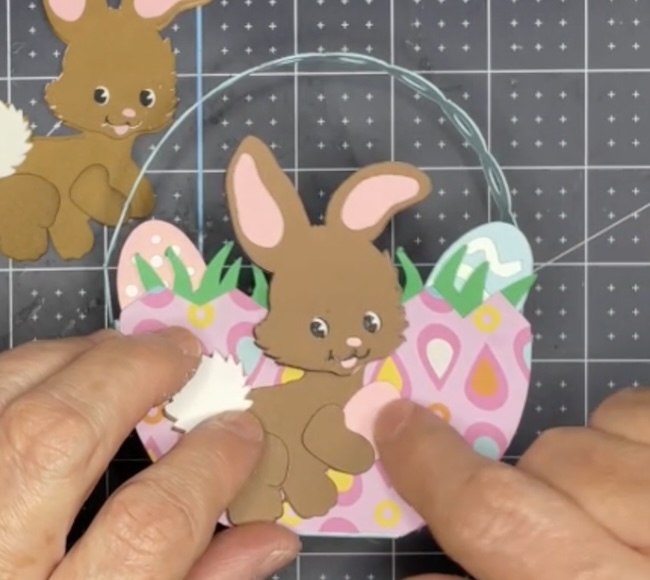
One of my friends made this for her grandchild. I love the shade of grey that she used for the bunny.
6. Fill with paper grass and treats to share with friends
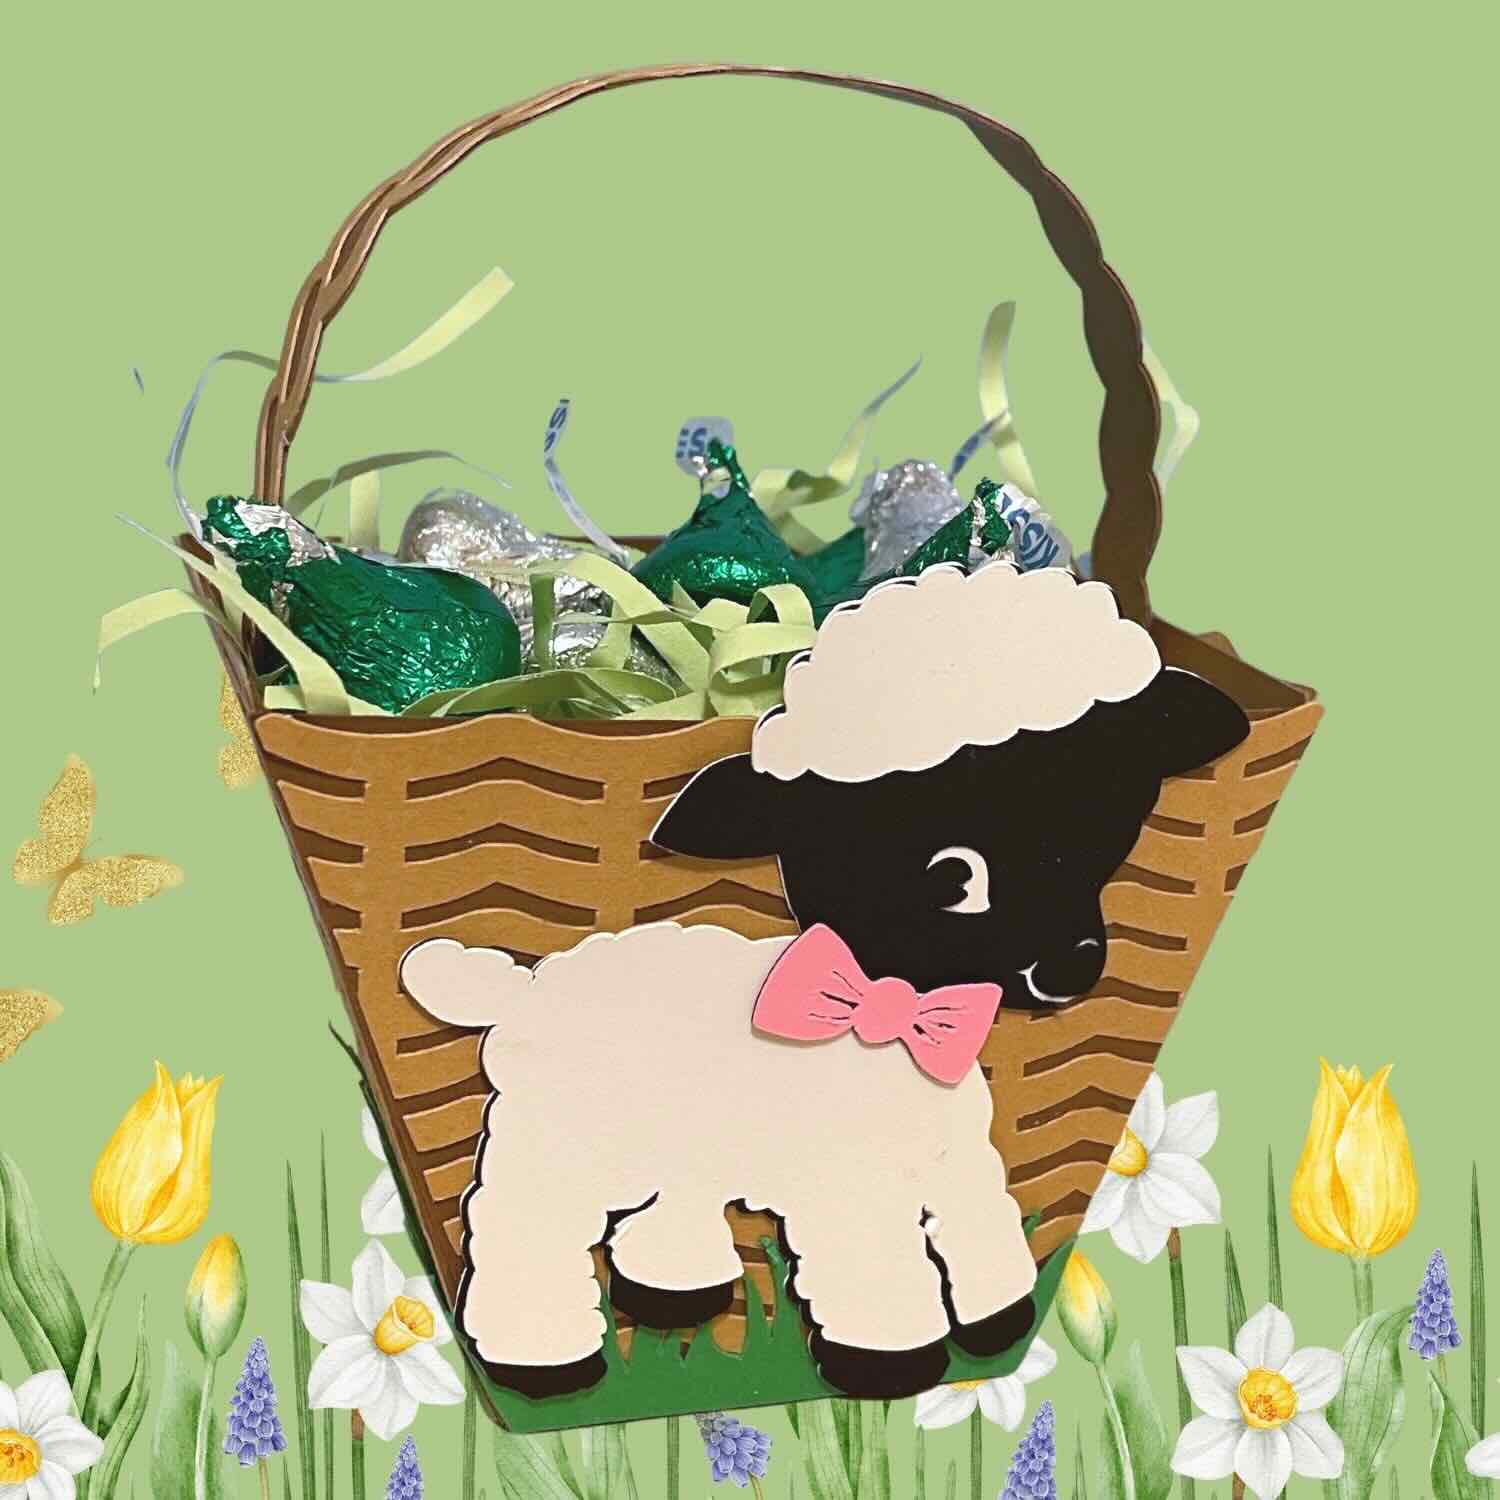
If you like these little baskets, I have a collection of baskets in my shop with 17 layered designs including my vintage cat and a little lamb candy basket.

Remember to save this and pin to your favorite Pinterest board
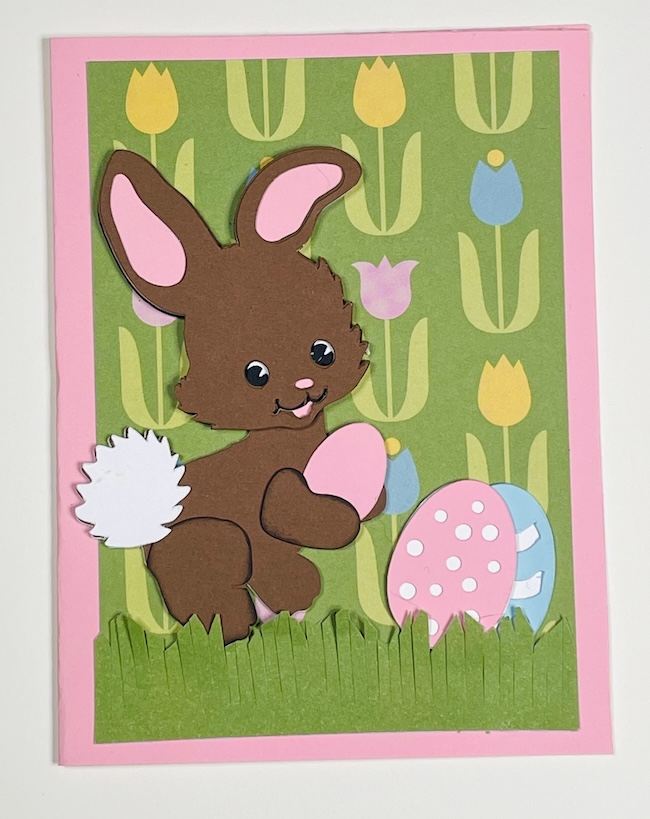
And if you like the bunny, he looks great on a card. I'm sending this version to one of my friends.
If you have any questions, please email me - [email protected]. I am always happy to help.
Thank you for reading.

Leave a Reply