 When you make a row of little cardboard houses you need a unique cardboard base that accentuates them. Because the post on making the Dutch Canal Putz houses is long, I decided to write a separate post on how to make this cardboard base.
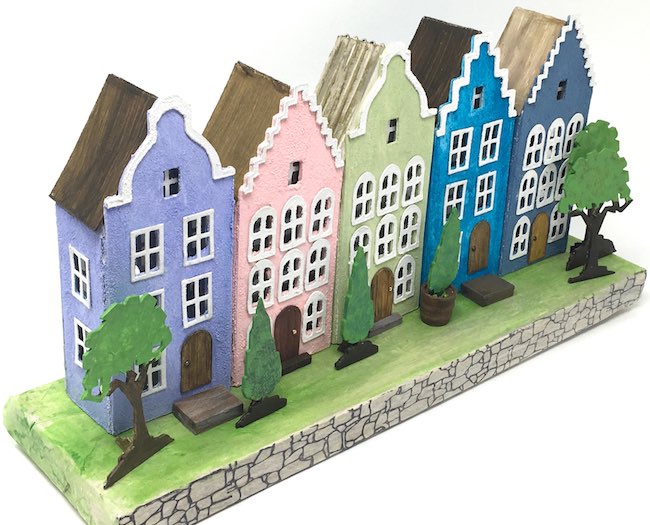
I struggled for awhile to figure out how to arrange and decorate these little Amsterdam Canal houses. Finally I saw some drawings on Pinterest that helped me decide to make a Rainbow Row of houses rather than separate them on individual cardboard bases.
Also to light the little houses I needed a cardboard base with slots for LED lights.
Here's how you make it.
This post contains some affiliate links for your convenience. Click here to read my full disclosure policy.
Materials for make the Rainbow Row Amsterdam Canal Putz House Base:
- Corrugated Cardboard
- Craft knife
- Glue Gun
- Mod Podge
- Brown packing paper
- Collage paper (or tissue paper)
- Paint
- Stone stamp
- LED lights
Steps to Make the Rainbow Row Cardboard Base:
- Measure the Rainbow Row of the Dutch Canal Putz Houses
- Estimate placement of LED lights
- Draw rectangle for LED lights
- Cut out space for lights on corrugated cardboard
- Glue cardboard layers together
- Cover with brown paper
- Paint the cardboard base with primer
- Make the stone edge on collage paper and glue to the edge
- Paint the base
- Decorate the base after the houses are glued down
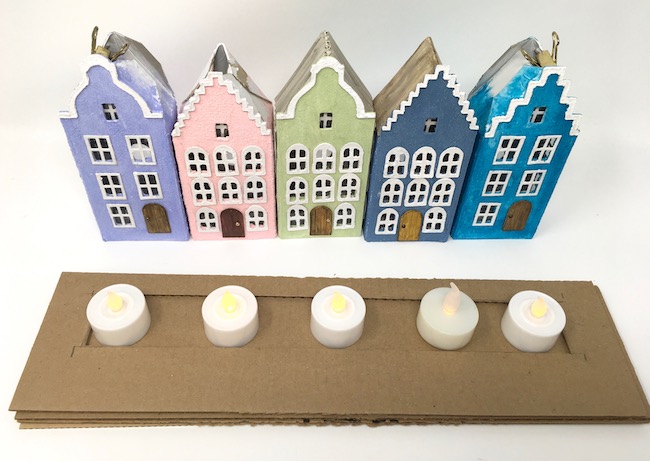
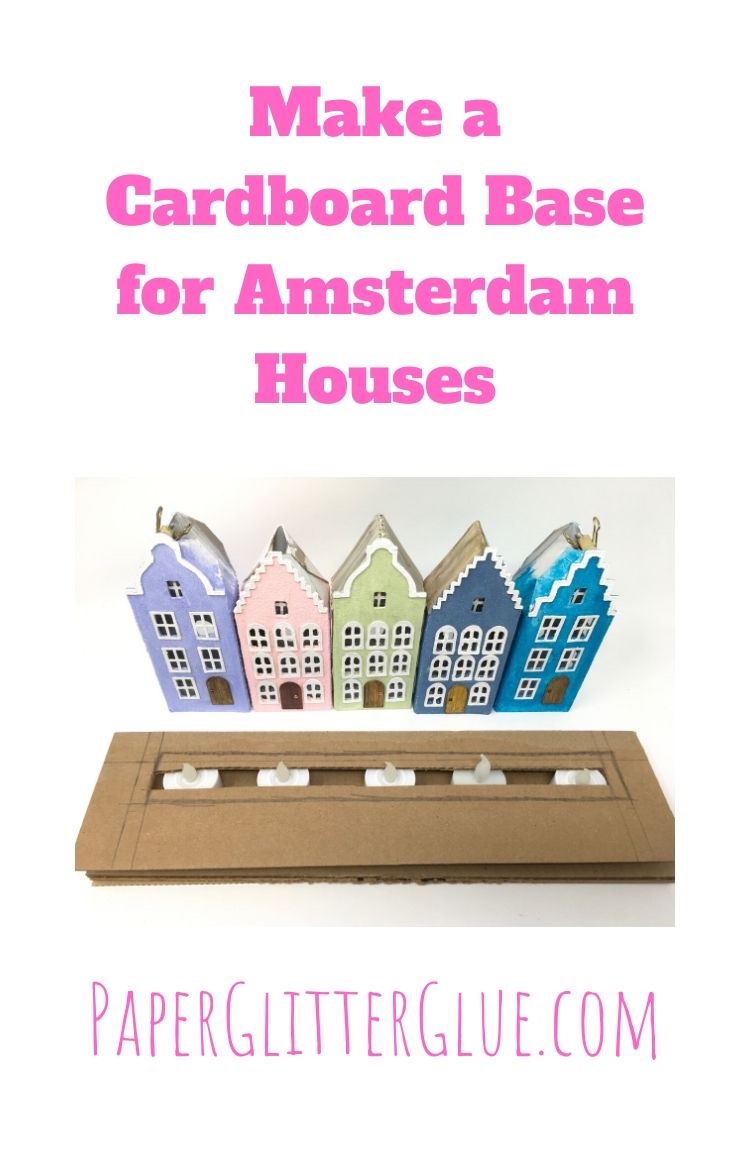
First Measure the Rainbow Row on the Dutch Canal Putz Houses
Cut cardboard large enough for the houses with 1 extra inch on each side of the little houses. Set the houses where you want them to go. I like to have some extra space in the front for landscaping.
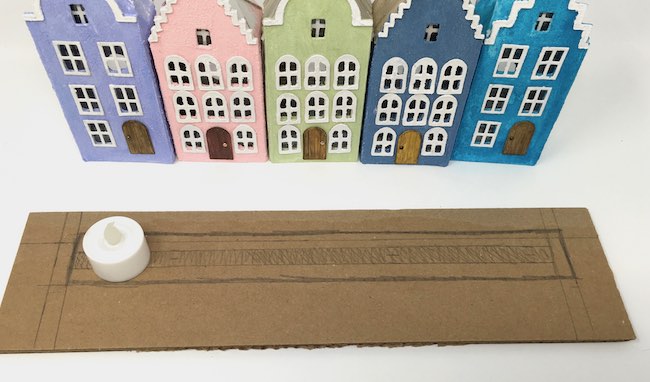
Now estimate the placement of the LED tea lights
The LED tea lights are 1.5 inches in diameter. And these houses are also 1.5 inches wide. So I cut enough layers of corrugated cardboard to cover up the body of the LED light and make a smaller slot so the light bulb shows through.
Draw a rectangle for lights
The piece of cardboard in the front shows the colored in section to cut out the slot for the LED light bulbs to show through.
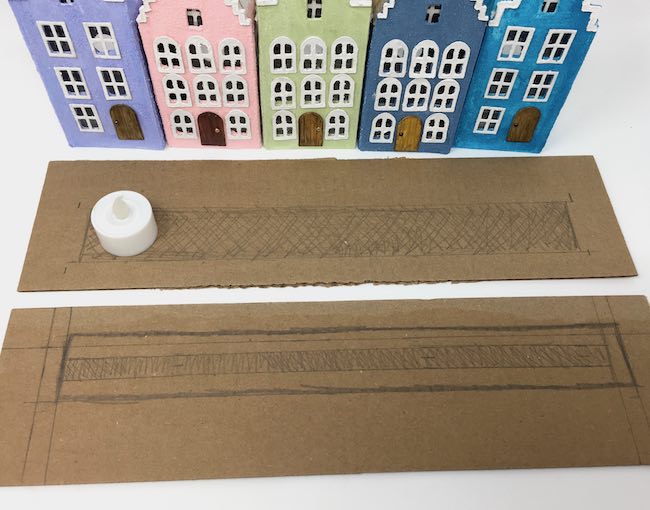
Cut out the space for the LED lights
Cut several layers for the body of the LED lights - usually it takes about 6 layers of cardboard for that.
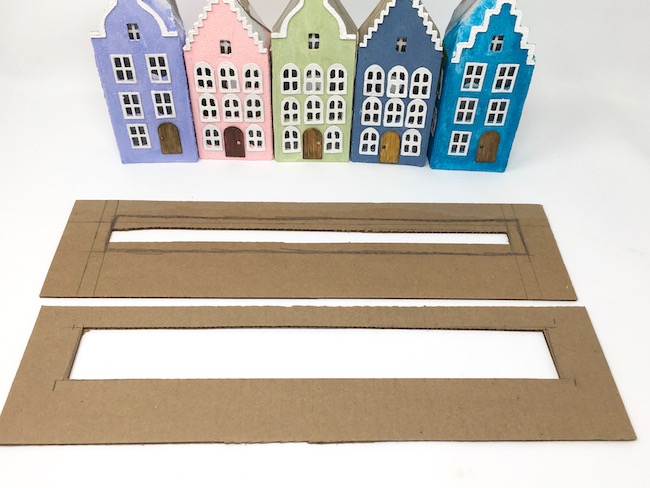
Glue the cardboard layers together
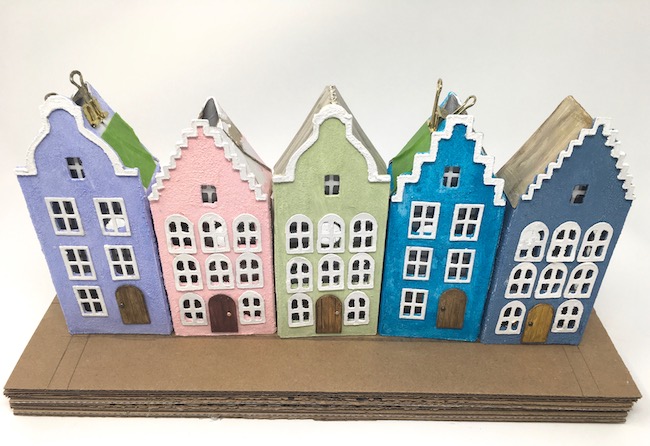
Use a hot glue gun to glue the layers of cardboard together. This is the fastest method. In the past I used regular glue, but it took so long to dry that the layers would pop apart. Hot glue is the way to go.
The final layer should be the narrowest slot for the bulbs to show through.
Cover the cardboard with brown paper
Now cover the 6-7 layers of cardboard with brown paper using Mod Podge. Try to fold the corners neatly. That's not what I usually do because I kind of like messy corners on Halloween houses, but for Rainbow Row the corners need to be neat.
Paint the cardboard base
Next paint the covered cardboard base with gesso primer. Then paint with a color matching the stone.
Make the stone edge on collage paper and glue on the edge
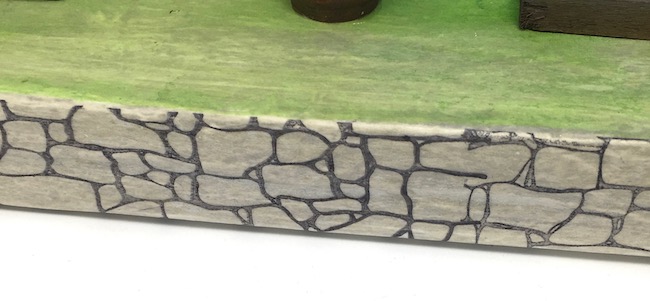
Because the Dutch canal houses are on a stone-lined canal, I stamped collage paper with a stone stamp. Apply the paper to the edge with Mod Podge.
Paint the cardboard base
Since the Amsterdam canal houses are colorful, I chose a muted green for the base.
Decorate the base after the little houses are glued down
Now add the landscaping to the cardboard base after the little houses are in place.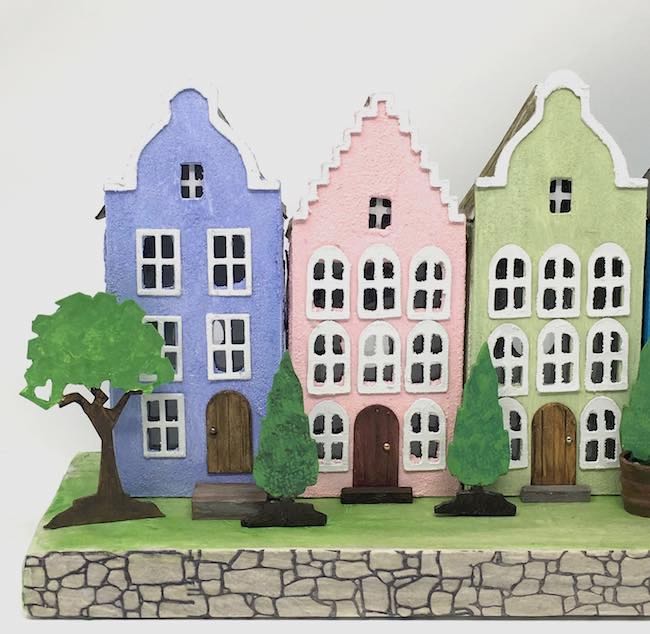
The next post will go over how to make all the Amsterdam Canal Putz Houses on Rainbow Row.
I hope you have fun making things.
Lucy
P.S. If you want to remember how to make this cardboard base for a long row of houses, pin this to your favorite Pinterest board.
Rati Saxena
How did you glue the houses to the base?
Lucy
Just run a thick bead of glue all along the bottom of the houses so they stick. If you wait just a few minutes, the glue gets tackier and will adhere better. This is another place where I recommend Aleene's Fast Grab glue.
Rati Saxena
Thank you so much!
Frank
So how do you get the LED fixture out if you need the change the battery? Or even to turn the lights on and off? There was no mention of an “Access hole” to do that?
Thanks,
Frank
Lucy
Frank, the bottom is open so the LED lights can be removed easily. That's a good question and I didn't realize that wasn't clear. So I will take a picture of the base of this house and add it to the post to show you how the base looks.
Helen J Roberts
Another great instruction sheet. Thank you!