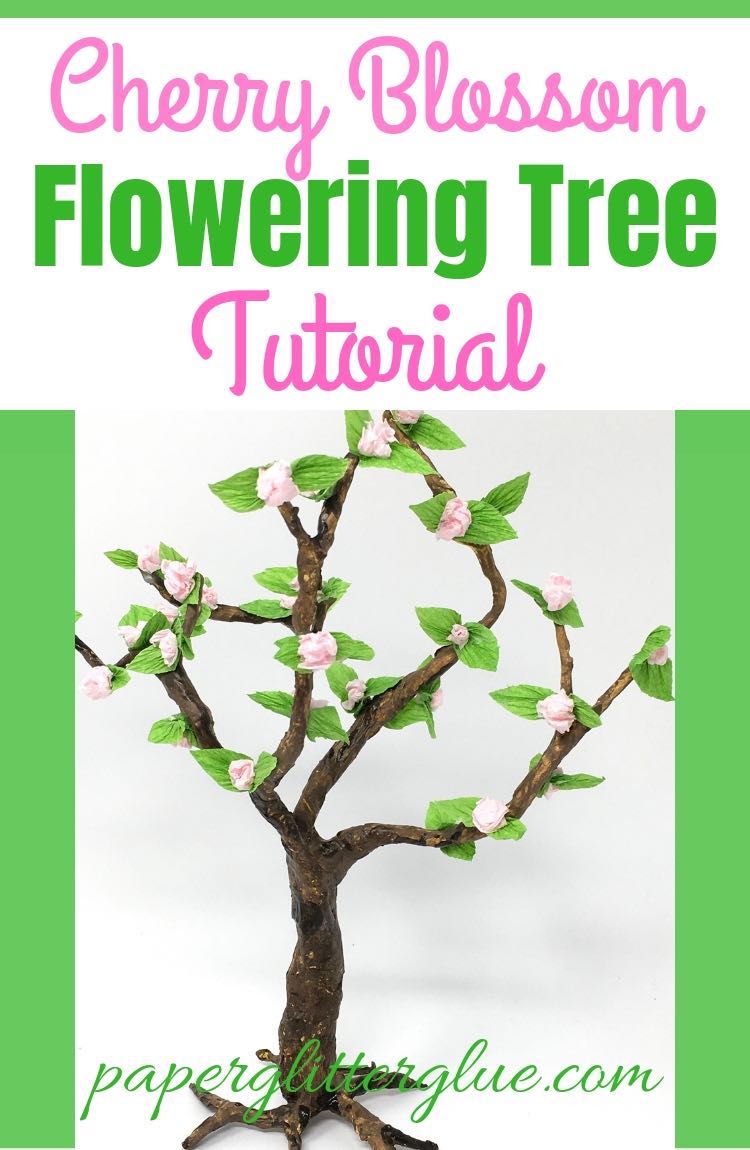
Here's how to make your own easy DIY Cherry Blossom Flowering Tree. It's based on the same tree structure as the Halloween Twisted Trees, but prettier. Then just add cute little spring blossoms.
Really, it's easy. I've included a free PDF with written tutorial on how to make this cute Cherry Blossom Flowering Tree in the Paper Glitter Glue library.
So let's get started making the Easy DIY Cherry Blossom Flowering Tree.
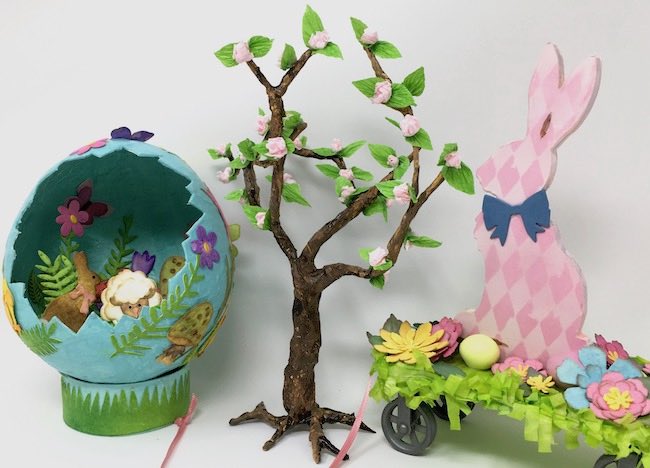
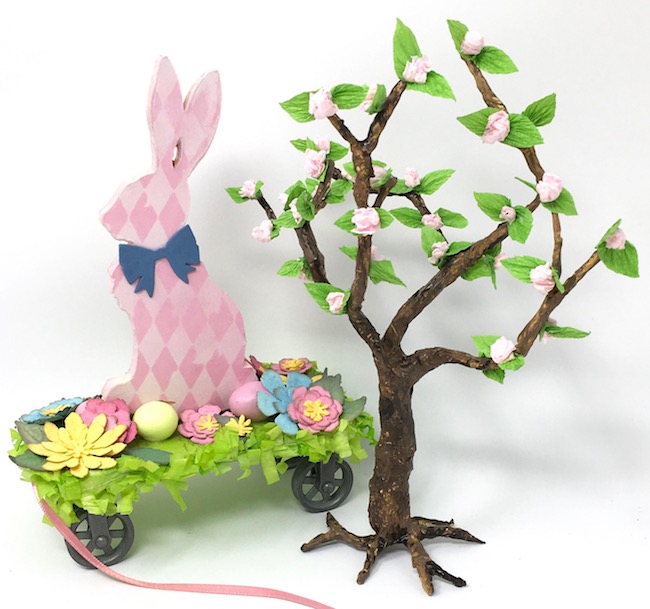
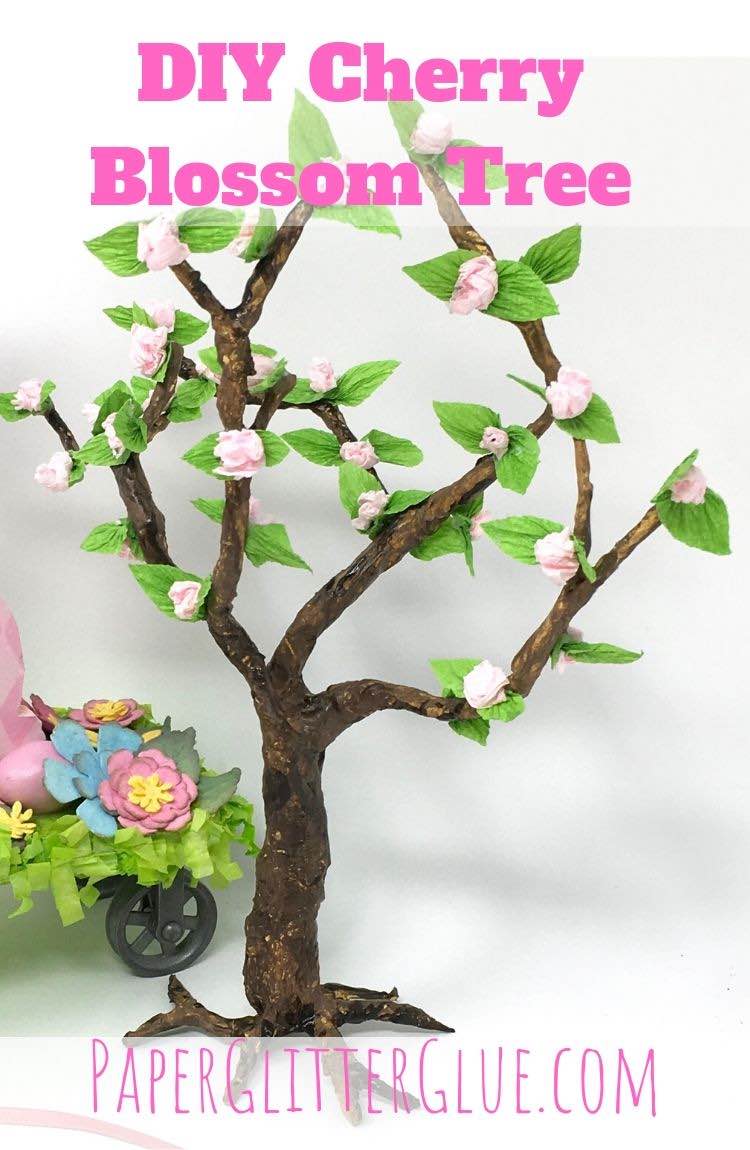
Spring flowering paper tree with the Paper Mache Easter Egg Diorama and the Pull Toy Bunny
This post contains some affiliate links for your convenience. That means if you make a purchase after clicking an affiliate link, I will earn a small commission at no cost to you. Click here to read my full disclosure policy.
Materials to make the Easy DIY Cherry Blossom Flowering Tree
- Floral wire
- Wire Cutters
- Newspaper or brown packing paper
- Collage medium
- Gesso
- Paint - shades of yellow and brown:
- Crepe paper

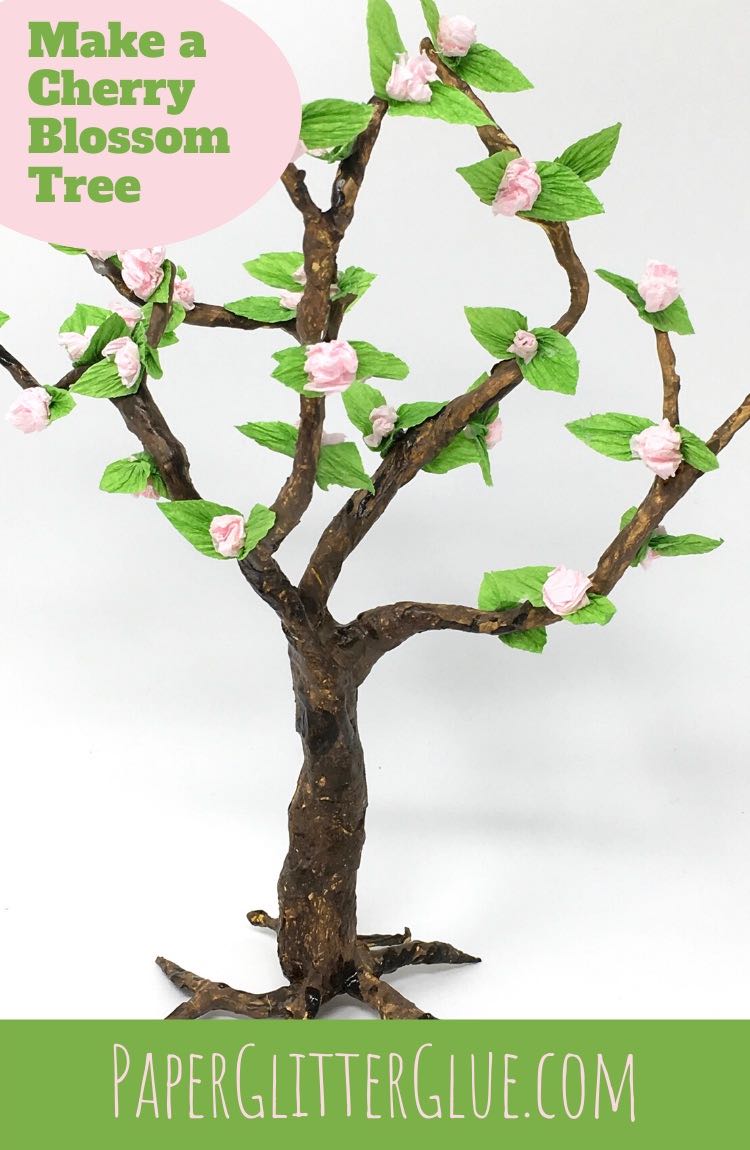
Cherry Blossom Flowering Tree with the Miniature Irish Stone Cottage
Steps to make the Easy DIY Spring Blossom Tree:
- Make the Spring Flowering Tree
- Paint your Spring Twisted Tree
- How to make the Cherry Blossoms
- Glue your Blossoms on your little twisted tree
Make the Spring Flowering Tree
First make the Spring tree using the instructions in the Twisted Tree Tutorial.
Briefly, I'll go over the basic instructions here just to emphasize the main steps, but the Twisted Tree Tutorial has much more detail.
Cut the wire to size
So you need to cut your floral wire long enough to make the roots and the branches. Most of my trees are about 7 inches long with the trunk about 3-4 inches tall. That means you add 1-2 inches for the branches and roots.
The photo below shows the height of the Spring Blossom tree.
Twist several strands of wire together to make the branches and roots.
Vary the length of the branches so your tree will look more realistic.
Tear Strips of Paper to wrap around the wire
For the twisted trees I like to use brown packing paper that I save from packages I receive. Newspaper or tissue will work as well.
Use collage medium as the glue to secure the twisted paper around the wire
I like to use collage medium because it's in a little jar and is so easy to smear on the paper. But you can use plain white glue if you want.
Twist strands of paper-wrapped wire together
Now here is how you build the structure of the tree itself - by wrapping the paper-wrapped wire sections together.
If needed, add more branches or more thickness on the trunk
Sometimes I realize that I didn't make enough branches or that the trunk isn't thick enough, so I add extra paper-covered wires wherever needed.
Trim any exposed wire
On the Cherry Blossom Tree it's not as necessary to trim any exposed wire ends because you can just glue blossoms on the ends of the branches. Still I like to trim them just so the branches won't poke somebody.
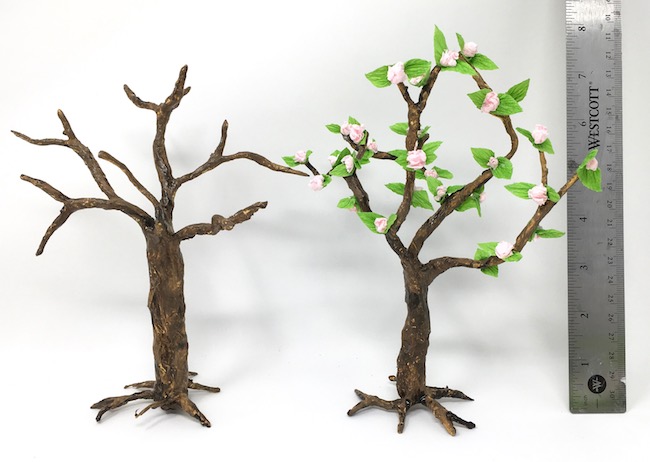
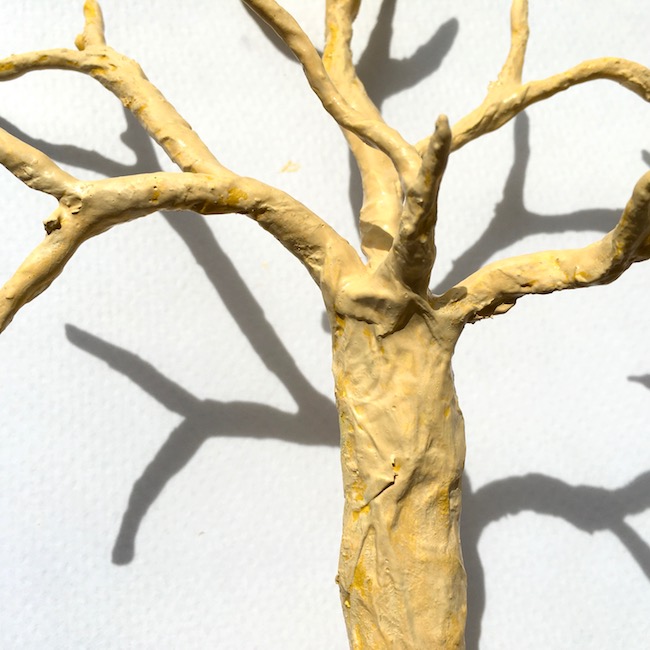
Paint the Spring Blossom Tree
It's important to paint the Spring Tree so that it looks like a growing tree unlike the creepy, dead-looking trees I use on my Halloween houses.
Here's how to do it.
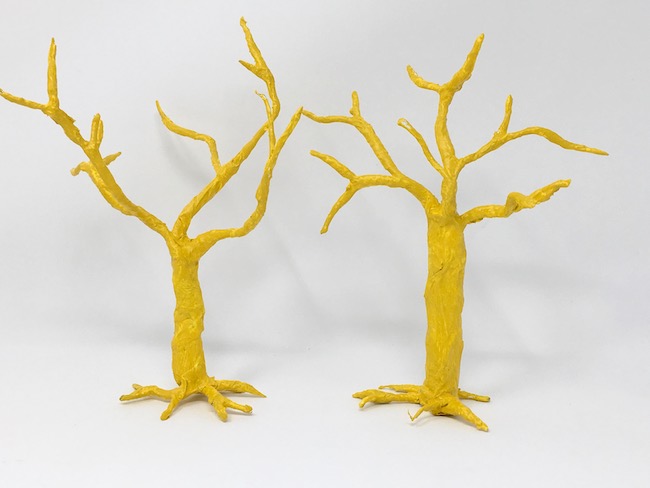
First here is the gesso primer layer.

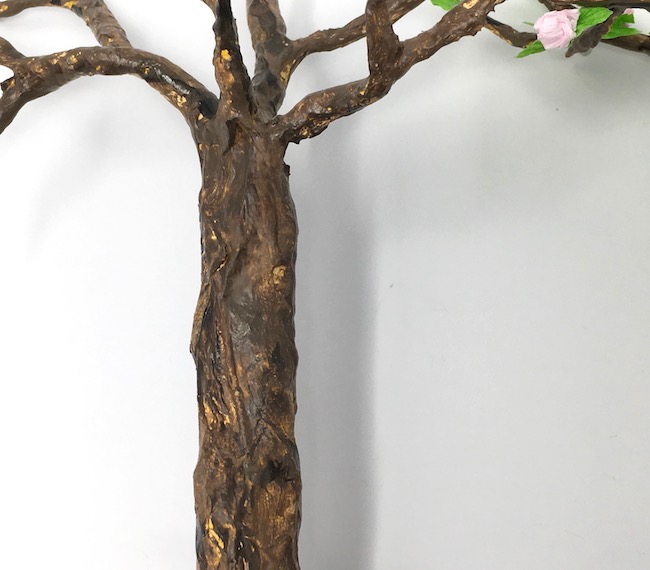
If you look at tree bark closely, you notice that there is a lot of dimension, depth, and color variation in the bark. To mimic that color variation, I layer the paint starting with lighter colors gradually moving to darker ones just like I do when I paint a stone texture.
You can see the gradual build-up of color in the photos below.
Make the Cherry Blossoms to decorate your Spring Tree
Now that you have your tree done, make the cherry blossoms. You can see how I make the leaves in the photos and the video.
What are your Material options for the blossoms on your little tree?
You have some material choices for the cherry blossoms. One option is to use tissue paper which works, but it is a little more difficult to use because it tears easily.
For the second option you can use the crepe paper streamers you buy at a paper store or dollar store. This paper is easier to work with than tissue paper and is still very inexpensive. But it is also a bit fragile.
What is the best option? It's a higher quality crepe paper that has more weight and body to it. Since this crepe paper twists beautifully and doesn't tear as readily, it is much easier to work with. I ordered it online since I didn't have a local store to purchase from.

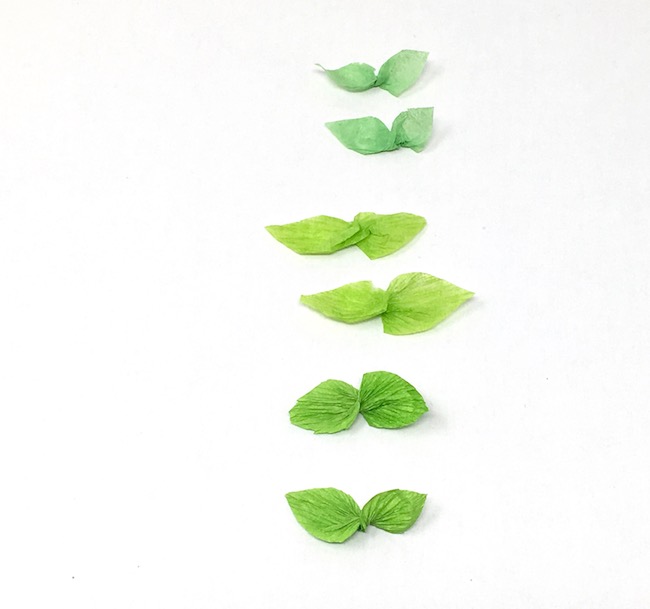
See how much nicer this crepe paper twists. I love the way the wrinkles on the paper look like veins on a leaf.
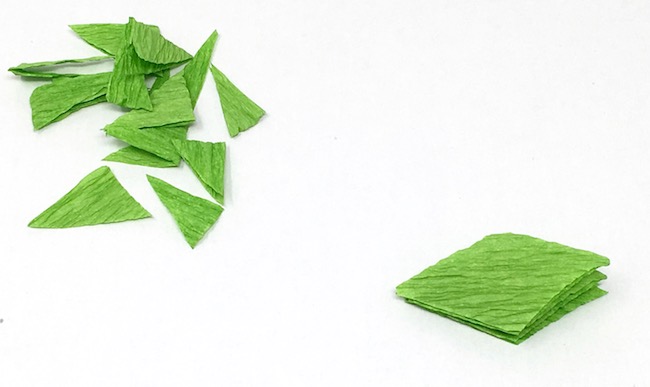
Now cut a strip of green crepe paper to make the leaves
I cut a long strip of green crepe paper to make the leaves. Cut the paper along the grain of the wrinkly part of the crepe paper. The leaves look better that way.

Fold the green crepe paper strip back and forth about 1.5 inches long. That will be the part you cut to make the leaves.
Next cut the folded crepe paper into a diamond shape
What's nice here is that you don't have to worry about cutting individual leaves, just cut the corners off your folded rectangle for the leaves.
Here's the magic part of the making the leaves for your cherry blossoms
Just twist your crepe paper in the middle and now you have two leaves. Because of the twist, it makes an oval shape like a regular leaf. And the wrinkles in the crepe paper mimic the veins on the leaves.
Sometimes the leaves tear a little bit, but don't worry about it. When you glue your blossoms on the leaves or onto the tree you can cover up that torn part.
Now to make the cherry blossoms
I experimented a little bit here. For this step I found the easiest way to make the blossoms for our springtime paper tree is to just cut a small rectangle of crepe paper and just roll it into a ball. It makes a very convincing little blossom with no stressful fussy cutting or folding.
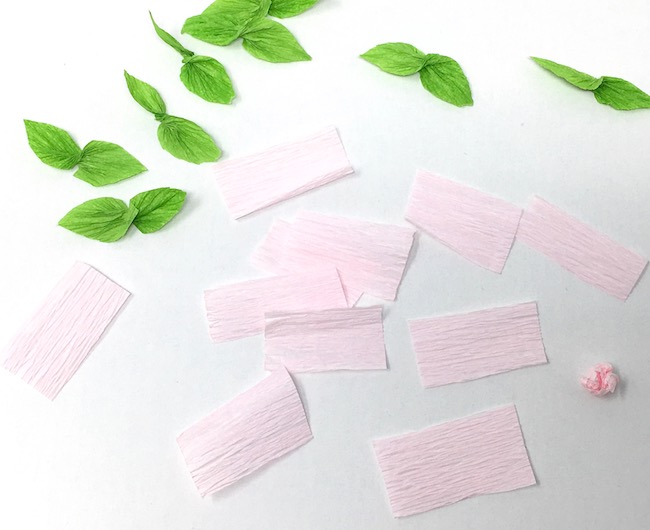
Finally glue the cherry blossom to the center of the leaves
Plop down a blob of glue in the center of the pair of leaves and place the blossom in the glue. That's really all there is to it. Now you can be as picky as you want about tucking in edges of the paper, but I don't worry it. After all this is still a twisted tree - not some precise work of art.
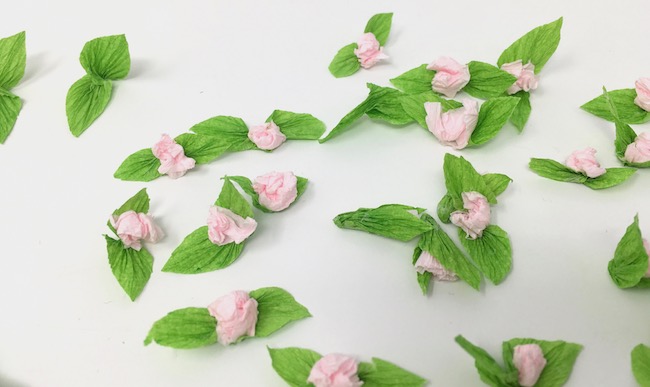
And just glue your blossoms on your tree
This is the easiest step of all. Just glue your blossoms wherever you think they are needed on your little Springtime twisted tree. For this step you can totally cover the tree with a burst of blooms or just add a few blossoms. Now it's all up to you.
I just squeeze some glue on the branch where I want the blossom to go and place the spring blossom there. Sometimes they move a little bit, but it's ok.
So you have finished your Easy DIY Cherry Blossom tree! What to do with it? Use it around one of your little glitter houses, your Easter decor, or even to decorate a cake. You'll find that people just like to look at it.

If you would like to download the Easy DIY Cherry Blossom Tree PDF:
- Access the Paper Glitter Glue Library
- Click the blue link in the middle of the page to get to the password-protected page
- Type in the password to the library on the password-protected page
- Now you are in the actual library part.
- Click on the download you would like. They are listed with the most recent first. You can click on as many as you would like.
If you don't have the password, just subscribe to my newsletter below and you will get the password immediately and in every email.
Don't worry, I hate spam too. I will never share your address or send you any spam.

Thank you for reading. I hope you have a lovely, creative day.
Lucy

look hours
My son really liked this project because he was very surprised by how beautifully we managed to create this tree.
Jennifer
Very creative. Love the way the tree looks with the spring attire 🙂
Sara Emily Barker
Hi Lucy, Looks like I have a lot to catch up on! I love your cherry blossom tree as well as the pull toy and egg diorama. These make wonderful spring/Easter decor, and look like they were so much fun to make. Dinner's ready, so I'll have to check out your other makes another time! Take care, my friend; sending hugs!
Lucy
Thank you so much, Sara. You are always so positive and encouraging. Thank you so much.