
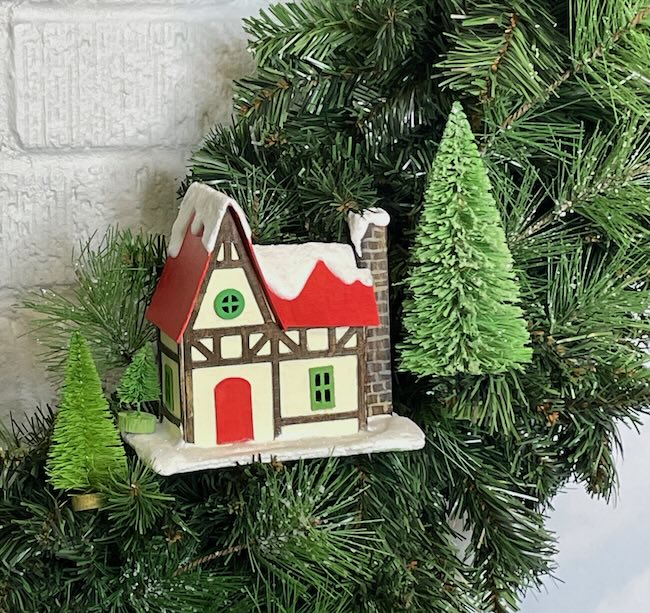
Learn how you can create this tiny, enchanting Alpine House out of either cardstock or cardboard. This charming miniature features wood trim details on the front and a glittery snowy roof that captures the magic of the season. Follow my step-by-step instructions to craft this cozy little house, ideal for tabletop displays, wreaths, or as part of a holiday village scene.
And if you like this house, you will love my Alpine Village Wreath Workshop. Be sure to check it out.
This design is free in my Paper Glitter Glue library - Design No. 173.
This post contains some affiliate links for your convenience. Click here to read my full disclosure policy.
What do you need to make the Alpine Christmas House?
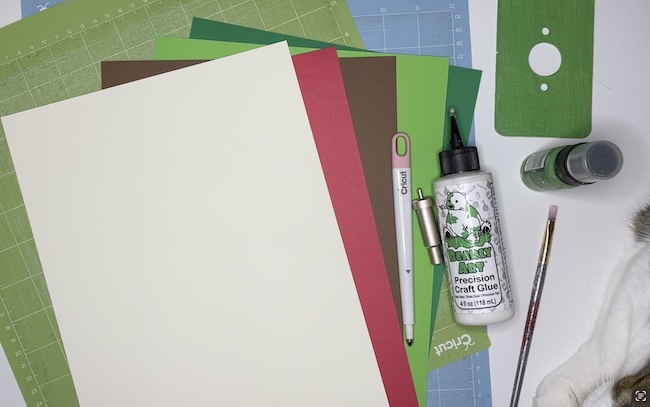
These are the supplies you need:
- Card stock - 110# card stock is best for the structure of the house. Choose 3-4 colors for the house.
- Cardboard - works well for a sturdier house that you can paint. I use 22 point or 30 point cardboard. Amazon calls it medium weight chipboard. I also like cardboard for the base.
- Glue - Bearly Art Glue works well for card stock and for adhering lightweight cardboard together. For structural cardboard, I use Aleene's Quick Dry Tacky Glue.
- Gesso primer and acrylic paint - necessary for painting cardboard if that is the material you chose for the house structure.
- Snow-tex to add snow to the roof and around the house base
- Glitter - if desired
- Bottle Brush trees - optional, but they work very well with this little house
- A way to cut out your project - Cricut Joy, Cricut Joy Xtra, Cricut Maker 2 or 3, Cricut Explore Air 2 or 3 will all work well for this project
- Cutting mats - Standard grip works well
- Fine Point Blade
- Scoring Stylus or Scoring Wheel - I like the scoring stylus best.

Outline of Steps to Make the Alpine Christmas House
- Download the pattern from the Paper Glitter Glue library - Design No. 173
- Cut out your pattern pieces. Choose the chimney you like - either the rooftop chimney or the side chimney, then choose the appropriate side roof as well.
- Fold along all the score lines.
- Prime and paint, if using cardboard.
- Glue the trim in place.
- After the trim dries, add the windows and the door.
- Fold the main house piece into a rectangle and apply glue to the side tab and adhere to make the house shape.
- Glue the roof tabs to the roof flaps on both sides of the house.
- Adhere the tall gable roof piece to the taller gable.
- Once the glue is dry, glue the side roof in place.
- For the chimney, fold along the score lines and glue the side tab in place.
- Glue the chimney of your choice in place. If you choose the side chimney though, it is easier to glue in place after you have glued the house to the base.
- Make a base out of cardboard or thick card stock.
- Apply glue to the bottom edge of the house. Center the house on the base and apply pressure to adhere the house to the base.
- Decorate as desired - add snow, little trees, and tiny figures.
- Show off your beautiful creation.
See the more detailed instructions below.
Step 1. Download the Pattern for the Alpine Christmas House - Design No. 173
The Alpine Christmas House is Design no. 173 in the Paper Glitter Glue library. For your convenience I've got the design available in two formats - as a printable PDF pattern and the SVG cut file for cutting machines like the Cricut.
To get access to all the Paper Glitter Glue library if you don't have the password, just subscribe to my newsletter and you will get the password right way.
Step 2. Cut out the pieces for the Miniature Christmas House
If you are using a Cricut to cut out your house pieces, here are the main score lines.
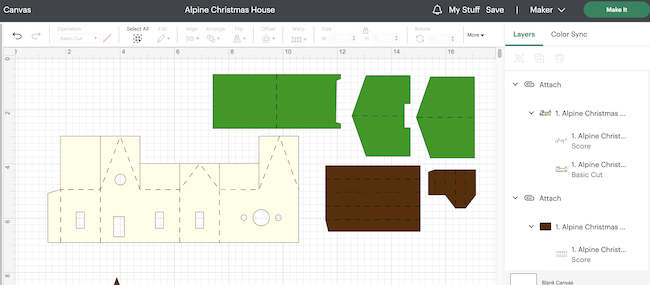
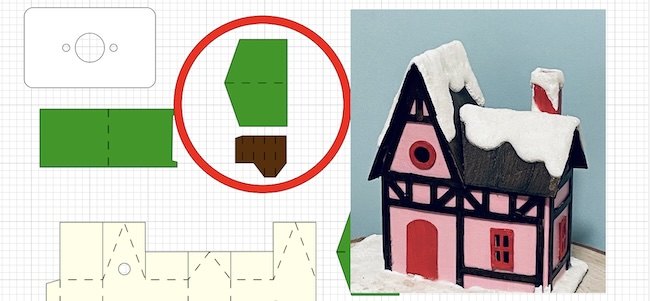
Choose the chimney style you prefer—either the rooftop chimney or the side chimney—and the corresponding roof piece.
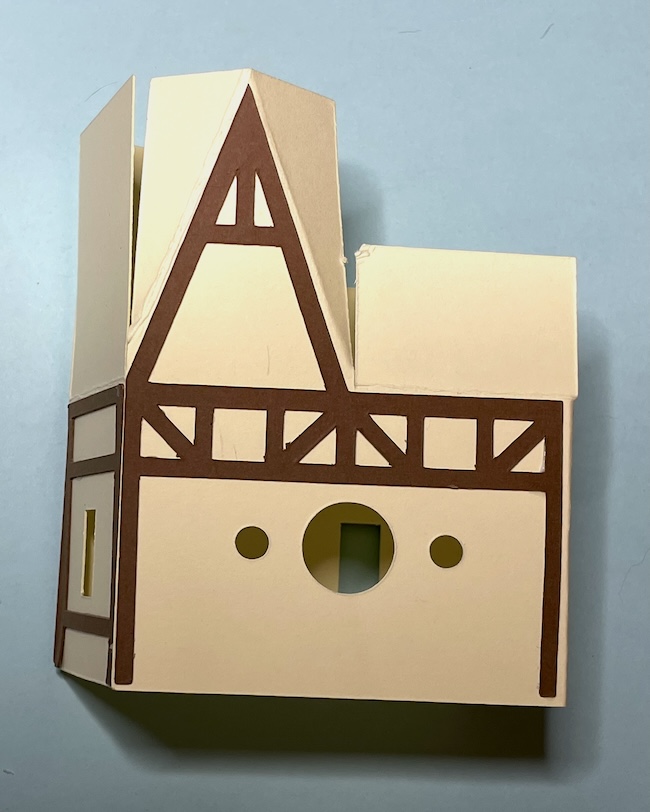
The photo below shows the chimney on top of the roof.
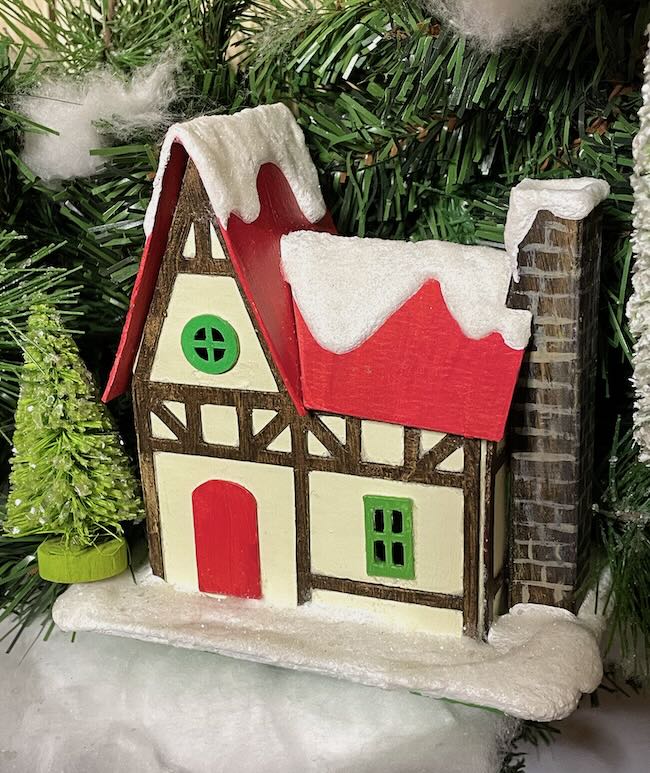
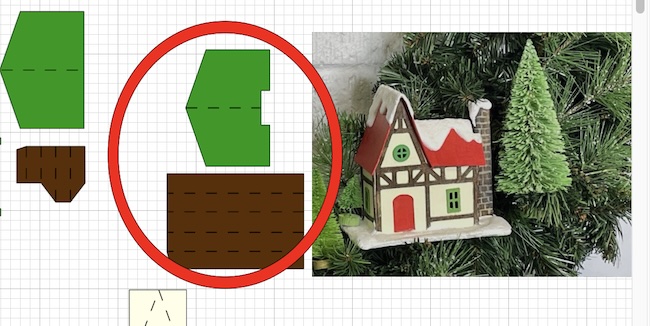
And this photo show the pattern pieces for the side chimney.
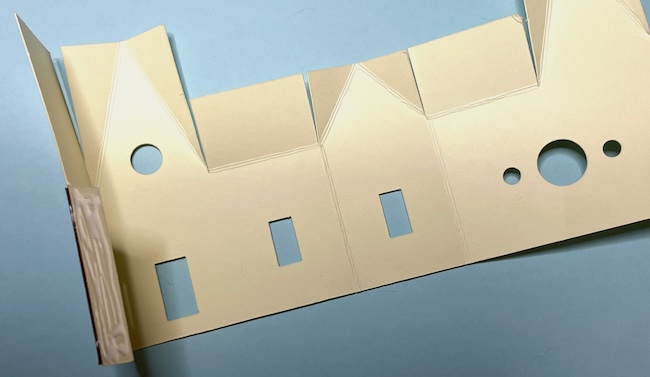
Step 3. Fold along all the score lines
Use a ruler or bone folder for crisp, clean folds. It helps to have everything folded before you are windows or trim.

Step 4. Prime and paint, if using cardboard
Allow the pieces to dry completely before proceeding.
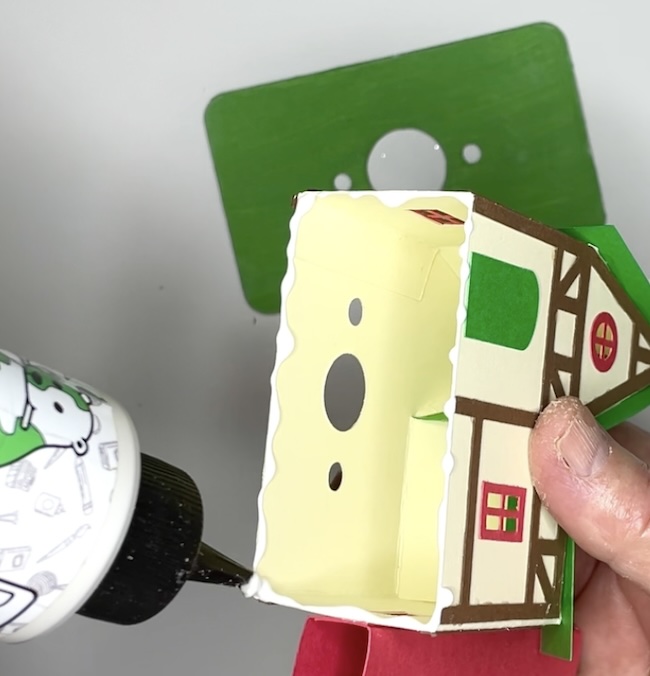
Step 5. Glue the trim in place
Apply glue to the trim pieces and attach them to the front of the house.
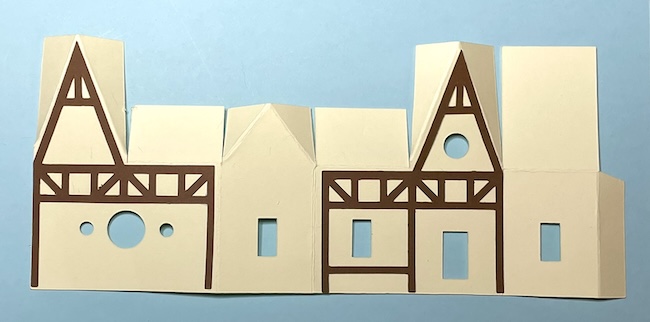
Step 6. After the trim dries, add the windows and the door.
Glue these decorative elements in place with a light touch of glue. I always tend to over glue, but you really don't need much here.
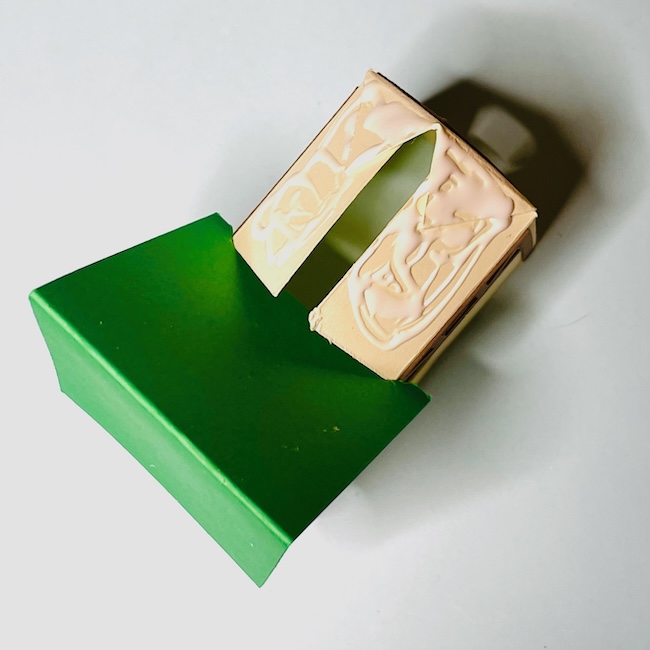
Step 7. Fold the main house piece into a rectangle and glue
Apply glue to the side tab and adhere it to create the rectangular house shape.
Now fold the house into a rectangular shape to glue the house together.
Step 8. Glue the roof tabs to the roof flaps on both sides of the house
Make sure the house maintains square corners as you glue the tabs and flaps together. Sometimes when you glue the shape shifts a bit and the house gets wonky. We don't want wonky for a Christmas house.

Step 9. Adhere the tall gable roof piece to the taller gable
Let the glue dry thoroughly before moving to the next step. Also be sure to insert the roof firmly into the space between the roof flaps.
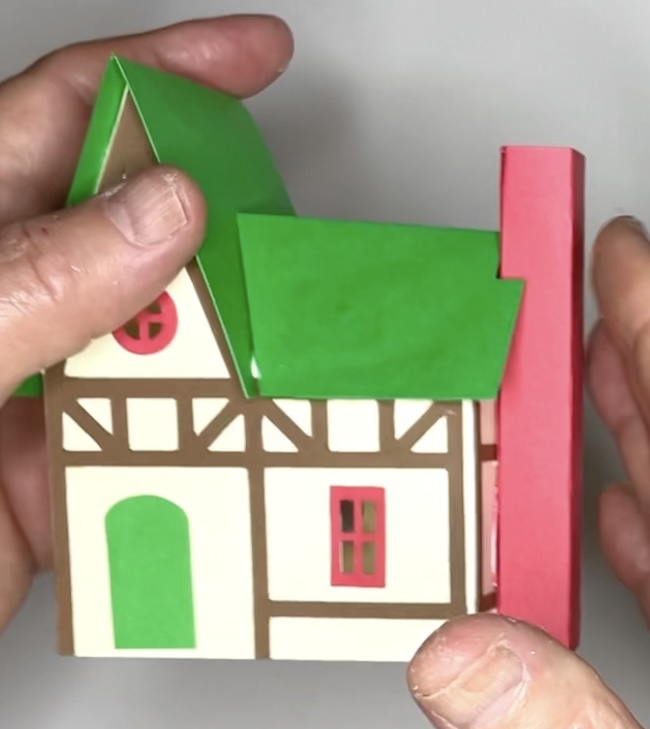
Step 10. Once the glue is dry, glue the side roof in place
It is a bit challenging to get this roof in place because it tends to slide upward on the main gable roof. Be sure to keep the top of the side roof flat when you glue it.
Step 11. For the chimney, fold along the score lines and glue the side tab in place
Both chimneys are made the same way, but gluing along the side tab.
Step 12. Glue the chimney of your choice in place
If you’re using the side chimney, it’s slightly easier to attach it after the house is glued to the base because it keeps the bottom even with the house.
Step 13. Make a base out of cardboard or thick cardstock
I think it makes a difference to make the base out of cardboard because it is so much stronger and protects your little house.
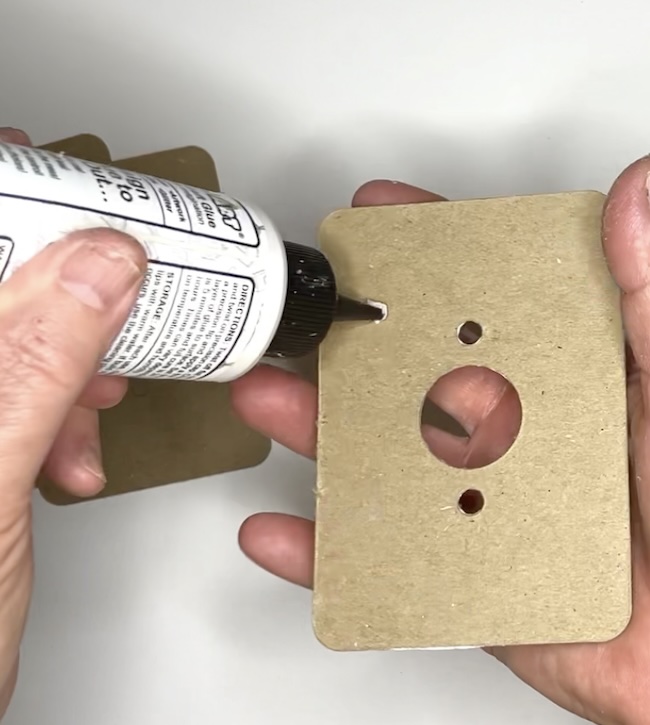
Step 14. Apply glue to the bottom edge of the house to adhere it to the base
Center the house on the base and press down to adhere. And then leave it alone so the glue can dry.
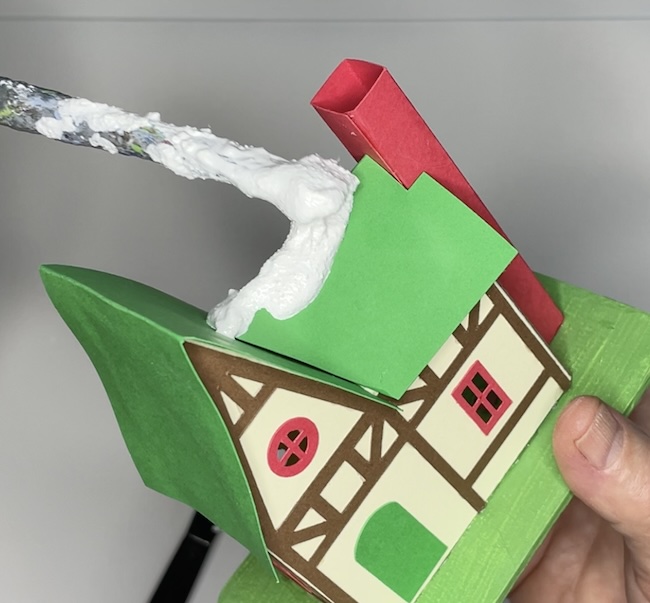
Step 15. Decorate as desired
Add glittery snow to the roof, miniature trees, or tiny figures to complete the Alpine scene.
16. Show off your masterpiece
Display your adorable Alpine Christmas House on a mantel, in a winter village, or as part of your holiday decor.
Have fun creating this festive project, and let your creativity shine!
If you have any questions, just let me know. You can email me - [email protected]
Leave a Reply