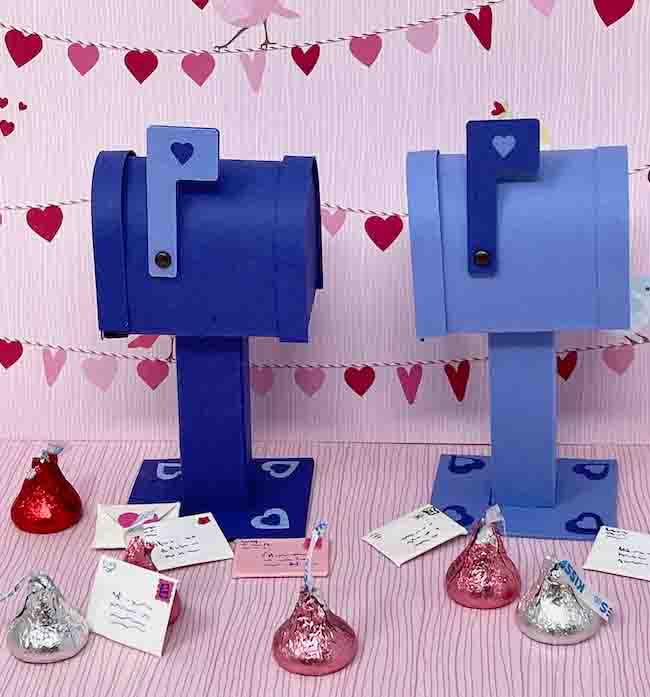
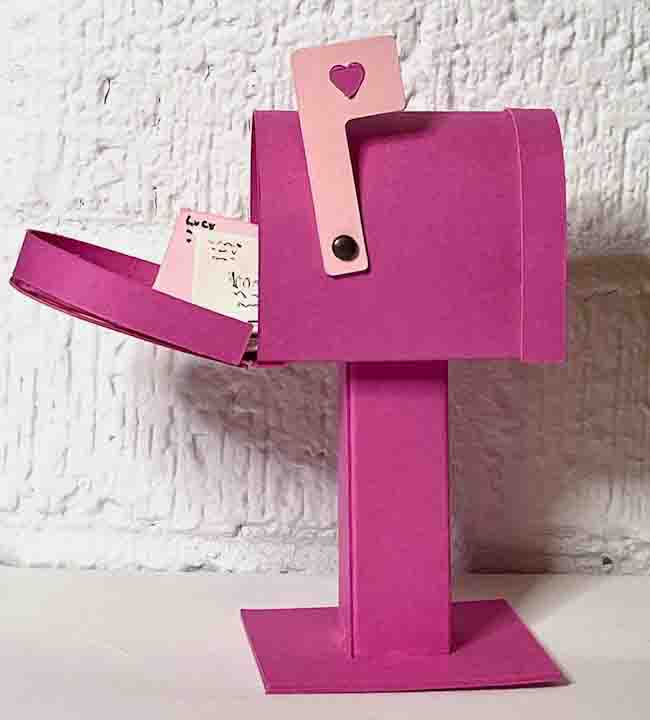
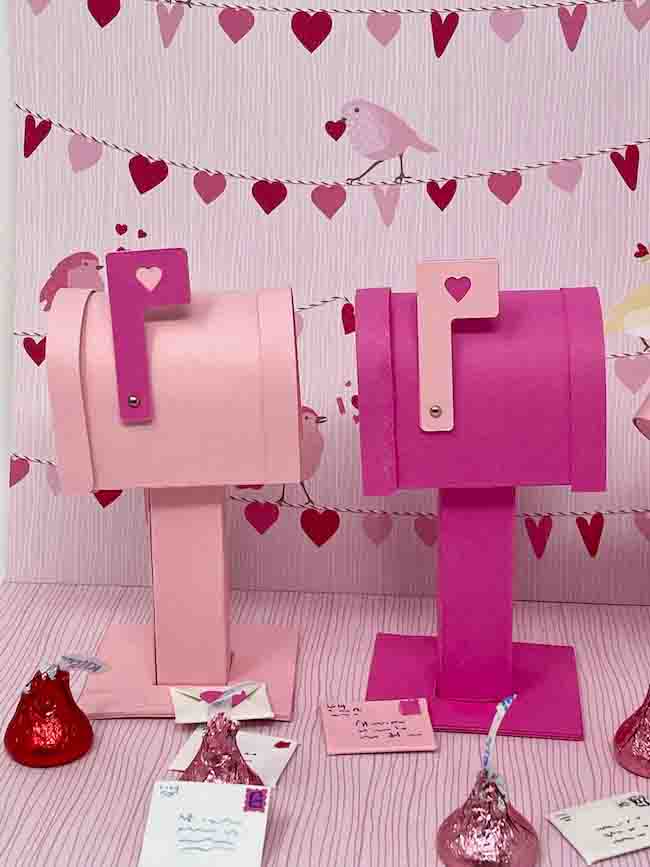
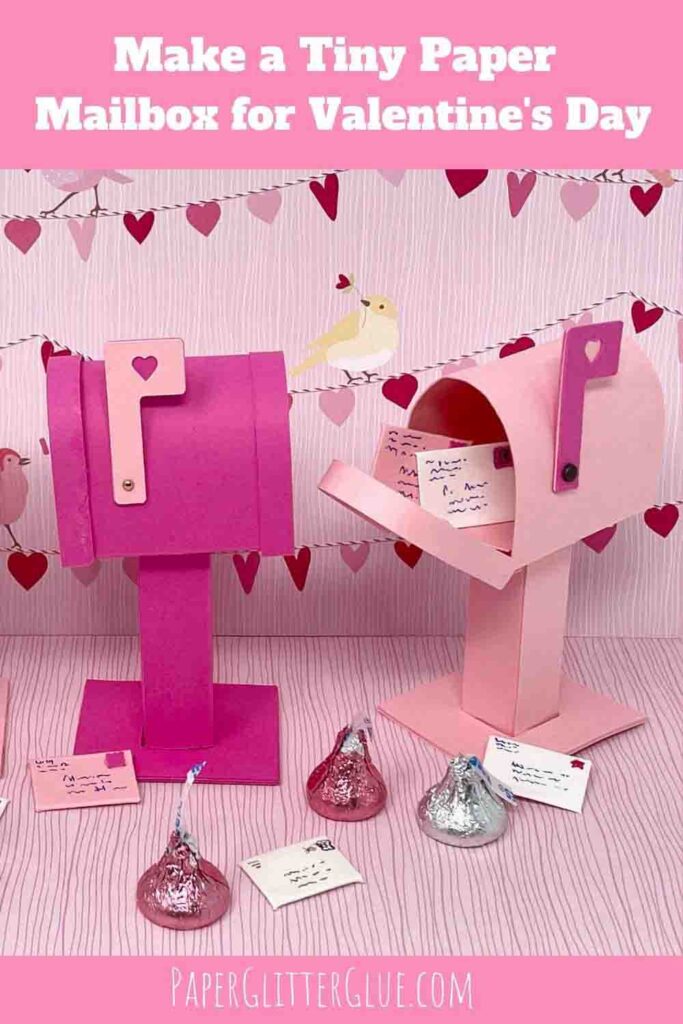
Here's how to make the cutest little Paper Mailbox for Valentine's Day. It's easy and such a fun 3D paper project. Basically all you need for the miniature Valentine's Day mailbox is a couple of sheets of cardstock, some glue, a tiny brad so the flag can move up and down, and the free pattern template from the Paper Glitter Glue library, of course.

One of my crafting buddies showed me a photo of a vintage mailbox made in Japan and suggested that we do it as a community project. You can see all the other little cardboard and paper mailboxes here. They are delightful.
For my project, I decided to modify the design for St. Valentine's Day. It's design no. 133. Just subscribe with the form below.
This post contains some affiliate links for your convenience. Click here to read my full disclosure policy.
What do you need to make the miniature paper mailbox?
Table of Contents
Materials to make the Paper Mailbox
- Card stock - this is the brand I use
- Lightweight PVA glue like Bearly Art Glue
- Tiny brads
- A way to cut your pattern - I used my Cricut Maker, but you can use any of the machines in the Cricut family. Your Silhouette cameo should work as well.

Steps to make the Paper Mailbox - Design No. 133
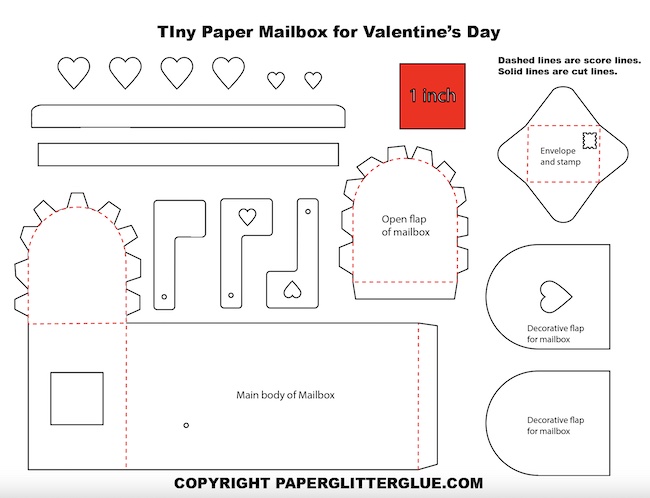
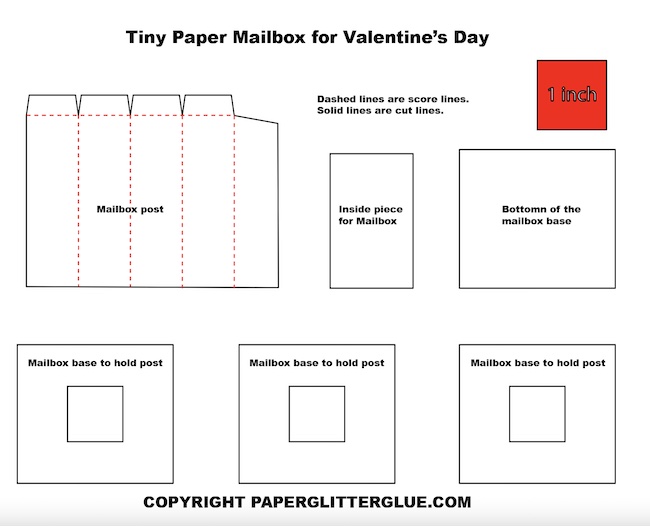
- Download the miniature mailbox pattern from the free Paper Glitter Glue library - Design No. 133
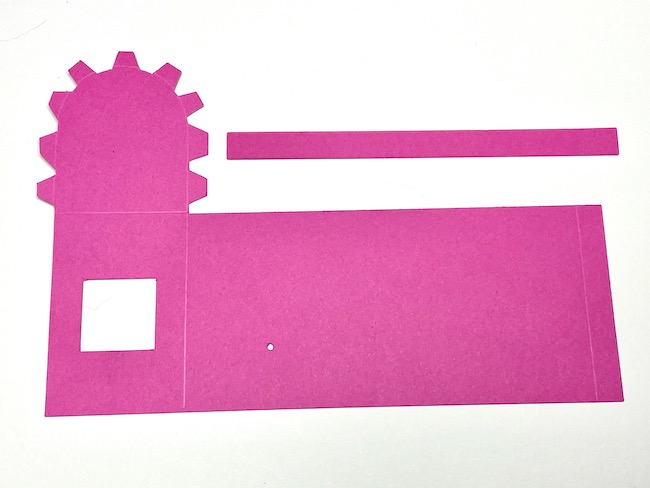
- Cut out the card stock mailbox pieces
- Glue layered pieces together - the flag, the front piece, and the base
- Assemble the main body of the mailbox, the mailbox post, and the front mailbox flap
- Glue the mailbox post inside the main body of the mailbox
- Adhere the mailbox flap to the body of the mailbox
- Finally glue the mailbox post into the base
1. Download the Free Pattern from the Paper Glitter Glue library - Design No. 133
First, download the free pattern for this project from my Paper Glitter Glue library. All you have to do is go to the password page and type in the password. The files are organized chronological so each file is found in the month and year when it was published. That means that you can find the miniature mailbox in the January 2022 section of the library. It's design no. 133 in the library.
But what if you don't have the password to the free library? Well, that's easy. Just subscribe to my newsletter where I keep you up-to-date on lots of fun paper crafts and you will get the password right away.
The mailbox file contains two versions - a printable PDF format and a cut file SVG format. The file folder is stored in zip format which means you have to unzip it to use the patterns. See the PDF patterns below.
Here are the directions from Microsoft on how to upzip a file folder. It's a little easier on a Mac. Just double click on the zipped file to open it.
2. Cut out the card stock pieces
Next, cut out the card stock pieces. This is a pretty simple pattern that you can easily cut by hand, but it is certainly easier using a cutting machine. If you are cutting the mailbox out by hand, I recommend using a paper punch for the hearts like this or this.
If you are using a Cricut (either the Maker or a Cricut Explore Air will work), please read the instructions below.

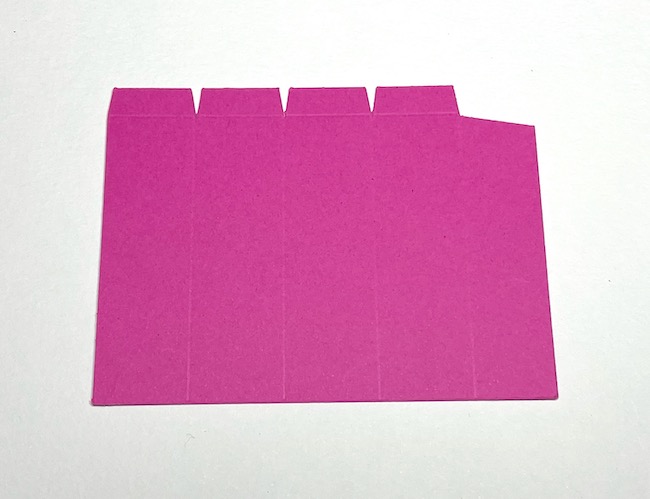
Important Note: Notice that the two skinny strips in the center are two different lengths. The longer one goes around the front flap of the mailbox and the slightly shorter one goes around the back of the mailbox.
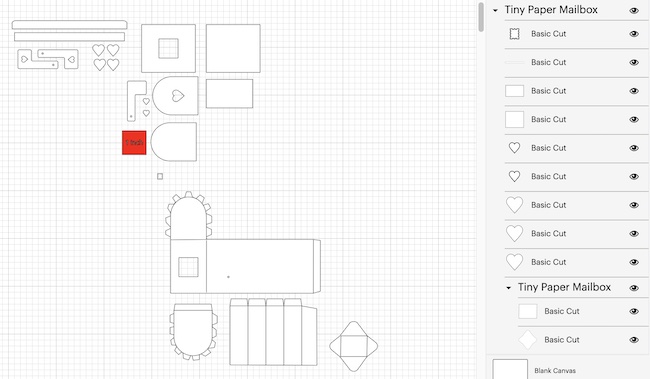
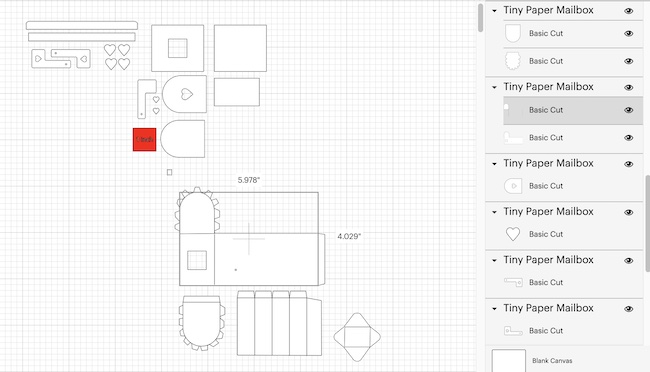
Upload the pattern to Cricut Design Space
First step, upload the pattern to Cricut Design Space and ungroup the design. Below see all the pieces within Cricut Design Space.
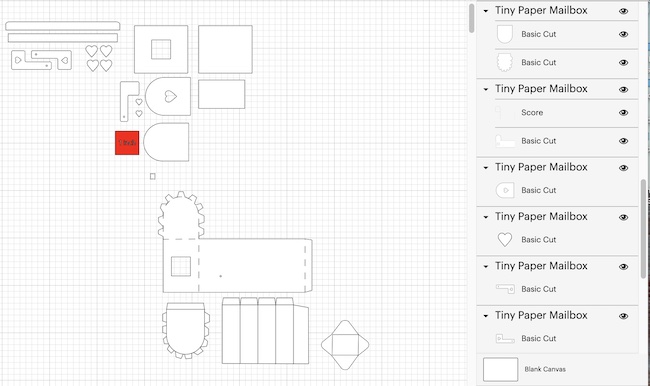
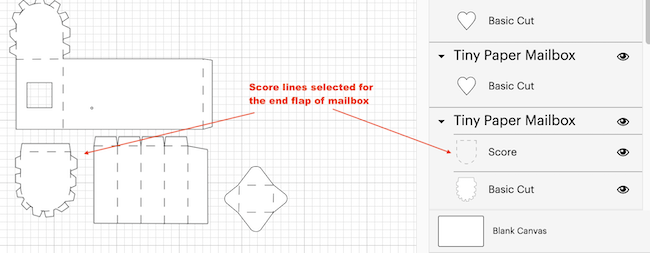
Next, designate the score lines in the pattern
In this pattern, you need to change the following lines to score lines and attach them to the part they belong to:
- main body of the mailbox
- front flap of the mailbox
- mailbox post
- envelope
Select the score lines for the main body of the mailbox, then go to the operations menu and change to score.
See the dashed lines on the main mailbox piece. Next be sure to attach them to the main piece.
So be sure to use the attach button at the bottom off the layers panel so that Cricut Design Space understands that these score lines belong to main body of the mailbox.
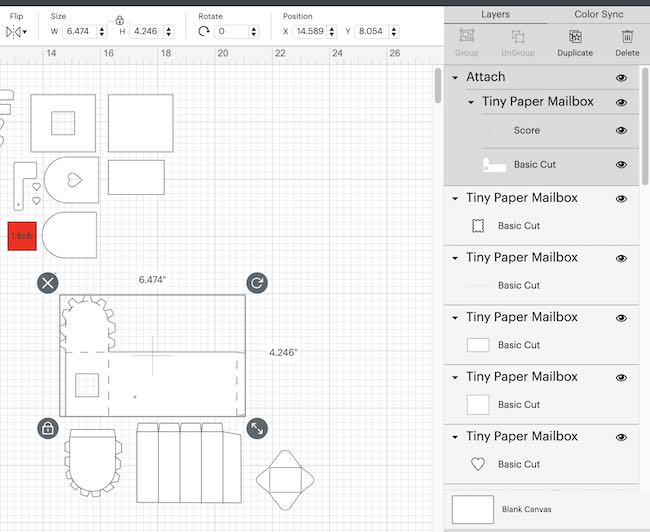
Do the same thing with the front mailbox flap. Select it and change this line to score under the operations menu.
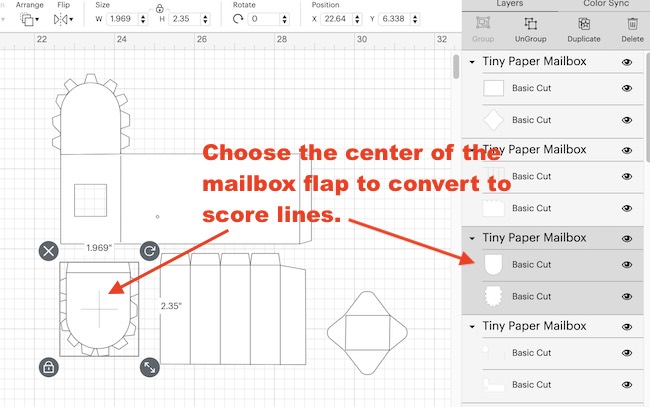
When the lines are converted to score lines, you see the dashed lines.
Next attach these score lines to the mailbox flap.
Do the same thing with the mailbox post and the envelope. The photo above shows all the score lines designed on the pattern.
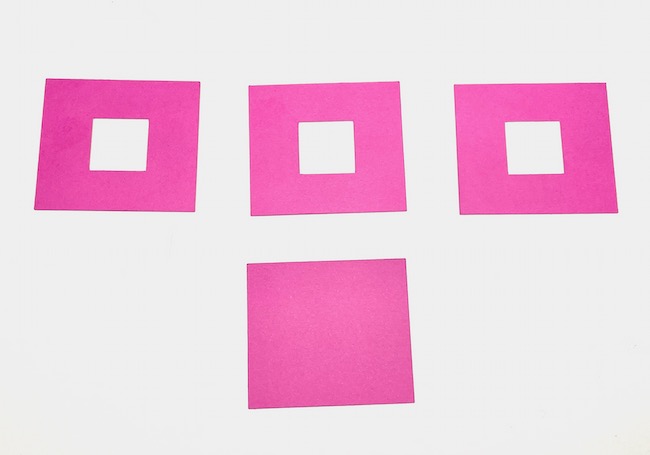
Duplicate the base pieces
To make the base sturdier, I usually cut out 3 base pieces with the cut out portion. When you glue those three together, they make a deeper area to insert the mailbox post.
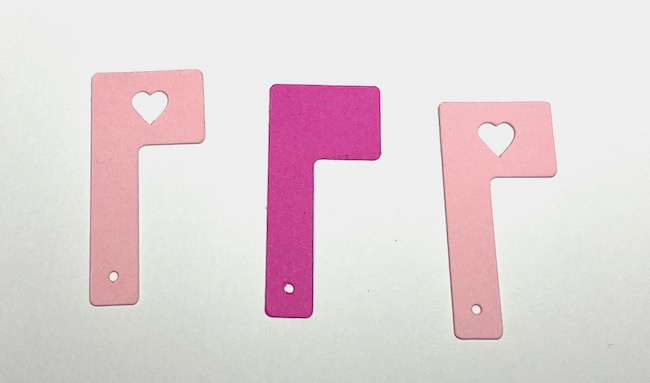
Cut out Contrasting Colors for the Flag and the Mailbox door
I think the easiest thing to do is to cut two mailboxes in contrasting colors and then you can switch the colors to make the hearts show up in the front of the mailbox and flag. That way you make two Valentine paper mailboxes in contrasting colors.
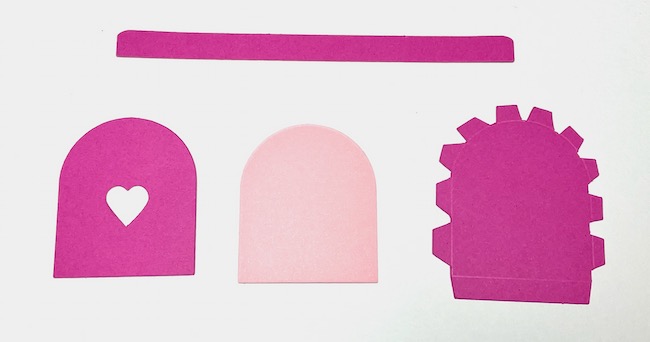
3. Glue the layered pieces together
The layered pieces are the base shown in the section above, the flag, and the front mailbox flap show below.
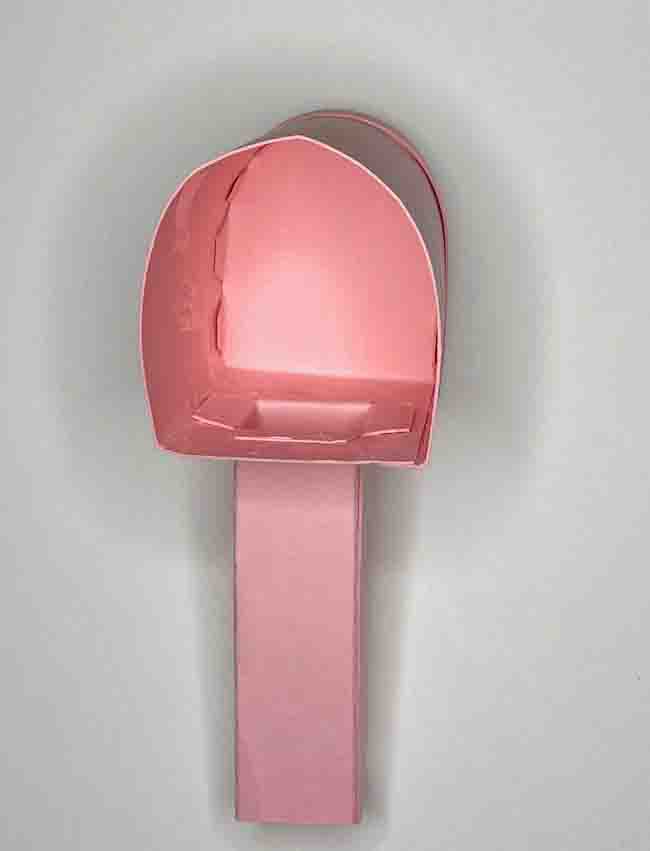
4. Assemble the main body of the mailbox, the mailbox flap, and the mailbox post
First, make the main body of the mailbox
Let's assemble the main body of the mailbox. Fold along the score lines. To make this easier, I use a ruler to fold the straight score lines.
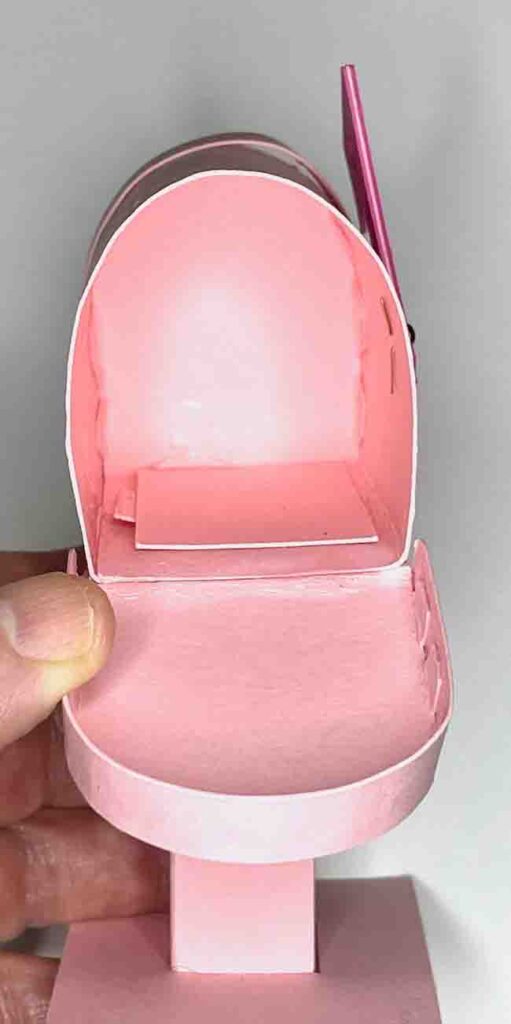
Then fold the little tabs on the rounded portion inward. Also make sure that the hole for the flag is on the side you want to to be. For example, on the piece below, I want the hole for the flag to be on the right side.
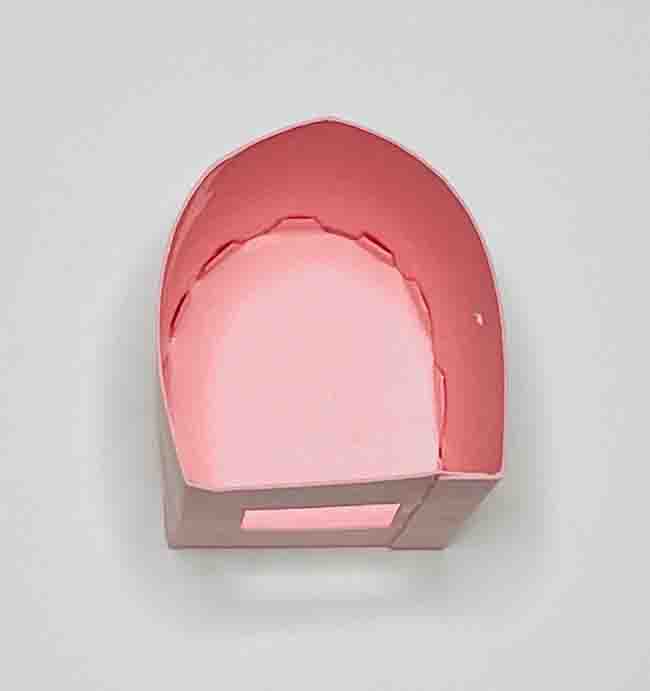
In other words, what you see below shows the INSIDE of the mailbox.
To help make the curve of the mailbox body, gently curve it with your fingers. Then apply glue to the side flap.
See how the flap goes on the outside of the mailbox body. Unfortunately, you can see that I lined it up just a bit crooked.
To glue the back piece of the mailbox, be sure to fold all the tiny flaps inward - towards the inside the mailbox. Also test fit the piece and push it inside to make sure it fits well. Next, move the back flap outward (outside of the mailbox) and apply a bead of glue on the inside back edge.
Now you can push the back flap into the body of the mailbox and the glue will hold. See how the inside looks.
And here is the outside back flap of the mailbox.
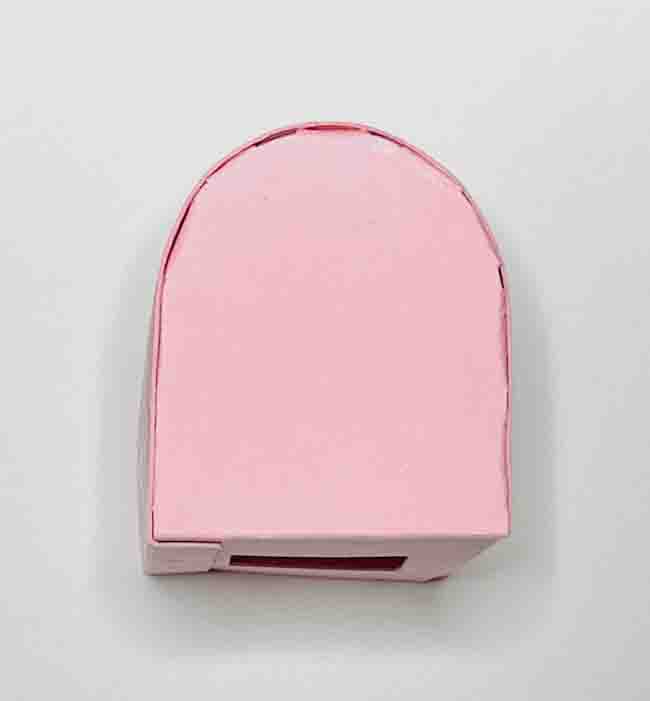
Finally, glue the back support strip around the edge of the mailbox. It looks better if you extend the strip outward slightly when you glue it on. That covers up the glue seam on the back flap when seen from the side.
That completes the main body of the mailbox.
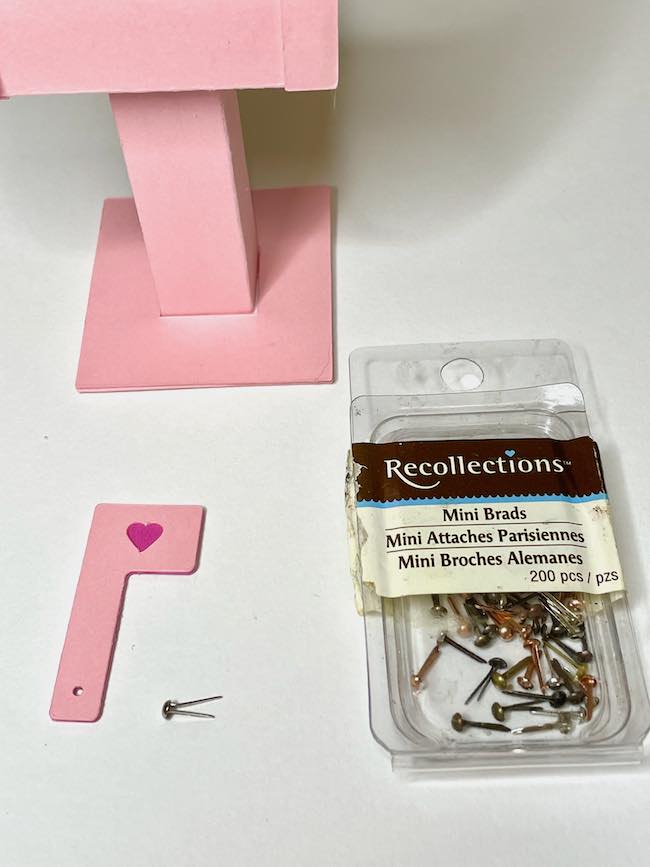
You can insert the tiny brad in the flag and put it on the mailbox now if you want.
Make the post for the Paper Mailbox
Next, fold along the score lines and glue the post together.
See the completed mailbox post below.

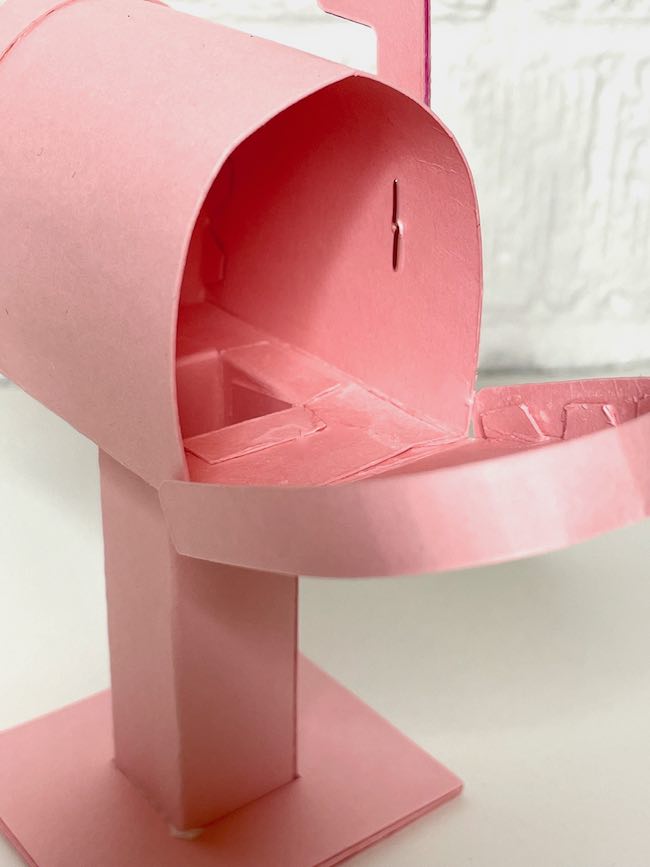
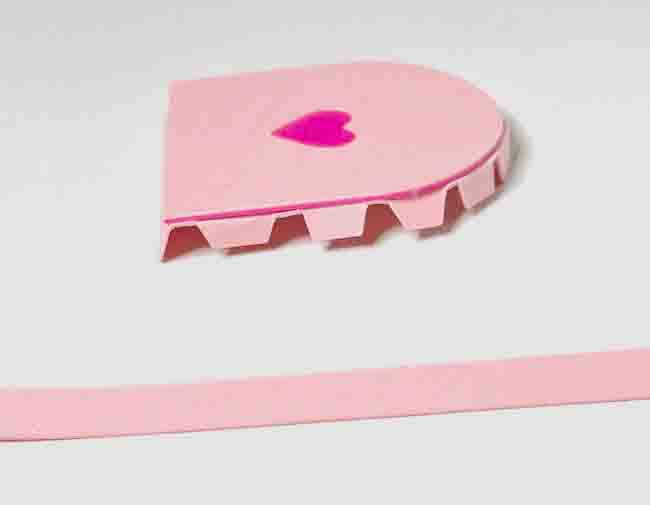
Make the Front Flap for Your Miniature Mailbox
Complete the front flap of the mailbox by gluing the side strip in place.
The side strip for the front flap of the mailbox is slightly longer than the flap for the back flap.
Just like you did with the strip on the back flap, glue it slightly forward to obscure the layers of the front flap.
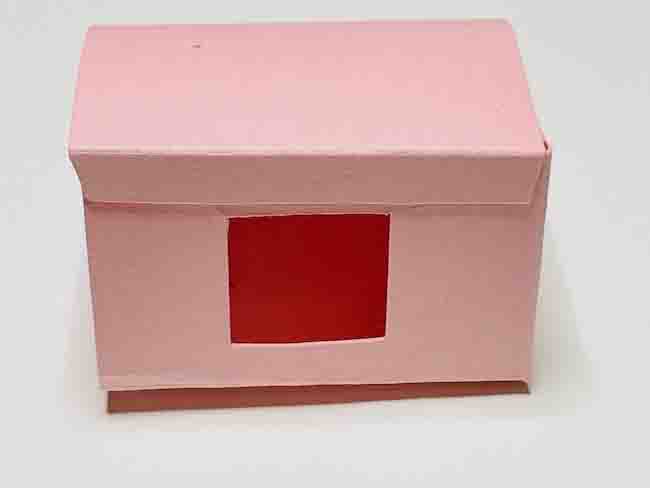
The miniature mailboxes below show what I mean.
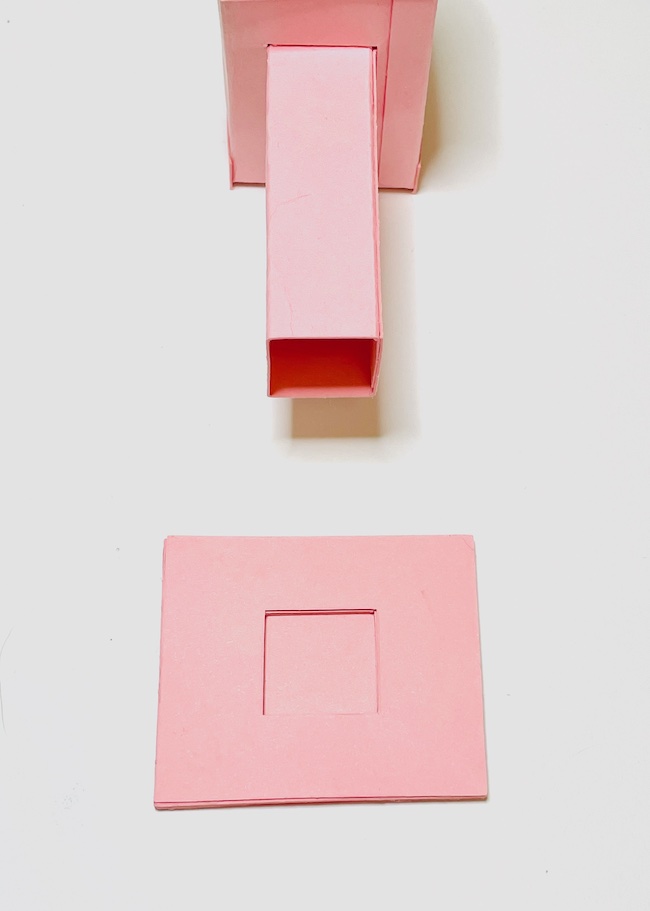
5. Glue the post inside the mailbox body
The flaps of the post go inside the mailbox. So fold them inward and apply glue to the outside of the flaps because these will open up and adhere to the bottom of the mailbox body. It helps if you wait a moment for the glue to get tacky and if you smear it to make a flatter layer. Glue sticks much better that way.
Below you can see the post flaps glued down.
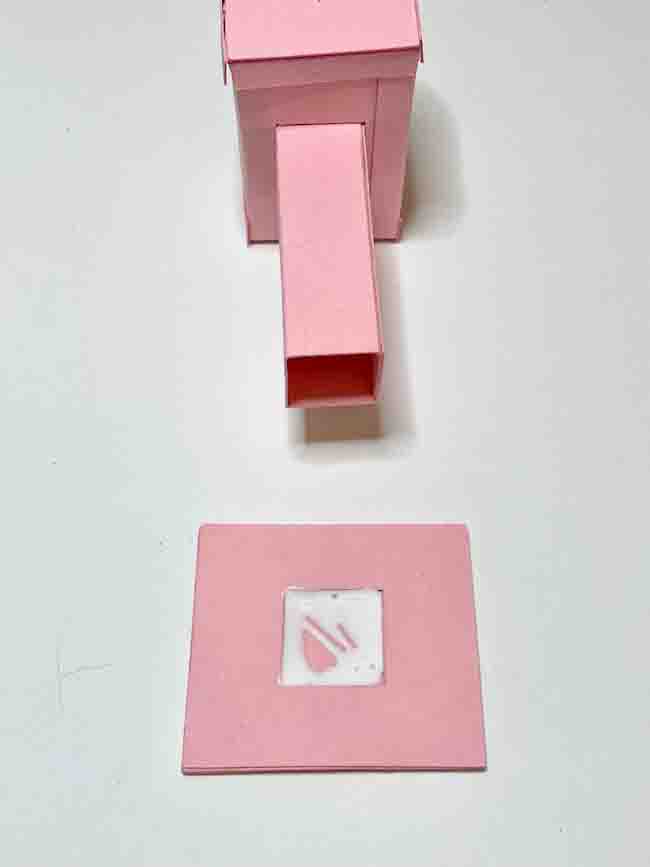
After the post is glued down, glue the rectangle piece down to cover the cutout for the post. If you want to put some candy inside your little mailbox, it helps to cover up the hole in the bottom.
6. Adhere the front flap to the mailbox
Apply glue to the flap of the mailbox and adhere to the mailbox. You can see how the flap fits on the photo above.
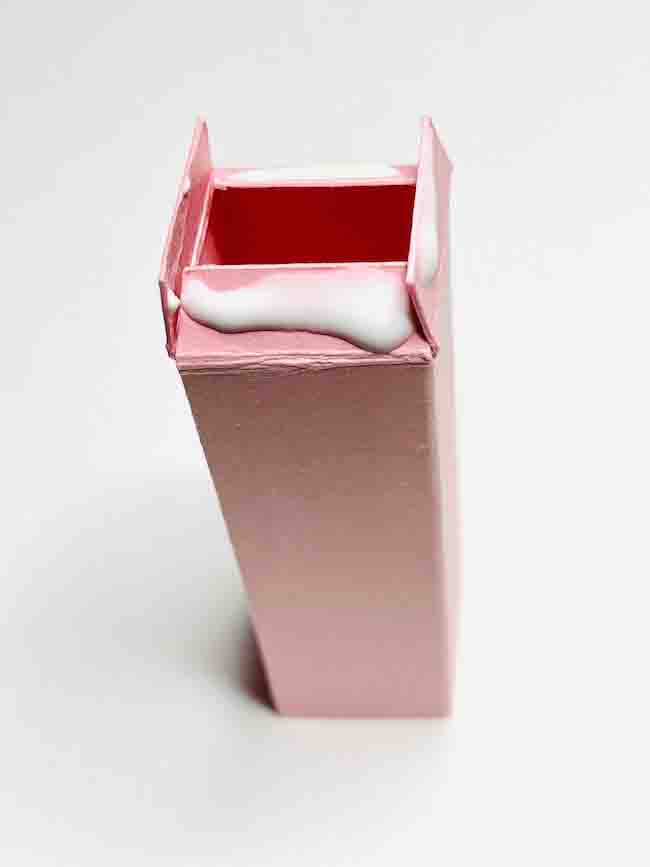
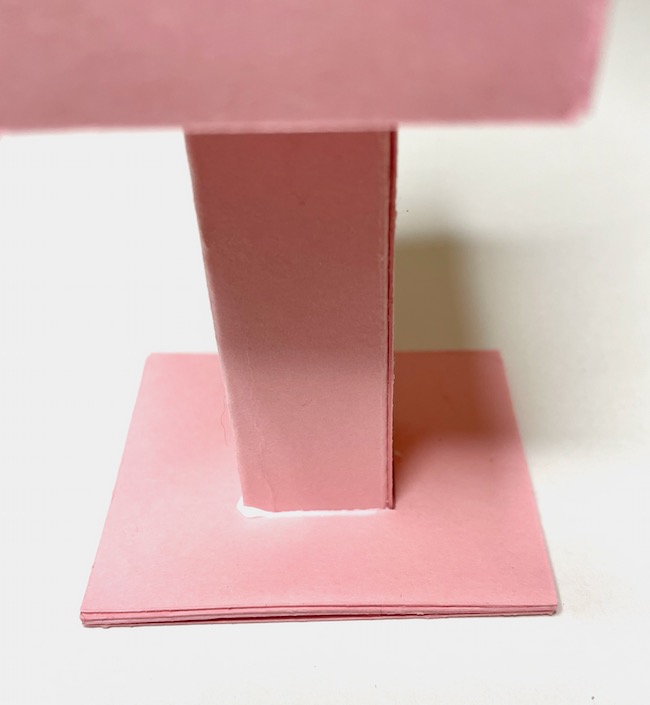
7. Finally, glue the post into the base
Here's the mailbox ready to be inserted in the post.
Apply a thick layer of glue in the recessed center of the base and insert the mailbox post.
And here is how it looks when the post is inserted in the glue and recessed area of the base.
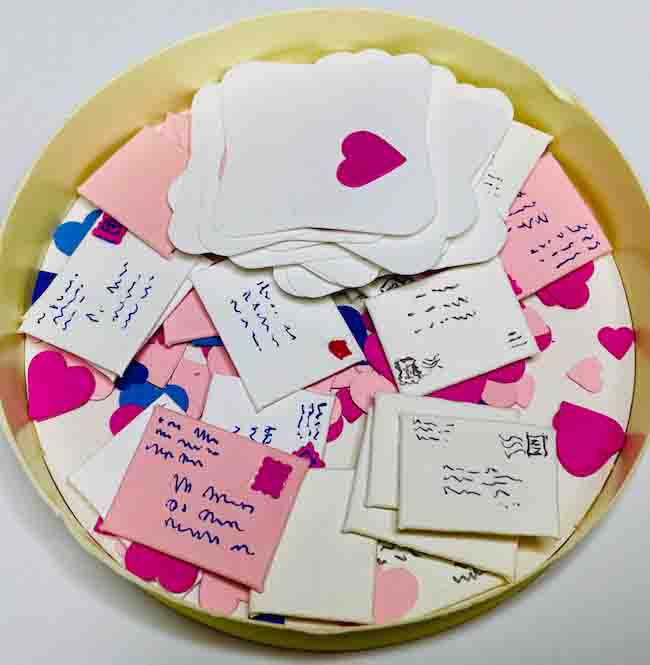
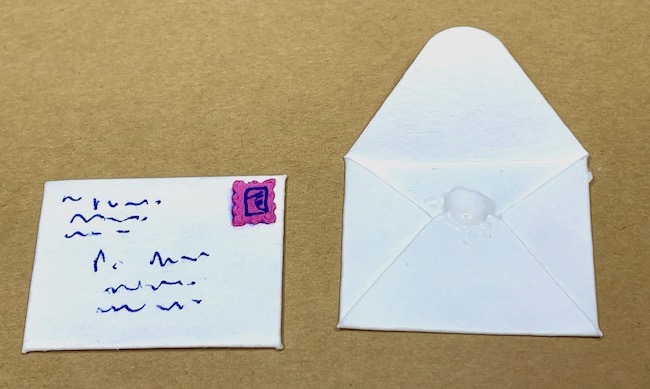
8. Make little envelopes because you have to have mail
What's left to complete the miniature mailbox? Mail! You've got to have mail. So here is how to make the tiny envelopes.
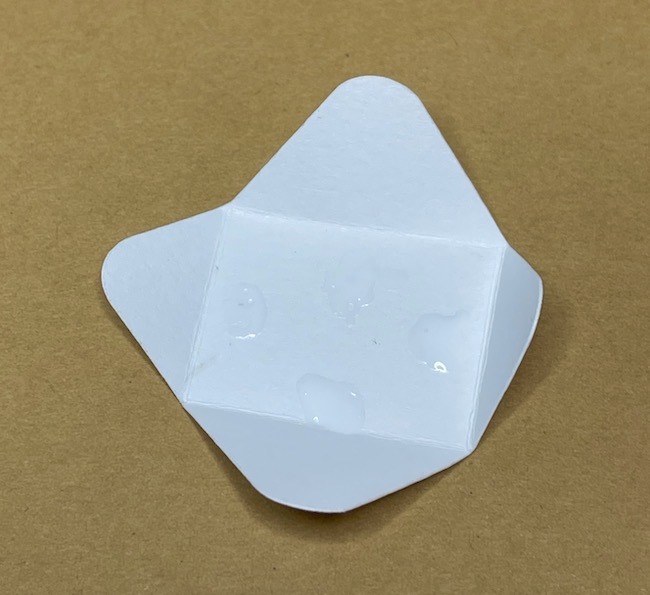
First, fold along the score lines of the envelope and apply 4 dots of glue to hold the flaps down.
Then glue down the side flaps on the envelope.
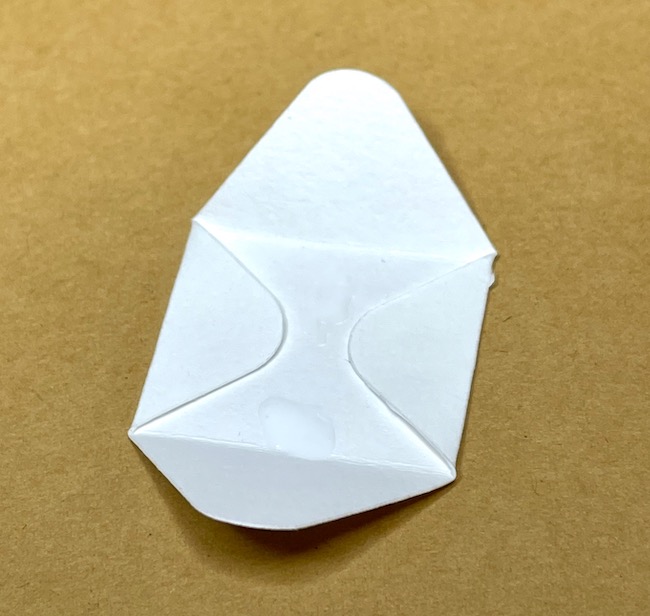
Then glue down the bottom flap followed by the top flap.
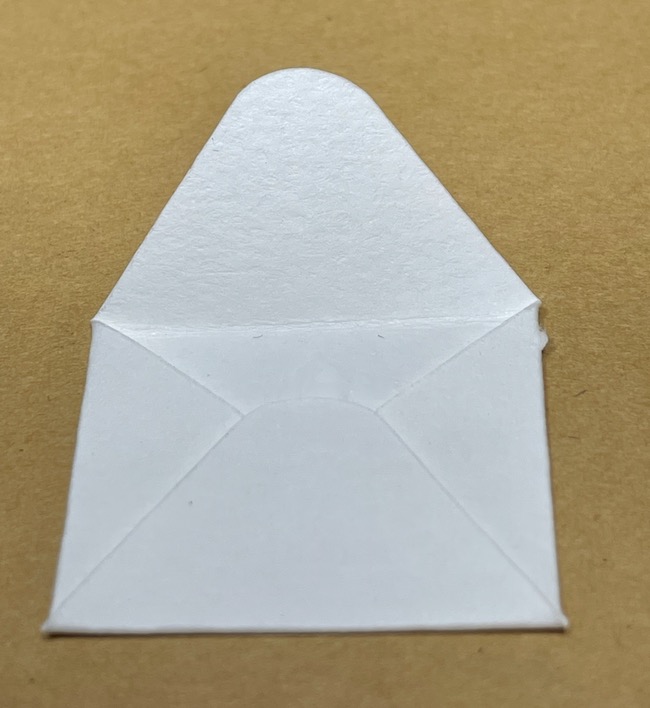
Finally, add stamps and hearts and "addresses" to complete the envelope.
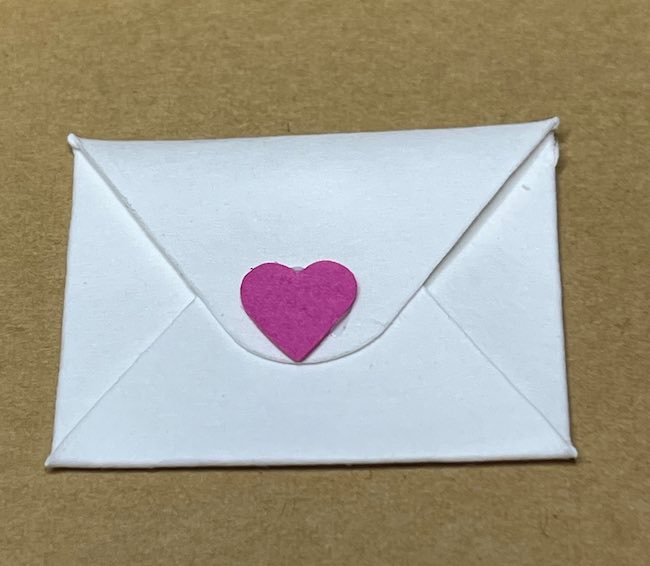
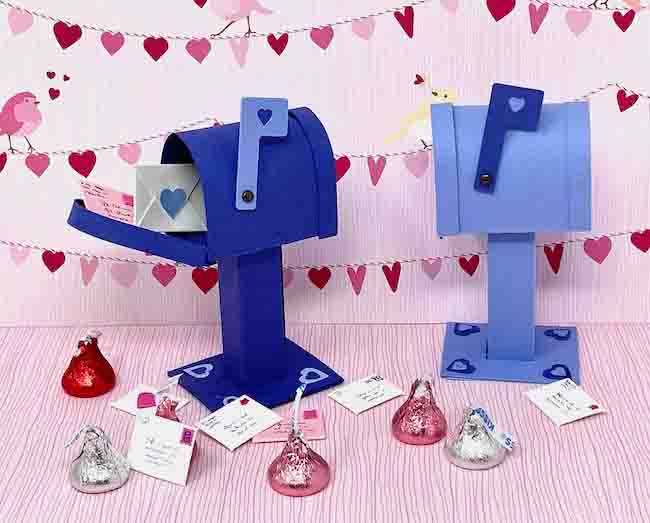
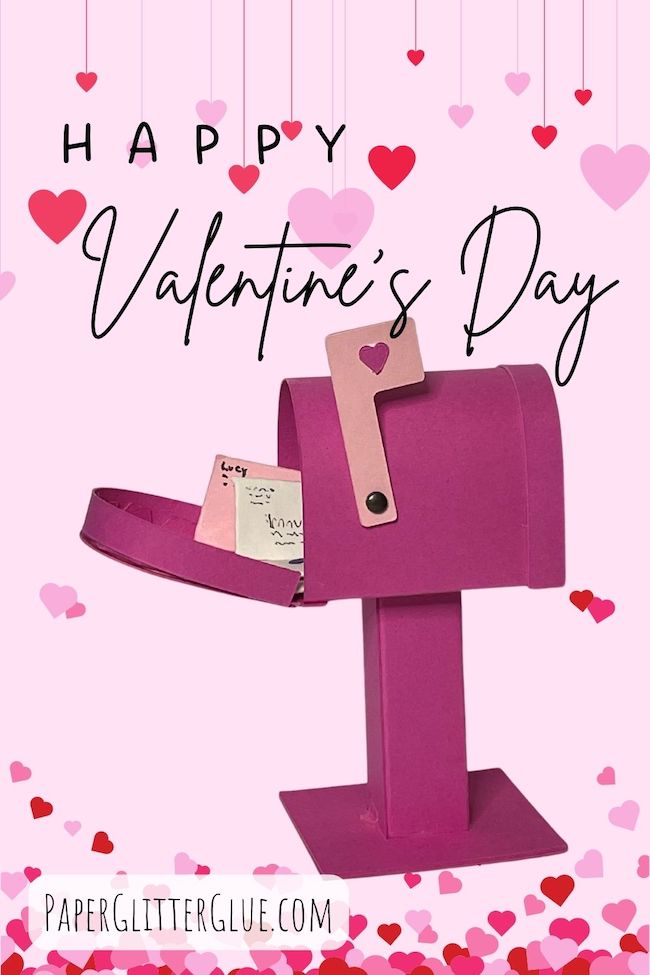
Now put some tiny envelopes in your miniature paper mailbox and you are done. Well, done except for sharing them with your loved ones or your child's teacher or co-workers, etc. etc. The tiny mailbox making and sharing are sure to bring joy this Valentine's Day.
You've got Mail! Sweet Mail for Valentine's Day
I hope you enjoy this St. Valentine's Day craft. It was fun for me to make and design. And thanks to my friends at the Cardboard Christmas forum for coming up with this idea.
Remember that the files are in the January 2022 section of the free Paper Glitter Glue library.
Interested in more St. Valentine's Day crafts?
Here are other projects I've made for Valentine's Day:
Valentine's Day Mini Llama Piñata Candy Box
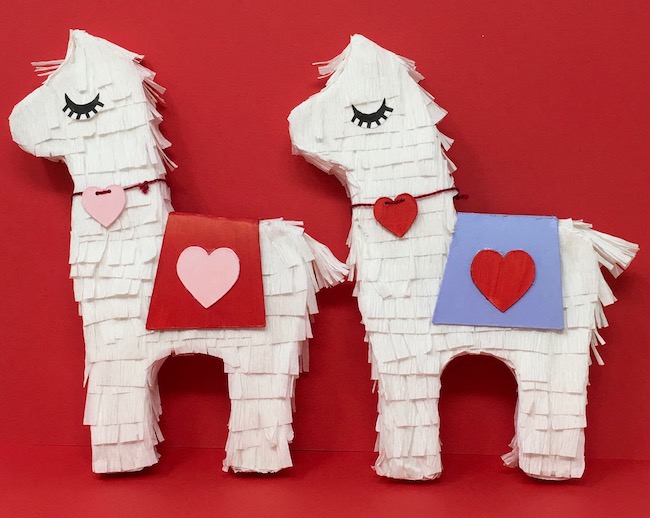
Aren't these mini llamas fun? You can make them too. There is some work involved but they are certainly worth it.
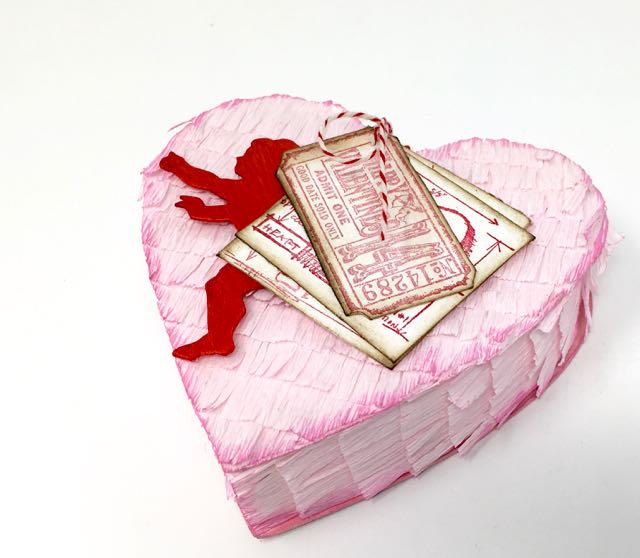
By now I am sure you have realized that I love to make candy boxes of any kind. But I especially love the ones that look like mini piñatas . I just love the fringy texture.
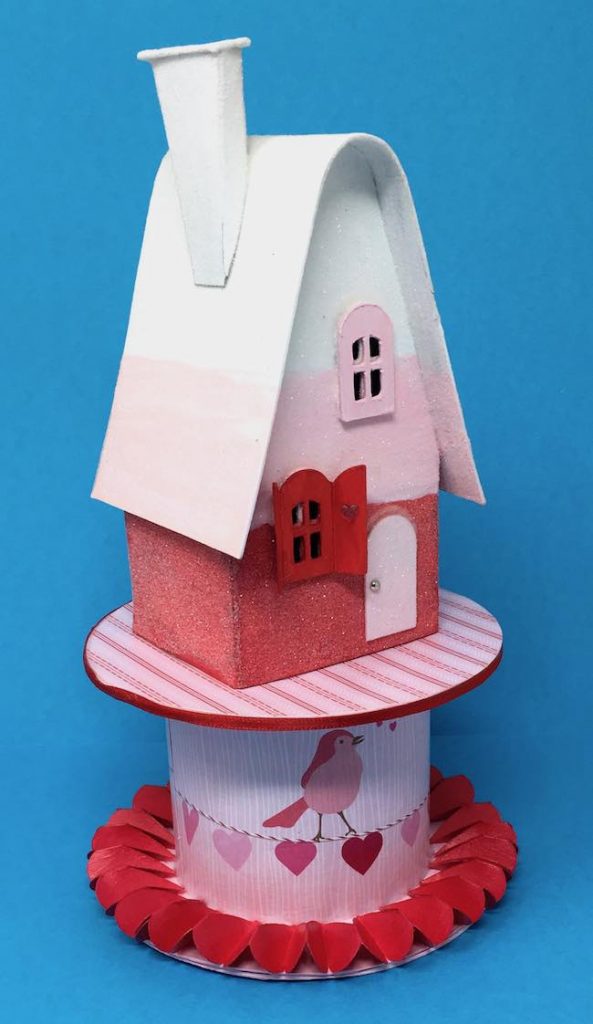
Did you know that there really is such a thing as candy corn for Valentine's Day? Unofficially, it is called "Cupid Corn". I'm not really a fan of the taste, but I do like the concept and the iconic shape.
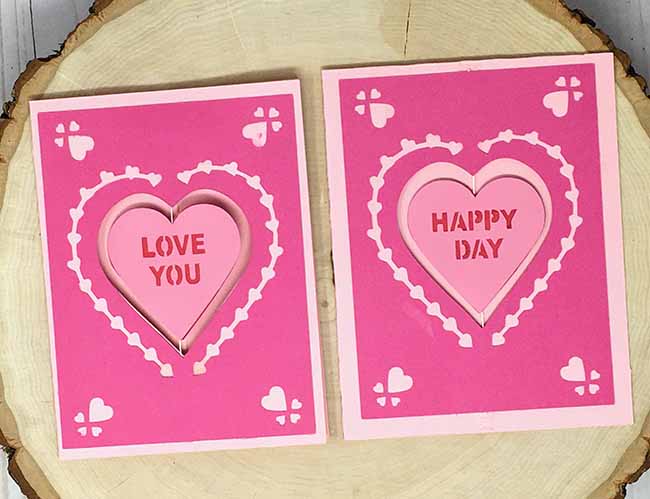
And what about a cute spinner card for St. Valentine's Day? That's another fun paper craft to celebrate the holiday.
Questions or do you need help making the Miniature Paper Mailbox for Valentine's Day?
If you have any questions, feel free to email me at [email protected]. I am happy to help.
Lucy
P.S. Remember to save this to your favorite crafting board on Pinterest.
Sabra
What an adorable tiny mailbox!!
Thank you for sharing your talents with us!
Lucy
Sabra,
I am so glad you like it. I had lots of fun making the little mailbox. And I hope you will too.
Sandra
Is there a trick to getting the door to stay closed? Mine wants to flop open lol
Thank you so much for this pattern! I'll be making a lot of these!!!!!
Lucy
I worked on that because the first one or two that I made did the same thing. I actually changed the pattern to make that less likely. On one of my first prototypes, I made a little latch with a folded piece of cardstock and a brad. I put that piece on the top of the mailbox. It helped hold the front flap in place. I don't have a photo now, but I'll add one to the tutorial in a few days.
Lucy