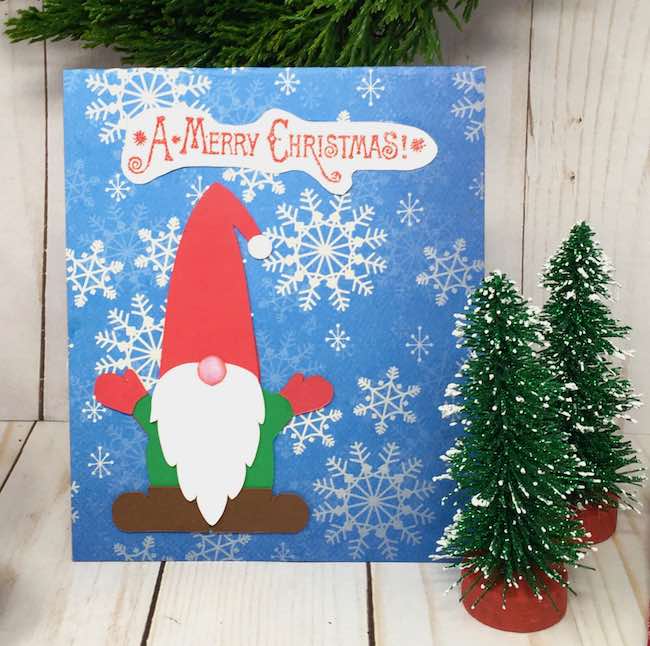
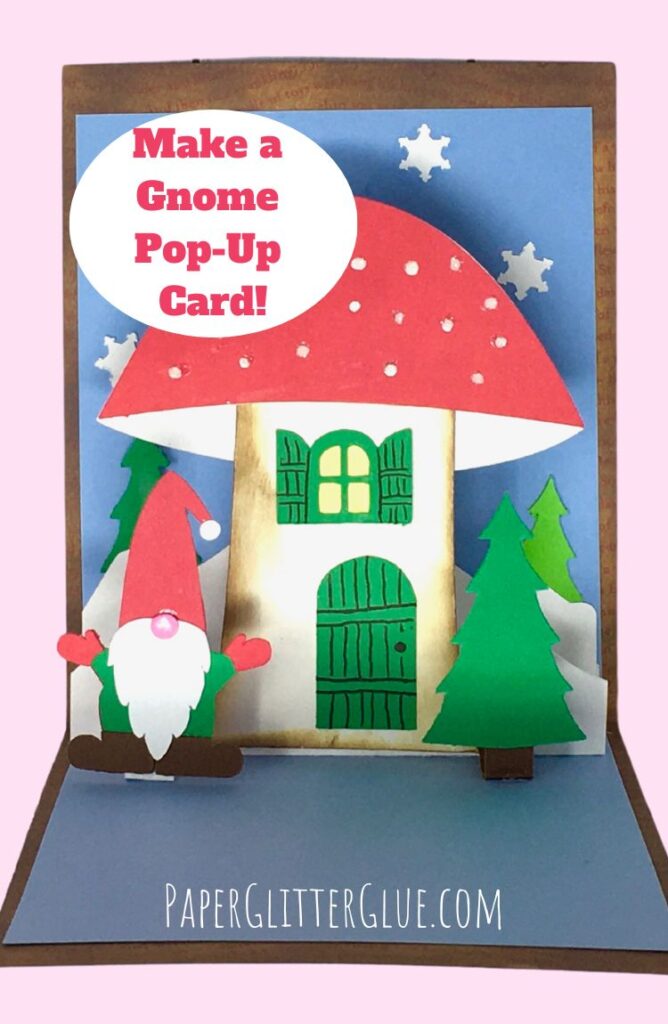
Here's a fun idea for you. Make a Gnome Pop-up card with a mushroom house on the inside. It's a perfect Christmas card.
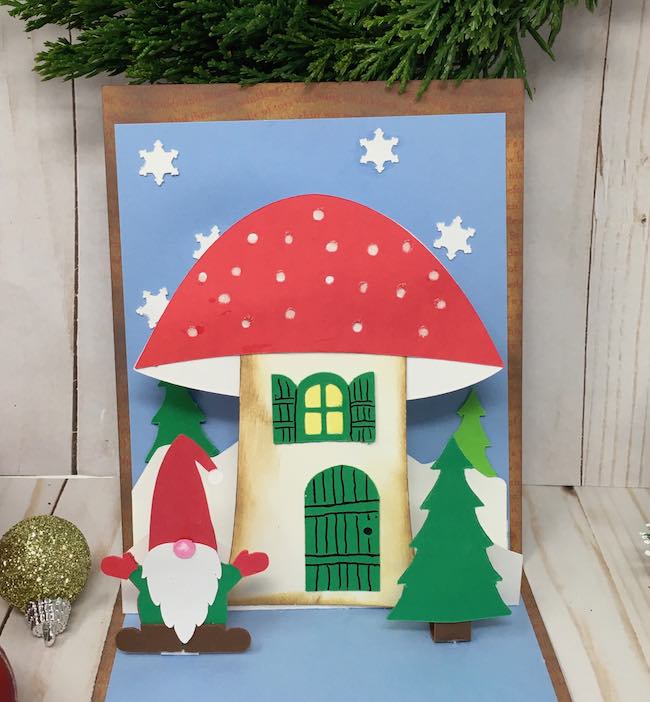
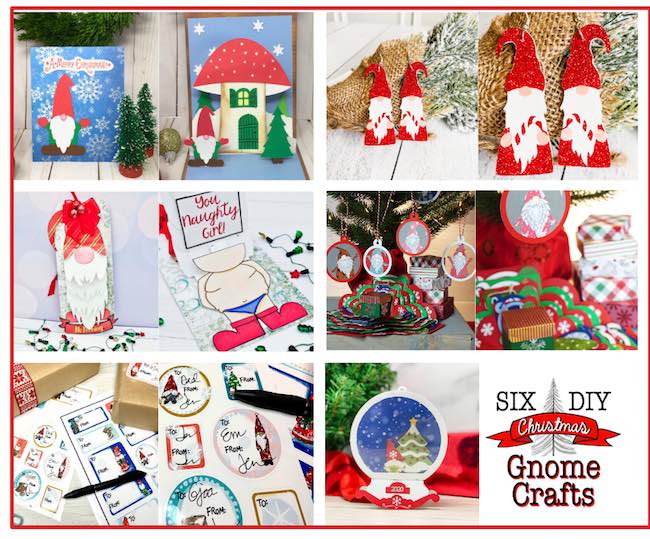
Some of my fellow crafters and I get together each November to make a crafts that you will love. Because gnomes are perfect for the holiday season, we chose gnomes again for our theme. Last year I made a Gnome gift box, so this year I made a Gnome pop-up card with a mushroom house inside (it's Design No. 98 in the free library). You know I had to have some kind of house involved. And here are the links to my friend's blogs for more great crafts:
- Jenny made the funniest Naughty Christmas Gnome Tag
- Amy made her adorable Gnome earrings
- Jen Swift made the cutest Christmas Gnome Gift Tag Stickers
- Emily made some wonderful Gnome Christmas Ornaments that fit in her amazing explosion boxes
My craft this year is how to make a gnome pop-up card - a fun way to share the Holiday spirit.
I have always loved pop-ups. This card is based on what is probably the easiest way to make a pop-up. You use a rectangle to make the pop-up part itself and then it folds into a parallelogram that folds flat.
One of my favorite pop-up teachers is Duncan Birmingham. Here's a link to his video on making this type of pop-up.
And here is an affiliate link to his Pop-Up book on Amazon.
The materials are listed below, followed by a summer of steps to make the card. And then finally, I go into detail for each step for how to make the card.
This post contains some affiliate links for your convenience. Click here to read my full disclosure policy.
Table of Contents
Materials to Make the Gnome Pop-Up Card
- Card stock - green, red, white, brown, blue
- Printed Christmas scrapbook paper for front of card - here is an example
- PVA Glue - Art Glitter Glue is excellent (and it doesn't have glitter) or Scotch Quick-Dry Tacky Glue
- Cutting Method - I used my Cricut Explore Air 2 but a Cricut Maker or other cutting machines would work well, too
- Glitter (optional)
- Holiday Sentiment Stamps - Stampers Anonymous Christmastime CMS352, Holiday Greetings CMS353, or Christmas Classic 322
- Embossing Ink
- Embossing Powder
- Heat Gun
- Distress Ink for nose and card stock edges
Instructions to Make the Gnome Pop-Up Card
- Download the free pattern to make the Gnome Pop-Up Card
- Cut and score the card stock pieces for the Gnome card
- Cut out the decorative card stock pieces for the card
- Assemble the gnome, mushroom, and pieces for the card
- Stamp the sentiment, if desired
- Glue large gnome and Holiday sentiment to front of card
- Glue the pop-up support to inner card
- Adhere the mushroom house to the pop-up mechanism
- Glue the gnome and tree to the support strips
- Adhere the support strips to the pop-up mechanism
- Add the snowy field behind the pop-up mechanism
- Finally, add glitter and snowflakes, if desired
For more details on to help you make the Gnome Pop-Up card, read on. Also here is a video which shows you how to construct the pop-up part of the card.
Download the free pattern to make the Gnome Pop-Up Card - Design No. 98 in the free library
First, get the pattern - Design No. 98 - to make the pop-up card. The pattern is available in two formats - as a printable file, the PDF file and as an SVG file, the scalable vector graphics file for cutting machines like the Cricut or Silhouette Cameo.
I keep all my free patterns in the Paper Glitter Glue library in chronological order. So this pattern is in the November 2020 section of the library. This is design no. 98 in the library.
But you need the password to get to the library. If you already have the password, just enter it in the password section.
And if you don't have the password, just subscribe to my Paper Glitter Glue newsletter with the form below to get the password immediately. Then you can download any free pattern from the Paper Glitter Glue library.
Cut and Score the Card Stock Pieces for the Gnome card background
The card is designed to fit in a standard envelope for cards - A7 - which is 5.25 x 7.25 inches.
Ok, so there are 2 card stock pieces for the actual card portion. I didn't include them in the pattern because, to me, it's easier to cut them out with paper cutter rather than a cutting machine.
Dimensions for the Gnome Pop-Up Card Bases:
Front card stock base - 5 inches x 11.5 inches
Inner card stock base - 4.75 inches x 11 inches
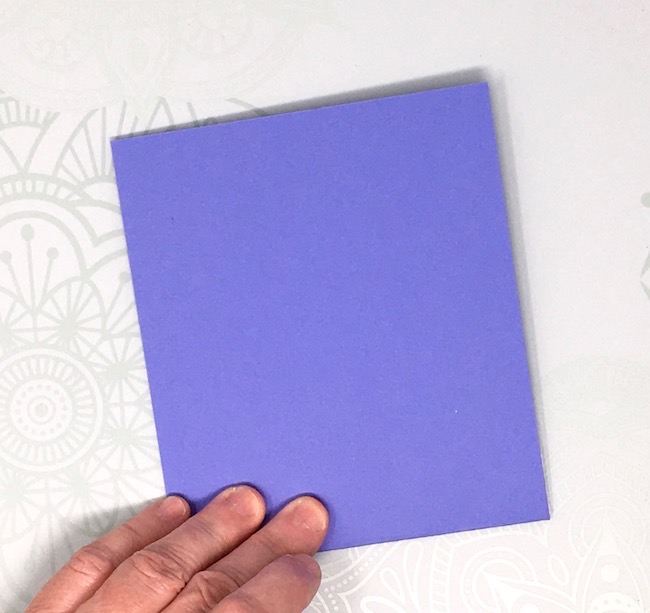
First, choose a nice print or color for the front of the card. My scrapbook paper was two-sided and the inner side didn't work well as the border so I inked the edges. Now it works perfectly as seen below. The size of the outer card piece is 5 inches wide by 11.5 inches long. Score in the middle at 5.75 inches.
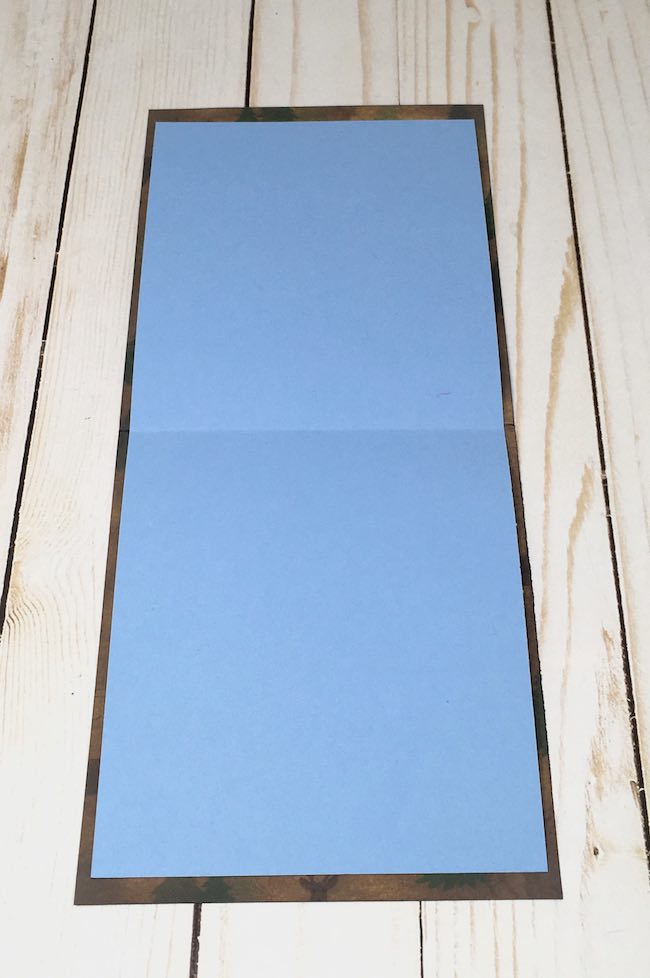
The inner card stock is 4.75 inches wide and 11 inches long. Score the inner card piece in the middle at 5.5 inches. I chose a pale blue for inner background.
Cut out the Decorative Card Stock Pieces for the Card
Next, cut out all the decorative card stock pieces to make the gnome, the mushroom house, the snow bank that goes behind the mushroom house, snowflakes, and trees.
For all of these pieces, I used 65# card stock. Also, to make the tree a little more stable, glue two pieces together.
Assemble the Gnome, Mushroom, and Pieces for the Card
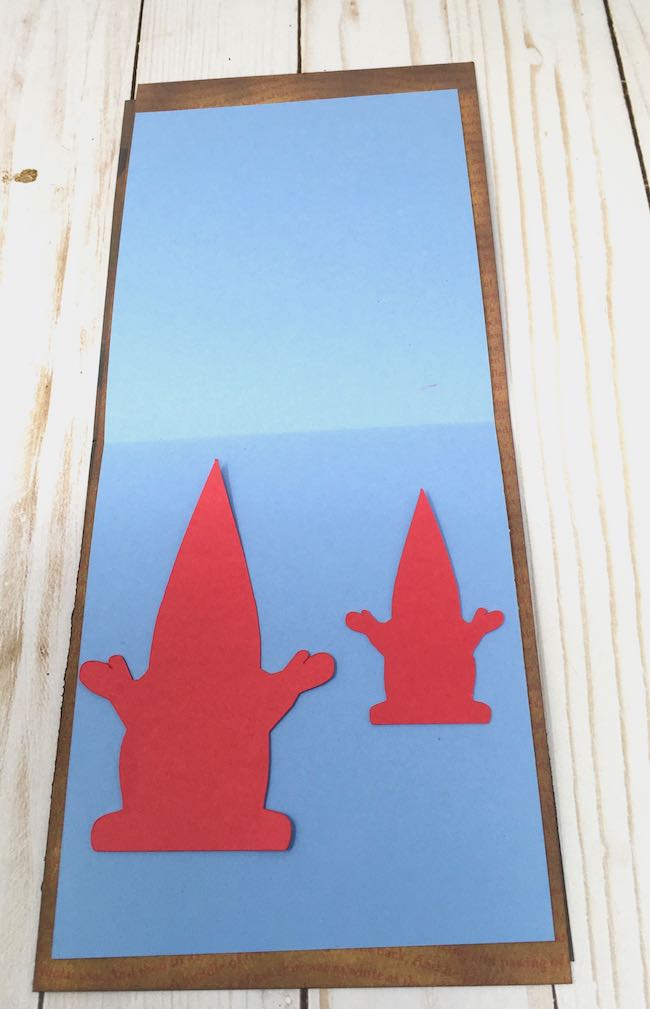
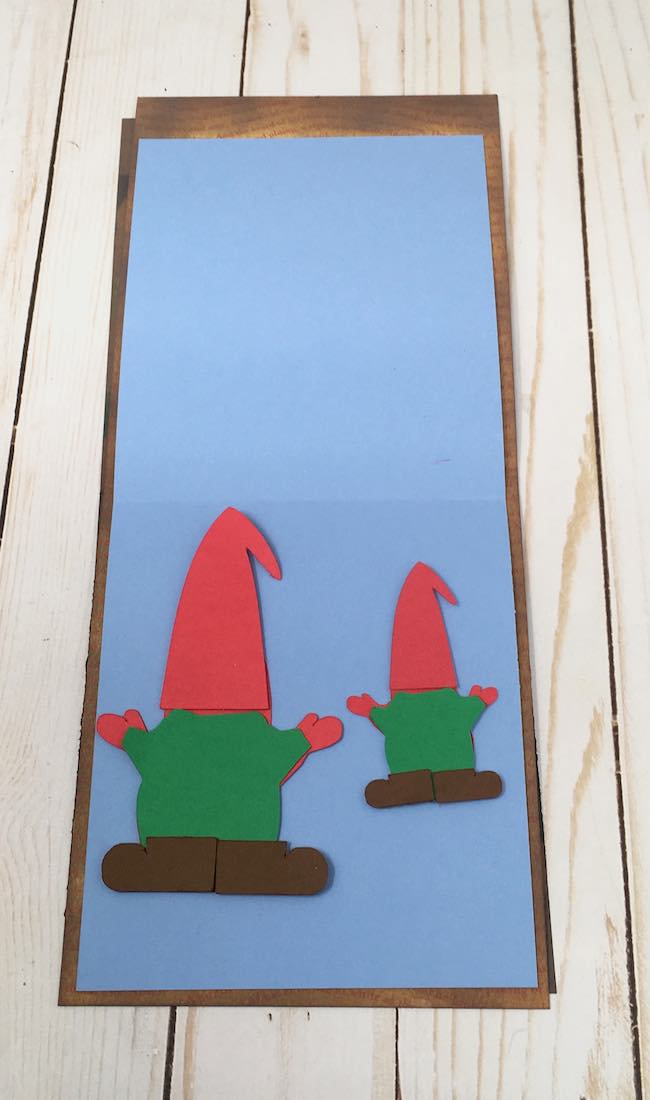
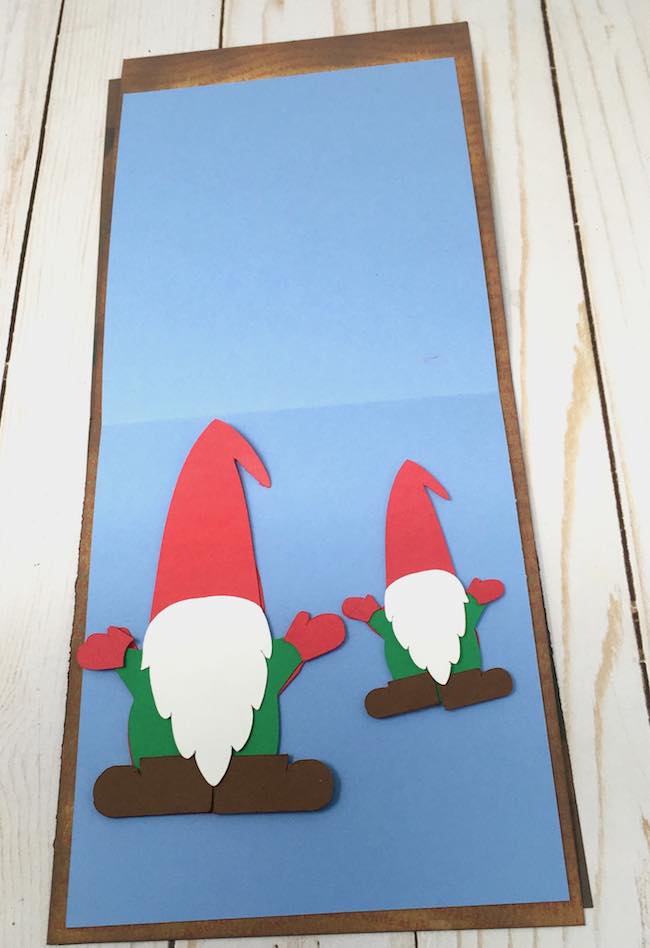
Now, glue the gnomes clothes and beard on the background gnome shape.
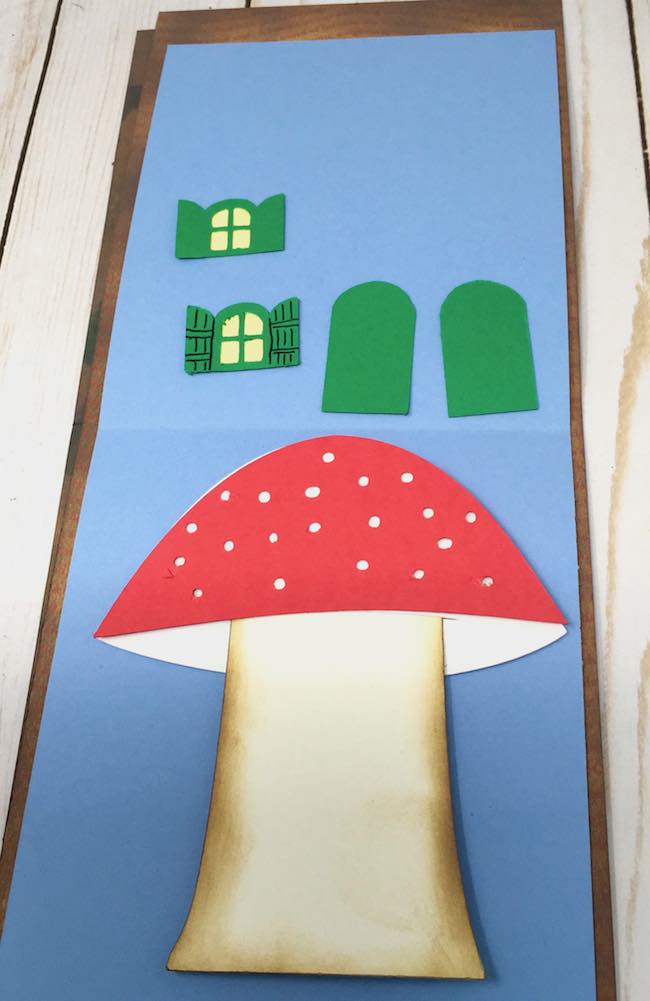
Draw the boards on the window and door for the mushroom house.
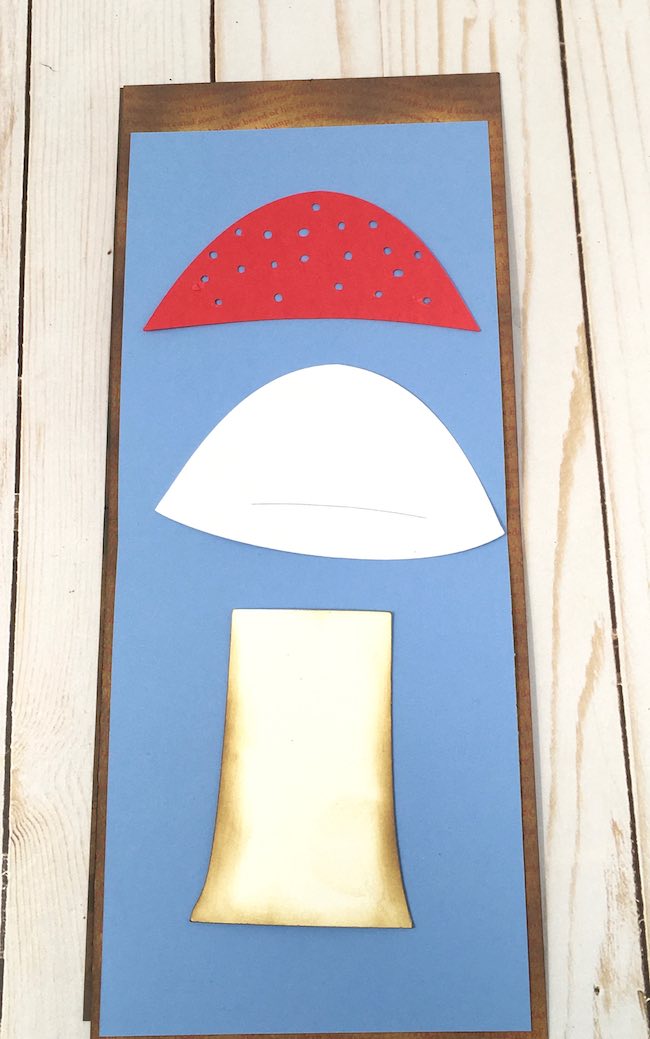
Also you can ink the edge of mushroom stem to give it more dimension. Then assemble the mushroom house as shown in the photos. The stem fits in the slit of the mushroom cap.
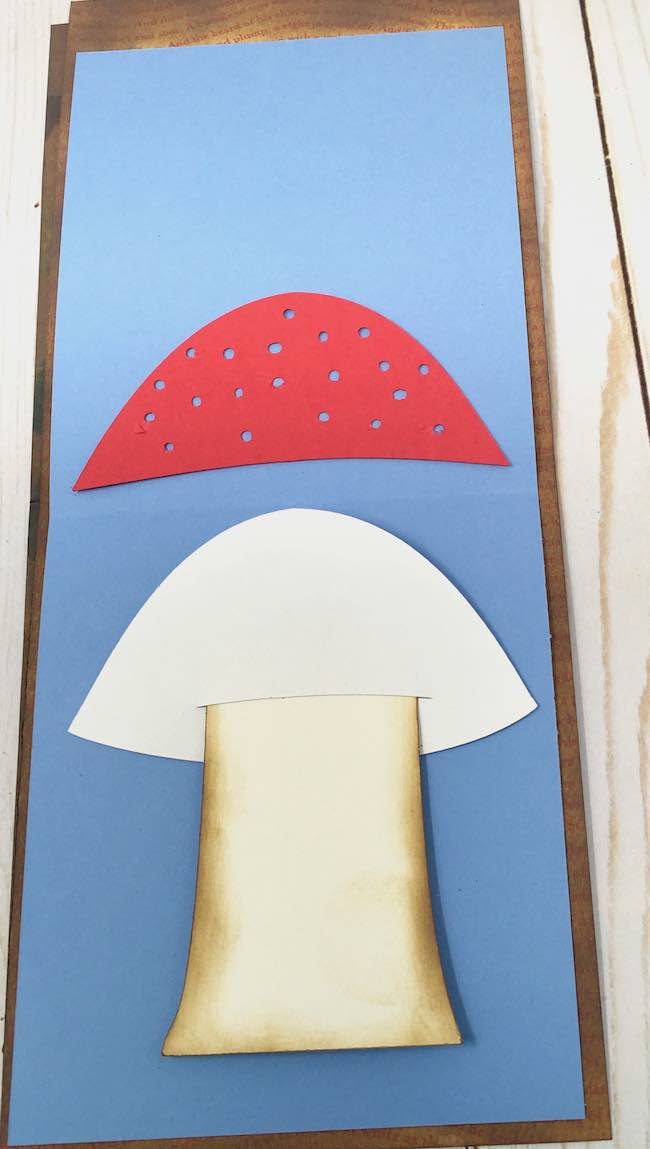
Glue in place, followed by the mushroom cap.
Stamp the sentiment, if desired
To make the "A Merry Christmas" sentiment, I stamped the holiday sentiment in embossing ink. Next, sprinkle embossing powder on the inked area. Then use your heat gun to melt the embossing powder.

Cut out the sentiment.
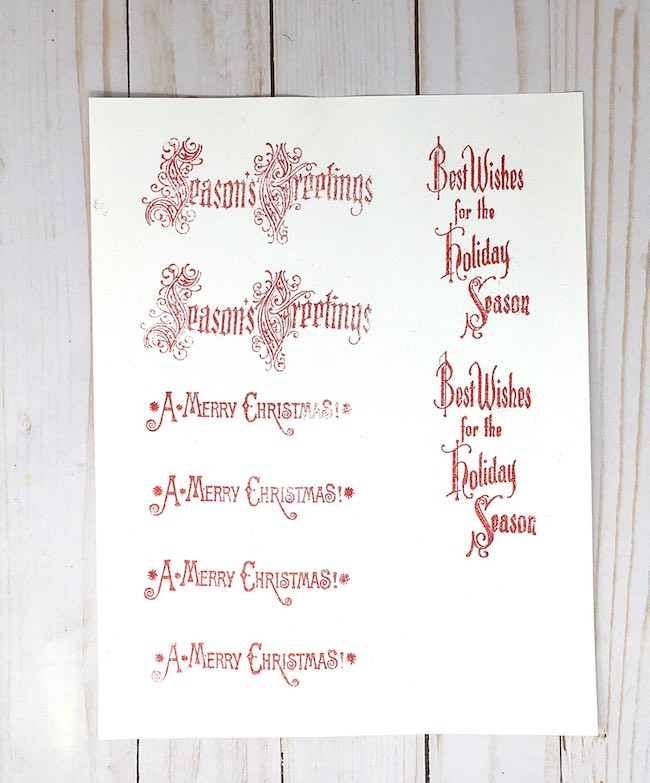
You don't have to use embossing ink, you can simply stamp the message and cut it out. Or stamp directly on the front side of the scrapbook paper.
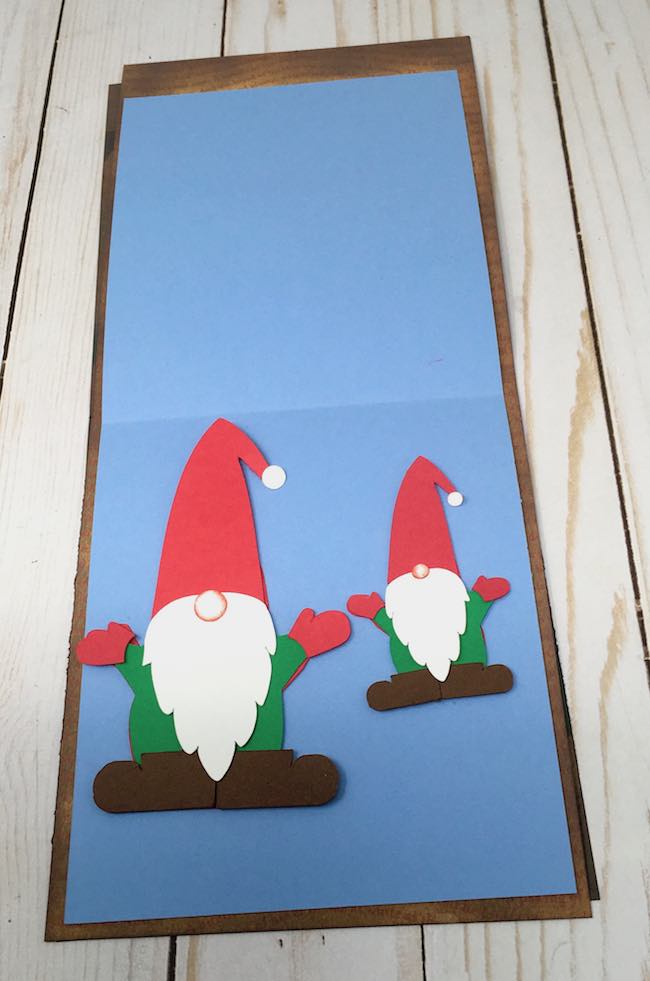
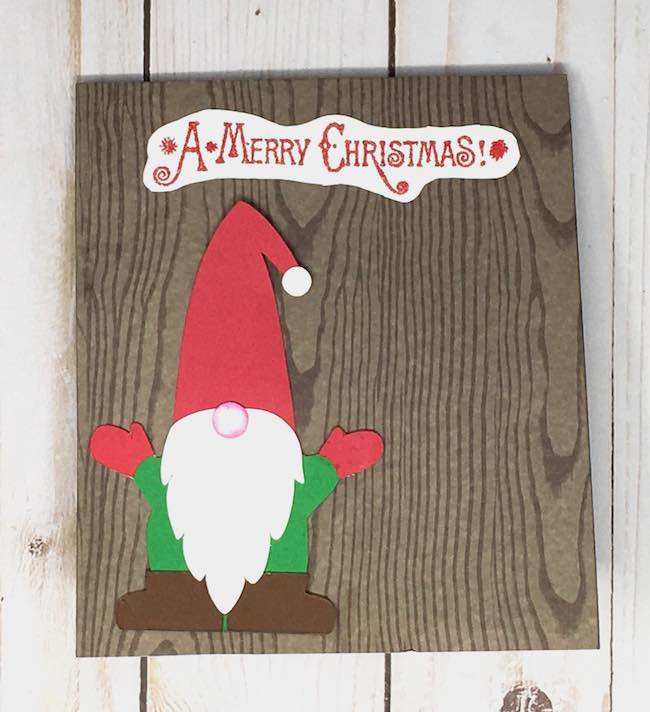
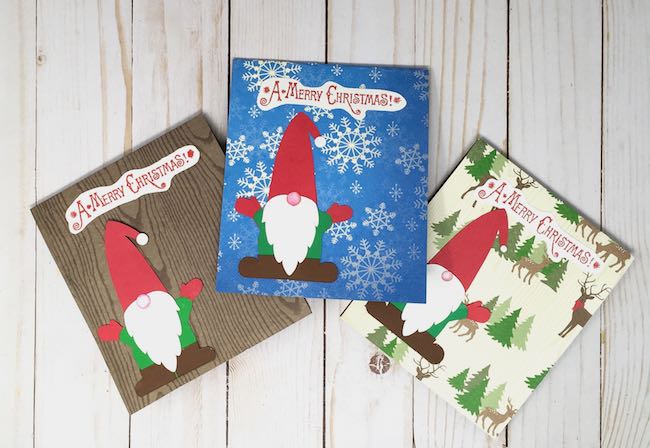
Glue Large Gnome and Holiday sentiment to front of card
Decorate the front of the card with the large gnome and a holiday sentiment. It's easier to do this before you glue the card together because the pop-up stuff is a little lumpy.
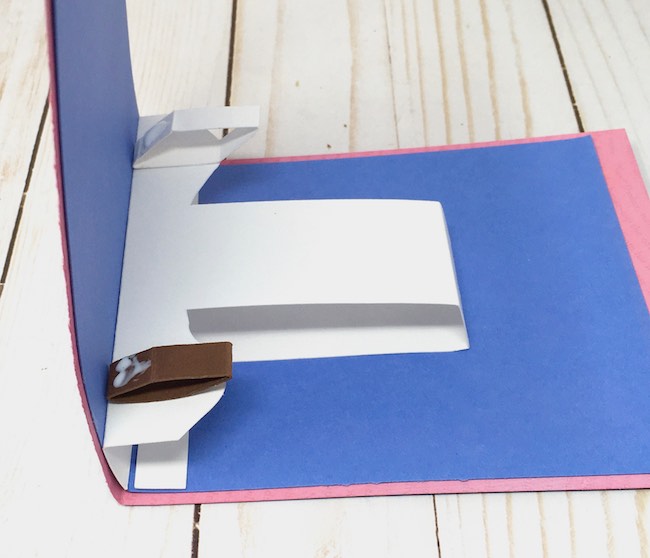
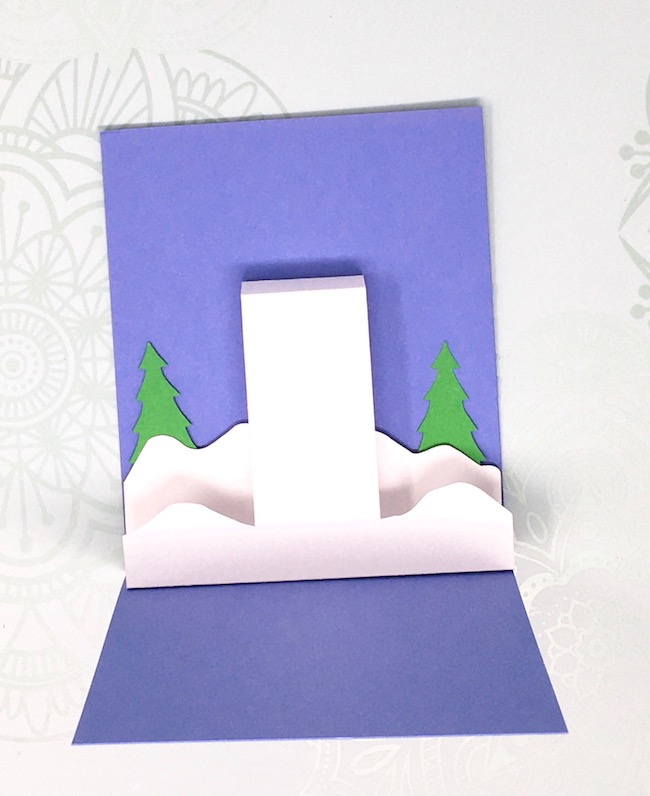
Glue the pop-up support to inner card
Below are the pop-up pieces for the gnome card.

Fold the pop-up mechanism along the score lines. Glue the upside down T-shape to the back of the inner card as shown in the photo.

Next, fold the pop-up mechanism in the configuration of how it will fit within the card.

Apply glue to the bottom section below the lowest score line and fold the card up.
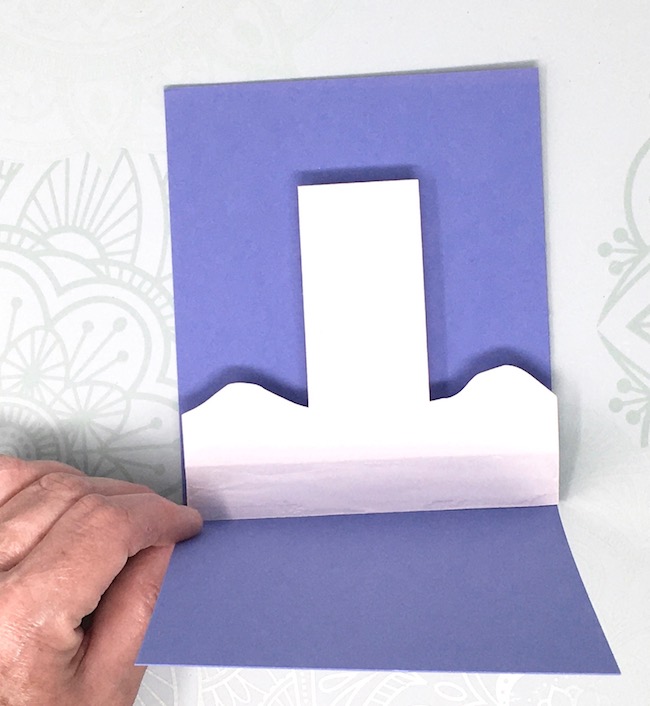
Apply firm pressure. Don't fully open it up until the glue begins to hold. Also you can use a narrow tape adhesive on a roll.

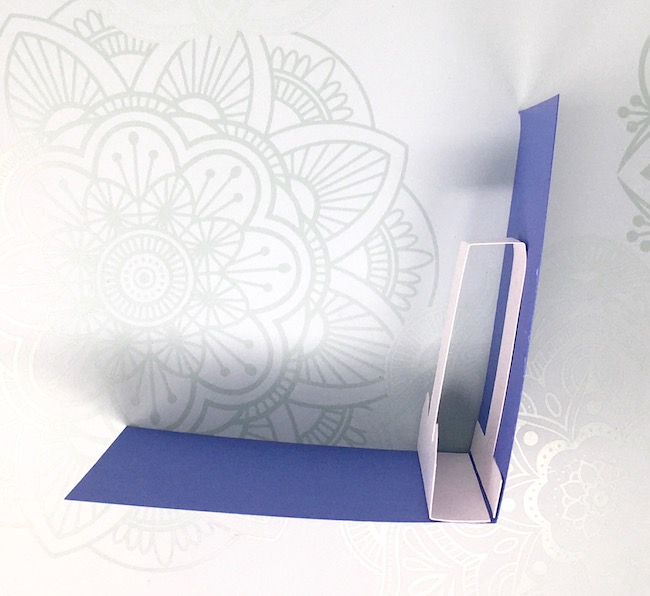
To help you visualize it better, here are two more views of the pop-up mechanism. First, is the front view.
Next is the side view.
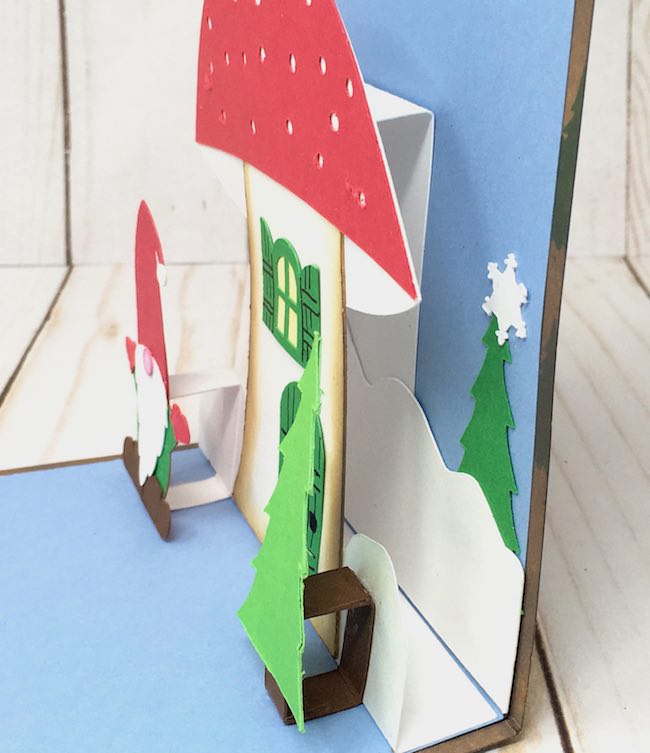
Adhere the mushroom house to the pop-up mechanism
Now, adhere the mushroom house to the pop-up mechanism. Once the mushroom house is in place, glue the gnome and tree support strips in place. In the photos, I skipped that step so you could see how the pop-up parts fit.
Glue the gnome and tree to the support strips
Once the support strips are in place, then glue the small gnome and the tree to the supports.
Adhere the support strips to the pop-up mechanism
Now that the mushroom house is in place, glue the gnome and tree support strips in place. Pay attention to how they support strips fit on the pop-up mechanism. Below I omitted the gnome and tree just to make it clearer.
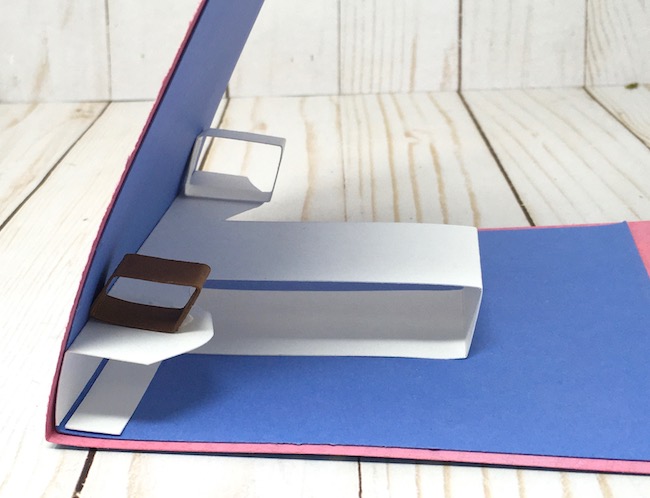
In the photo above, the strips are glued to the pop-up mechanism. Below shows the glue applied to glue the support strips to the bottom part of the card.
Add the snowy field behind the pop-up mechanism
Next, glue some trees to the snowy field and apply glue to the back of the field and adhere to the area behind the pop out portion of the card.
Glitter and add snowflakes, if desired
If you like you can add snowflakes and glitter. Around this time of year, glitter always adds a nice sparkle.
And that is how you make the gnome pop-up card.
How about this? Good Housekeeping even asked permission to include it on their website under 55 Best DIY Christmas Card Ideas for Beginner and Expert DIYers!
If you have any questions, just email me at [email protected].
Lucy
And be sure to share on your favorite Pinterest board, too!
Jessie Jones
Hi Lucy,
Was wondering if you have an Angel Policy?
Lucy
No, not really. It is ok if you want to make things to sell from my patterns as long as you credit me as the designer. And of course, if your project is made by hand (meaning you glue it together yourself) as opposed to manufactured.
What are you interested in making?
Ruby`````````````````````````````````````````````````
Thank you for being so generous to share. Love the gnome card.
Rubs
Lucy
I am happy to share. It's fun for me to make things like this so it just makes sense to share with other people who like to make things.
Lucy
Emily
These are SO cute! I love pop-ups and my best friend adores this style of gnome and mushrooms. Thanks for sharing!
Lucy
Thank you, Emily. I am so glad you like the gnome pop-up card.
Lucy
GG
So sweet - thank you for sharing this.
Lucy
Thank you. I am so glad you like it.
Lucy