Here is how I design 3D paper house patterns (SVGs) with score lines so they work in your Cricut or other automatic cutting machines. It makes more sense to explain the process in detail in one post so you can always refer to it later to figure out the score lines on the paper house patterns I design. Or really for any of my 3D paper craft patterns.
These patterns are based on programs that make SVG designs - Scalable Vector Graphics - designs that can be scaled up or down, made larger or smaller without losing detail. That's what allows you to choose the size of your design within the software.
This post contains some affiliate links for your convenience. Click here to read my full disclosure policy.
The purpose of this post is to teach you about Cricut Design Space because that is the type of machine that I use.
What I want you to see here is how to find and mark the score lines for my 3D paper craft projects. Other design software for other automatic cutting machines have similar options for scoring.
First, most of my paper house or 3D designs fit 8.5 x 11 inch paper
First off, I design my patterns to fit on a 8.5 x 11 inch paper or cardboard. Why? That's because that is the size cardboard that I have. The people in the office where I work save me lots of nice cardboard that is 8.5 x 11 inches. So each page of the design fits that size. This size cardboard makes great little putz houses.
Here is a simple paper house pattern to demonstrate score lines
This is the Easy Paper House pattern before the score lines are marked and designed as score lines. The Easy Paper House pattern fits nicely on my standard size cardboard. Even the roof and chimney options fit nicely on one page.
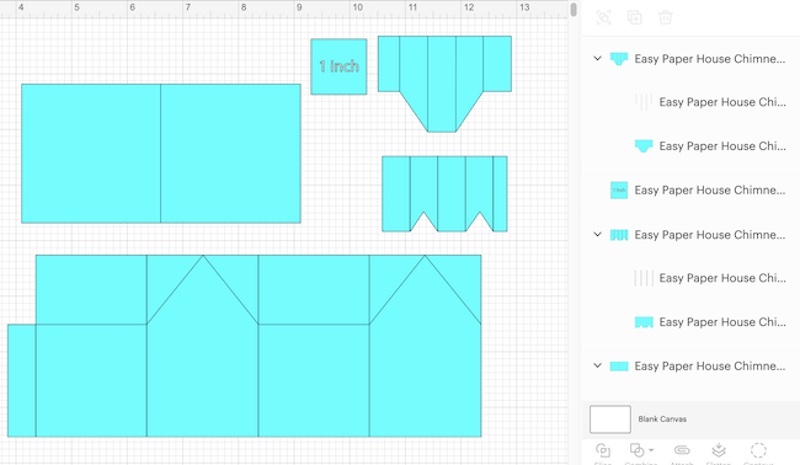
That's the typical way my patterns look when they fit on this size paper.
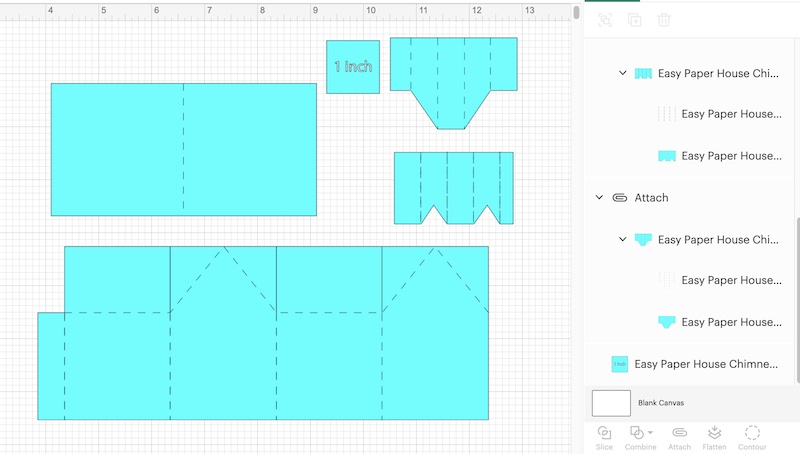
And this photo shows the Easy Paper House with score lines marked and attached.
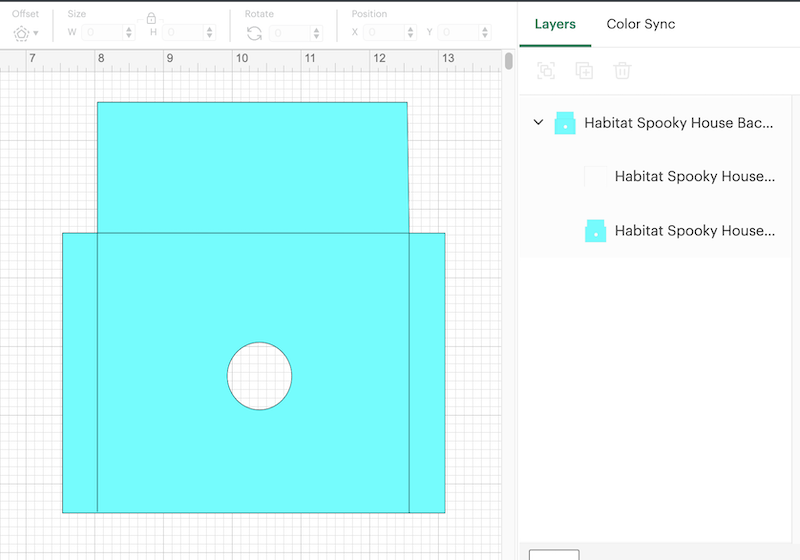
But what if the house is too big for one 8.5 x 11 inch paper or cardboard? Then we make what I call an inset house where a back piece is inserted into front piece. The Habitat Halloween House is one example because the front is 9 inches across. Below is the front of the Habitat Paper House.
And here is the inset back piece with the glue tabs on each side.
Ok, so that is the general structure of all of my houses. Rarely there are different variations, but most of my 3D paper house patterns look like these photos when you import them into Cricut's Design Space. Now let's get to the score lines and how to mark them and attach them.
What about Score Lines? How do you ensure the design software understands score lines?
So how do you make sure the design software understands score lines? Because in Cricut's software a line is a line, you have to make it very clear to your Cricut what to do with this line. It's a bit of a challenge.
In addition, remember that Cricut Design Space software is regularly updated which means that things change. I will regularly update this page to follow the most recent Cricut Design Space update.
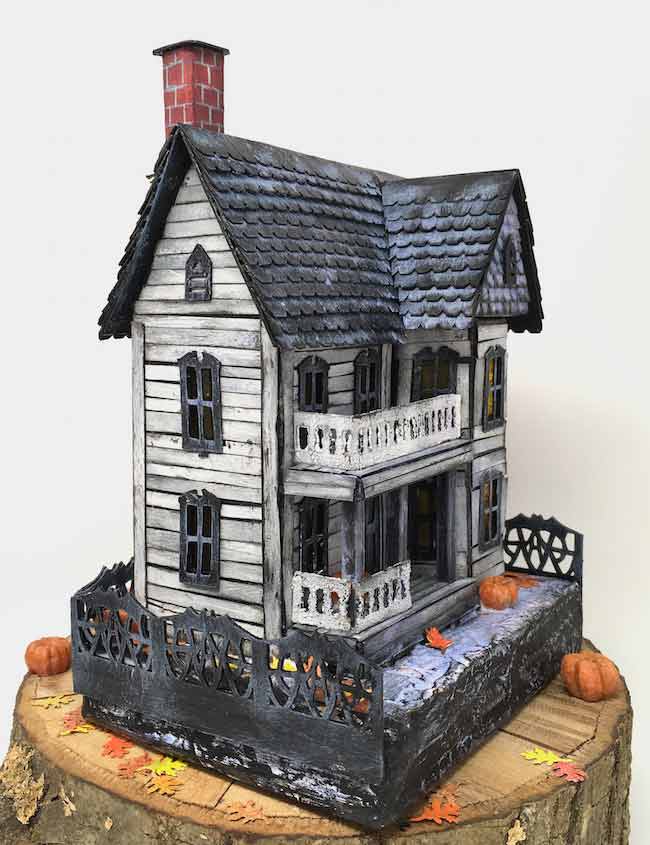
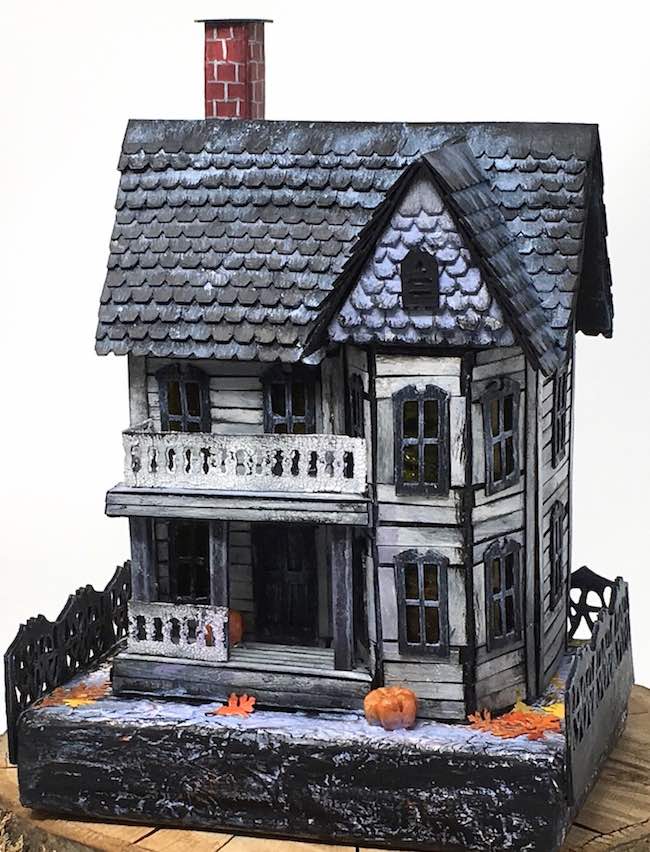
I'm using the Habitat Halloween House as the example for several reasons:
- It's a seriously great house- for Halloween or any season, really
- It is fairly complicated and needs a good explanation
- It's a good example to learn from
- And it's free in the Paper Glitter Glue library as Design No. 60 in the October 2019 section of the library. Subscribe to my newsletter to get the password to the free library.
Directions to cut the Habitat Halloween Paper House SVG Pattern in Cricut's Design Software
First, import the SVG paper house pattern into your design software.
For this house, I import each sheet for the house separately. Some of them take as bit of time to cut so I work on other things while my Cricut Explore Air or my Cricut Maker cuts things out.
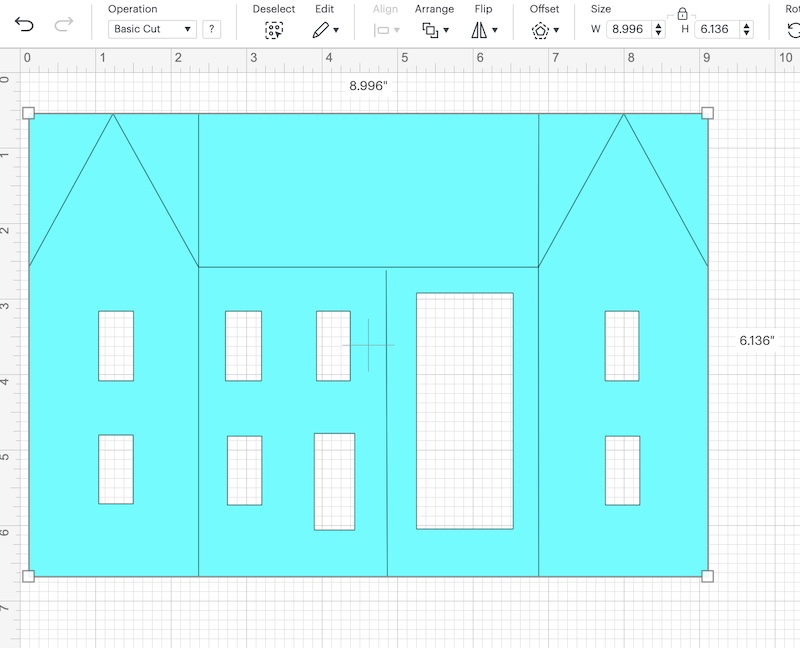
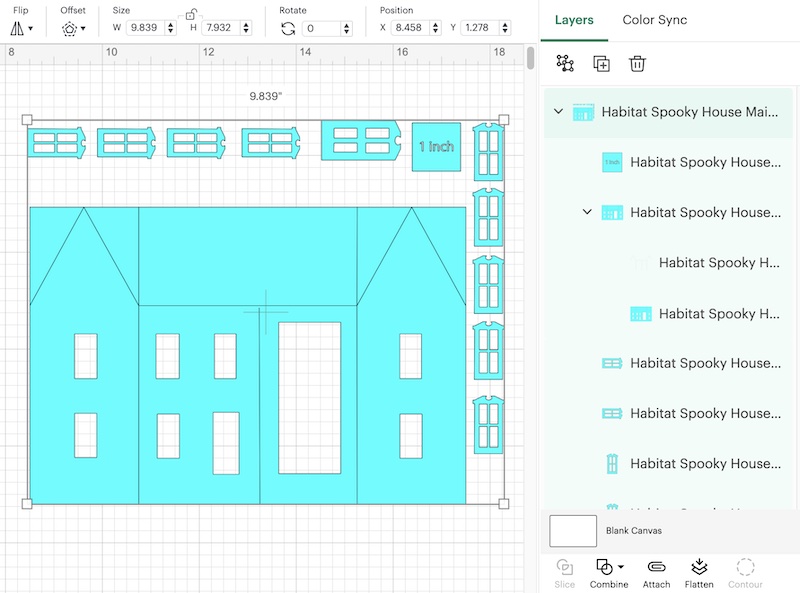
Let's do the front of the Habitat Halloween House first. It includes window cutouts because that's what fits easily on the 8.5 x 11" cardboard.
Next ungroup to make the score lines and attach them to the house.
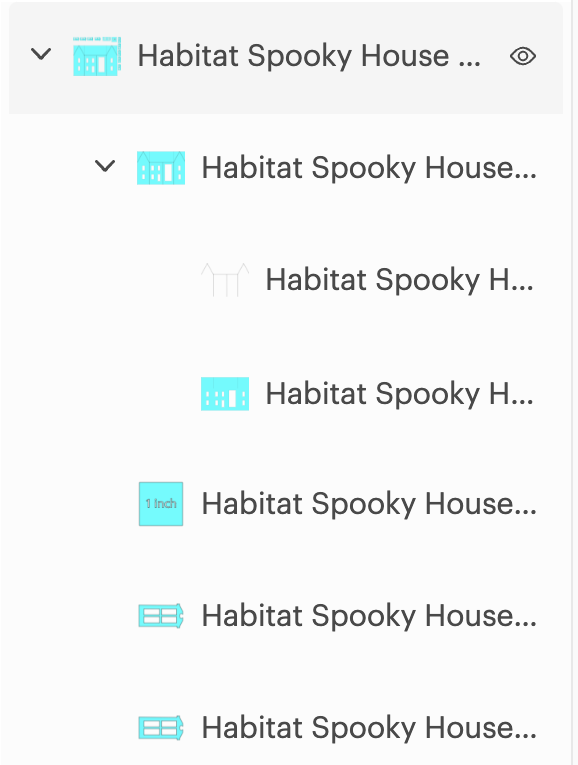
To do that, click the ungroup button at the menu on the right just under where it says layers and color sync. Below you see the Habitat Halloween House ungrouped. It's a subtle change on the screen.

You can tell the pattern is no longer grouped because each piece that is to be cut out is separate. They are no longer under the overall same heading - Habitat Spooky House.
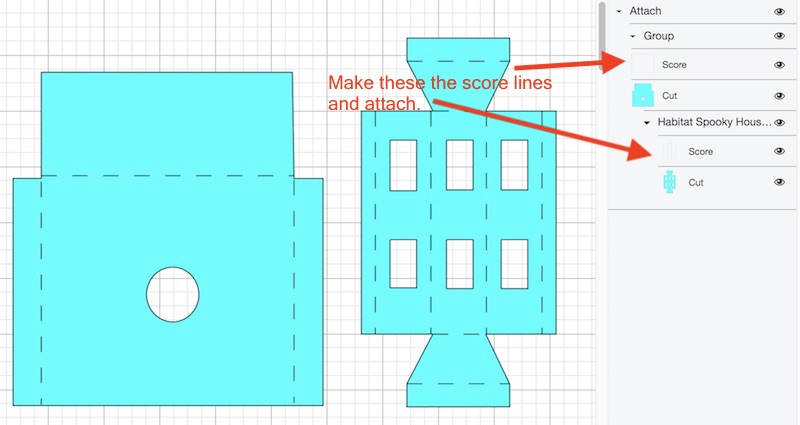
Now find the score lines for this paper house pattern - the Spooky Halloween House for Habitat
It's a fairly complicated house (but isn't it cool?). That's why I want to include photos showing the score lines on the patterns in Design Space.
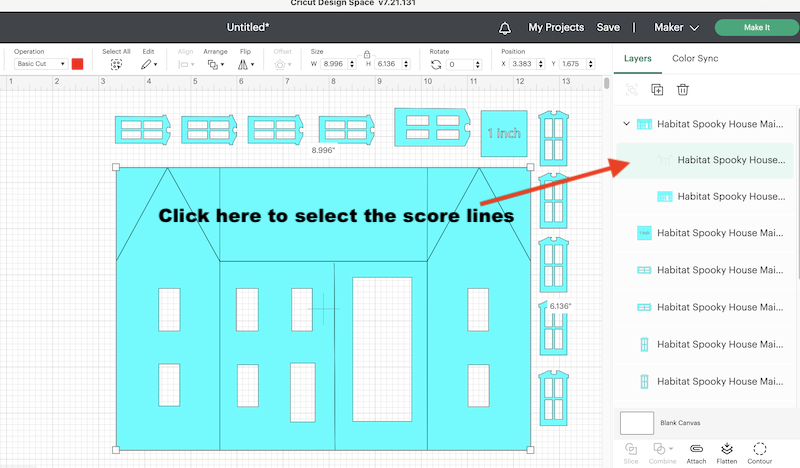
You can find the score lines combined in one box. I always try to draw them with red lines so that they show up, but Design Space doesn't show them that way in this screen. And these lines are grouped with the main part of the house they below to.
See the lines in the menu below? The angled lines are the score lines for the roof an the sides. Next change them so Design Space understands that we want them scored.
Now change the score lines so Design Space knows not to cut them out, but score them instead
Follow these photos to learn how to do that.
First click on the area in the right menu in the score line section. You actually can select the score lines from the house pattern itself if you want.
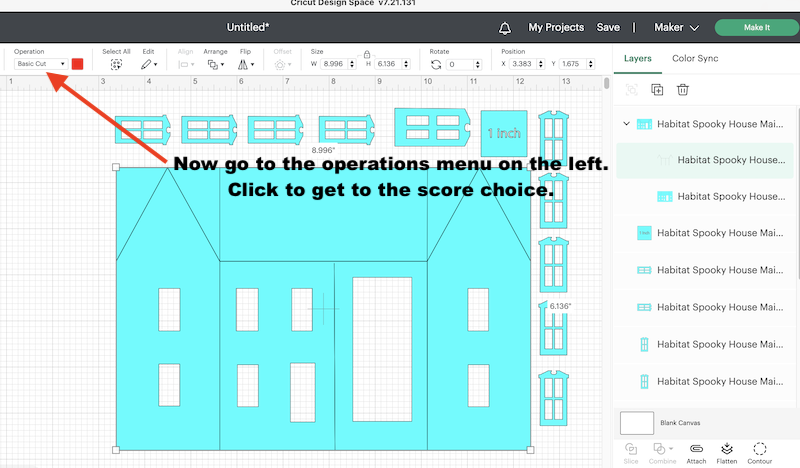
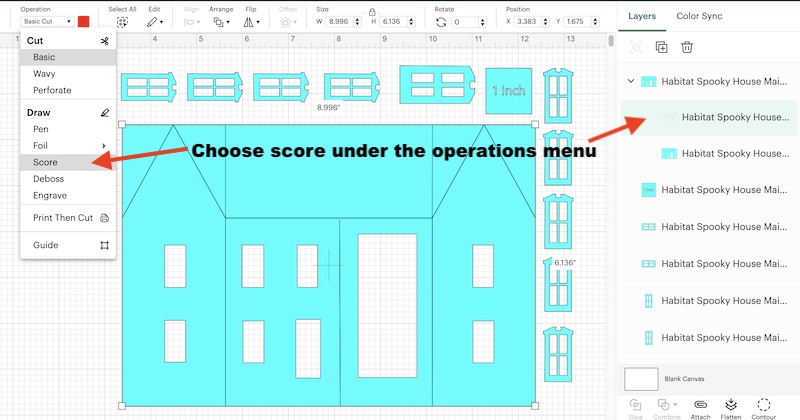
Now find the Operations menu on the left upper section of Design Space.
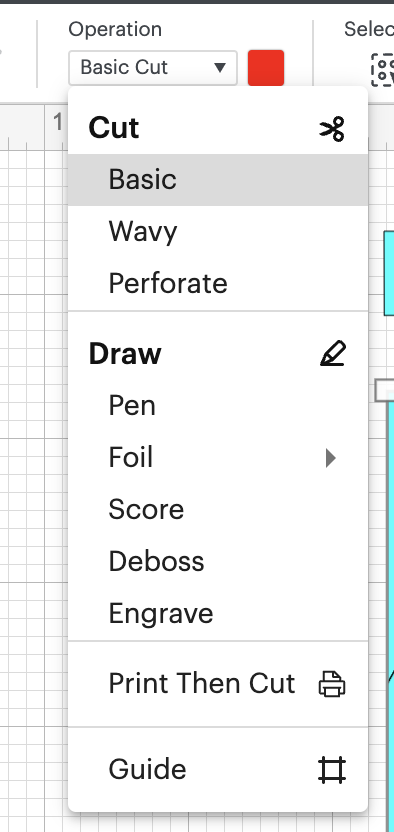
These are your Operation menu choices as of November 2022.
Notice the red box. That means that the area selected - the grouped score lines - is red. That's why I always try to make my score lines red so you know that these lines are indeed score lines.
Now click the Operations Menu
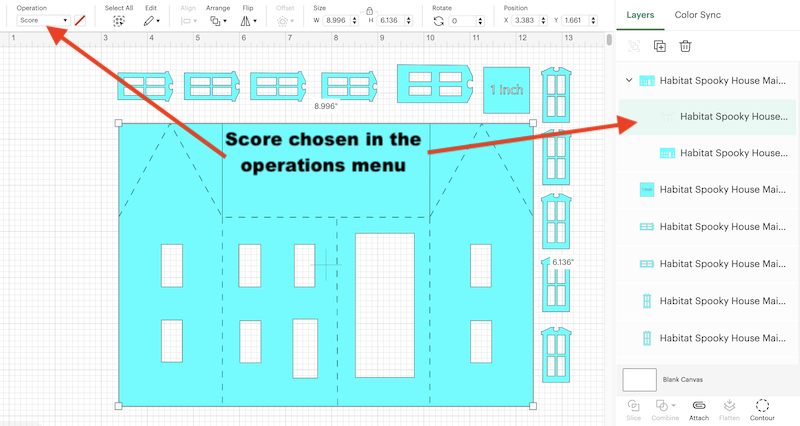
These are the changes on your screen when you do that. You actually see the score lines appear and the lines are marked score on both the left and right areas of design space.
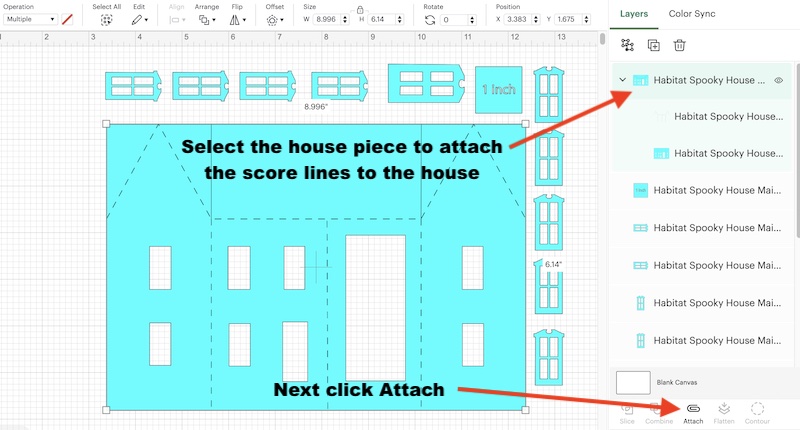
And finally attach the score lines and the cut lines to the main body of the house
See the attach button at the bottom of the screen. That's what you click to attach these lines to the main house.
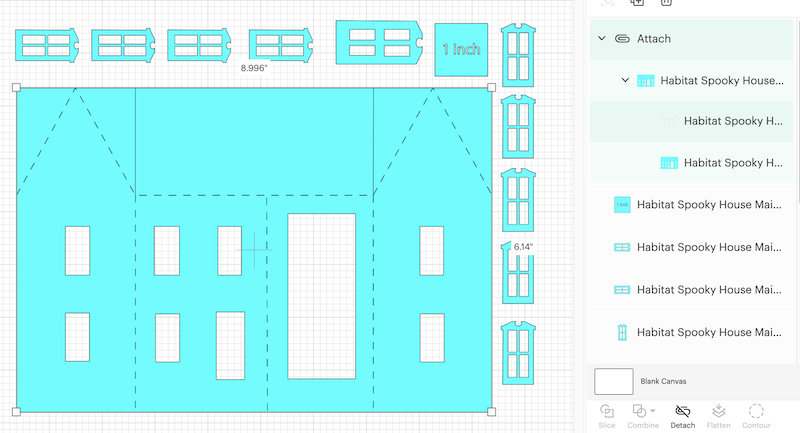
So that attaches both the cut lines and the score lines to the main body of the house and you can go ahead and make it.
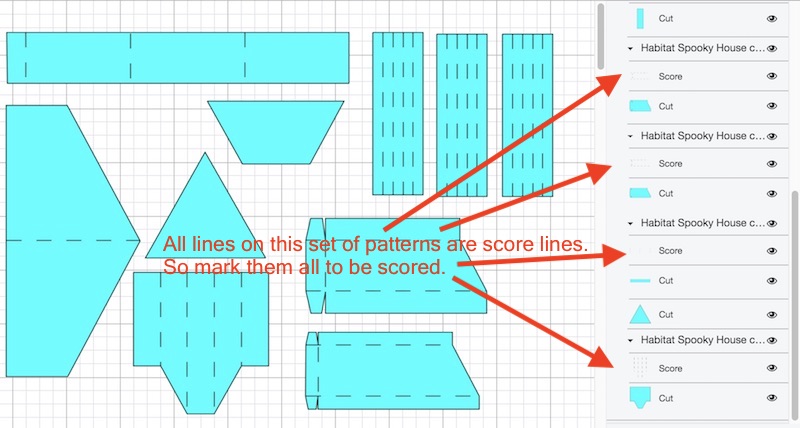
And below you can see the other Habitat Halloween House paper pattern pieces with all the score lines changed and attached
Back inset piece with the front extension
Miscellaneous pattern pieces for the Habitat for Humanity House
Some score lines are not visible in this menu, but be sure to mark all of these lines as score lines. And then attach them to their appropriate place.
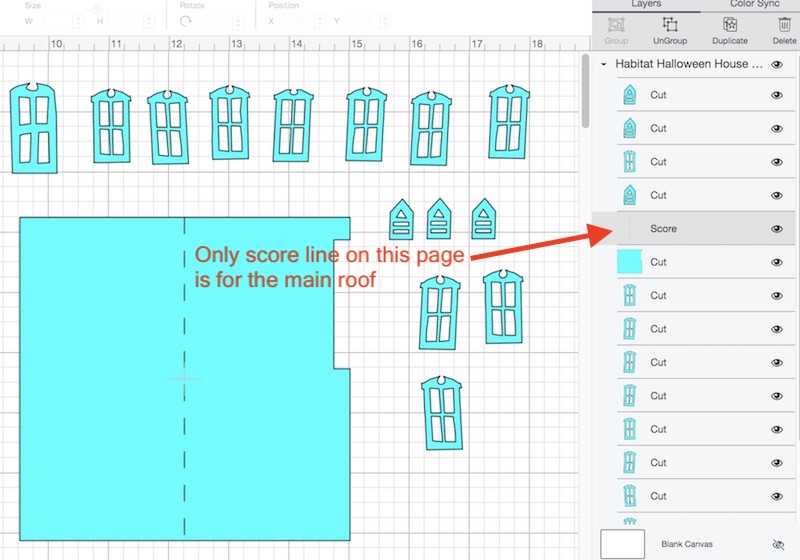
And here is the only score on the main roof page which also has a set of wonky windows and door choices for the Halloween House. You can delete the wonky windows if you want to use the neater set on the page with the main body of the house.
In Cricut Design Space, you don't have to change anything on the shingle page for the Habitat Halloween house.

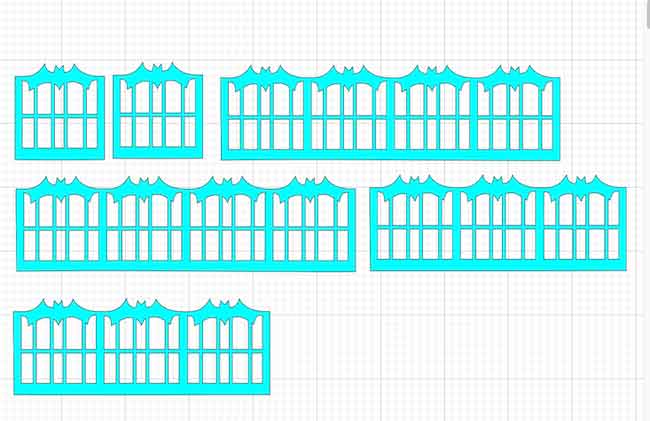
Again you don't have to do anything special for the Bat Wing fence either. To make it strong, I generally glue two layers of cardboard together.
So that's how to specify the score lines in Cricut's Design Space. And you can see the score lines on the pattern pieces for the Spooky Miniature Halloween House for Habitat.
Subscribe to my newsletter and download the pattern for this house and many other free patterns from my Paper Glitter Glue Library.
One of my online friends has numerous written and video tutorials on using the Cricut. You can find lots of great information on Jennifer's website - JenniferMaker.com.
Let me know if you have any questions. And remember that you can email me anytime for any questions at [email protected].
Thank you for reading.
Lucy
Jeanne Giordano
Thanks so much for including this tutorial on your web page. It has been a great help. Sometimes visual is better.
Lucy
Thank you. I just barely finished this post. I can't believe you found it already.