How to make the Coolest Spooky Miniature Halloween Paper House for your own Halloween Decor!
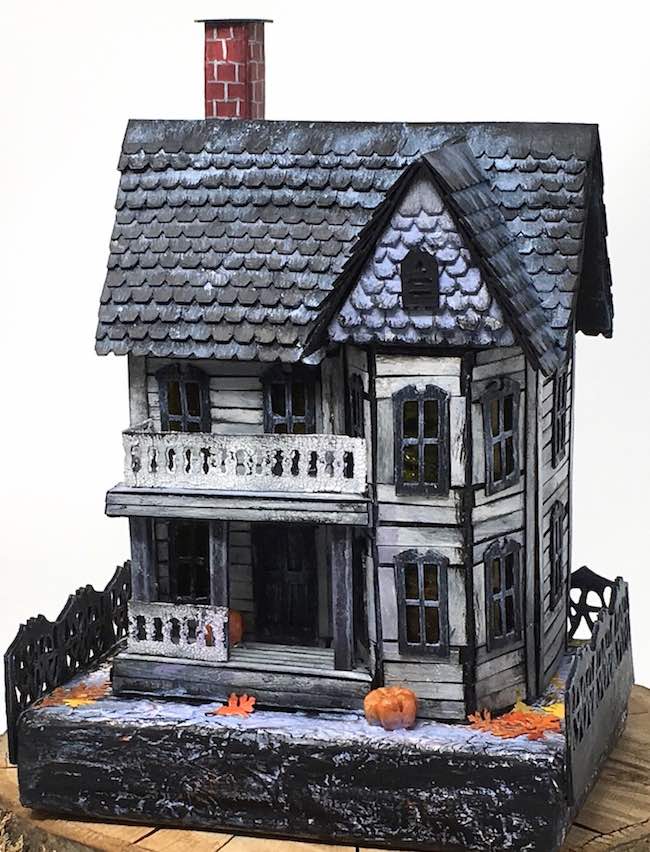
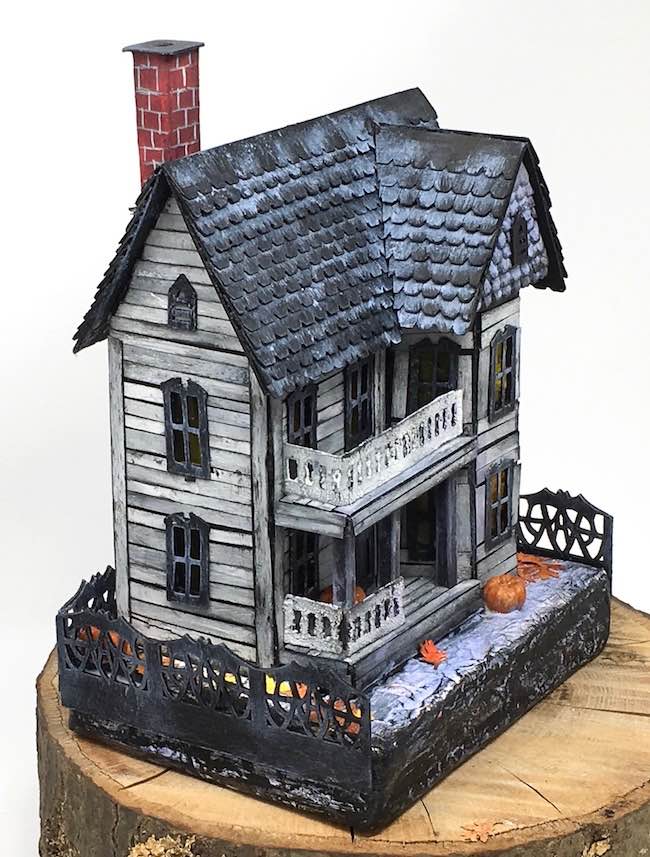
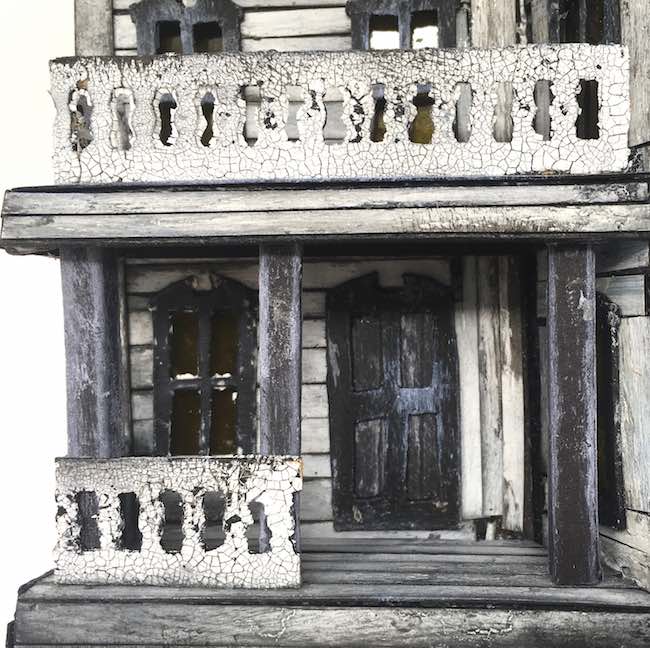
And here it is - the Spooky Halloween Paper House for Habitat for Humanity's fundraiser. Just like last year's miniature paper house I made this one based on an actual vintage home in a historic district in Upstate SC. This miniature Halloween house has great lines and lots of spooky, distressed details including a bat wing fence.
What do you need to make this fun little Halloween house?
Well, there's cardboard, of course. I love cardboard as the main miniature house building material. And then you have to have a way to cut your cardboard. And glue - gotta have glue. Various shades of paint - I'll list them below. Then you need to distress your vintage Halloween house - I used crackle paste and crackle medium. Add a few Fall seasonal items and you've basically got all the materials you need. Here's the detailed listed below.
But I do need to be honest. Even if you don't need a lot of material to make this house, it is fairly challenging.
In addition, I've made a YouTube video showing distress techniques for your houses.
This post contains some affiliate links for your convenience. Click here to read my full disclosure policy.
Materials to make the Miniature Spooky Halloween House
- Cardboard - I use cardboard about this thickness which is a little thicker than inexpensive poster board.
- Card stock 110# - I only used this for the porch supports
- Glue - Aleene's Fast Grab Tacky Glue is my favorite for gluing the house together because it does stick so much faster. Often I use a thinner glue when I am gluing strips like the shingles and the siding onto the house.
- Cutting knife and cutting mat
- OR an automatic cutting machine like a Cricut Explore Air 2 (which is what I use), Cricut Maker, Silhouette Cameo, or a Brothers ScanNCut
- Black Gesso Primer
- Paints - I love to use Tim Holtz Distress Paints because I love the colors so much, but you can use any acrylic paint - this is a good set of colors. For this house I used the following paint colors:
- Ranger Texture Paste Opaque Crackle
- Crackle Medium for the siding
- Corrugated cardboard for the base
- Brown paper - recycled
- I love these Tim Holtz Miniature Pumpkins
- Miniature Leaf Punches - Tim Holtz and Mini Oak Leaf Punch
How to make the Spooky Halloween Paper House - Outline of Steps Involved
- Download pattern and cut out
- Download the pattern - Design No. 60 - from the Paper Glitter Glue library
- Cut out your pattern
- Score the score lines
- Fold along the score lines
- Prepare all your house pieces
- Prime your cardboard pieces
- Add an extra layer of cardboard to the front piece for more support
- Make crackle siding, if desired
- Add siding to the house before you glue it together
- Glue window material to the back of the windows, if desired
- Glue the windows and doors to the main body of the house
- Fold the angled front extension and glue the flaps down
- Construct the main house and front extension
- Adhere the front extension to the house
- Glue the house together
- Test fit the roof with the front extension roof
- Glue roof to house. Add chimney
- Glue the triangular top to the front extension then glue the front extension roof on top
- Add shingles to the roof or paint it
- Construct the porches
- Make the porches
- Make porch columns and glue in place
- Add porch railings to the porches
- Make the base for the Halloween house
- Make the fence and cardboard base
- Paint the cardboard base
- Glue the house to the base
- Adhere the fence to the base
- Decorate
First Download the Halloween House Pattern from the Paper Glitter Glue library
To download from the Paper Glitter Glue library, just go to this page, click the big ORANGE link in the middle of the page which will take you to the page where you add the password. Type or paste in the password and you have access to all my free files in the library. The most recent file is added last. This Habitat house is Design No. 60 in the October 2019 section of the library.
If you don't have the password, just subscribe with the form below and you will immediately get the password.
There are 3 different formats of files for this little Halloween House - PDF for printing, SVG and DXF for most cutting machines. There are actually 2 sets of PDF files - one with descriptions of the pattern pieces and one without. If you have any problems downloading these files, please let me know at [email protected].
Next Cut out Your Pattern for the little Habitat Halloween House
If you are cutting the patterns out by hand, simplify things if you can. For example, rather than cut the shingles exactly like I designed them, just cut strips of cardboard and then make cuts for each shingle with scissors. For the balusters, you can use a die or a punch to make the porch railing. That's what I did before I got my Cricut cutting machine.
I wrote a separate post with how to mark score lines in Cricut's Design Space. These photos show you the score lines of each section of this design.
Score the score lines
My Cricut Explore Air 2 does score the cardboard, but it doesn't score it as deeply as I like, so I go over the score lines to make sure I can fold easily along the score lines. The Cricut Maker does a better job of scoring with its scoring wheel.
Now Fold along the Score Lines for the Spooky Miniature Halloween House
IMPORTANT NOTE - there is one score line that is not a fold line. It is a marker to show you where the edge of the angled front extension goes. SO DO NOT FOLD AT THIS SCORE LINE. In the photo below I drew a blue line so you can see where the marker goes. The front extension is designed to be 2 inches wide.

Narrow score lines especially those on the front extension can be a little challenging to fold so I fold the cardboard across my metal ruler.
Prime your cardboard pieces
Because this is a Halloween House I prime the house with black gesso.
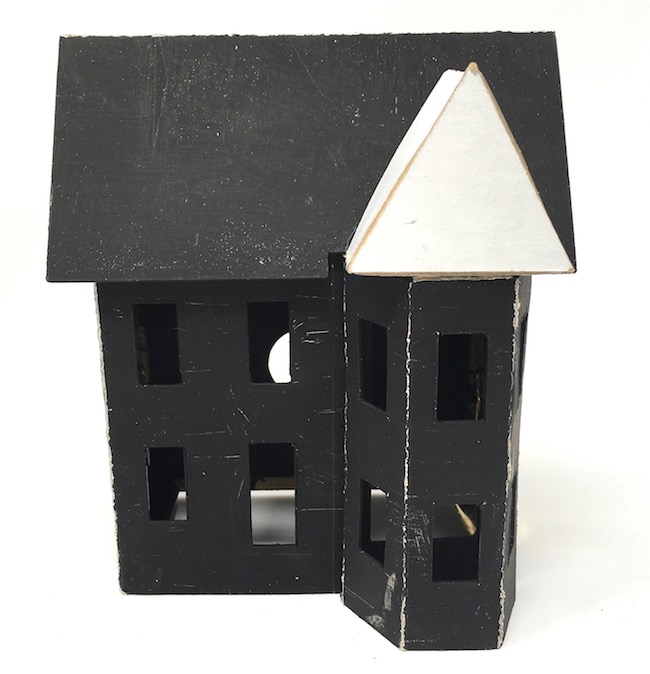
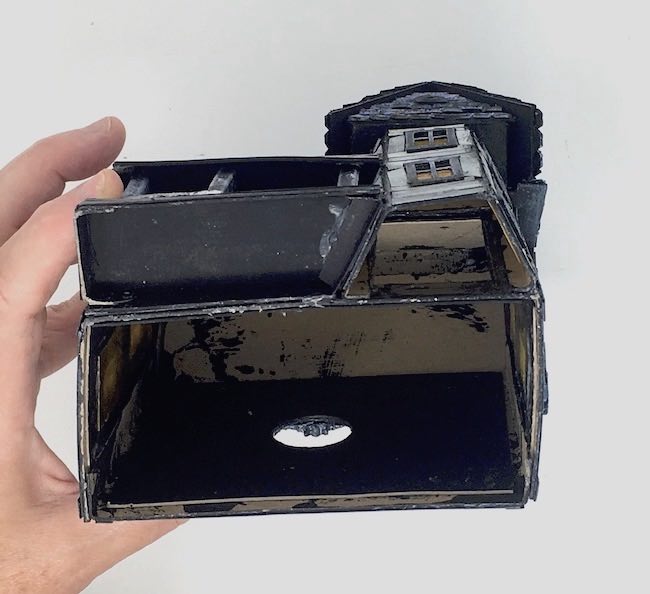
This photo shows the primed basic structure of the Spooky Miniature Halloween House with the angular front extension with the triangular roof piece. Also you can see that I didn't quite line it up very well with the 2 inch marker line.
Add an extra layer of cardboard to the front of the house for support
Since the front of the house has to support two levels of porches as well as a big front extension, I glued 2 layers of cardboard behind the main part of the house. This ensures that the house will be sturdy for the next steps.

You don't have to do this, but it holds the house together so much better. I just cut out some extra front pieces and trim them down on each side so it is still easy to fold the house together.
Make crackle siding if desired
If you want creepy, aged crackle siding on your house, here are the instructions for making your paper look old and cracked.
Add siding to the house before you glue it together
To simplify putting the siding on, I glue on as much siding as possible before gluing the house together. Remember the score line on the front of the main building that is NOT a fold line. That is where the edge of the front extension goes so use that as a marker for where to put the siding on the front of the building. But remember - DO NOT FOLD ALONG THIS PARTICULAR SCORE LINE - it is a marker, not a fold line.

I had to add some vertical strips because I didn't measure very well.
Glue window material to the back of the windows, if desired
If you want your windows to be translucent, you can add vellum behind each window or use some plastic acetate from packaging. Generally, I stain the acetate with alcohol inks and then apply a thin layer of glue to make it look like old wavy glass.
Just like it is easier to adhere siding before you glue the house together, it is easier to glue the window "glass" on before you glue your miniature house together.
Glue the windows and doors to the main body of the Miniature Halloween house
And before you glue all the pieces together glue the door and the windows to the house. The little triangular windows are designed to be like attic vents.
On the pattern there are 2 sets of windows and doors - nice, straight fairly symmetrical windows and a set of crookedy, wonky windows. Choose whichever set you like the best.
Place a piece of paper or cardboard behind the door to give it some dimension.
Glue a square of cardboard behind the door then distress the door with a contrasting color.
Fold the angled front extension and glue the flaps down
To help keep the front extension angled properly, I included a top and bottom flap as well side flaps. Glue the side flaps to the folded flaps. Look at the extension from the top and bottom to make sure it looks like a symmetrical trapezoid or half a hexagon. It's a little challenging to get it at the correct angle.

Adhere the front extension to the front part of house
After experimenting with some prototypes, I found it easier to get the front extension to stick on the house before you glue the house all together. You can use some binder clips and painter's tape to hold it in place while it is drying.
Next, Glue the house together
Now that you have the siding, windows and front extension on your little miniature Halloween house, you can glue it together.
I call this type of house an inset house, meaning that the back piece is inset relative to the front piece. When I make a house that is larger than what I can make with an 8.5 x 11 piece of cardboard, this is how I make the house.
Again, use binder clips and tape to hold it together.
Test fit the roof with the front extension roof
Once the finished cardboard house is all glued together, you can fit the roof on. You have to test fit it because sometimes the front extension doesn't stick exactly where you want it to. You might have to trim the roof overhang a little bit to get things to fit. Don't worry - you can add shingles to obscure any holes.
See the prototype below. I cut the roof edge a little bit more in the middle and extended the roof pattern ¼ inch on each side.

Glue the main roof to the house
Next glue the main roof to the house once it fit nicely. Add the chimney (or two if you like).
Glue the triangular top to the front extension then glue the front extension roof on
I thought about several different ways to make this triangle piece on the front extension. I think this is the simplest way. So first glue the long strip into a triangle and glue the triangular piece in front. It's pretty easy.
Then glue it to the top of the extension. And finally glue the triangular roof to the extension. It overhangs an equal amount of both sides.
But in case that seems too difficult or you don't want to bother gluing the shingles on the angled roof extension (one piece at a time), you can just use the trapezoidal piece in the pattern for the front extension roof. This way is much simpler and still looks good.
Add shingles
If you are cutting out the shingles with an electronic cutting machine, give the machine some time to do the cutting. For this roof, I made cut out the pattern twice so I would have enough shingles.
Once the house is all together, you can glue on the shingles. I glue them on one strip at a time, cutting each strip to fit depending on the angle. There are two sets in the pattern that stagger pretty well. But you are going to have to fit each piece separately on the front with the front extension roof.

Here you can see how each row of shingles was cut to fit the roof of the front extension
Another alternative is just to paint the roof.
Make the porches
What is the truth about the porches? I think they are a pain to make. But I also think they add such great detail to the house that they are worth it.

The thicker piece is the bottom porch and the thinner one goes on top. Fold each piece along the score lines and glue the tabs down. Next glue on siding pieces as the porch boards if you like.
Then glue the bottom porch to the front of the house. Figure out how high you the second story porch and glue it to the house. This is why I use Aleene's Fast Grab glue, it helps stuff like this stick quickly. The photo below shows how the porch piece is glued to the house itself. I hope that helps. It also shows that the house is a little wonky. That is pretty typical for me, but it doesn't show up so much on a Halloween house.
Make the porch columns
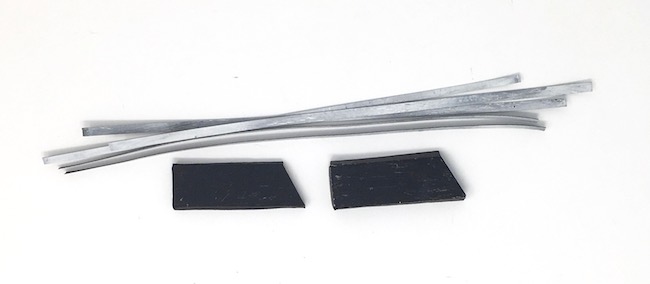
Make the porch columns. So they will have sharp creases, I use 110# black card stock to make the porch columns. Next fold the porch columns along the score lines and glue them together. I used 3 columns in the front of the porch. I distressed them all, you can see them below.
Ok, now here is the main porch challenge - cutting the columns to size. Measure from the top of the bottom porch to the top of the second story porch. If your porch pieces are glued on straight or parallel, then the columns will be the same length. But that never happens for me. So I pick one side, measure and cut the column to length. Then do a test fit, trim a little more if needed. And it is almost always needed. Then test fit again until the column stands up pretty nicely in the space provided. Take it out of its place, apply a thick blob of glue to both ends and then put it back in place. Do that with the other 2 columns. Let dry before you do another step.
Add porch railing to the porches
Now bend the porch railings to fit the porch and glue in place. Trim it to fit the first story porch leaving an opening for doorway.
Make the fence and cardboard base
I made this cardboard base just like the cardboard base for the Putz House mansion. The dimensions for this base are 4.5 inches by 6 inches. Prime and paint it in your desired colors.


Now the fence is optional, but I made two patterns for a bat wing wrought iron fence to embellish the base. The one I used on this house didn't look the way I wanted it to so I made a better one which is in the downloaded file.
Each panel of the bat wing fence is about 1.5 inches so the 3 section part goes on the each side and the back piece is 6 inches wide. Again to make the fencing more substantial, I glued 2 layers together.
Please note - it does take the machine awhile to cut out the fencing. I know some people are capable of cutting out things like this by hand, but I am not. I would either use these fence dies or just cut strips for a picket fence.
Glue the your little Halloween house to the base

When your little cardboard house is finished, glue it to the your cardboard base with a thick bead of glue on every surface that touches the base - the porch, the front extension, all around the structure of the house. You want it to have every chance to adhere well to the base.
Adhere the bat wing fence to the base
After the house is firmly in place, then glue the fence around the base. You can choose to go around the outside of the base or on top of the cardboard base - whatever looks best to you.
Finally decorate your spooky miniature Halloween house
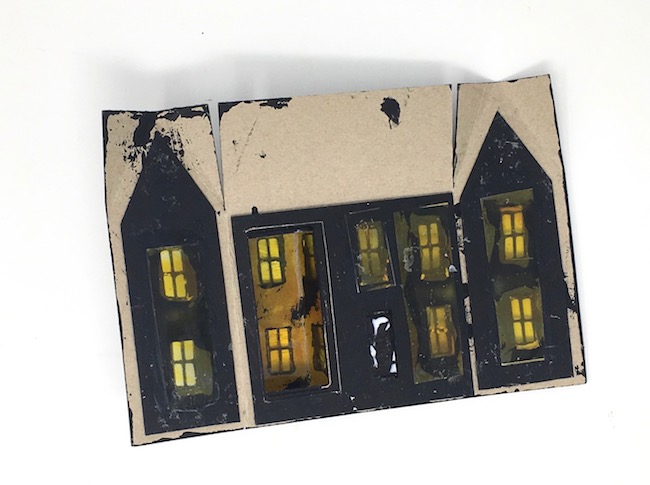
I was in a bit of a time crunch to turn this in for the Habitat for Humanity fundraiser so I didn't go too crazy with the decor. It really needs a twisted tree and some bats, but I just didn't have time. So I just went with some leaves punched out of stained paper and added a few pumpkins. The house has a pretty decent spooky creep factor all on its own. Oh, and there is a bat on the back around the light hole in the back.

So that's a detailed account of how to make this spooky, aged Halloween house out of paper and cardboard and glue and paint. I hope you will try to make this house or some variation of it because it is a great addition to any Halloween or Fall decor.
If you have any questions, email me at [email protected] or you can join my Facebook group for more inspiration and advice.
Lucy
P.S. Please feel free to pin any photo to Pinterest.


Carol
This is an awesome house and I am excited to try making it. Thank you for the pattern. All your houses are just amazing!
Lucy
Thank you so much, Carol.
Lucy
jay
how wide did you cut the house? 8.5x11?
Lucy
Jay,
I usually use 8.5" x 11" cardboard to cut out the pieces because that is what I have. The main structure of the house is 4.25 inches wide and 6.125 inches tall and 2.25 inches deep.That's without the porch or the front extension. Is that what you asking?
Wendy
Hi Lucy
Are these patterns enlarged or are they the exact size that I download print out from your site?
Thanks!
Lucy
Wendy,
The pattern that I post is exactly the one that I used. The only possible change is that everybody's printer is different so the pattern may be printed slightly smaller than I designed it.
On my newer patterns, I include a one inch square so you can check how the patterns are printed compared to how I designed it, but I haven't done that in the older patterns.
Does that answer your question? I hope so.
Lucy
Katie
I love this. Plan on working on it soon, but when I downloaded the SVG files, there was nothing but a blank page for the fence. Going to go back and get the PDF files since I can import them into the Silhouette Studio for my Cameo 3.
Lucy
If I save the file as an Inkscape SVG, it often shows up as a blank file in Silhouette Studio. So that is probably what happened. I try to remember to save it as a plain SVG file. I will go and check. Thank you so much for letting me know so I can fix this.
Lucy
Stephanie
Awesome. So perfect. Spooky to the max. Great job.
Lucy
Thank you, Stephanie. I do appreciate it.