One of the easiest projects to make for Easter or Spring is paper mache eggs. You can make so many delightfully different, creative home decor items with them. And they are so inexpensive. The only real cost is buying the water balloons from the dollar store. Dilute some white glue and then use strips of scrap paper and poof! you have all the materials you need to make an adorable paper mache egg.
And what can you do with your paper mache egg?
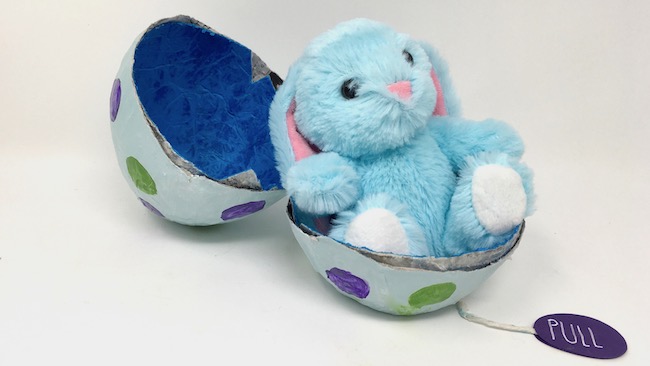
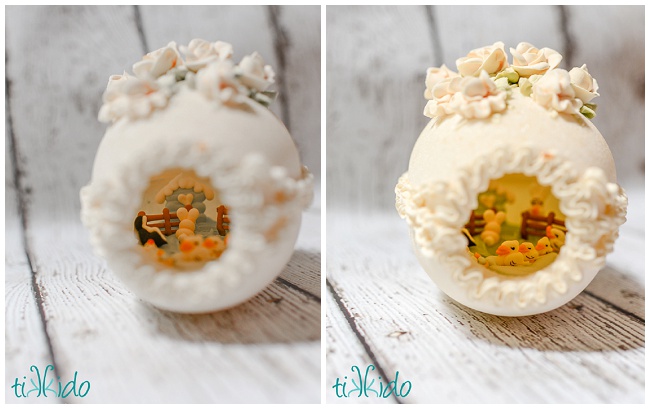
I love the Paper Mache Surprise Egg for Easter.
You can make lots of shadow boxes or dioramas. Here are the ones that I have made so far:
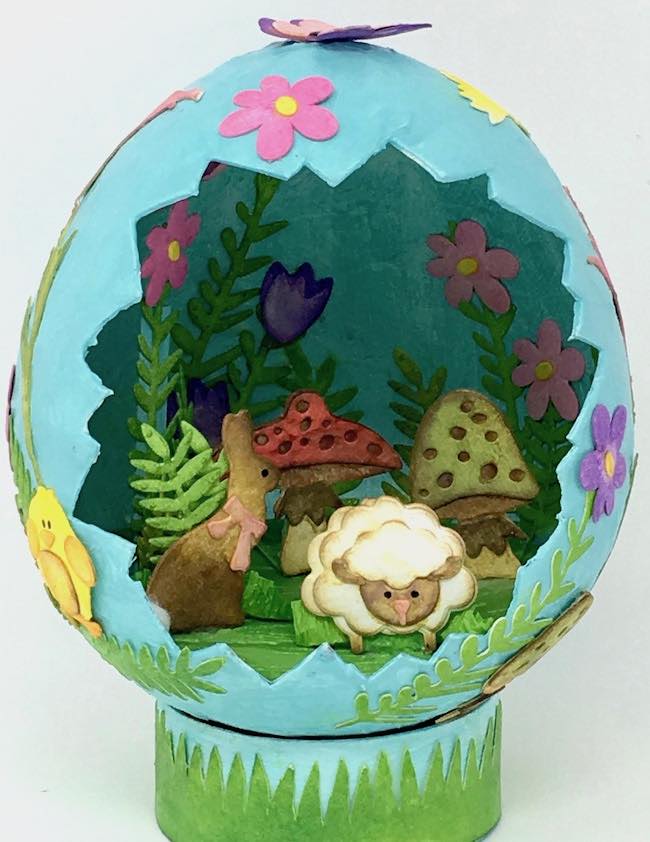
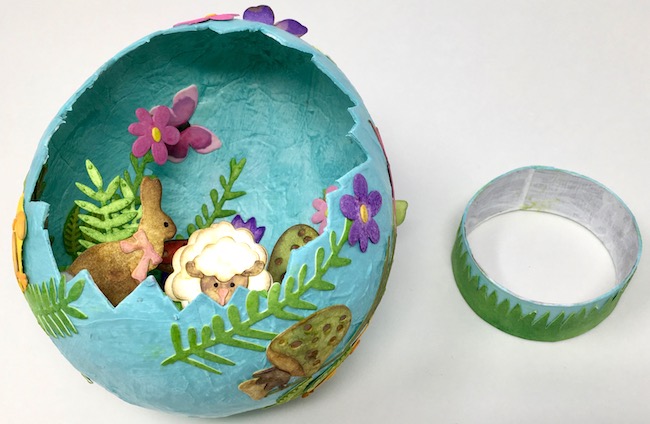
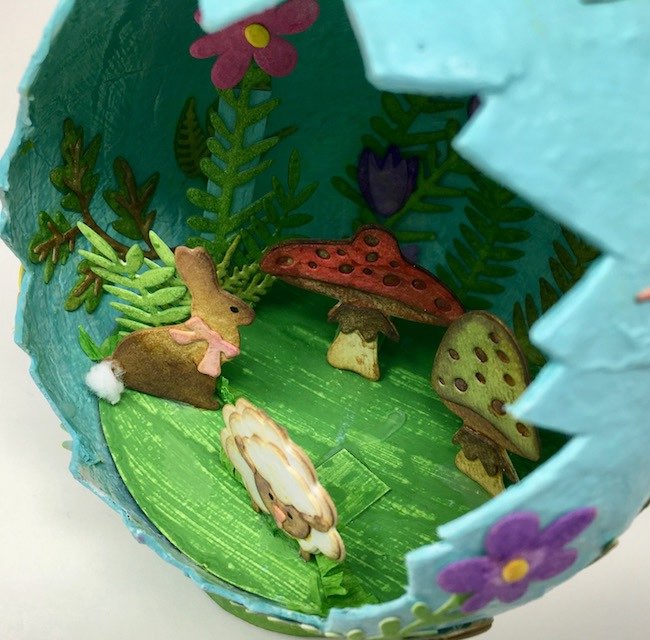
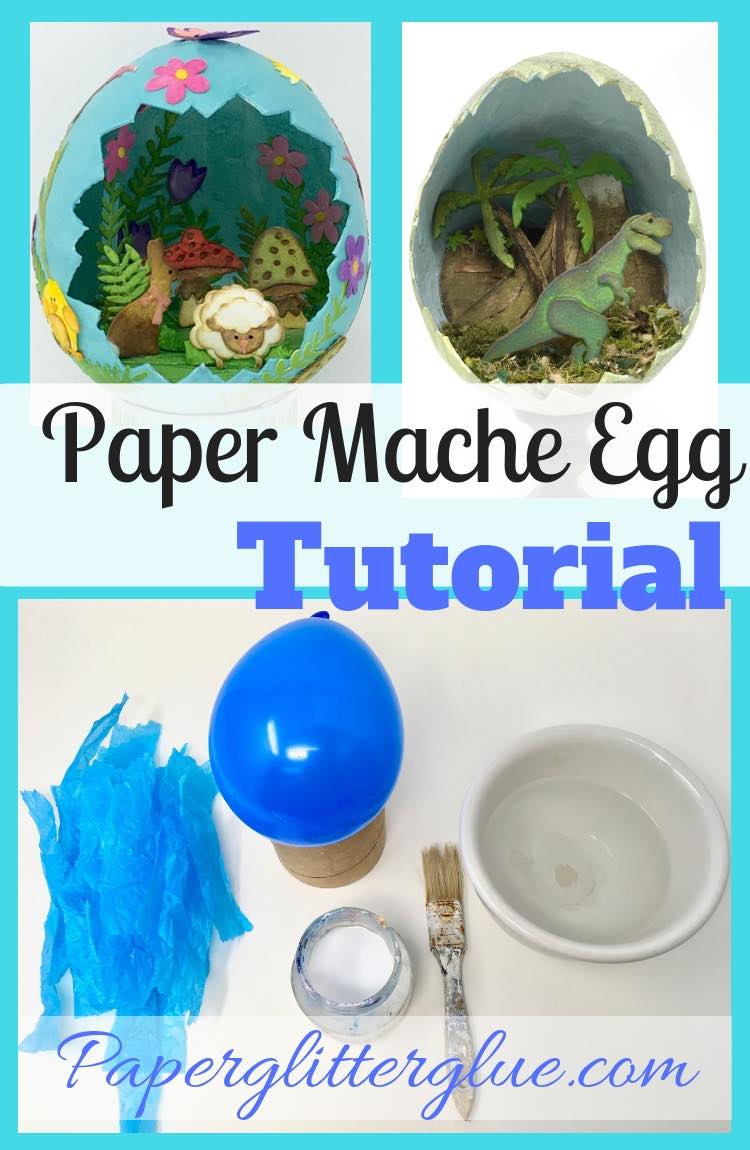
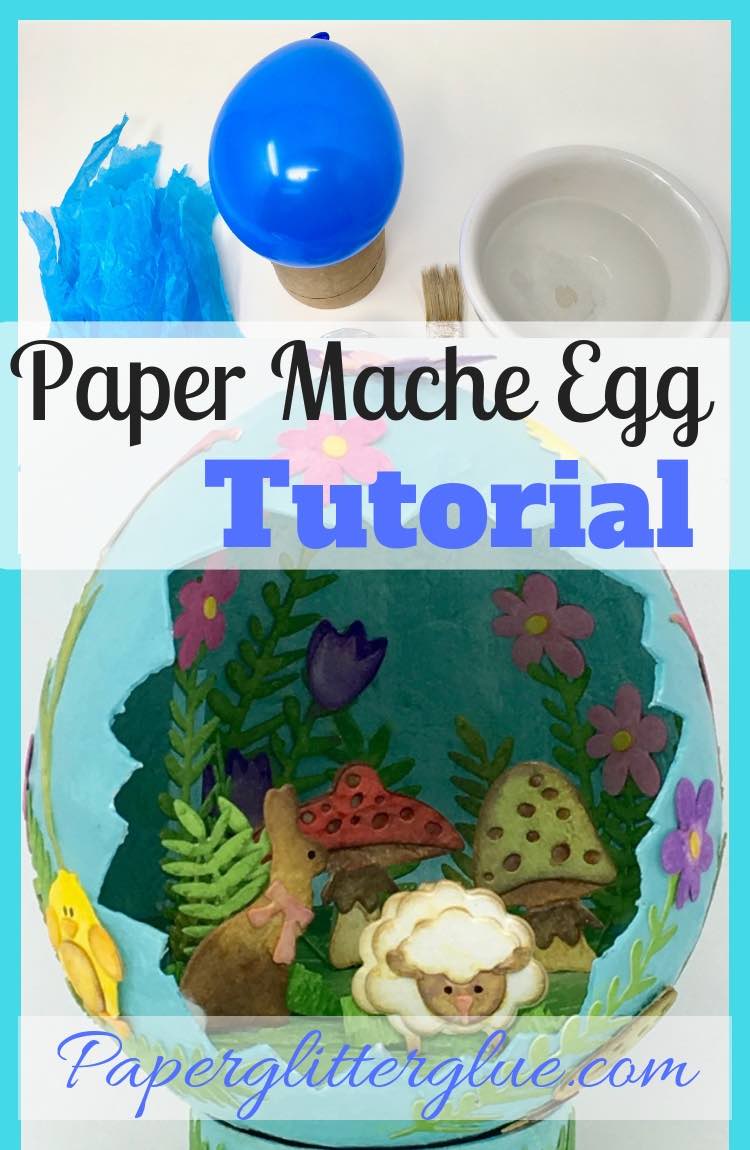
This paper mache egg is made with lots of die cuts from Tim Holtz to make a Spring scene. I love the flowers and the fun little animals.
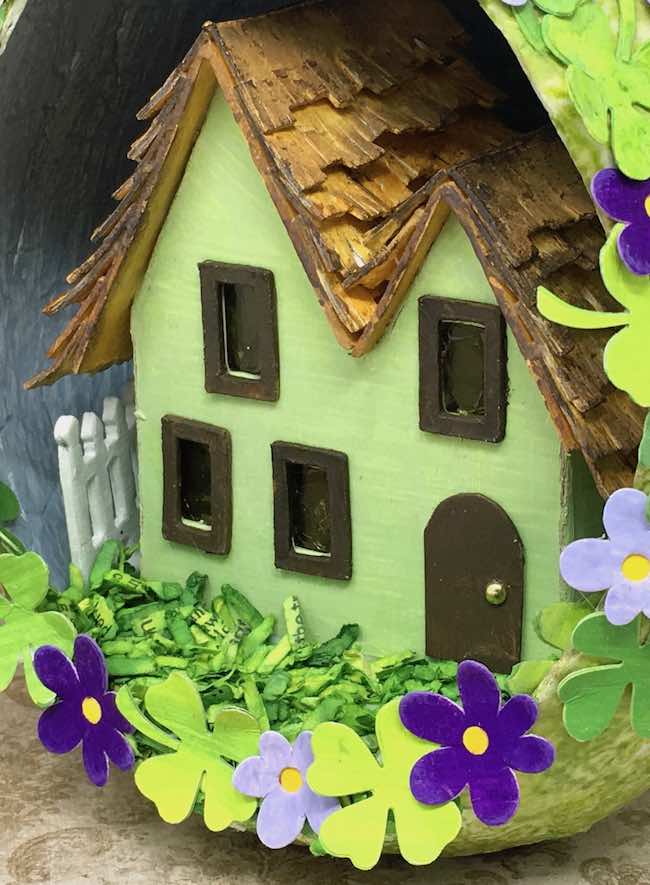
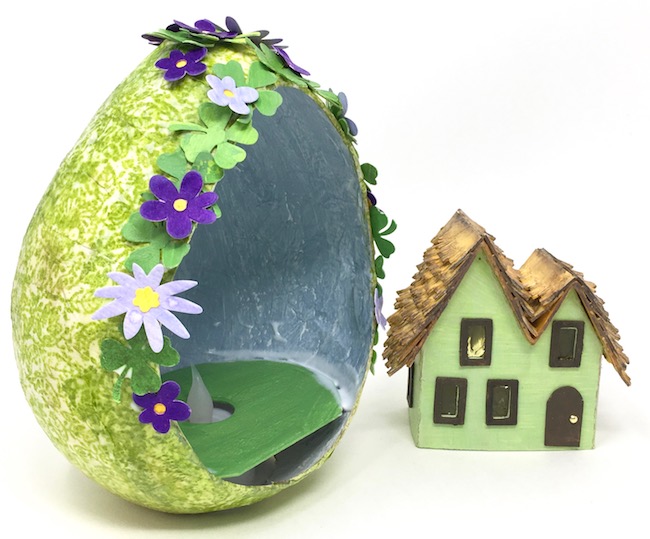
You know I had to add a little Putz house to at least one of the paper mache eggs. This is a mini Irish cottage set in an egg decorated for St. Patrick's Day.
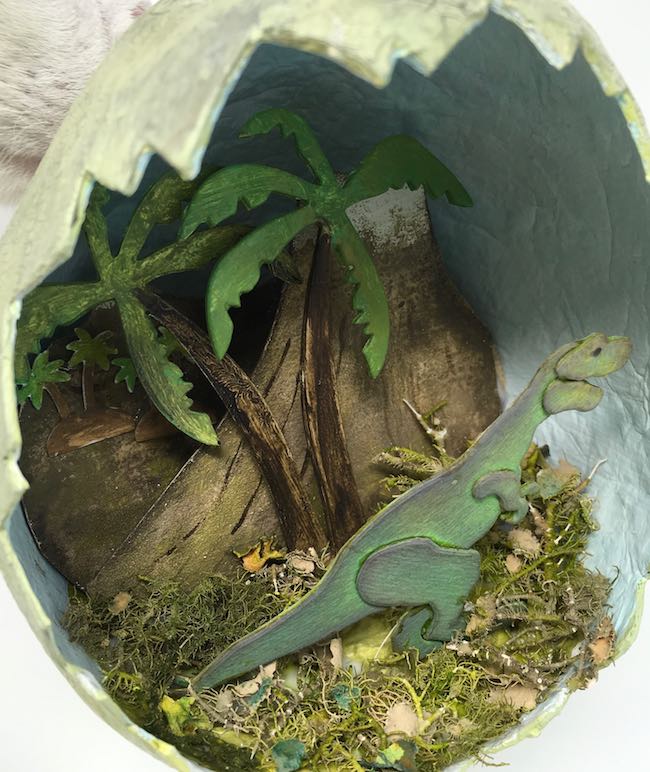
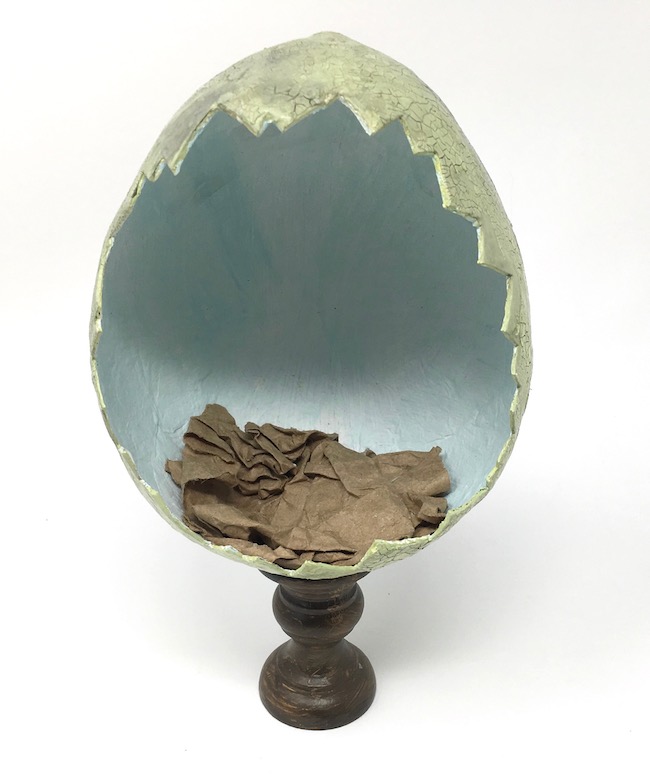
And finally I made the Jurassic Egg - a dinosaur diorama inside a cracked paper mache egg. The T. rex roams the volcanic prehistoric setting. Oh, and there is a real monster in this setting. Bill the cat is photobombing in the left upper corner.
When I make these paper mache eggs for a home decor piece, I add several layers of paper mache so they will be very sturdy and last for many seasons. I also used about 4 layers to make the Paper Mache Surprise Egg with a pull tab to break open and get to the treats inside.
But it you want to make a paper mache egg for a piñata or to crack open for a gift or a little treat, you don't need many layers at all. You can use 3 layers of tissue paper or newspaper. It would be dangerous to make a really solid egg for a piñata because then someone would have to whop it with a lot of force to break it open.
So if you want a paper mache egg to crack open, don't use as many layers.
Let's go over the steps to make a paper mache egg
This post contains some affiliate links for your convenience. Click here to read my full disclosure policy.
Materials to make Paper Mache Egg
- Water balloons
- Diluted white PVA glue (or Mod Podge)
- Scrap paper - tissue paper, newspaper, or brown packing paper
- Gesso
- Paint
- Bowl to hold balloon
- Craft knife with an 11 blade
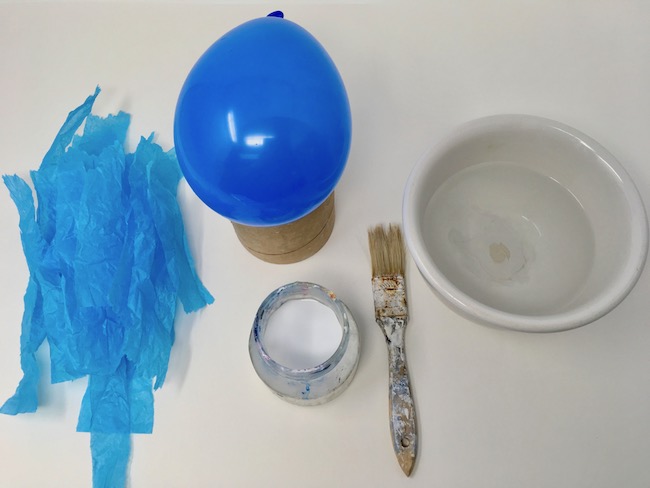
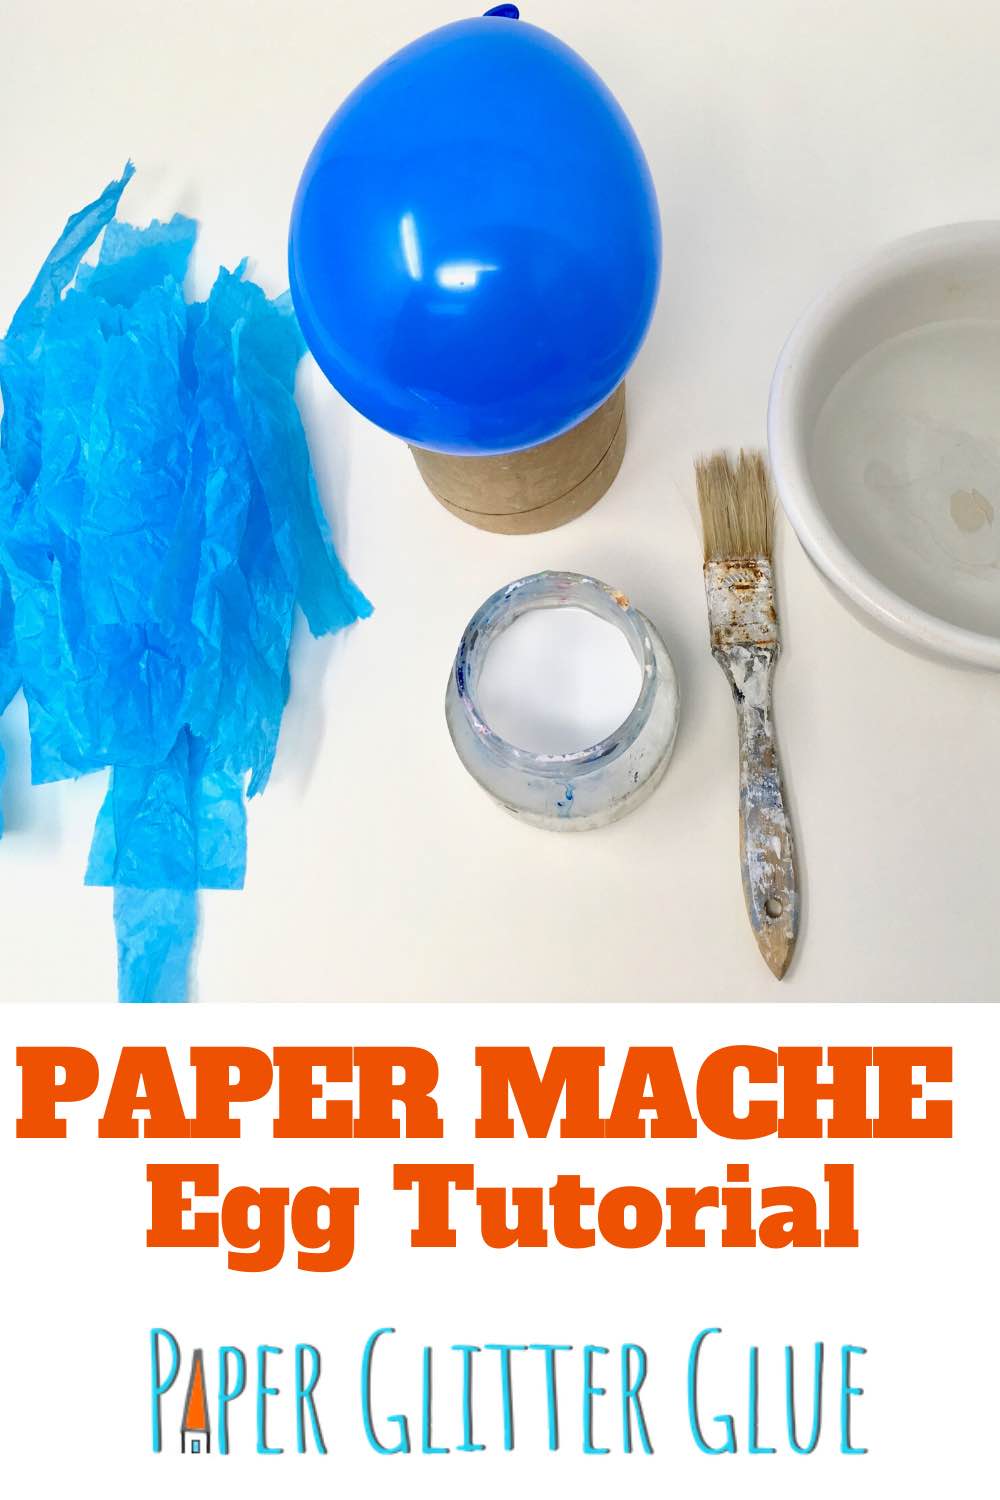
Torn tissue paper strips, diluted white glue, water bowl, paint brush and water balloon to make paper mache egg
Summary of How to make Your Fun Paper Mache Egg
- Mix white glue with water 1:1
- Blow up balloon and tie it tight
- Tear paper in strips
- Apply torn paper strips to your water balloon
- Allow balloon to dry
- Pop the balloon and remove
- Cut an opening in your paper mache egg
- Prime egg with gesso then paint the color you choose
- Make decorative elements
- Form a base for your paper mache egg to hold it upright
- Adhere decorations on your paper mache egg
Now here is more detail on how to make your Egg with Paper Mache
Mix white PVA glue with water
Regular white glue (PVA glue) by itself is a little too thick to coat the paper so I dilute it about 1 part water to 1 part glue. During some of my experimentation in making the paper mache egg-shapes, I sometimes diluted the glue too much. You want it thin enough to coat the paper but not be sopping wet because if it is really wet the paper gets too soggy, sticks to your fingers, and takes forever to dry.
Other options to glue your paper strips on the egg are:
- Mod Podge also diluted but 1 part water to 2 parts Mod Podge
- Traditional flour paper mache paste - 1 part flour to 2 parts water
Blow up your balloon and tie it tight
Now blow up your water balloon to the size you want. Try to keep it in an egg shape. If you blow up a water balloon all the way, it seems to get rounder. So stop when it is close to the egg shape you want. But you don't want it too mushy or the paper won't adhere well.
Water balloon that developed a leak around the knot and deflated before the paper was applied
And do tie the knot on the balloon tight. I didn't do that on one balloon and it deflated before the paper mache dried which made it all wrinkly and unusable.
Tear Paper in strips
Really, first you have to choose what kind of paper you are going to use. For a lightweight, delicate balloon, tissue paper is the way to go. If you are going to make a piñata balloon, tissue paper is a good choice. But if you are going to make a seasonal home decor piece, then I would use either newspaper or brown packing paper. Since I order a fair number of craft supplies online, I have a lot of brown packing paper so that is what I use most often.
Now tear the paper into strips. At first I tore the small little pieces that took much longer to adhere to the balloon. After that, I decided long strips were sufficient. One thing I didn't think about is that paper has a grain - it is easier to tear in one direction than the other. So tear you paper in the direction that is the easiest. For newspaper and copier paper that is in the long direction.
Another craft tip here is to wrinkle your paper before you wet it. It makes it a bit more flexible and easier to apply.
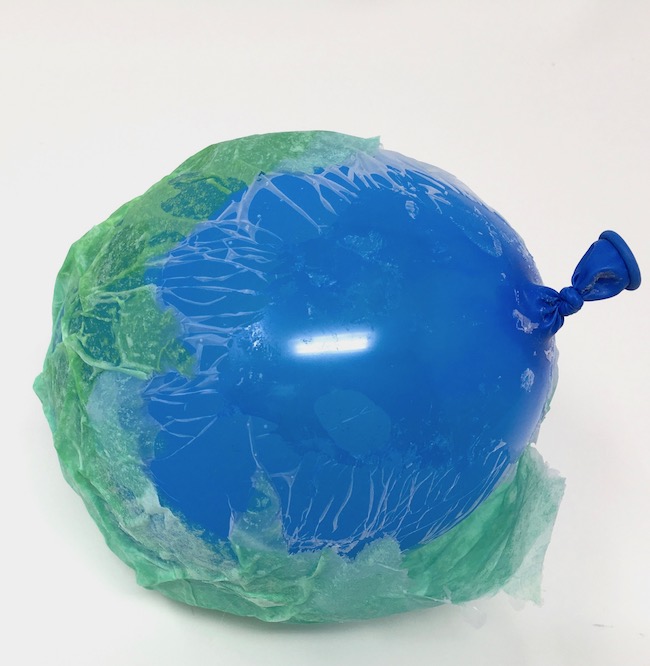
Now apply the paper to your water balloon
Have your balloon in a bowl that is large enough to contain it. The balloon is light and will try to escape until you have a fair amount of paper mache on it.
To cover the balloon, first dip the paper in the diluted glue mixture. Pull the paper between your fingers to get the excess glue off.
Apply the glue-covered paper to your balloon smoothing as you go. Continue to apply strips overlapping as you go. I try to add extra layers around the tied knot on the balloon to prevent leakage.
Craft tip: Have a bowl of water you can dip your fingers into because they get covered with so much glue it is hard to get the paper to adhere to the balloon rather than your fingers.
Generally you let each layer dry before you add subsequent layers. More about drying the balloon in the next section.
Allow the Balloon to dry
Tissue paper is thin enough for 3 layers to dry easily in one application. But if you are using the brown packing paper I would add no more than 2 layers before letting it dry over night.
I have a trick to help the balloon dry faster. I clip it to the front of a fan with a binder clip. Just put the balloon knot in the binder clip and clip it to the wire front of the fan. It really speeds up the drying process.
Also each layer seems to dry a bit faster than the one before.
In general, you have to give the drying process 2-3 days. That's really the only trick to making these great paper mache eggs. You have to factor in the drying time.
Important craft tip - do not use a heat source to dry the balloon. Heat will make the balloon expand and could pop before the paper dries ruining all your work. You can put it in a warm dry place, but not near a very warm place like in the oven, for example.
Pop the balloon and remove it
Now pop the balloon by poking a hole near the exposed knot, cutting the knot, etc. Sometimes the balloon is stuck to the inside layer of your paper mache, don't worry. It will deflate and you can get it out.
Cut an opening in your paper mache egg
Now decide how you want to make an opening in your paper mache egg:
- Do you want to make a piñata? If so, make a small opening at the bottom to fill with treats.
- Do you want to make a cracked egg? Then cut a jagged edge around the front of the egg
- Do you want a smooth, pretty panoramic egg? Then cut a smooth round circle on the front of the egg
- Do you want to make a chick bursting out the top of the egg? Cut a cracked edge at the top so your chick can escape.
The paper mache eggs that I made were very thick and sturdy so it was a bit challenging to cut through the paper mache material. I used a sharp craft knife with an 11 blade (the sharp pointy blade) and inserted it to start the cut. Once I had some material removed, I actually could use scissors. But to make the jagged, cracked edge I just used the craft knife making short cuts each time.
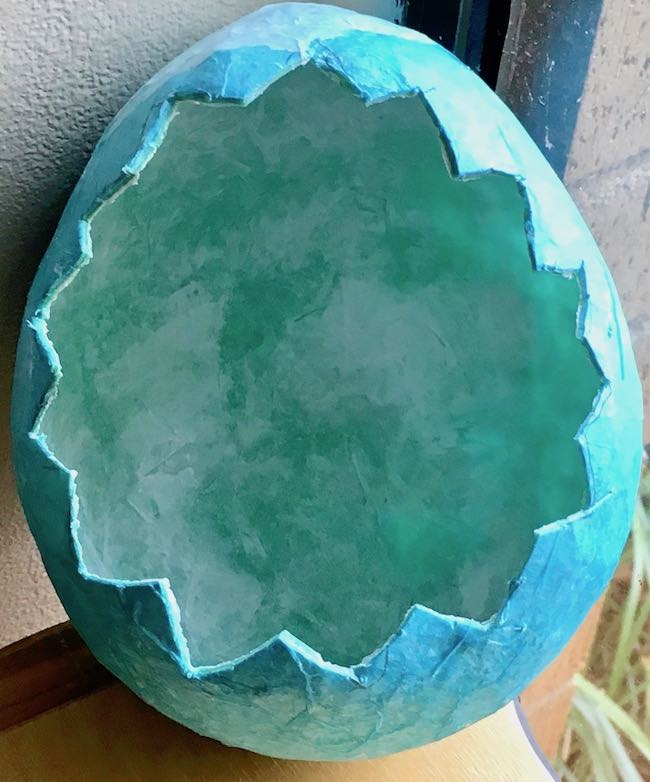
Cracked egg edges cut out on paper mache egg
Jagged edge for the Dinosaur diorama egg
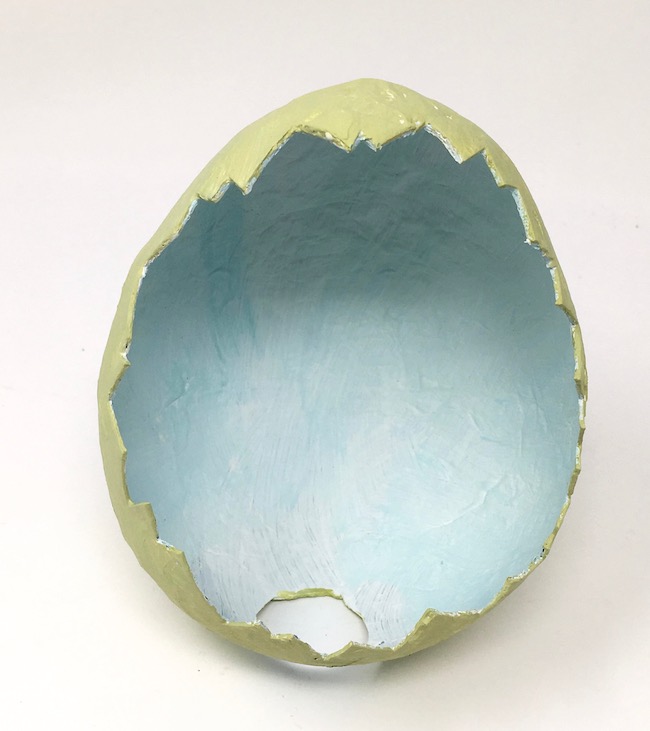
Prime egg with gesso then paint the color of your choice
Prime your paper mache egg inside and out. I use regular gesso for this step.
Next choose the colors for your egg. It is important for the inside of the egg to be a light color. My first paper mache Easter egg project was the cute little egg with the bunnies and the lamb. I made a mistake on this egg, I painted the inside color too dark. I did better on my last paper mache egg - the Dinosaur Diorama. For that one, I painted it the faintest light blue. It worked much better.
You can see on the Dinosaur diorama egg above how the blue is a much lighter color.
Choose whatever color works well with your design for the outside color.
Now make or gather your decorative elements
Here's where you get really creative. You can use die cuts like I did on my paper mache eggs. Or perhaps you want to make a little house to fit inside your egg. Perhaps you have little plastic figures you want to add to your egg. Or even cut out Easter graphics for the inside of the paper mache egg. Maybe you want them to look like the traditional panoramic eggs like this one from Tikkido.com below:
1979 Victorian panoramic sugar egg from tikkido.com (Used with permission)
Form a base for your egg to stand upright
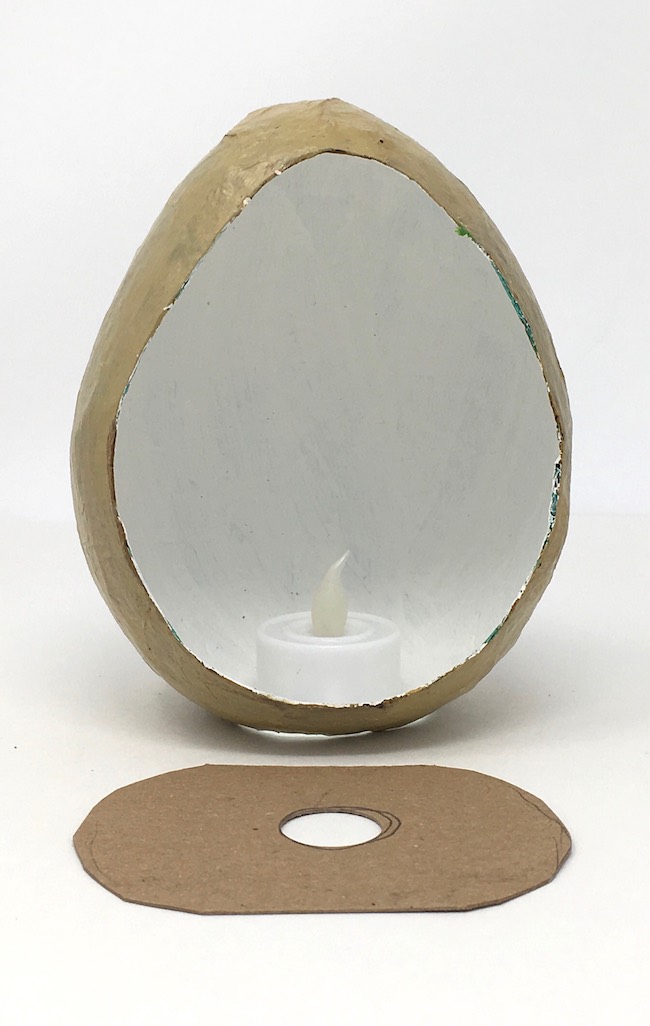
Decide how you want your egg to stand. There are a number of options to make your egg more stable. On the St. Patrick's Day Irish Cottage and the Dinosaur diorama, I cut a circle out of the bottom to make it stable. On the paper mache Easter egg, I simply made a ring to hold the egg.
Martha Stewart's website shows a paper mache egg where the top of the egg was cut off and used as a base. That's a cute variation.
Adhere decorations on and inside your paper mache egg
One reason I suggested making the base before you add your decorative elements is that it is easier to decorate your egg when it is stable on a base.
Depending on how you are decorating your egg, you probably need a base for your decorations to stand on. For two of my eggs I cut an oval piece of cardboard to fit inside the egg. For the Dinosaur Diorama paper mache egg, I crumpled up paper for the support. I've even seen some eggs that had a vertical piece of paper as the background to the decorations.
Be sure to decorate both the inside and outside of your paper mache eggs.
And I hope you have fun. I also hope these instructions help you make your own paper mache egg.
Oh, one more important thing
Now I have a private Facebook group that you can join if you would like to share your projects or ask questions that you think will help other people. Please be sure to subscribe to my newsletter as well. Click here to go to join this group: Paper Glitter Glue Private Facebook Group
Lucy
P.S. Pin to your favorite Pinterest Board!
Leave a Reply