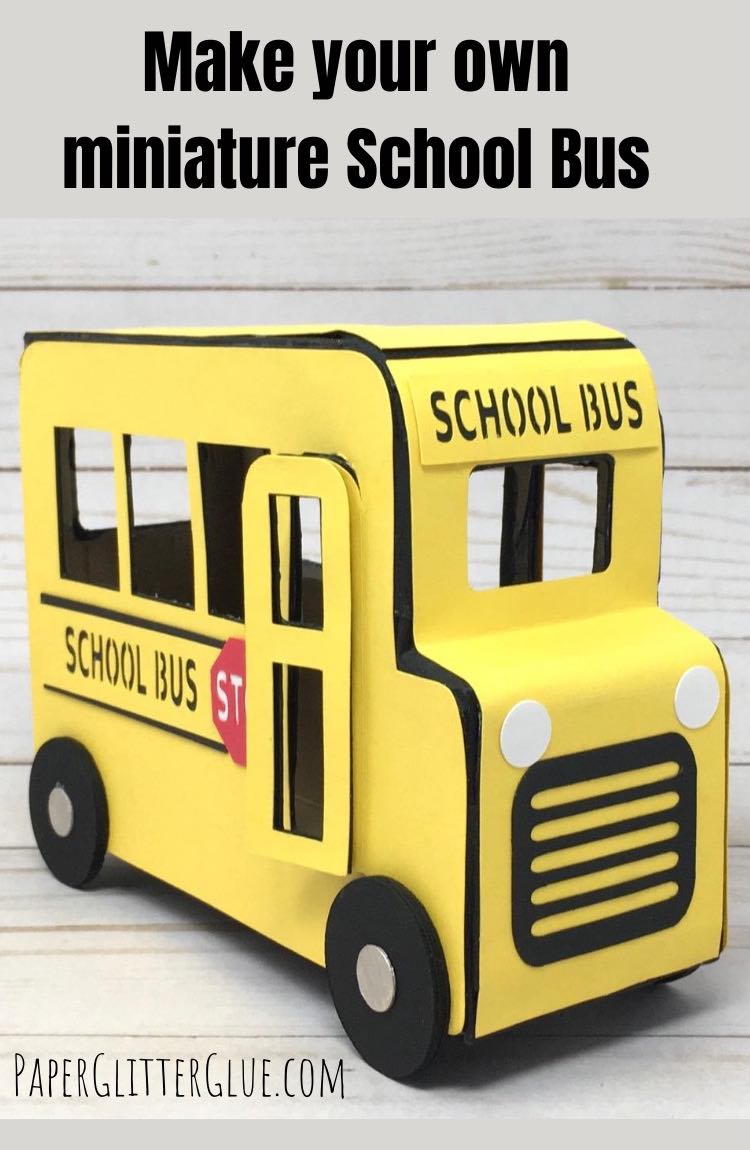
How to Make a Little DIY School Bus from a Recycled Box

Did you ride the school bus when you were little? I did for most of my school years. I also remember that I didn't like it for the most part. But times are different now and I'm more nostalgic about the school bus. One of my friends told me that her young pre-school children get excited when they see a school bus. So of course, that means that I designed a DIY School Bus for you to make.
The DIY School Bus is design no. 90 in the August 2020 section of the free Paper Glitter Glue library.
Be sure to subscribe to my newsletter to get all my papercrafty news and to get the password to the free library.
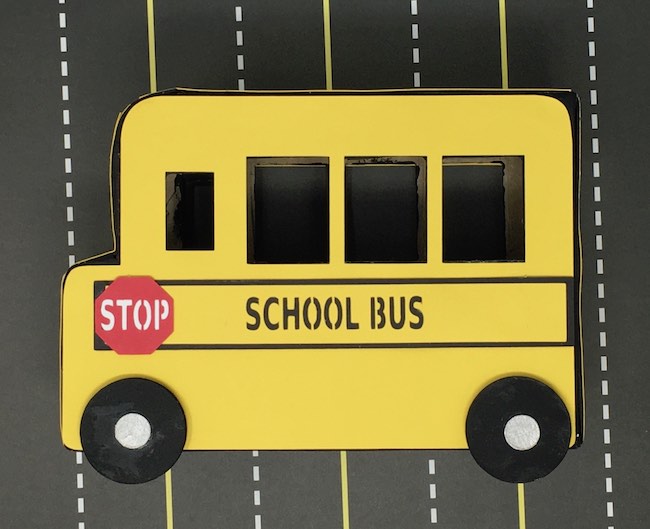
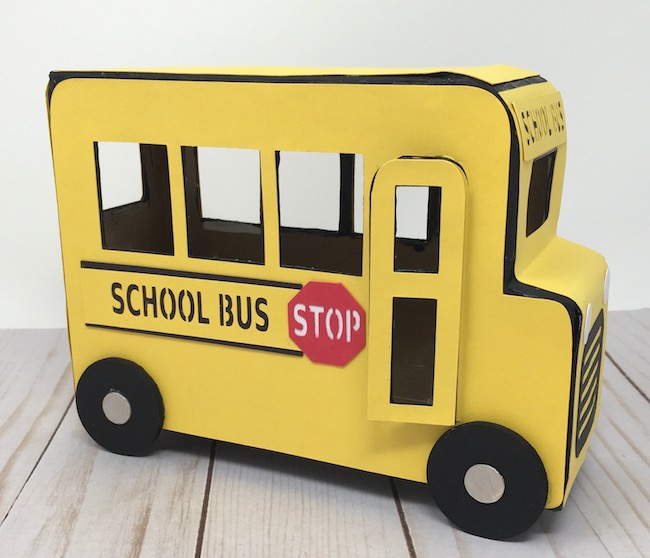
It's another paper project in the recycled box series using a pasta box. I am so tickled about how it turned out. What do you think?
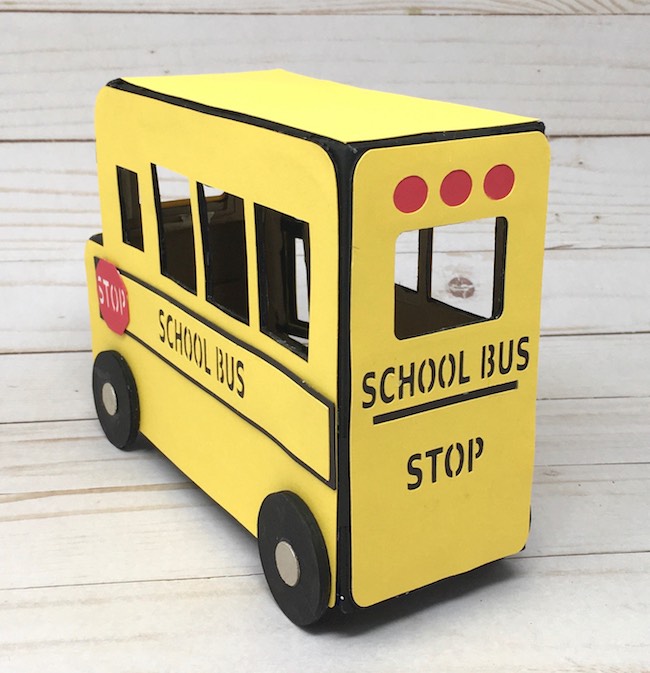
So the pasta box forms the underlying structure for the bus with cardboard reinforcements on each side. Then the cover the cardboard layer with colored card stock to complete your little bus. Here's how to make it.
This post contains some affiliate links for your convenience. That means if you make a purchase after clicking an affiliate link, I earn a small commission but it won’t cost you a penny more. Click here to read my full disclosure policy.
Materials to make the DIY School Bus Recycled Box
- School Bus Pattern (design no. 90) from the Paper Glitter Glue library
- Pasta box (empty pasta box, that is)
- Cardboard (this is what I use)
- PVA glue - I used Aleene's Fast Grab and Art Glitter Glue
- Masking tape
- Painter's tape
- 65# Colored card stock - yellow, black, red
- Black gesso primer
- Silver paint or silver paper for hubcaps and headlights
- Craft knife
- A way to cut out the pattern - I used my Cricut to cut everything out
Summary of steps to make the DIY School Bus
- Open recycled pasta box
- Cut out cardboard bus shapes and card stock for the bus - Design No. 90
- Trace bus windows and door openings on the pasta box
- Cut out window and door openings
- Use glue and masking tape to form the bus shape on pasta box
- Glue cardboard school bus shape to each side of the pasta box
- Paint the edges of the bus with black gesso
- Prepare the card stock for the bus
- Adhere the card stock to the school bus
- Make wheels
- Glue wheels to the bus using to score lines to line up wheels
Related Links - Recycled Box Crafts for You to Make
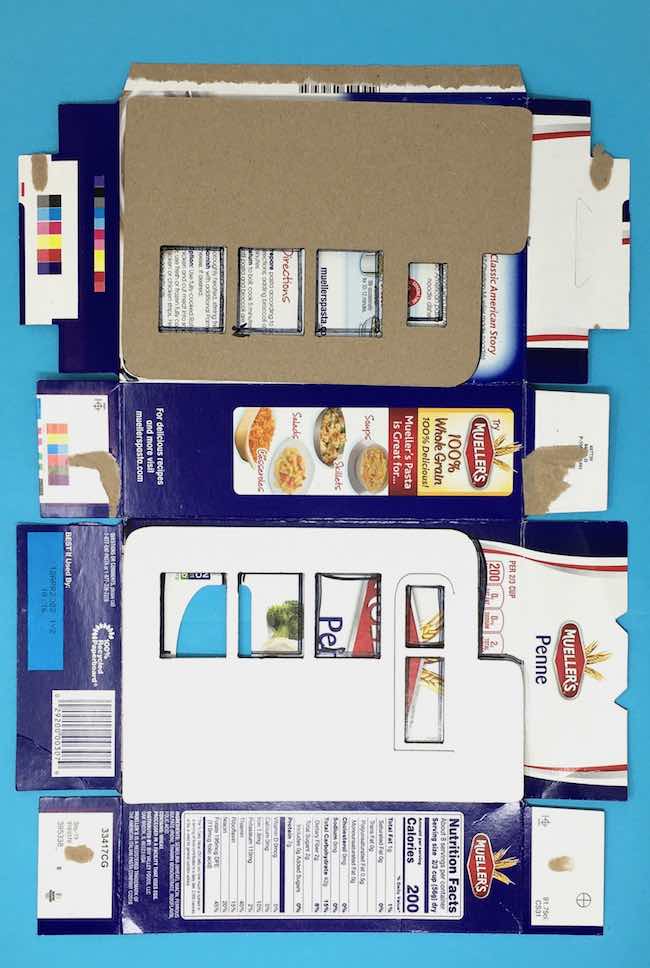
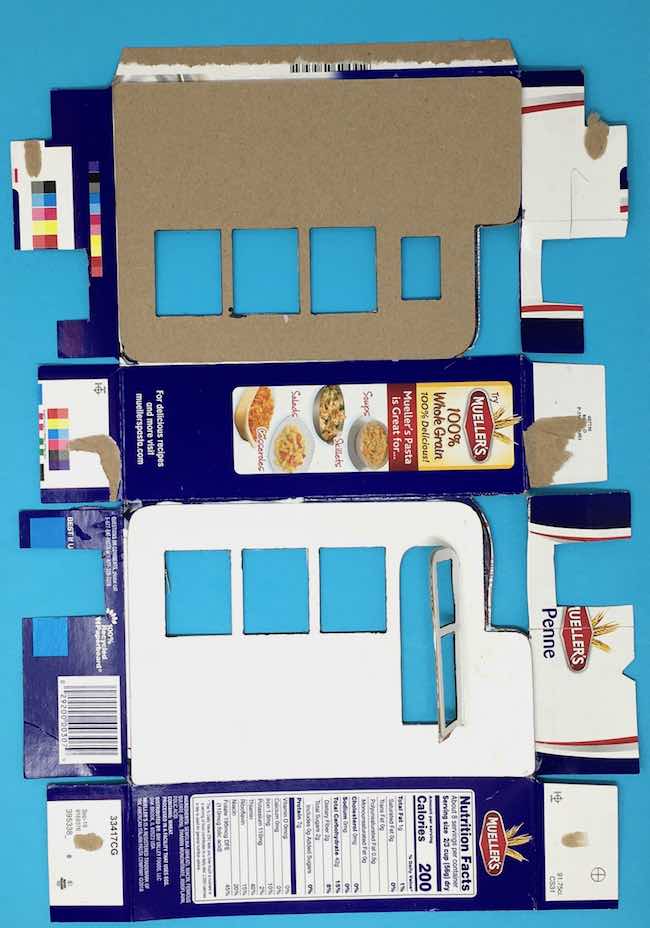
First, open the recycled pasta box
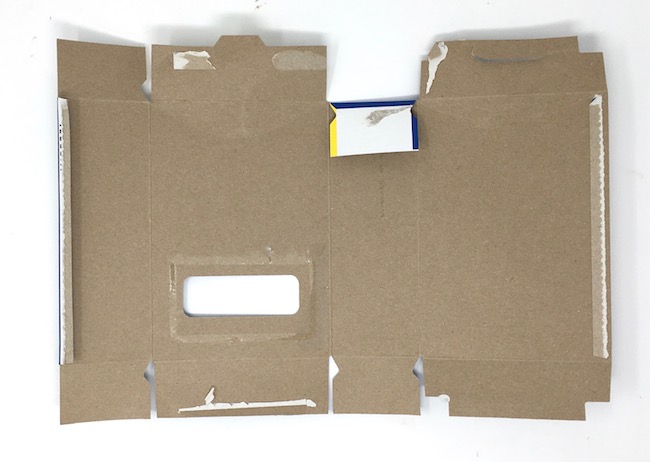
When you open the box, be sure to save the tab on the side to glue it back together. You can see it on the left side below.
Oh, I bought lots of different types of pasta to check out the size of the boxes. Almost every box has front dimensions of 5 inches across and 7.5 inches high. The thing that varies is the depth of the box. Most of the boxes are 2.5 inches deep - that's what this pattern is based on. But you can pretty easily resize the side pieces if needed.
Next, cut out cardboard bus shapes and card stock for the bus
To get the school bus pattern, just type in the password to get access to the library. If you don't have the password, just subscribe to my newsletter and you will get the password right away. Use the form below to subscribe.
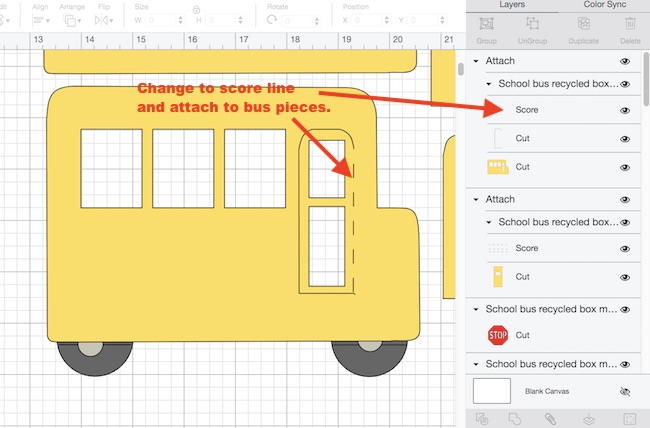
Here's the pattern in Cricut's Design Space (which is the software I use to cut out my projects).
The two important sets of score lines - one for the door and 3 lines to help you make the front of the bus. Those are the most important score lines you need to change from cut to score and attach to the designated piece in Cricut's Design Space. But there is also a score line on the wheel which is used as a marker for gluing the wheel to the body of the bus. I'll show you that in a minute.
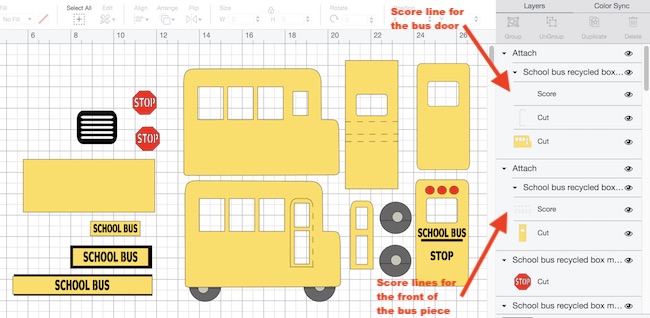
See the close-up of the score line for the door opening.
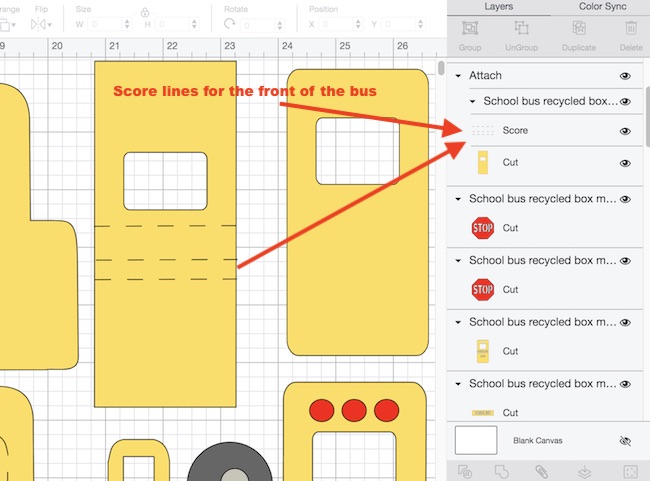
And here is a close-up of the score lines for the front of the bus.
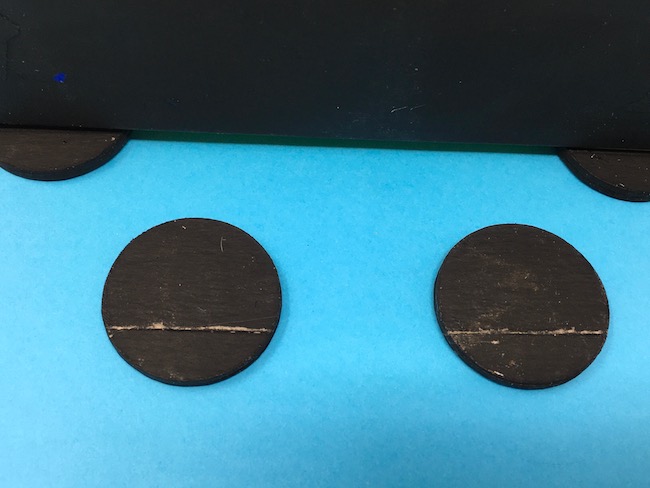
So the next score lines are lines on the bus wheels. Why do the wheels need score lines? Just to make it easier to glue to the bus. If you line up the bottom of the box with the score lines, each wheel will be level and the bus won't be crooked when standing up. More on that during the construction of the bus.
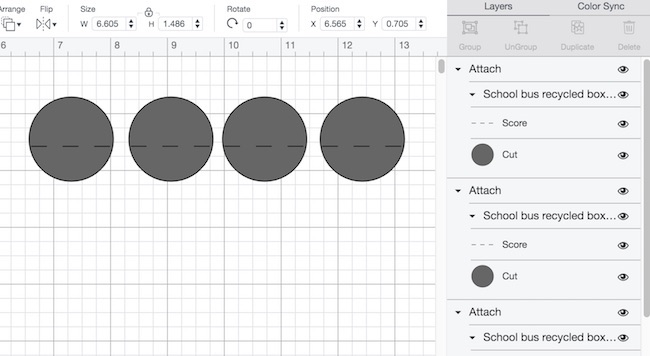
Also, cut out 12 wheels to glue 3 together. That makes your wheels sturdy.
In summary, here are the pieces you need to cut out of cardboard:

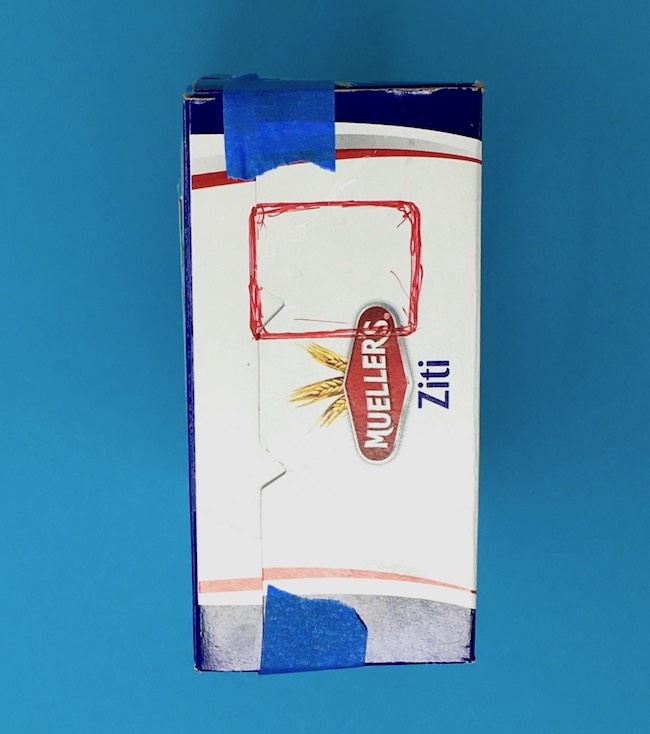
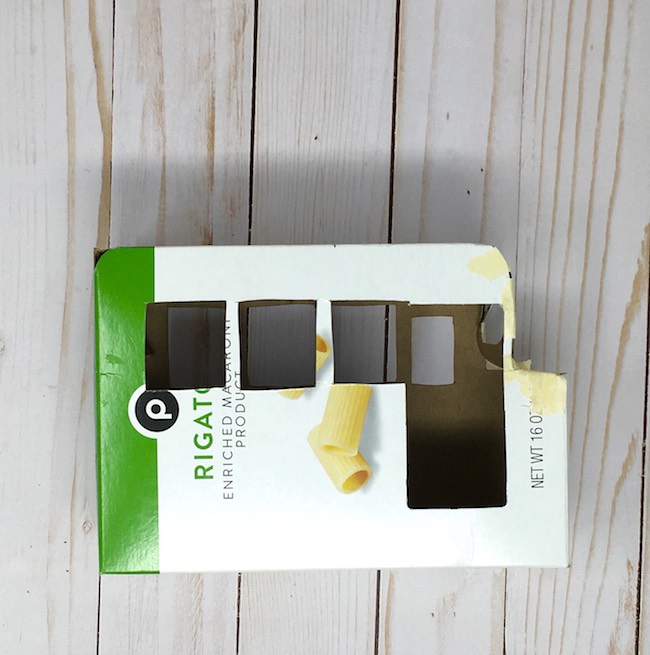
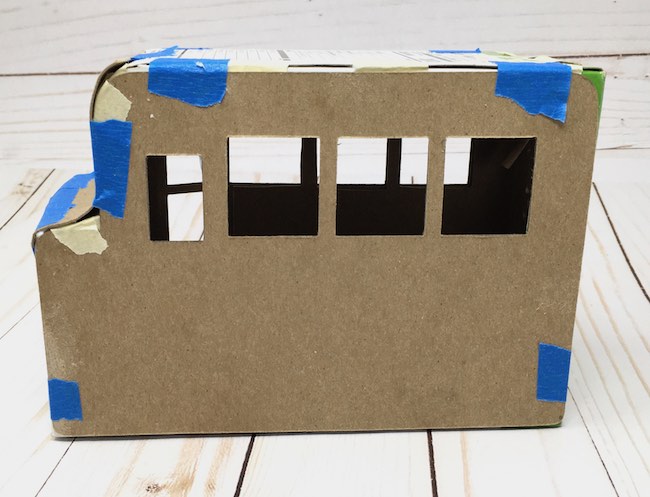
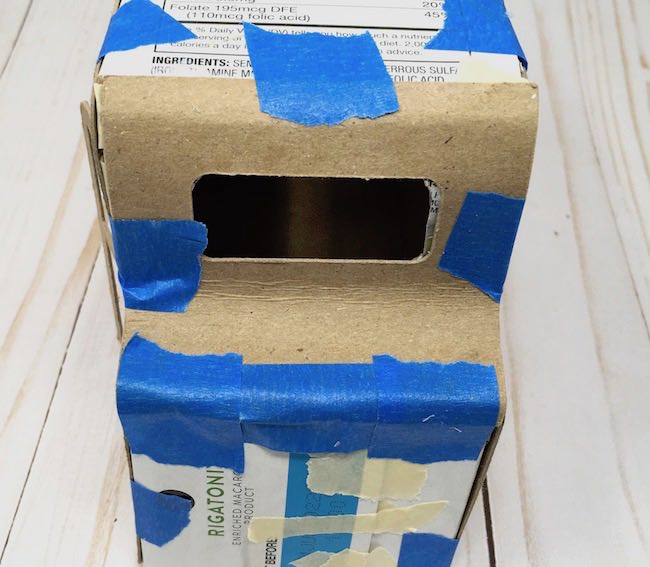
Next, trace bus windows and door openings on the pasta box

Cut out window and door openings
For this step, use your craft knife to cut these openings. You don't have to be very precise because the cardboard pieces will cover them up. Also, cut the opening slightly larger than the windows.
In addition, cut out the front curved bus front and the windows on front and back of the bus.
Use glue and masking tape to form the bus shape on pasta box
The only tricky part is making the curve on the front of the bus. Use glue and masking tape to make the shape. But the nice thing is that even if it's not perfect, the underlying structure won't show because it is painted black.
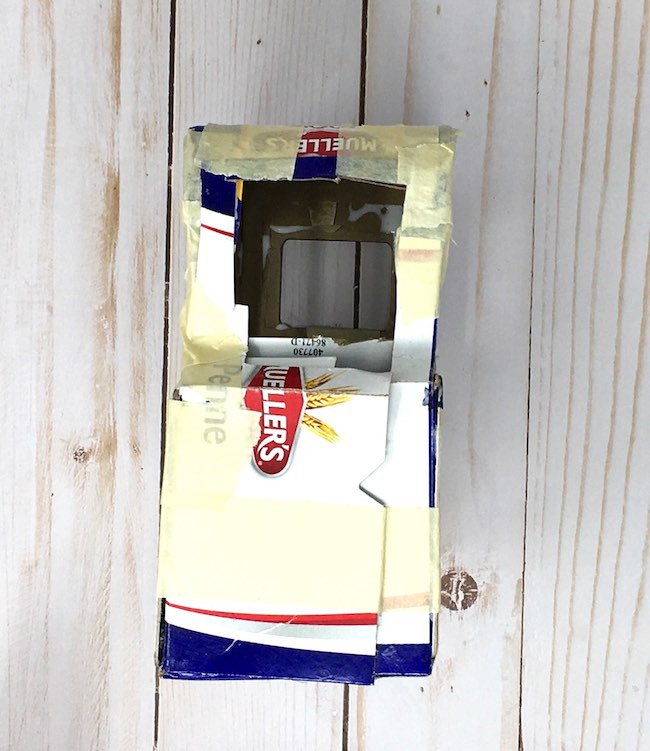
Now, I know the box looks kind of sloppy, but it will be fine when we paint the box black and add the overlying cardboard and card stock layers.
Glue cardboard school bus shape to each side of the pasta box
For this step, I use my favorite glue, Aleene's Fast Grab, to hold the cardboard on the box. But I also temporarily hold the cardboard in place with painter's tape until the glue sets. After the glue is dry, I pull the blue painter's tape off.
Note: I didn't make a cardboard piece for the bottom of the bus. Also there is a piece for the top of the bus that you can cut out in cardboard and card stock, but the top of the bus doesn't really need a cardboard piece for reinforcement.
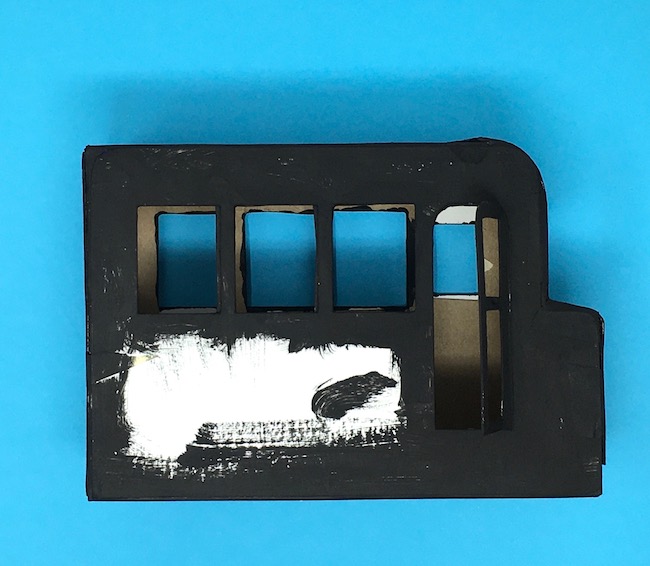
Paint the edges of the bus with black gesso
In order to make the edges look like shadows or black striping on the edge of the bus, prime them with black gesso.
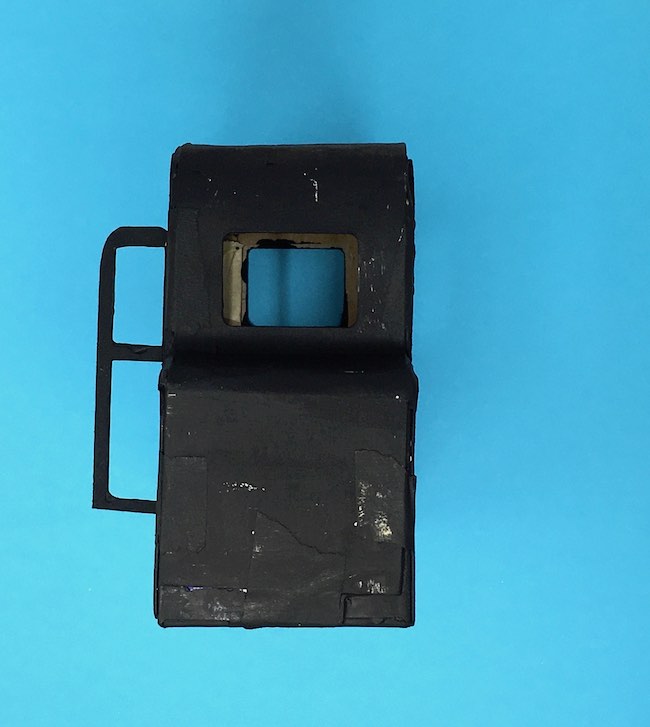
To reinforce the door, the pattern also includes a separate door to cut out in cardboard and in yellow card stock.
Be sure to paint the bottom of the bus, too.
Next, prepare the card stock for the bus
Below you see all the pieces to decorate the bus. Note: I didn't cut card stock for the wheels. I painted them with black gesso.
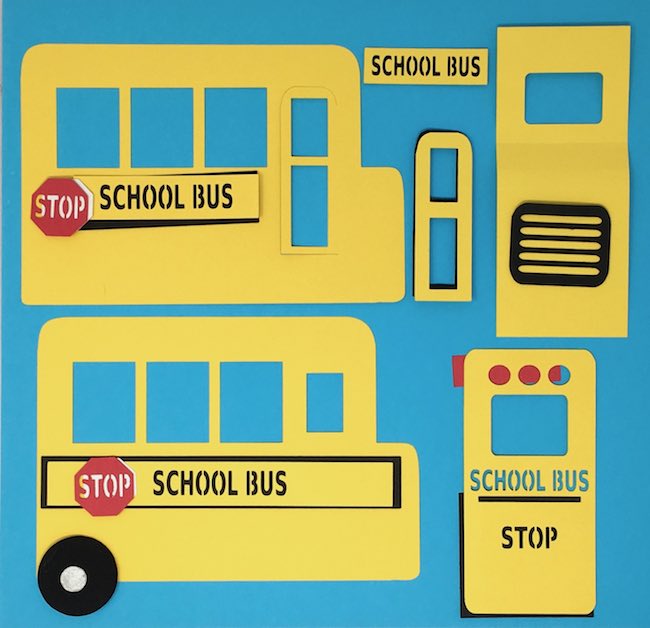
To prepare the card stock, cut out all the pieces in the appropriate colors. Then glue the white hexagon behind the stop sign, red card stock behind the lights on the back. And all the school bus cutouts have black card stock backing. Use silver paper if you want to make head lights or silver hubcaps.
Make the door by adhering the card stock cut out to the black painted cardboard door.
Adhere the decorated card stock to the school bus body
Art Glitter Glue and Bearly Art Glue are thinner glues that work well to adhere the card stock to each side of the box. If you smear it into a flat layer, the paper will adhere flatter with few wrinkles.
Finish the door by adhering the card stock door to the black painted cardboard door on the body of the school bus.
After the yellow card stock bus and all the signs are adhered to the bus, glue the door on.
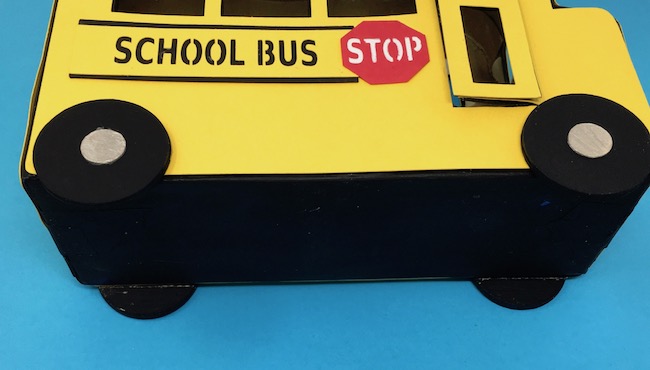
Make the wheels on the bus
To make the wheels, cut out 12 wheels in cardboard. Glue 3 wheels together to make them sturdy enough to support the bus. Paint the wheels black. I guess you could use card stock on top of the cardboard, but I just like the deep black color of the gesso primer. And since I had to paint the body of the bus anyway, might as well paint the wheels black too.
Glue wheels to the bus using to score lines to line up wheels with the bottom of the bus. You might have to re-score the lines after painting just to make the lines a little easier to see.
Apply the glue to the top part of the wheel.
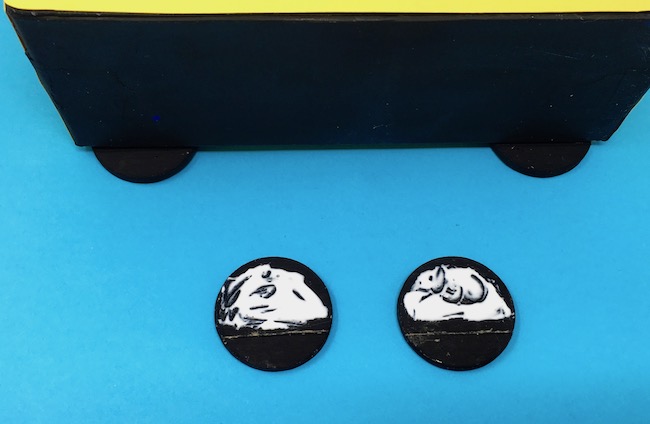
Now adhere the wheels on the bus.
If the score lines are lined up properly, then the bus will be level when you stand it up.
So that's it - the DIY School Bus from a recycled pasta box. It's easy and fun and kids will love it.
Let me know if you make it. You can share any of your paper projects on my private Facebook group just for paper crafts. I love to see what you make. And be sure to pin any of the photos on your favorite Pinterest boards. Thank you for reading.
More back to school crafts that you might like:
- The Little Red Schoolhouse
- DIY Cricut Teacher Pencil Earrings by my friend, Amy Romeu
- DIY Teacher Gifts by Abbi Kirsten
Questions? Just email me - [email protected] and I will be glad to help.


Iris
The bus is so cute!!
I vote for the stone house for the habitat project!
Lucy
Iris, I am so glad you like the little bus.
And thank you for voting for this year's Habitat House pattern.
Lucy
Lara Hartley
well i thought i said this already but here goes again - NEAT LITTLE BUS! a very cool and creative design lucy. i am so envious of your ability to create from scratch.
Lucy
You did comment, but I always approve comments. That's why you couldn't see it.
Thank you so much.Lucy
Lara Hartley
this little bus is just too cute! what a neat design lucy.
Jan Southern
I like the Stone house with the three gables best. I vote for it.
Lucy
Thank you for voting on the 2020 Habitat Halloween House.