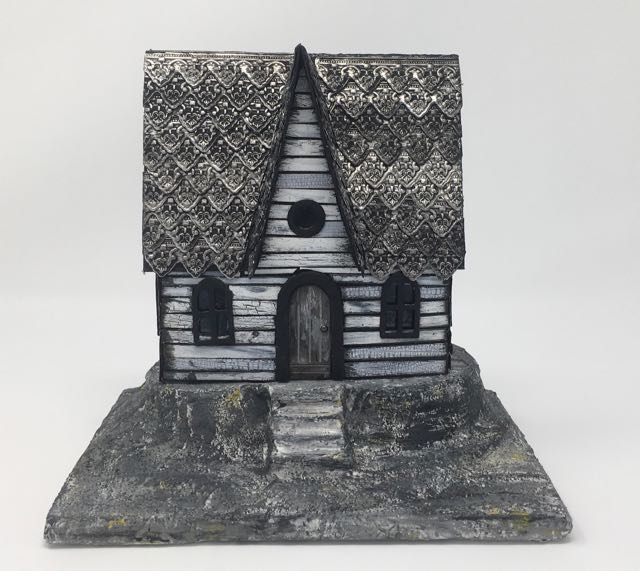
This Halloween House makes me happy because I just love these embossed roof shingles. Initially, I had something different in mind for this house pattern, but when I played around with the Tim Holtz Sizzix Impresslit die - Mini Provincial, I wondered how the strips would work as roof shingles. I think the embossed metallic strips work beautifully as silver tiles on the roof of this little Halloween house.
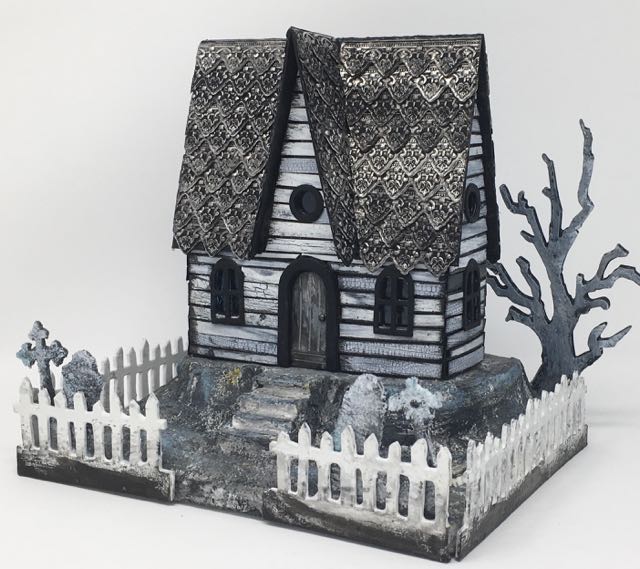
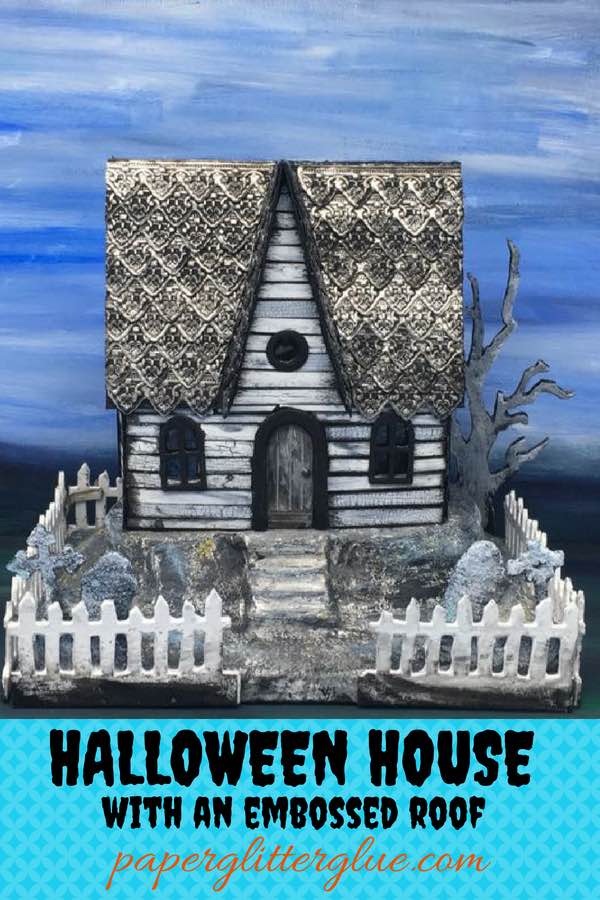
The finished Haunted Halloween House with its embossed roof made from embossed metallic tape on cardstock
Special Features of this Paper Halloween House - metallic roof shingles, extreme roofline and stairs
Every time I make a putz house or a glitter house, I try to do something different. I want each of my houses to be unique. That means I experiment with different techniques on each house. I've already mentioned making the embossed roof shingles to decorate the roof which I made using this technique. But the roofline itself, is a major feature of this house. It is extreme, I know. That is intentional because it's a Haunted Halloween House - it's supposed to have distorted proportions, though I think this one is a bit much. I'll modify the next pattern where the height of the house and the height of the gables are the same - 2 and ½ inches. That will still make a creepy steep roofline, but not as extreme as this one.
The base has a stairway which I've only done a couple of times. I've made them before on the Bat Wing Houses. I figured if I elevated the house it might balance out the roofline a little bit.
What about the colors? I struggle with colors especially on the Halloween houses. Grays and blues and black and white are pretty much what I do on the Halloween houses. Often I paint and repaint and distress with different colors and then paint over again until I find a way to add more color. I'm pretty sure that will happen here. For one thing the graveyard doesn't show up very well in the front. Another option is adding some moss to the base. That may help. Oh, I will add some pumpkins before Halloween. Thank goodness for orange pumpkins, they have saved my little houses from monochromatic boredom many a time.
Outline of How to Make the Silver Shingled Haunted Halloween House
This isn't going to be a full tutorial because it's an experimental house. I will sell it at the Halloween Houses for Habitat fundraiser, but it's not a pattern that I am going to use over and over like I did with the Davenport series of Halloween houses or Jack's house pattern. So I'll just outline the steps for making this house - mostly in photos.
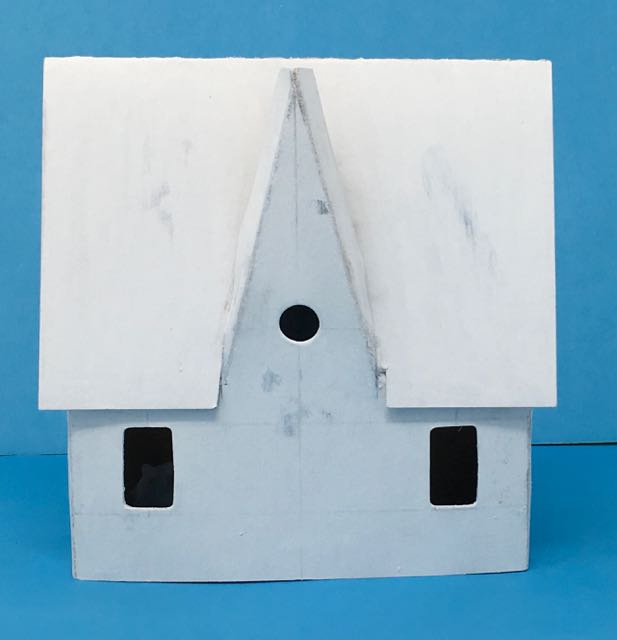
Here's the pattern as I cut out windows and doors with my arbor press. The house is too wide to cut out of one 8.5 x 11 inch paper or cardboard so I cut the front and make a piece to inset in the back of the house. You can see the tabs on each side of the back piece (the piece with the light hole in the center).
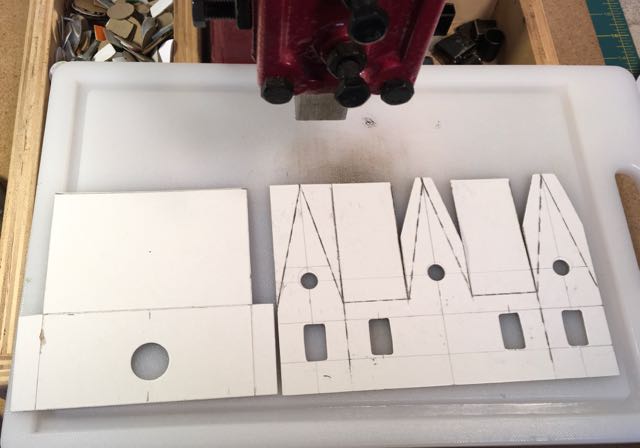
Using the arbor press to cut out the windows on the Silver Roof Haunted Halloween House.
I need to make sure that some light can get to the circular window in the front gable. Before I glued on the roof, I marked where the window shows up on the roofline and made a triangular cut to all light to reach this little window.
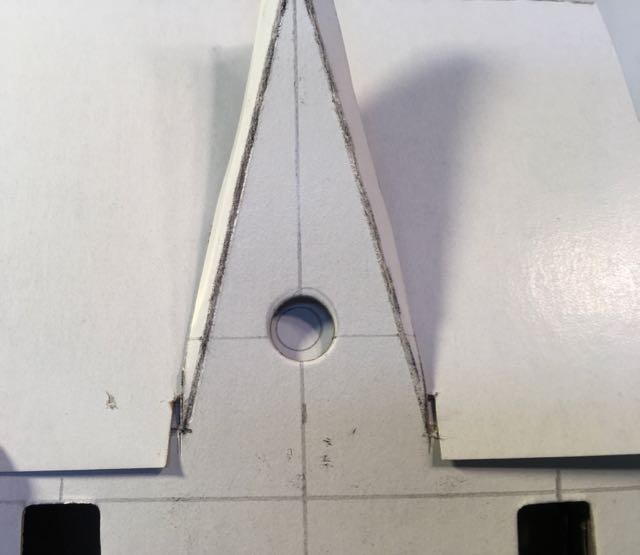
Before you glue the roof on, mark where the window is to cut a hole in the roof for light to shine through

Mark a hole where the little window is located
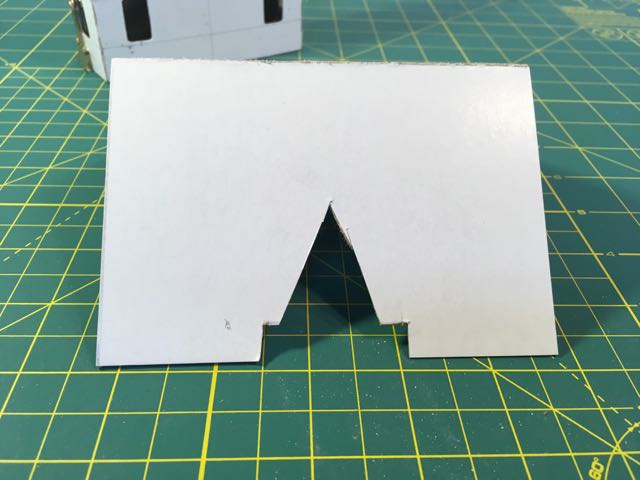
Cut out a small section of the roof for lighting the front gable window
Front view of the little Halloween house during construction. There now, the little gable window can see the light.

Yep. That roofline is steep, but it does make it kind of creepy, doesn't it?
Decorate the House with Crackle Paint Siding
I had leftover crackle painted strips from a previous house that I glued on to decorate this Halloween house. If you want to see how I attach the siding, see this post about Gus the Ghost's House.
Paint the house a contrasting color before you glue the siding on. Generally, I paint the house black for my Halloween houses.
Make the Embossed Roof with Dresden-like trims
This textured embossed roof just kills me. It's very tactile and visually appealing to my eye. It is made just like any other shingled roof - layered strips made from the Tim Holtz Sizzix Impresslit die called Mini Provincial, offset and glued on.
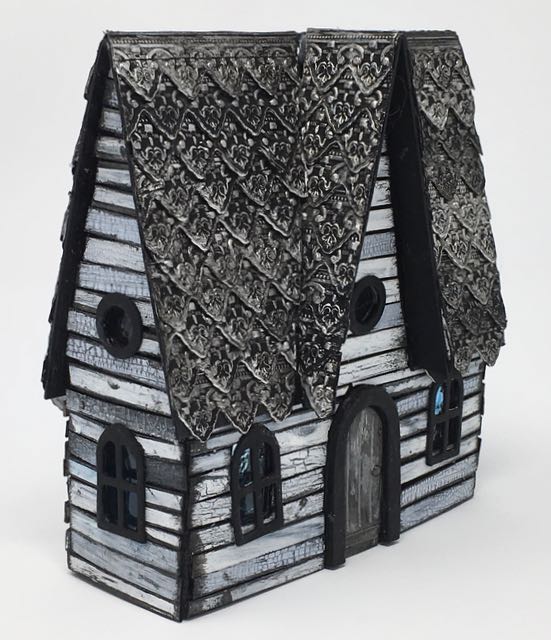
Crackle paint siding and embossed strips for the roof shingles make this a very textural house
Cardboard Base for the Silver Roof Haunted Halloween House
I don't usually make separate holes for the light, but I wanted to make sure that the LED lights fit below each window to light up the house better.
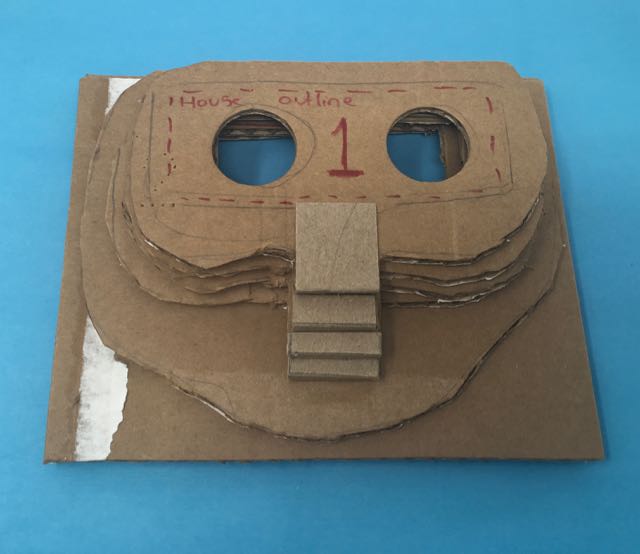
I start at the top layer to fit the house, then cut each successive layer for the base. The edges of the steps were reinforced with cardboard because corrugated cardboard tends to give too much and you lose the sharp edge of the step.
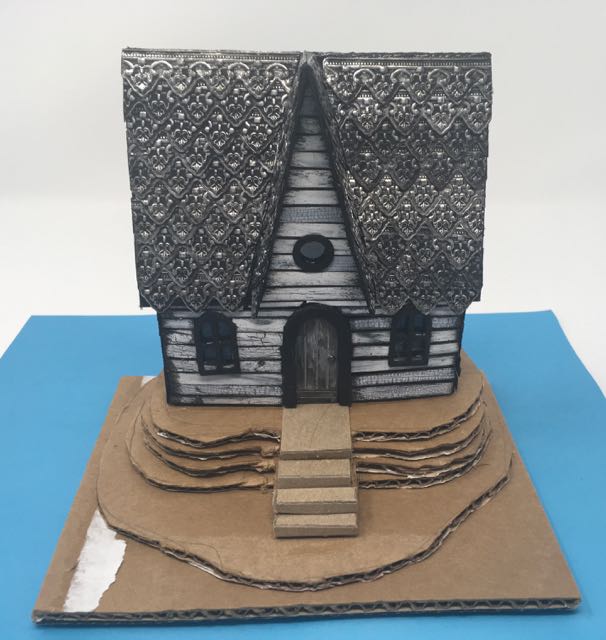
Testing the Silver Roof Halloween Haunted House on its base.
The little Haunted Halloween House perched on its painted base
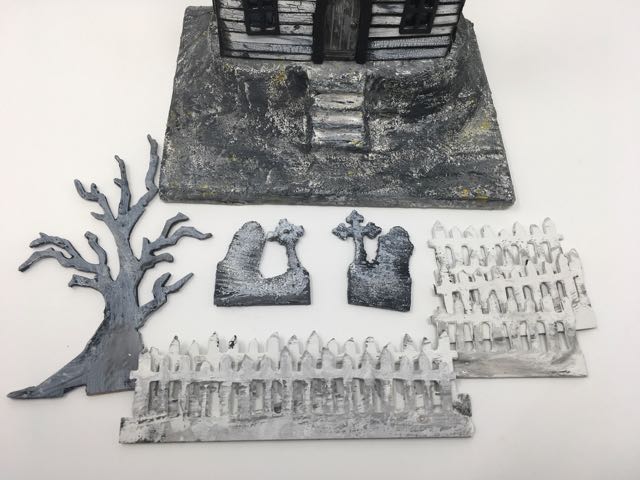
These are the decorative elements planned for the Embossed Roof Haunted Halloween House
The Finished House - Embossed Roof Haunted Halloween House
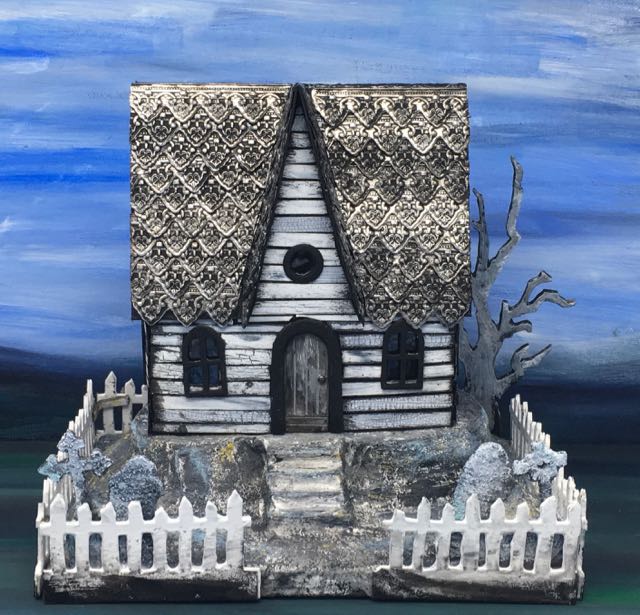
Front view of the Embossed Roof Halloween House with all the elements in place.
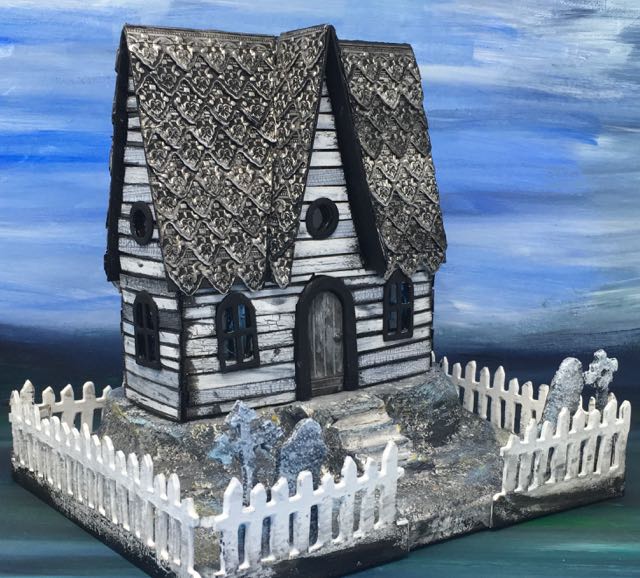
Angled view of the Embossed Roof Halloween House
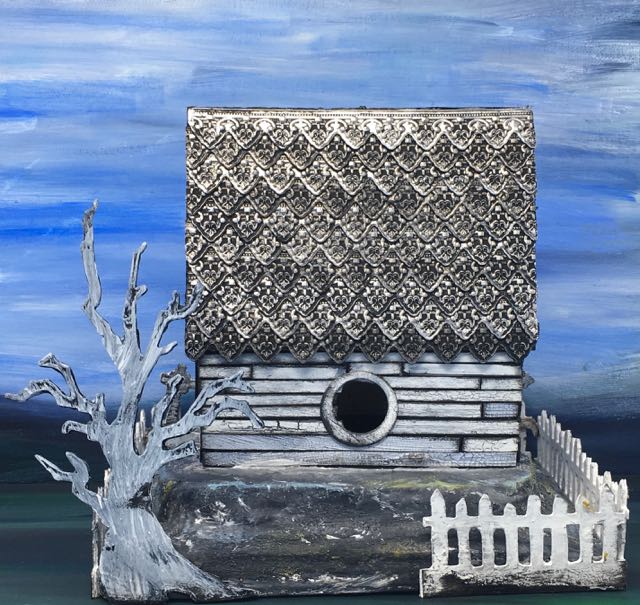
I'll probably do some more painting on the base of this house to add a little more color. The tree certainly needs some help. I want the back to look good just like the front of the little Halloween house.
What do you think? The embossed strips are so much fun for a roofline - not like a real house, but still very fun. I hope you've found some inspiration here for making your own little house. Let me know if you have any questions.
Ya'll take care.
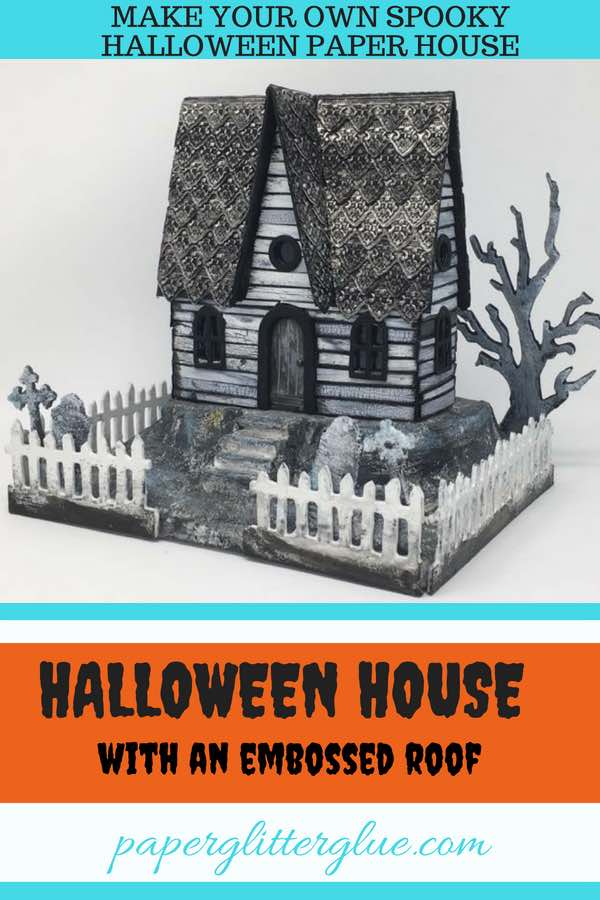
Pin to your favorite Pinterest board to remember this Halloween House
Lynn
I really like the roof tiles. They give this house so much character. The stairs are also very nice. What about trying a distressed purple paint?
Cole // Cole Smith Writes
Sharing this with a couple of my friends who have already started their Halloween countdown...
Tammy Moon
i love it you did a nice job