
Now that we have 3 patterns for making your paper Fairy House, we can get to the fun part - decorating the houses. Today we are going to decorate the Fairy Houses with Shamrocks or 4-Leaf Clovers. I just love decorating my houses with this greenery. This is the 4th day in the Whimsical Fairy House Challenge.
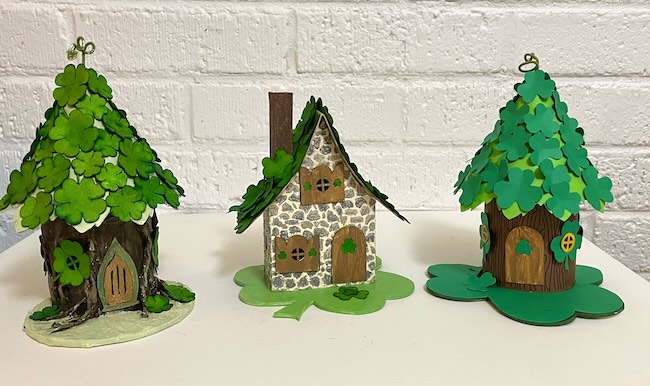
For this demonstration, I made 3 different versions:
- one circular house with paper mache bark and 4-leaf clovers colored with Distress Spray stain
- another circular house with card stock shamrocks
- and a Fairy house cottage painted to mimic stone with stained shamrocks on the roof
This post contains some affiliate links for your convenience. Click here to read my full disclosure policy.
What do you need to make these cool Fairy Houses?
I've made a detailed list of materials on the Whimsical Fairy House Challenge page. But I'll mention some of the materials that are highlighted on these houses.
- My favorite material for making the shamrocks or clovers is watercolor paper with Distress Spray Stain. I just love the vibrant colors you get with this brand of spray stain. It's messy, but the colors are amazing.
- For painting cardboard, you have to use a gesso primer so the paint sticks better.
- I made a stone surface on the Shamrock Fairy Cottage more realistic by adding fine sand to the primer.
- Glue - My two main glues are Bearly Art Glue for the lighter stuff and Quick Dry Tacky Glue to hold heavier things like cardboard.
- I do like to make my houses out of cardboard. This is what I've ordered from Amazon recently. It cuts beautifully on my Cricut.
- And then I love my Cricut Maker, but other cutting machines will work.
Download the Free Patterns for the Fairy Houses and Decor
The tutorials for the Easy Fairy Houses are listed here. The pattern is Design No. 155 in the Paper Glitter Glue library. The Fairy House cottage is Design No. 156 in the library. Those are two options for your Shamrock or Clover house.
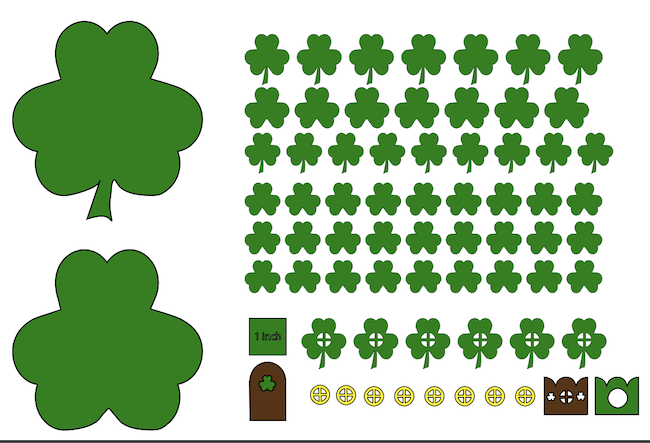
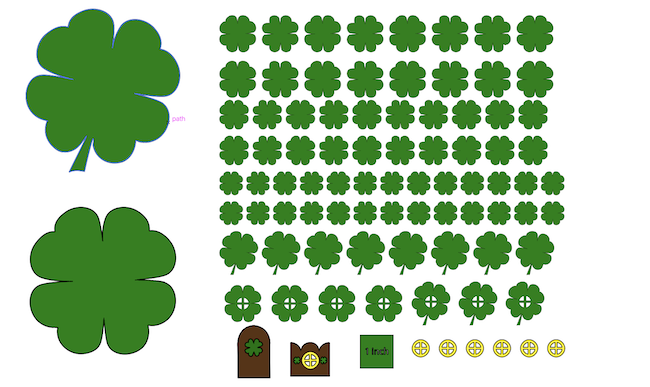
The decorative elements of shamrocks and clovers are included as Design No 158 in the library. These files are available in SVG and PDF formats in one zip file.
How do you get these patterns? If you have the password to the library, simply type it in on the password page, but if you don't have the password, just subscribe to my newsletter and you will get the password right away.
I know it's kind of a pain to have to do this, but it's one way of protecting my files.
The Basic Steps for Making Fairy Houses decorated with Shamrocks and 4-leaf clover:
- Download the patterns from the PaperGlitterGlue library
- Decide which fairy house structure you want to make - circular, hexagonal, or the Fairy cottage
- Choose either card stock or cardboard for your project
- Cut out the fairy house and a decorative elements like the shamrocks or clovers
- Paint or stain your pieces if you are using cardboard or watercolor paper
- Assemble the house
- Glue on the shamrocks or clovers to the roof of your fairy house structure
- Glue your house to the base of your choice. I like to glue 3-4 layers of cardboard together to make a sturdy base
- Decorate around the base of the house
Watch my YouTube video to see more details on decorating your Fairy house with Shamrocks and Clovers
Here's what the Shamrock and Clover files contain:
That's all I have for now. I'll see you tomorrow.

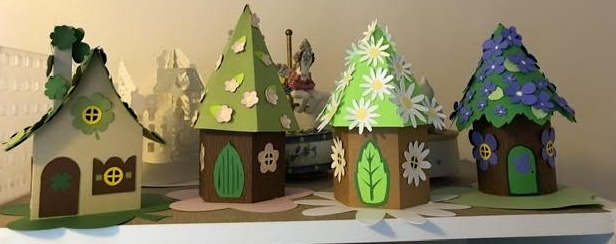
Here's a set of Fairy Houses from Catherine. I love how she added the 4-leaf clovers to the chimney of her Fairy House. It's always fun to see what other people create.
Lucy
P.S. If you have any questions, you can always email me - [email protected]. And if you like this project, please pin it to your Favorite Pinterest Board.
Leave a Reply