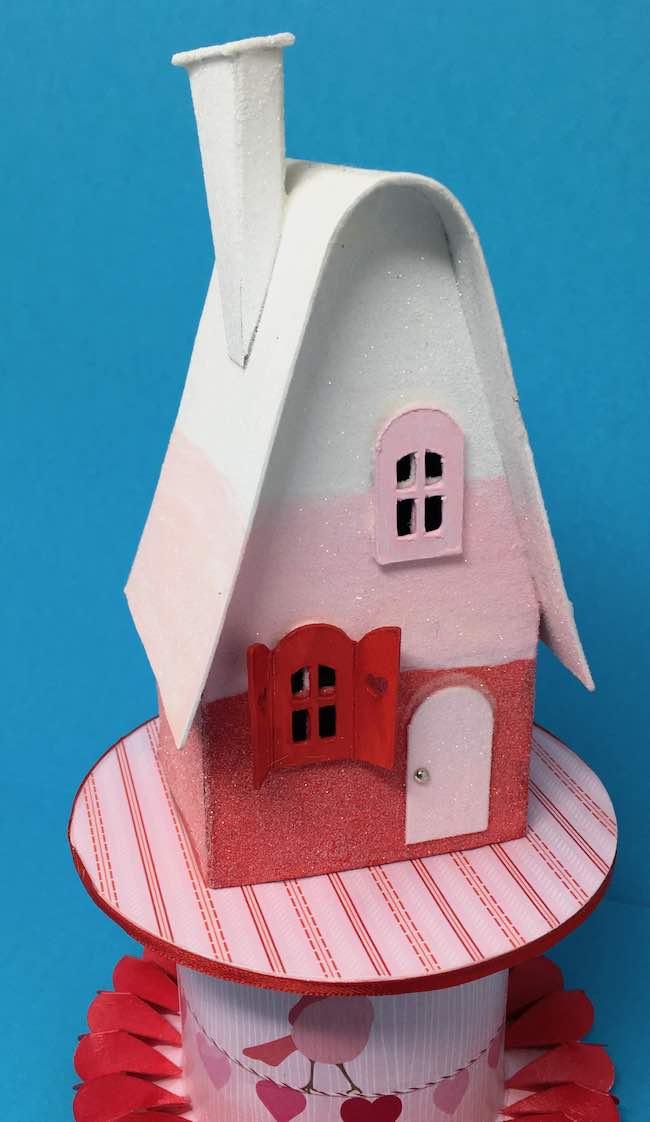
Another Valentine paper house? Yes, the Valentine Candy Corn house. Did you know that there actually is a name for Valentine candy corn - it's called Cupid Corn. Just like Christmas candy corn is called Reindeer Corn.
Here is a good article about Candy Corn:
Here are other variations of the Candy Corn houses:
- Halloween Candy Corn House
- Fourth of July Candy Corn House
- Bunnies in the Garden - Springtime at the Miller's Place
- Candy Corn House - Evolution of an Idea
The updated pattern is listed in the Paper Glitter Glue Library and design no. 139 in the September 2022 section library.
This post contains some affiliate links for your convenience. Click here to read my full disclosure policy.
Materials needed for the Valentine Candy Corn House:
- Pattern for the Candy Corn house - Design No. 75
- Cardboard - gotta have cardboard
- Aleene’s Fast Grab Glue or other PVA glue
- Cutting materials:
- I used my Cricut to cut out the pattern
- Metal-edged ruler
- Craft knife with an 11 blade
- Gesso
- Paint:
- Mod Podge
- Glitter - my favorite is Ranger's Clear Rock Candy Glitter
- Scrapbook paper and red card stock
- Empty ribbon roll for your base
- Embellishments
Steps to make your Valentine Candy Corn House:
Briefly, these are the steps in making this cardboard house:
- Download the pattern from the paperglitterglue.com library. Use either the PDF or SVG version of the Candy Corn pattern - Design No. 75.
- Cut out your house by hand or with an automatic cutting machine.
- If cutting by hand, copy and cut out the pattern for the Valentine Candy Corn House onto cardboard
- Score along the fold lines
- Cut out the window openings
- If using an automatic cutting machine like a Cricut, just be sure to mark the score lines and attach.
- Prime and paint the little house
- Glue on windows and the door
- Glue house together along tab in the back
- Next glue roof flaps together for supporting the candy corn gables
- Score the roof at the score lines to gently curve it to fit the roof
- Glue roof to house
- Glitter at this step if desired
- Glue the crookedy chimney to roof
- Make base, prime, paint - directions for a ribbon roll base
- Glue house to base and add embellishments
Detailed Instructions for making the Candy Corn Putz house
-
Download the pattern to make the Valentine Candy Corn House
To download the pattern, just go to the Paper Glitter Glue library page, click the big blue text link in the middle of the page which takes you to the page where you add the password.
The password is included in every one of my email newsletters. What? You don't get my free crafting newsletter? That's easy. Just subscribe below and I will send you the password immediately.
-
To cut out the pattern by hand, copy the pattern for the Candy Corn Putz House onto cardboard
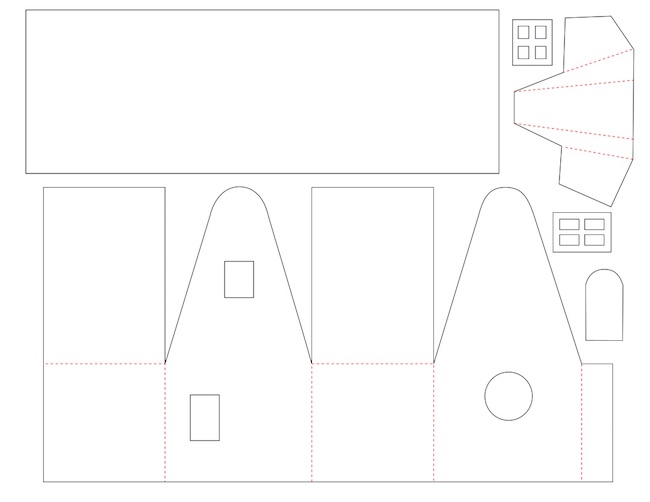
The pattern itself is simple – it is just a basic gable house with a rounded top. This pattern fits on an 8.5 x 11 cardboard which makes a nice-sized Putz house- not too big or too little. And you can always enlarge or reduce the pattern if you would like to make a different size.
Also I included a set of windows in the pattern files from the Front Tower Clockhouse so you have many more options for windows.
-
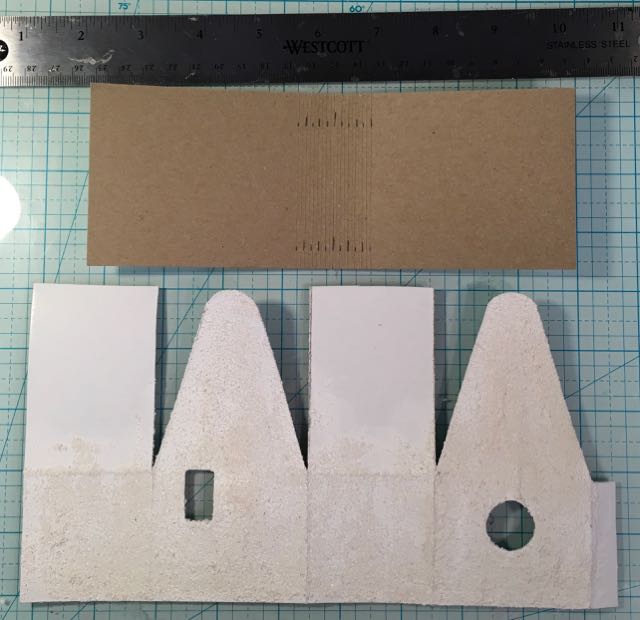
Score the fold lines before you cut out your pattern when you are cutting by hand
It is often easier to score the pattern before you cut it out.
-
Cut out the pattern
My favorite material is a relatively thin cardboard like the kind you find on the back of a paper pad. It's easy to cut and easy to fold. You can use cereal box cardboard as well. Some people use cardstock for their miniature houses, but I prefer my houses to be stronger than that. If you are going through all the effort to make these adorable houses, it makes sense to use a stronger material.
-
Cut out the window openings for your little house
One major advantage to cutting a pattern by hand is that you can choose exactly where you want the windows to go. And you can choose the shape of the windows. The most important thing to remember is that when you cut out material near the sides of a house, it gets weaker there. So you may notice that on all my houses, I don't cut out the doorway all the way to the bottom of the house. I generally leave a ¼ inch strip of cardboard at the bottom.
-
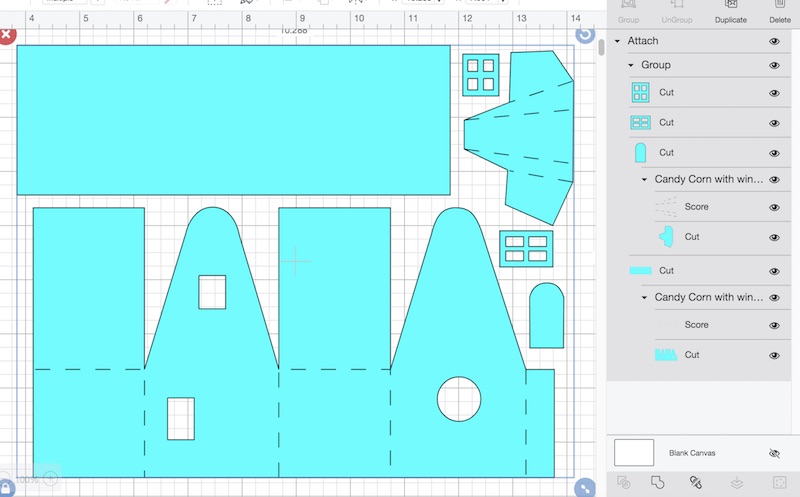
If using an automatic cutting machine like a Cricut, just be sure to mark the score lines and attach
-
Prime and paint the house
I always prime my cardboard houses with gesso because it makes the paint adhere better.
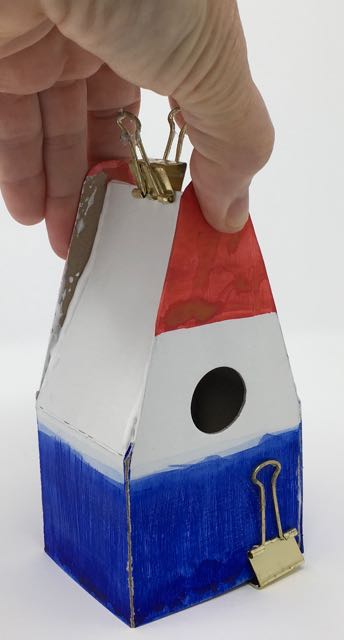
So for the Valentine Candy Corn house I painted the house with red on the bottom, pink in the middle and white on top to mimic Cupid Corn. But you can paint with the Candy Corn colors you like best. Here are some color options for Seasonal Candy Corn houses:
- Halloween Candy Corn (the classic Candy Corn):
- Yellow, Orange, White
- Thanksgiving Candy Corn (also known as Indian Corn):
- Chocolate Brown, Orange, White
- Christmas Candy Corn (also known as Reindeer Corn):
- Red, Green, White
- Easter Candy Corn (also know as Bunny Corn):
- Pastel colors/White
- Fourth of July Candy Corn (also known as Freedom Corn):
- Blue, White, Red
It doesn't really matter on this particular house if you paint it before or after assembly.
If you have painted your house before you glue it together, you can also glue on the door and window frames while the pattern is still flat.
For the windows on the Valentine Candy Corn house, I designed some windows which are included in the pattern. In the past, I have used Tim Holtz Village Dwelling windows, but these dies are now retired. You can still find them online, but Sizzix isn't actively making them at this time.
-
Cut out roof, chimney and prime
For the roof, cut out a 3 x 8 inch rectangle and trim to the size you want. At first I made two patterns for this, but I only included the wonky pattern because it works better. 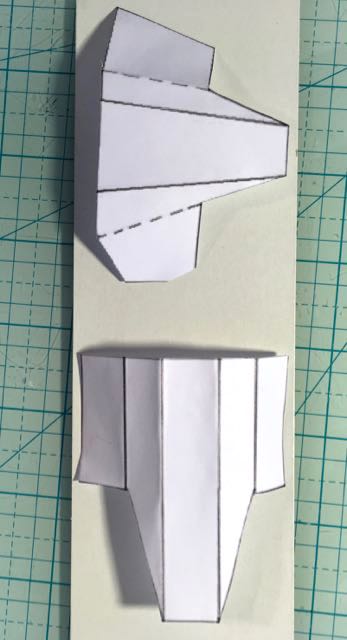
When you paint the roof be sure to prime the underside edges that will form the overhangs on the roofline. Save the final painting until you have glued the roof on the house so you can match the painted lines on the body of the Candy Corn house.
-
Glue house together along tab in the back
The little tab on the right side of the pattern is the glue tab. I apply a thick layer of glue and let it get just a little tacky and then adhere the back and side together.
This photo is from making Fourth of July Candy Corn pattern (P.S. I repainted it to look better before I finished that house.)
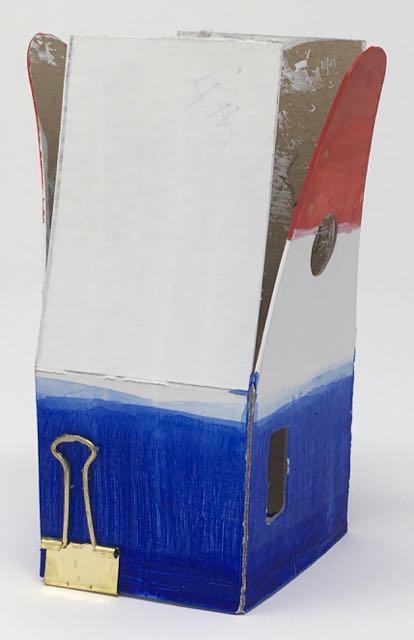
Here's how I use the binder clip to hold the house together.
Binder clips are a great help in holding the glued sides together. They don’t work on the top edge though because the roof flaps for this particular pattern are in the way. You can use painter’s tape that doesn’t pull off your paint if you need to.
-
Glue roof flaps together for supporting the Valentine Candy Corn gables
The roof flaps function as the "under roof" and give support to the house gable ends. Glue the edge of the roof flaps to the each gable. You can glue the flaps together behind the candy corn gables for support like in the photo below.
This photo clearly demonstrates why you need roof flaps on this house. After painting, the Candy Corn gable ends tend to flare outwards.
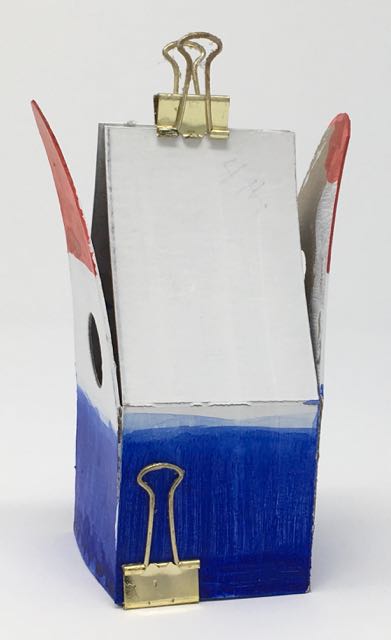
Apply glue to the edges of the roof flaps so you can glue the Candy Corn gables together. Now they will be firmly adhered to the house.
Now either hold or tape the gables to the roof flaps so that they are firmly adhered to the flaps. Sometimes you just have to hold things in place until the glue sticks.
-
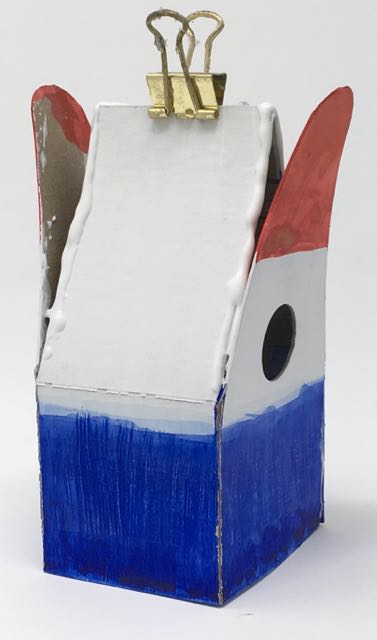
Score the roof at the score lines to gently curve it to fit the roof
Once the house structure is dry, it's time for the roof.
Make a light score line at the mid-point of your roof. On either side of your roof piece, score 6-7 parallel lines every ⅛ inch. This allows you to gently curve the roof to the fit the rounded top of the gables.
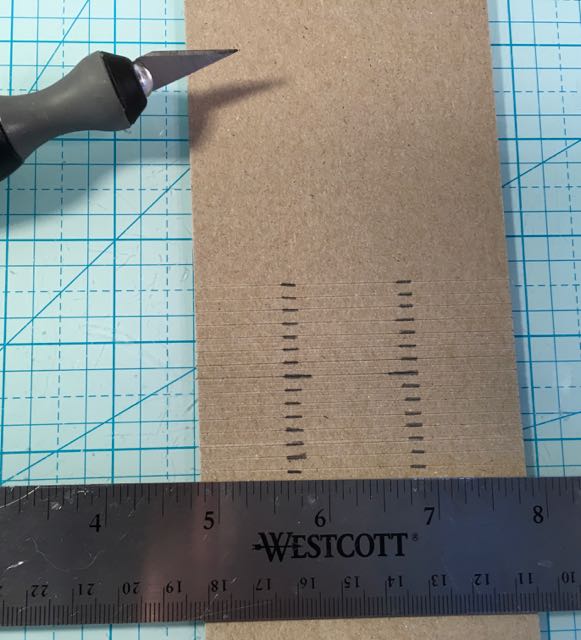
Score the lines on the roof cardboard.
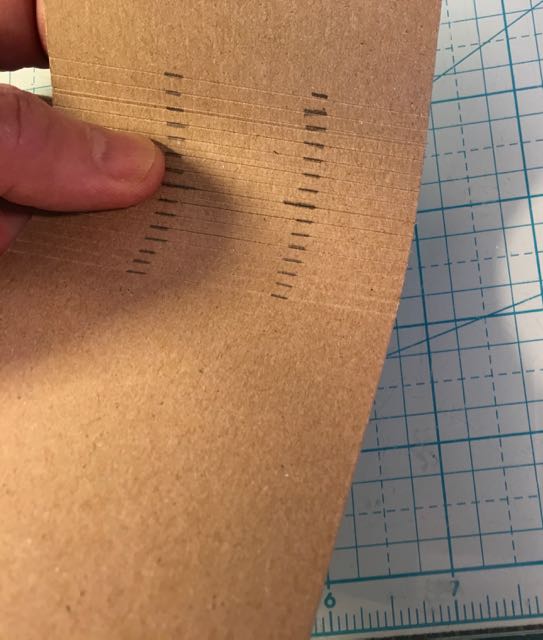
Using your thumbs gently curve the roof piece at the scored lines. Use two thumbs to make the curve on each side.
-
Glue roof to house
Be sure the previous pieces you have glued are dry before you glue on the roof. If you use the Aleene’s Fast Grab or Quick Dry glue you do not have to wait nearly as long because these glues are pretty thick.
Smear glue on the gable edges and the top of the side walls, but try not to use too much because it will leak out around the roofline. You can get the tip of your craft knife to scrape off the excess glue.
Center the roof over the house (with equal overhangs on each side). Painter’s tape might come in handy here, but normally I hold the roof in place until I am sure the roof is firmly adhered. Keep watching to make sure you haven’t made the roof slide forward or backward too much.
-
Glue chimney to roof
Next glue the chimney to the roof after the roof is dry. Usually I hold the chimney in place because it's hard to tape on an angle. After the roof and chimney are glued on, paint the Red/Pink/White colors of the Valentine Candy Corn pattern on the roof.
-
Glitter now if desired
If you are going to add glitter, this is a good time. Paint one side of the house at a time with Mod Podge then sprinkle on the glitter of your choice. My favorite glitter is made by Ranger called Clear Rock Candy Glitter. It's beautiful and doesn't spread the way most plastic glitters spread. That's because it's not plastic, it's a mineral-based glitter.
-
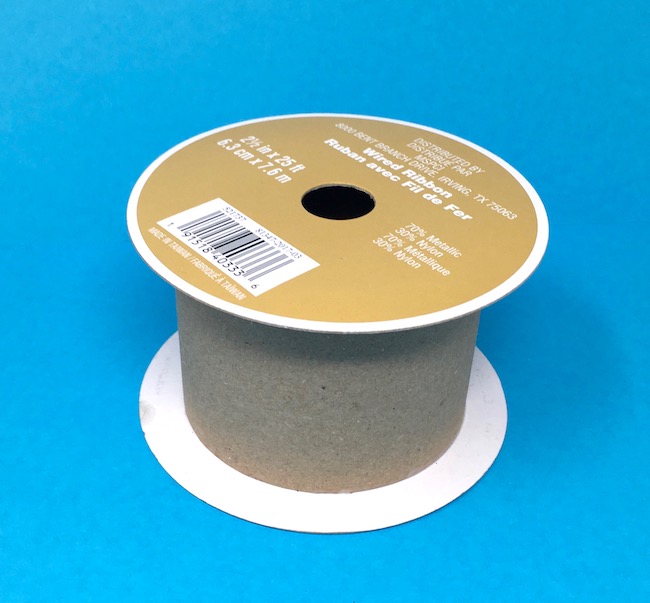
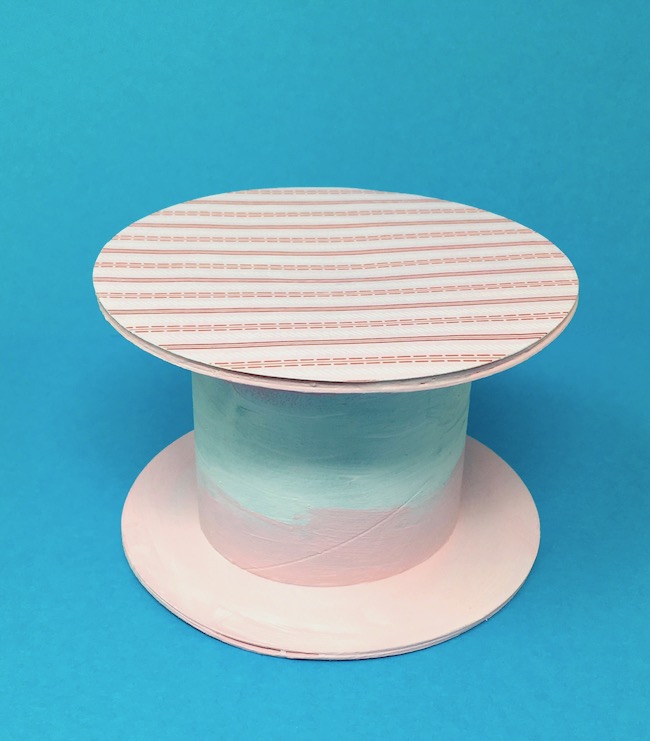
Make base, prime, and paint - Ribbon Roll Base
A whimsical, funky little cardboard house needs a whimsical base so I made the base with a ribbon roll.
The ribbon roll that I used has a 4.5 inch diameter circular top. To reinforce that I cut out 4 circles with the same diameter and glued 2 to each side of the ribbon roll. That makes the ribbon roll much stronger.
Next paint the entire roll with gesso primer.
After that paint the roll a color close to the scrapbook paper colors you've chosen.
Measure the height of the inner roll and cut out a piece of scrapbook paper to fit around the inner cardboard. Glue the scrapbook paper in place with Mod Podge or diluted white glue.
Below you can see the scrapbook paper to cover the inner cardboard roll.
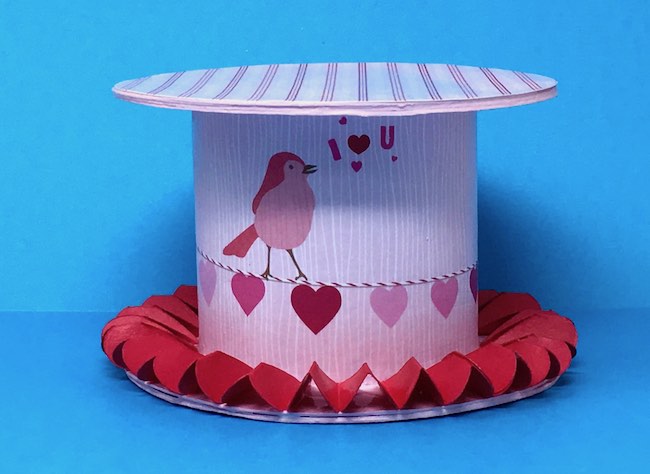
Make the Valentine heart garland to cover up the bottom circle. Here's how the SVG file looks in Cricut's Design Space.

I used 3 strings of hearts to make the garland at the base. Fold along the score lines and glue the end hearts together to make a circle.

Apply 2 thick lines of glue to the base of the ribbon roll - one line of glue next to the inner cardboard roll and one about halfway outward of the base. Let it sit for a minute so the glue gets extra tacky. You want the heart garland to stick pretty fast.
After that, fit your circular heart garland around the base and spread the garland so that the hearts are evenly spread around the circular base. That means not too smushed together at one section or too spread out at another section.
And finally glue a circular piece of scrapbook paper to the top of the ribbon roll. Then if you want, glue a thin strip of ribbon or garland around the edge to disguise the cardboard edge.
-
Glue the Valentine Candy Corn house to base and add embellishments around the house
Once you have the base completed, glue the house to the base with a thick layer of glue along the bottom of the house. Add any desired embellishments around the house - little trees, valentine hearts for a pathway or whatever else you imagine.
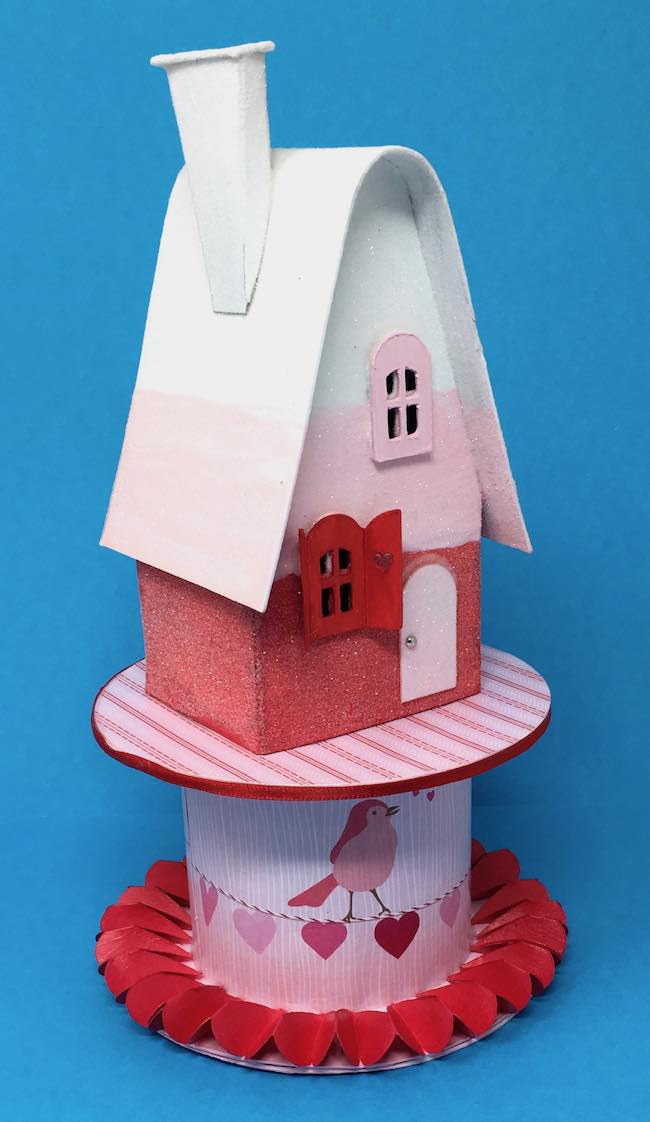
And that's how you make the Valentine Candy Corn Paper House
I love to see all the paper projects that you make. You can even join the Paper Glitter Glue Facebook group to ask questions or to share your projects there.
Have a great crafting day.
Lucy
Feel free to post the Valentine Candy Corn House to your favorite Pinterest board. 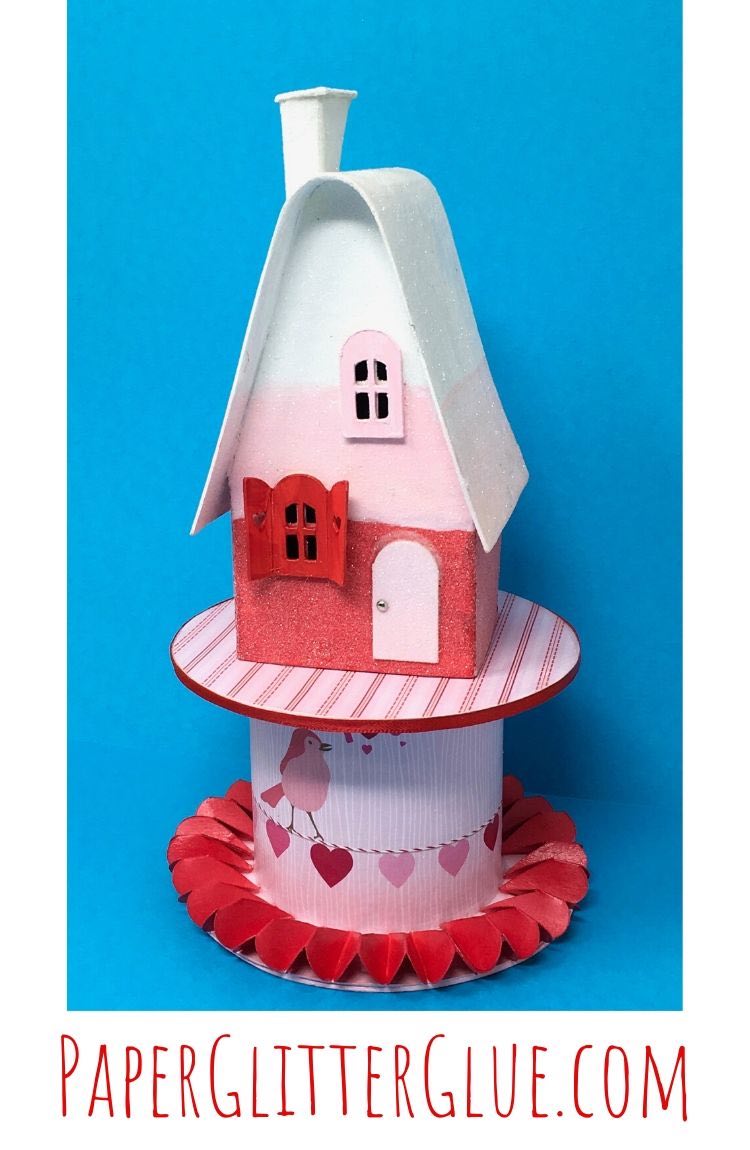
Leave a Reply