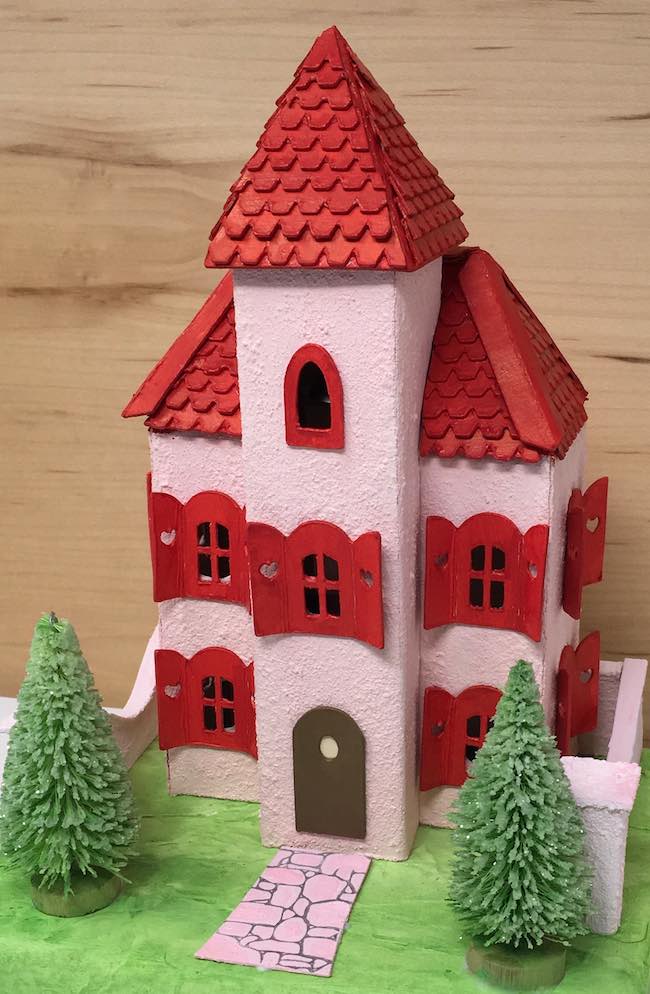
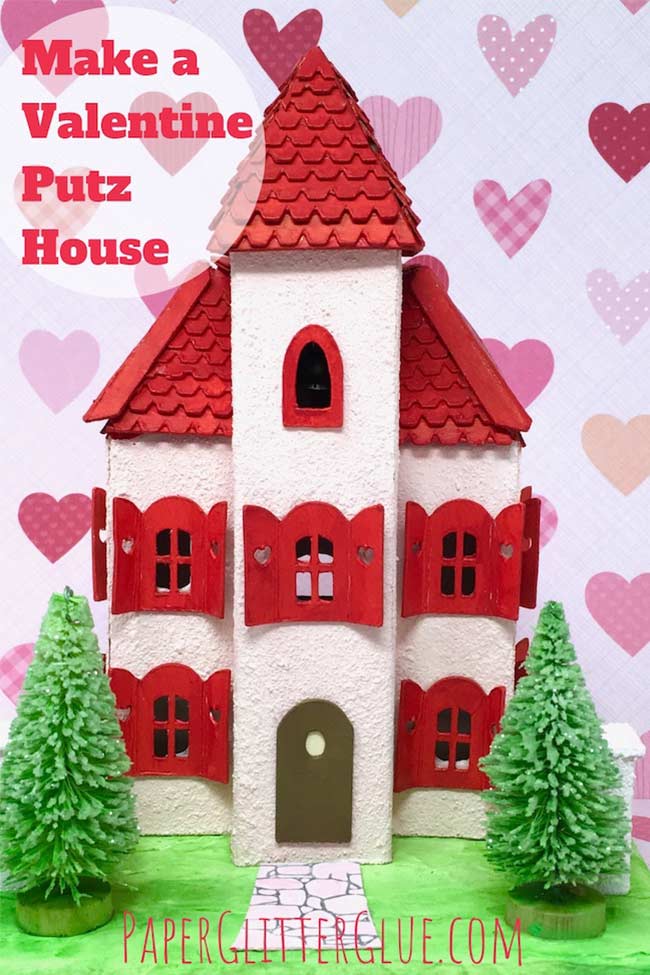
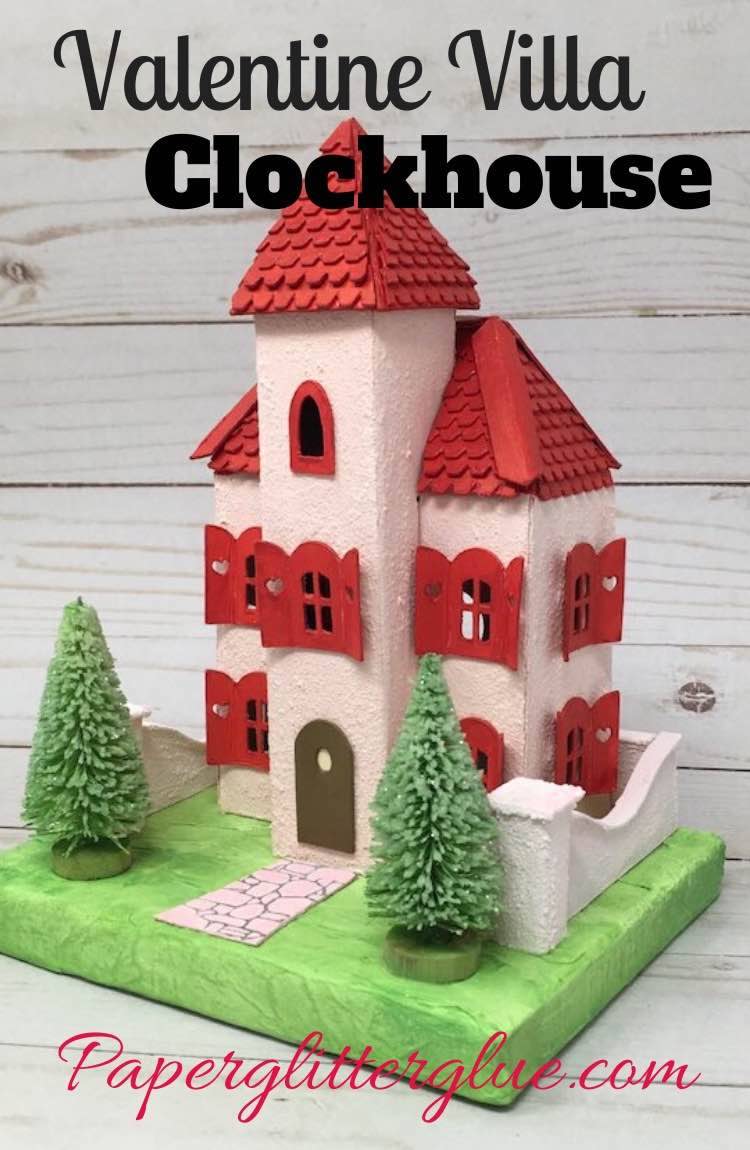
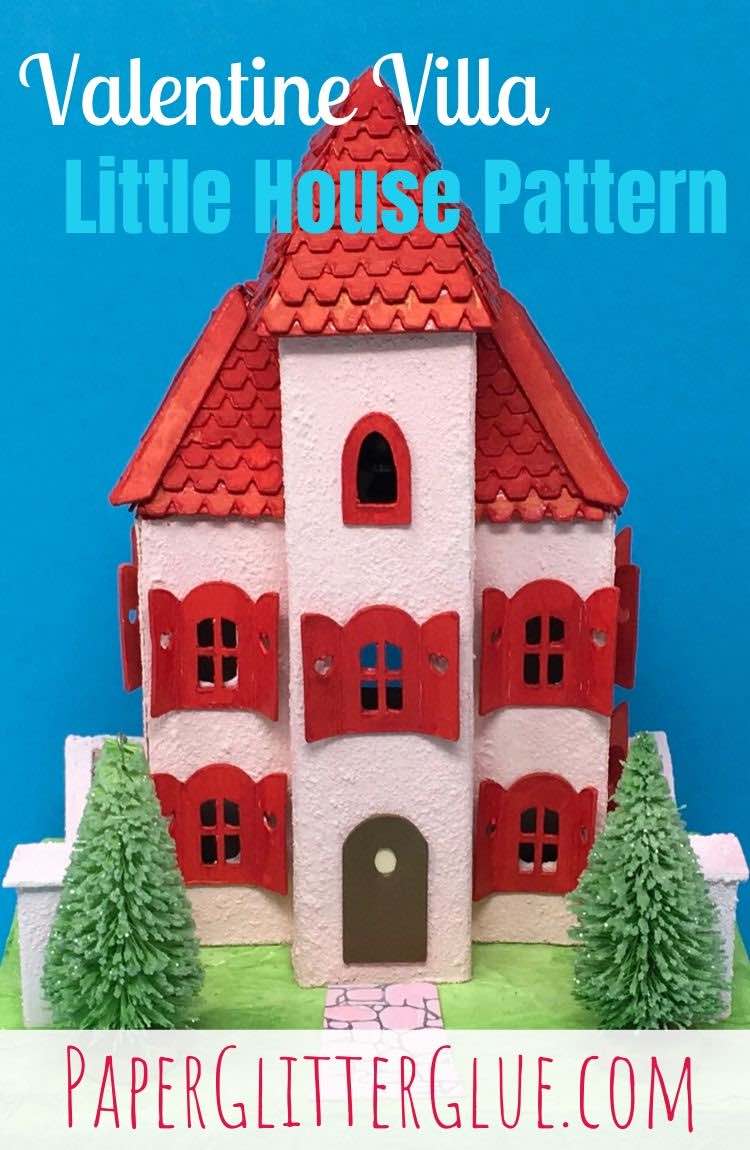
How to make the Valentine Villa - a cute miniature house with a front tower
I love this little cardboard house with the tower in the front. It's perfect for Valentine or really for any other holiday. You can get the free pattern - Design No. 74 as a printable PDF or as an SVG for automatic cutting machines. If you don't want to make a Valentine version, check out the other variations below.
Recently one of my friends asked about the pattern for the Front Tower Clockhouse. It’s a fun little paper house with a cool tower in the front of the house that I made about a year ago. At first I only had a PDF pattern so now I've made an SVG pattern for you as well.
Subscribe to my newsletter to keep up with my crafty news and get the password to my free pattern library.
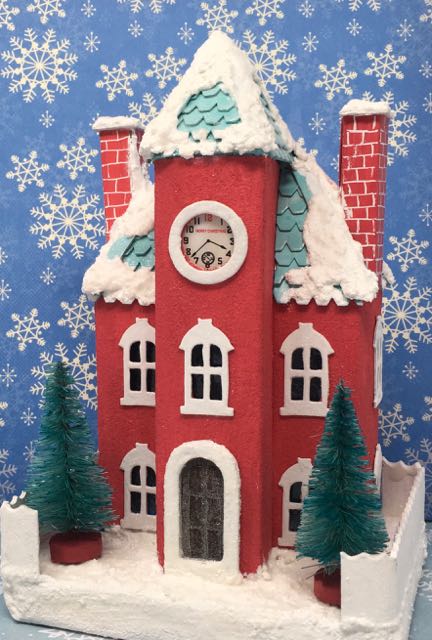
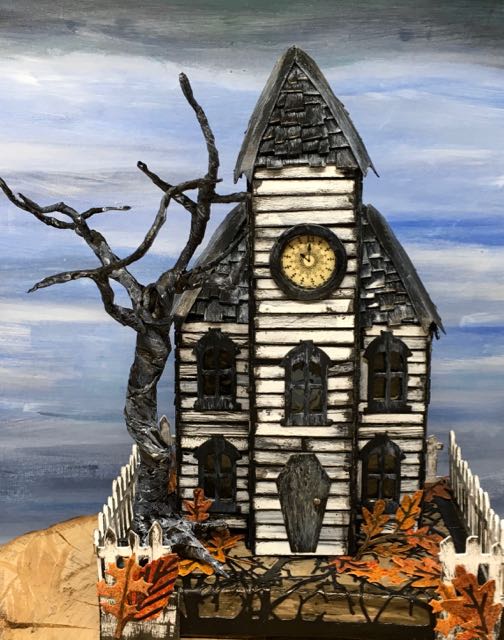
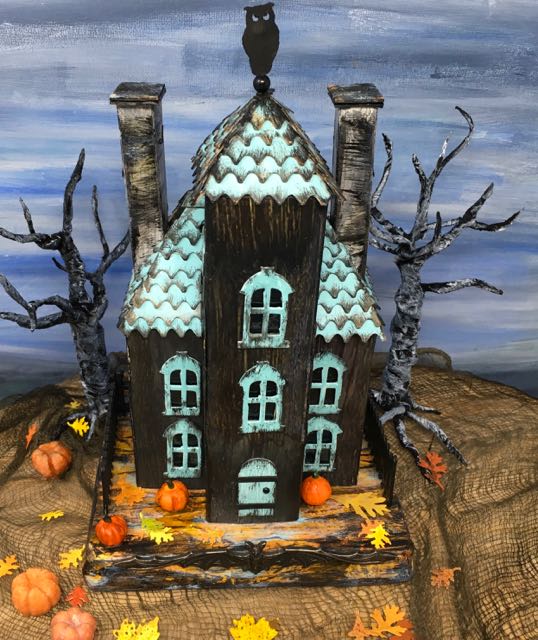
In the past, I've made 3 different houses with this pattern.
And here is an incredible version that Peg made. She reduced the size so it would fit in a cloche. Isn't it wonderful?

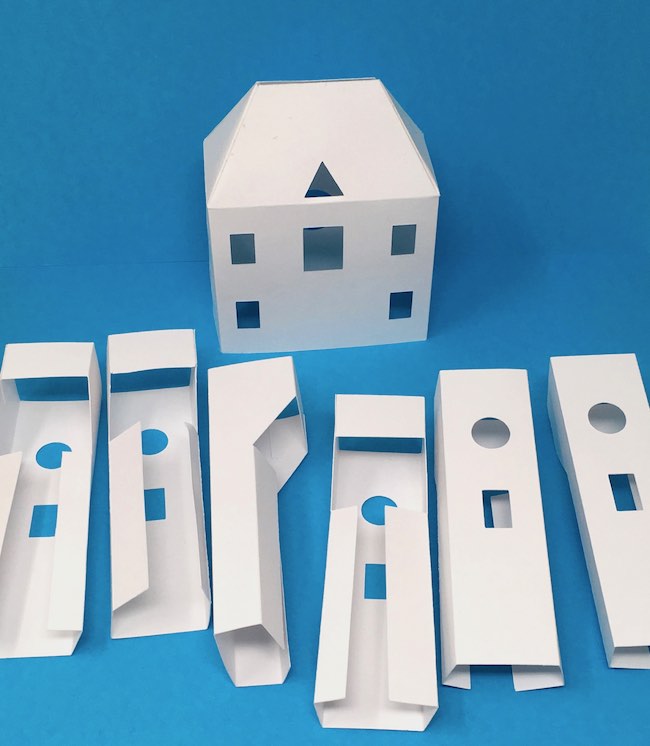
I designed some variations on this pattern as well. You can either make the tower as a bell tower or a clock tower. For the Valentine Villa, I chose to make a bell tower. Also, there are 4 variations for the windows (including windows with heart cutouts on the shutters) and 3 different door options. So this pattern has lots of choices to personalize your own little house.
How you make the Valentine Villa with its Bell Tower
This post contains some affiliate links for your convenience. Click here to read my full disclosure policy.
Front Tower Clockhouse Pattern Materials
- Pattern for the Front Tower Clockhouse - Design No. 74 - from the Paper Glitter Glue library
- Cardboard
- Corrugated Cardboard
- Glue - yes, my favorite Aleene's Fast Grab is the choice here
- Ranger Grit Paste
- Paint:
- Ranger's Clear Rock Candy Glitter - really, a great glitter
- Mod Podge
- Bottlebrush Trees
- Stampers Anonymous Slate and Stone background stamps
- Tiny Bells
Directions to make the Valentine Villa version of the Front Tower Clockhouse
- Download the Front Tower Clockhouse pattern - Design No. 74 - from the Paper Glitter Glue library
- Cut out the pattern - I used my Cricut Explore Air 2
- Prime and paint house pieces
- Assemble the house structure
- Choose tower design and assemble
- Attach the tower to the house
- Glue on door and windows
- Decorate roof, add chimney if desired
- Make cardboard base
- Decorate the base
Here are more details on how to make the Valentine Villa
First download the Valentine Villa pattern from the Paper Glitter Glue library
The Valentine Villa pattern is available in two formats - as a PDF pattern or in SVG (scalable vector graphics) format. The SVG format allows you to cut out the pattern with an automatic cutting machine like a Cricut Maker or a Silhouette Cameo. Important note - the pattern is listed as the Front Tower Clockhouse (not the Valentine Villa) because I've used it several times before under that name.
If you already have the password, then just open up the library and enter the password so you can download the pattern.
If you don't have the password, then subscribe to my newsletter with the form below and you will get the password right away. I add files to the library chronologically with the most recent file first. There are lots of cool patterns in the library in addition to the this one.
Cut out the Clockhouse pattern
Next cut out the pattern. You can cut by hand or using an automatic cutting machine.
Below I drew the score lines with a red marker so you could see them better. There are two
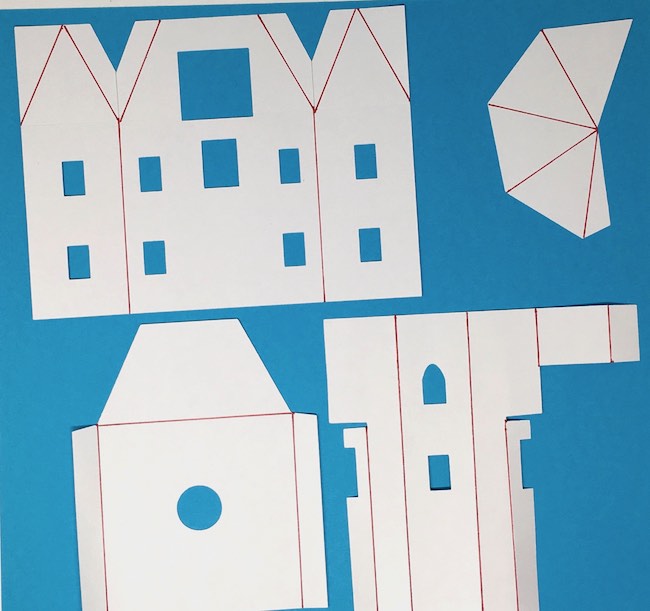
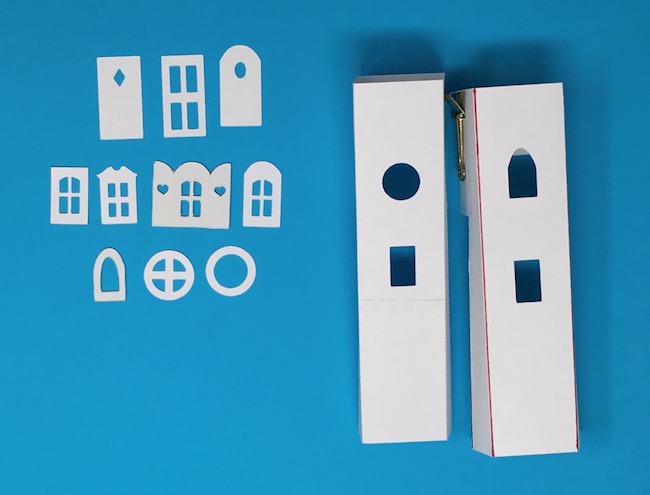
And here are the window and bell tower options for the Front Tower Clockhouse.
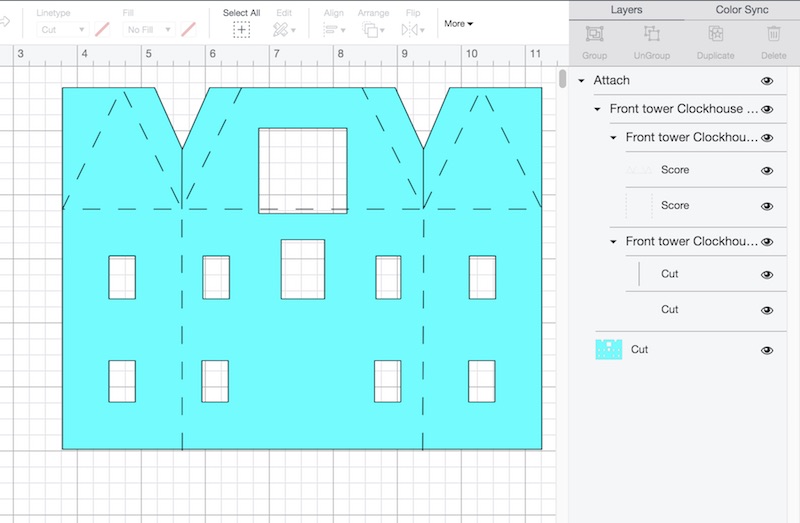
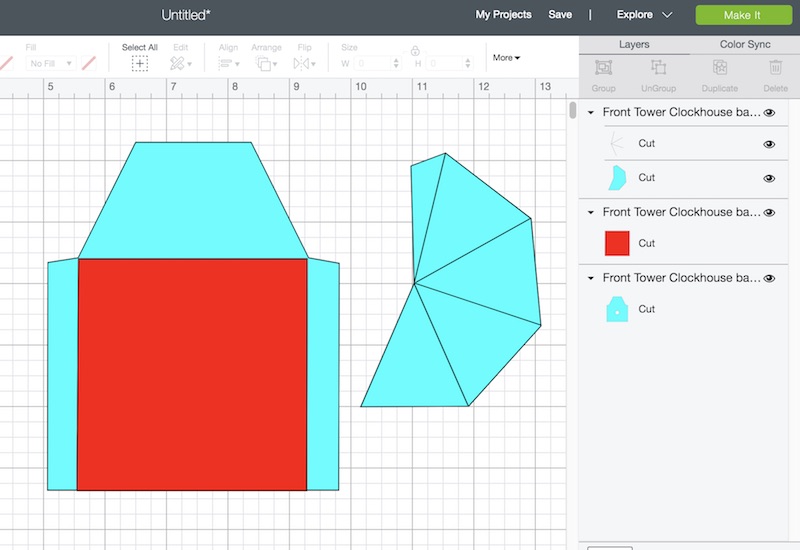
To cut out all the pieces required, I did use my Cricut automatic cutting machine. Here's how the main pattern pieces look in Cricut's Design Space.
The score lines are the first 2 sets of lines on the main pattern piece so be sure to change them from Cut to Score. The bottom 2 lines are cut lines (the lines that separate the gable ends from the front of the house) so leave them alone as cut lines. Then attach both of these lines to the body of the house by selecting everything and then click attach.
And here is how the back piece and steeple look before the score lines are marked in Cricut's Design Space. The big red area is actually a set of score lines for the back piece. The steeple score lines are all grouped together. (Edit 10-14-21 - I've updated the pattern so the lines are regular score lines so the big red square is gone).
And this is how it looks with the score lines changed from Cut to Score.
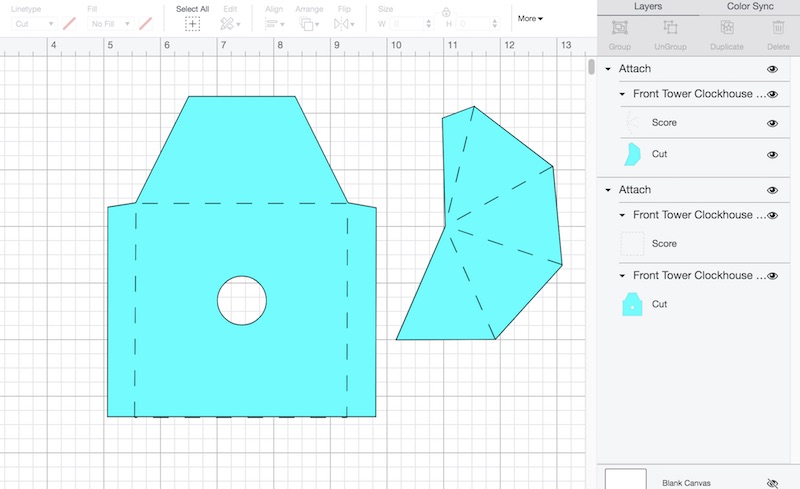
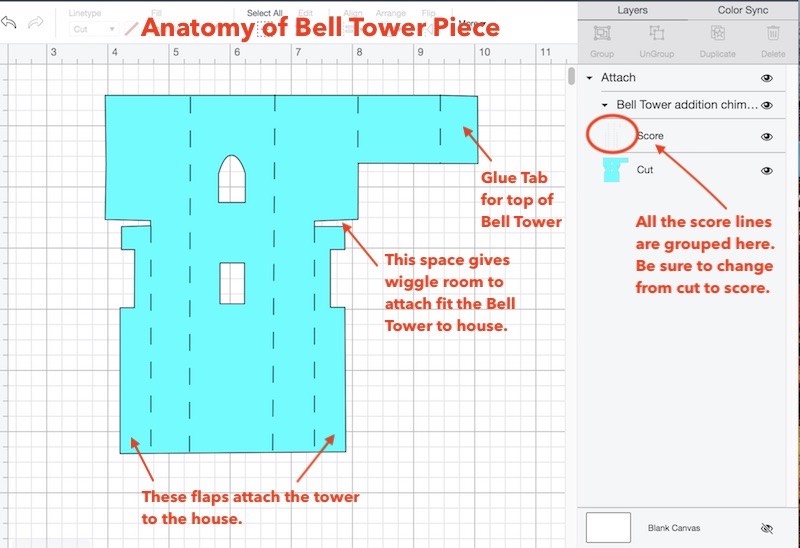
For the bell tower see the description below. All the score lines are grouped together so just click on the one area and under the Linetype option convert them from Cut to Score and attach to the main part of the bell tower.
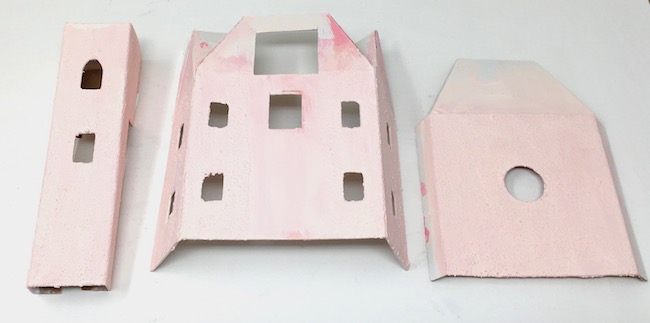
Prime and paint Clockhouse pieces
Generally, I prime and paint my houses pieces before assembly. You can do it after the house has been assembled, but I like to do it at this stage. Also fold along the score lines before you paint. It's easier to see the score lines before painting and you'll be able to paint the corners as well.
Also I covered the cardboard pieces with Ranger's Grit Paste to add some extra texture. It's a villa after all - it has to look like stucco, right?
Assemble the Front Tower Clockhouse structure
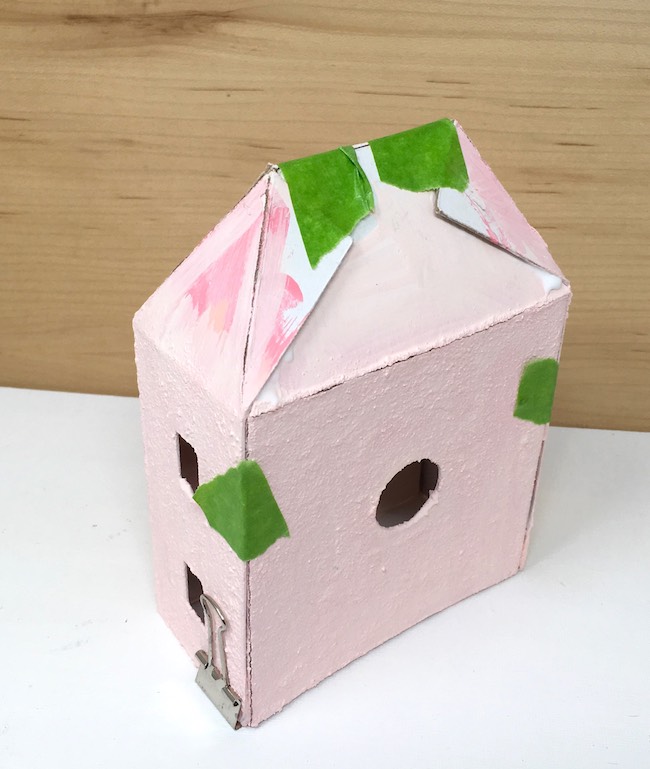
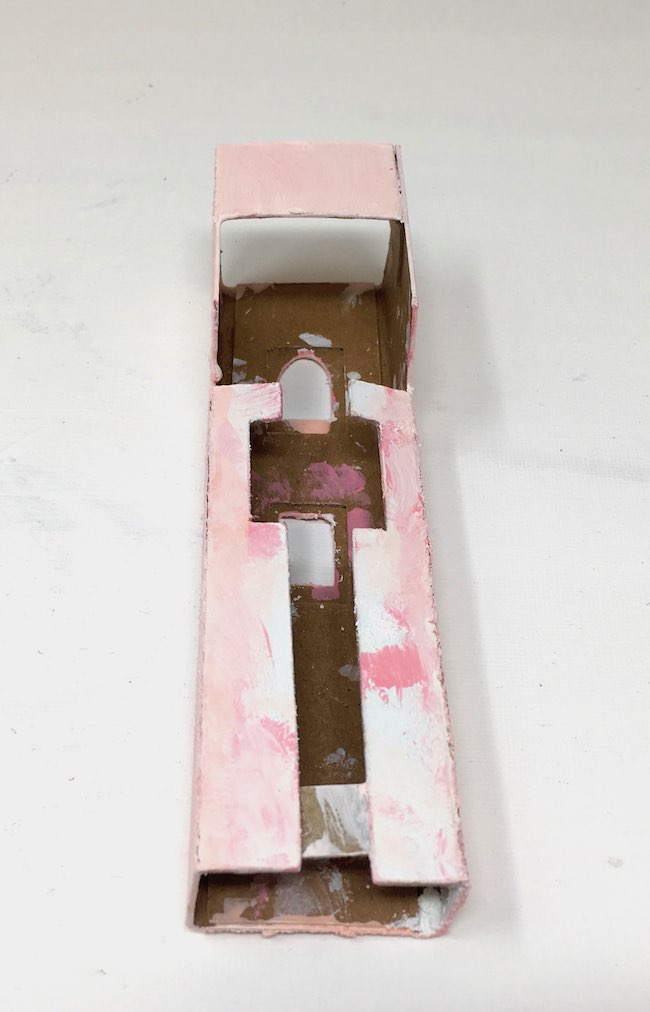
Next assemble the house. First glue the back piece tabs inside the sides of the main front piece of the house. That way the seams won't show from the front of the house. I call this type of house an "inset house" where the back piece is set in the front piece. It allows you to make a larger house with two pieces of 8.5" x 11" cardboard.
Painter's tape and binder clips hold the pieces in place while the glue dries.
The exposed roof flaps will be covered up with an an additional roof piece on top.
Choose tower design and assemble
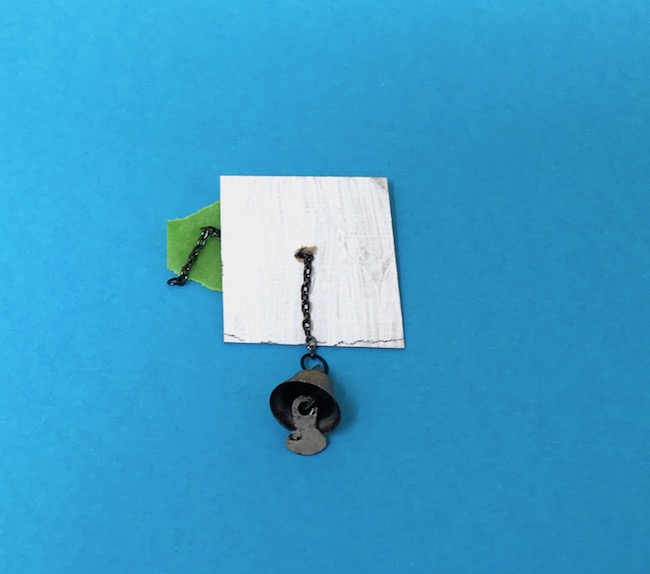
Next choose whether you want to make a bell tower or a clock tower. For this house I chose the bell tower. I learned from my friend Rhonda how to hang the bell in the tower so that it swings freely. Here's her tutorial on hanging the bell in a putz church bell tower. Test fit where the bell is going to hang before you glue the tower to the house.
So initially I tried to make the pattern with the angle at the back of the tower matching the roof angle, but I couldn't get it to fit very well - like multiple failed prototypes. The angles just would not fit together well.
That experimentation led me to a different - and much better - solution.
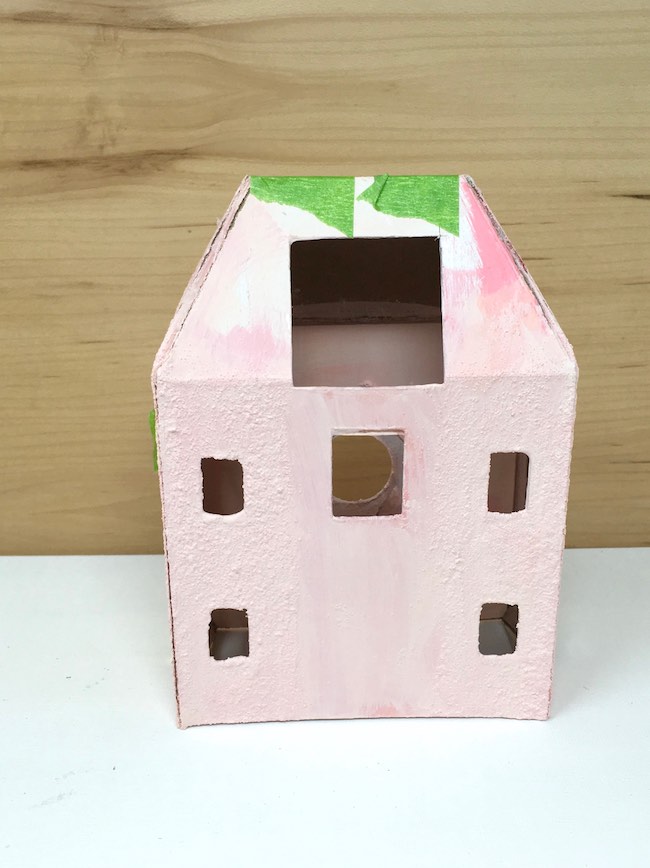
To solve the problem, I cut a square out the roof that is just slightly larger than the back of the tower and inserted the tower into the roof. That makes the house sturdier and keeps the tower centered on the house. It just plain works. Below you see the square cut out in the roof where the top of the tower fits in. Additionally, more light enters the tower as well.
Attach the Tower to the House
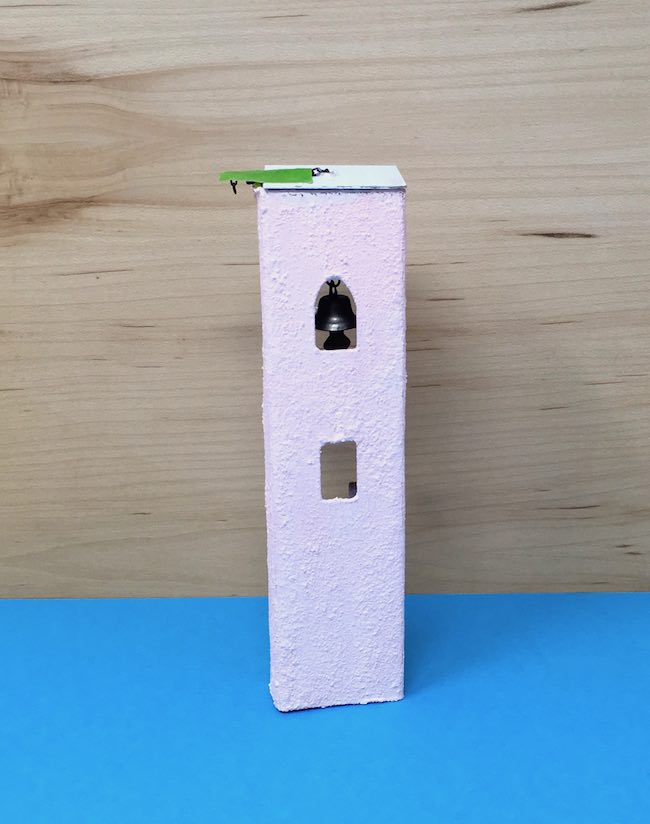
Here is another trick that helps with making the tower. Glue a small strip of cardboard on the inside bottom of the tower to keep it square. If you glue the strip of cardboard on outside back of the tower, it adds too much thickness and makes the tower stick out at the bottom when you glue it to the house.
See the little strip at the bottom of the tower. (And you can see why I paint before assembly - because I am just flat out messy with paint.)
Now apply glue to the back of the tower where it touches the house and fit it on your house. Let dry. To make the roof shingles easier, I added the steeple later in the process.
Glue on door and windows
And here is a good time to glue on the door and windows. Because you really have to hold the tower in place to make sure it adheres well, it helps to glue the door and windows on after the tower is firmly attached.
Pick out which windows appeal to you. Of course, I had to choose the windows with the heart shutters. I am always amazed at the tiny details that the Cricut cuts out so beautifully.
Decorate roof, add chimney if desired
Next step is figure out how you want to do the roof. If you want to just paint the roof, make sure that you glue the roof flaps on the inside of the house - don't let them show on the outside.
But I designed the pattern so you can make an over roof and add shingle to the over roof before you glue it to the house. That is easier.

The little strips cover the edges of the shingles. On your pattern, the strips are bigger than the ones I used on the Valentine Villa.
Make the cardboard base
Next make the base for your house. I just did my standard cardboard base with several layers of corrugated cardboard glued together. But there is a square cut out in the middle so you can add an LED light or other lighting underneath. As always, I include the traditional putz house lighting option in the back as well.
Here are some links to more detailed instructions for making cardboard bases for the little houses:
Decorate the house and base
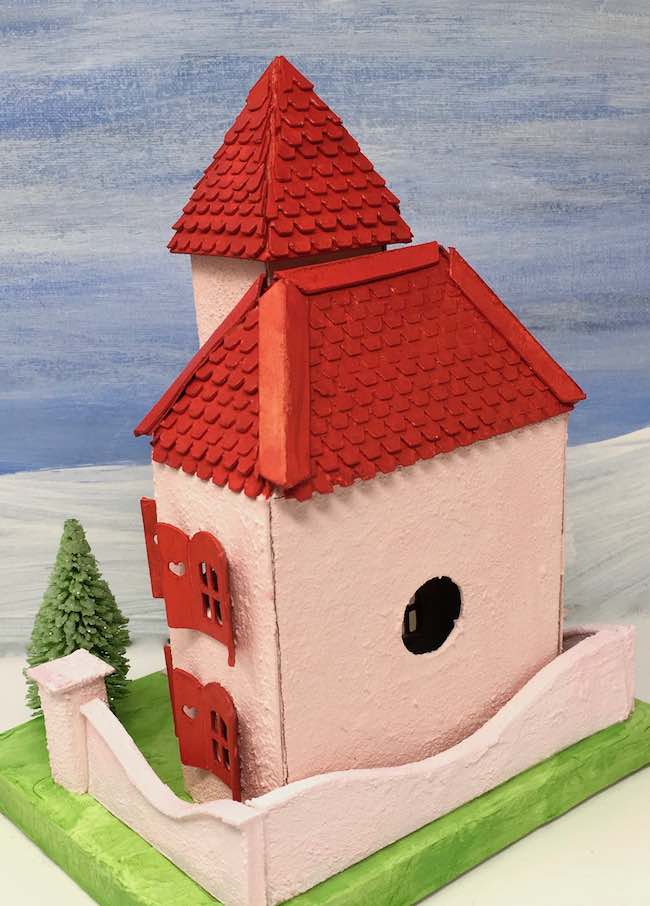
For most people this is the funnest part. I chose to make a stone wall just like I did for the Red Roof Holiday Cottage. The pattern is included in the file for this house. And then I made a simple pathway with a piece of cardboard stamped with a stone design from Stampers Anonymous.
To snow or not to snow? That's my dilemma at this point. I kind of think it needs snow on the roof to cover up some of the seams and around the stone wall and walkway. I'll update things later if I add snow.
So that's how you make the Valentine Villa - a variation on the Front Tower Clockhouse pattern.
I also posted this little house in the Simon Says Stamp Monday Challenge for the topic "Home Decor". There are always great projects there. Be sure to check them out.
I am slowly upgrading all my patterns in the library to include more details and SVG files as well. The easiest way to ask questions about making these kinds of paper crafts is to join my Facebook group about paper crafting where there are lot of highly creative people (and very nice people, too) making really cool stuff. Or you can always email me at [email protected].
Thank you so much for stopping by.
Lucy
P.S. If you want to remember the Valentine Villa or share it - pin it to your favorite Pinterest board.
Marcelle
Thank you so much for your quick reply! I posted a reply and got a message that it would not be published because of the required fields* (which I filled) lol!
So here I go again! I will be looking forward to getting those 12 little houses.
I have Adobe creative suite 4, but it is no longer compatible with my MacBook Pro, or probably the other way around, lol!
I have downloaded Sketchbook but I am unsure if I can work with this and Inkscape. There is also QCAD that I hear mentioning here and there. I will look into that as well!
Have a great day!
Marcelle
Marcelle
I have downloaded quite a few of your free small houses SVG files today. I felt like a kid in a candy store. I saved them all to my Cricut library and I will surely make them. Your 12 houses of Christmas are not available in SVG files?
Thank you so much for this!
Lucy
Marcelle,
I am so glad you like the patterns. I haven't finished converting the 12 houses of Christmas into SVG patterns yet. I will do it a little later in the year. And when I get it done I will be sure to let you know.
Thank you. Lucy
Marcelle
Hello,
Thank you so much! I will truly enjoy making the small houses.
Do you know if sketchbook allows you to work the same as with Adobe?
Thank you!
Marcelle
Iris
Thank you for this great little valentine house! I just love it and the updated design. It makes it so much easier. You are do very talented and creative and I love all your designs.
Lucy
I am so glad you like it. And thank you so much for your kind comments about the design.
Lucy