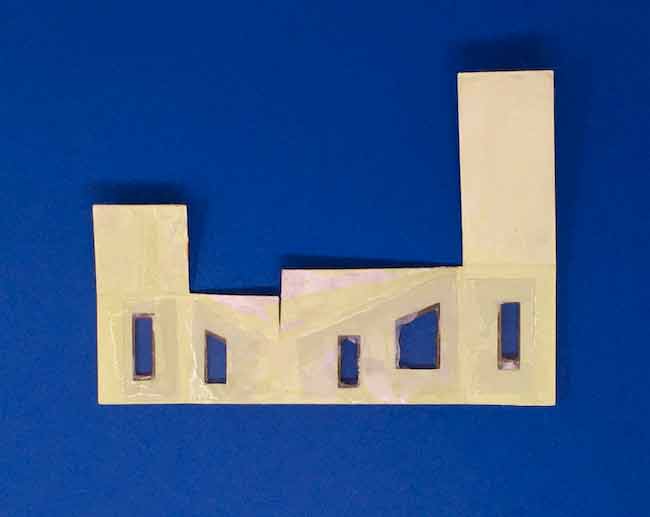
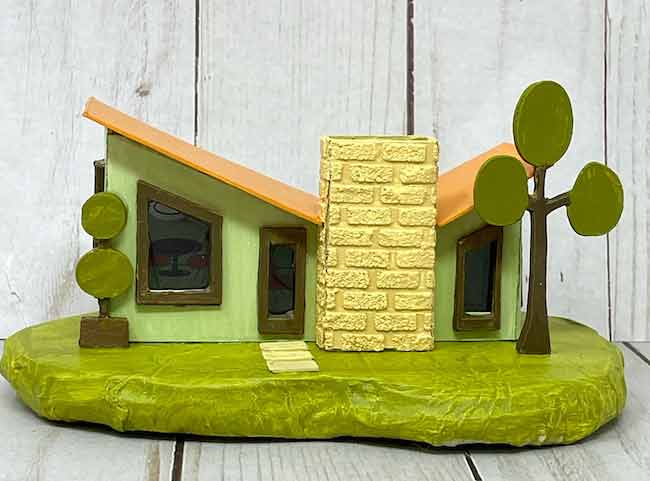
This is a first for me - a Retro Mid-Century Modern Putz house - specifically an Inverted Butterfly Roof Mid-Century Modern Putz House.
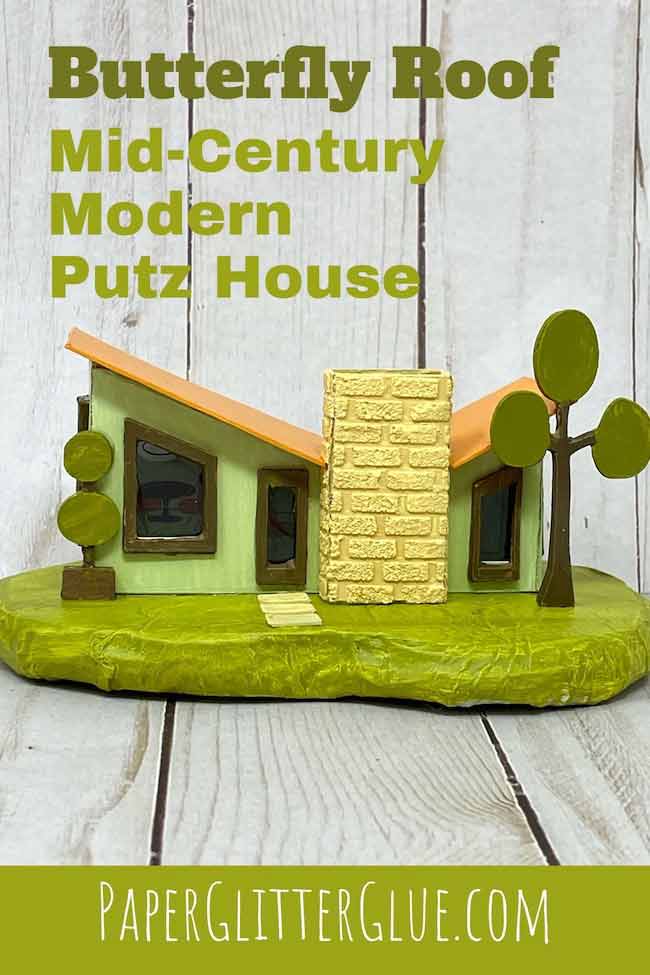
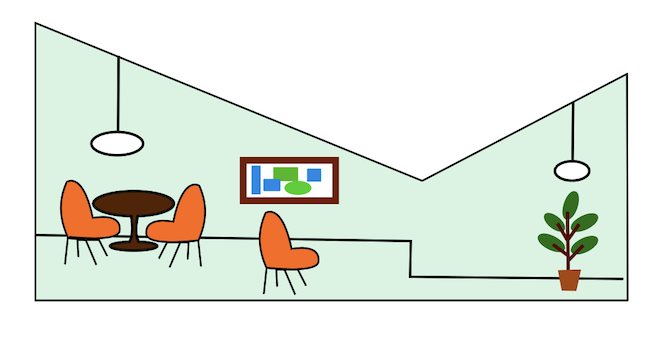
This retro design is challenging because the windows are large which makes the house a bit of structural challenge to maintain strength. But there is a big advantage to larger windows - you can see inside. So I made an abstract setting for inside the house. I drew the furniture like a retro drawing from the 50s.
So what do you need to make this cool retro putz house? The main things you need are the free pattern from the Paper Glitter Glue library, cardboard (you could use heavy card stock), paint, and glue. Let's get started.

This post contains some affiliate links for your convenience. Click here to read my full disclosure policy.
Table of Contents
Materials for the Butterfly Roof Mid-Century Modern Putz House
- Cardboard - this is the kind I use
- Glue - Aleene's Tacky Glue works well
- Gesso Primer - I used white gesso
- Paint colors for house, trim, roof, and dock or pier:
- Bundled Sage Distress Paint
- Picket Fence Distress Paint
- Walnut Stain Distress Paint
- Spiced Marmalade Distress Paint
- Peeled Paint Distress Paint
- Plastic for windows (I recycle plastic packaging for this)
- Grit Paste for chimney brick
- Free pattern for the Butterfly Roof Putz house - Design No. 117 - in the Paper Glitter Glue library May 2021
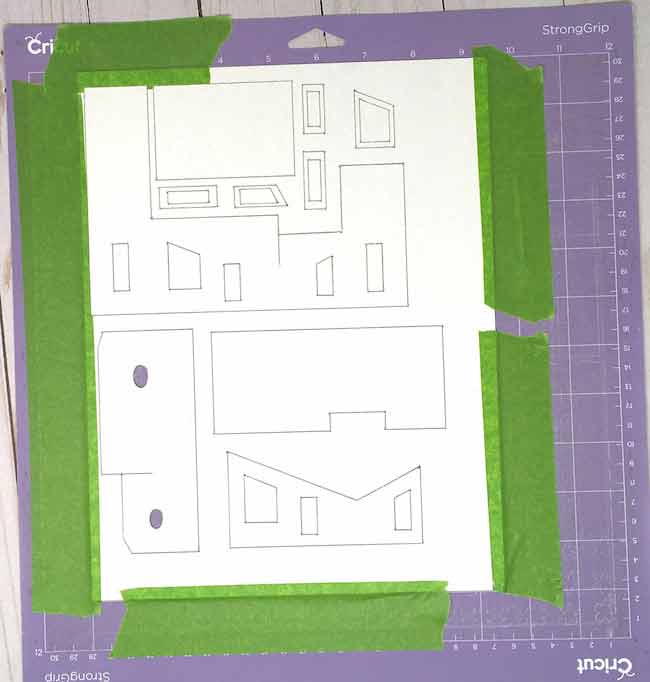
- A way to cut out the pattern - I used my Cricut Maker to cut the pieces
Materials for the Retro Base for the Mid-Century Modern Putz House
- Corrugated Cardboard
- Hot Glue
- Brown packing paper or crumpled Newspaper
- Gesso primer
- Paint
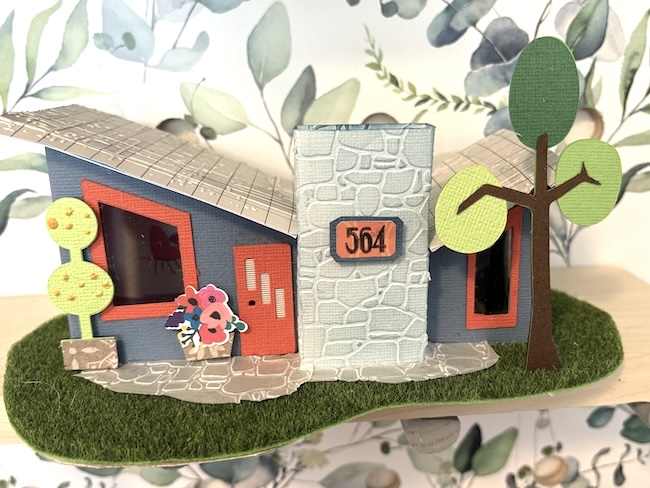
This version of the Butterfly Roof was made by Karen. She graciously allowed me to share it with you.
Steps to make the Retro Butterfly Roof Putz House
- First, download the pattern - Design No. 117 - from the Paper Glitter Glue library
- Cut out the pattern pieces
- Prime and paint the house pieces
- Stencil the brick, then paint
- Print the inside PDF and cut out
- Glue the printed PDF inside the back piece of the house
- Glue on clear plastic for windows inside the house
- Adhere windows and the door to the outside of the house
- Assemble the house
- Make the funky retro base
- Glue the house to the base and decorate
Related Links:
- Make a base for a Putz house
- Stencil stone for chimney
- Palm tree tutorial in this post
First download the pattern for the Butterfly Roof Putz Mid-Century Modern House - Design No. 117
I keep all my free patterns in the Paper Glitter Glue library in chronological order so you will find this pattern in the May 2021 section. To access the patterns, just click the click here button in the middle of the About the Paper Glitter Glue Library page which will take you to the password page. Just type in the password in the form on the page. If you don't have the password yet, just subscribe to the Paper Glitter Glue newsletter and you will get the password right away. Here's the form to subscribe.
The pattern is available in two formats - as printable PDF Files and SVG cut files for cutting machines like a Cricut Maker or a Silhouette Cameo or a Brother Scan N' Cut. Also all the files are in a compressed or zipped folder for security.
If you use the printable PDF Files, there is a 1 inch square to show you the size it is supposed to be.
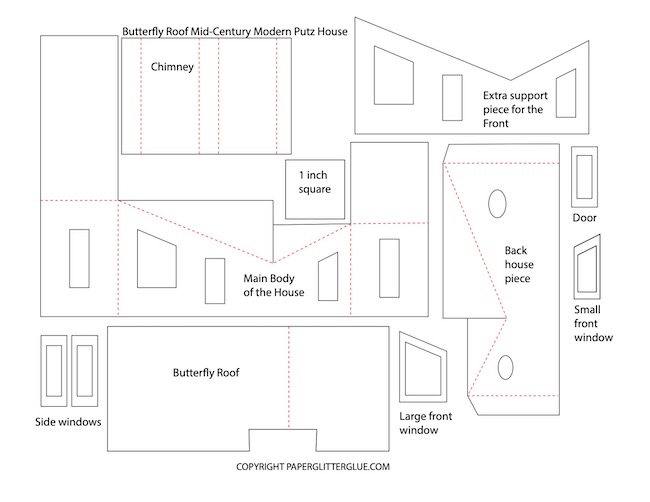
Next, cut out the pattern pieces for the Butterfly Roof Putz House
Here are all the pieces for the Butterfly Roof Putz House:
- Main body of the house
- Back piece of the house
- Roof
- Chimney
- Side windows
- Front angled windows
- Rectangular door
- Extra front piece for support
- Brick stencil for the chimney
- PDF file for the inner decor
- Mid-Century Modern tree files
- Retro Base file
This is a pretty tiny house - 4 inches across and about 2 inches high on the highest side of the roof. I have included a 5 inch version as a separate file if you are interested. If you want an even bigger house, just group all the pieces together and enlarge them in your Cutting Machine Design Software. Or scale them together on your printer.
Here's how the Butterfly Roof Mid-Century Modern Putz House looks in Cricut's Design Space. Within Cricut Design Space, the score lines are already designated and attached to the appropriate piece. That's already done for you.
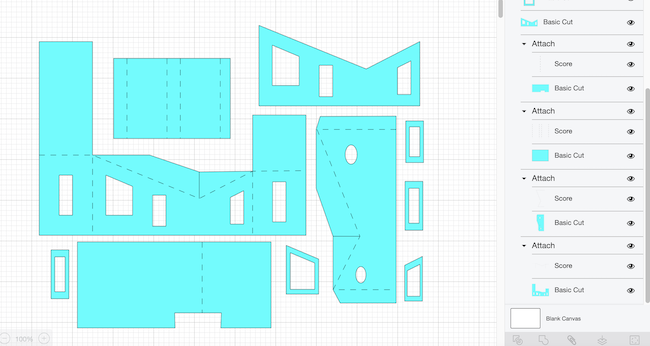
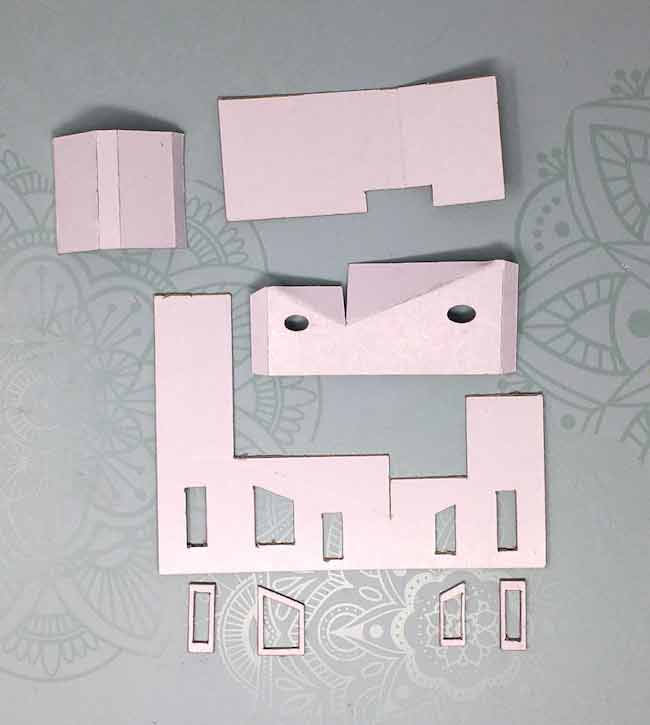
Here are all the pieces my Cricut cut out on one sheet of cardboard.
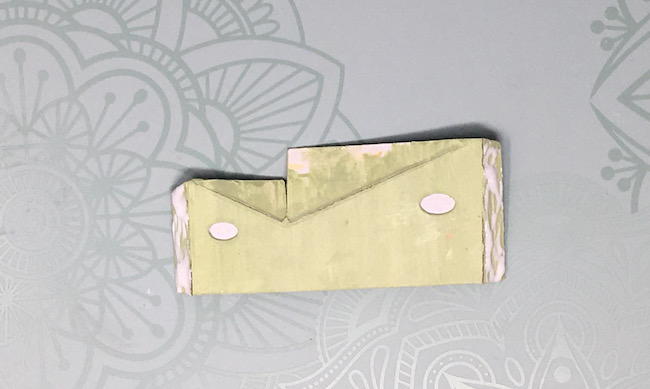
Next step, prime and paint the house pieces
First prime the house with gesso. The kind of recycled cardboard I use has a slick white layer on one side which won't take paint very well unless it is primed. But even cardboard with brown on both sides, you need to prime it so the paint looks better.
And because I want to be able to see through the windows on this miniature Mid-Century Modern house, I also painted the inside of the house with a neutral color.
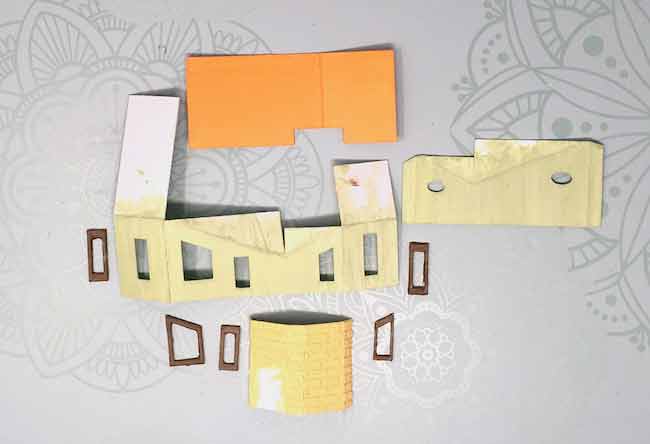
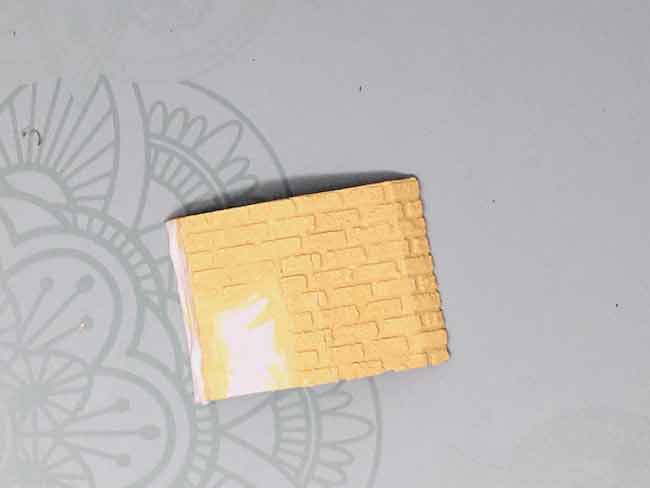
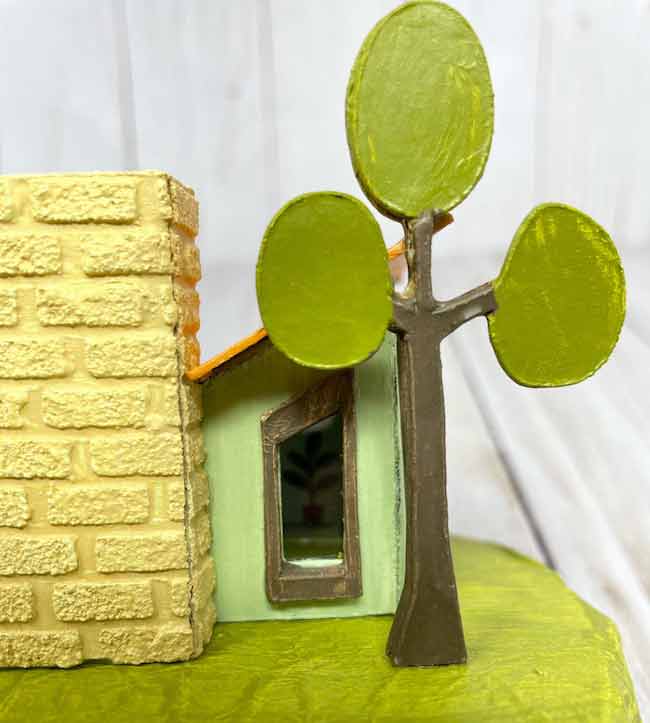
Stencil the brick on the chimney
One cool feature of mid-century modern houses is the stone or brick work. That's why I made a stencil for the brick on the chimney which is included in the free files.

And to make the brick stand out, I like to use Ranger's Grit paste for the brick. It's a easiest product I've found for making stone work or brick. But there are other things you can use - texture paste or modeling paste which I buy from the artist's aisle at my local hobby store.
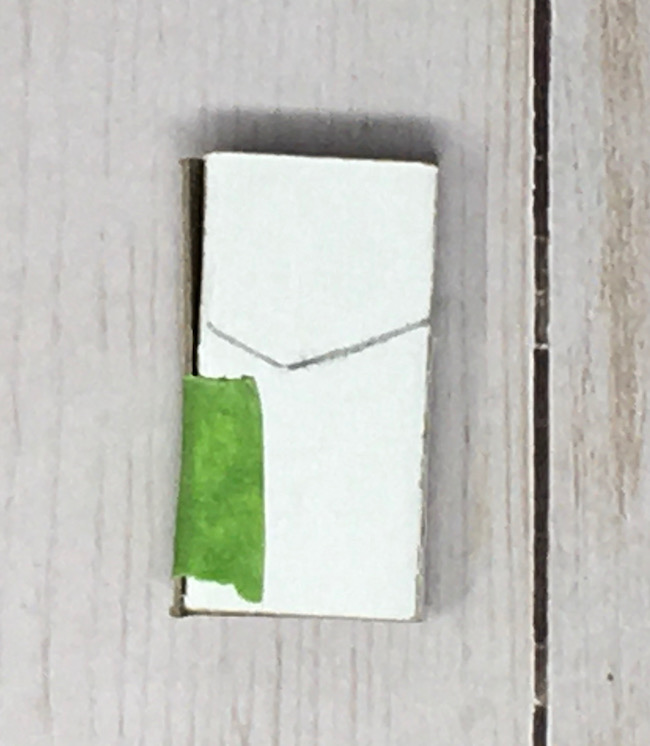
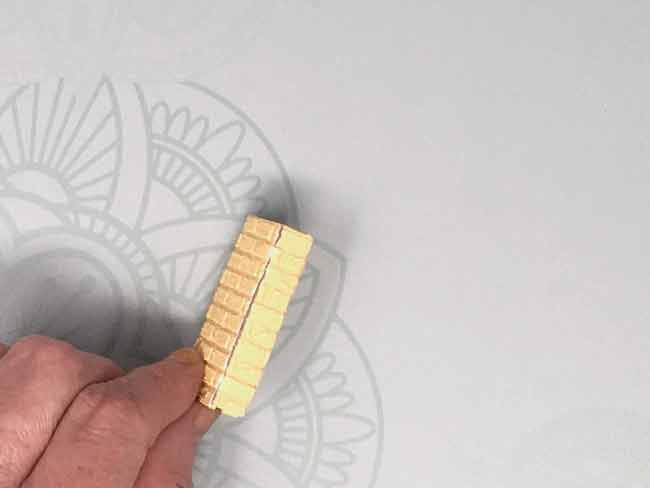
Before you stencil, fold along the score lines and test fit the chimney on the house and roof. Then draw a line on the back of the chimney above the roof line. You can see that on the photo above.
When you stencil the brick, apply the paste to the front and sides as well as the part of the chimney above the roof line. To make sure I stencil the correct area, I tape off the area I want to avoid.
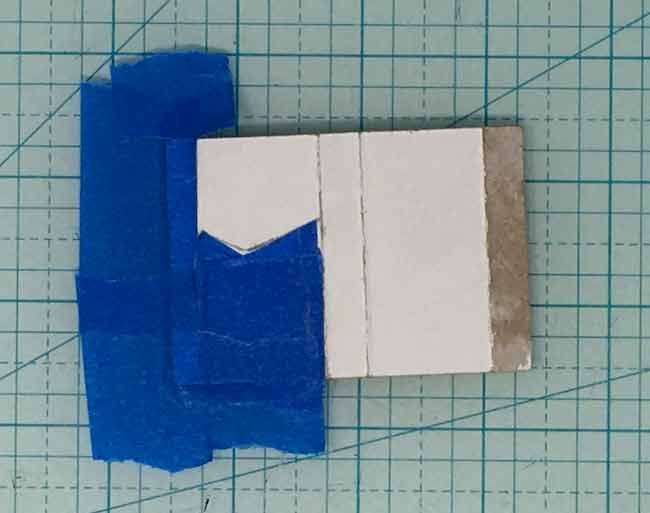
The chimney will fit better against the house if you omit stenciling to the back of the chimney that needs to adhere to the house.
Also, do not apply paste to the side glue tab for the same reason. The chimney glue tab is slightly narrower than the side flaps.

Next, spread a thin layer of grit paste on top of the stencil.
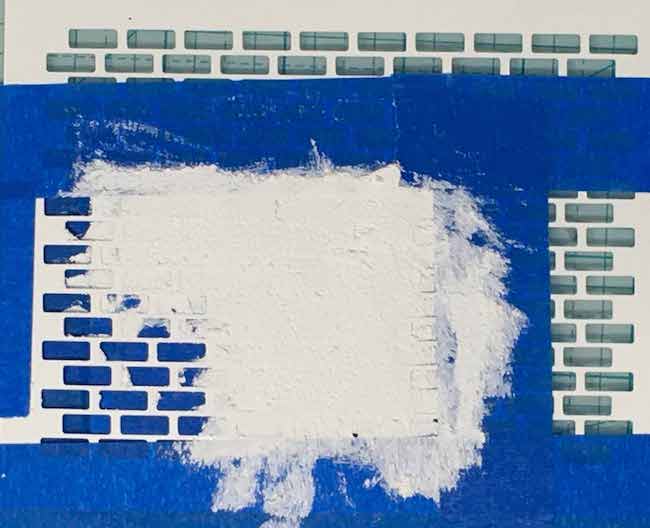
Gently remove the the tape and lift up the stencil.
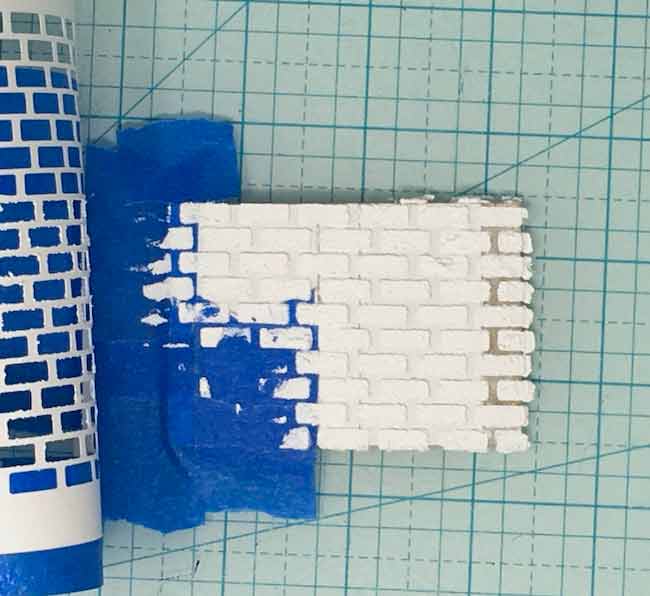
When the grit paste is dry, prime and paint the chimney.
To assemble the chimney, fold along the score lines and glue along the side glue tab to finish the chimney.
Finally, touch up the edges of the chimney that open up when you assemble the chimney.
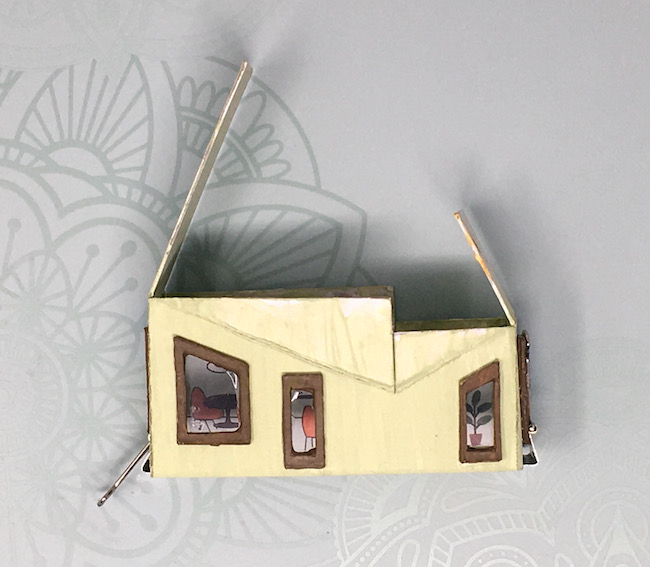
Print out the inside of the Butterfly Roof Putz House
For the inside of the house, I drew this kind of abstract mid-century modern room that you can print and cut out to fit inside the house. If you don't like my decor, you can go online and print up another funky scene for your house. Just use the shape of this piece so it will fit inside the house.
Next, glue the printed piece on the inside back of your MCM Putz house
Now you may wonder why I am gluing it on the inside back of the house. That's because I love the depth and dimension that it gives to the little house.
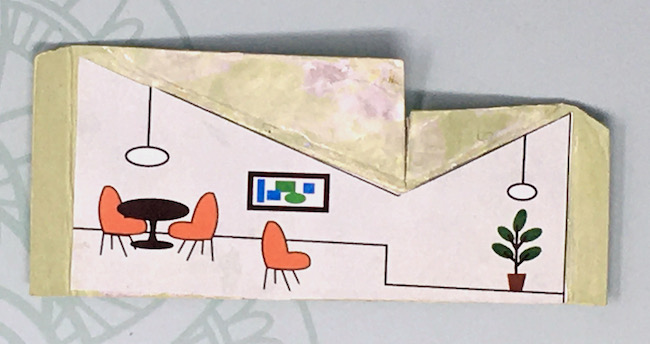
But if you want to glue it to the front windows, you can, you do lose the dimension, though it is easier.
Glue the plastic windows to the inside of the house
Really, you don't have to do this, but again I think it adds a great detail to the house.
There are two ways to glue the windows to the house. You can do it like I did for this house just glue pieces of plastic to the back of the window.
This is how it looks after the windows are glued in place.
But if you want to make the house stronger, you can sandwich a plastic piece between the front of the house and the extra front piece included in the pattern.
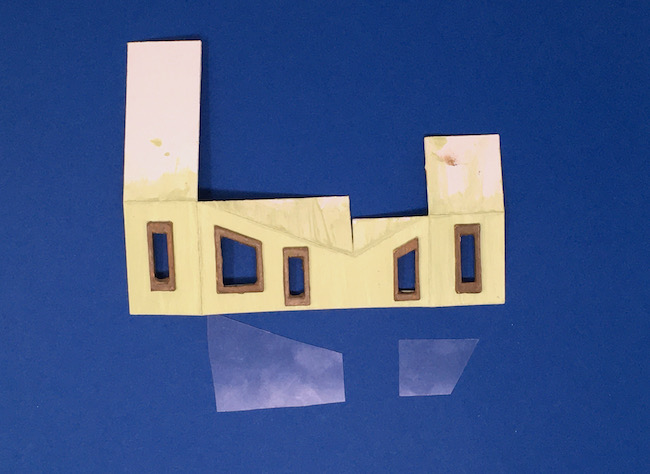
Adhere the outside window frames and door to the outside of the house
I think you will find that this detail really makes the little house pop. Just glue the painted window frames and the door to the front of the house. And you may be wondering what door? Well, the middle rectangular piece on the front of the house is the glass front door. Draw a tiny doorknob if you want to make it more obvious.
Now assemble your adorable Mid-Century Modern Putz house
After all that, you basically have the entire house made. All you have to do is glue the two back side tabs inside the side walls of the main part of the house. Use binder clips to hold them in place while the glue dries.
The photo below shows how the house looks like with the side tabs glued in place.
Next, glue the roof tabs to the roof flaps. And I know this seems like a silly detail, but it really does make it so much easier to glue a house together. In addition, it really facilitates gluing the roof in place.
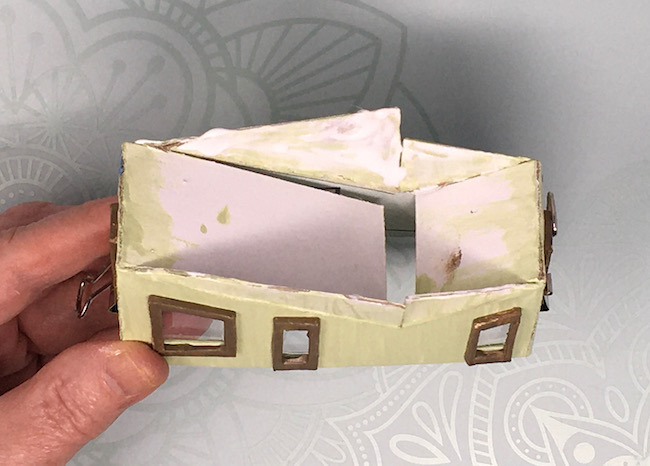
Next step is to adhere the roof tabs to the roof flaps. Notice that the larger roof flaps overlap when glued down. After I noticed this, I changed the pattern so this won't happen on your house.
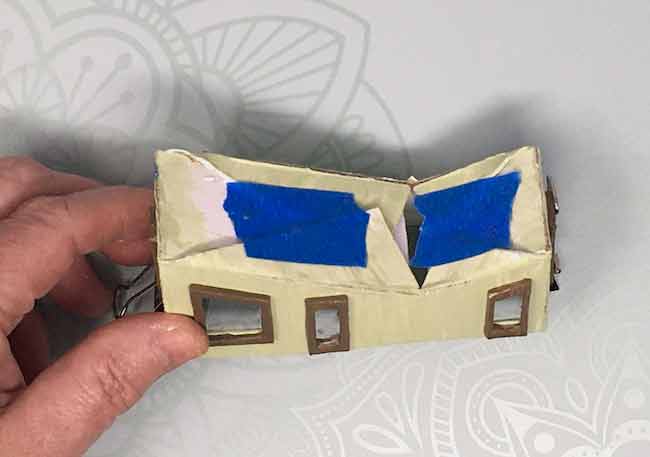
After the glue has dried for the structure of the house, glue the roof in place with edge of the cut out for the chimney right on the edge. Be sure not to extend it past the house which forces the chimney out of alignment.
Last, glue the chimney in place where it fits in the roof cut out.
Finally, you tiny MCM putz house is completed. What we have to do next is make the base and landscaping.
Make the base - the perfect setting for your little house
For this house, I thought of a retro curved base would work best. I've included that shape in one of patterns.
Now if you want to make a standard base, just go ahead. But I really like this shape.
To make the base, I glue 3 layers of corrugated cardboard together. But I also cut a slot to allow some lighting under the house. The house is too narrow for LED lights to fit underneath, but you could use some teeny wired lights.
Normally, I would build up a base high enough for an LED tea light to fit underneath, but it just didn't look right for this house.
Finally, make your retro scene complete with landscaping
In the files, you will see some retro trees that you can glue along the house. If you want them to be especially sturdy, glue several layers together.
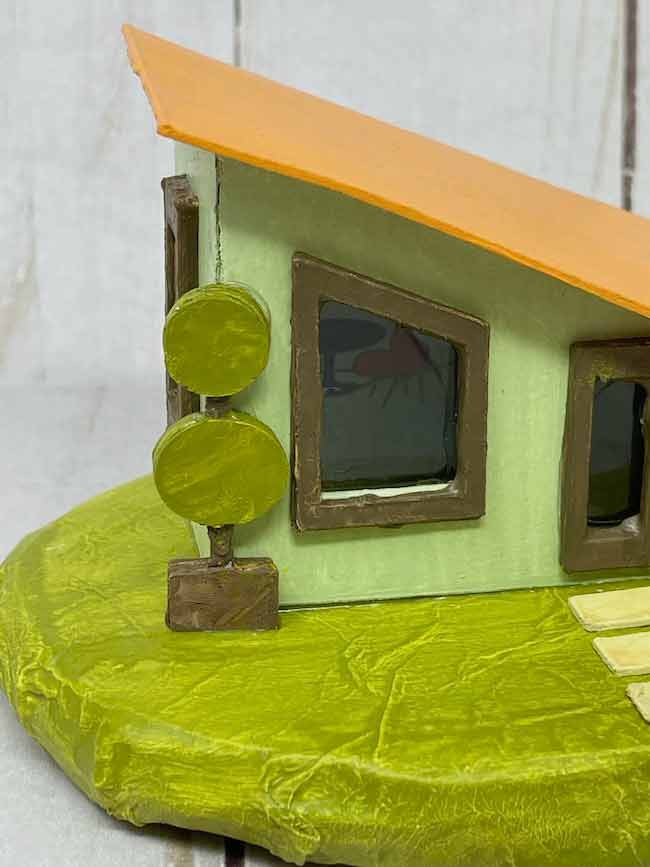
To make them stand up, just cut out 1-2 extra tree trunks and glue to the back of your tree and then embed the tree into a solid blob of glue.
Another cool tree for this retro putz house would be a palm tree like the one I made for the Little House by the Sea. You can read how to make a miniature palm tree here.
So that is it - the Butterfly Roof Mid-Century Modern Putz House. I do hope you like it. I will eventually make more of this style.
Be sure to pin this to your favorite Pinterest board, too.

Please let me know if you have any questions? You can email me at [email protected]
Thank you for reading.
Lucy
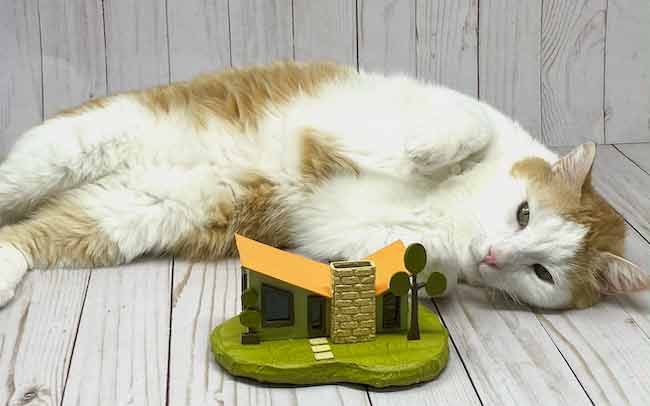
P.S. Bill likes to photobomb my photo sessions. He also provides a good sense of scale so you can get an idea of how big the Butterfly Roof MCM Putz House is.
KAREN L WATKINS
I enlarged the Butterfly Roof Mid-Century Modern Putz House to 6"wide. I l really like the size but can't find any files like your interior. I would love to enlarge your file, but don't know how to do that either. Any help is appreciated.
Thanks,
Beth
Thank you so much for this tutorial. I really look forward to making my own little house 😀
Lucy
I am so glad you like it, Beth. Mid-Century Modern houses are so fun. I need to make more MCM designs.
Lucy
Laura Mertes
I love the pic with Bill. Have you heard of the Facebook group “Cats in Dollhouses “?
Lucy
No, I haven't heard of that Facebook group. I bet it is hysterical.