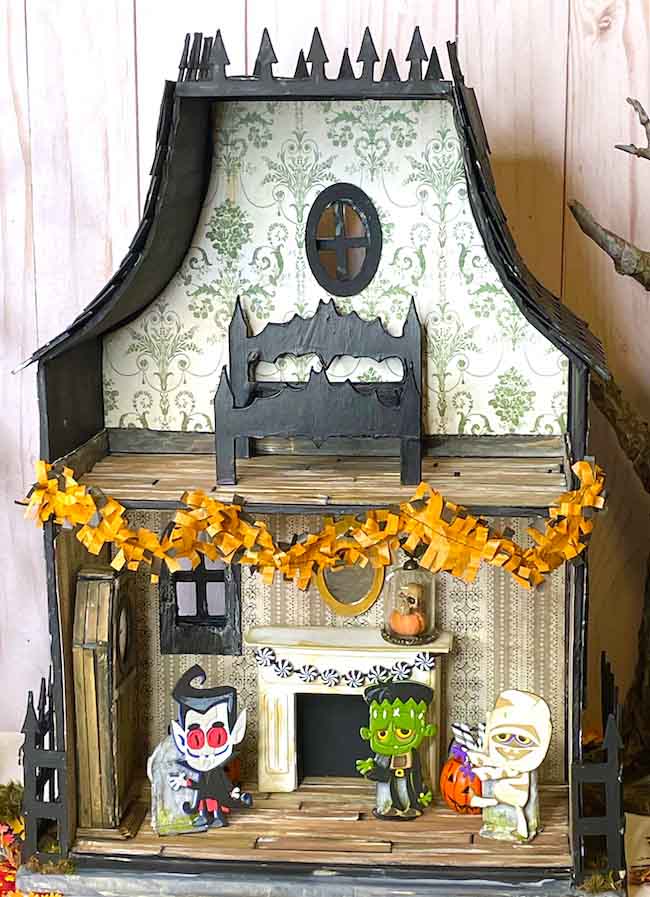
Yes, it's party time! I needed some miniature figures that I could make for my haunted dollhouse. Tim Holtz, a designer for Sizzix, came out with the cutest little die cut figures that a perfect for the party. Meet Ace (as in ace bandage), Stitch (for obvious reasons), and Stanley (just because) who are wild and crazy party guys. If you ever host a dollhouse Halloween party, you want these guys at your party. Here's how to make the Costume Party Paper Figures.
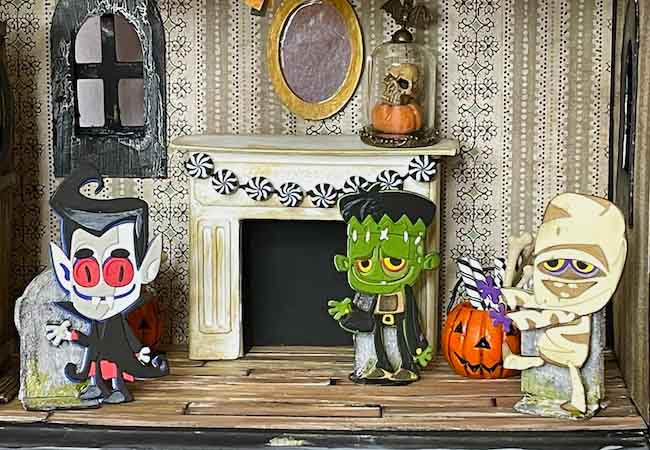
Table of Contents
How to Make the Costume Party Paper Figures from Sizzix and Tim Holtz
To make these little figures, you need these Costume Party Sizzix Colorize dies which are phenomenal, but kind of fiddly. I've come up with a technique that will really help.

This post contains some affiliate links for your convenience. Click here to read my full disclosure policy.
Materials to Make Costume Party Paper Figures
- Sizzix Thinlits Die Set 28PK - Costume Party, Colorize by Tim Holtz
- Cardstock - various colors and shading
- Quick-drying glue like Art Glitter Glue or Ranger Collage Medium
- Precision tweezers for paper crafts (Fine Point curved tweezers)
- Die cutting machine like a Big Shot
- Distress inks for shading, edging
- Grit paste
Directions to Make the Halloween Paper Figures
- Introduction to Colorize dies
- Cut out the pieces for each paper figure in the appropriate colors - Design No. 128
- Arrange the colored die cuts in order of assembly
- Glue the cut out pieces in order to assemble the paper figures
- Add additional backing to make the figure more sturdy
- Make a structure to support the party paper figures
1. Introduction to Colorize Dies
What is remarkable about these Tim Holtz Colorize dies from Sizzix is how they come together to give great shading and depth to these die cut figures. So what these dies do is separate the colors with different layers of die cuts. It will be more obvious in the photos below.
While the effect is remarkable, it has its challenges. How do you know what tiny pieces go where? And how do you glue down these little tiny pieces of card stock? Fortunately, Sizzix has made videos that are incredibly helpful. For my suggestions to these questions, read on.
2. Cut out pieces for each paper figure
Ok, here is the first challenge - cutting out all the pieces in different colors. Because the Monster figure is relatively easy, let's talk about the Monster figure first to get started.
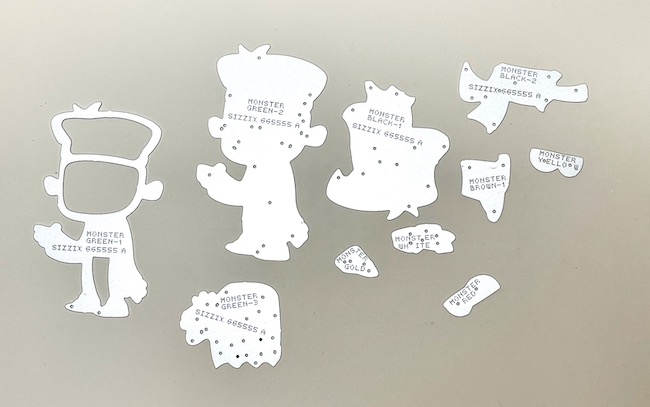
Notice that each die has the name of the figure and the suggested colors. Since this is the first time I've used these dies, I used the colors suggested. If a color was suggested more than once, I tried to use a different shade of the same color or inked it to distinguish the shades.

In addition, if the die has a lot of tiny pieces, it helps to cut extras because they will jump away and they are difficult to find. So to reiterate, CUT OUT EXTRA TINY PIECES because they will hide from you.
3. Arrange the colored die cuts in order of assembly
Next, pull up the Sizzix video to see how the Monster comes together. And here is the trick I used that helped me so much. I made a sheet with a list of the dies in order that they should be used. I think you can get an idea in the examples below.
Monster Die Cuts Sorted by Color and Order of Assembly
The photo shows my handwritten sheet showing how I organized the colored die cuts for monster. I found that this made it so easy to assemble the layers of dies. I named him "Stitch".

Sometimes you look at these tiny pieces and wonder "what could this possibly be?" That's why you have to at least take a quick view of video.
If you don't arrange your paper cut outs this way, you'd be hard pressed to realize that the two brown rectangular pieces are layers of the shirt. Or you'd never figure out that those funny little brown bits are shoes.
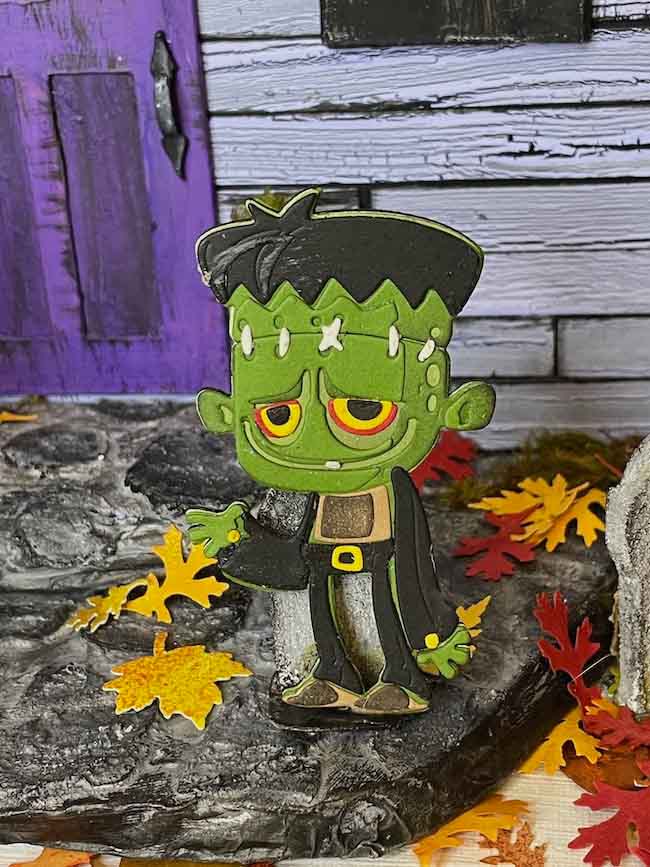
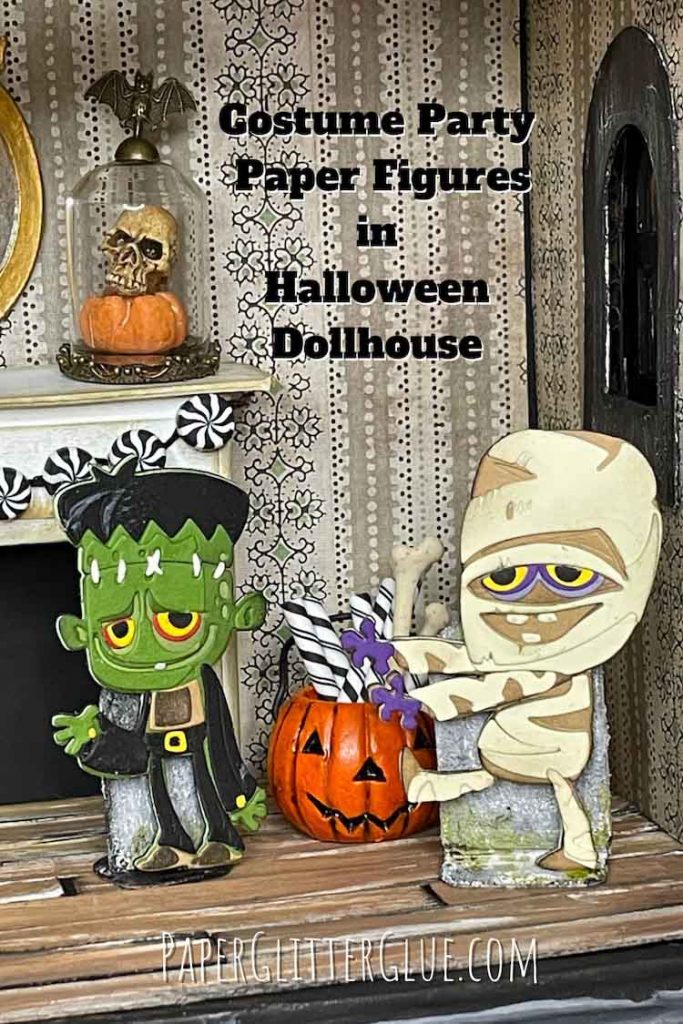
Stitch the monster figure has numerous layers. In fact, see the two layers of the brown shirt and the teeny, tiny brown upper layer of shoes.
Mummy Die Cuts Sorted by Color and Order of Assembly
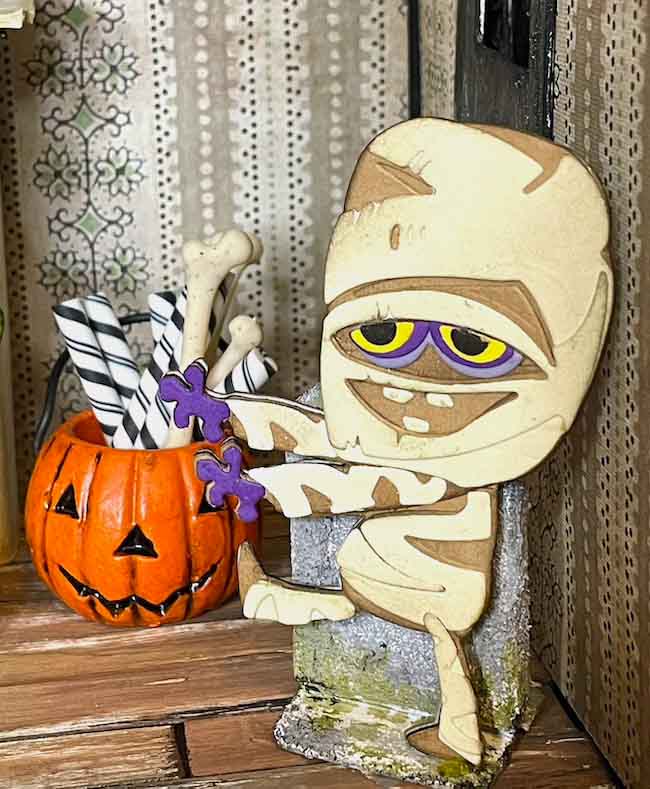
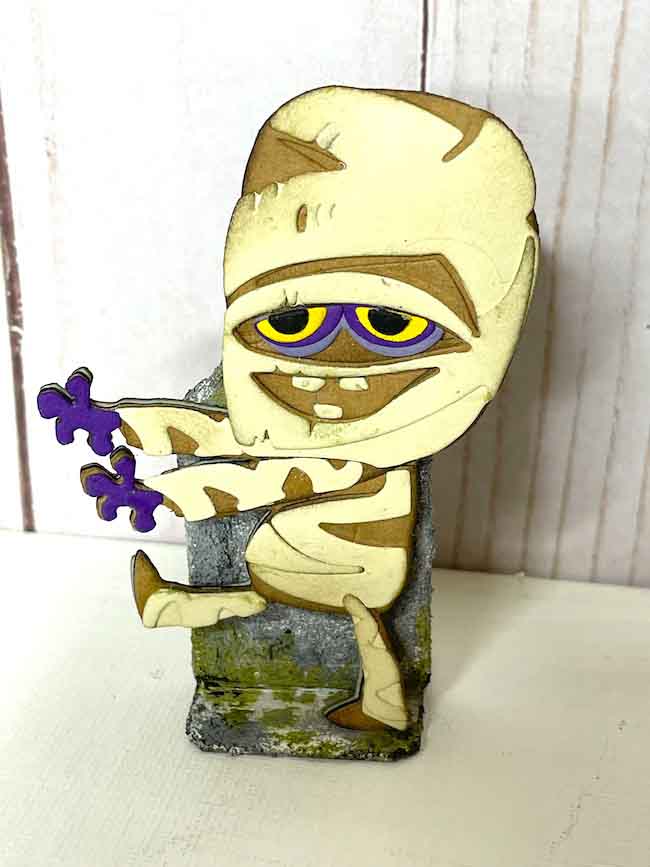
In the photo below, you see the colored card stock pieces for the Mummy Costume Party figure. To differentiate the brown layers, ink the edges for more depth. Do the same on the cream layers of the mummy that I call "Ace".
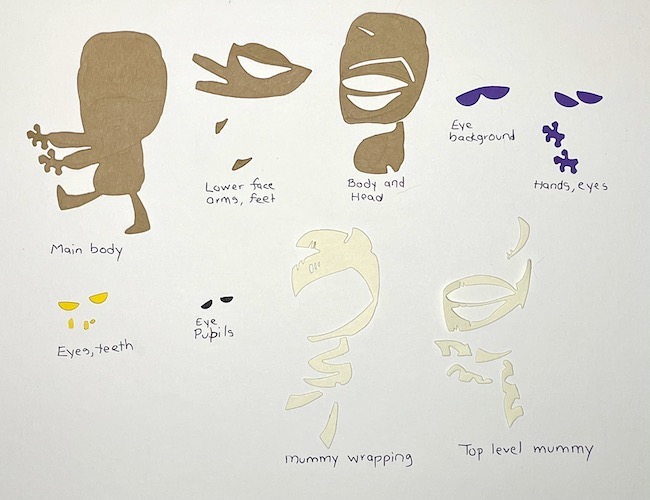
In the photo below, you can see why I named the mummy "Ace" - because of ace bandages. See the layers of bandages and the eyes. I used the same color of brown and cream, but distressed the edges to give some definition to the layers.
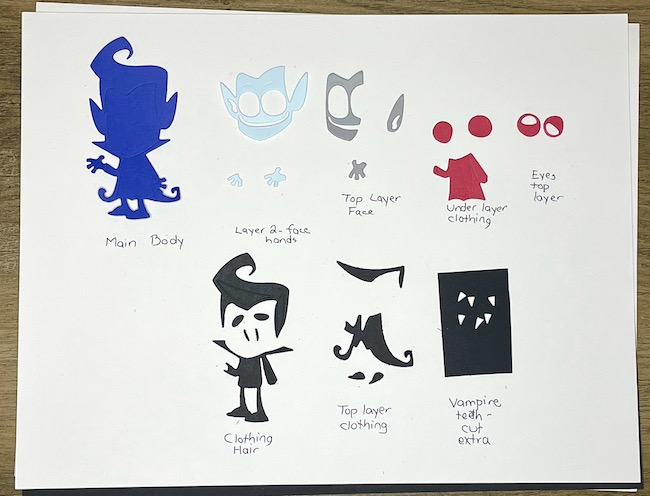
Vampire Dies Cuts Sorted by Color and Order of Assembly
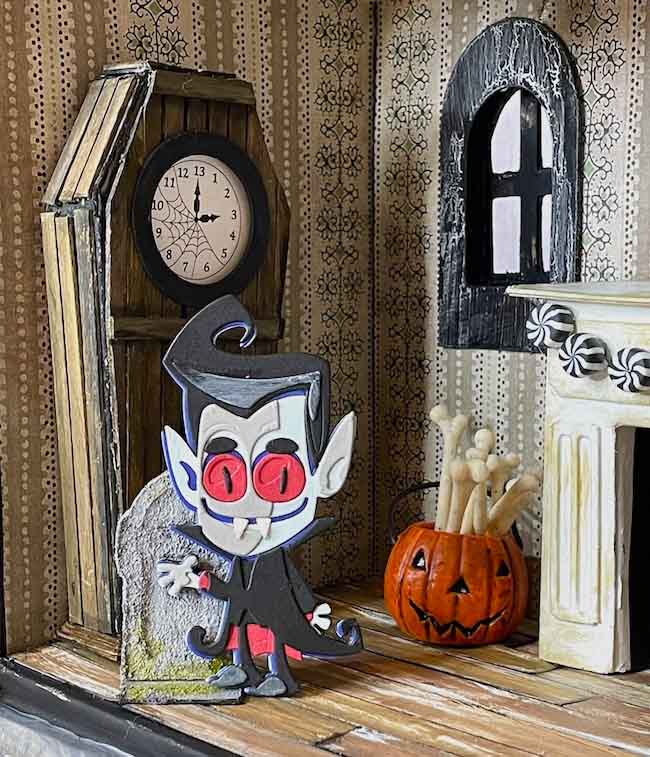
Below see the colored card stock pieces for the vampire that I call "Stanley".
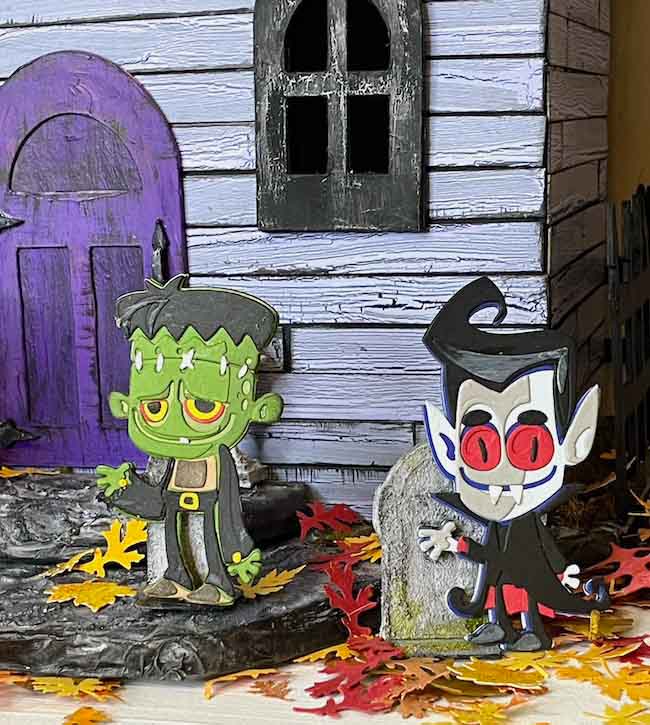
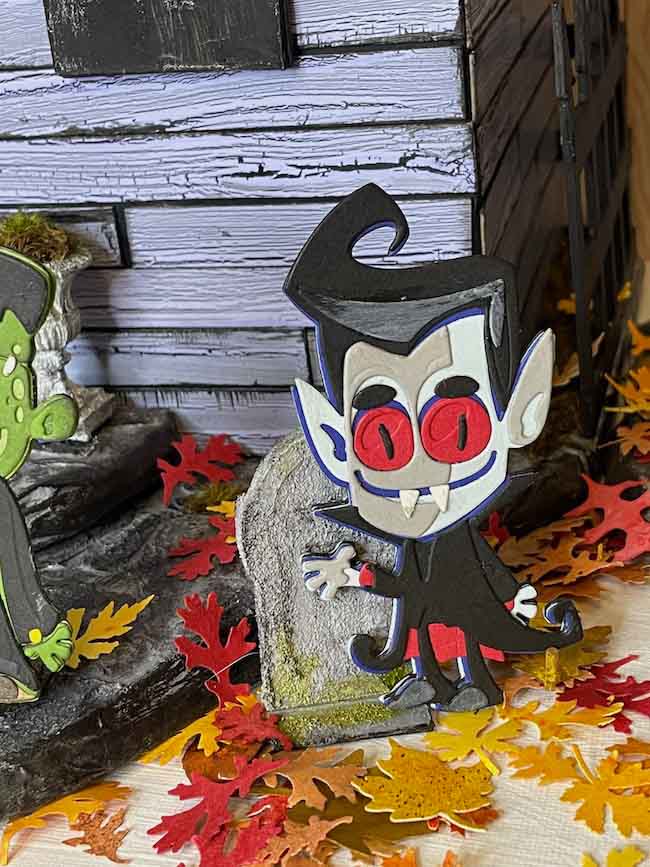
Stanley the vampire stands outside the dollhouse.
Cheat Sheet for Assembly of Costume Party Paper Figures
So to make things easier for you, I made a set of PDF cheat sheets so you can cut out each set of figures and arrange them in the order of assembly. Simply die cut the pieces in the suggested colors and place them on this sheet in order.
You can get these cheat sheets from the Paper Glitter Glue library. If you already have the password, just go to the library and enter the password.
If you don't have a password, then just subscribe to my newsletter and you will get the password immediately. And then you have access to all the free files in my library.
4. Glue the cut out card stock pieces in order to assemble paper figures
Now that you have the colored card stock pieces cut out and placed in order, glue the pieces together in the order on the sheets and in the videos.
When you follow the sheets and the Sizzix videos, it's pretty easy to glue them together. So we've solved that problem.
How to glue down the tiny pieces of card stock
The next challenge is gluing down the tiny pieces - the teeth and the buttons, in particular. There are a number of ways to do that - probably the easiest is to use fine, precision tweezers. But I actually dabbed a needle (or use a toothpick) in the glue, applied it to the piece. Then I used the needle to place the tiny pieces.
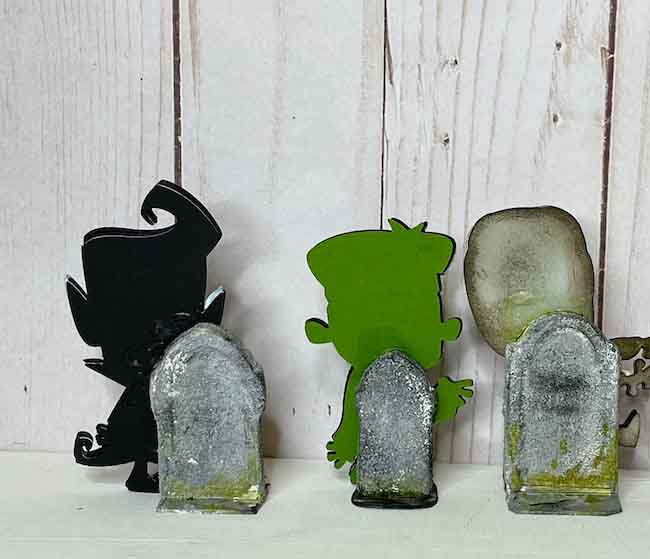
5. Glue Additional Backing Pieces to Make the Paper Figures More Sturdy
To make the party guys sturdy so they can stand up, cut out 2-3 extra background pieces and glue to the back of the paper figures. See how nicely the costume party figures stand up!
6. Make a Support Structure so the Costume Party Paper Figures Can Stand
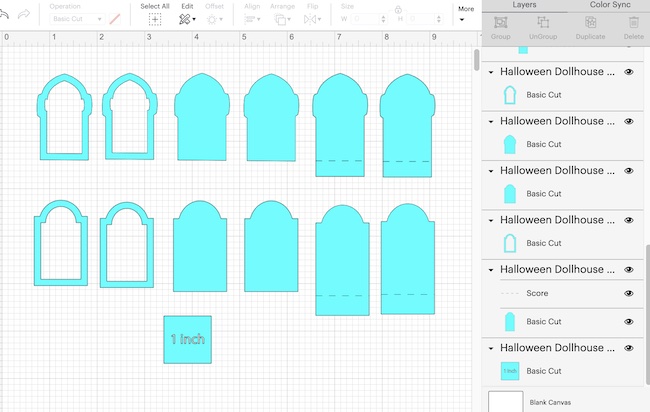
I decided to use a tombstone as the base to make Ace, Stitch, and Stanley stand up. To get the tombstone pattern, you can find it in the Haunted Dollhouse files in the Paper Glitter Glue library.
Cut at least 2 pieces of each and glue them together to make a tombstone. And the base of the tombstone is designed to be like bookends with one flap folded forward and one folded backwards.
As you can see in the photos, the tombstones support the figures well.
Here's how the tombstone design looks in Cricut's Design Space.
See the photos below which shows the back of Ace the Mummy glued to the tombstone.
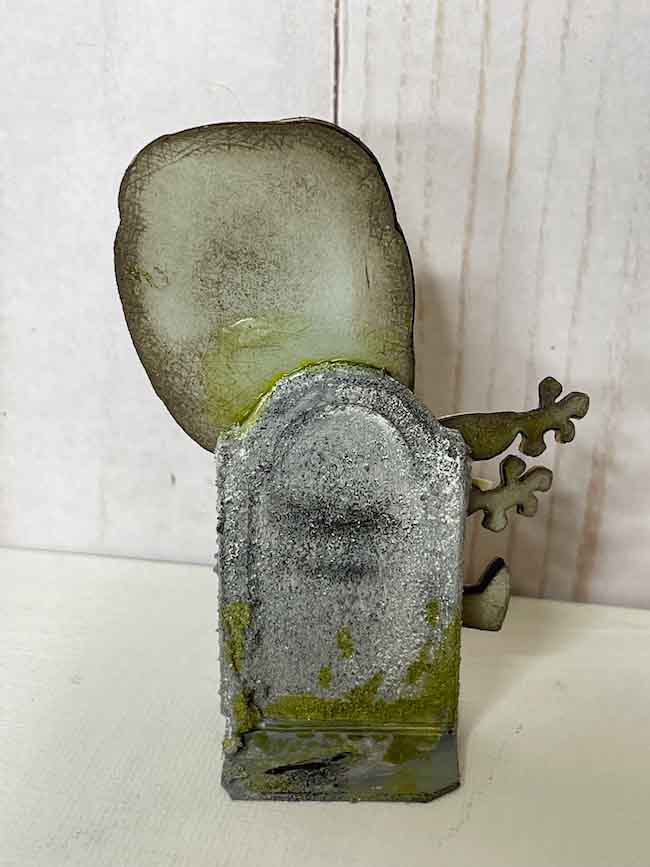
After you glue the cardboard pieces together, coat the tombstones with grit paste. Then paint the tombstone with shades of grey and black. I used a bit of green Mica spray painted at the base to mimic moss.
And that is how you make the delightful Costume Party paper figures so you can add them to any Halloween diorama or decor.
In the photo below. you see Stanley the vampire who greatly admires the Coffin Clock.
I'm entering Ace, Stitch, and Stanley in this week's Simon Says Stamp Monday challenge which is Spooky/Halloween. I certainly think these characters fit that challenge. Fortunately, the Simon Says Stamp Wednesday challenge is also Spooky/Halloween so I can join that one as well.
As an additional bonus, the challenge for the Funkie Junkie Boutique Challenge is Grunge, Ghouls, or Giggles, I think my little Halloween paper figures certainly fit since they are funny, grungy little ghouls.
Related Links
- DIY Halloween Dollhouse
- Distressing Techniques for Halloween Houses
- Miniature Haunted Clock
- Sizzix Costume Party Colorize Dies designed by Tim Holtz
- Simon Says Stamp Monday Challenge
- Simon Says Stamp Wednesday Challenge
- Funkie Junkie Boutique Challenge
Questions about making the Costume Party Paper Figures or the Haunted Dollhouse?
If you have any questions, please email me at [email protected].
And be sure to pin a photo to your favorite crafty Pinterest board so you can remember where you found this cool paper craft.
Jenny Marples
Oh my! Your fun figures look so at home in their spooky abode Lucy. I love your attention to detail with every part of this. Thank you for sharing it with us at The Funkie Junkie Boutique blog xx
GG
So cute! Will have to give these a try 🙂 Thanks so much for all the wonderful tutorials!
I checked the library but couldn't find the cheat sheet you mentioned - is it in with one of the other files?
Lucy
Thank you so much for letting me know that I forgot to add those files. I have added the files now.
Lucy
Lucy
Thank you for reminding me about that. I forgot to add the cheat sheets, but they are there now.
I hope they help you.
Lucy
Monalisa
Oh my gosh, those are so cute! Thank you Lucy!
Lucy
Thank you so much. I think they work so well with my little dollhouse.
Lucy