Since my favorite paper crafts are crafts for Halloween, I would like to share some of my best techniques for making Spooky Halloween paper crafts. It's a summary of my Distress Techniques for Halloween Paper Crafts. There's even a video to show you these techniques so you can see them better.
An Example of Distress Techniques on a Halloween Paper Craft
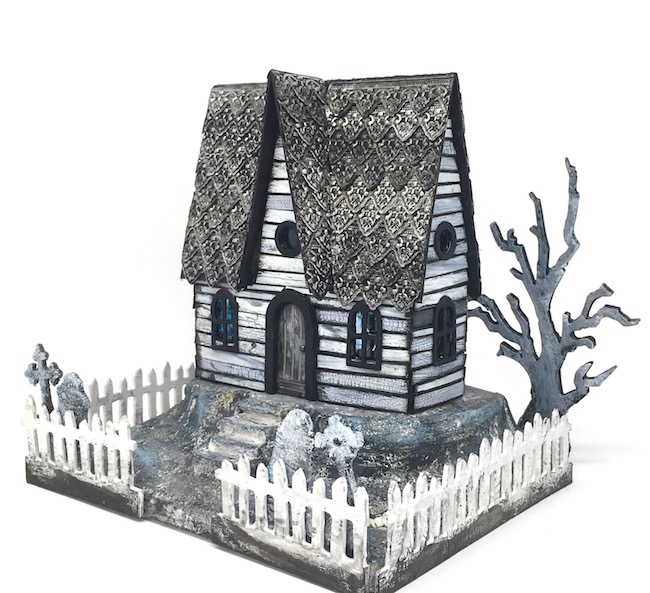
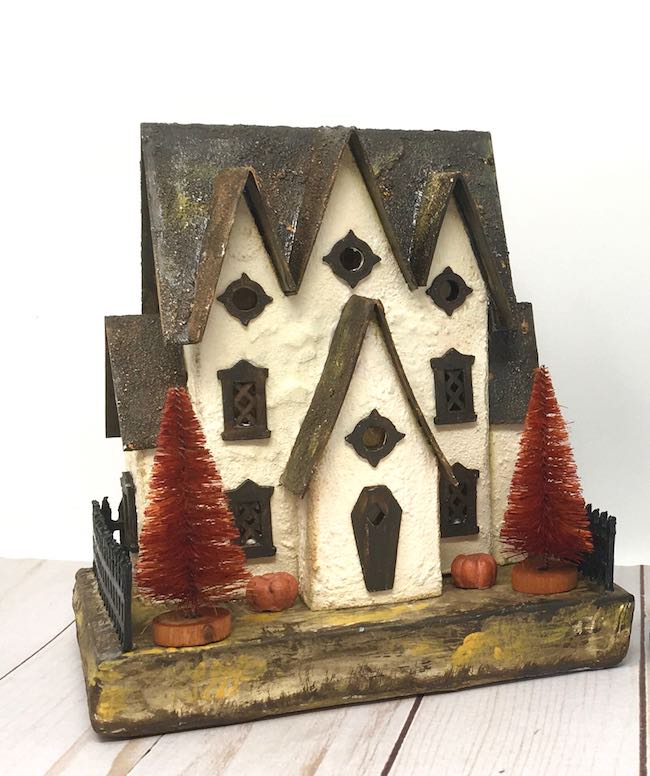
The Embossed Roof Halloween house demonstrates so many of these techniques - different texture techniques, embossing, crackle paint, grit paste and layering of cardboard and layers of paint color.
Basically, there are two main ways to distress paper crafts so they are spookier or have an aged or creepy dimension - texture and color. By using both of these in your Halloween crafts, you will add personality and visual interest to your projects. First, let's go over texture options for our paper crafts.
This post contains some affiliate links for your convenience. Click here to read my full disclosure policy.
Texture Options to Distress Your Halloween Paper Crafts
There are a number of ways to add texture :
- Layers of paper, crumpled paper, or cardboard
- Add dimension to paint - mix with sand
- Emboss the paper surface
- Texture Paste or Grit Paste
- Crackle surface
- Stencil your surface
I use all of the techniques at different times and for different purposes.
First, layers of paper or cardboard to add texture
How can you use layers of some kind of paper to add texture? Well, first you can use different thicknesses of paper or cardboard to add dimension. That's one reason I use cardboard for windows and doors on my little houses rather than card stock. It is far easier to cut out the tiny windows in card stock, but it just doesn't give the same dimension. Here's an example from the upcoming Halloween house book.
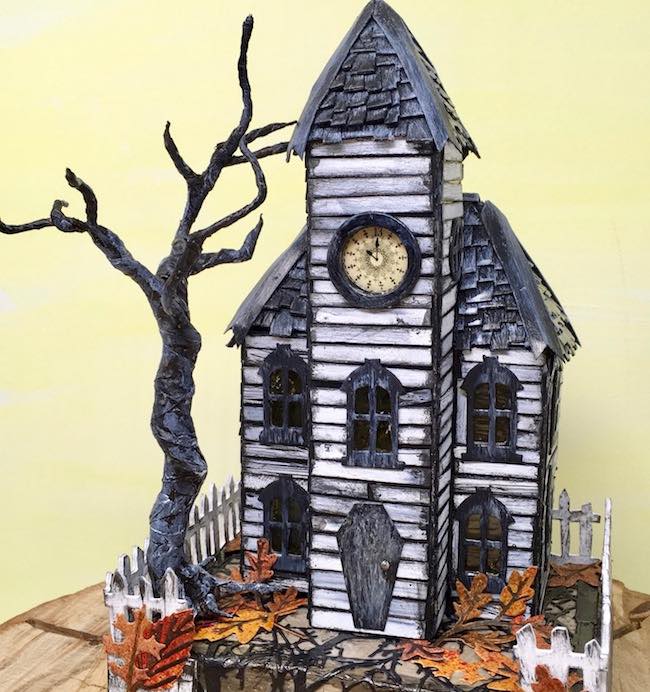
Luna's Creepy Clock House has cardboard windows and window shutters that are far more dimensional than card stock versions would be. Crackle paint helps as well.
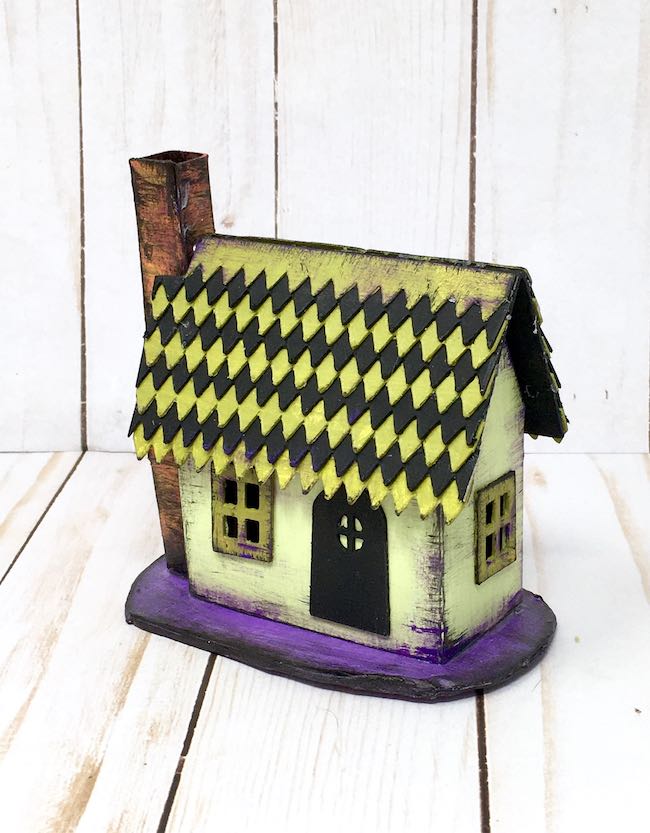
Another example of layering technique that gives delightful dimension to your paper crafts is shown below in the harlequin pattern in the shingles. I made a V-shaped pattern for shingles that I used on Hilda's Haunted Abode (in my book - 13 Handcrafted Halloween Houses).
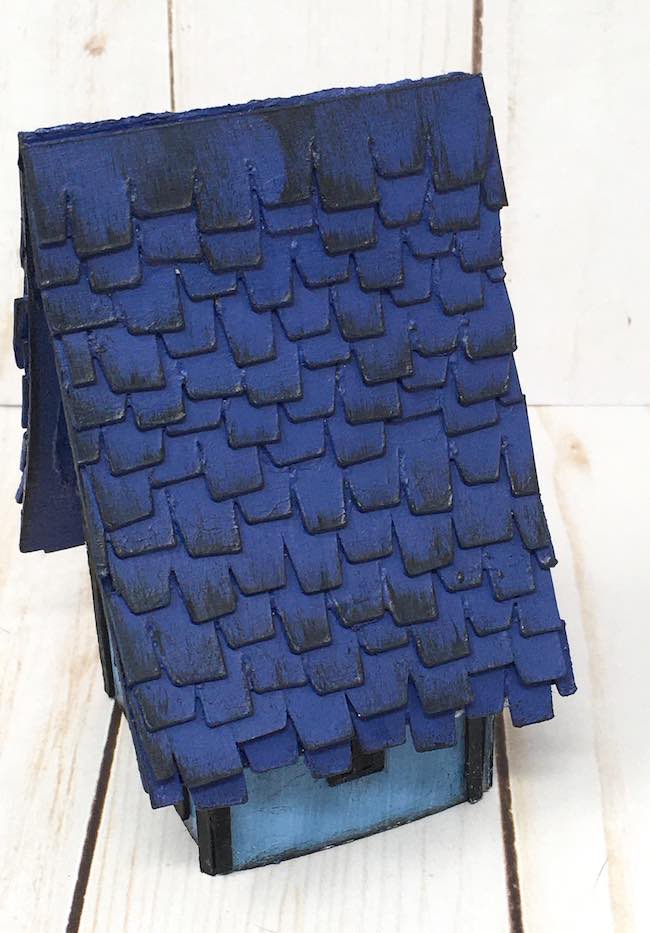
And this photo shows Morgan's Medieval House with staggered shingles giving dimension and visual interest to the miniature house.
And finally, I think that the twisted trees that I make to landscape around the little houses are the best example of how twisted paper can add personality and visual interest.
Here's an example of a twisted paper tree on the Haunted Schoolhouse base
Add depth perspective by varying sizes
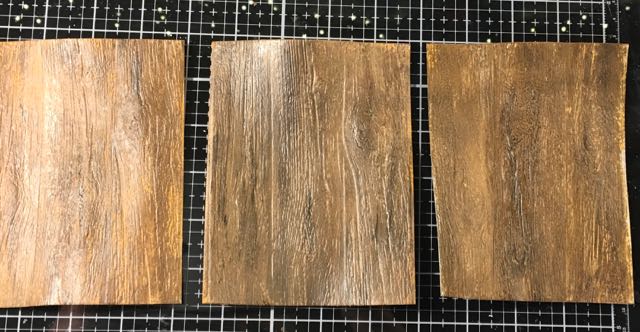
While this isn't a Halloween project, it certainly demonstrates how layers of cardboard can add dimension. I call this project "A Study in Perspective". To make it I cut out rectangles from cardboard sheets and used Tim Holtz Cityscape dies to give the illusion of space and dimension.

Add Dimension to the Paint itself
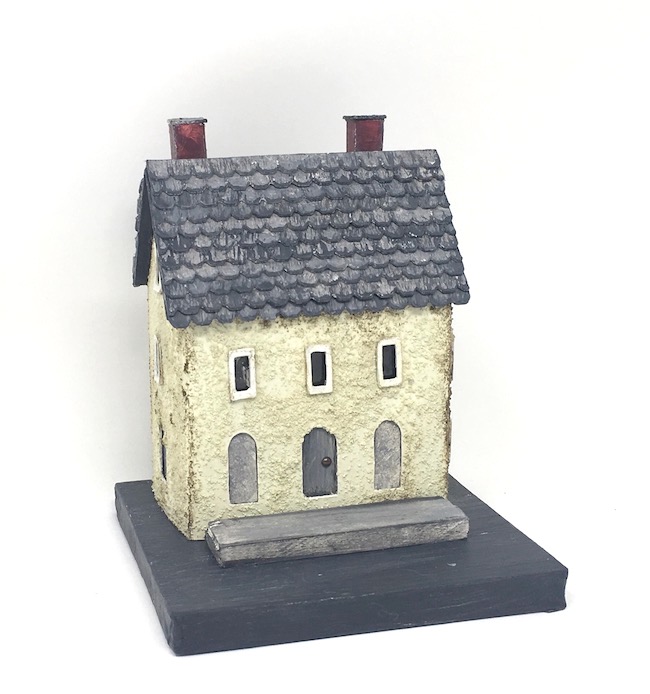
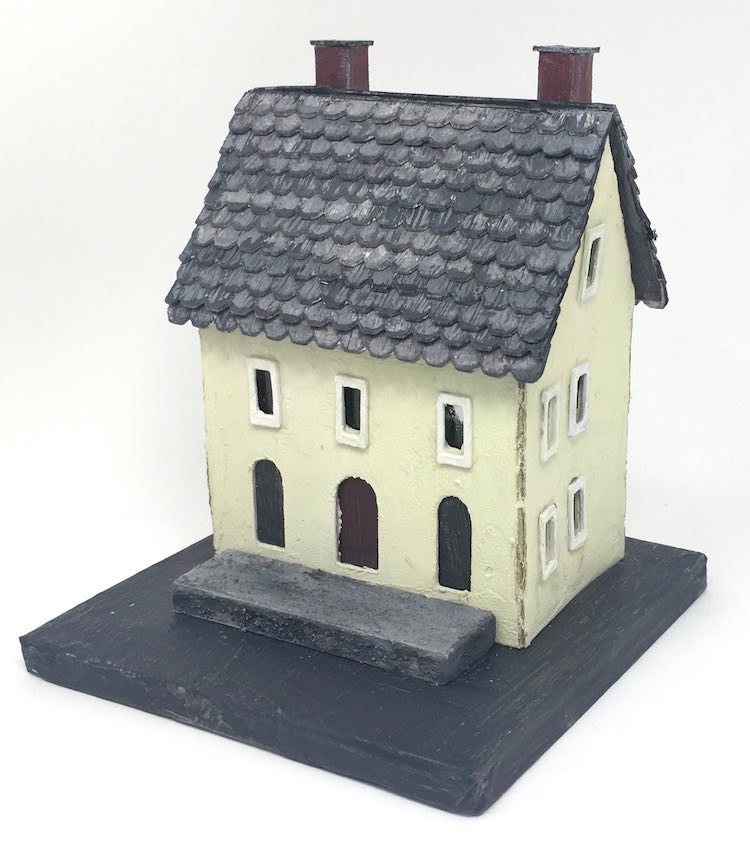
Next, you can add dimension to the paint by mixing it with something like sand, for example. I made the Plaster house with 3 different textures - See the plaster house as an example.
This plaster house was made with Antique Linen Distress Paint was mixed with coarse stone granules.
The little house below is from my book "Create 12 Simply Super Miniature Houses". The surface consists of fine sand mixed with paint. Isn't it a lovely finish for a paper craft? It's not really spooky, but it could be with some black paint as distressing.

Emboss the Paper Surface
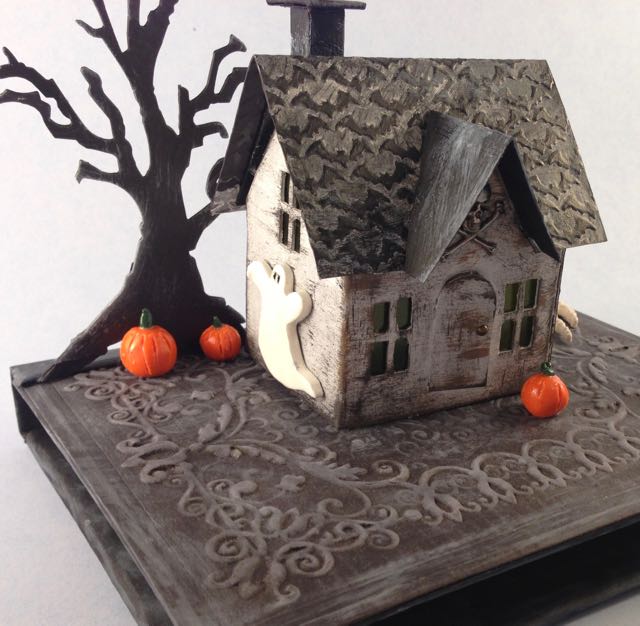
Oh, you will get incredible results with embossing. There are so many options for embossing. First, let me show you some techniques I used when I first started this blog. I made a "book" as the base for one of my first Halloween houses. I used an embossing folder that I ran through my Sizzix Big Shot to make this cardboard look like a book. Isn't that fun?
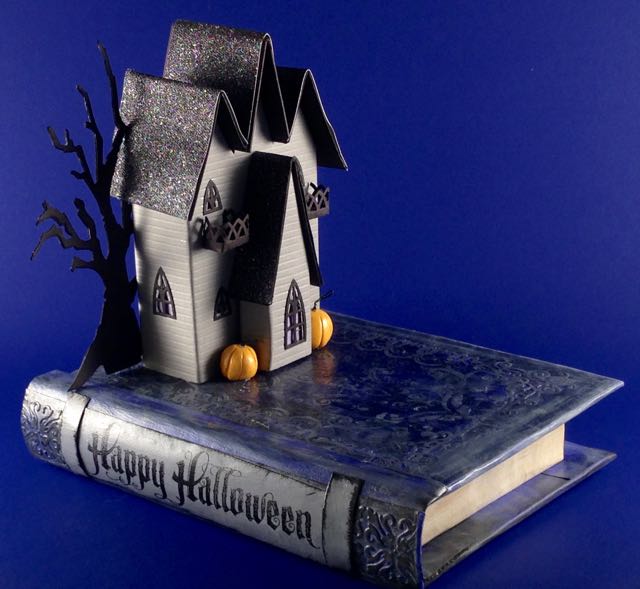
Little cardboard house known as the Triple Gable Gothic House on a book base.
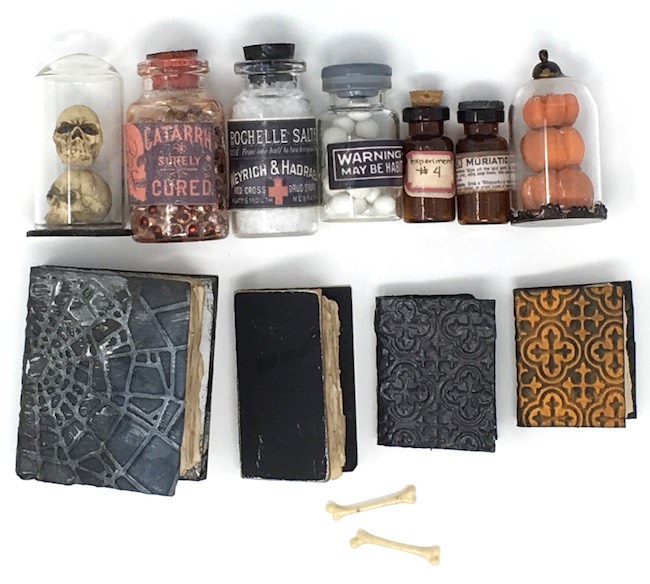
Speaking of books, for one of my Halloween projects I made actually made little books for a Halloween bookstore. A number of these little books have embossed book covers. Again, these miniature books are made with card stock and an embossing folder run through a machine like the Sizzix Big Shot. Easy.
 Embossing folder variations
 Embossing folder variations
Embossing folders have so many different variations. I'm going to show you my absolute favorite embossing folder combined with a cutting die. It's the Provincial 3D Impresslit. It is truly amazing. I used metallic tape over cardstock to make these strips. To make the embossed texture more prominent, distress with black paint. This photo is from the first house shown in this post.

Wood Grain Embossing Folders
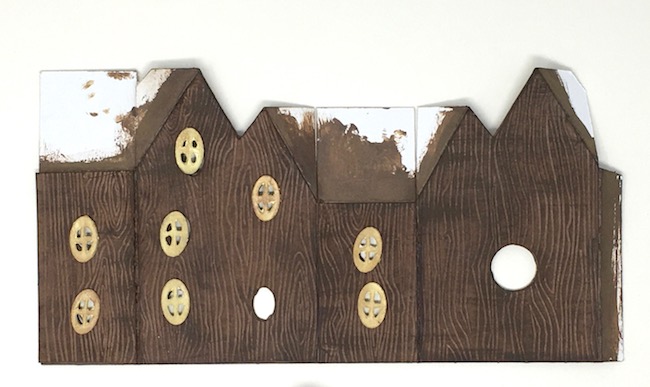
And finally, you can emboss wood grain using embossing folders that you run through a machine like a Big Shot or you can use an debossing tool with an electronic cutting machine like a Cricut Maker.
See how the third layer of paint really makes the embossed cardboard look like wood
I designed a free wood grain pattern that is in my Paper Glitter Glue library. You can see it on the Spring Blossom Fairy House located in the April 2020 section of the library. I debossed the wood grain on cardstock and then highlighted the raised areas with a darker brown paint.

Texture Paste or Grit Paste as a Distress Technique
This is a very simple way to add dimension and texture. My favorite product is Tim Holtz Grit Paste from Ranger. It just add such wonderful dimension so EASILY. That's the main thing - it's easy. Whenever I make a stone texture with a stencil on my paper crafts, I use this product - Ranger's Grit Paste from Tim Holtz. But you don't have to use it with a stencil. Just coating your project with either texture paste or grit paste elevates it.
Remember when I showed you the Plaster house painted with a sand mixture? Well, I made 2 other versions with texture paste and grit paste. The version below is coated with Ranger's texture paste and is pretty smooth.
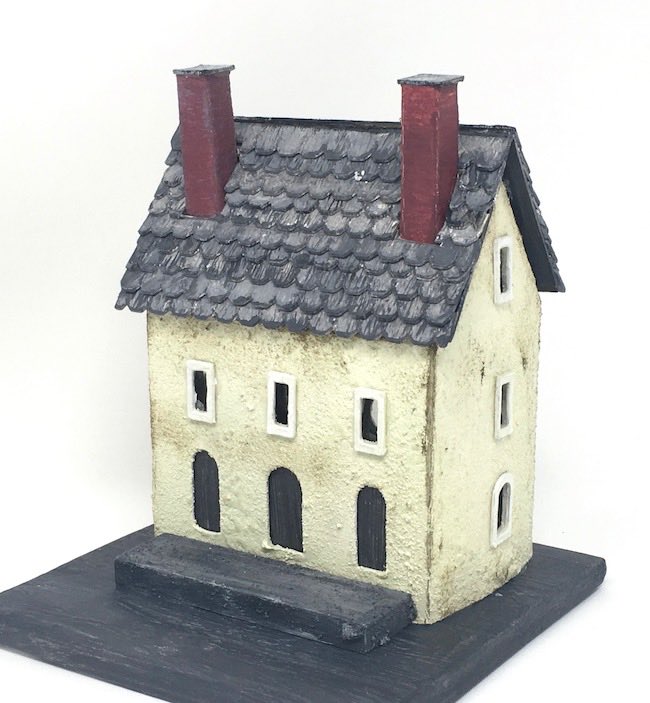
Next is the Plaster House version covered with grit paste and paint. I love the texture and way that it distresses with a contrasting paint. It's my favorite.
And I used it on one version of the Stone House with Three Gables. I love this finish.
Stencil Techniques for Distressing Your Halloween Paper Crafts
Stencils are a wonderful way to add texture and visual interest to your paper crafts. My first stencil on a Halloween house was a bat stencil called Batground for a little house roof. Doesn't that look great? By the way, this little house is the first house I made from the Tim Holtz Village Dwelling die which is no longer available, unfortunately.
Ghost side view of the Halloween Village Dwelling
You can find stencils online easily. Here are some of my favorite stencils for Halloween products.
- Bat Stencil
- Stone Stencil - this is my favorite, the mini stone stencil
- Brick Stencil
- Harlequin Stencil
- Tim Holtz Shifter stencils
But really making a stone texture is my absolute favorite for using stencils.
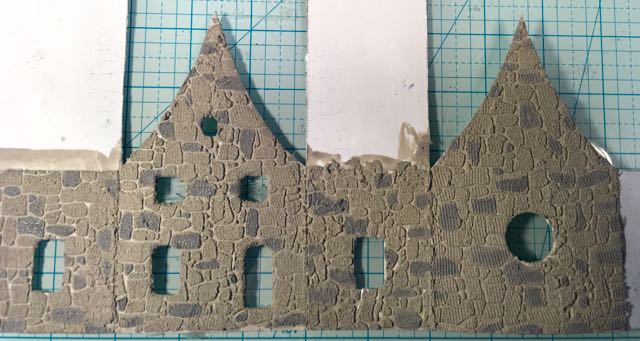
See how wonderful grit paste works as stenciled stone on the Greystone Halloween House?
Completed painting the stone texture on the Greystone Halloween House
For details on how to make a stone texture, see the Stone Texture tutorial. In addition, I made a stone stencil that you can cut with an electronic cutting machine for the Stone House with Three Gables.

Crackle Paint - Perfect for Halloween Paper Crafts
Crackle paint adds incredible dimension any Halloween paper craft. I use it most often when I make crackle siding for little houses. It is one of the very best ways to personality and patina to your paper projects.
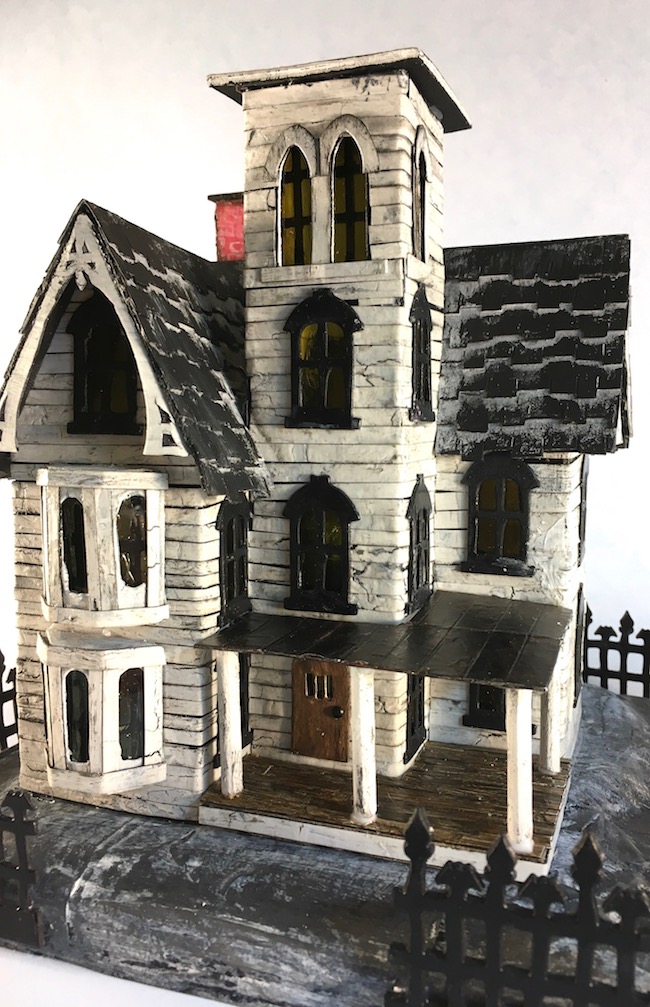
The Abandoned Italianate Mansion shows how perfect it is.
I've got a tutorial on crackle paint techniques including on how to make a crackle texture with white glue like Elmer's Glue All.
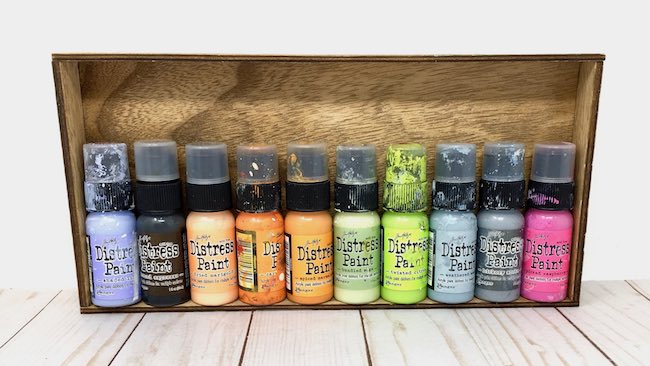
Next, Use Color as a Distress Technique for Halloween Paper Crafts
The main thing about color is that when it varies it is more interesting - not just one flat area of paint, but varying colors to give the piece depth. That's what I like so much about the Tim Holtz Distress Paints. They automatically add dimension - probably because the paint is a little thinner than some of the other acrylic paints available, but there may be some magic in the formulation of the paint. In addition, the color palette is perfect for Halloween.
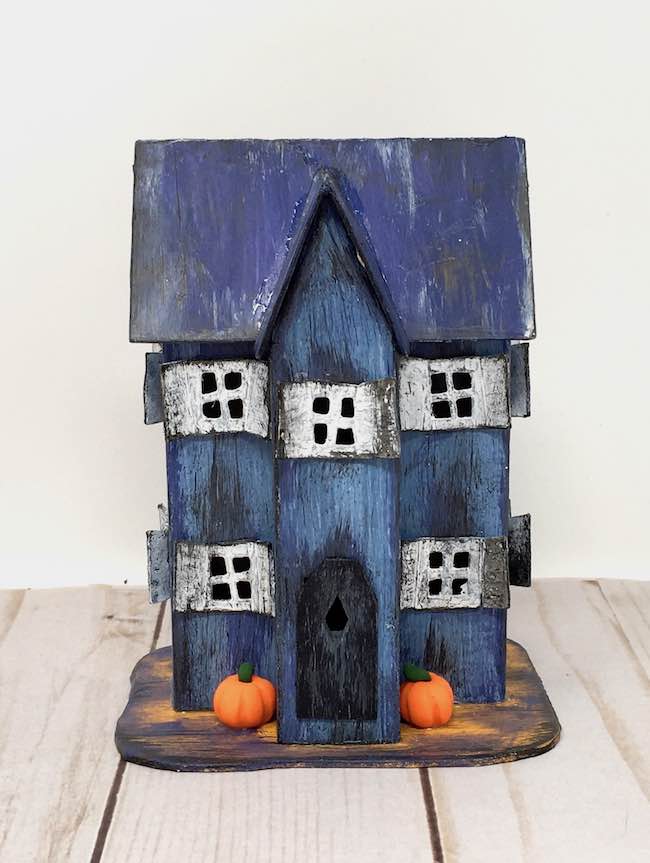
And then, the Tim Holtz paints have an option with a dabber top which is so perfect for distressing. I showed you how I do it in the video. Basically, I get the color I want to use for distressing - most often Black Soot or Ground Espresso with the dabber top and just streak the paint along the sides I want distressed. If you put too much on, just keep a paper towel or rag handy and wipe it right off. Here's an example on a little house in my Halloween book, "13 Handcrafted Halloween Houses - for a Howling Good Time" .
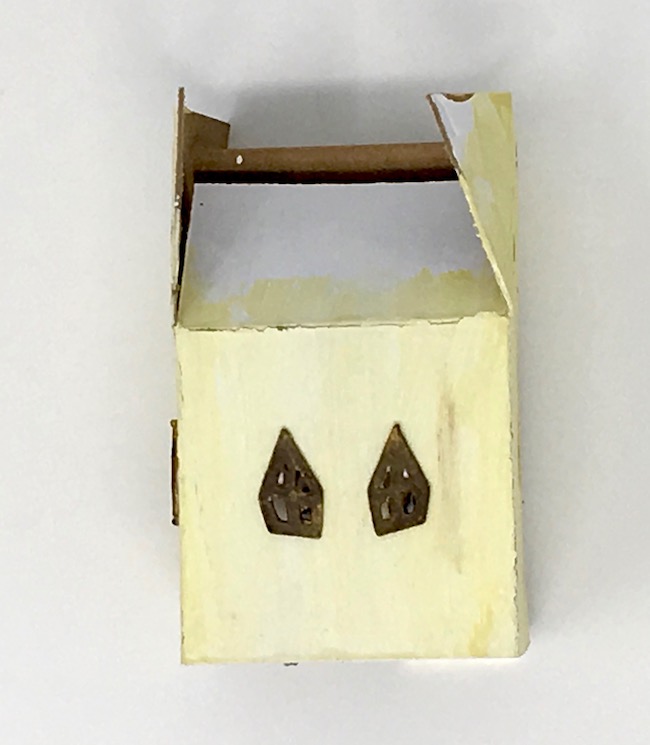
Just paint layer applied to the house structure
And here is how it looks with distressing on the edges. You might now want this much distressing. It's easy to modify how much paint you use.
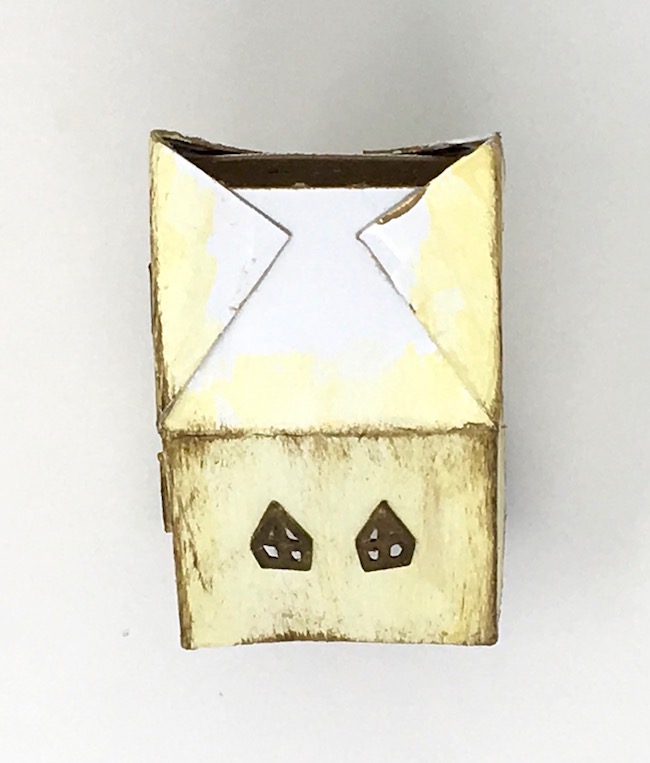
Distressed edges of the little house using Ground Espresso paint
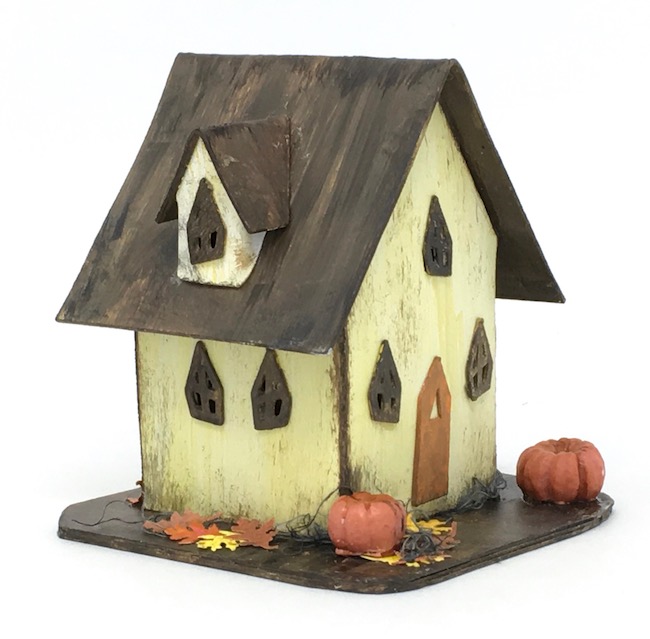
Finally, this is how Esmeralda's Quaint Cottage looks finished.
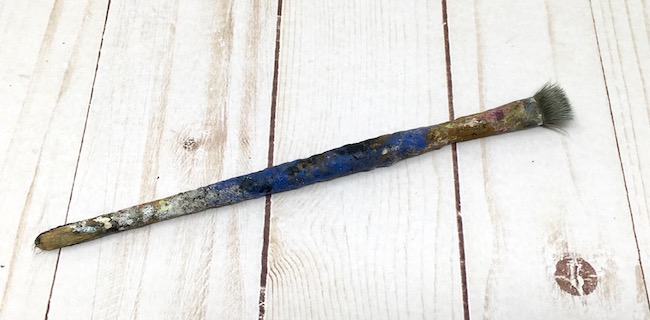
But remember, you can also use a paint brush for this distressing technique as well. I use my favorite scraggly brush because it applies paint in a scraggly manner which I love.
Layers of paint for dimension
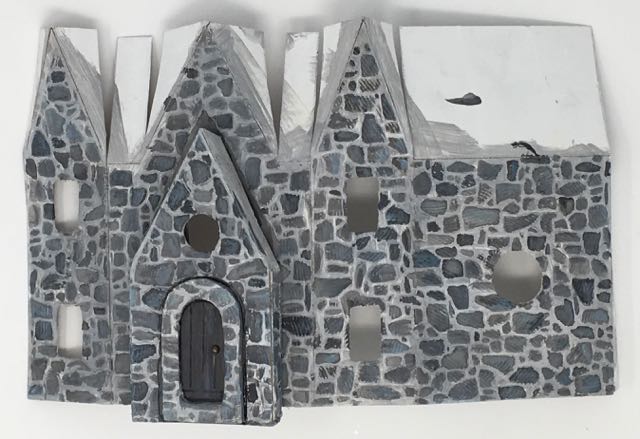
Another way to distress and add visual interest with paint is to layer colors of paint. That is one thing I do when I paint stones on a textured surface. I start with one color - either my lightest or darkest and build on that.
Here's a series of photos showing how the stones come to life with layers of paint.
Painting the stenciled stones with Hickory Smoke, a darker grey color
And here is how it looks with many more layers of color.
Finally, here is the little house finished. See what dimension these layers of colors gives to this Irish Stone Cottage. So you can see that it is not just the grit paste that gives this miniature house its appeal.
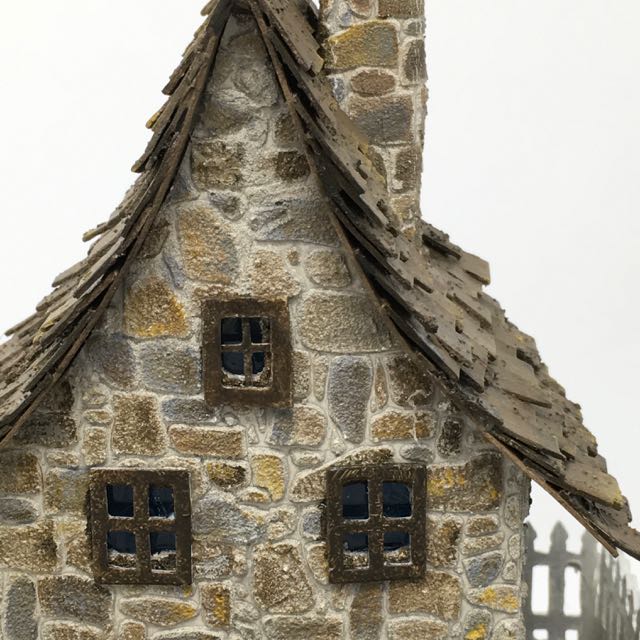
Stone texture on the Irish Cottage - mimic the look of real stone on your paper crafts
These are just some ideas for Distressing Techniques to bring your Halloween paper crafts to life. Let me know what techniques you like the best. In addition, you can even share them in the Paper Glitter Glue private Facebook group. Just request to join.
And thank you for reading.
Lucy
Chris
I purchased the white paper die-cut Putz houses months ago (maybe even last year) and I’m just getting to work on them. I don’t believe this was meant to be painted as the paper wouldn’t handle wet paint. There were no instructions. I did get several houses but I’m not sure what to do with them, I believe they were $25. They are charming but I’m not sure what to do with them. Help, please.
Lucy
Chris, where did you purchase these houses from? I don't have any die cut houses for sale.
So I think you are asking me how to save the houses that you purchased and painted. Is that it?
When I paint something and it gets all wavy, I put it between two large, relatively heavy, flat objects. I have a glass cutting mat I use most of the time to flatten pieces on my work table. But you could use a large book or piece of wood. If you are worried that the paint will stick to the wood or the book, put the paper house between two pieces of wax or parchment paper. Sometimes it helps if they are just a tiny bit wet when you put the weights on them. Leave them for a day and think they will be much less wavy when you pull them out.
Kim
I never have time. Everytime I end up having a little I always check out your blog! One day soon I’m going to try some of you techniques!!
Lucy
Kim, I hope you do come up with some time because these techniques are fun.
And thank you so much for checking out my blog. I do appreciate that very much.