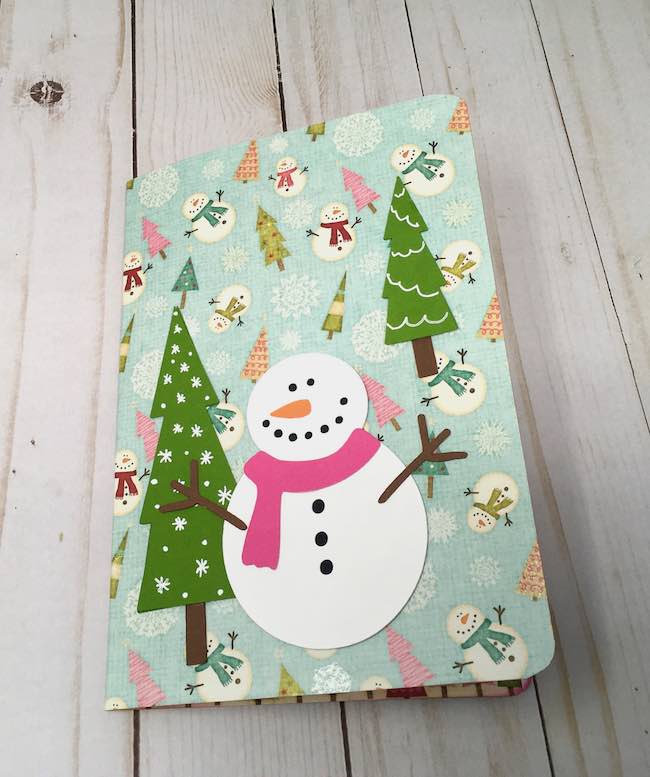
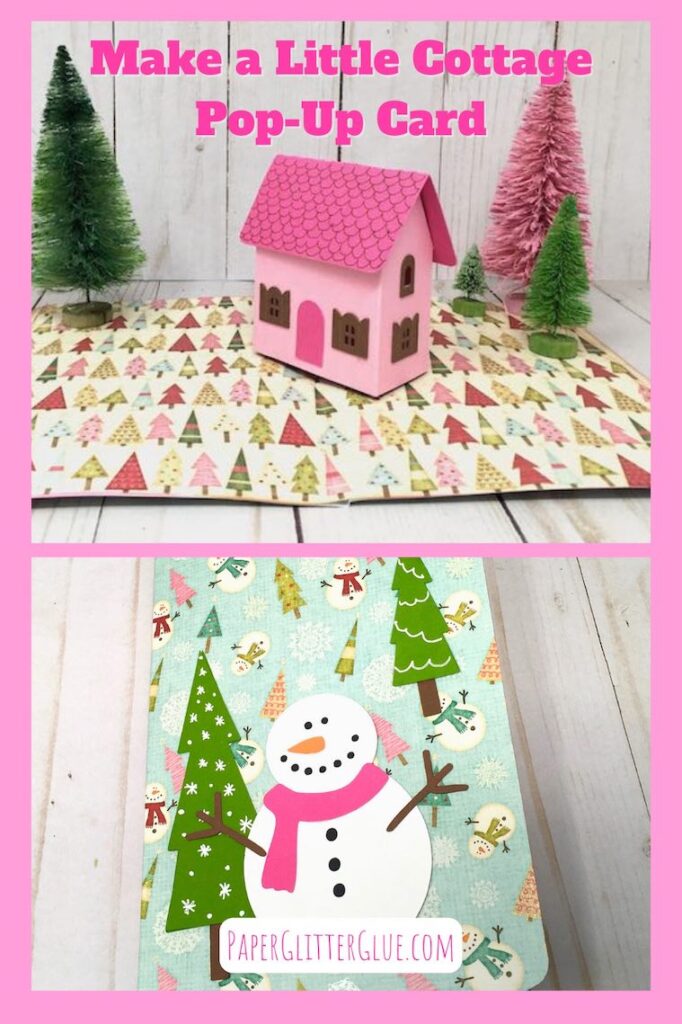
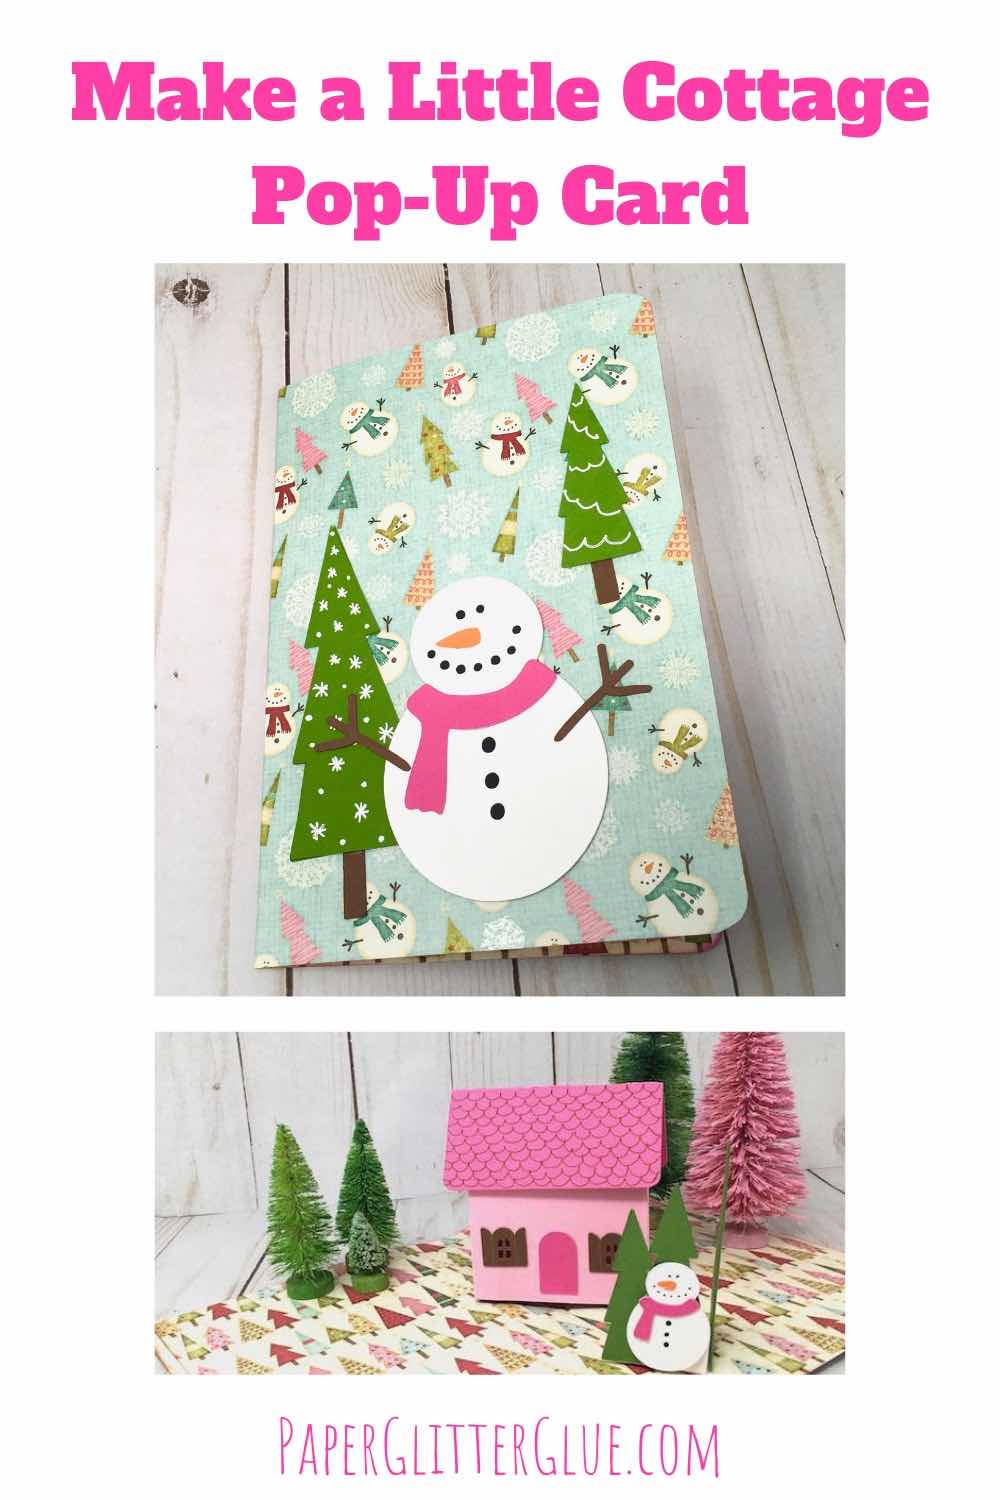
Here is my latest paper craft - The Little Cottage Pop-up card. It is another great holiday craft for the 12 Day Craft-Along. You can get the free pattern as Design No. 104 in the Paper Glitter Glue library.

As you know, I love to make 3D crafts from paper. That is my favorite crafting adventure. So making pop-up cards is perfect extension of that.
Making a house pop-up card has some challenges, but I've tried to simplify the process as much as possible and I'll explain the steps to show how to make it easier. Let's get started.
This post contains some affiliate links for your convenience. Click here to read my full disclosure policy.
Table of Contents
Materials to make the Little Cottage Pop-Up Card
- Card stock for the house - 110# card stock works best
- Scrapbook paper for the card base - 8.5" x 11"
- Glue - Art Glitter Glue is a good option, Bearly Art Glue is great, too
- A way to cut the card stock - I used either the Cricut Explore Air or Cricut Maker
Directions for making the Little Cottage Pop-Up Card
- Fold 8.5" x 11" card stock or scrapbook paper in middle
- Cut out house pieces - Design No. 104 - in the Paper Glitter Glue library:
- Main body of the house
- Roof
- Roof beam
- Windows and door
- Pop-up tab
- Cut out decorations for the front and middle of the card:
- Large snowman
- Large trees
- Tiny snowman
- Small trees
- Pop-up tab for tiny snowman and trees
- Glue the snowman and tree parts together
- Decorate the house and glue the body of the house together
- Glue on roof beam and pop-up tab
- Make a 90 degree template for pop-up tab
- Draw 90 degree angle on card base
- Glue house to card base
- Add snowman and trees to pop-up tab
- Mark 90 degree angle on card base for tiny snowman pop-up, then glue
- Add backing to card base, if desired
For more details, read on.
1. Fold the 8.5" x 11" card stock in the middle
First, fold your card stock or scrapbook paper in the middle for placement of the house pop-up. It is important that you crease this fold well. This paper does need to be 8.5" x 11" because you need that much space for the folded house in the middle of the card. It seems large for the size of the house, but it is necessary.
2. Cut out the house pieces - Design No. 104
Next, cut out the house pieces. To get the free pattern go to the Paper Glitter Glue Library and download Design No. 104 in the November 2020 section of the library. You do need the password to get into the library. If you don't have the password, subscribe to my newsletter with the form below and you will get the password right away.
Subscribe NOW!

Subscribe to get my free newsletter by email. Also get access to all the fun patterns and tutorials in the Paper Glitter Glue library with the secret password. I will send you a newsletter every one to two weeks.
All you need for the basic house is the main house piece, the roof, a roof beam, and pop-up tab. The roof beam is the part of that keeps the roof in place while the house rotates during the pop-up movement.
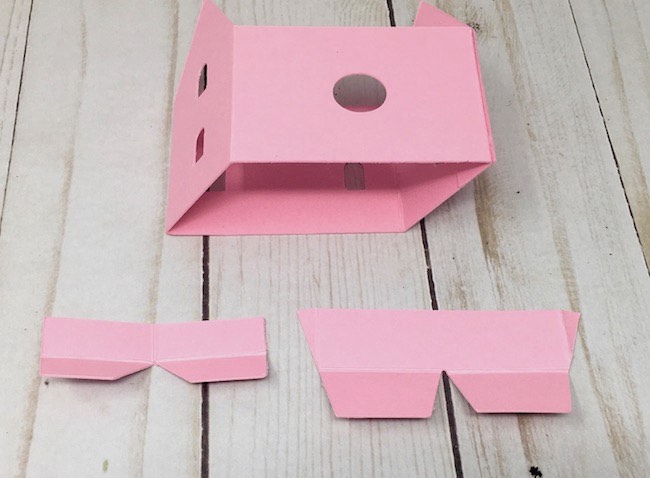
On the left lower corner is the pop-up mechanism with the roof beam in the lower right corner of the photo above. Cut out the decorative pieces as well - the door and the windows.
3. Cut out any decorative pieces for the card
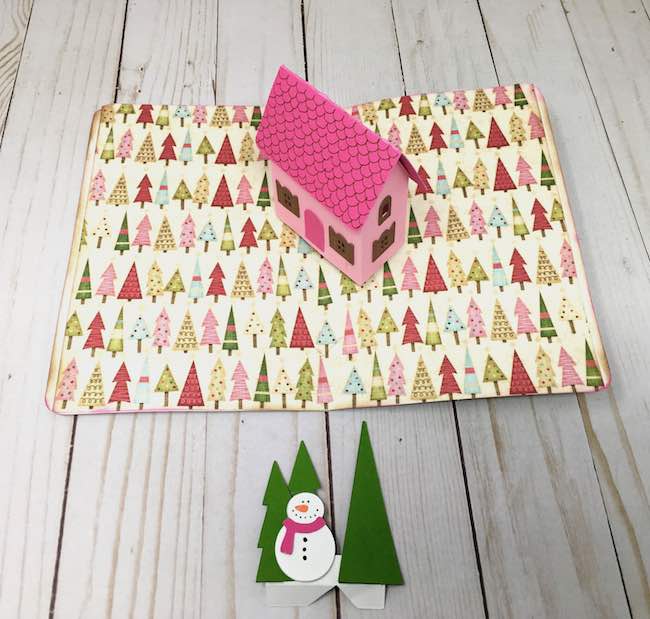
Since the card looked pretty naked with just a house pop-up in the middle, I decided to make a snowman and some trees for both the front and the middle of the card. The scrapbook paper that I chose for the front of the card was the inspiration for the snowman.
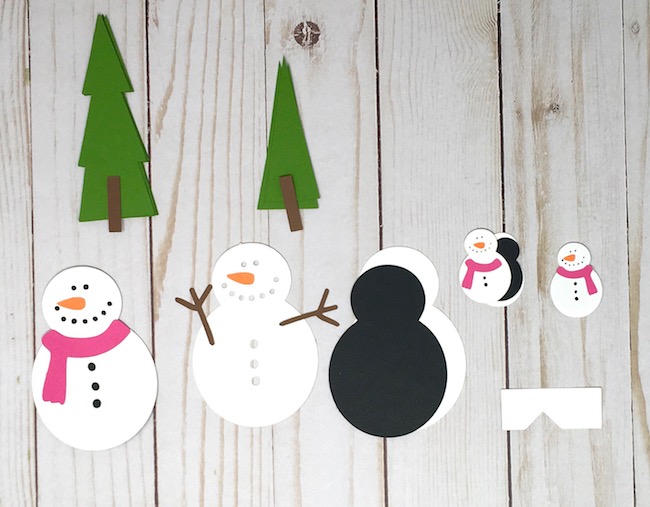
For this card, I used one large and one small snowman, 2 larger trees and 3 smaller trees. Also, I glued several layers of trees together so they would have more dimension. I do that on almost all my cards because I just like dimension.
4. Glue the snowman parts together
Because I dislike gluing lots of tiny circles to card stock, I made the snowman out of 3 layers. The top layer has cutouts for the black eyes, mouth, and buttons. Just adhere that piece to the slightly smaller black layer and then make a solid white backing. You don't really have to have the white under layer, but it does give dimension. Then glue on the nose, the scarf, and the twig arms. Make the tiny snowman exactly the same way, though it is important to have a white back layer for that snowman.
Craft hint - if you use a good glue like Art Glitter Glue, Bearly Art Glue, or Scotch Tacky glue, you can squeeze out a small puddle and use a toothpick to apply the glue to tiny parts like the tiny snowman nose. It works well for any tiny parts.
For the tiny snowman, I omitted the stick arms because I'm sure they would get all crooked in the pop-up process.
I used a 65# card stock for my trees so I glued several layers together to make them sturdier. That is especially important if you use trees on your extra pop-up inside the card. Glue on tree trunks for the trees on the front of the card.
I added a bonus Snowman with a top hat in the file.
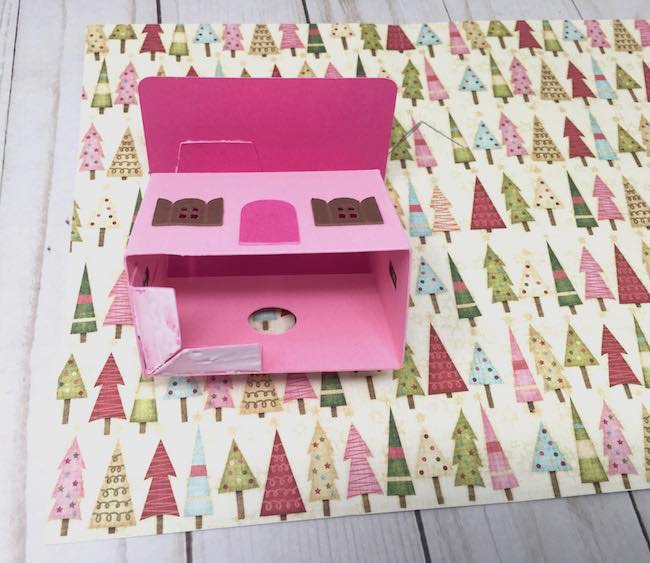
5. Decorate the little cottage for the pop-up card and glue the body of the house together
In the pattern, there are little windows and a door to glue on the house. But there isn't a door cutout on the house itself. That's because the house is more stable without a cutout for the door.
Lately, I have enjoyed drawing a scalloped roof patterns on my little house roofs. I've done that for almost all the house projects in the 12 Day Craft-Along series. I just like the way it looks.
Now glue the house together along the side tab like we usually do on all the little houses.
6. Glue on the Roof Beam and the Pop-Up tab to the Little Cottage
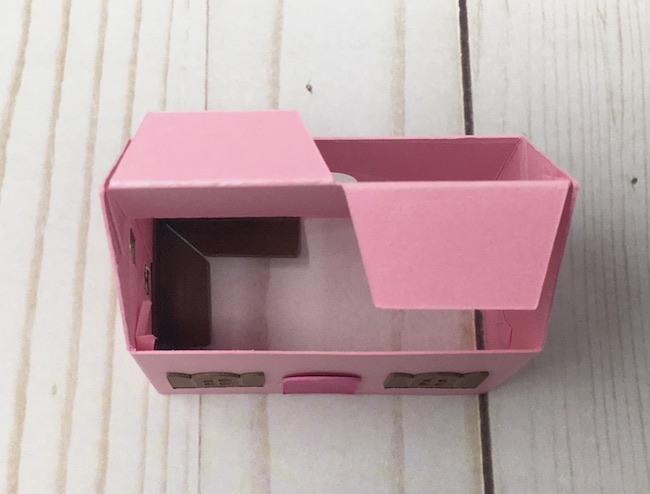
The photo below shows how the roof beam and the pop-up tab look on the cottage. The two flaps on the top hold the roof in place.
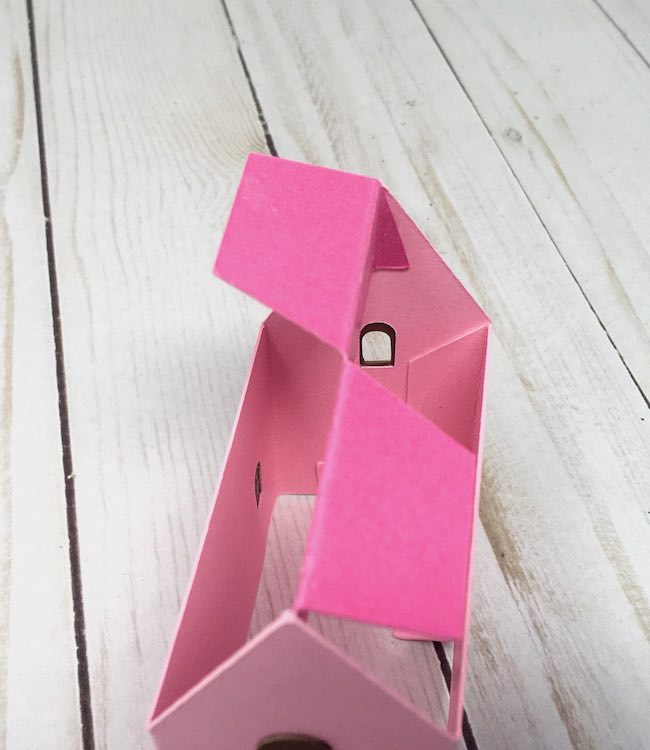
And this photo shows the little angled tab that holds the roof beam in place. After I made a couple of sample houses, I made the angled tab bigger to make it easier to glue to gable end of the house.
Below is another example of gluing the roof beam in place on sample pop-up house.
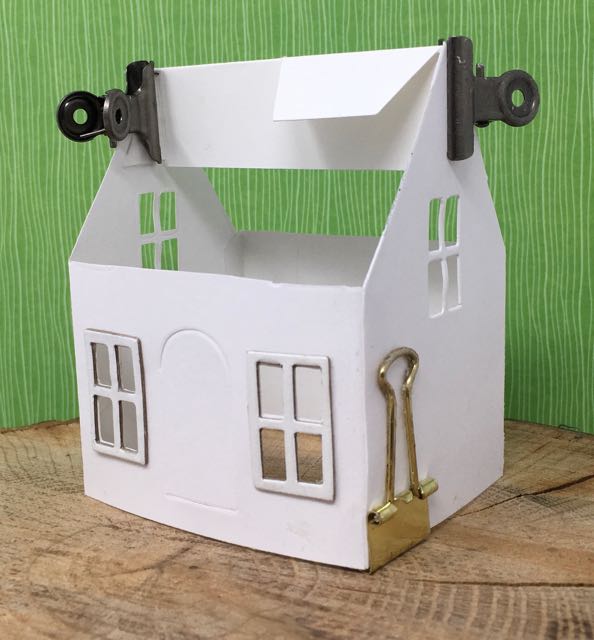
Be sure to glue the roof beam in place so that it goes straight up and down - in other words, so the roof beam is perpendicular to the flat card base.
Next glue the pop-up tab in place. It goes on the back corner of the little cottage. The photo below shows how it it glued to the house. Note: It also shows the roof tab glued to the roof.
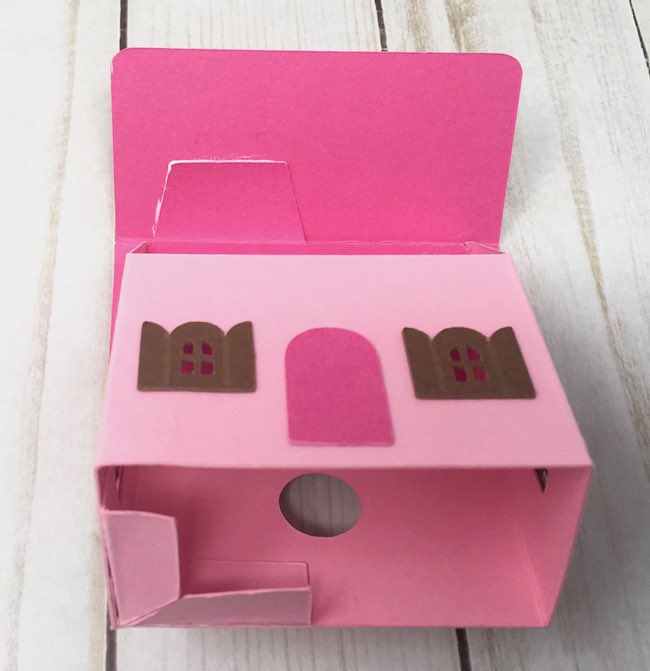
This view shows the pop-up tab glued to a sample house card.

Next, glue the roof to the glue tabs on the roof beam. One flaps is folded forward and one tab is folded backwards as you can see on the photos above.
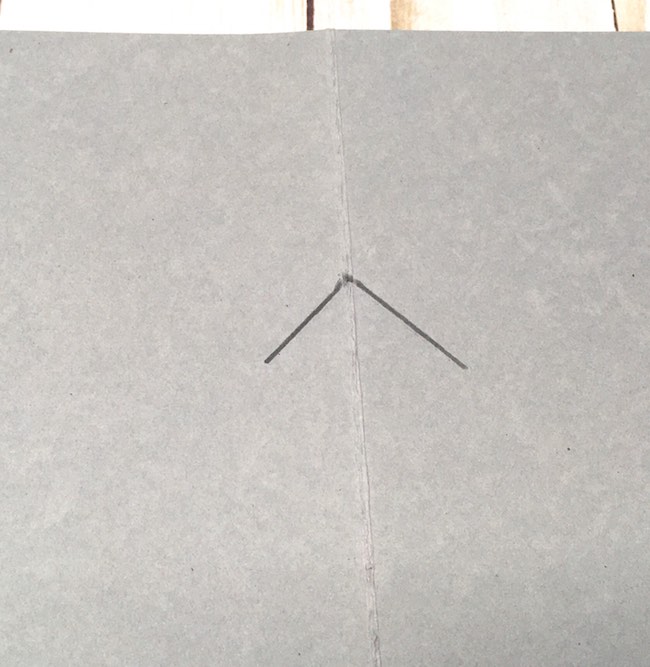
7. Make a 90 degree template for your Little Cottage Pop-Up card
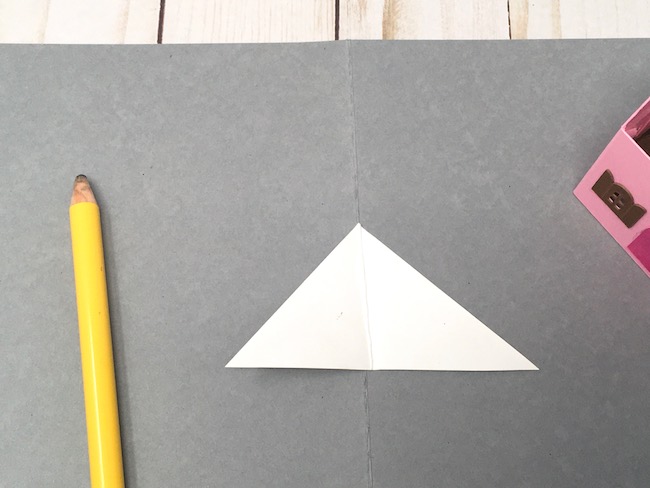
I tried to remember how I did that last time and I figured a protractor was the way to go. But after searching for a protractor for 30 minutes, I decided there must be a better way. Yes, there is. And it's easy, too. Cut off the corner of a piece of paper paper or card stock because that should be an accurate 90 degree angle. Then fold it in half on the diagonal as show below. That's all there is.
This is happens to be an important step because how well the pop-up card opens and closes depends on the placing the house or the pop-up mechanism at a 90 degree angle. That also mean that you have to know where the 45 degree line is. In other words, the 45 degree line matches the fold line on the card.
8. Draw the 90 degree angle on the inside of the card
The back corner of the house is going to fit on this angle so lightly draw it in pencil where you want the house to go. Be sure to leave enough room for the house to fold up. That means you have to locate the angle somewhere in the middle of the card. Too far back, the house sticks out on the back of the card.
Because of the angle of the pop-up tab, the house will fold towards the point. Think of the angle as an arrow that points the way the house will fold. The same is true if you add a second pop-up tab for a snowman and trees.
Lightly pencil in the angle on your inner card base. Below is a sample card so I didn't pencil it in too lightly.
9. Glue the house to the card base
Now for the fun part, making your little house actually pop-up. Simply apply glue to the bottom of the pop-up tabs and adhere to the card fitting it in 90 degree angle that you drew on the card.
You can see my penciled angle for placing the house in the center of the card.
10. Add snowman and trees to pop-up tab
After I finished the card, I realized it needed much more decor than the busy background paper. That's when I decided to add the little snowman and trees as an additional pop-up mechanism.
To do that, use the extra pop-up tab and glue the snowman and trees to the tab. But remember that these objects will fold either inward or outward depending on how you place the pop-up tab. I placed the tab so that the snowman and trees pointed outward when the card was folded up. That meant that the trees extended past the bottom of the card. I had to trim down the trees a bit for them to fit. Just a word of warning.
11. Mark 90 degree angle on card base for tiny snowman pop-up, then glue
Just like you place the house, mark an angle and glue the snowman pop-up tab in place. But remember what I told you about the way the pop-up folds. See the tall tree above, I had to significantly trim it down because it kept poking out of the bottom of the card.
12. Add backing to card base
If the base of your card is two-sided, you don't have to do this, but my paper was plain on the back so I glued it to another sheet of scrapbook paper with a coordinating design. You can decorate the front of the card either before or after you glue it to the inner card base.
And that's it. Seems like a lot of steps, doesn't it? Play around with the pop-up mechanism and you will definitely get the hang of it and perhaps fall in love with the making these kinds of cards.
13. Now you have finished the Little Cottage Pop-Up card. Share it with someone you love.
Whew! That's it for me tonight. I hope you have a great day and get to do some fun stuff.
Here are all the 12 Day Craft-Along Projects
- DIY Easy Autumn Paper Leaf Wreath
- Easy Tiny Paper Church - Quick Holiday Craft
- Tiny Paper Cottage
- Tiny Paper Barn - Quick and Easy Holiday Craft
- Make a Tiny Paper Swiss Chalet for Your Holiday Decor
- Make the Cutest Tiny House Holiday Garland
- Little Cottage Pop-Up Card - Make One for the Holidays
- Make a Paper Holly and Ivy Wreath
- DIY Christmas Fairy House - Paper Fairy House with Poinsettia Roof
- A Storybook Holiday Cottage for Christmas
- Easy Snowman and Scotty Dog Gift Tags
- Little House Gift Tags - From My House to Yours
Lucy
P.S. Remember to email me if you have any questions - [email protected]. And feel free to pin any of these photos to your favorite Pinterest board. Also the Paper Glitter Glue Facebook group is a good place to get answers.
Ann
I would really love it if the instructions were in a pdf file that I could download and have with my as I start to crate this project. Having to view it on the screen is not easy for me. I have tried copying and pasting into a WORD document but that wastes so much time formatting it to fit without being 50 pages.
Lucy
Ann,
Occasionally, I do write out the instructions for some of my PDF files, but it is pretty time-consuming as you noted. It is essentially writing a little booklet for every project. I will try to do that more often because it is a good idea and it helps people.
Lucy
Mary
Hi Ann, download the app called "PrintFriendly". Then all you have to do is click on a little button and the page will pop up as a pdf that you can customize (delete items not needed) and print!
Joanne Lewis
Hello! Thank you for sharing this wonderful project! I'd like to try it but I don't have a Cricut machine - where would I find the patterns to cut out?
thanks - I'll send a photo when it's finished!
Joanne
Joanne Lewis
Oh dear, I am sorry! I went back and read the email and of course the patterns are in your library... I'm on my way there now!
Joanne
Lucy
I always make a PDF pattern - a printable pattern - for all my houses. I made houses without a Cricut or automatic cutting machine for several years so I do whatever I can to make the patterns easy to cut out by hand. For this house you could make the windows as rectangles rather than arched. That is easier to cut. I hope you will try it. And this snowman is simply 2 circles joined together. And I would love to see a photo when you are done.
Lucy
Renona Joplin
Loved this idea for the pop house card. I resized mine to fit 12 x 12 paper of course then it stuck out from the 81/2 x 11 base card. Luckily I had some 11x 17 cardstock which I cut down to 11 x 14. Much bigger final card but it is so cute. The house is just over 4 inches tall with the roof. I love it.
Giving it as a new house warming card. I hope my daughter and son-in-law love it too. I added an oak tree pop -up with a flower bead and a sidewalk, window boxes under all the windows and two cats. Now I have to figure out how to have some cows pop up. Don't know if I have enough room on the fold.
Lucy
I would love to see a photo your card. It sounds incredible. I mean, really, all the details sound incredible - window boxes, cats, oak tree pop-up. I bet it is so impressive. And then maybe a cow? Delightful.