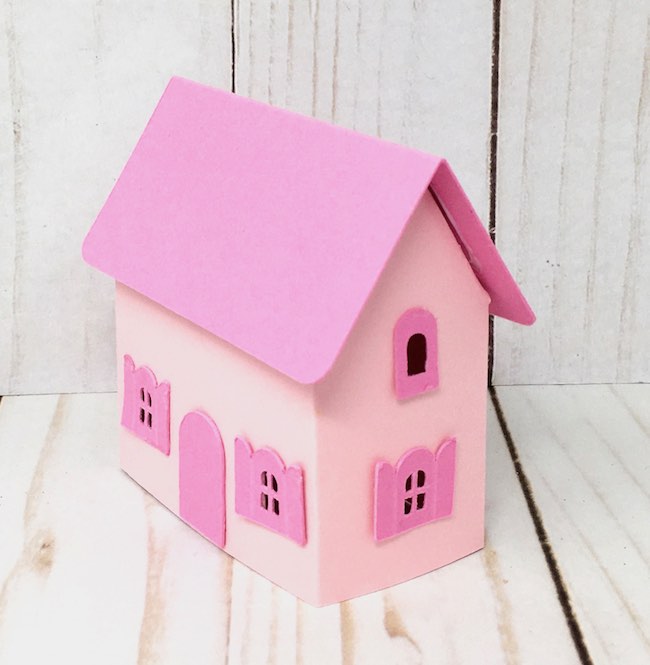
Here's the Tiny Paper Cottage - the another craft project in the 12 Day Craft-Along.
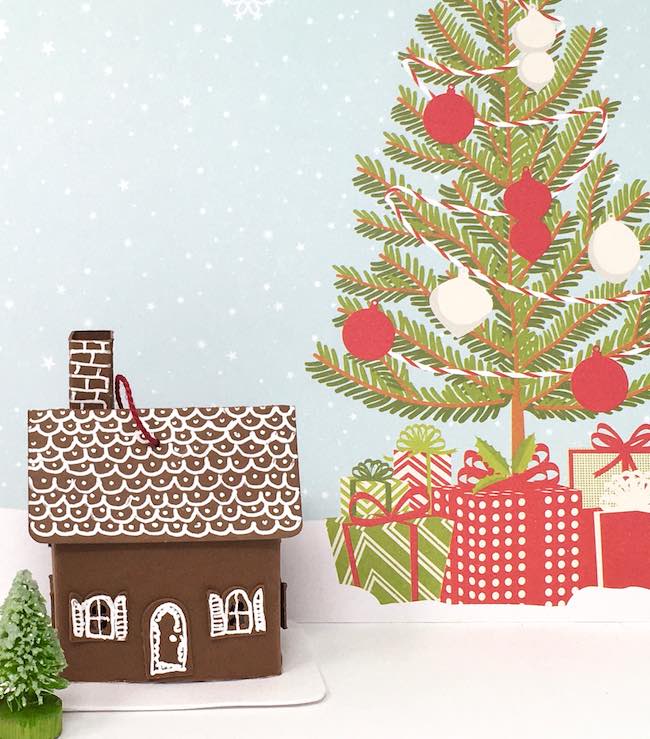
This tiny paper cottage is another miniature house in the quick win craft series. Just like the others, the tiny cottage is made from card stock. And it is easy to cut out even if you hand cut your projects. Really, you can put it together in less than 15 minutes.
Here are the other little paper houses in this easy craft series:
- Tiny Paper House Ornament
- Easy Tiny Paper Church - Quick Holiday Craft
- Tiny Paper Barn
- Make a Tiny Paper Chalet for Your Holiday Decor
- Tiny Paper Birdhouse
- Tiny Paper Cottage
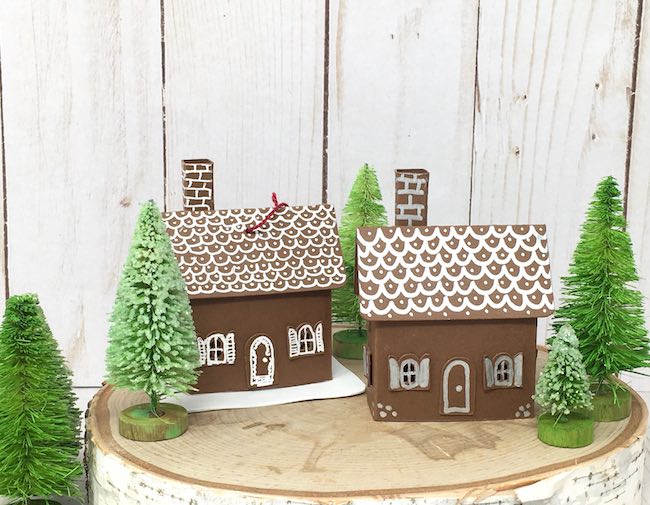
These miniature paper cottages come in two sizes - the tiny version is 1.75 inches across the front and about an inch deep. It is 3 inches tall with the chimney. The small version is 2.5 inches across the front and 1.5 inches deep and 4 inches tall including the chimney.
This post contains some affiliate links for your convenience. Click here to read my full disclosure policy.
Supplies needed to make this Tiny Paper Cottage
- Card stock - I used either 65# or 110# card stock - either works
- Glue - Any PVA glue will work, I used Aleene's Quick Dry Tacky Glue
- Decorative options:
- Gel pen - the Uniball Signo is my favorite
- Paint the color of your choice
- Glitter, anyone?
- Cutting method - I cut out the tiny cottages with my Cricut Maker, but the design is still easy to cut out by hand
- Embroidery Thread
- Large needle
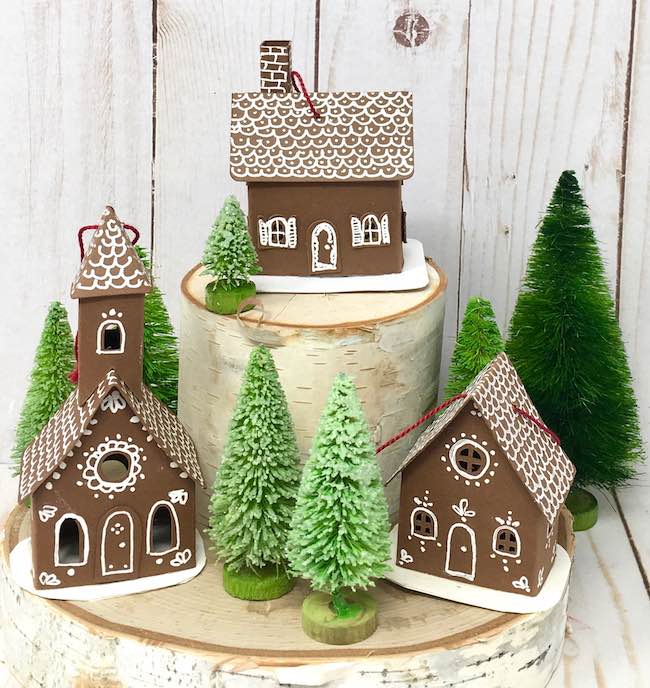
See the cute tiny houses (and church). Don't they make great ornaments?
Steps to Make the Tiny Paper Cottage
- Download the free Tiny Paper Cottage pattern - Design No. 101 - from the Paper Glitter Glue library
- Cut out the tiny cottage pattern
- Use the pen or paint or glitter to decorate your little cottage
Or use contrasting colors of card stock - Assemble the tiny paper cottage
- Make a hanger for your tiny cottage if you want it to be an ornament for hanging
To get more details about how to make the paper cottage, read on.
1. Download the free pattern template for the tiny paper cottage
If you are new to my craft blog, here is how to get the tiny cottage pattern. Subscribe to the Paper Glitter Glue newsletter where I share craft tips and inspiration and new projects. The form is right below. You will get the password to my library right away. And I will never send you any spam.
Then go to the library and you have access to all the files in the library. Please note that all of my free files are listed in chronological order. So pay attention to the month and year for the file you are looking for. This miniature paper house is located in the the November 2020 section as the third project in the 12 Day Craft-Along series.
The pattern for this tiny holiday paper craft is available in 2 formats - a printable PDF format and as an SVG file to use with automatic cutting machines. Also you have an option for the scalloped pattern on the roof or a plain roof.
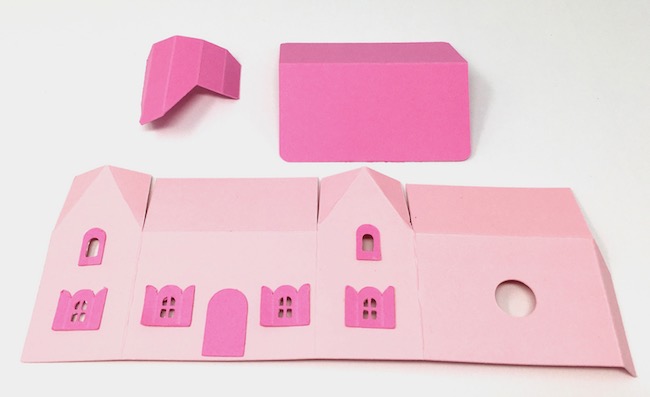
2. Next cut out the pattern
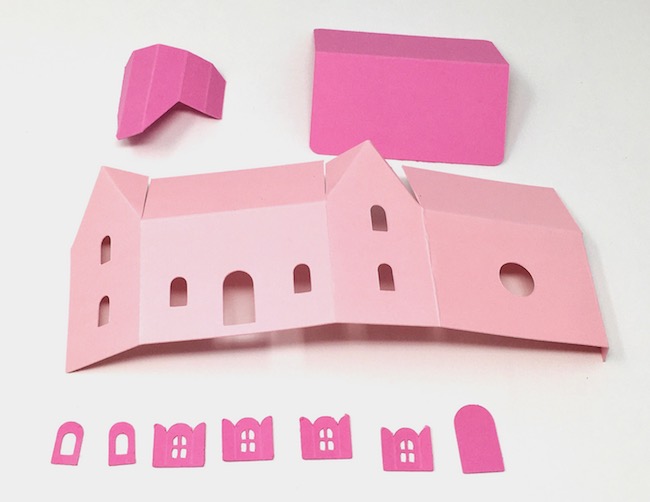
As you can see from the photo above, this pattern is easy to cut out by hand. It's actually designed so if you don't have a cutting machine, you can cut it out simply since it is basically straight lines. You can simplify the windows into rectangles to make it even easier to cut out.
If you are using an automatic cutting machine, you have to make sure that the score lines are specified and attached to the proper card stock section. I have done most of that for you if you are using a Cricut and Cricut Design Space. But there are two places where you have to remember to use the attach button. I'll show you below.
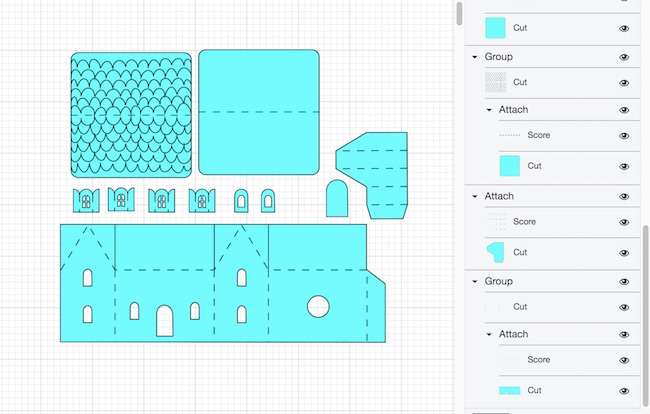
Here is how the pattern looks when you upload it to Cricut's Design Space.
First, select the body of the tiny cottage so you can attach the cut lines to it.
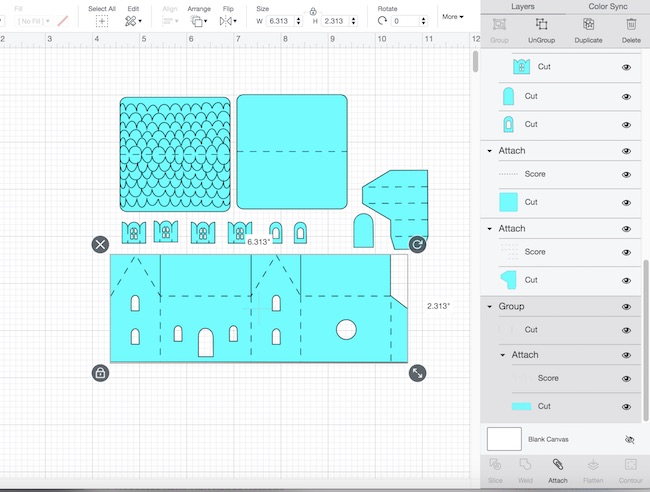
After you have selected the group that includes the body of the cottage, just click the attach button at the bottom right hand corner. That tells your Cricut machine that those 3 cut lines belong to that piece.

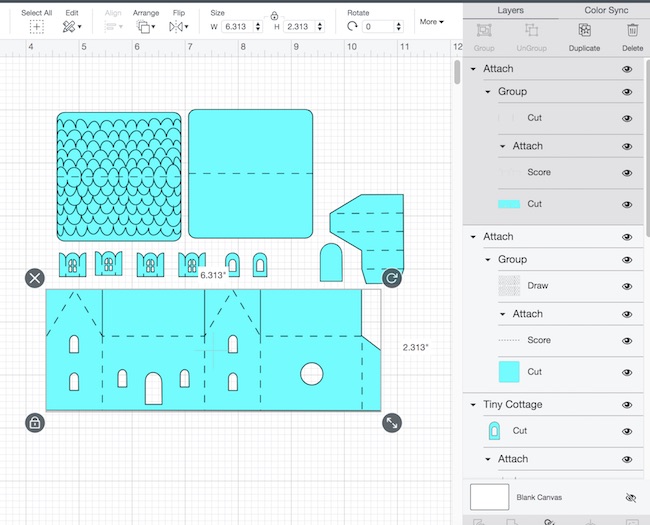
If you choose to use the roof with the scalloped shingle pattern on it, you have to specify draw for the cutting machine as well as attach that to the roof. To specific draw, go to the Linetype menu which is in the left upper corner.
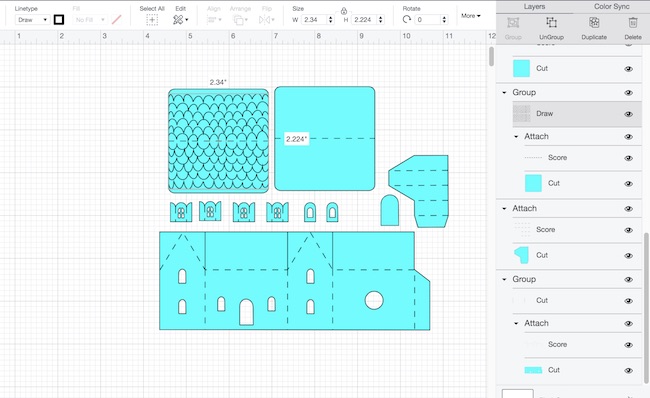
After you have specified draw (or you could use the foil and the foil transfer tool), be sure to attach those lines to the roof.
3. Decorate your Tiny Paper Cottage
It is much easier to decorate the tiny paper cottage before you assemble it. So if you are going to glue on windows and the door, do so before you glue the house together.
Or you can draw designs on the cottage pattern with a gel pen.
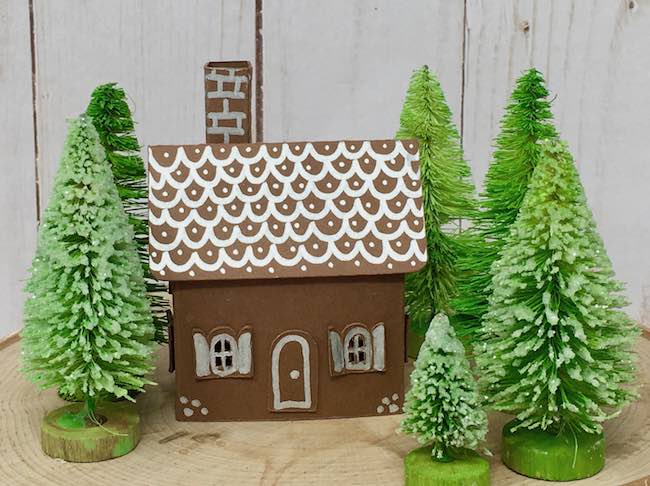
My favorite white gel pen is the Uniball Signo. It is amazing how beautifully it allows you to draw with white ink. I made a small and tiny version of the cottage decorated with the white pen. The Cricut pens write very nicely as well.
Here's a photo of the tiny cottage made with a silver metallic pen from Cricut.
4. Next assemble the tiny paper cottage
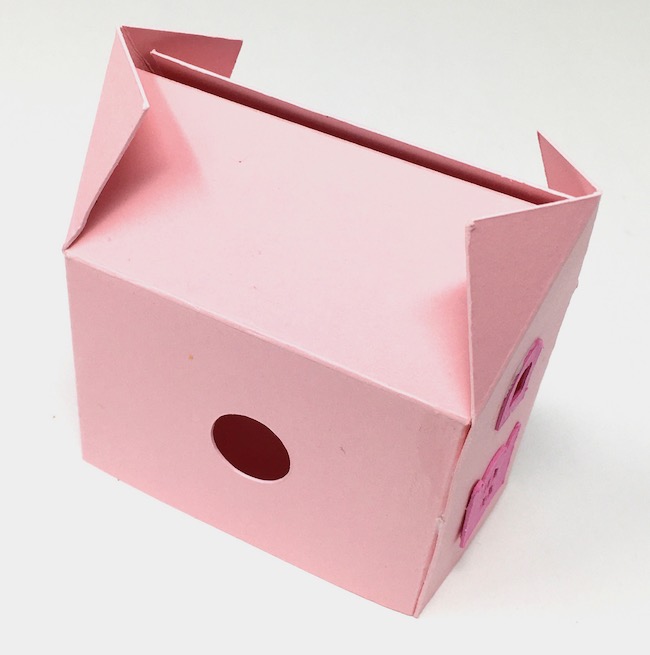
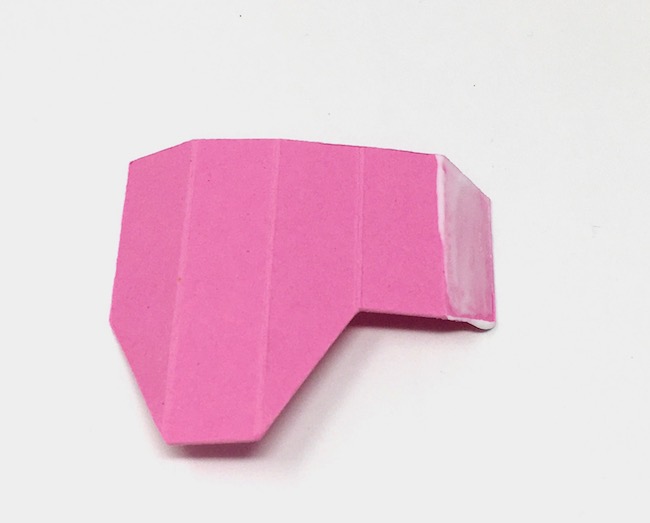
First, fold along the score lines to make it easy to assemble.
You can see how the score lines are folded in the photo above.
Next, apply glue to the side glue tab to form the structure of the little house.
This is how it looks when you have assembled the main structure of the cottage.
Glue the roof tabs to the roof flaps
After that, fold the paper cottage roof flaps inside the roof tabs and glue the roof tabs to the roof flaps.

Adhere the cottage roof to the body of the house
Finally, apply glue to the upper surface of the roof tabs and adhere the cottage roof in place. Hold in place for a minute or two. Fortunately, card stock sticks together quickly.
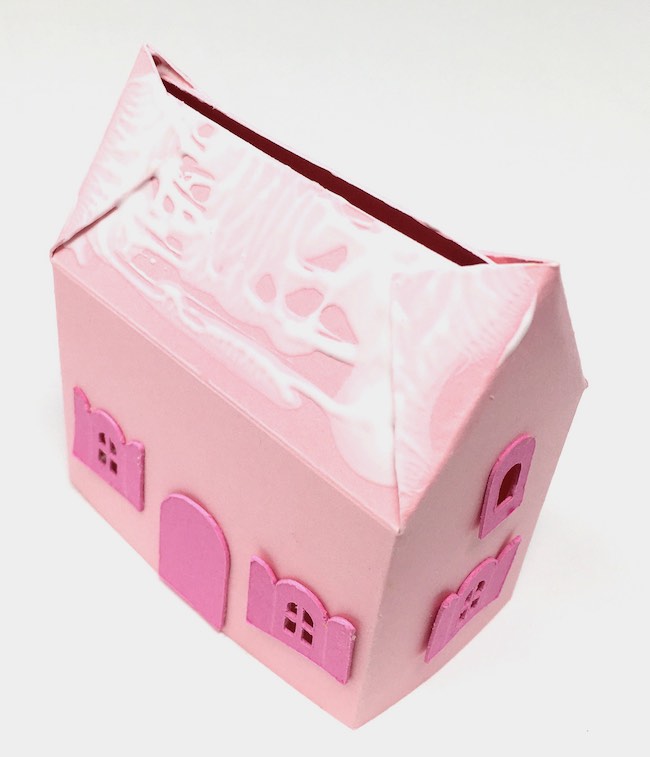
Mop up excess glue with a q-tip or a toothpick. I almost always have to do that because I tend to use too much glue.
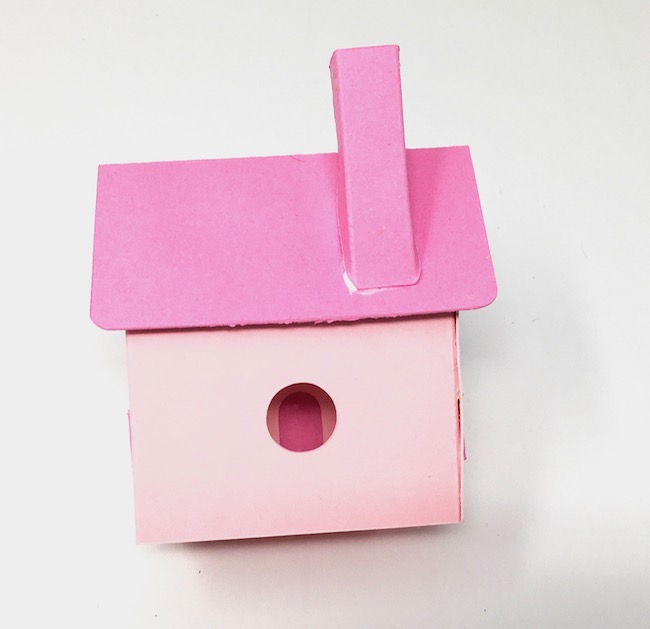
There is an optional chimney pattern in the file if you would like to have chimney on your little house. Just fold along the score lines, glue the glue tab to the opposite side. Glue the chimney to the back part of the roof.
Apply glue to the angled bottom of the chimney.
Next adhere the chimney to the back side of the roof
5. Glue your paper cottage to a card stock base, if desired.
To simplify construction, just glue 2-3 layers of card stock together for the base. I just kind of estimated how big to make the base - something like 2.5 inches by 2 inches for the tiny cottage. Also it helps to round the edges of the base because so you won't get bent corners.
If you want to put the small version of the cottage on a base (which means the slightly larger version of the tiny cottage) use a piece of cardboard about 3-4 inches wide by 2.5 inches deep. But remember if you want to add more landscaping (bottlebrush trees, snowmen, etc), make a bigger base. The small version of the cottage is large enough for a tea light to fit underneath so you can leave off the base if you want to just set it over a tea light. Both the tiny and small versions of the cottage have a hole in the back so you can use the tiny LED light strings to light up the house.
6. Make a Hanger for the Tiny house
If you want to use your tiny house as an ornament, thread a needle that has a large eye (like a crewel needle or embroidery needle) with embroidery thread or baker's twine. Poke a hole in the roof about ¼ inch down from the top. Pull the needle through and then tie the thread in a knot. That's it.
Now you have an adorable little cottage ornament that doesn't take much time at all. You could make a multitude of tiny cottages for your holiday decor. They even make great little gifts or gift tags.
I hope you enjoyed making another little tiny EASY paper cottage. You can even make it with kids because you know they love little tiny things. Remember that this little cottage fits perfectly on a Christmas wreath.
Also you make other tiny structures to complete your little village. The previous post was about making a tiny church. The tiny paper house ornament has a design on it that you can use with the Cricut foil transfer tool or a pen.
Let me know if you have any other questions - email me at [email protected]. Please be sure to come by frequently for all the other crafts in the 12 Days Craft-Along.
-
12 Day Craft-Along Projects
- DIY Easy Autumn Paper Leaf Wreath
- Easy Tiny Paper Church - Quick Holiday Craft
- Tiny Paper Cottage
- Tiny Paper Barn - Quick and Easy Holiday Craft
- Make a Tiny Paper Swiss Chalet for Your Holiday Decor
- Make the Cutest Tiny House Holiday Garland
- Little Cottage Pop-Up Card - Make One for the Holidays
- Make a Paper Holly and Ivy Wreath
- DIY Christmas Fairy House - Paper Fairy House with Poinsettia Roof
- A Storybook Holiday Cottage for Christmas
- Easy Snowman and Scotty Dog Gift Tags
- Little House Gift Tags - From My House to Yours

Adriane
Oi Lucy
Você esta de parabéns, percebo o carinho e a dedicação que você tem com cada trabalho seu, amo seus trabalhos, são lindos, bjs.
Lucy
Muito obrigado. Isso é muito gentil.
Lucy