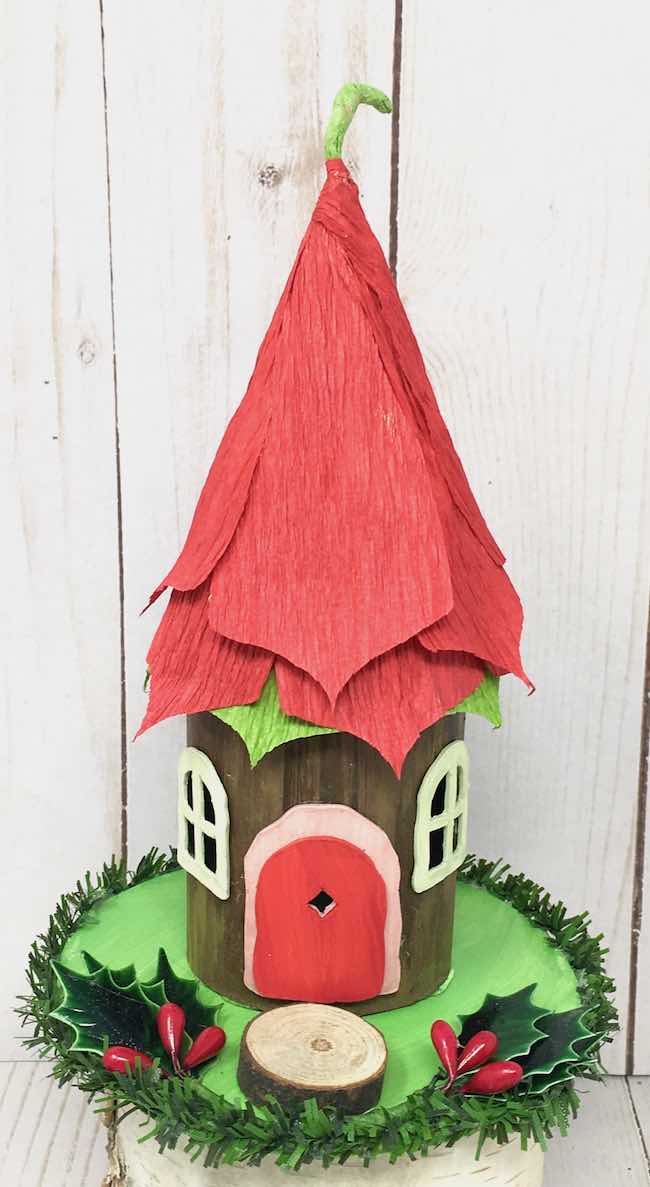
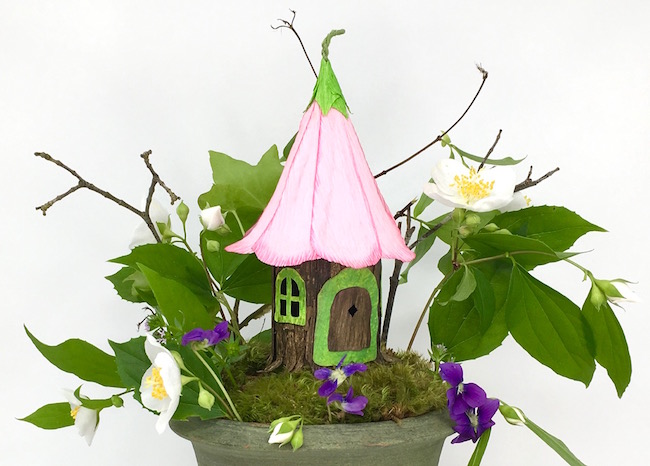
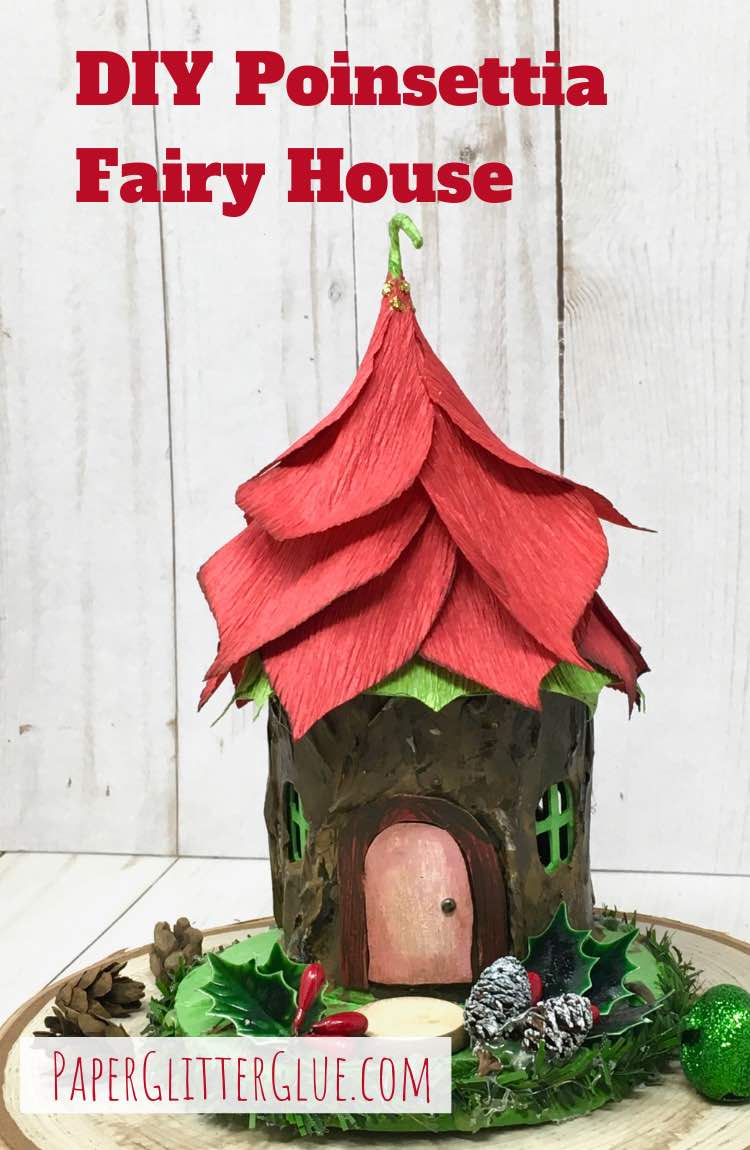
I just love this project - a Christmas Fairy House made with Poinsettia Petals decorating the roof - paper Poinsettia leaves, that is. It's a variation on a paper fairy house I made over a year ago as a guest post for JenniferMaker. And it certainly fits the bill for a great craft for the 12 Day Holiday Craft-Along. If I count correctly, this is project no. 9 for the Craft-Along.
This post contains some affiliate links for your convenience. Click here to read my full disclosure policy.
What materials do you need to make the Christmas Fairy House with Poinsettia Roof?
- Cardstock
- Cardboard
- Crepe paper - red and green
- Paint - here's what I used:
- Glue - I prefer Aleene's Fast Grab Tacky Glue for cardboard and Aleene's Quick Dry Tacky Glue for cardstock
- Wire or Pipe Cleaner for stem
- Tiny Holiday Decorations
- Pattern for the Holiday Fairy House with the Poinsettia Roof - Design No. 106 - (PaperGlitterGlue library)
Outline of how to make the Christmas Fairy House with Paper Poinsettia Roof
- Download the pattern for the Paper Fairy House with Poinsettia Roof - Design No. 106
- Cut out the pieces for the Paper Fairy House
- Cardboard for the base of the Paper Fairy House
- Card stock for the roof of the Paper Fairy house
- Card stock or cardboard for the Door and Windows
- Crepe paper is best for the Poinsettia Petals, but card stock works as well
- Glue the roof piece into a cone with a small wire loop for handle
- Glue the body of the house together
- Prime and paint the body of the house
- Adhere windows and door pieces to the house
- Glue the leaves and petals to the roof top cone
- Make a base
- Adhere the house to the cardboard base
- Add snow if desired
Here are more details for making the Paper Fairy House with Poinsettia Roof.
Download the free pattern for the Christmas Fairy House - Design No. 106
First, get the pattern for this Fairy House from my Paper Glitter Glue library. If you have the password, go to the Paper Glitter Glue library, type in the password and download the pattern from the November 2020 section of the library. It's design no. 106 in the library.
If you don't have the password, just subscribe to my Paper Glitter Glue newsletter. You will get the password right away. And the newsletter contains craft tips and tricks along with some crafty inspiration and new crafts on the blog.
The little fairy house pattern is available in two different formats:
- Printable format - the PDF file
- Scalable Vector Graphics. - SVG file for cutting machines
Both of these files are zipped so you have to unzip them or extract them to open the files.
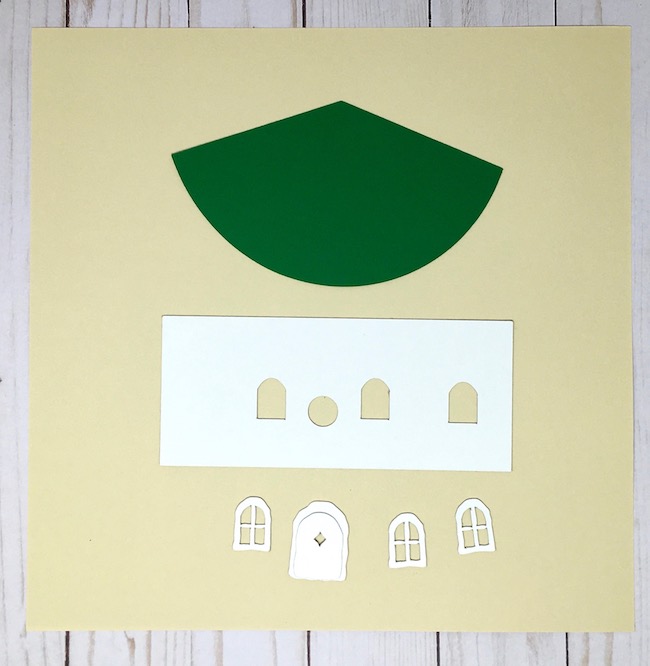
Next, cut out the pattern pieces for the Paper Fairy House
Please note there are different patterns for the Fairy House - one has a much steeper, narrower cone and base. The other one has a wider base and cone. Just choose the shape that you like better.
Here's a summary of materials for the Paper Fairy House:
- Tree Trunk Base for the Fairy House - 30 pt cardboard
- Roof cone - 65# card stock
- Windows and Door - card stock or cardboard. I used cardboard
- Poinsettia petals - crepe paper, but card stock would work as well
- Circular base to hold the Fairy house - 3 layers of cardboard glued together
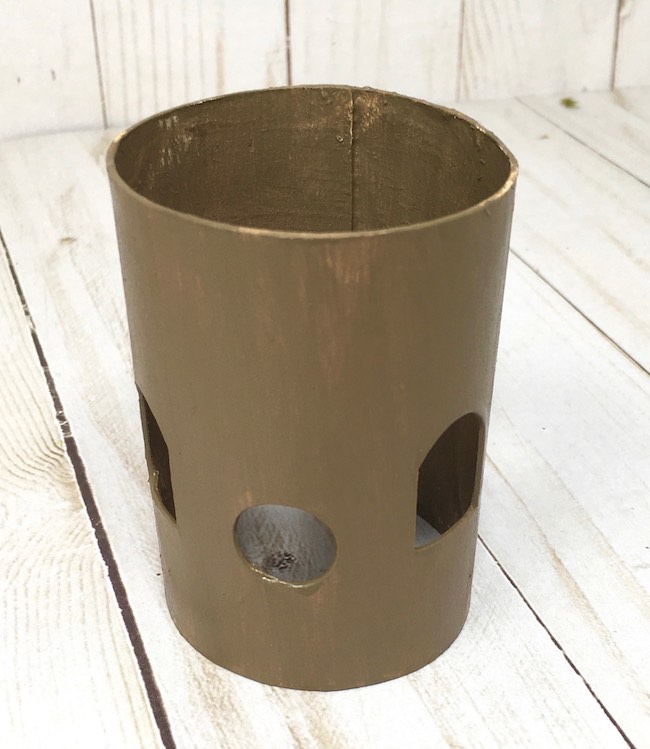
For this house, I use cardboard to make the cylinder for the base (tree trunk) of the Fairy house. But you can use a cardboard roll like a toilet paper roll. That works well, too. The only thing about using a cardboard roll is that you don't have any window cutouts.
For the cone on the roof, you really need a fairly flexible paper like 65# card stock. It is so much easier to roll into a cone-shape compared to cardboard.
Either card stock or cardboard work for the windows and doors.
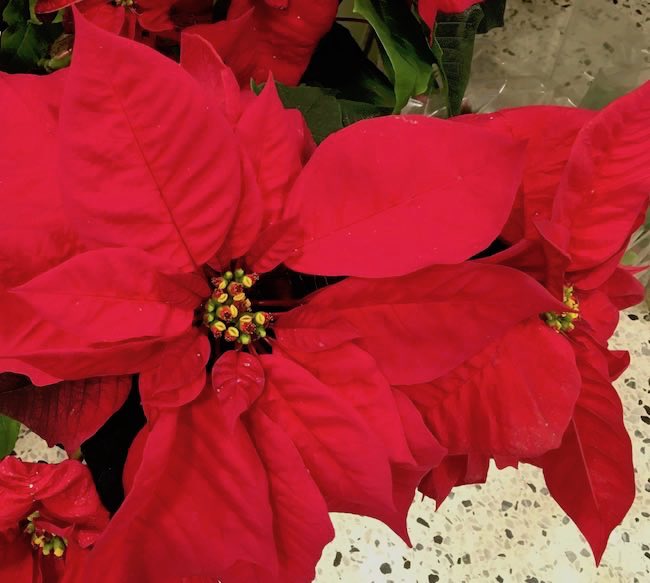
And for the poinsettia petals (which are really colorful leaves called bracts), use crepe paper or card stock.
Also I used 3 layers of cardboard glued together for the circular base to glue the fairy house to.
All of these pieces cut out easily by hand or with a cutting machine like a Cricut Maker. I used my Cricut Maker because it cuts out crepe paper so nicely. Fortunately, there aren't any score lines in the pattern so you don't need to score or attach anything.
Glue the semi-circle into a cone shape to make the roof
Form the conical roof before you make the base because you need to make sure that cone fits nicely on the base. If the base is too big, the cone does not sit on the base very well and tends to fall off easily.
To make the cone, it helps to gently curve the semi-circle before you try to glue it together. Hold the lower edge and roll the semi-circle into a cone. Again, it doesn't matter if it's not perfect because you cover it up with leaves and petals.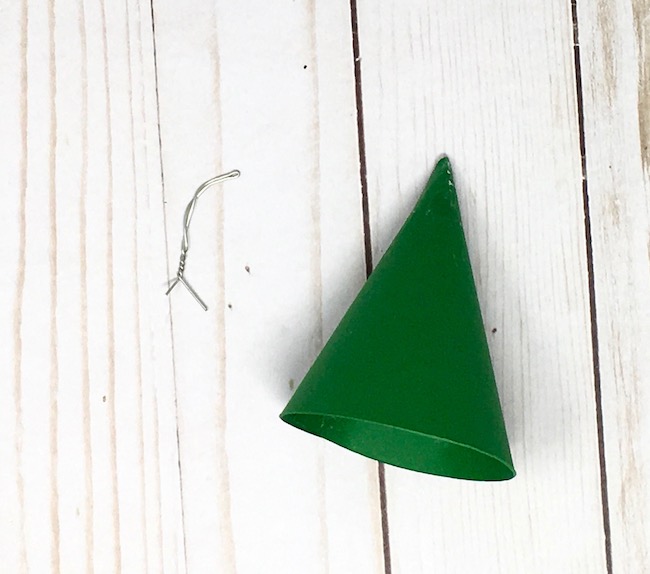
Next form the stem for the cone. Take a piece of wire about 4-5 inches long, fold it in half and twist together. Leave a little bit of the two wire ends flared open to provide a way to anchor the stem in place. The photo shows you what I mean. The wire forms the stem at the top of roof so you can take the roof on or off if you don't want to attach it.
After the cone-shaped roof is securely glued together, put the wire through the opening at the top of the roof. Well, usually there is an opening in the top because it is difficult to form a perfect cone. If you don't have one, just snip a little bit off the top of the cone so the wire stem fits through.
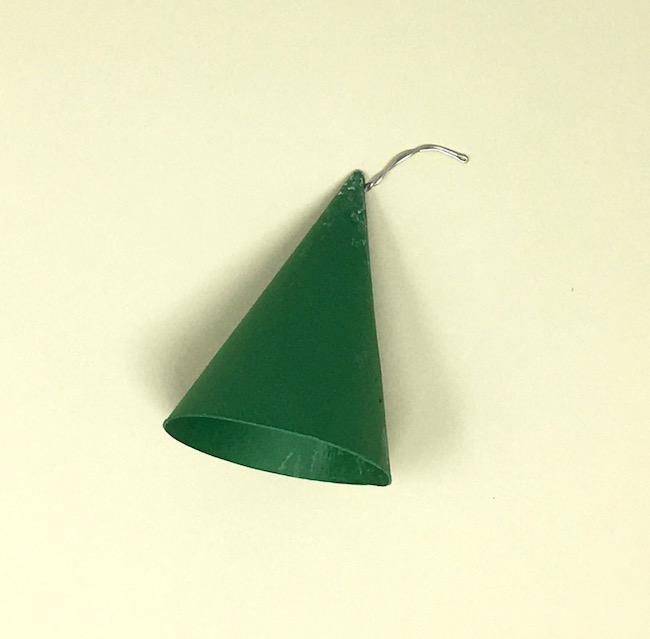
To hold the wire in place, squirt some hot glue to the tip of the cone. That holds it nicely.
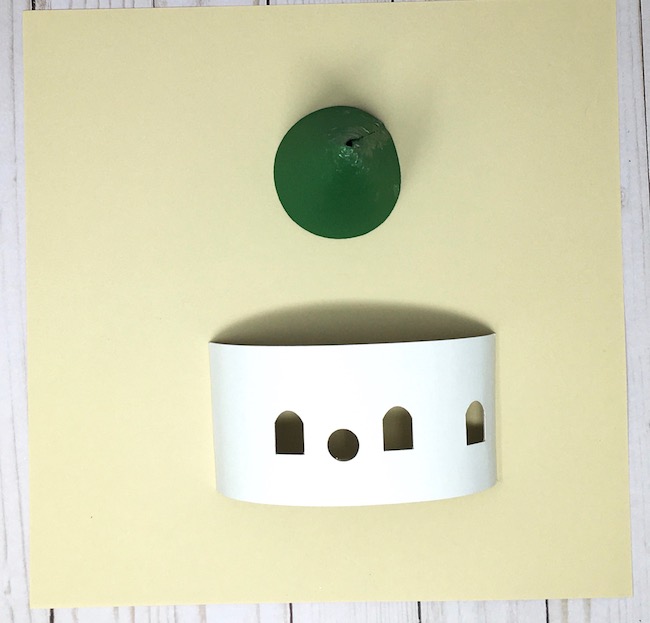
Glue the body of the little holiday fairy house together
To make this easier, gently curve the cardboard before you glue it. Put it between your thumb and forefinger with both hands and bend it slightly into a curve. Make sure that it fits the size of your cone. Your cone should sit on the circular base without falling off too easily.
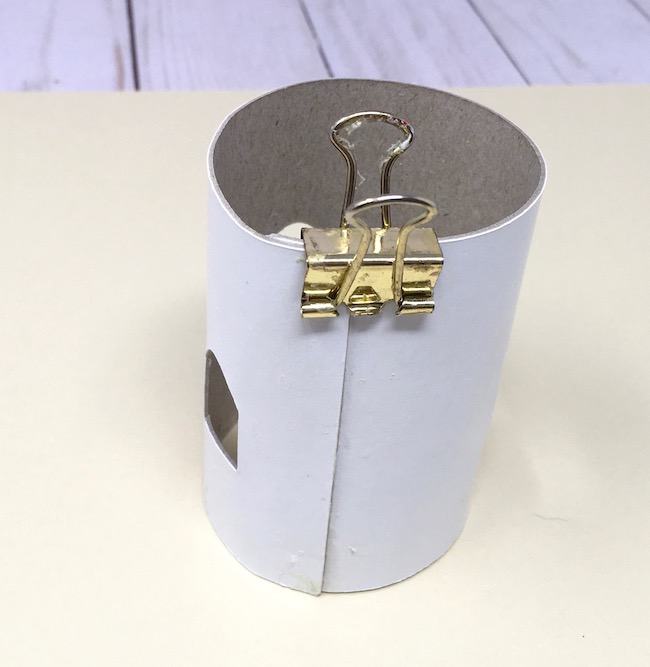
Test it before you glue it together.
Next, apply glue to one end of the house and glue the house into a circle. The cone sits better on the base if your base is circular, but it's ok if its not perfectly circular. Also, remember that you can use a cardboard roll like a toilet paper roll just to make it easier. That might work better if you are making the Fairy house with kids.
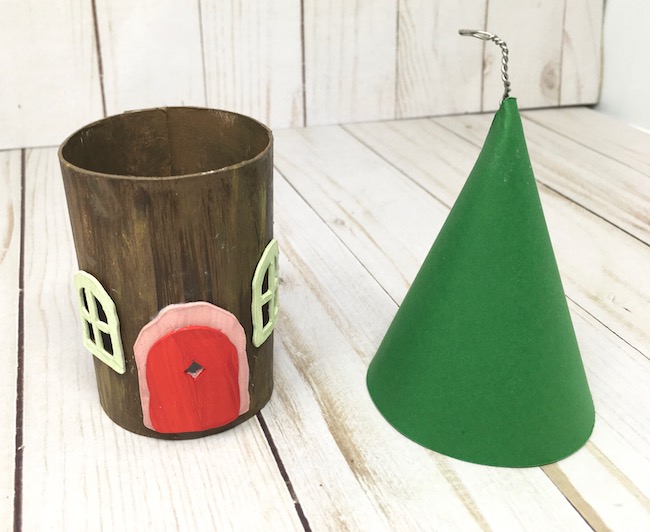
Prime and paint the body of the Christmas fairy house - options to mimic wood siding
In past years, I've made two fairy houses, both with a wood grain effect on the surface of the house. The one I made for JenniferMaker was made using a Tim Holtz wood embossing folder on strips of paper to simulate bark.
But for the other Spring blossom fairy house, I designed a wood grain debossed pattern on my Cricut that you can use.
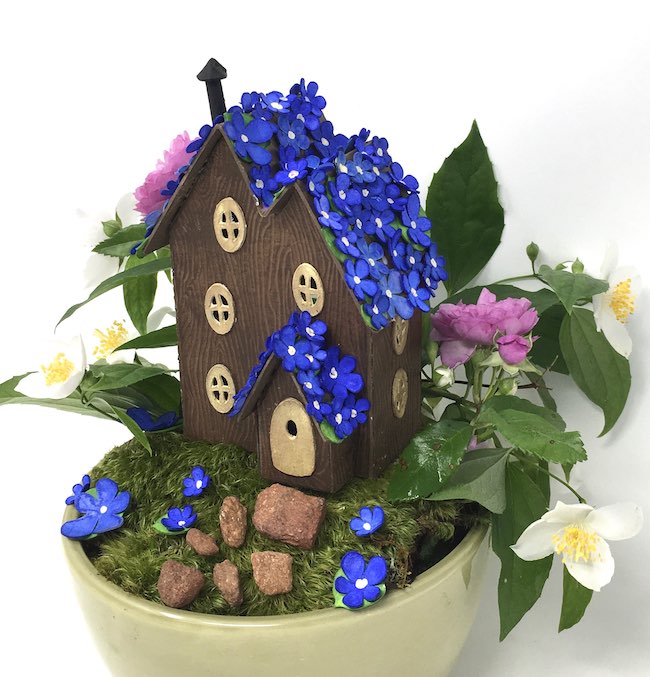
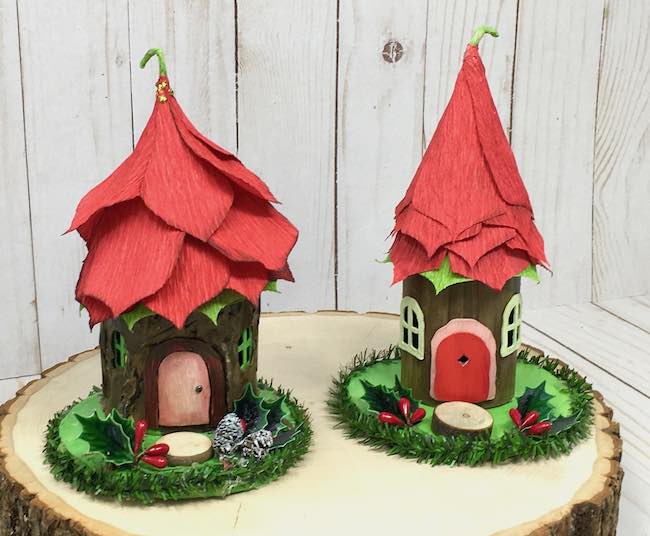
Both of these techniques are time-consuming - very effective, but time-consuming. So I just went with a very simple painted pattern on the base of one Poinsettia Fairy house. We're making easy crafts this month. The roof is the most appealing aspect of the house so that is what people notice the most.
Note: The second house has a paper mache added to mimic the bark.
Simply prime the house with gesso primer, then paint with a base color of paint. I used Walnut Stain Distress Paint. Add contrast striations with a darker paint - Ground Espresso Distress paint. And finally a few highlights. I used Fossilized Amber Distress Paint for this step. That's it. Simple. It adds some dimension without taking a lot of time.
Here is the main part of the house with the base coat painted on.
And here is house with just some contrasting streaks to mimic bark. Not very sophisticated, but it's good enough for a quick craft.

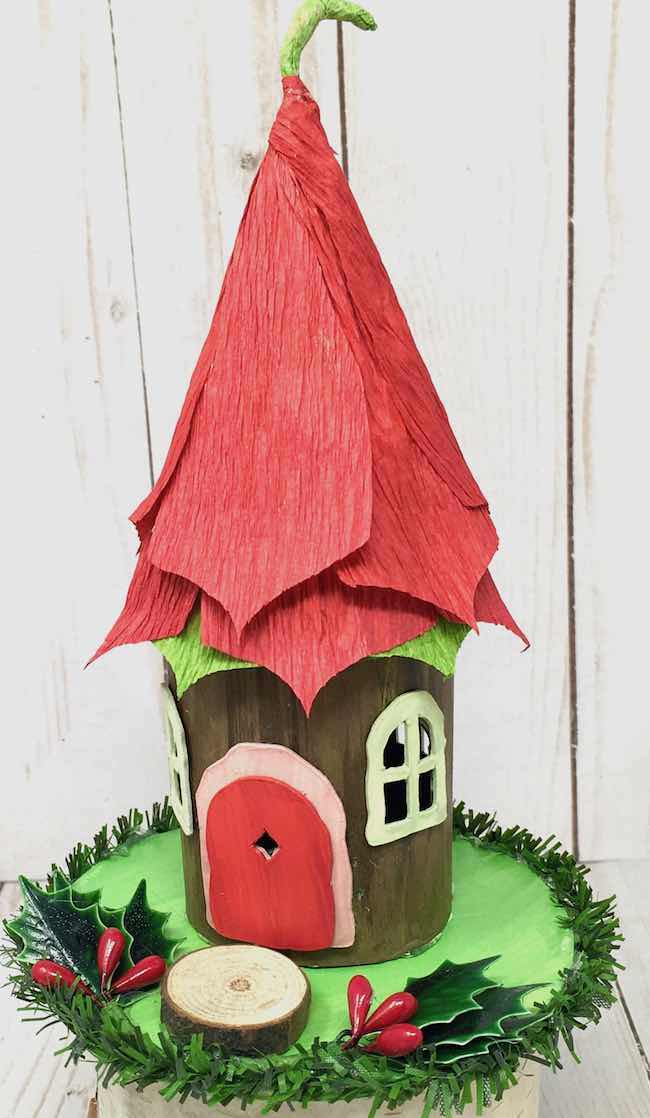
Next, glue on windows and the door to the Fairy House
For the windows and door to fit well on the house you have to curve them just like you did the house itself. Otherwise they just won't stick well. Notice that the door has a door frame that goes behind the door to make it a little more prominent.
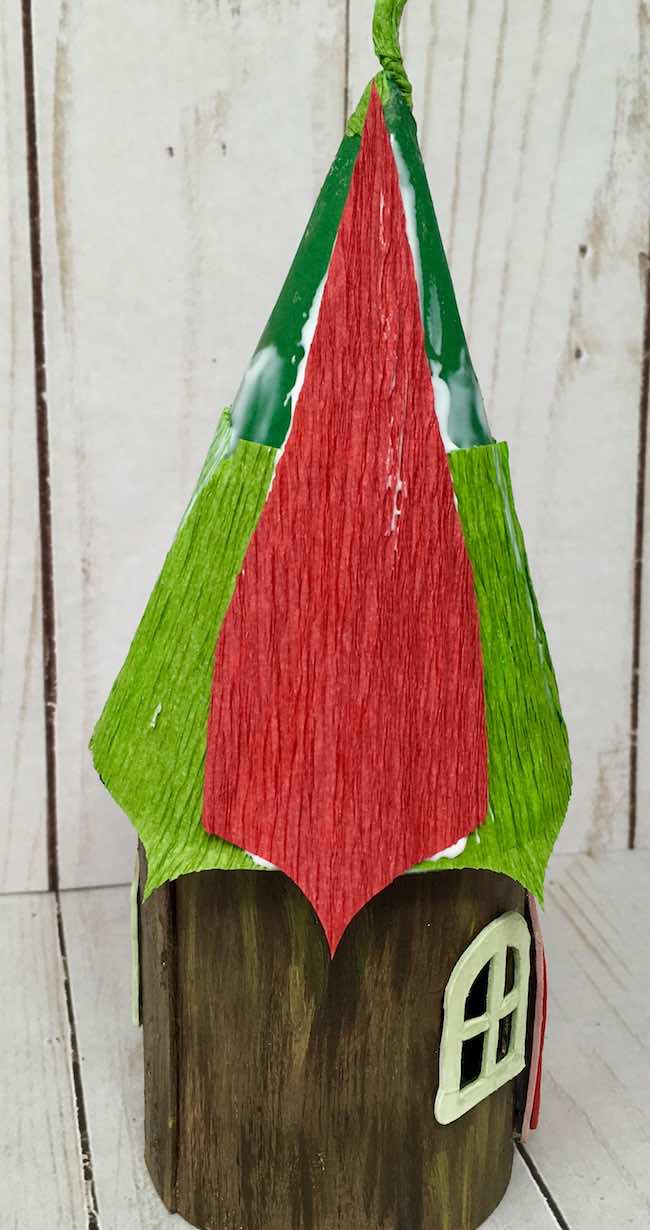
Glue leaves and petals to the roof top cone
Prop the roof top cone on a glue bottle or a toilet paper roll while you work. Then glue the leaves and petals to the cone-shaped roof. Start with the green leaves right at the edge of the cone. Allow the point of the leaf to extend over the edge of the cone. I think I used about 5 green pieces. Also wrap some leftover strips of crepe paper to the wire time.
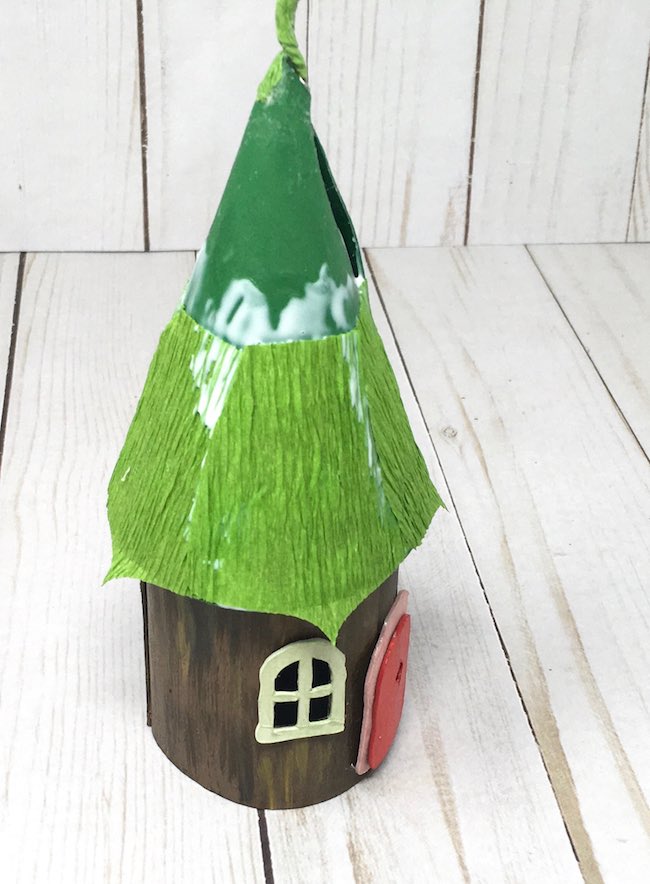
Follow that layer with a layer of colored crepe paper Poinsettia petals. I chose red because that is the most iconic color for Poinsettias. Again allow the tip of the leaves to overhang just a bit and alternate the colored tips with the green from the bottom leaf layer.
Important note: If your roof is not going to attach the roof to the tree stump bottom piece, don't allow the edge petals to extend over the edge too much. If they extend too far and you take the top off the bottoms the petals get bent. But if you glue the top to the base, you don't have to worry about that.
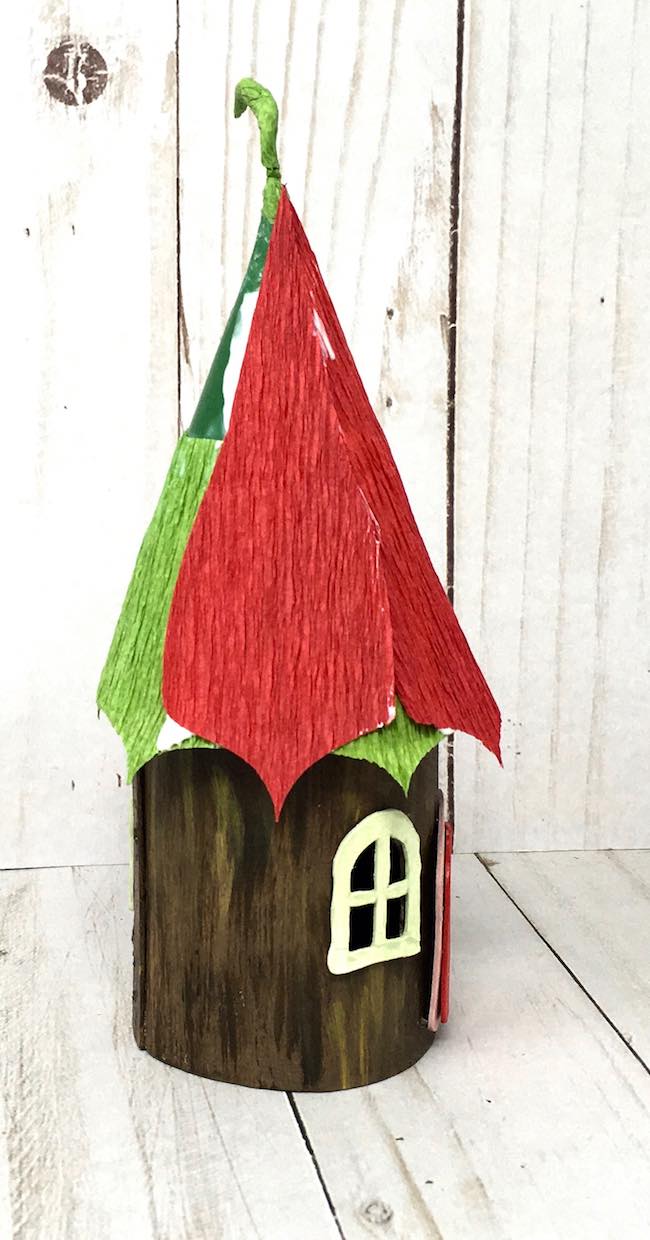
For this Fairy house, I only used 2-3 layers of petals.
Also for the upper layer of petals, twist the excess crepe paper around the base of the stem.
On the second fairy house which has a wider cone, I only anchored the petals at the top and flared them at the sides to get a better appearance of a poinsettia flower.
Make a Base for the Poinsettia Fairy House
In the spirit of keeping things simple, I just glued 3 layers of 4 inch cardboard circles together for the base. I painted it a pretty shade of green (Mowed Lawn Distress Paint).
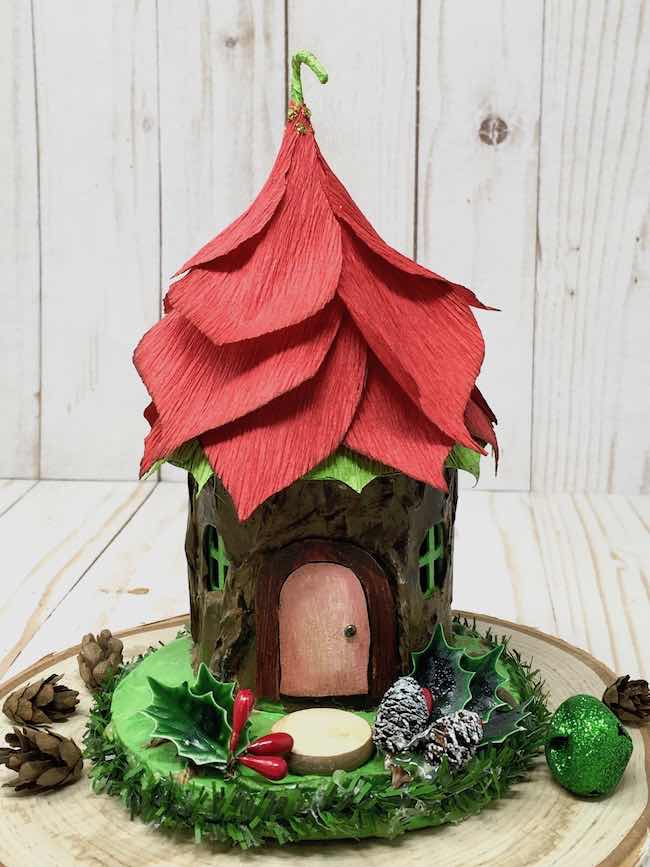
Next decorate the base and place the house on the base
This step can be one of my most time-consuming steps, trying to decide how to decorate the base. But fortunately, I went into my Christmas decor items and found a piece of garland and some tiny holly leaves and a wooden section from a stick. That makes the perfect stepping done for a Holiday fairy house, doesn't it?
One option is to add the decor to the base before you glue the house on the base. It's much easier to manipulate things without the house in place. Also the house had to be moved backwards to make room for the stepping stone.
To adhere the house to the base, just run a bead of hot glue around the bottom of the house and smush it onto the cardboard base. Another fast and simple step.
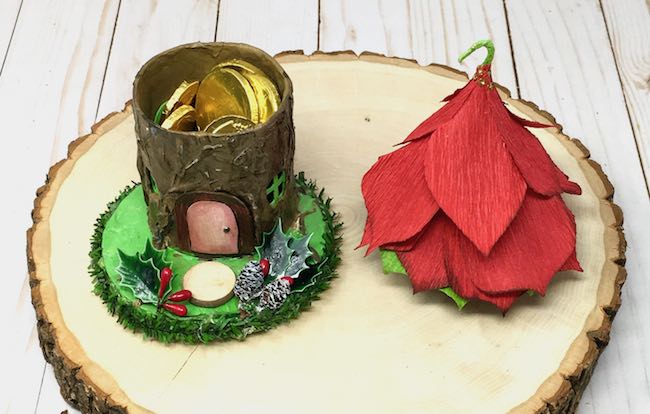
And that's it. Now you have a finished Holiday Fairy House that everyone can enjoy. Since the roof is removable, you can put some candy or treats inside to the delight of everyone.
Here are all the 12 Day Craft-Along Projects
- DIY Easy Autumn Paper Leaf Wreath
- Easy Tiny Paper Church - Quick Holiday Craft
- Tiny Paper Cottage
- Tiny Paper Barn - Quick and Easy Holiday Craft
- Make a Tiny Paper Swiss Chalet for Your Holiday Decor
- Make the Cutest Tiny House Holiday Garland
- Little Cottage Pop-Up Card - Make One for the Holidays
- Make a Paper Holly and Ivy Wreath
- DIY Christmas Fairy House - Paper Fairy House with Poinsettia Roof
- A Storybook Holiday Cottage for Christmas
- Easy Snowman and Scotty Dog Gift Tags
- Little House Gift Tags - From My House to Yours
Questions? If so, just email me at [email protected]. I am always happy to help.
Lucy
Julie
You are so clever! I love all your little houses but this fairy one is my new favorite. It would make a cute gift box for something small & then to save & reuse as decor. I enjoy your blog and craft ideas so much. Can't wait to see what you come up with next!
becky
I am sooooooo loving this!
Will have to make.
I might use Sycamore bark for the siding and use a slice of wood for the base.
THANK YOU so much for these creative ideas!
Lucy
Sycamore bark as siding and a wood slice as a base sounds incredible. I would love to see your version.
Marie Andersson
So lovely fairy-houses! The new version is my favorite, more projects to my to-do-list...
You make everyday sunnier, thank´s for all patterns and tutorials.
Lucy
Thank you so much, Marie.
Your comment makes my day sunnier.
Lucy