I made this paper gingerbread house for the Holiday Maker Fest in November 2020. But you can still get my files for this adorable Scented Gingerbread House by going to the Paper Glitter Glue library as design no. 96. It's free, of course.
When I was asked to participate in JenniferMaker's Holiday Maker Fest craft summit, I knew a Christmas house would be my project. One of my friends suggested that gingerbread paint I made last year would be perfect for this project. And she is right. So here is the Gingerbread Cardboard Cottage.
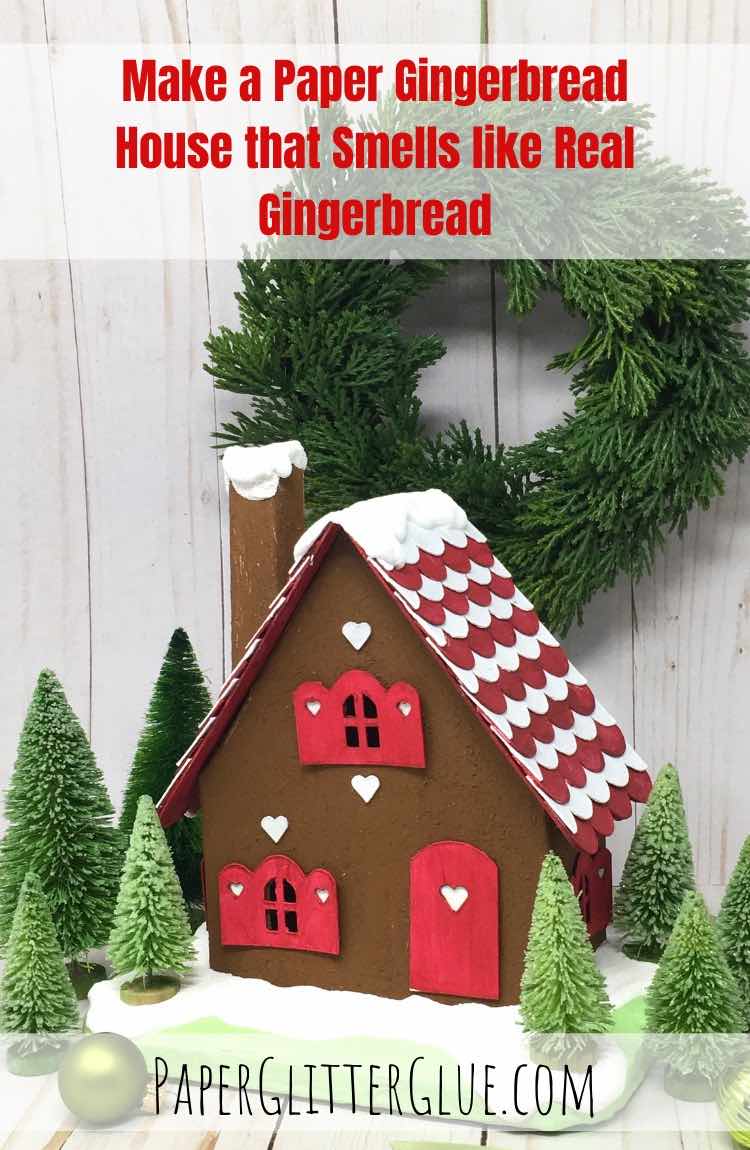
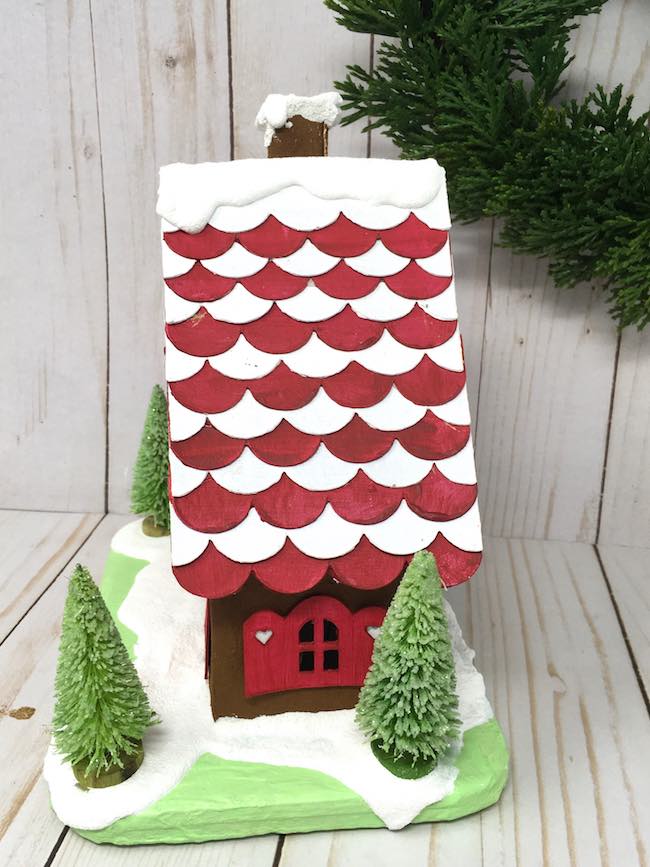
So I made a Gingerbread house out of cardboard covered with gingerbread paint. And the little house looks and smells like a real baked Gingerbread house. But the great thing is that you can display the house for many holiday seasons to come.

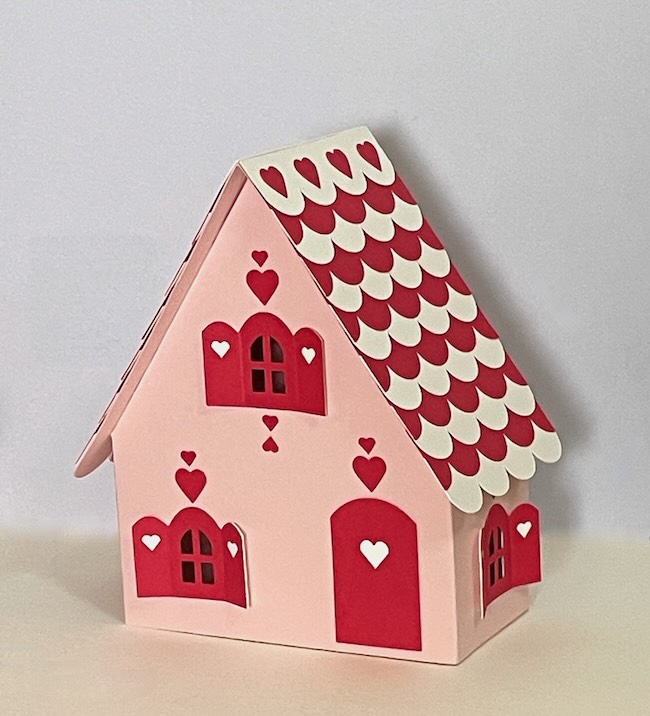
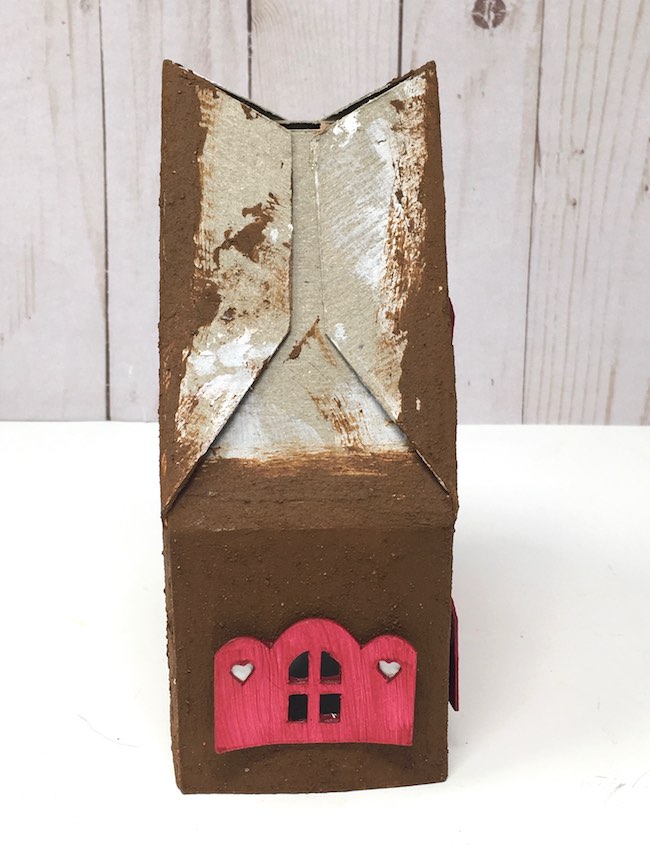
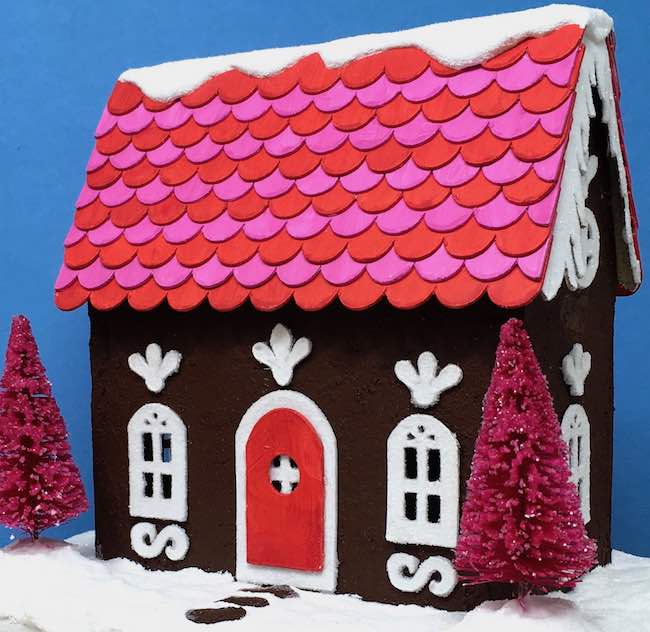
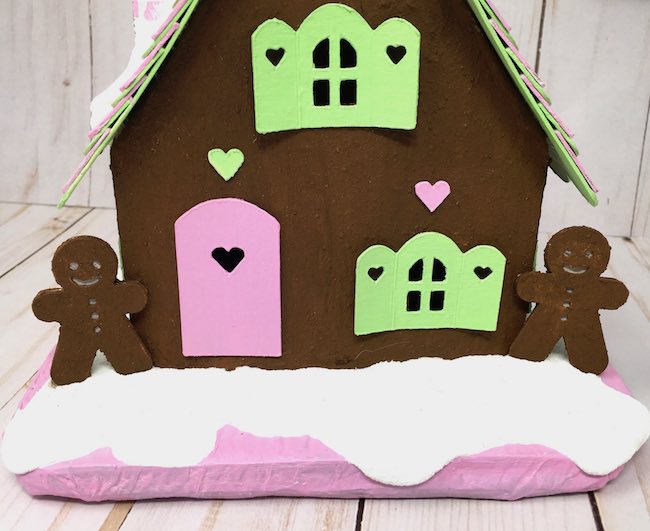
But you can make it without the gingerbread paint. It's still a great design. What about making one for Valentine's Day? Wouldn't that be cute? Here's my variation below.
Paper Gingerbread House for the Holiday Maker Fest
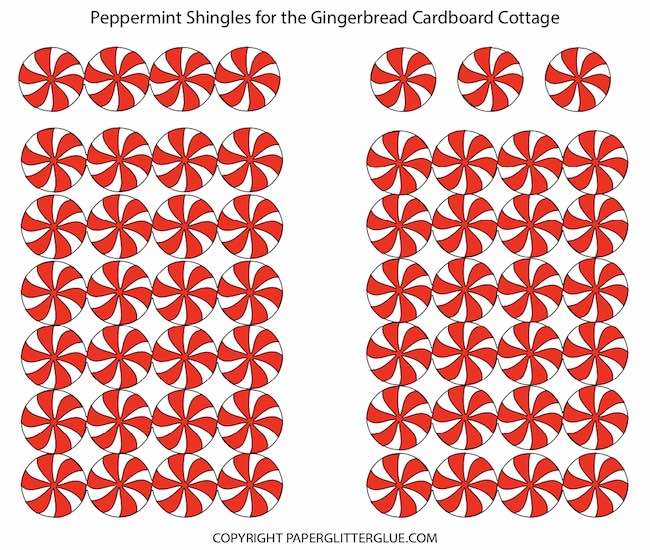
Structurally, the house is easy. What makes the little house so special? It's all the details that you can add. Gingerbread paint gives the house its real personality and fragrance. Then the alternating shingles make the roof pop. And there's a even a brick stencil to decorate the chimney. What about a little gingerbread man to greet visitors to the house? In addition, there is a pattern of peppermint candies for roof shingles if you like.
This post contains some affiliate links for your convenience. Click here to read my full disclosure policy.
Materials List for the Paper Gingerbread House
Gingerbread Paint:
- Acrylic paint - I used include Burnt Umber, Burnt Sienna, Yellow Ochre, or Raw Sienna
- Cinnamon
- Ginger
- Cloves
- Disposable knife for stirring paint
Gingerbread Cardboard Cottage:
- Pattern templates - Design No. 96 - from the Paper Glitter Glue library
- Cardboard - this is what I use for the house itself
- A way to cut cardboard - an Xacto knife or I use my Cricut
- Glue - Aleene's Fast Grab works best for gluing cardboard pieces together
- Corrugated cardboard for the base
- Gesso primer
Decorative Options for Your Gingerbread Cottage:
- Stencil material for brick on roof - I used Yupo paper, but you can buy stencil material
- SnowTex
- Glitter paper
- Mod Podge
- Glitter - I love Tim Holtz glitter the best
- Bottlebrush trees - here's an example of what you can get online
- Christmas figures
Summary of Steps to Make the Gingerbread House in Cardboard
How to Make Gingerbread Paint
- Gingerbread Paint Recipe
- Add water if the paint gets too thick
How to Make the Gingerbread House structure
- Download the free house pattern - Design No. 96 - from the PaperGlitterGlue library
- Cut out the cottage in cardboard
- Paint the gingerbread cottage before assembly
- Stencil the brick pattern on the chimney if desired
- Glue on decorative trim - windows, doors, hearts, or birds
- Glue the house together
- Add shingles to the roof piece
- Glue on the roof
- Adhere the chimney
Make a base for the Cottage
- Follow the directions here to make a cardboard base with an LED light option
- Glue the little cardboard house to the base
Decorate the Gingerbread Cottage with Snow
- Dilute the Snow-tex with white paint
- Drip along the roof line, around the chimney, and on the base.
Add Embellishments to Your Little Paper Gingerbread House
- Apply glitter to the snowy areas
- Add bottlebrush trees
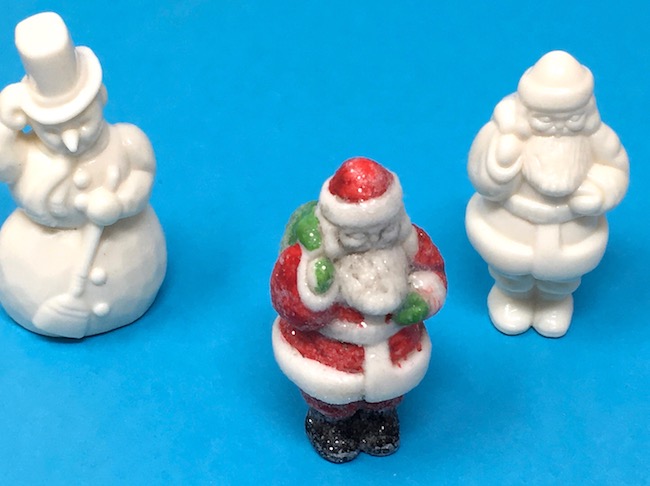
- Add Christmas figures
Now, read on for more details on how to make the paper Gingerbread House. Let's start with how to make gingerbread paint.
First, Gingerbread Paint Directions
Here's my YouTube video for making Gingerbread Paint.
Gingerbread paint is the secret that makes this paper-based Gingerbread House so unique. Below the types and shades of paint that I use to make this special paint.
For darker gingerbread, use Burnt Umber acrylic paint and Burnt Sienna. Both paints can be easily found on the paint aisle in your hobby store or order online. To lighten the color, mix Burnt Umber and Yellow Ochre acrylic paint. And finally, you can make the lighter gingerbread color with Raw Sienna. That color is a little harder to find, though.
To increase the scent of the paint, I use lots of cinnamon. It has the strongest odor and is the cheapest of the 3 spices. Ginger is the most expensive and has the most subtle scent. But I found that fresher spice bottles of ginger smell stronger than older bottles. Cloves are not always used in gingerbread, but this spice has a wonderful scent and dark color so I add it.
Gingerbread Paint Recipe:
- ¼ cup paint in the Gingerbread shades
- ¼ cup water
- 2 tablespoons cinnamon
- 1 teaspoon ginger
- 1 tablespoon cloves
- Water as needed to keep the mixture paintable
Measure paint in a ¼ cup. Mix the colors you like. I used Burnt Umber and Yellow Ochre.
Add the acrylic paint in a small glass container that allows you to mix the materials easily. I used a recycled salsa jar. A tight-fitting lid allows you to save the paint for several days.
Add ¼ cup of water to paint and mix well.
Add 2 tablespoons of cinnamon, 1 teaspoon ginger, and 1 tablespoon of cloves to the mixture. Stir well with something like a plastic disposable knife.
The paint mixture get thicker over the next 24 hours. Add water as needed to make the mixture more paintable. You want it thick enough to smear a thick layer over the surface of the cardboard.
This recipe makes enough gingerbread paint for about 2-3 houses.
Next, Download the patterns for the Gingerbread Cardboard House
To get the pattern for the Gingerbread House, just go to my Paper Glitter Glue library where all the files are free. All you have to do is subscribe to my newsletter and you will get the password right away. Type in the password and you will find the file in the October 2020 section of the library as the Gingerbread Cardboard Cottage.
Download the zip file, extract it if you are on a windows-based PC, or unzip on a Mac. Then upload the file to your design software if you are using a cutting machine.
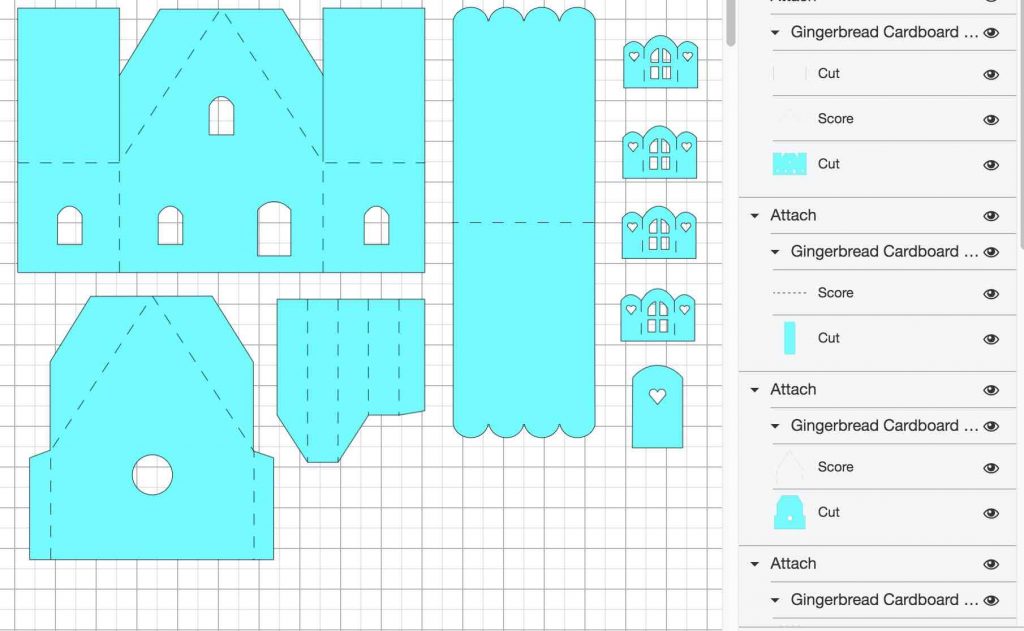
Here's how the file of the main structure of the house looks in Cricut's Design Space. Please note that all the lines on the pattern are score lines that need to be designated at score lines and attached to the piece they belong to.
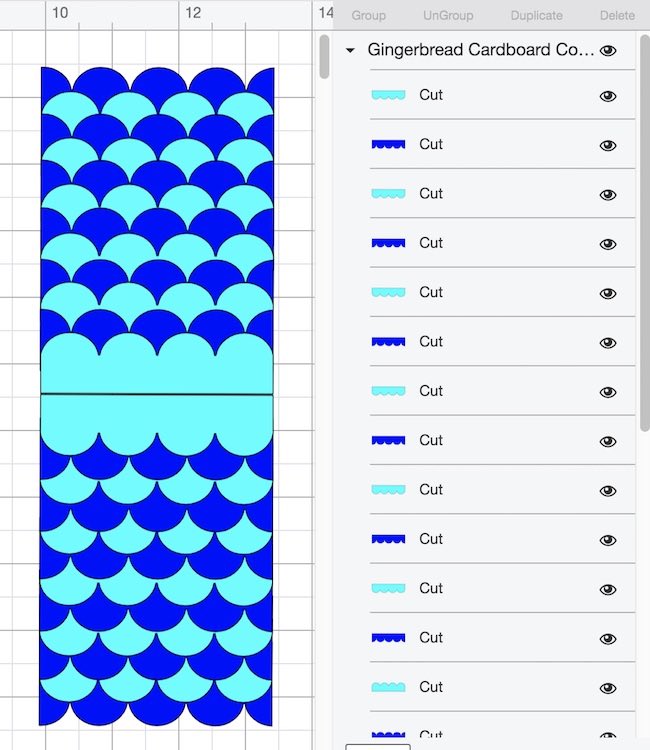
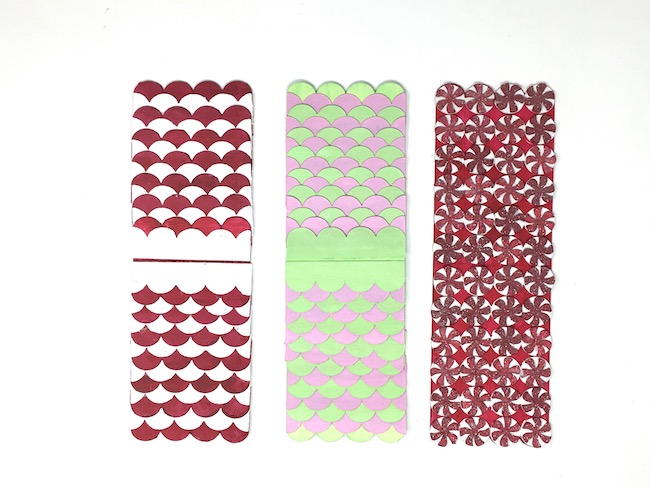
And here are the scalloped decorative pieces for the roof.
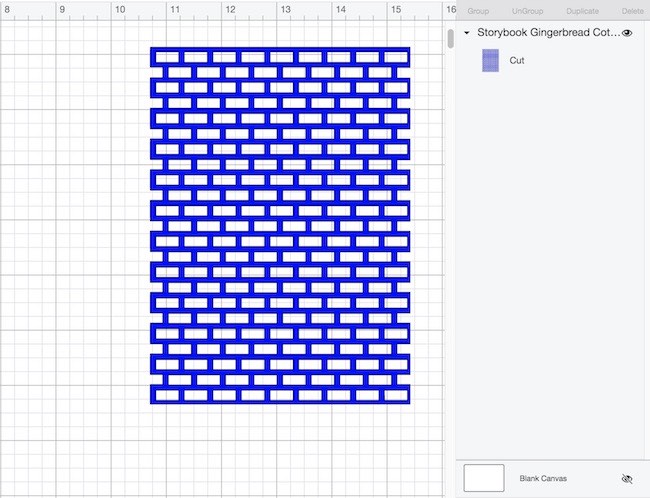
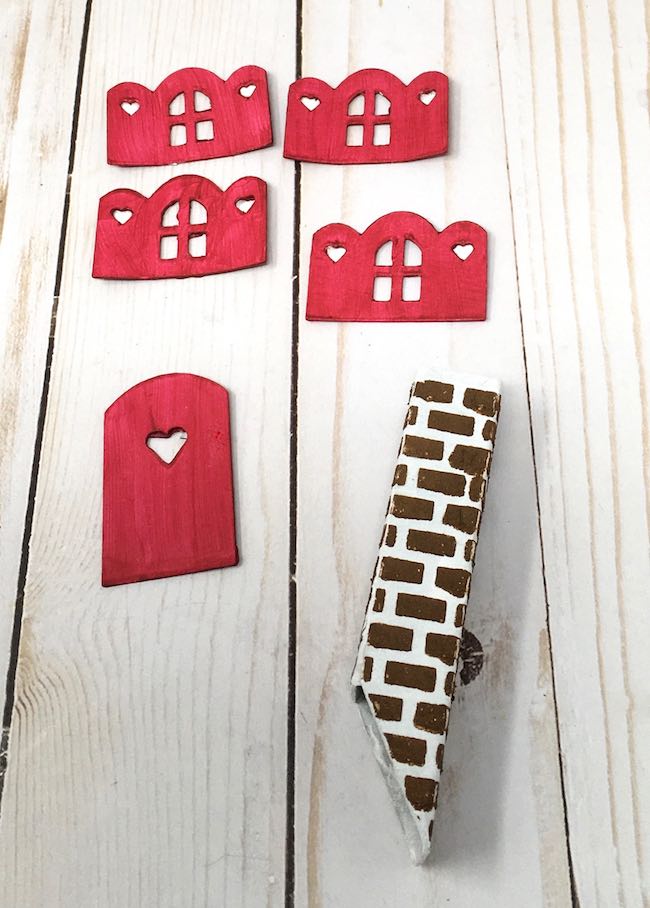
To stencil the chimney, you can use the brick pattern template below. The stencil pattern is included in the Gingerbread Cardboard Cottage file. I cut the stencil out of Yupo paper (a synthetic polypropylene paper) because that is what I had and it works beautifully. But you can purchase stencil sheets if you like.
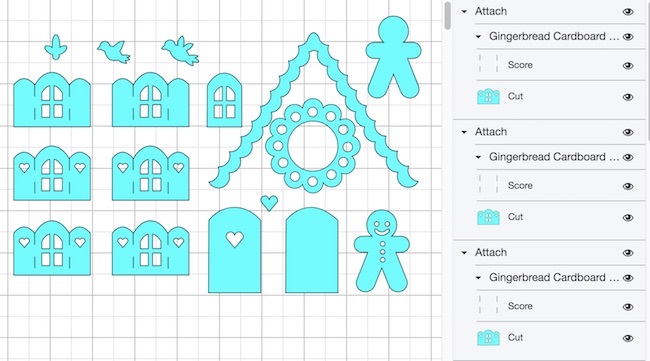
The design includes options for decorative trim. For my Gingerbread houses, I just used the hearts and the gingerbread men on one of my prototype house. The pattern includes plain windows, windows with shutters that have hearts on them, and windows with unadorned shutters. Just choose the ones you want.
Also, I included a plain gingerbread man as a backing so the cut out details show up better. More on that in the decorative section.
Cut out the house pattern
Once I discovered how easy it is to make houses with a Cricut, that's how I cut out all my house patterns. But it's not really a difficult pattern, you can easily cut it out by hand.
Please note: I use a fine tip blade on my Cricut and the Light Chipboard setting on my Cricut to cut the cardboard. I run it through twice to make sure the machine cuts the cardboard correctly. If it does not, don't move the mat and run it through again.
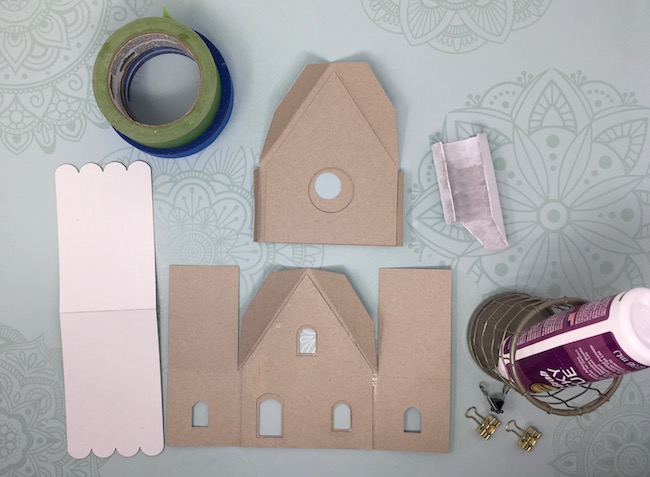
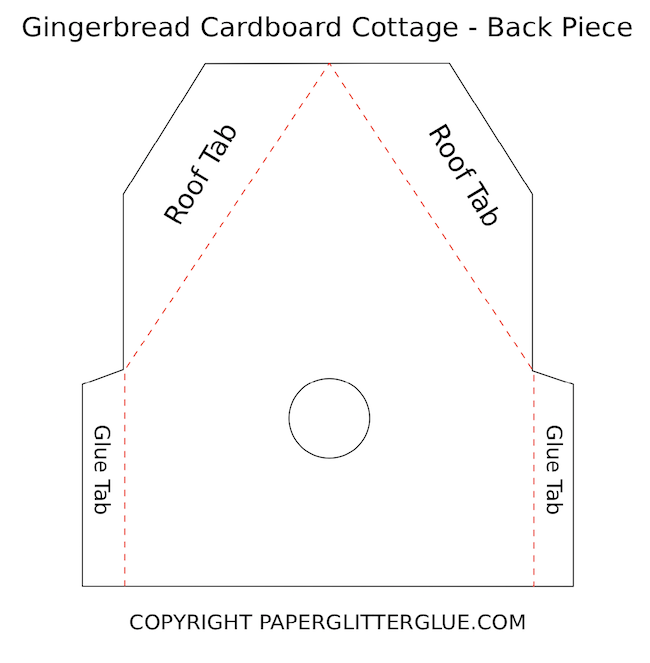
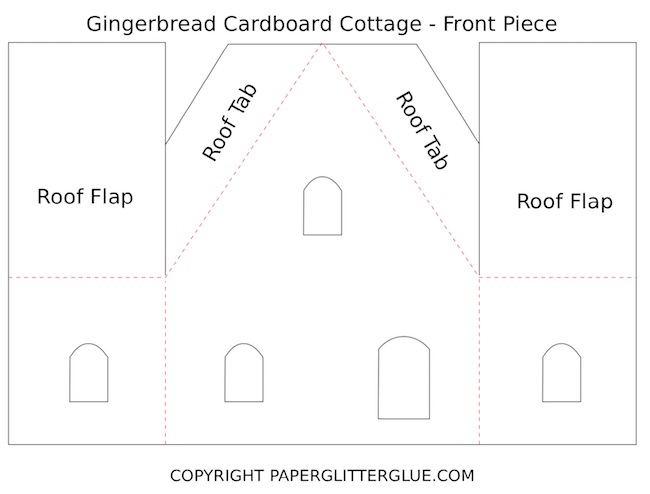
And below are the two main pattern pieces for the house. Please note that there is a extra piece of cardboard glued to the front and back of the house pieces. That is to help prevent those pieces from getting wavy when you paint the thick gingerbread paint.
Next, paint the cardboard pieces with gingerbread paint
First, fold along the score lines just enough so you know where they are. That makes them easier to find after the thick paint has been applied.
As I mentioned in the section above, I glue a reinforcement piece to the front and back pieces to help keep the pieces flat once the gingerbread paint is applied.
To apply the gingerbread paint, it's more like you smear the paint on the cardboard kind of like applying peanut butter to bread. If you try to paint it, your layer will be too thin and won't give you the real gingerbread effect. In the Holiday Maker Fest video, I show you how to cover the material with a nice layer of gingerbread paint.
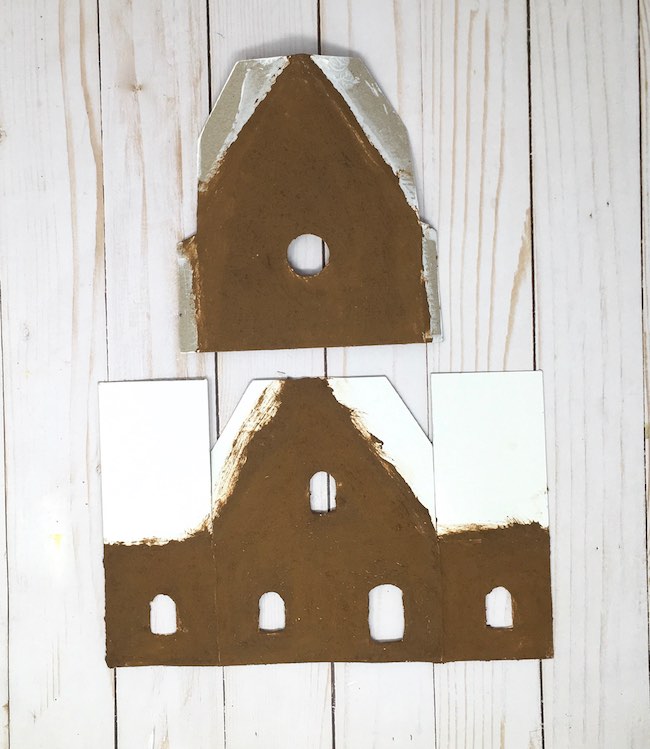
One other thing to do is to paint both the front and back sides of the house with gingerbread paint. That helps the pieces dry flatter as well.
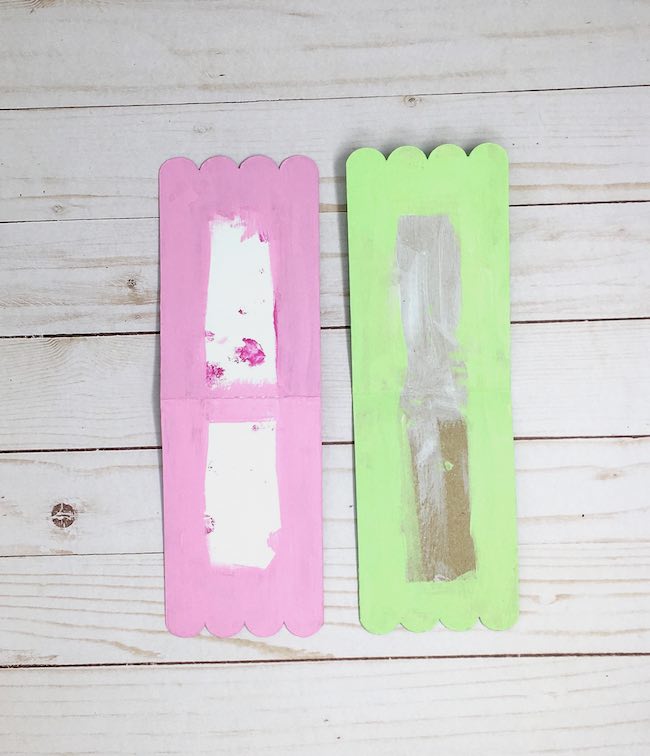
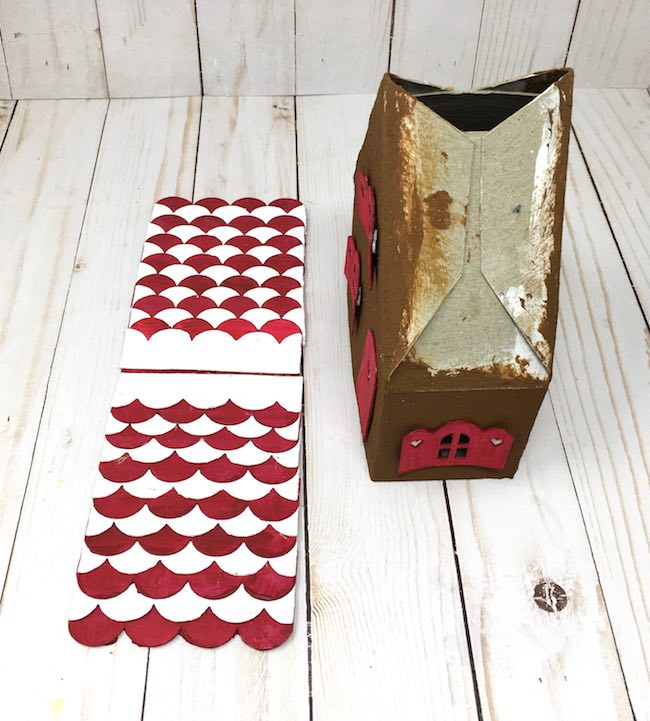
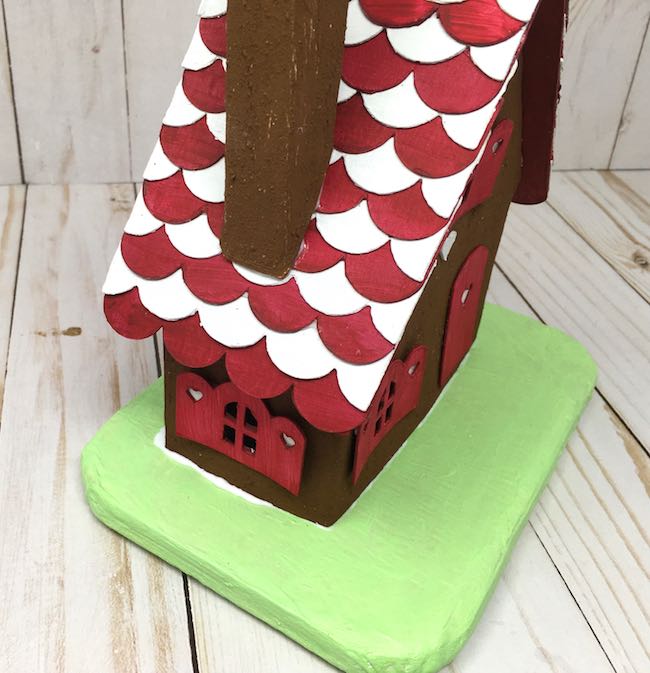
I chose to paint the roof with one of the colors of the shingles. If you do that, be sure to paint the underside of the roof so that the overhang is the same color. For example, the photo below shows the underside of the roof with the overhang painted. Really, you don't have to paint the whole roof, just the edges and the center seam in case the shingles don't cover everything.
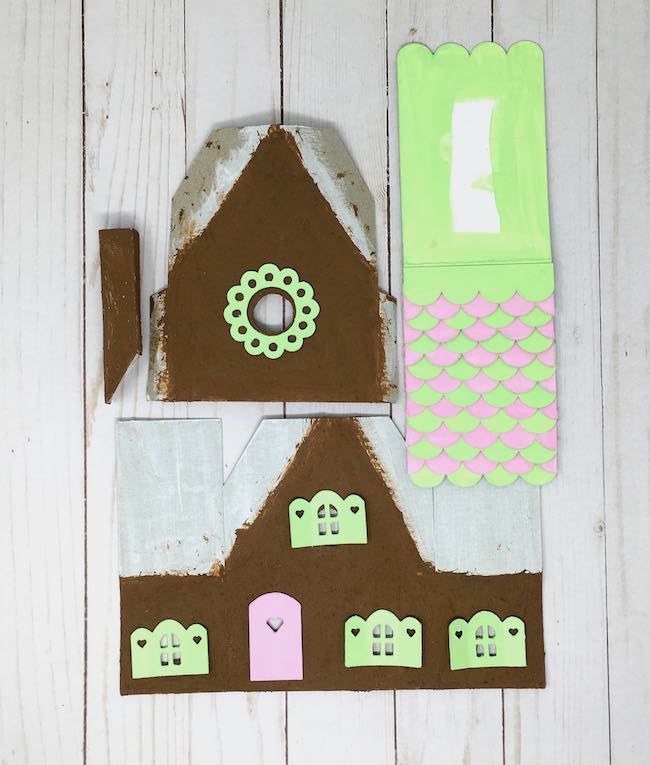
Glue on decorative trim - windows, doors
Most often, I glue the trim to the house before I glue it together. You don't have to do that, but sometimes it is easier to place the trim places while the gingerbread house pieces are flat.
Glue the house structure together
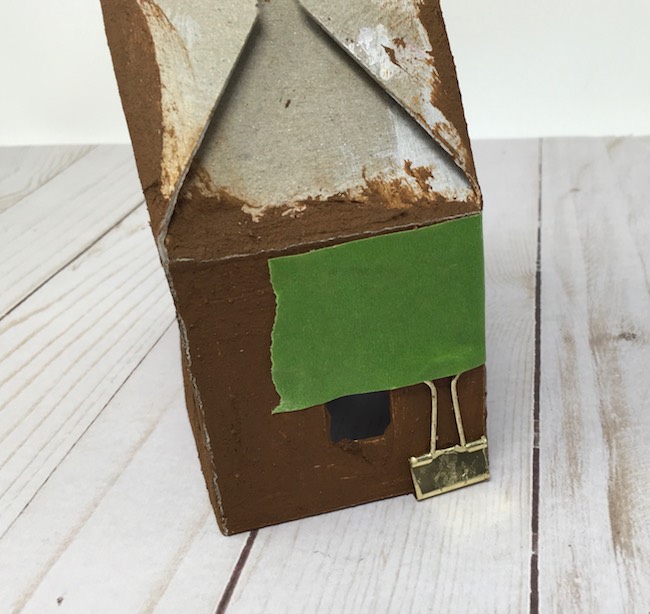
I use binder's clips and painter's tape to help me with this step. The back piece fits just inside the larger front piece. Apply a thick layer of glue to the glue tabs on each side of the back piece. You can see the glue tabs most clearly on the photo below.
To hold the houses together, I use binder clips and painters tape.
Then glue to the roof tabs to the roof flaps that are on the front piece. You can see that the roof flaps go inside the roof tabs.

And this is how the structure looks when everything is glued together.
Add Shingles on the Gingerbread House Roof
I love this part because the shingles add such a lovely decorative touch to the little house. And the design makes it easy. The roof pattern itself has the first row of scallops on the bottom edge. So just line up your first row on top of that. Then alternate each row of shingles to make this great scalloped effect on the roof.
For closely spaced shingles as show in the photos below, you need 28 rows of shingles. For the peppermint candy decor on the roof, you need 12 rows total. That's 48 peppermints.
Two important reasons for gluing the shingles on before you glue the roof to the house - it is far easier to glue them on when the roof piece is flat, but also the weight of the shingles helps hold the roof piece in place during the gluing process.
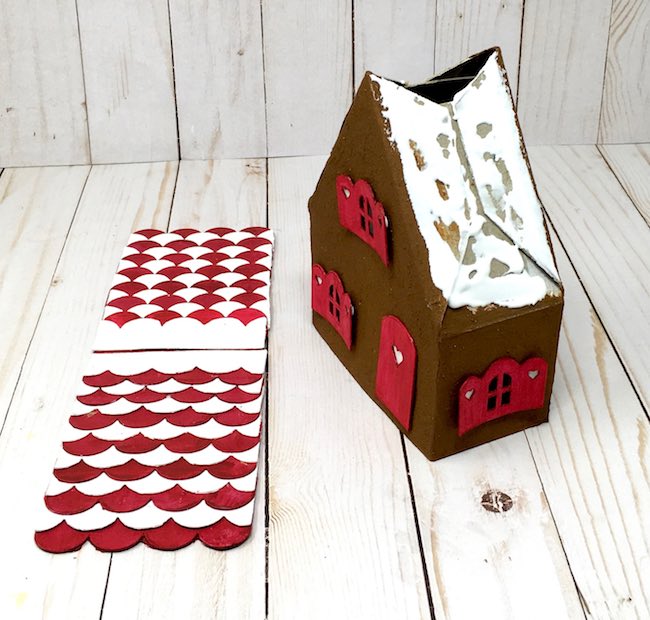
Now glue the roof piece on the house structure
Below you see the little Gingerbread house ready for the roof to be adhered.
To adhere the roof with shingles to the house, just apply a thick layer of glue to the top of the house especially on the edges of the gable. For this step, I use a LOT of glue.
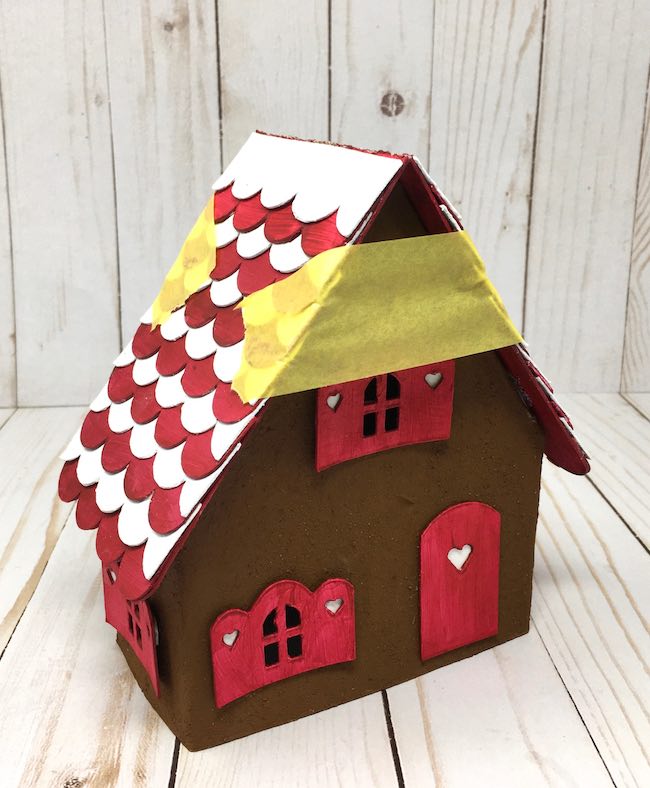
Often I use painters tape to hold down the roof while the glue dries. And here is how is looks taped down. For the roof, I used a painters tape for sensitive surfaces.
First, stencil the chimney if you want to make it look like bricks.
Then apply glue to the glue tab (the short, narrow side of the chimney) to glue it together. Apply a thick bead of glue to the angled bottom of the chimney and adhere to the roof. Be sure the roof is dry before you do that.
I never have figured out a good way to tape the chimney to the roof while the glue dries. If I try to use tape, I end up making the chimney all crooked. Now I just hold it in place until the glue starts to hold. This is where my favorite glue - the Fast Grab Tacky Glue - comes in very handy.
Make a Cardboard Base for the Paper Gingerbread House
Now for the cardboard base. You don't have to glue your house to base if you don't want to. But if you want your house to last through several holiday seasons, then a base is useful because it protects the structure of the house when you store it. In addition, the base is fun to decorate as well. Here's a link to a more detailed description of how to make a base.
For the base of the Gingerbread Cardboard Cottage, I use this as a template. Cut out 2-3 copies in corrugated cardboard and use hot glue to glue them together.

Then I cut out one layer from regular thin cardboard for the top layer. It's smoother that way. Glue that piece in place. Next, using Mod Podge, glue paper on top to cover the cardboard. I wrinkle up packing paper for this step. When the glue is dry, prime and paint it.
Once you complete the base, glue the Gingerbread House to the base.

Apply a thick layer of glue to the bottom of the house.
Often glue oozes out from the bottom. Since I applied snow all along the base of I didn't worry about it. But wipe it up with a cotton swab if you aren't going to do that.
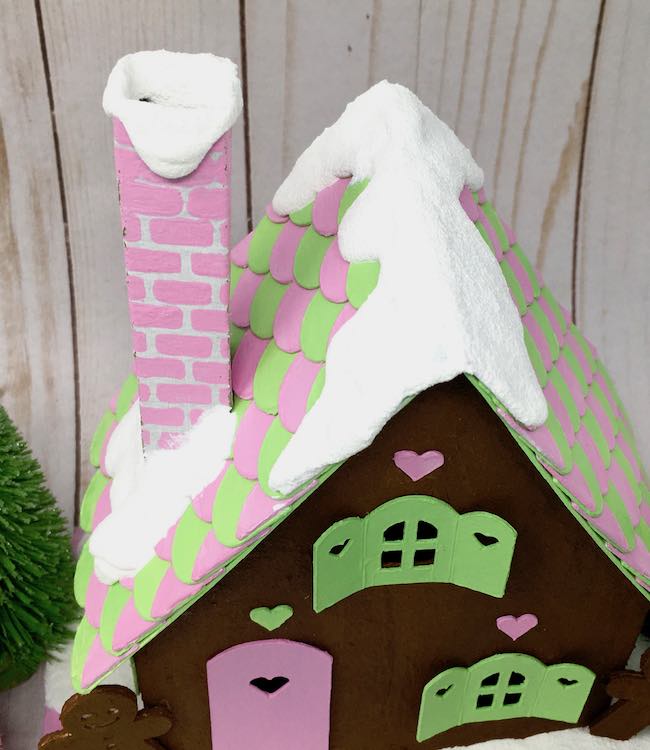
Decorate the Gingerbread House with Snow
You can see how I decorated the house with snow in the video. My favorite snow material is Snow-Tex, but it is pretty thick. To make the Snow-Tex flow better, mix it with white paint. Add enough white paint so that it oozes slightly when it is applied. It makes more natural looking drip when you do that.
If you want to make the snow glittery, paint the snowy areas with Mod Podge, then sprinkle glitter on top.
Valentine Version of the Gingerbread Cardboard Cottage
I like to add bottlebrush trees to many of my houses including a Gingerbread House I made last year. You can paint the trees whatever color you like.
Apply glue to the bottom of the bottlebrush trees and smush into the wet snow. If you want, cover the tree bases with more snow or even add snow to the tree itself.
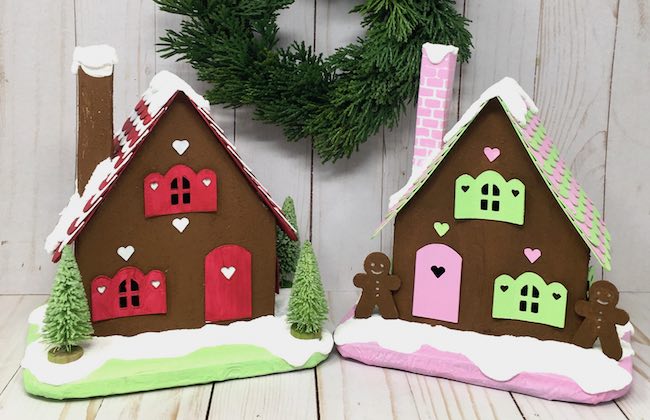
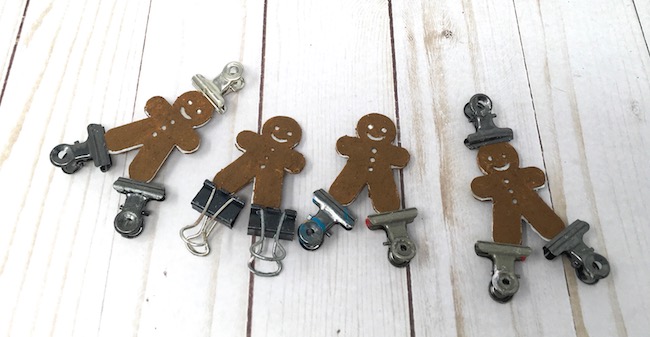
For one Gingerbread house, I added a gingerbread man on each side of the house.
Since I often over-engineer things, I made the gingerbread men by gluing a solid gingerbread figure between two figures painted with gingerbread paint. I used some binder clips to hold all the layers together. They make such a smiling bunch. Once the glue dries, paint the white edges with a bit of gingerbread paint.
In addition, there are adorable figures you can add to your little house. I love these vintage-styled figures from Tim Holtz.
Helpful Links:
- Make a cardboard base for paper houses
- My first gingerbread house painted with gingerbread paint - free pattern
- Gingerbread Ornaments painted with Gingerbread Paint
So that's how you make a Gingerbread Cardboard Cottage that smells like real gingerbread. You can have so much fun with this paper craft. It's a great craft to make with your kids.
Thank you so much for stopping by. I hope to see you on other fun projects.
Lucy
Lis
Sorry, I didn’t find the template, please help me.
Lucy
Lis,
The only way to get the files right now is if you purchase the VIP All Access Pass to the Holiday Maker Fest. But you will get the files for free on November 4th when my video goes live at the Holiday Maker Fest. After that, I will put the files in my library.
I have lots and lots of other cool files. The Recycled dollhouse made with a pasta box is very similar.
I hope that helps you. Let me know. You can email me at [email protected] for more questions.
Aylene Price
So super cute, thank you Lucy. Some years ago I made some felt gingerbread people for my Christmas tree and put Xmas spices in with the stuffing. Gave it that extra touch.
You've inspired me to make a start adding to my village for this year, have been fussing around with Xmas scrapbooking pages and making cards, time for some houses. 🙂
Cheers, Aylene
Lucy
Thank you so much, Aylene. I hope you have much crafting fun.
Lucy