
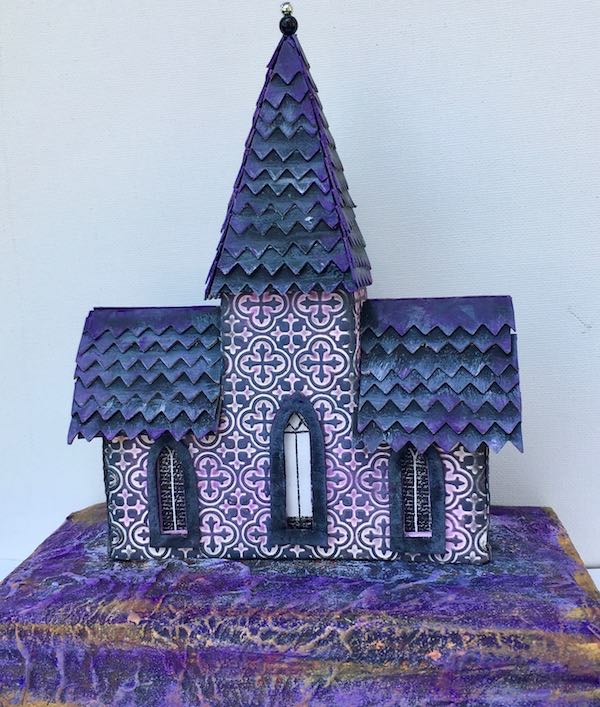
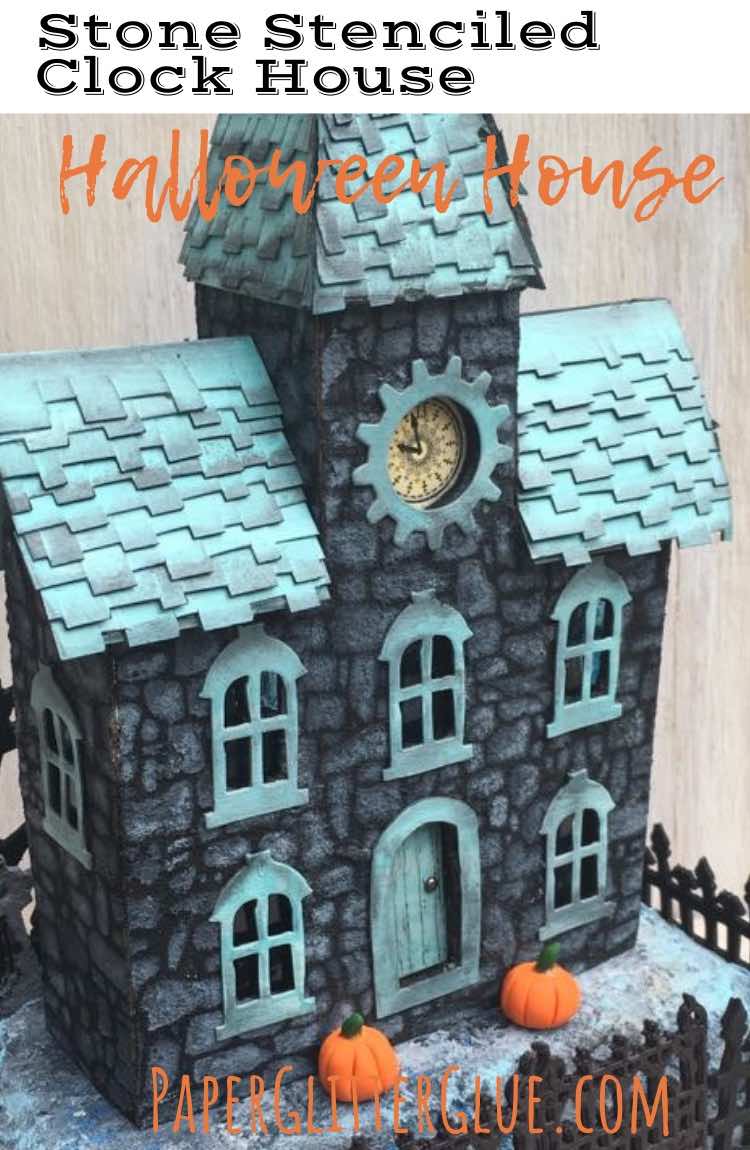
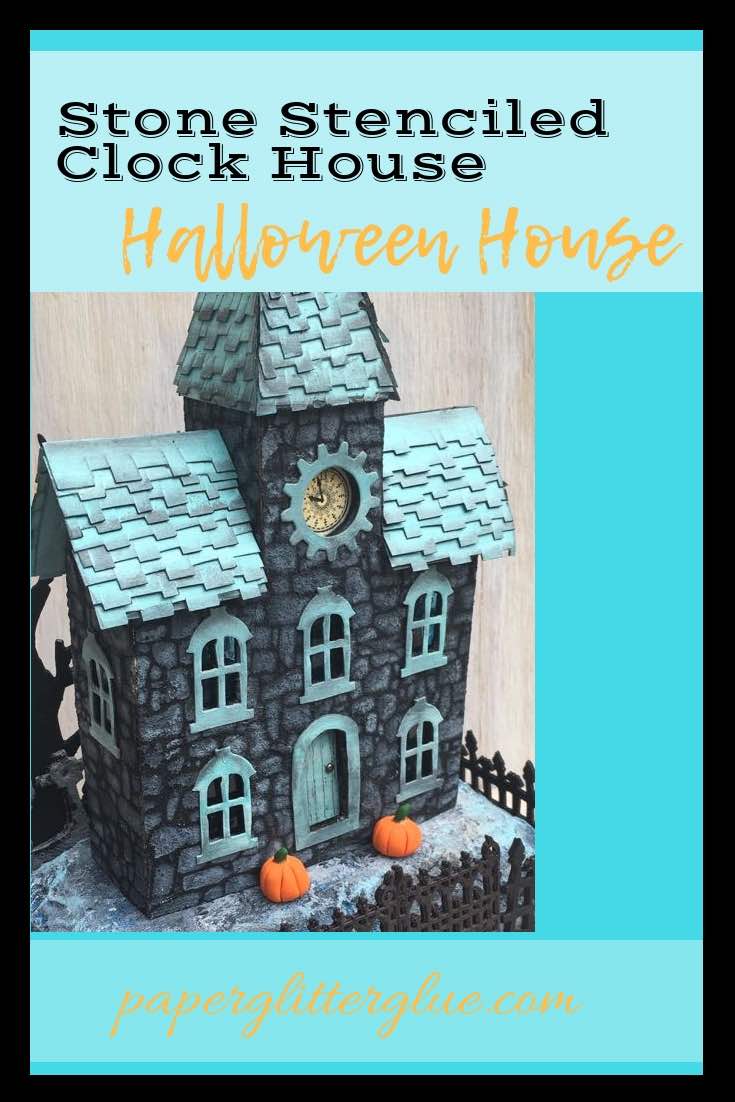
Front view of the Stone Stencil Clock house - a Putz house made for Halloween
Here is one of my favorite little cardboard house - the Stone Stenciled Clock House. Well, maybe the top 3 (Abandoned Italianate house and the Stone house with 3 gables, although the Bat Wing houses are right up there as well). I started to make it for the PaperArtsy challenge "Aqua" but I didn't make the deadline. I wanted to do a very different roof - different color at least. You have to balance the roofs and the body of the house. If the house siding is very detailed you need a more muted roof. If the roof is very detailed, then the body of the house needs to be subdued. That's what I think anyway.
Where to find the pattern for the Stone Stenciled Clock House - Cardboard Christmas Forum
When I draw an original pattern for a little house, I always include it in the free Paper Glitter Glue library. But this house is not one of my patterns. Fortunately, you can find the pattern for this house on the Cardboard Christmas forum. I modified the plan to make it 2 inches taller. You can easily do this as well. If you want to see how the original pattern looks like, here is a previous Halloween house made from the same pattern.
This is an ingenious design for a Putz house - really amazing because of the way the tower comes together. I hope you will try out this pattern from the Cardboard Christmas forum.
Another variation on the Stone Stencil Clock House pattern from the same pattern
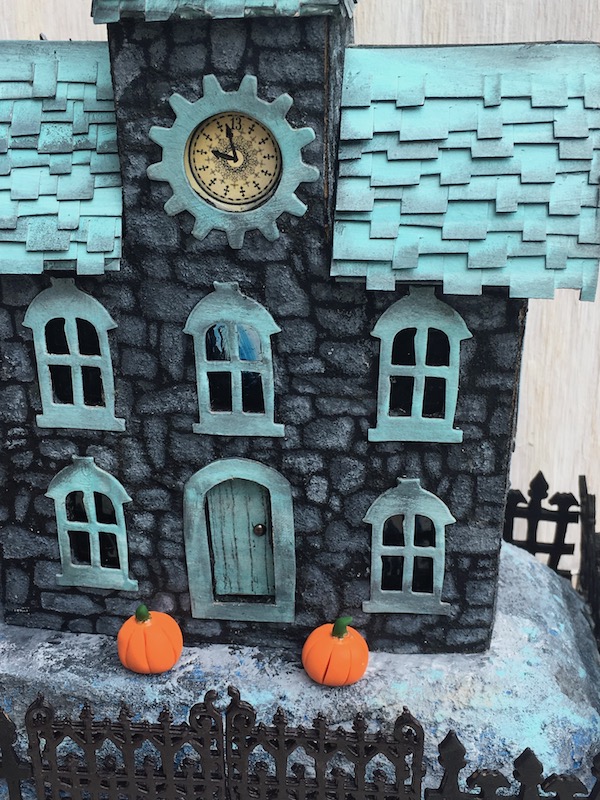
You can see through the window a little. I painted the back side of all the windows with Glossy Accents to make it look like wavy glass. That way you can't see the candle as well. The light makes it look spooky. I used the 13 hour clock that I found online.
This post contains some affiliate links for your convenience. Click here to read my full disclosure policy.
Base Layer for the Stone Stenciled Clock House
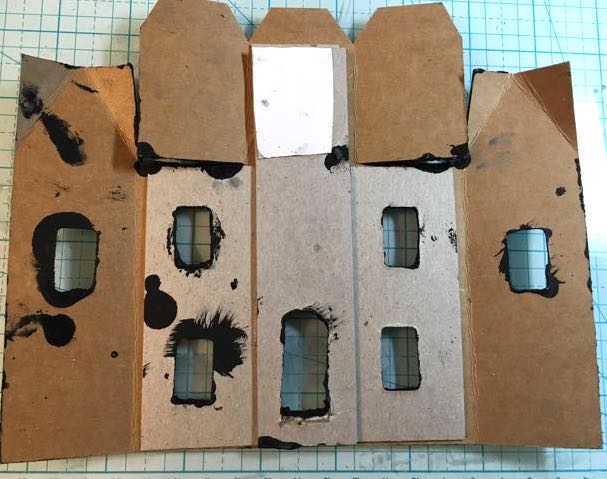
I made the siding by painting the house with a thick layer of heavily sanded black gesso - just using the sand you buy in a jar at the craft store. It gives a lovely, irregular bumpy texture. It's perfect for stone or a rough plaster.
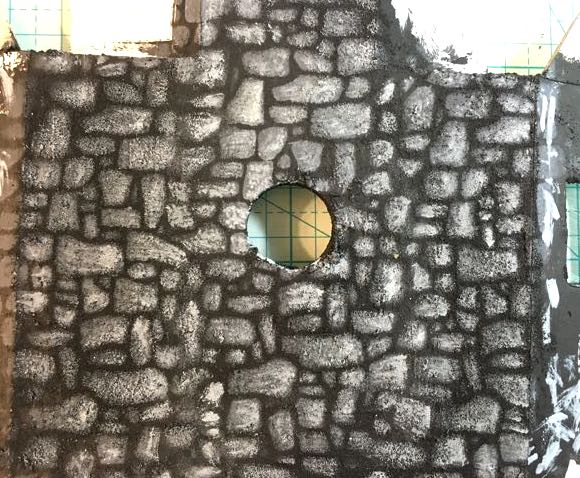
Below you can see the back piece of the Stone Stencil Clock House that has been stenciled with stone. I added another layer or two of color with a little bit of blue in it.
Reinforce the back of the cardboard to make it more sturdy
Here's how the back of the house looks when I glued an extra layer of cardboard on it. The purpose of this extra layer is to make the house more sturdy. The white paper at the top is the back of the clock.
To make windows, I stain leftover plastic packaging with alcohol ink and glue them in place with Glossy Accents.
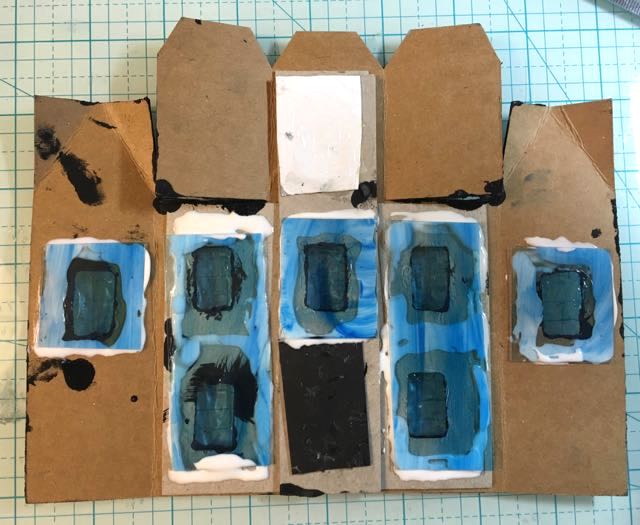
Mini-Stone Stencil from Tim Holtz for the stones
Then I used the mini-stone stencil from Tim Holtz and Stampers Anonymous and Iced Spruce Distress Oxide ink for the base of the stone. To give more dimension to each stone I painted over each of them with Hickory Smoke, Pumice Stone and/or Picket Fence paint. The stones are subtle, but I love them. At first I was unhappy with my choice of windows (window frames from the Village Manor) because I thought they covered up too much of the stone, but now I think it's perfect for this house.
I didn't use texture paste for these stones because sometimes it is hard to separate the space between the seams of the stencil. This stencil is smaller than the front and back of the house. I was able to work around it with the Distress Oxide inks, but it's somewhat more difficult with texture paste. I continued to experiment and you can see how it worked on the Irish Stone Cottage.

Back of the Stone Stenciled Clock House - Graveyard and Tree
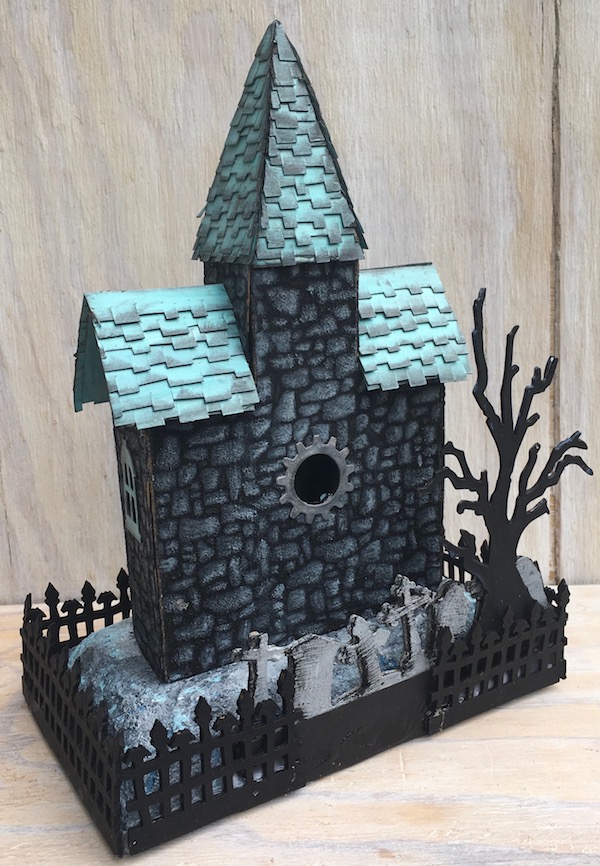
The graveyard doesn't really show up on the front. It is there just to add a little interesting detail in front of the tree. The tree is, of course, my favorite die cut tree - the Branch Tree from Tim Holtz and Sizzix. I think it is retired, but you can still find it online.

Gothic Gate from Tim Holtz and Spooky Bat Wing Fence from La La Land Crafts
The gate in the front is the Tim Holtz Gothic Gate. I cut it out of heavy cardstock and glued multiple layers together. I also cut off the posts on each side because they are too tall and I cut the gate in the middle to look like it could open - didn't really need to do that. It would be more sturdy without doing that. I put my standard 2 pumpkins out front. The hilly base is angled such that this was the only place for the pumpkins.
 I am going to share this one with the PaperArtsy challenge "Dark to Light" because I think the stones definitely work as dark to light. Also the entire house is outlined in black with the fencing.
Thank you for reading. I do love comments.
Lucy
GG
I love this! The colours, the finishing details - everything is perfect. It's brilliant 🙂 Thank you for sharing.
Lucy
Thank you. I am so glad you like it.
Michele Burk
Your choice of colors is perfect. Love all the details.
Elaine Lawson
I applaud your amazing talents and your patience! I'll just sit and gaze on this one!
Elaine Lawson
Lucy
Thank you, Elaine. I'm glad you like it.
Lucy
Thank you, Jennifer for your kind comments. This remains one of my very favorite houses.
Jennifer
I just love your creation! This is really something. Love the stones and the colors.
Becky J-P
Hi from Northumberland! Oh my gosh, I'm so excited to find this blog! I just got the Tim Holtz village dies and I've become kind of obsessed with house making now. I absolutely love this color combo-it really captures that weird shade of twilight when the moon is out and bright. I'll be following for sure now that I've found you!
Sue
Wow Lucy this is amazing, those colours are fabulous together xx
kaybee
Think this must be my favourite house too! I love all the detail and the colour palette. When can I move in!
Laney
Hi Lucy! This house is definitely one of my favorites, too. The stonework is gorgeous. I am always amazed at your skill in achieving these types of effects. Very realistic looking. I love the color of the roof/windows. It's the perfect shade of blue/aqua and it looks so good with your stonework. I really love this fence - so perfect for a Halloween house - and I love how it goes around the outside of the base. And speaking of the base - another fantastic paint job! I don't know if it was your intention but to me it almost looks like this house is sitting on top of a rock somewhere. Beautiful and spooky. 😉
Hazel Agnew
Wonderful.
Corrie Herriman
Gorgeous !
Ldybg93
Wow, I just love the stonework - gonna have to give that a try! The color combo is great too. Lucky person who gets this one!!!
Trish
Lovely house, i love the pumpkins!
laury55
Love your project, it really looks fantastic and there are so many details to look at