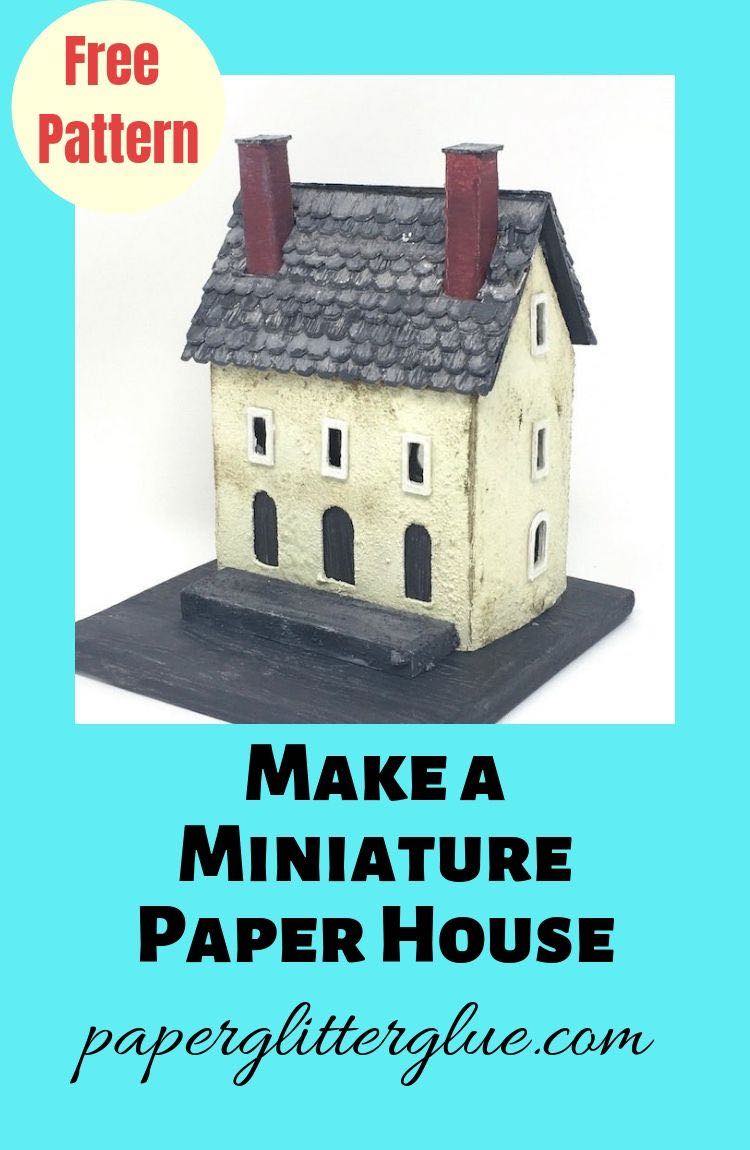
Here's how to make the Miniature Plaster House
One of my readers asked me about making a little house for his railroad train set-up. The photo he shared with me is a plaster house with lots of doors and windows that looked kind of industrial. I took the challenge and here are the 3 versions of the Miniature Plaster House with 3 different textural finishes.
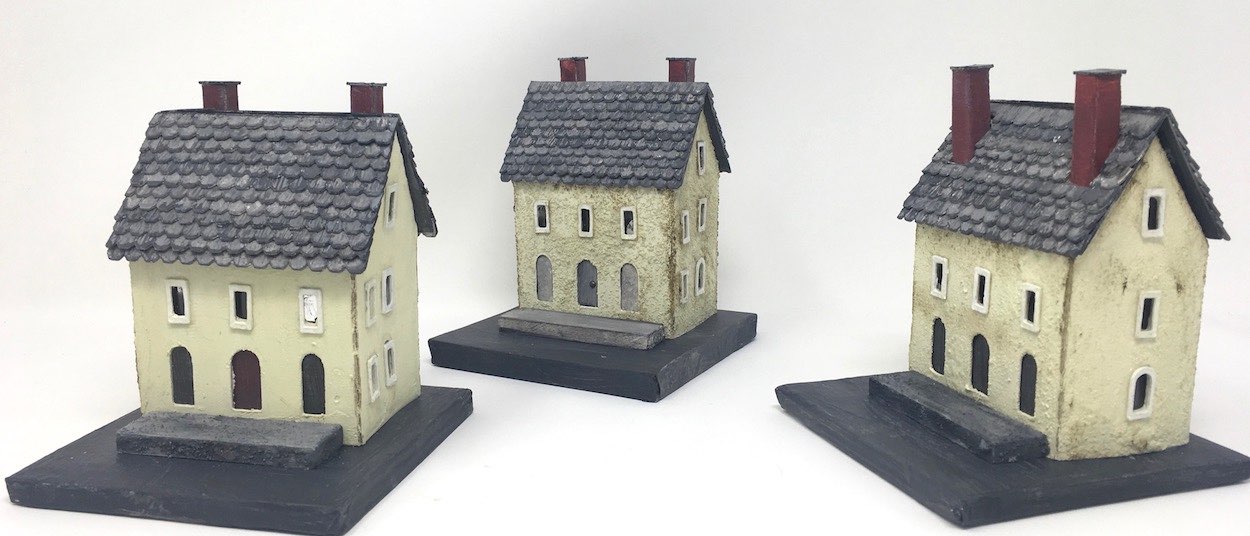
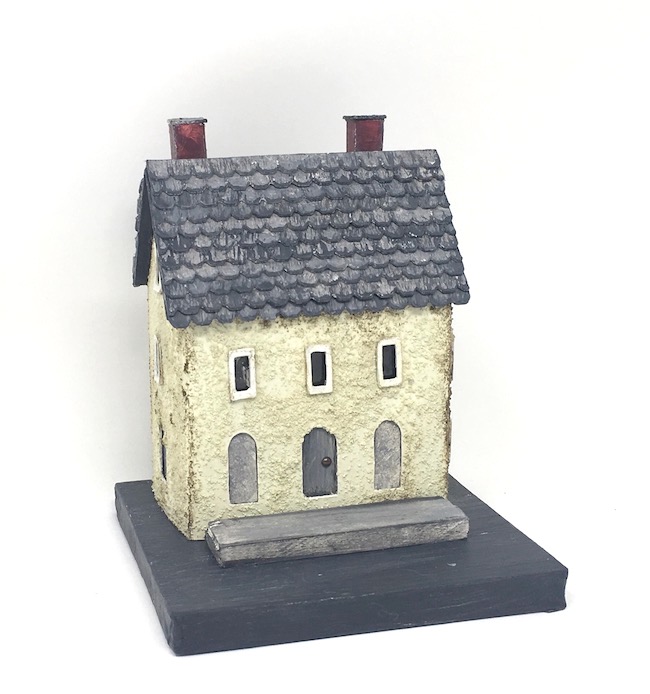
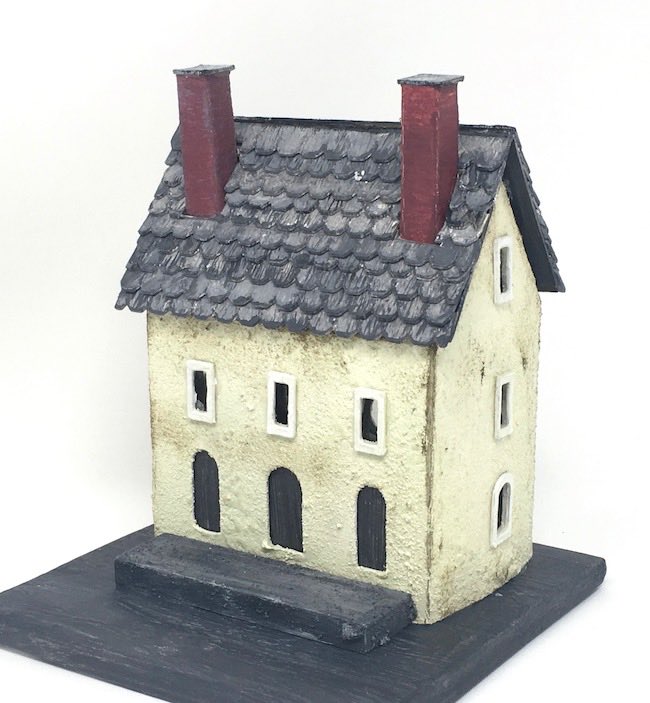
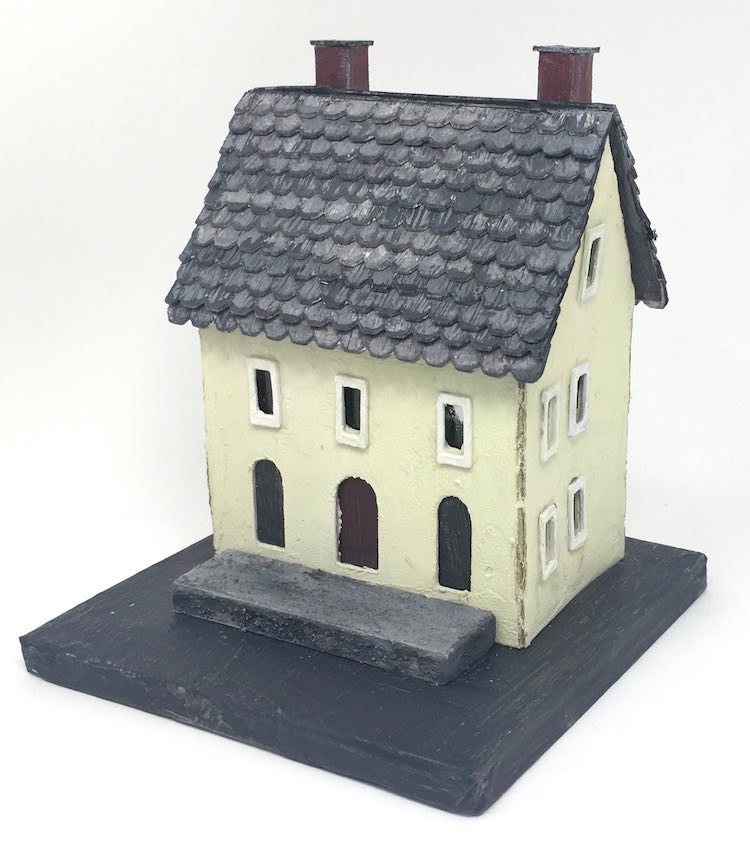
The miniature plaster house is smaller than a lot of my houses because it is designed for an N-scale railroad set which is smaller than the more typical HO scale train sets. The size is 3 inches across the front and 2 inches on each side. But it is made just like I make all my putz houses.
In addition, there are also two short videos with the steps to make the plaster surface and a few tips on making the shingles on the slate roof.
This post contains some affiliate links for your convenience. Click here to read my full disclosure policy.
Material to Make this Miniature Plaster House
- Cardboard
- Pattern Template - Design No. 57 - from the Paper Glitter Glue Library
- Method to cut out the pattern - craft knife, metal-edged ruler, or automatic cutting machine (Cricut, Silhouette, or ScanNCut)
- Glue - here's the best glue for this project
- Gesso
- Texture options:
- Fine craft sand or fine stone granules
- Texture paste
- Grit paste
- Paints
- Corrugated cardboard for base
- Brown wrapping paper to cover the base
Related Links to help make this little house:
- Amsterdam Canal Houses - textured houses, also good construction photos
- Stone Texture - How to Add to Your Paper Crafts - another variation on texture for your house
- 3-D Paper Doghouse Pattern - simple shingles
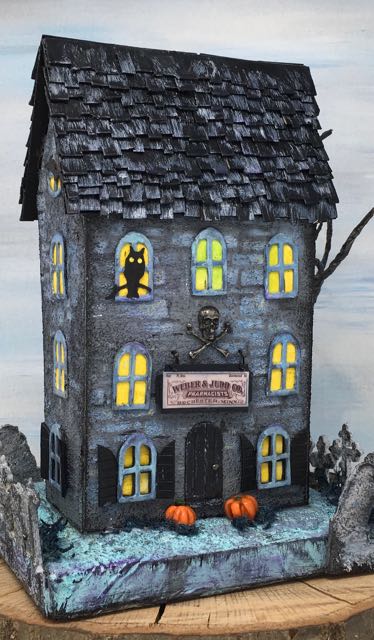
- Weber and Judd Apothecary Halloween house - rough cut shingles
- Irish Cottage - hand cut wooden shakes
- Faded Mansion - how to make a cardboard base
- Make Shingled Roof for a Miniature Railroad House - You Tube video link (also below)
- Make Plaster Surface for Your Miniature House - You Tube video link (also below)
Summary of Steps to Make A Miniature house with Plaster texture
- Download the pattern from the Paper Glitter Glue library - Design No. 57
- Cut out the little house pattern in cardboard
- Prime the house, roof, shingles, chimneys, doors and windows with gesso
- Apply the texture option of your choice to the body of the house
- Paint with Antique Linen paint or your desired color
- Glue acetate inside house for windows, if desired
- Glue on windows and doors
- Assemble the house
- Glue the slate shingles on the miniature plaster house before adhering the roof
- Adhere the roof to the little house
- Make a front step and cardboard base for the house
- Finally glue the house to the base
So let's get started making this tiny house perfect for railway setting.
First download the pattern from the Paper Glitter Glue library
Get my free PDF and SVG cut files at the Paper Glitter Glue Library. If you need the password for the Paper Glitter Glue library, just subscribe to my newsletter so you get notified whenever I have a new pattern or craft project for you. You will immediately get the password to the library where all my free patterns and tutorials are located.
Now cut out the little house pattern template in cardboard
Cut out the pattern by hand or use your automatic cutting machine. I have been using my Cricut Explore Air 2 to cut out my house templates which makes my crafting so much easier. But this house pattern in particular is really easy to cut by hand.
If you use a Cricut or a Silhouette be sure to mark the score lines before you cut the cardboard.
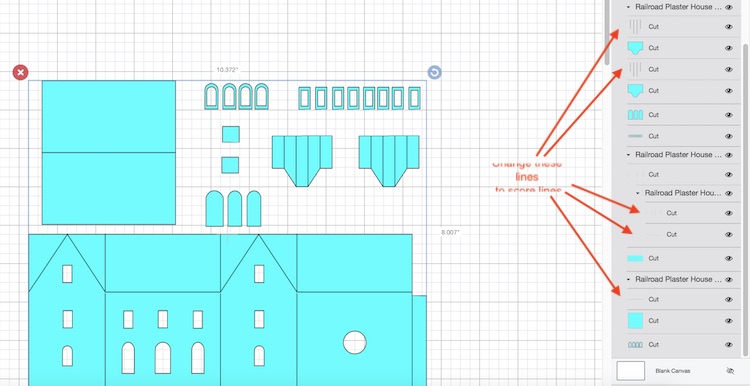
So the only lines you DON'T mark as score lines are the three lines that cut the roof flaps. Those three lines are supposed to be cut.

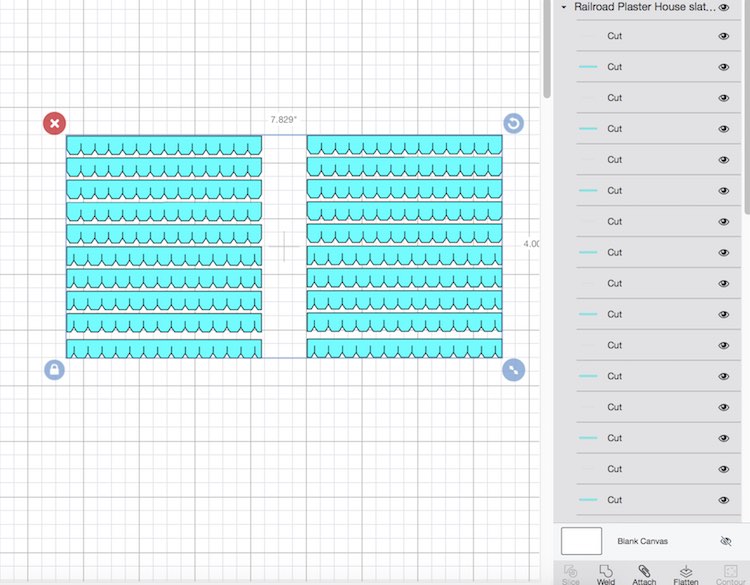
And here is the way the roof shingles pieces look in Cricut Design Space. For each of the little houses I used between 20-22 strips for each roof. You don't have to change anything for these pieces - all the lines are cut lines.
Next prime the house pieces with gesso
Prime each cardboard piece for your plaster house with gesso. Gesso really helps the paint and texture paste adhere better.
Apply the plaster texture surface to the house
I've made a video showing several different options to give a plaster-like finish to your miniature house.
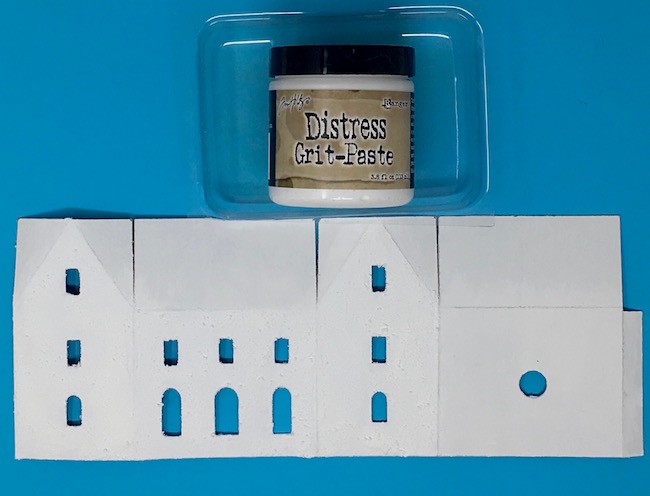
The two cardboard cutouts below are the regular texture paste version and the grit paste version.

Here are the options that I tried in order of most gritty or rough texture to the smoothest:
- Fine stone granules mixed with paint
- Fine white craft sand mixed with paint
- Ranger's Tim Holtz Grit Paste
- Ranger's Texture Paste - Opaque Matte
All of these options are shown in the short video.
To make the grittiest - the roughest texture - mix the fine stone granules which you can find at the craft store directly with paint. For this house, I wanted a pretty neutral color so I chose Antique Linen from the Tim Holtz Distress Paints. It looks like an old plaster color perfect for this little house.
Next I mixed fine white craft sand with the same color paint. It is much smoother than the fine stone granules. You can see it in the textured surface video.
After that I made a house with Ranger's Grit Paste - love this stuff. Most often I use it when I am making a stone surface on my paper crafts. It adds an nice gritty textured surface so easily. I just spread it on with my finger for this miniature house. I like this surface very much. Also it distresses so well. That's the random brown paint you see on the house below.
Finally I used Ranger's Texture Paste - Opaque Matte. Truthfully, this is my favorite plaster surface. Up close it looks wonderful. But if you want texture to be seen from a distance, the others are better options. To apply this texture paste, you can use your finger, the back edge of a plastic disposable knife, or a palette knife if you have one.
Now Paint Your Mini Plaster House
You can paint the house now. Even the 2 options using paint mixed with sand need some touch up because when you fold the house to glue it the edges open up a bit and show raw cardboard edges.

Glue plastic acetate inside the windows
For this step I use leftover plastic packaging to cover the inside of the windows. You can stain them with alcohol inks if you want a little color, but I didn't for this series of Putz houses.
Next Glue on the Windows and Doors
On a textured surface, it is easier to glue the windows and doors to the body of the miniature house before you glue the house together. On these houses, I designed the doors to be inset so I glued the doors inside the house, behind the doorway cut out. That's just to give a little more dimension. And really, it is easier this way.

Also this is a good time to glue the chimney into a square shape.
Assemble the House
Now you get to assemble the house. Structurally, it is a very simple house. Just apply glue to the glue tab and adhere it to the other side of the house. For things that really need to stick I always use my favorite glue - Aleene's Fast Grab Tacky Glue. The sides of the house stick together faster and better with this glue.
Glue the Slate Shingles to the Roof Piece (and other Roof Options for your little house)
For this step it is so much easier to adhere all the shingles and the chimney to the roof before you put the roof on the house. I designed the shingles with 2 different strip that stagger the seams between the slate shingles easily. If you want the twin chimneys on top, you do have to do a little fussy cutting. I show you how in the video - Make Shingled Roof for a Miniature Railroad House.
If you are hand cutting the shingles, simplify the design by just cutting straight strips of cardboard at fairly regular intervals and then stagger those strips. I've done a number of houses this way. Here are a few examples of rooftops on my little houses. The Doghouse is probably the simplest if you are going to cut shingles by hand.

Below you can see the rough hand-cut strips for the Weber and Judd Apothecary Halloween House.
Below are the hand-cut wood shingles for the Irish Cottage. That is another good option for this house.
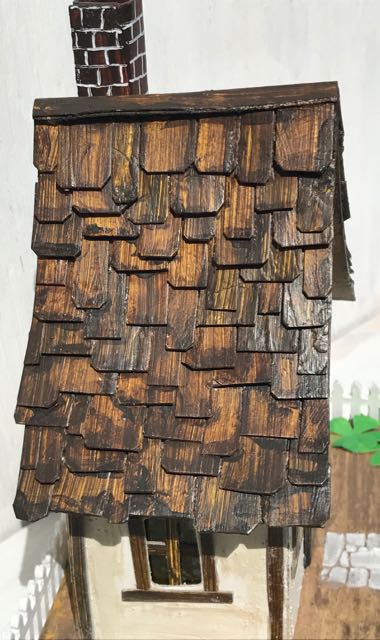
The wooden shakes on the Irish cottage made from cardboard painted with shades of yellow and brown then cut into irregular shapes
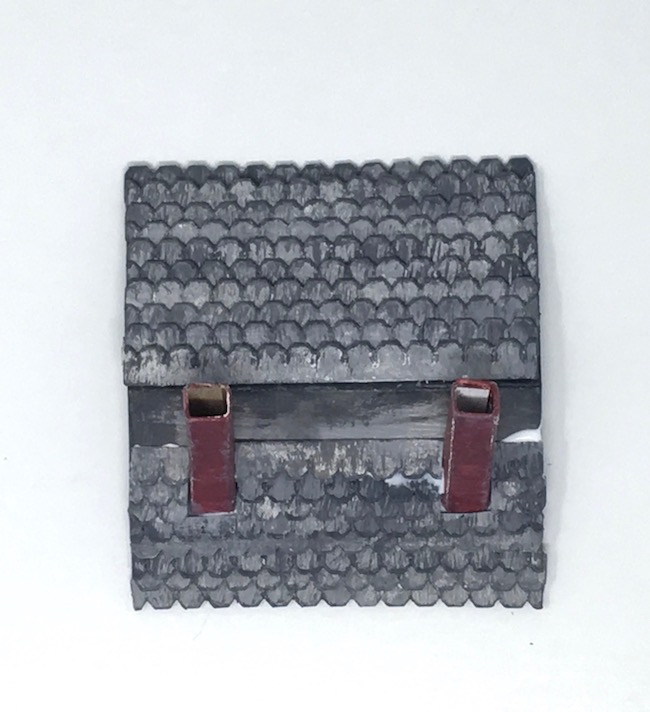
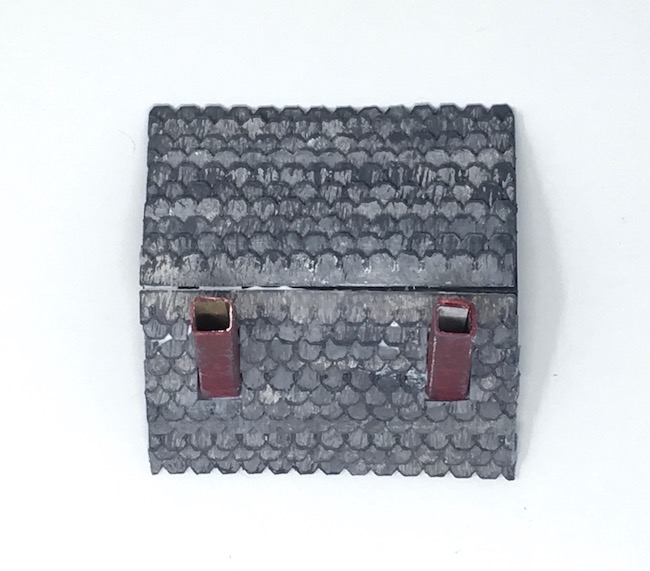
Here is a succession of photos showing how the roof shingles go around the twin chimneys.

Adhere the roof to the little house
Now you can glue the roof to the house once the shingles are dry and firmly adhered to the roof piece. Often I use painter's tape (green Frog Tape) to secure the edges while the glue dries.

For two of the houses, I applied the twin chimneys to the back of the roof. One has the chimneys in the front.
Make the Front Step and Cardboard base for the Mini Plaster Railway House
Because I want this to be a simple house for scenery around a train set, I made a small simple base. That way you can put a lot of houses close together on the railway scene. The base is 4.25" square. And I cut a small piece of balsa wood to act as the front step. In addition I didn't put a light hole in the bottom like I usually do.
More details on making a cardboard base for the little Putz houses are here, though this putz house base is much simpler. It's only 3 layers of corrugated cardboard covered with recycled brown packing paper.

Both the base and step are painted with Hickory Smoke paint distressed with some Black Soot paint mixed with the Hickory Smoke.
Finally Glue the Plaster Railway House to the Cardboard Base
The final step is easy - glue the house to the base. Apply a thick layer of glue to the bottom edges of the house and firmly apply it to the base. Next apply glue to the back and bottom of the step and stick that to the house and the base.
And there you have it - a miniature plaster house that you can use for railway scenery or dress it up for other seasons such as Christmas or Halloween. For the houses I've completed, I plan to decorate one house for Christmas, one house for Halloween and leave one plain. I'll add those photos when they get done.
Do you have any questions, comments? Please join me in my Facebook Group "Paper Houses and Paper Crafts hosted by Paper Glitter Glue" where it is easy to ask questions or you can email me at [email protected]. I am happy to help.
And here is a great version of this house called "A Windy Day" by Winnie from Palm Harbor, Florida. I think she did a great job. I love her trees, the colors, the scattered leaves, and the scarf blowing in the wind because it conveys a windy day beautifully.

And here is Mary's Christmas ornament version of the Miniature Plaster house.

Aren't they great variations on the plaster house?
Lucy
P.S. Be sure to save this little paper craft project your favorite Pinterest board so you can remember where you found it.


Sara Emily Barker
Lucy, well it looks like I'm really late to the party, but better late than never! I love these little houses with the faux plaster. I really like them all for different reasons, but I do appreciate your comparisons with your experiments and am very grateful you shared your experiment results! Those wood shingles on your Irish house are amazing! I bet you are in full Halloween house tilt right now! Sending hugs! Sara Emily
Lisa Hoel
I love your little house and the comparisons of the different texturing medias!
Lucy
Thank you, Lisa. You know it's fun experimenting with different craft materials, isn't it?