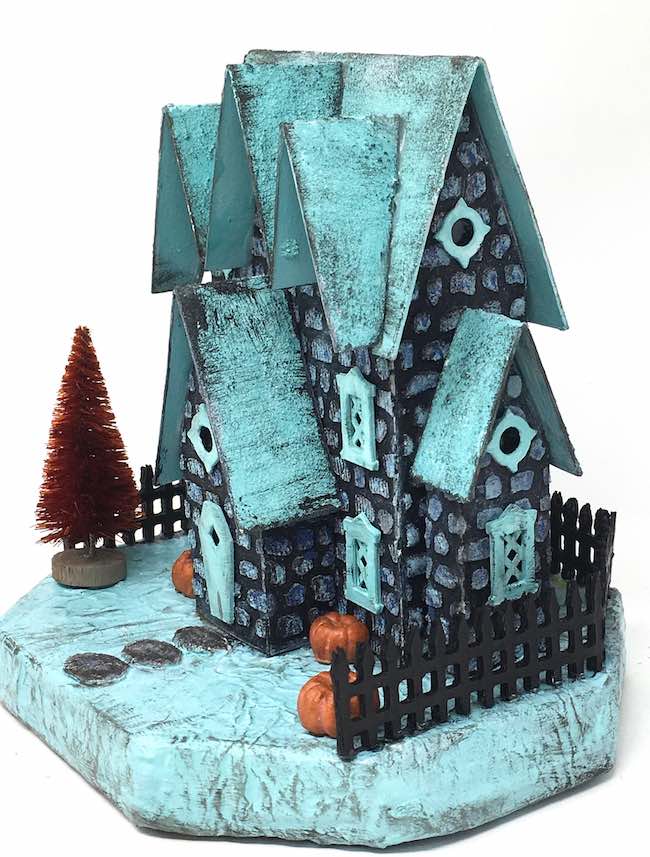
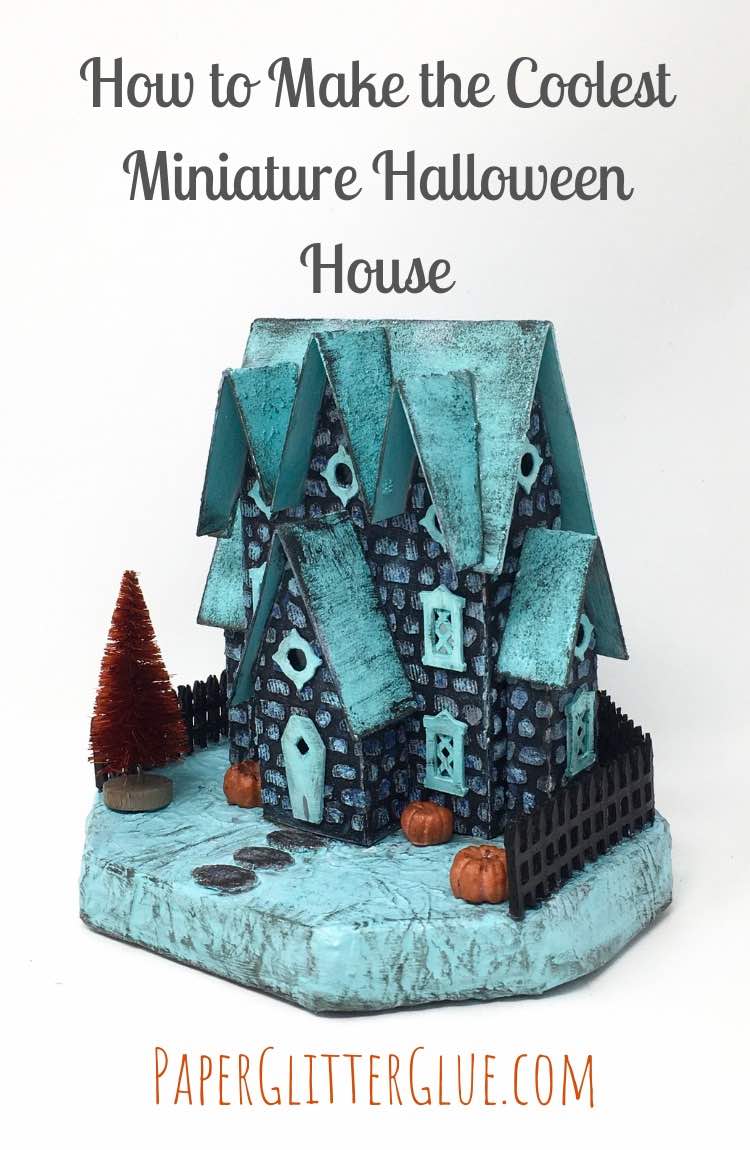
Let's get started making our Halloween paper crafts starting with the Stone House with Three Gables.
And here is the plaster version.
I am so excited because this is my favorite time of year for crafting.
Two years ago I made a little Halloween paper house called the Stone House with Three Gables, but I didn't know how to make patterns at time. But now I do. Finally, here is the pattern to make the Stone House with Three Gables. I learned to make these patterns from JenniferMaker's A CUT ABOVE course.
In addition, each year I make a house for my local Habitat for Humanity to auction at their fundraiser. This is the 2020 Habitat house for this year.
Here are the materials to make the Stone House with Three Gables.
This post contains some affiliate links for your convenience. Click here to read my full disclosure policy.
Materials to Make the Stone House with Three Gables
- Cardboard - this is the kind I use for the body of the house
- Corrugated cardboard
- Card stock
- Stencil material - I used Yupo synthetic paper, but you can also use real true stencil material
- OR this stone stencil
- Glue - Aleene's Fast Grab Tacky Glue is my favorite to glue the house together
- Ranger Grit Paste
- Gesso primer - black
- Mod Podge
- Tumbled Glass Distress Paint
- Chipped Sapphire Distress Paint
- Black Soot Distress Paint
- Tim Holtz Halloween Mini Pumpkins
- Pattern for the Stone House with Three Gables - Design No. 93 - from the Paper Glitter Glue Library
- A way to cut out the pattern - I use a Cricut electronic cutting machine
Steps to Make the Stone House with Three Gables
- Get the pattern for the Stone House - Design No. 93
- Cut out the pieces for the miniature house including the stencil
- Stencil the stone pattern on the cardboard, optional or below
- Or cover with grit paste for a rough plaster surface
- After the grit paste has dried, prime with black gesso primer
- Paint the stones on the house or paint the surface of the house
- Optional - glue window material to the back of the house
- Paint the roof pieces
- Glue the house together along the side glue tab
- Next, glue the main roof piece on
- Let the main roof piece get dry throughly before you glue the gable pieces on
- Glue the front and side extensions to the house
- Adhere the windows and doors to the house
- Make the cardboard base
- Glue the house to the base
- Decorate the base to finish the house
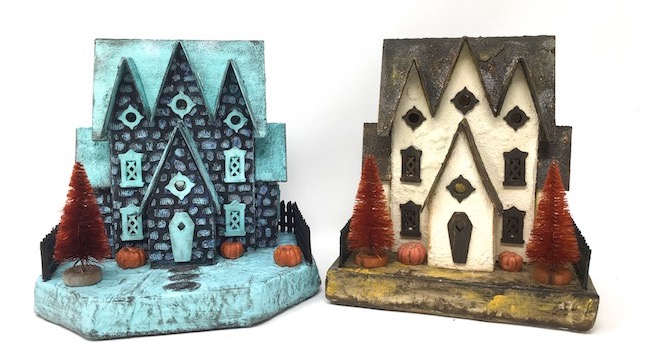
Here are two main variations I've made of the Stone House with Three Gables. Which version do you like better?
Related Links to the Stone House with Three Gables
- Here's how to make a Twisted Tree for landscaping your little house.
- More details on making a stone surface texture on your paper crafts.
- How to make a base for your little cardboard house.
- And finally, read about making a Plaster surface on your project.
Get the pattern to the Stone House with Three Gables
So here is how to get the free pattern for the Stone House. Simply go to the Paper Glitter Glue library and type in the password to get the pattern. The patterns are listed chronologically. So locate the Stone House pattern in the September 2020 section of the library.
And how do you get the password to the library? Just subscribe to the Paper Glitter Glue newsletter with the form below and you get the password immediately.
The free pattern is available in 3 formats - SVG, DXF, and as printable PDF files whichever one is most convenient for you.
Cut out the Miniature House Pattern Pieces including the Stone Stencil
This little house pattern has the following pieces:
- One main house section
- 7 roof pieces:
- Main roof
- 3 Front gables along the roofline
- 1 Front extension roof
- 2 Side extension roofs
- Front extension section
- 2 Side extensions
- Chimney - optional
- 8 round windows
- 6 rectangular windows
- 1 Coffin door
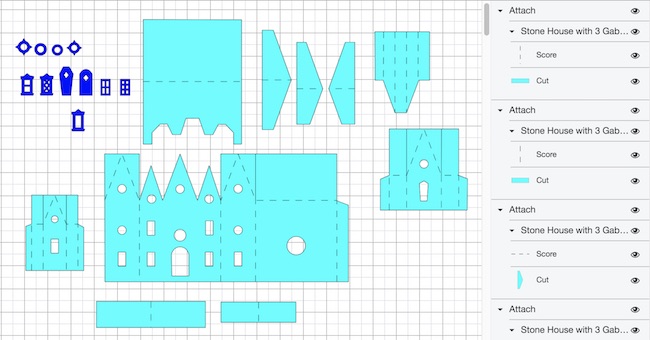
Since I use a Cricut electronic cutting machine to make my little houses, here's how it looks in Cricut Design Space. You can see the score lines noted below, but they are also easily seen on the PDF files.
See the score lines on the main house piece.
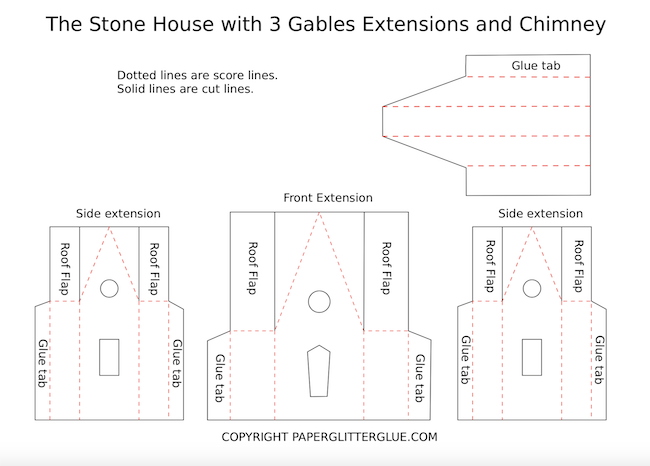
And here are the score lines on the chimney and the extension pieces show on the PDF pattern so you can see them clearly.
Next, here are the pieces for the roof.
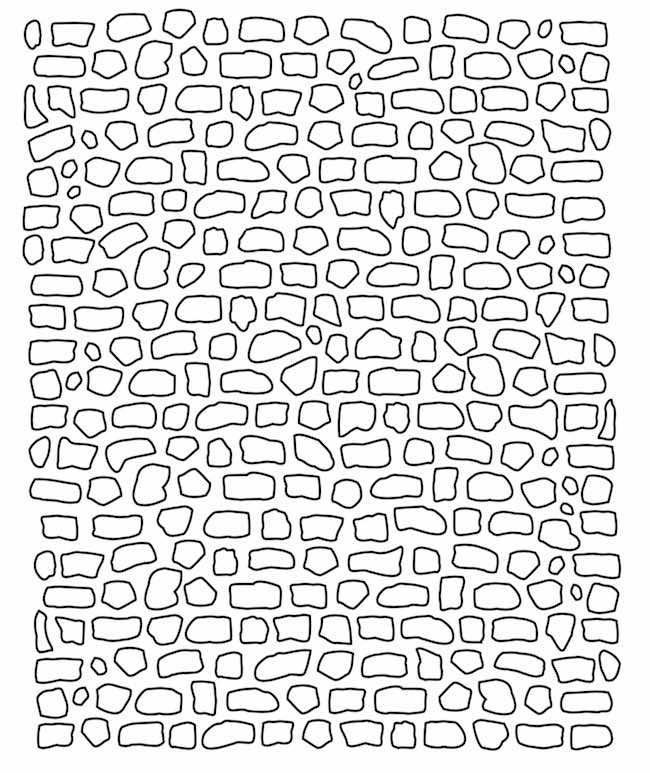
In addition, there is an SVG file to make a Stone stencil.
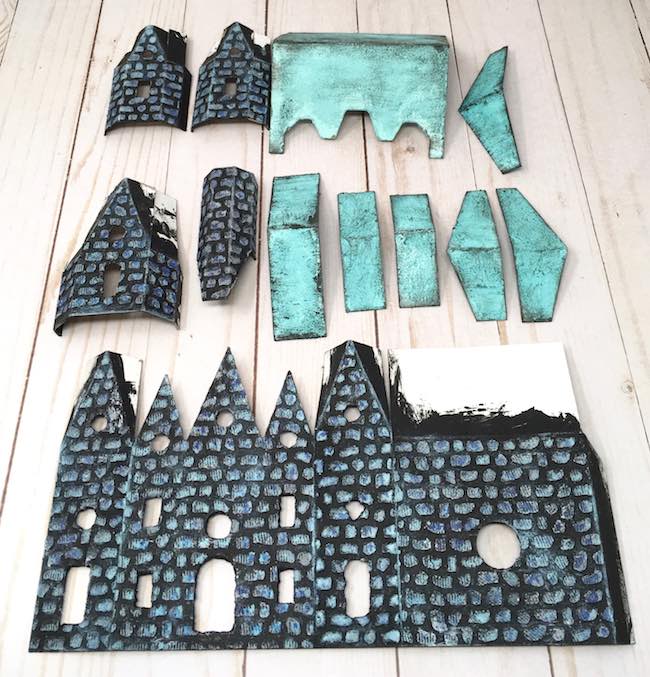
And finally, here are the cut out pieces for the house.
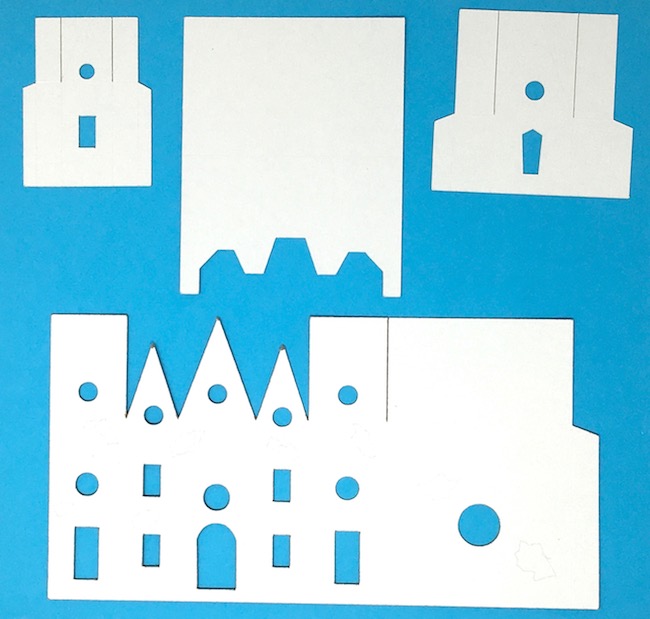
These are the main structural pieces for the Habitat Halloween house this year - the Stone House with Three Gables.
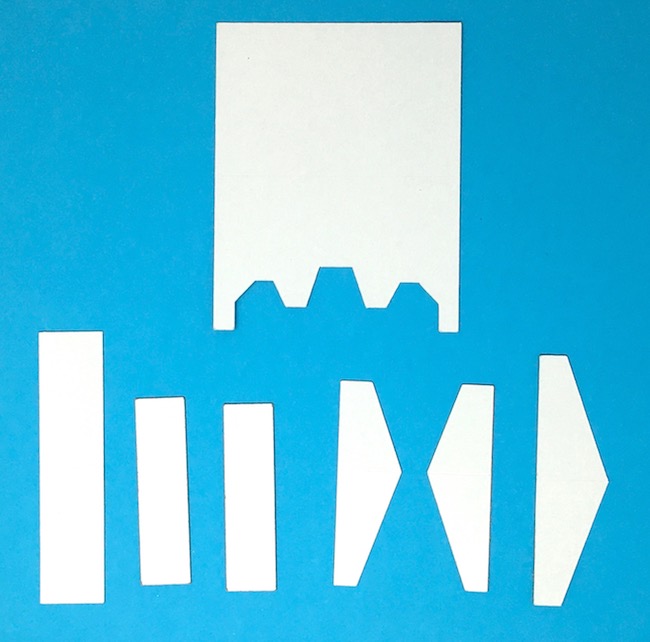
The 7 roof pieces for the miniature Halloween house
Stencil the stone on the main house structure (optional)
If you want to stencil the surface of your little house, do it now because you can't do it once the house is assembled. Here's my best tutorial on making a stone surface on paper crafts. For that project, I used Stampers Anonymous Mini Layering Stencil #28 . I love that stencil. So if you don't have a machine to cut out my SVG stencil, that stencil is what I suggest you use.
Generally, I work on one side of the house at a time. In fact, the whole reason I made the stone stencil was to be able to make a stenciled stones on little houses easier. It really simplifies making a stone surface. Just mask off one side at a time. Tape the surface over the area where you want the stones. Then use grit paste through the stencil. Grit paste is the best making stones.
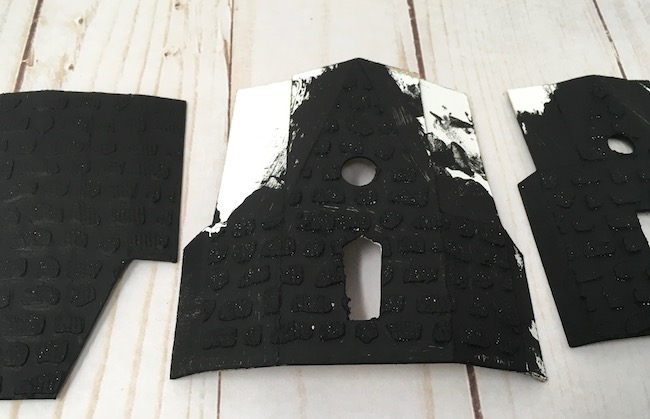
After you stencil each side of the house, here's how the stones look.
Prime with the color you want for the "mortar" between the stones.
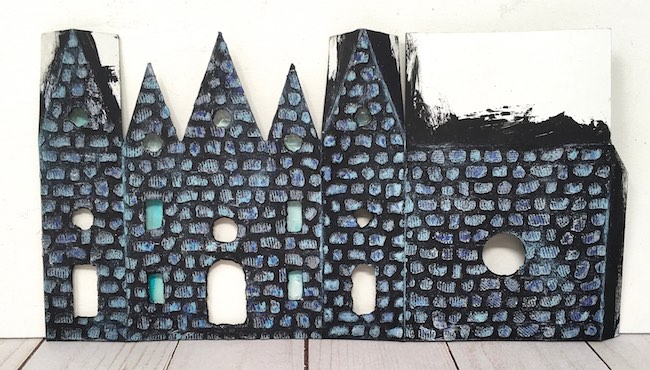
And here are the stones after they've been painted with layers of paint.
Optional - glue window material to the back of the house
Often I glue some tinted plastic behind the house windows to make the light have a different color. You can see the blue tint behind the rectangular windows on the piece above. And on the other house you can see a yellow color to the windows on a different house in a photo below. To tint the plastic material I use alcohol inks like these.
Paint the roof pieces
For this house, I decided on a simple roof finish because the front of the house is so complex. It just makes sense to make a simpler roof when you have so many visual details on the house itself. To make a roof like this one, coat the roof pieces with grit paste for texture. Prime after you coat with grit paste. Then paint with the base color of paint which is Tumbled Glass. Finally grunge it up a little bit with black paint.
Next glue the house together
I love this step because you get the first idea of how the house looks. Apply a thick layer of glue on the glue tab on the side. Then glue the house together supporting the glued surface with binder clips and painter's tape. You know I love these two tools to help me glue my houses together. I didn't take a photo, but I did record a short video that shows you how to glue the house together on a sample house made out a card stock.
Here's the video on making this Halloween House.
Glue the main roof piece in place
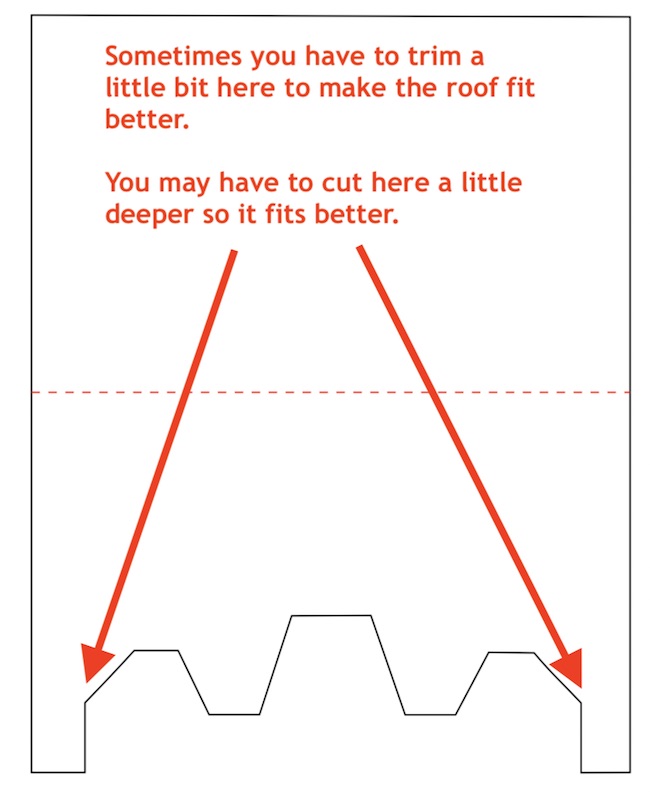
Just adhere the main roof piece in place by applying a bead of glue along each gable edge. Sometimes you have to make tiny adjustments on the how the roof piece fits on the house because the thickness of materials varies. So you may have to cut a little bit on the sides of the roof to make it fit.
Next step, glue the gable roofs in place
Ok, now we glue the front gable pieces in place. Again, painter's tape to rescue because it holds all the little pieces in place while the glue dries.

First glue the middle gable in place.
Next, glue the two side gables in place. Sometimes you have to trim the middle part of side gable to make it fit in the bottom of the V-intersection. Notice that one side of the side gable roof piece is longer - that is so it will be supported by the roof overhang.
Now, glue the three extension pieces in place
First glue the front extension in place by applying a thick bead of glue to the glue tabs on the back of the extension pieces. I like to hold them in place rather than use painter's tape in this instance because I can apply some pressure to make the extension adhere better.
Adhere the windows and the door to the house
You can do this step before or after the house is assembled. It doesn't really matter. But I sure do like this step because you can really see how the house looks.
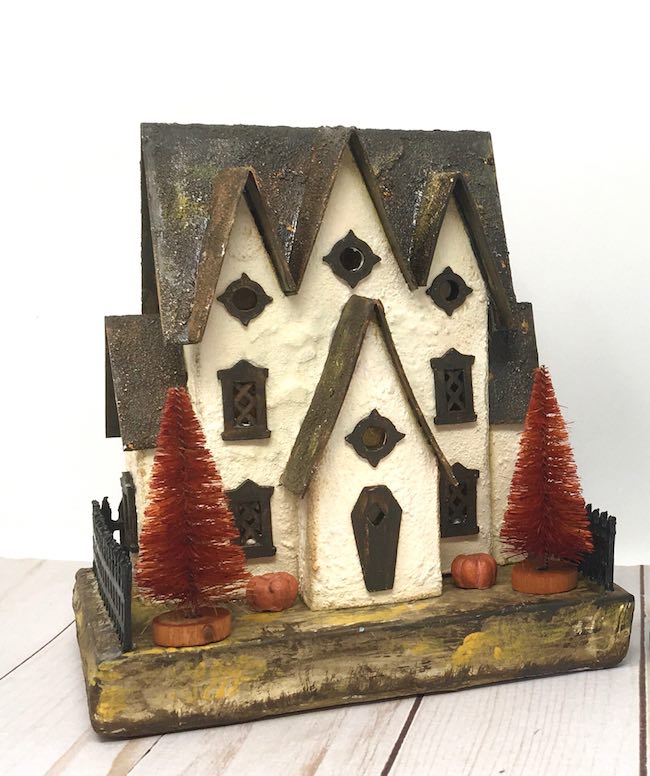
I just want to let you know a couple of tips here. First, there are several options for windows in the file. I like to cut my windows and accessory pieces in cardboard, but several of the window pieces have too many details to cut out in cardboard. So what I did was cut the detailed windows in card stock and framed them with cardboard. You can see that in the view below. I love how the outer window frames the pattern inside.
Also, the others windows and door work well so you can use this pattern for other seasons.
Make the cardboard base
My technique for making a cardboard base is pretty simple. Cut out several layers of corrugated cardboard in the shape you like.Glue corrugated cardboard layers together using hot glue. Then cover with crumpled brown paper and and paint. Truthfully, I have repainted this base about 4 times. I keep trying to make it spooky and overdid it time after time. Here's the final iteration of the base.
And here is one of the failed painted versions on the base. What was I thinking?
For my best tutorial on how to make a cardboard base for a house like this see this post.
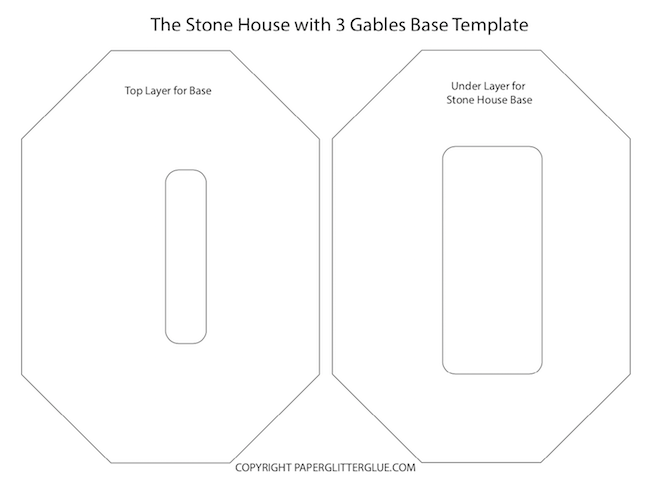
Also I wanted a special base for this particular house, so I have included the pattern in the free file. The top layer has a smaller opening because the Stone House is pretty narrow.
Glue the house to the base
To glue the house to the base, just a apply a thick layer of glue to the bottom of the house and stick to the base. Prime the base, then paint with the final color. Distress it so its perfect for Halloween. Like I said above, I painted the base to this house 4 times trying to get a base with some distressing, but not too much to detract from the house.
Now DECORATE!!
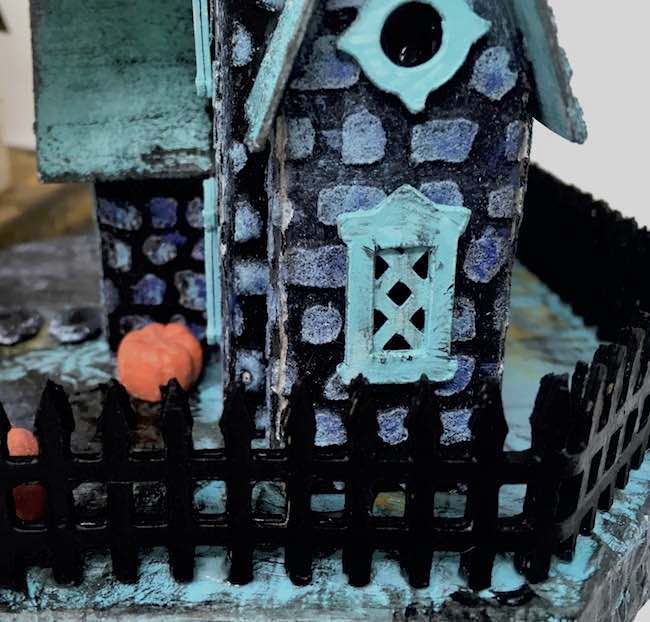
This step is not really my best skill. While I am fairly creative about the houses, I am a bit of a dud in decorating the houses. Part of it is because I don't want landscaping to cover up any details on my house. Part of it is a lack of imagination. So on this house, I only used some Tim Holtz mini-pumpkins to decorate because I really do think the house is enough. Oh, I added fencing. This fence pattern is from my next book about Halloween houses. I will add the link when I get it done in the next week or two.
Eventually, I turned the stone stenciled version into a snow-covered frosty version. What do you think of it?
So let's get going. Creative fun awaits.
Lucy
P.S. Remember to pin to your favorite crafty Pinterest board.









Lesa McCauley
It is so hard to choose between the two houses. They are both SUPER CUTE!!!
If I have to choose... I guess the darker stone version. And now, immediately, I want to say the other... Anyway, think donate both and then make a new Thanksgiving house. Thanks for sharing your vision. Happy Halloween
Lucy
Thank you, Lesa. I appreciate your comments about the little houses. I think I am going to donate both to Habitat.
Lucy
Sylvie Harding
I so love making your little house a love the looks of them thank uou Sylvie harding
Lucy
Thank you so much for your kind words.
Howard Lamey
Lucy...
I like both!...too hard to choose...I’ve downloaded the patterns and am making the three gable house right now...mine will be a Christmas glitter version though...I’ll send you pictures when finished...
Howard
Lucy
I can't wait to see your version. I know it will be lovely.
Lucy
Susan Kimmet
I hope I'm going to be brave enough to try this one, it looks so good! Thank you for the pattern and good instructions.
Lucy
I hope you will try it. It's not really as hard as some of the others. Thank you for your kind words.
Lucy