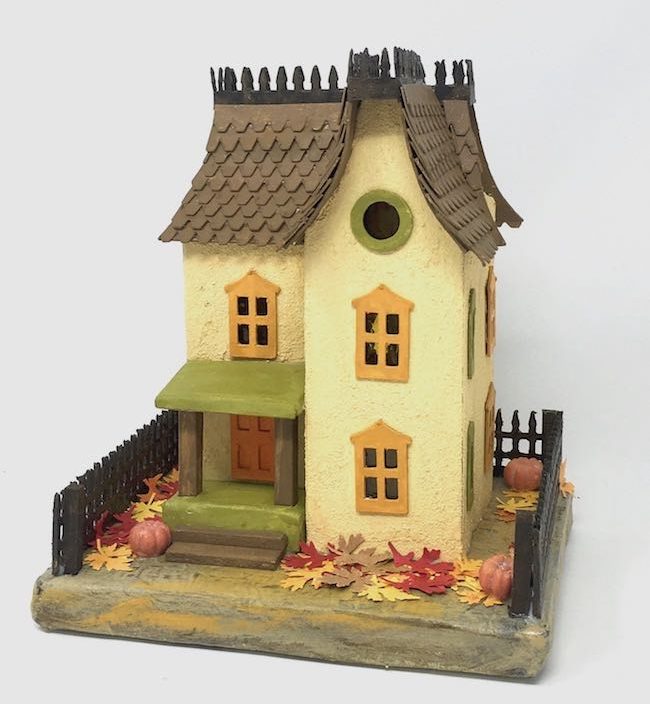
Despite everything, it's still a time for giving thanks. I know when things are difficult it is important to express gratitude because there are always good things to be thankful for. In honor of the season of gratitude, here is my Thanksgiving Putz House based on the Davenport Halloween houses I made in 2018.
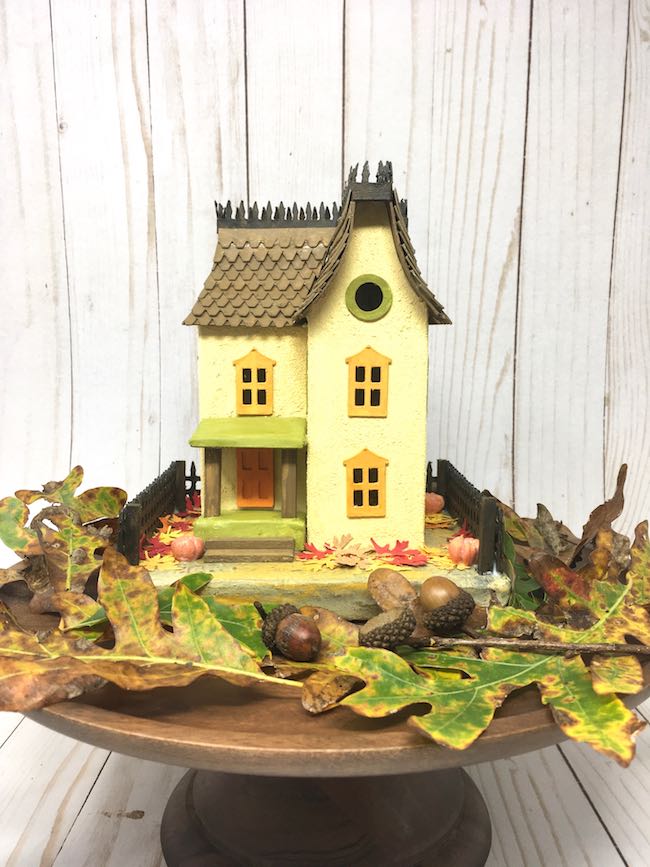
This putz house is challenging with a curved roof and a front extension with the same curved roof design. I've simplified the design as much as possible, but it is still a fairly challenging house. So let's get started.
This post contains some affiliate links for your convenience. Click here to read my full disclosure policy.
Supplies to Make the Thanksgiving Putz House
- Cardboard - this is the kind I use for the body of the house
- Corrugated cardboard
- Card stock
- Glue - Aleene's Fast Grab Tacky Glue is my favorite to glue the structure together
- Ranger Grit Paste Or mix sand with the paint color of your choice
- Gesso primer - white
- Mod Podge
- Scattered Straw Distress Paint
- Wild Honey Distress Paint
- Carved Pumpkin Distress Paint
- Peeled Paint Distress Paint
- Gathered Twigs Distress Paint
- Ground Espresso Distress Paint
- Tim Holtz Halloween Mini Pumpkins
- OR make your own pumpkins with polymer clay
- Leaf Punches like this or this or use the included SVG Leaf Pattern with the files in the library
- Pattern for the Thanksgiving Putz House - Design No. 95 - from the Paper Glitter Glue Library
- A way to cut out the pattern - I use a Cricut electronic cutting machine
Directions to Make the Davenport Thanksgiving House
- Get the pattern for the Thanksgiving Putz House - Design No. 95
- Cut out the cardboard pieces for this Thanksgiving Putz house
- Cover with grit paste for a plaster surface
- After the grit paste has dried, prime with white gesso primer, then paint the house
- OR mix fine sand with your desired paint color for your textured paint
- Optional - glue window material to the back of the house
- Paint the roof piece including the underside of the overhang
- Glue the house together along the side glue tabs on the back piece
- Glue the roof flaps together
- Next, glue the front extension and porch floor in place
- Adhere the windows and door to the house
- Let the front extension dry throughly before you glue the main roof piece in place
- Adhere the roof to the house
- Glue the decorative roof spires to the roof, followed by the shingles
- Add the porch roof and columns
- Make the cardboard base
- Glue your putz house to its base
- Decorate the base to finishing touches the house
Now, let's go into more detail about making the Thanksgiving Putz House.
First, download the pattern for the Thanksgiving Putz House (Design No. 95)
Ok, here is how to get the pattern for the Thanksgiving Putz house. It is listed in the November 2020 files as Design No. 95 in the Paper Glitter Glue library. You need the password to get the files. And how to get the password? Just subscribe to the Paper Glitter Glue newsletter with the form below and you get the password immediately.
The file is listed in two formats - a printable PDF format and a SVG pattern for automatic cutting machine like a Cricut or a Silhouette or a Scan N Cut. If you cut out your patterns by hand, use the PDF file.
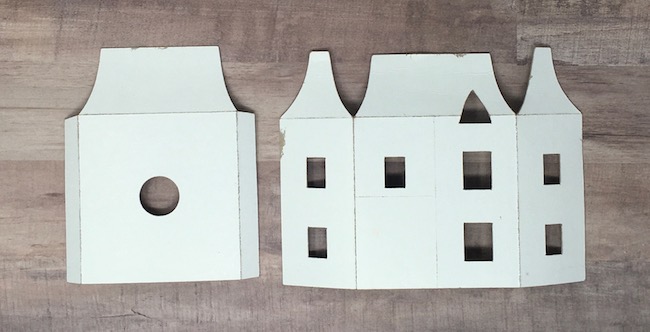
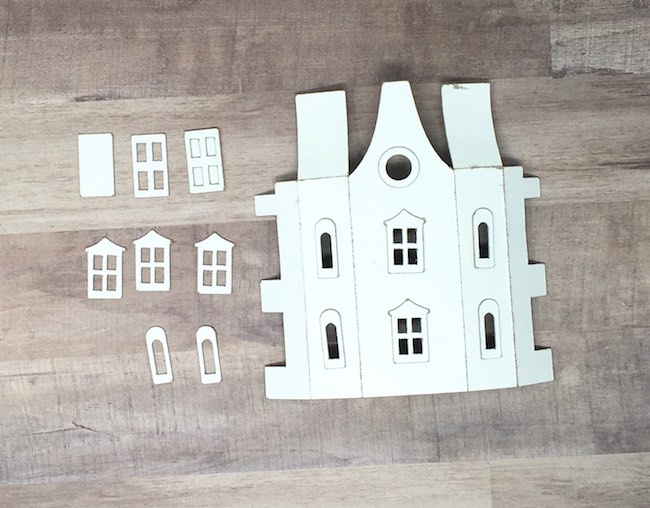
Cut out the cardboard pieces for the Thanksgiving Putz House
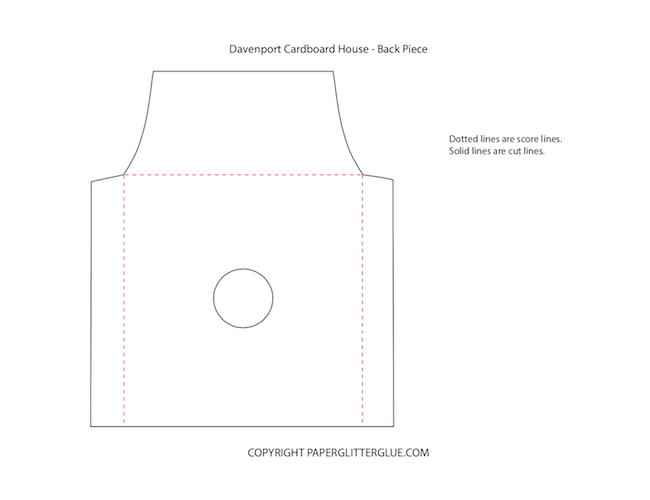
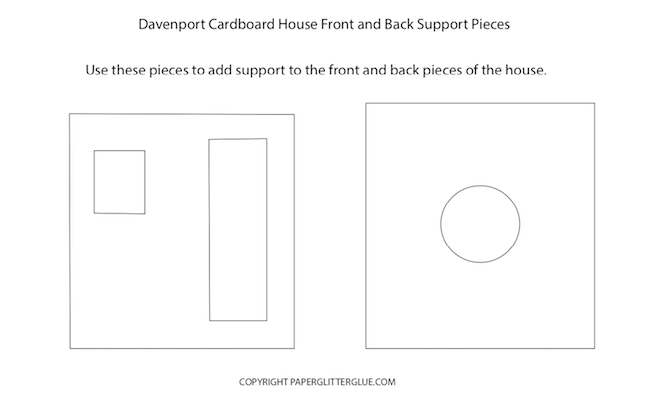
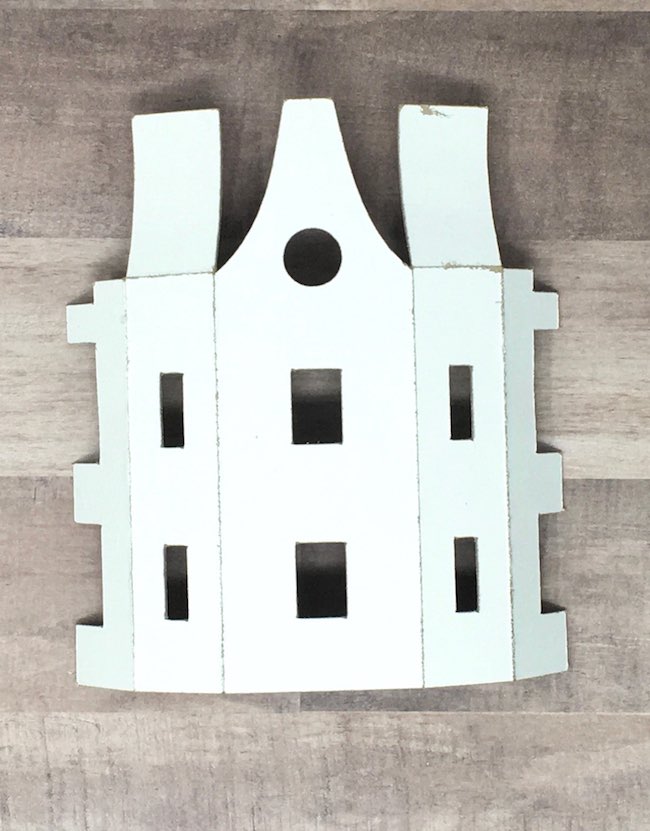
Here's main front piece, followed by the back piece. That forms the main structure of the house. But to reinforce the house I often add an additional piece on the front and back to reinforce the structure.
Please notice the score lines on front of the house. See the horizontal line on the front is below the single window? Actually, it is a score line. It is a line to indicate where the porch roof goes. Also the vertical line in the middle shows where the front extension is to be glued in place.
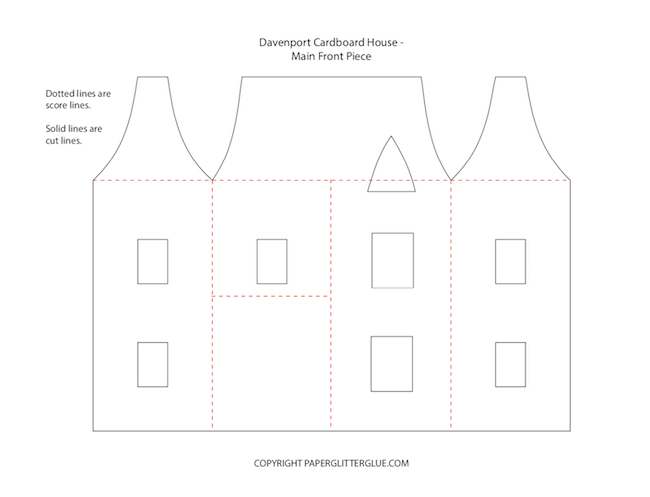
Above, please notice the score lines on front of the house. See the horizontal line on the front is below the single window is not actually a score line. It is a line to indicate where the porch roof goes. Also the vertical line in the middle shows where the front extension is to be glued in place.
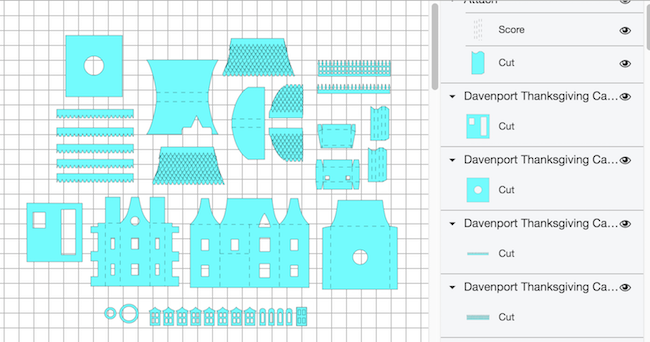
Here is how the pattern looks like in Cricut's Design Space. Recently, I learned to make patterns for Cricut where the score lines are already attached to the appropriate cardboard piece. That makes it much easier to make projects with a Cricut. I am not sure how this process works on other electronic cutting machines.
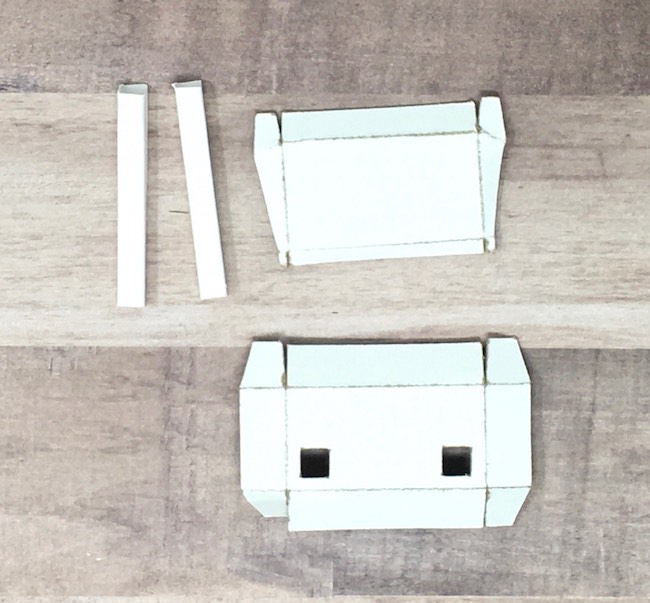
Next, here are the actual pieces for the Thanksgiving Putz house
Below see the front and back pieces with support pieces.
Now, look at the front extension piece below.
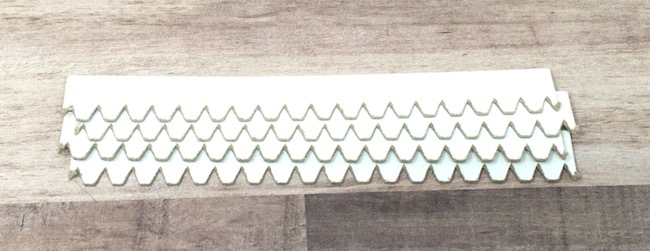
And here are the roof pieces and the shingles. Gently curve the roof pieces to fit the curves of the gables.
The SVG pattern includes shingles as straight shingles and some that are pre-cut to fit the angles of the roof.
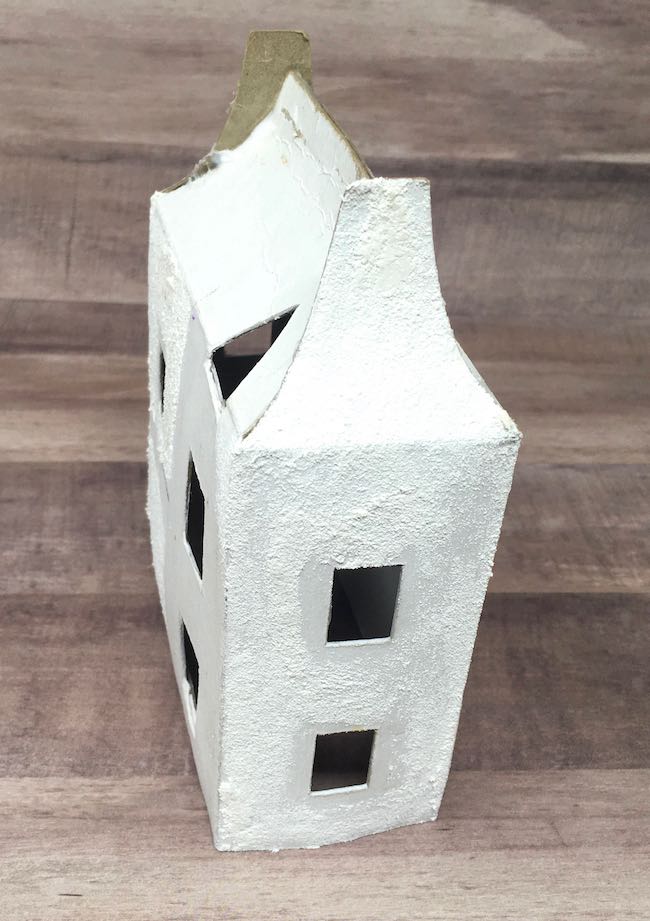
Cover with grit paste for a plaster surface
If you want a plaster surface, cover the house with grit paste, but don't cover the glue tabs with the paste. In addition, you can make a plaster surface by mixing sand with paint. You can read about the plaster finish technique here.
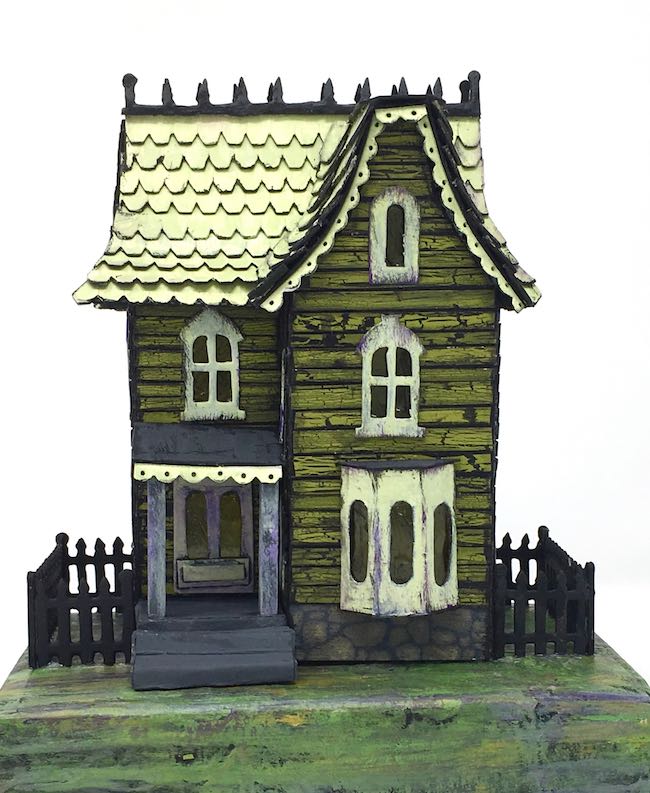
On the previous versions of Davenport Halloween houses, I did three different finishes which you can see below. So you have other options for finishing your house. First is Davenport Green with crackled siding.
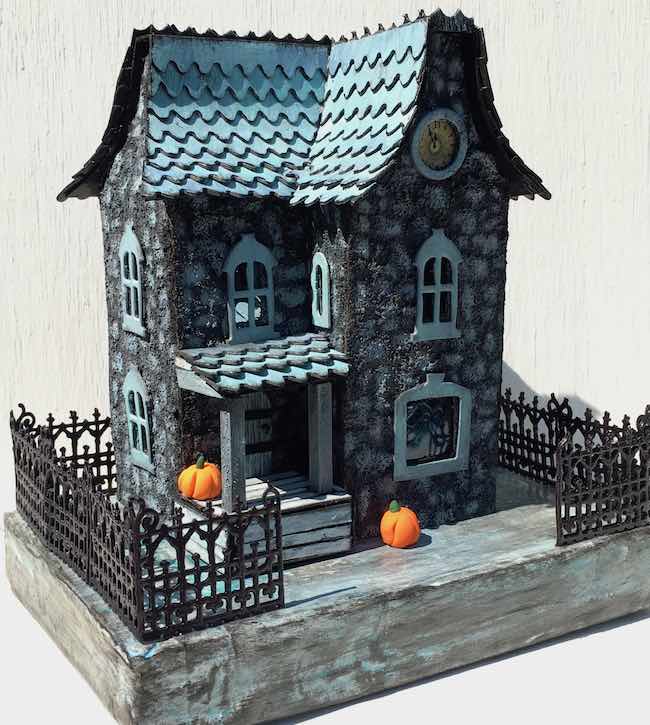
Next, Lady Davenport's house has a stone stenciled surface.
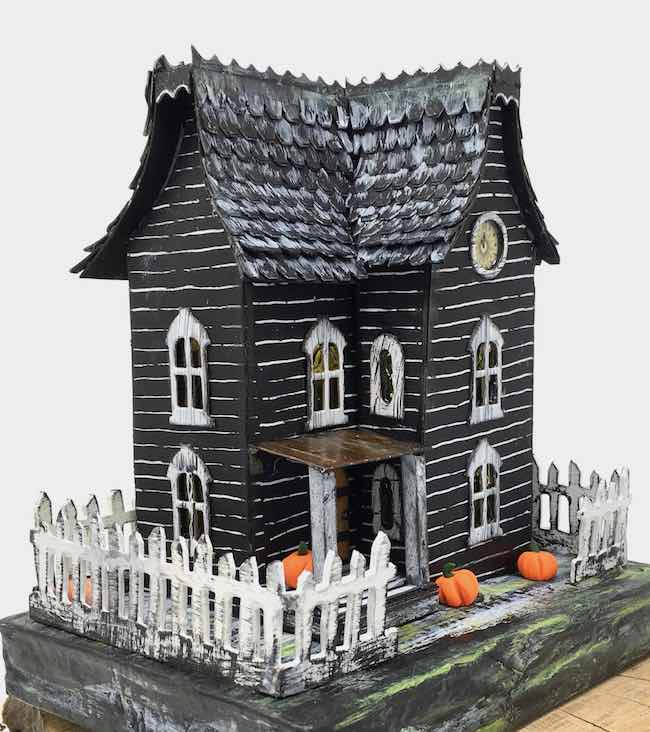
And finally, here is Davenport Hall with painted siding.
So you have lots of options for finishing the surface of your Davenport Thanksgiving Putz house. You can read about them in the links above.
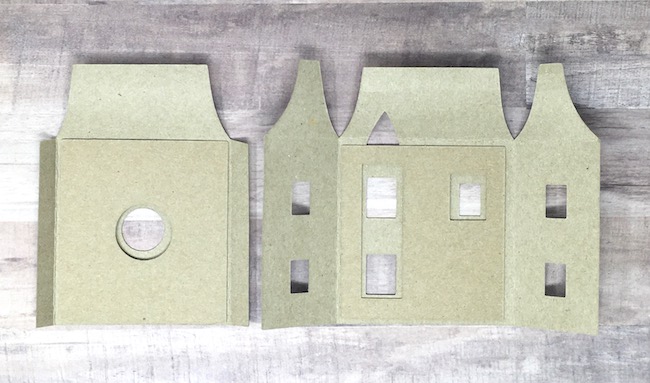
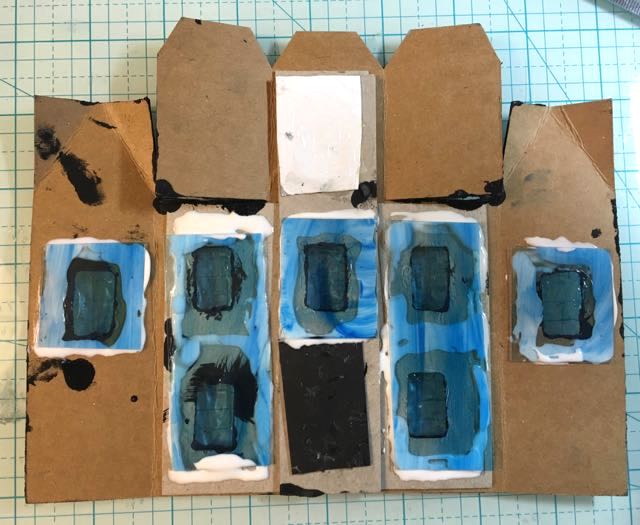
Optional - Glue window material to the back of the house windows
If you want a window surface that looks like glass, you can use recycled plastic glued the back of the windows. It's easier to do this before you glue the house together. You can see the yellow-tinted plastic in the Davenport house above. Also Lady Davenport's house also shows the windows with a blue tint.
And here is an example from a different house, but you get the idea.
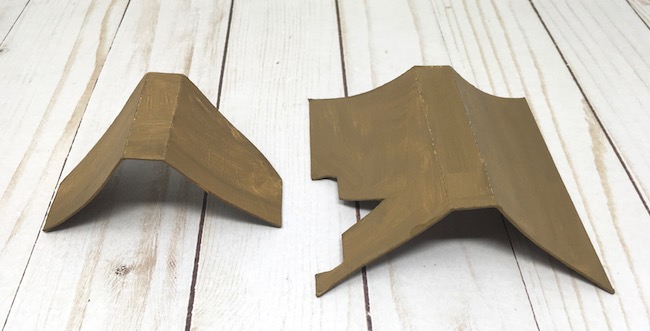
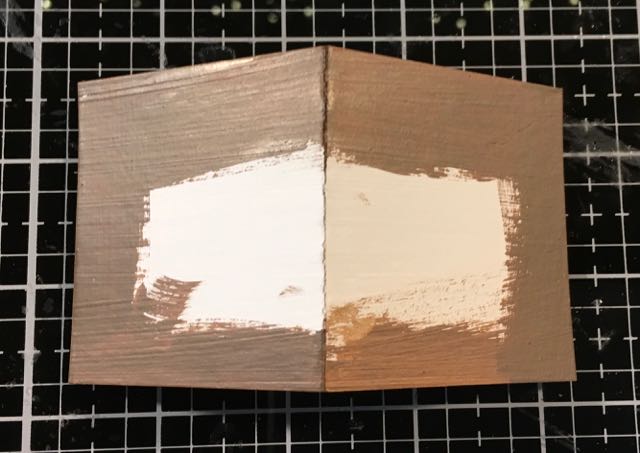
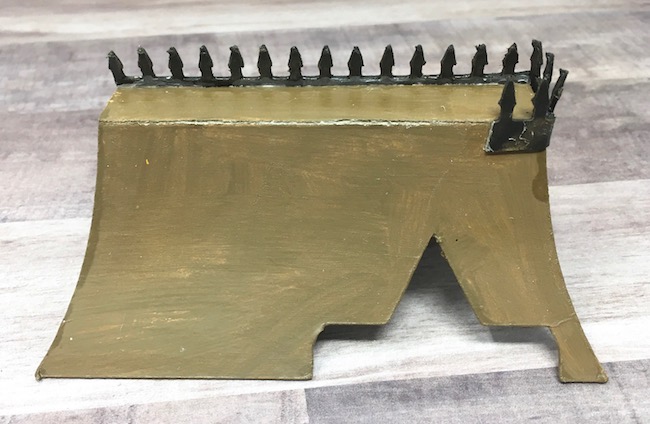
Paint the roof pieces including the underside of the overhang
When you paint the roof, be sure to paint a section of the underside of the roof that is exposed as the overhang. We can't have any raw cardboard. See the example below.
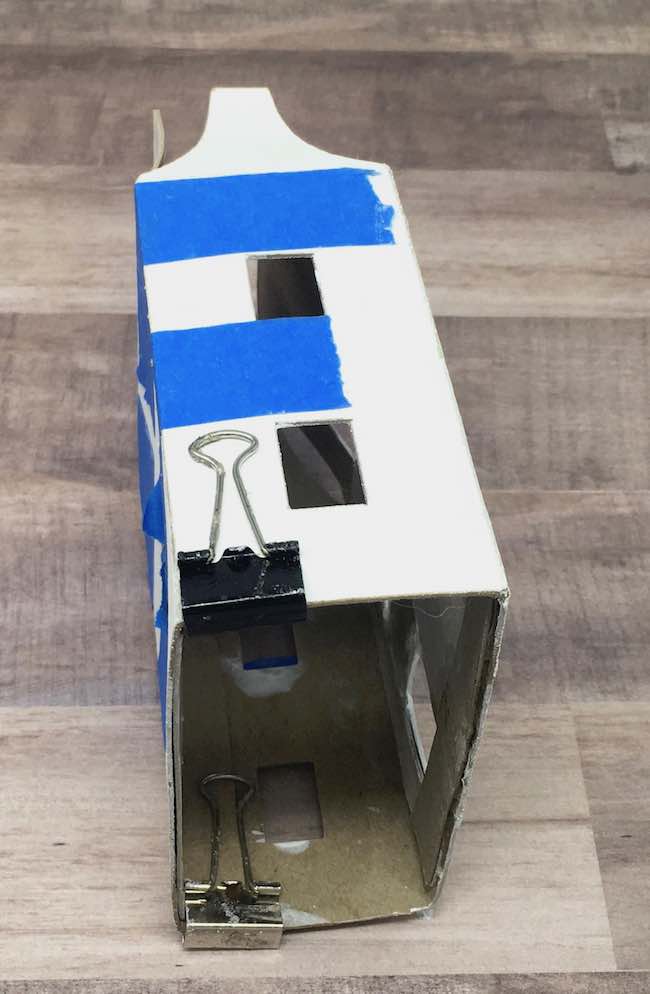
Glue the house together along the side glue tabs on the back piece
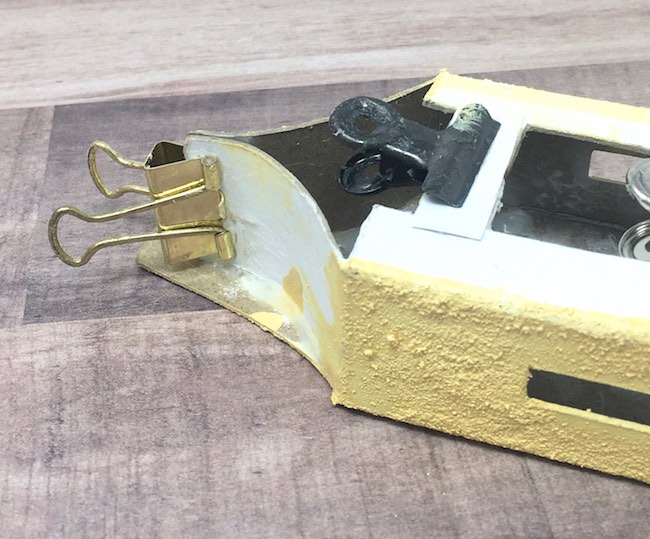
Since this Thanksgiving house is larger, the back piece is a separate piece that must be attached to to the front and sides. Here I use my favorite glue - the Fast Grab Tacky glue and binder clips and tape to make sure the back piece adheres well. As shown below, the back piece is inserted within the sides of the main house sides. See how the binder clips help hold the bottom of the house and the painter's tape helps with the sides.
Next, glue the roof flaps together
For the next step gently curve the roof flaps - the two flaps at the top of the house. The flaps help with the structure of the house. They provide support for each gable end.
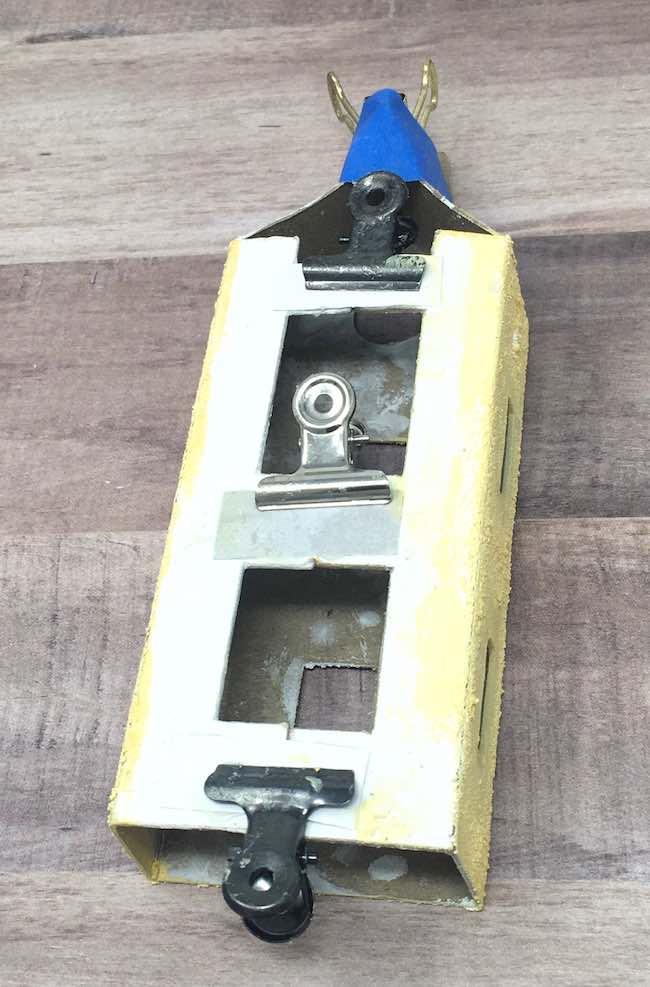
In the photo below, you can see the roof flaps at the top glued together held with binder clips while the glue dries.
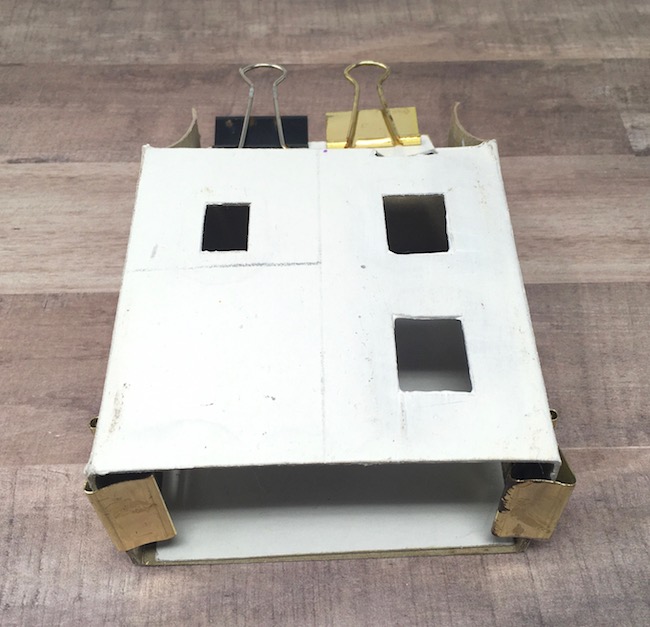
The photo where the house is covered with grit paste also shows the roof flaps after the glue dried. In addition, the house is designed so that the side gable ends curve inward to match the roof flaps.
One additional detail to note in the photo above are the pencil lines. The vertical line shows where the front extension needs to be glued. And the horizontal line that extends halfway across the front shows where the porch roof goes.
Next, glue the front extension together
To make it easier to keep the front extension square, I added flaps to the back of the front extension that touch when it is square.
I didn't add an extra cardboard piece on the back because that pushes the extension forward and makes the seam between the house and the extension more prominent.
But to make it easier to keep it together, I glued a small strip of paper to function as the connection on the back of the extension. Those pieces make it a more solid piece. Also glue the roof flaps together behind the front gable of the front extension. Binder clips come in handy here, too.
Next, glue the front extension in place
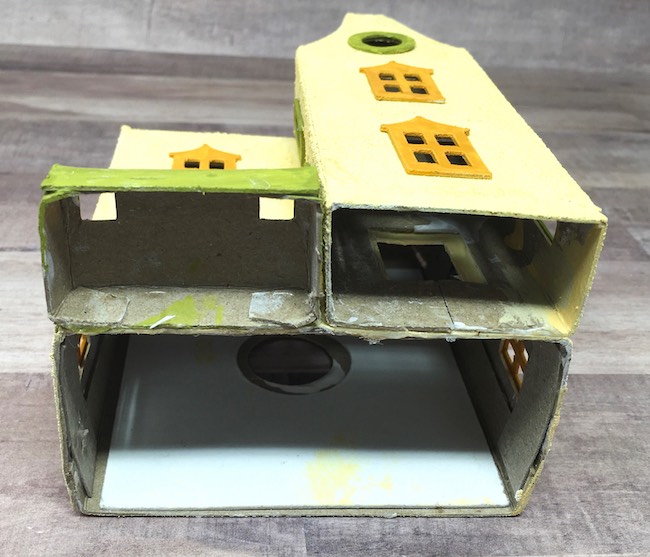
Really, you can either glue the roof in place or the front extension on at this step. For this house, I glued the front extension in place first. The same thing with painting, you can paint before or after gluing the front extension in place. Also in the view below, you can see how the roof flaps are curved and glued together to provide support for the gable ends of the house.
Glue the front porch base to the house
One reason to glue the front porch base to the house before you glue on the roof is so you can lay the house on its back without bending the curved roof when you glue it in place.
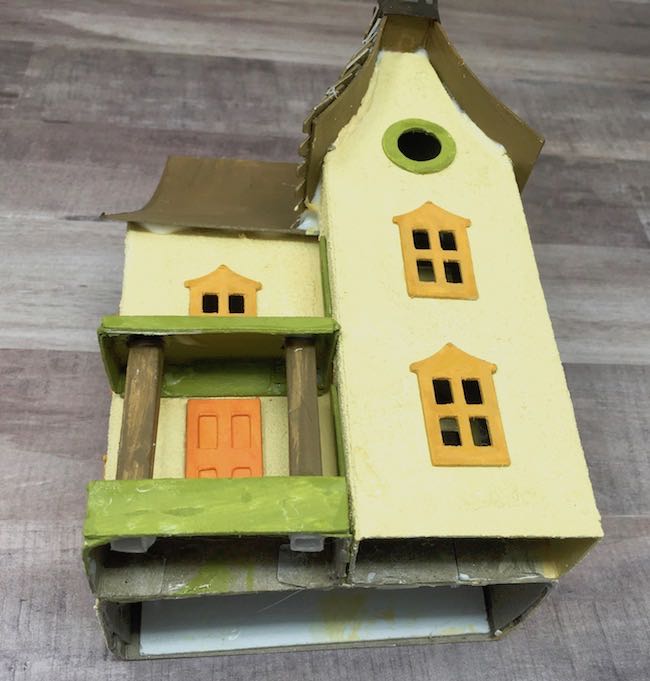
Add the windows and door to the house
If you haven't already done so, this is a good time to glue the windows and the door to the house. The porch roof makes it more difficult to get the door and windows in the proper place so be sure to glue them on before you add the porch roof.
Adhere the roof to the Davenport Thanksgiving House
Now is a good time to adhere the roof to the house. For this roof, I did glue the shingles on the back of the roof before I glued it to the house. That portion of the roof was not difficult because you don't have to fit the shingles around the front extension roof.
In addition, I designed a set of shingles that are pre-cut to fit this curved this roof. That helped, but it's still not perfect. I had to do some trimming to make them fit the way I wanted. Also, remember to gently curve the roof piece to fit the curves of the gables. If you want the spires on the roof you can glue on the back portion because you don't have to fit it around the front gable.
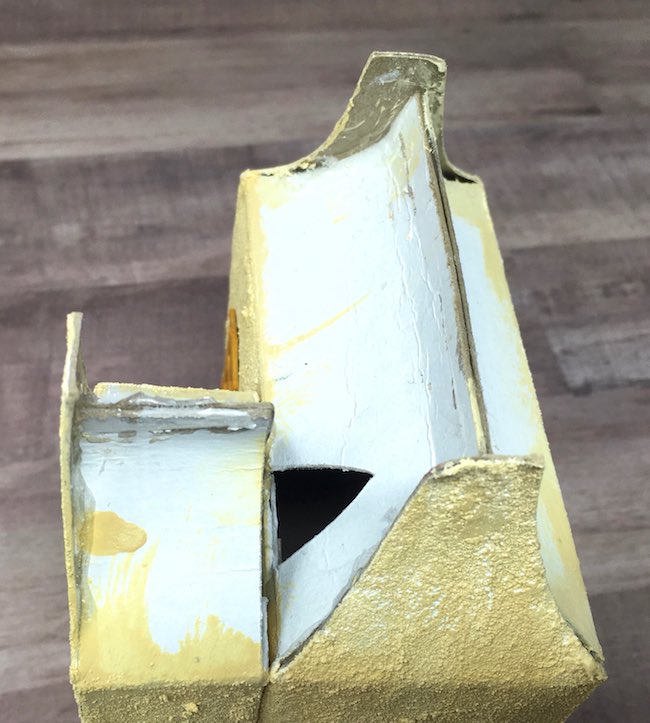
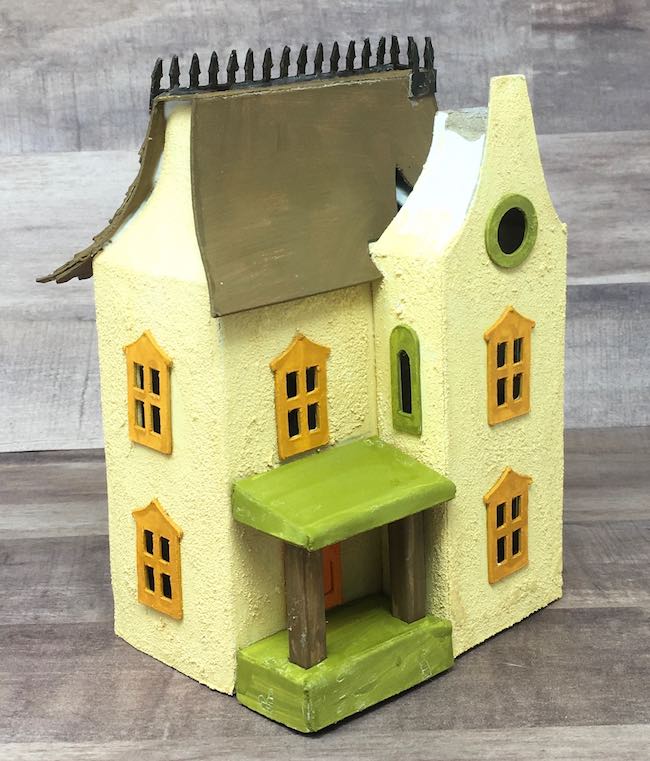
See how the roof piece fits around the front extension.
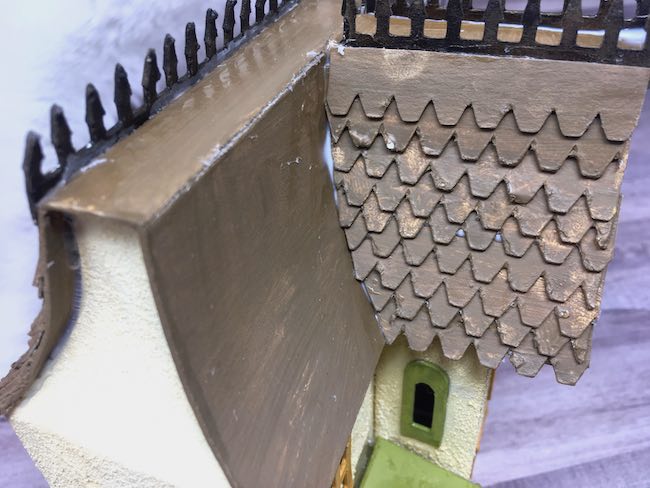
Next glue the front extension roof in place. Just like the main roof, this roof curves to fit the outline of the front gable extension. Because of the curves intersecting curves, it is difficult to get them to match perfectly. That is where the shingles provide a great service. They cover up any gaps where the roof pieces don't fit together exactly.
If you are making a winter house, snow covers these gaps beautifully.

Glue the decorative roof spires to the roof, followed by the shingles
Next, glue the roof spires to the roof (if desired), you don't have to do that though. They are actually kind of difficult to line up properly. Then glue the shingles on. Fortunately, the shingles fit the curve of the roof and cover up any gaps between the roof pieces..
Add the porch roof and columns to your Thanksgiving Putz House
Once the shingles are done, it's a good time to glue the porch roof in place. Make the porch roof by folding along the score lines and gluing the tiny flaps in place.
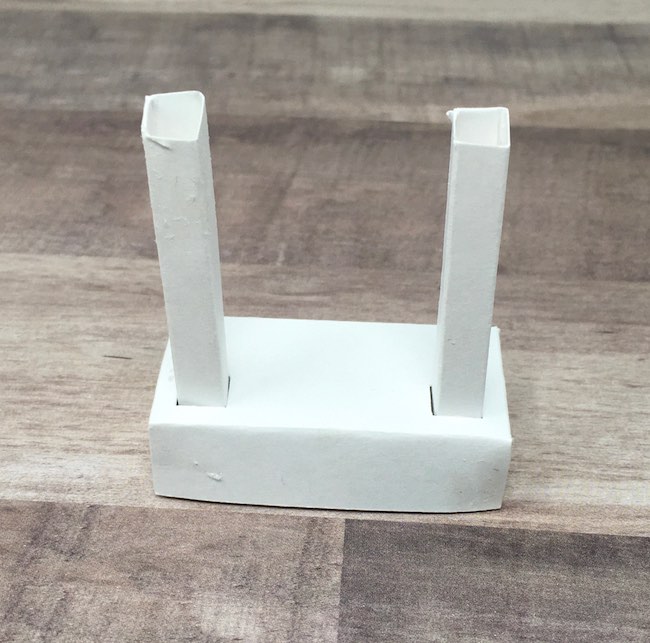
Please note: when you make things with thin fold lines that are close together as on columns, you get much sharper lines if you use cardstock. So that's what I use for columns. The other option is to use ¼ inch wood dowels which you can find easily at any hobby store.
This photo shows how the cardstock columns fit in the porch base prototype.
And here are the porch roof pieces. On the pattern, the columns have an angle cut into the top.
Adhere the porch roof to the horizontal line on the front of the house. Glue along the back piece and the angled side that touches the front extension of the house.
After the porch roof is dry, insert the porch columns (with the angled edge at the top) in the squares on the base. Don't push them up too far because you can push the porch roof upward. If the column pieces are too tall just trim them at the bottom. They are actually designed to be a little long so you can cut them to length.
After the porch roof and columns are in place, you have completed the structure of the house itself. Soon, a really fun part is coming up - decorating the house.
Make the cardboard base
As one of the final steps, make a cardboard base for your miniature Thanksgiving house to sit on. The house is 4 inches wide, 6 inches tall and 3 inches deep at the front extension side. So I made a base 6.5 inches wide and 5 inches deep to give room for some fences and a little decor.
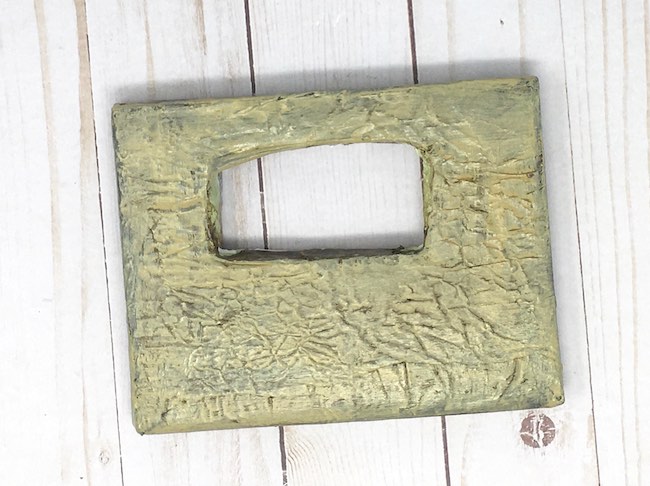
You can read about making a cardboard base for a putz house here. Basically, the base consists of 3-6 layers of corrugated cardboard hot glued together and covered with brown packing paper or newspaper. Then I paint it with colors that match the house.
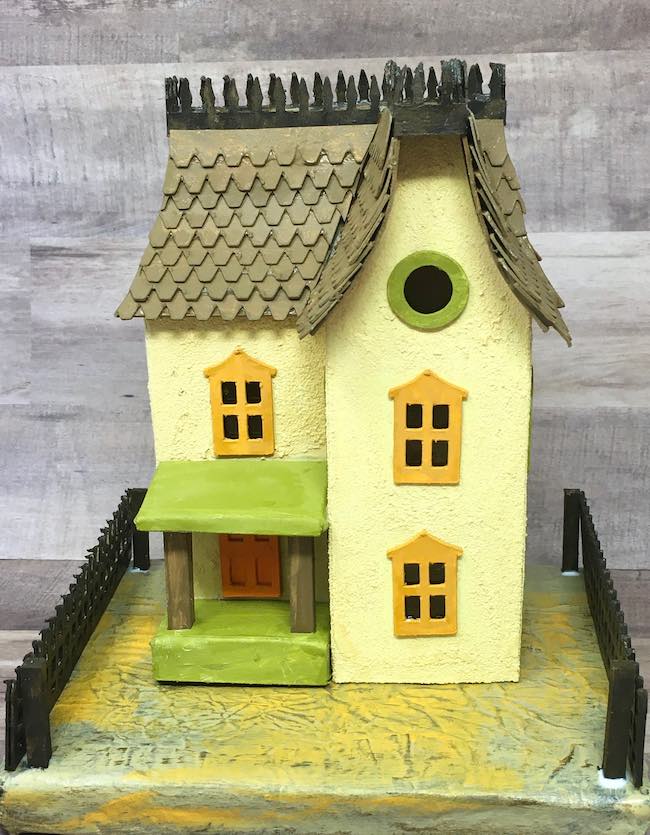
Glue your putz house to its base
Next, glue the Davenport house to your base. To do this, apply a thick bead of strong glue to the bottom of the house and adhere it to the base.
Decorate the base to finishing touches the house
To add the fence, cut a small square in the base where you want to insert the fence posts. Each fence post is made from ¼ inch dowel about 1.25 inches tall. Fill the holes in base with glue, then insert the pre-painted fence post into the base. Let dry.
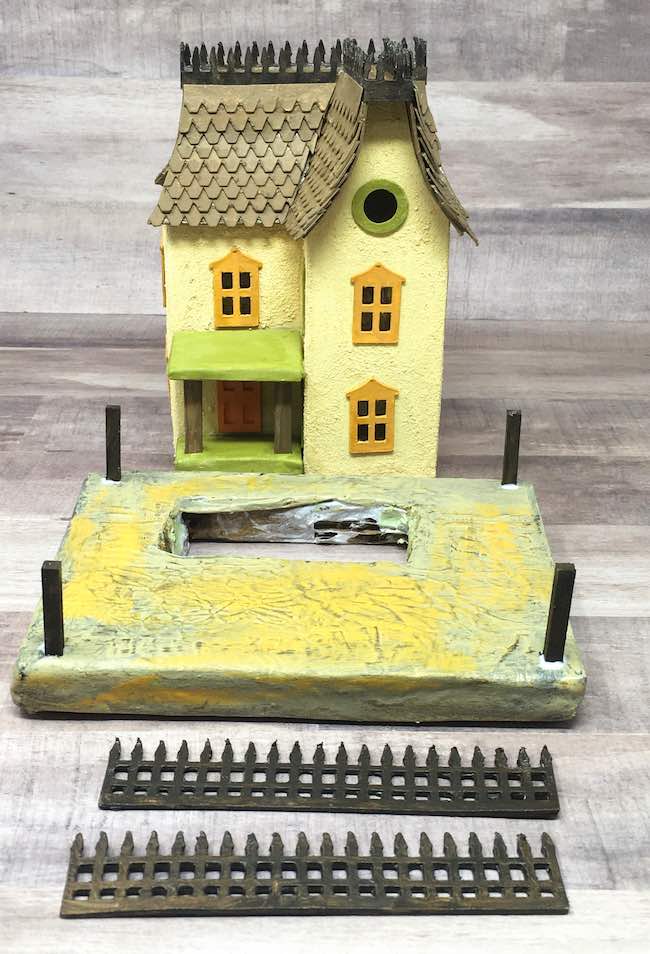
The photo below shows the fence posts drying with the fence pieces sitting in place, but not yet glued down.
After that, glue the fence to the fence posts.
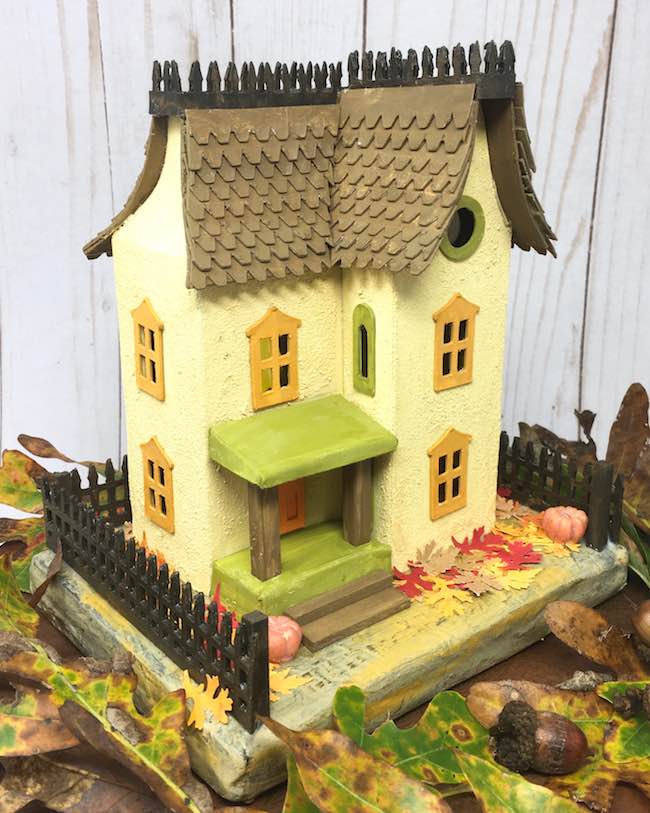
Finally, the last step. Now you get to decorate. I chose to keep things fairly simple - a set of stairs in front of the porch made with balsa wood dowels.
For more color, I used a Tim Holtz leaf punch to cut out lots of leaves to scatter about. But if you don't have a leaf punch, I included 2 cut files of leaves that you can use. Also to give the leaves a little more realistic color, I sprayed them with Distress spray stain because I love the colors you get on cardstock for fall leaves.
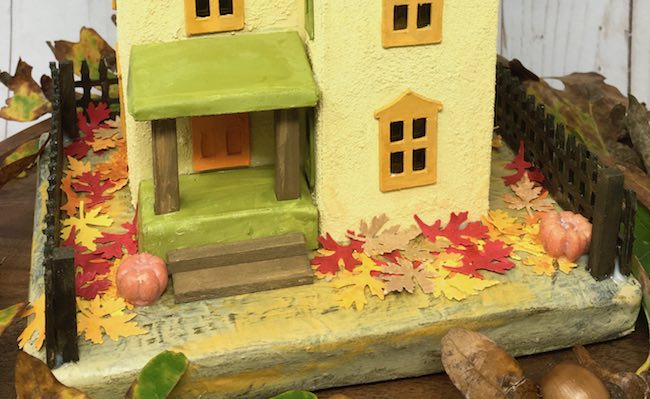
And then pumpkins - a house of Thanksgiving needs pumpkins, doesn't it? I used Tim Holtz mini pumpkins here, but you can make your own pretty easily with polymer clay. Just roll the clay into little balls and use a knife for the lines on the pumpkin.
So that is the Thanksgiving Putz house - a little cardboard house expressing gratitude.
And I'd like to thank you for following along. I hope you are staying well and able to create something lovely every day.

P.S. Be sure to pin to your favorite Pinterest board so you will remember where it is saved.

Jayne Kasten
Lucy -- I adore your houses. It is a joy to watch your tutorials, too! Thanks for sharing your designs with us.
Happy and thankful blessings at this time of Thanksgiving!
Lucy
Thank you so much for your kind words. I hope you have a joyful holiday as well.
Lucy