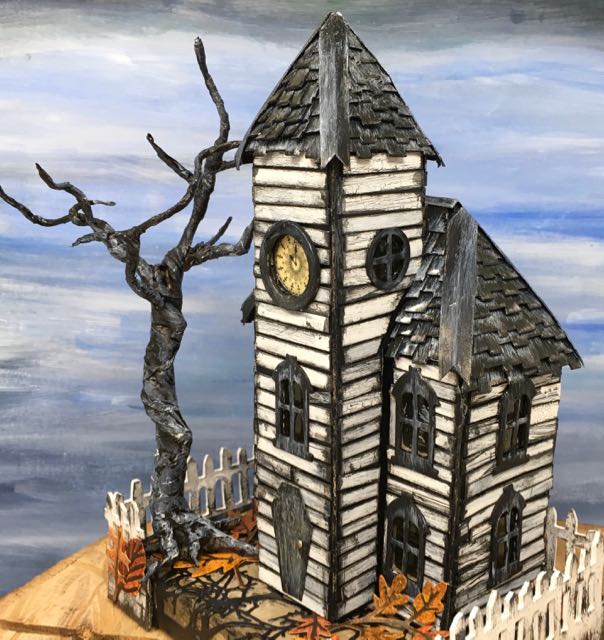
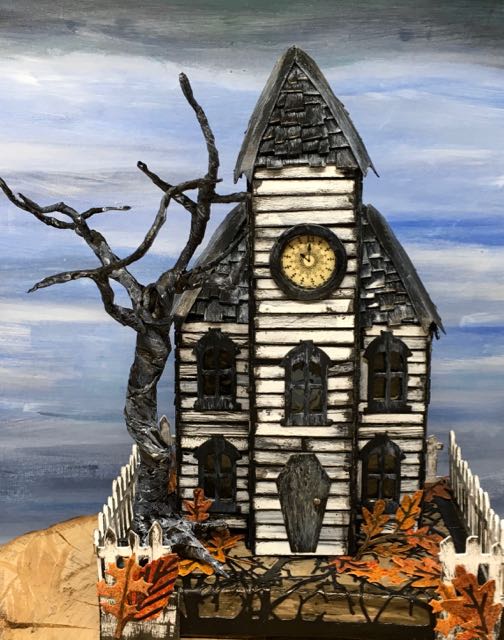
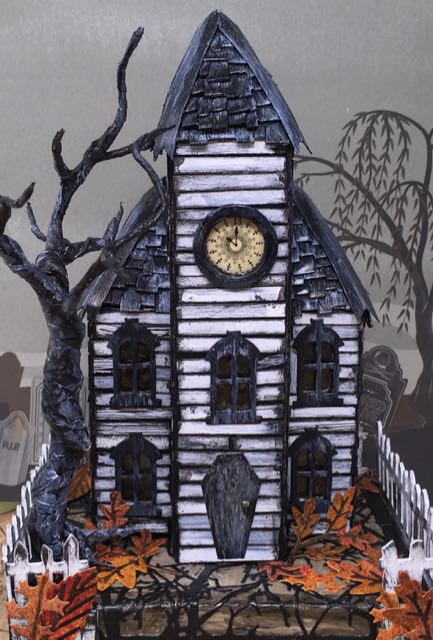
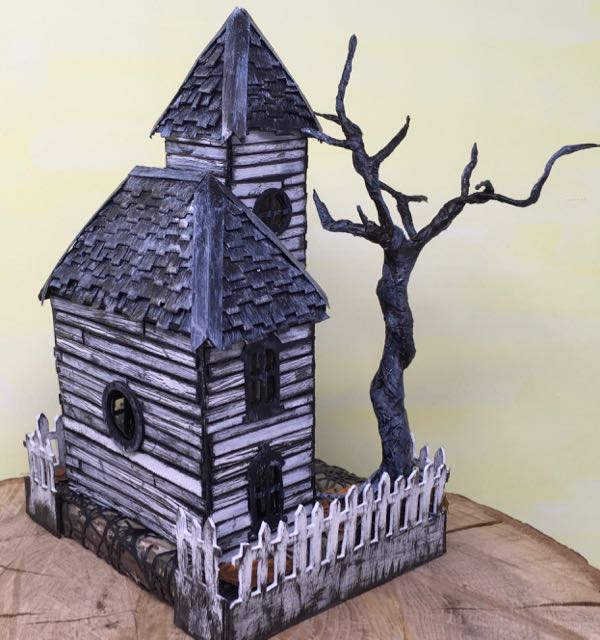
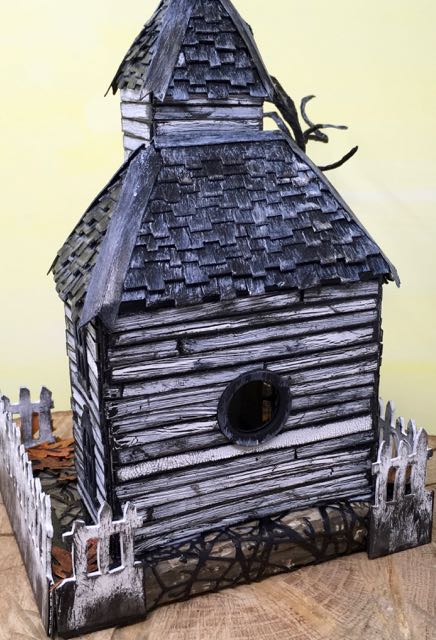
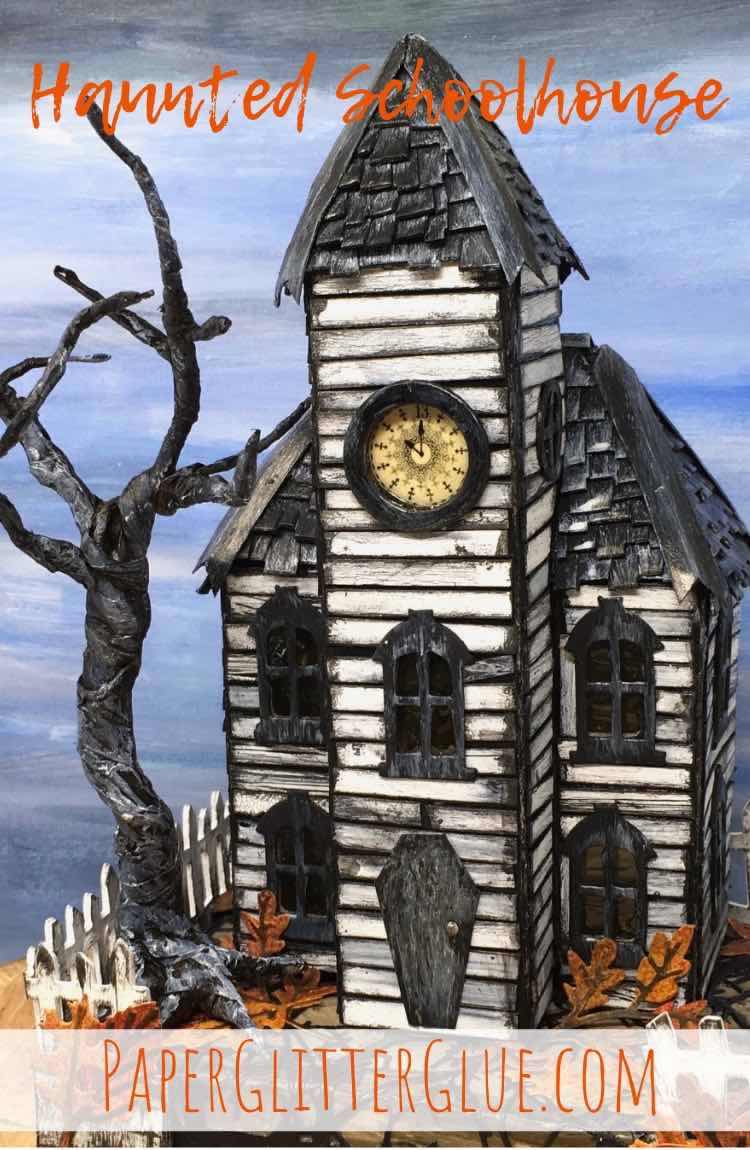
The pattern to make this Haunted Schoolhouse and Kelly’s Christmas Clockhouse is called the Front Tower Clockhouse. You can use it to make either a mildly spooky, haunted miniature house like the one below or a cheerful Christmasy house like Kelly’s house.
This FREE paper house pattern as the Front Tower Clockhouse is now available as both SVG and PDF patterns to download from my library. Look under Design No. 74 at the Front Tower Clockhouse in the January 2020 section of the library to get the pattern from the library.
So let’s get started making this miniature paper house with a cool front tower and a hipped roof.
This post contains some affiliate links for your convenience. Click here to read my full disclosure policy.
MATERIALS to make the Haunted Schoolhouse:
- Cardboard
- Design No. 74 House pattern from the Paper Glitter Glue Library January 2020 section
- Tracing Paper
- Cutting Mat – my current favorite
- Cutting Tools – Craft knife and scissors
- Metal-edged ruler
- Glue – Aleene’s Fast Grab Glue is my favorite
- Ranger Glossy Accents to make window panes
- Paint
- Window dies – I love Tim Holtz Village Manor dies, but I designed my own windows for the Front Tower Clock House pattern in the library
- Corrugated cardboard for base
- LED lights
- Embellishments
- Cutting machine like the Cricut Maker or Cricut Explore for the SVG patterns
STEPS FOR MAKING THE THE HAUNTED SCHOOLHOUSE PUTZ HOUSE
Briefly, these are the steps in making this cardboard house:
- You can use your Cricut to cut out the pattern or cut out by hand
- For cutting out by hand, copy the pattern for the Front Tower Clockhouse - Design No. 12 - onto cardboard, score the fold lines, cut out
- Cut out the window openings
- Prime and paint the house or add siding
- Cut trim for windows, door and roof shakes or shingles if you are using shakes on your house
- Adhere windows and trim before you glue the house together
- Cut out chimney and prime and paint
- Glue house together along the tabs in the back
- Glue house addition (the front tower) to the house
- Adhere the chimney to roof or each side if desired, then the shingles if that is the type of roofing you chose
- Make base, prime and paint
- Glue house to base and add embellishments
When you take it one step at a time, it’s easier. Still honestly, I would say this is a moderately difficult paper house to construct.
Related Links for Making a Putz House:
- How to make a Paper Halloween House
- Easy Crackle Paint for Paper Crafts
- Twisted Tree Tutorial
- What do you need for making paper houses?
- 8 Essentials Tools for Making a Putz House
- What is a Putz House and How Do You Make One?
- How to Add Light to Your Little House
- How to Make Crackle Painting Siding for Your Miniature Paper House
Download the pattern to make your Haunted Schoolhouse - Design No. 74 in the January 2020 section in my free Paper Glitter Glue library.
FIRST DOWNLOAD THE VALENTINE VILLA PATTERN FROM THE PAPER GLITTER GLUE LIBRARY
The Front Tower Blockhouse pattern is available in two formats - as a PDF pattern or in SVG (scalable vector graphics) format. The SVG format allows you to cut out the pattern with an automatic cutting machine like a Cricut Maker or a Silhouette Cameo. Important note - the pattern is listed as the Front Tower Clockhouse because I've used it several times before under that name.
If you already have the password, then just open up the library and enter the password so you can download the pattern.
You can get the password for my resource library with the pattern for the Haunted Schoolhouse and other free patterns and tutorials by filling out the newsletter subscription form below.
DETAILED INFORMATION TO CONSTRUCT YOUR OWN HAUNTED SCHOOLHOUSE PUTZ HOUSE
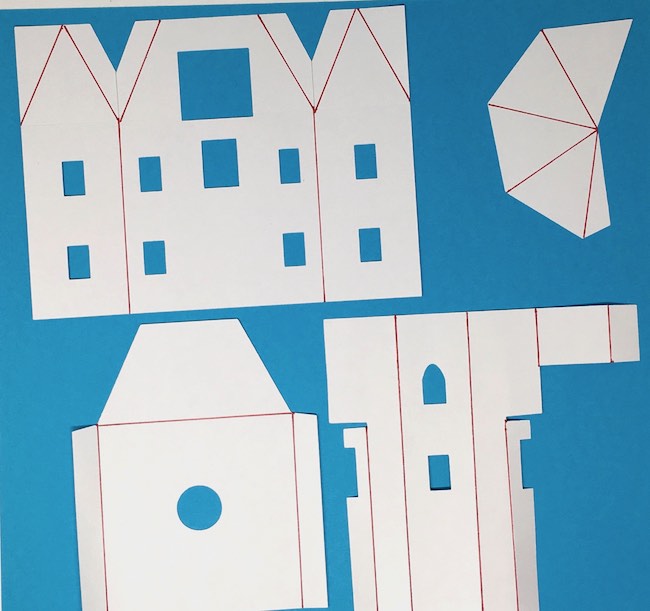
The pattern itself is not terribly complicated – it is a basic hipped roof house with a front tower. This pattern is a little larger than many of my patterns. So it requires a insert on the back to complete the house.
If cutting by hand, once you have the pattern copied, the score along the fold lines BEFORE you cut it out. It is so much easier to score before you cut because you have a bigger area to hold on to. I usually score the cardboard with the back of my craft knife to make the lines thinner and sharper. The house folds better when you do that.
Here are the main pieces for the Haunted Schoolhouse.
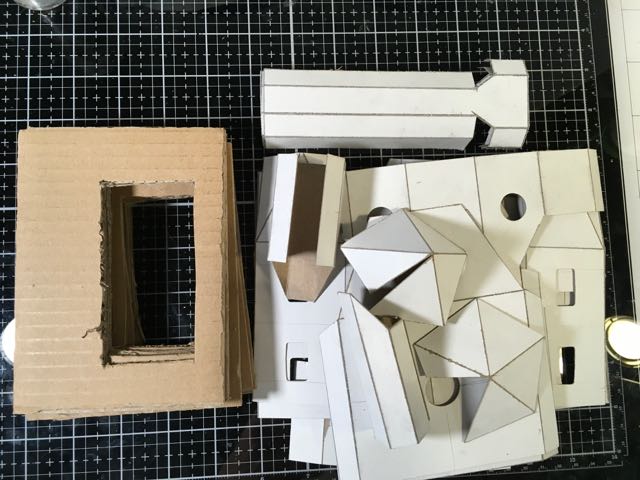
Update 2025: Now that I use a Cricut to cut out my patterns, cutting out windows isn't nearly as tedious.
Prime the house pieces if you are painting your house
Depending on the colors of the house I prime the house with either white or black gesso. Since this is a Haunted Schoolhouse for Halloween, I primed this house with black gesso. Also when I glue on individual strips of crackle siding, I want the space between the strips to be shadowed black. When I am adding a detail like this siding, I find it easier to apply the crackle strips before the house is assembled. You can do it later, but it’s much easier at this stage.
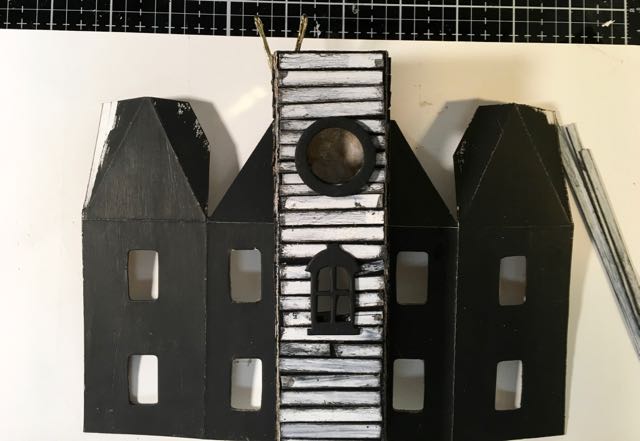
Make the inside window panes
To make the inside window panes for the little houses, I use plastic packaging stained with alcohol ink, then coated with Ranger’s Glossy Accents to make them translucent and kind of spooky – like wavy glass. I glue them on with Glossy Accents as well.
For this one I wanted the house to have windows to look like smoky glass similar to mica. So I stained them with mushroom alcohol ink.
Now glue to the inside of the house after you have painted or applied the siding, but before you glue the house together. You can do it afterwards if you forget (as I sometimes do), but it is easier at this step.
Also I cut out a door in the shape of the coffin to enhance the spooky Halloween, haunted feel. That is included in the SVG pattern.
Assemble the house
After the outside decorations are adhered to the front and back pieces, you can assemble the house together by gluing the back piece inside the front and side pieces.
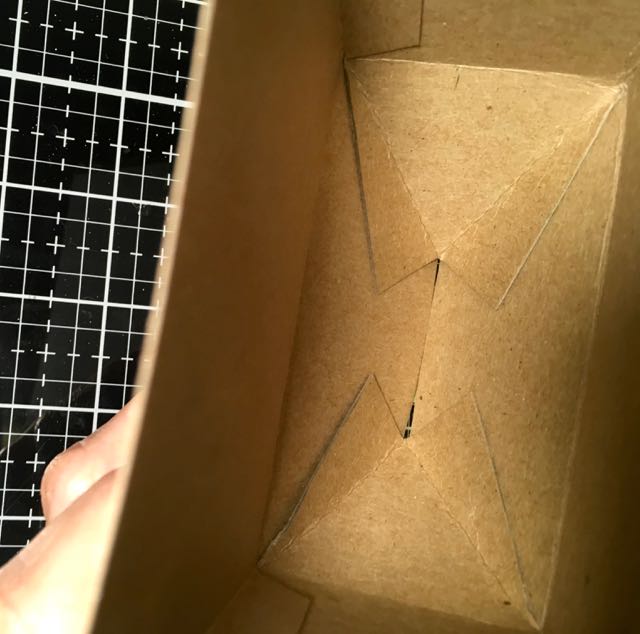
Glue the hipped roof pieces together
Here’s how the hipped roof looks like inside. Glue these roof flaps down as well.
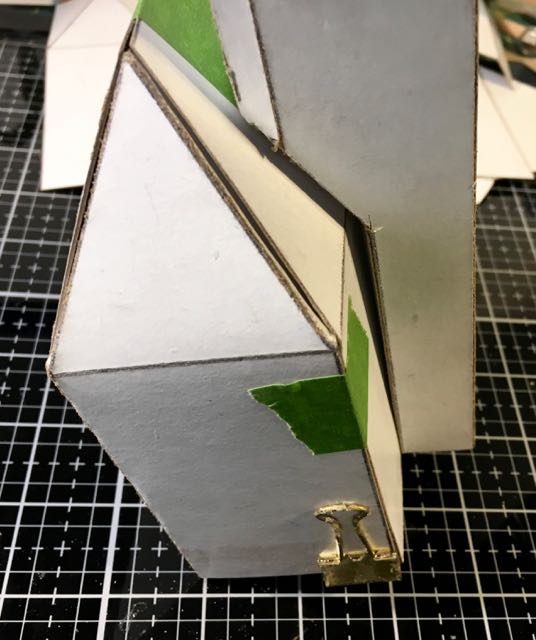
Gluing the tower to the house
This step is a little tricky.
Update - I changed the pattern to make it easier to make. There is now a cutout in the roof piece so the tower fits in that space so much better. It's easier to make the tower stand up straight.
Glue the shingles to the over-roof pieces
I used to glue the shingles onto the roof after the roof was adhered to the house, but now I like to glue the shingles in place BEFORE I glue the roof pieces to the house. If you want a chimney, assemble the chimney and mark on the roof where the chimney goes and cut out your shingles to fit around the shingles.
Use the flashing to finish the edges of the roof.
Make a base for the house
Here’s how I make a base so I can add LED tea lights to light up the little Putz house. There’s more detail on the construction of the cardboard base in this tutorial.
Using 4 layers of corrugated cardboard, cut out a section large enough for 2 LED tea lights where you would like the house to be located on your base. The little battery operated LED lights that I use are 1.5 inches in diameter so I cut a space just a little larger than that so they will fit. The house width is 2 inches so keep the cut out section about 1.75 inches wide.
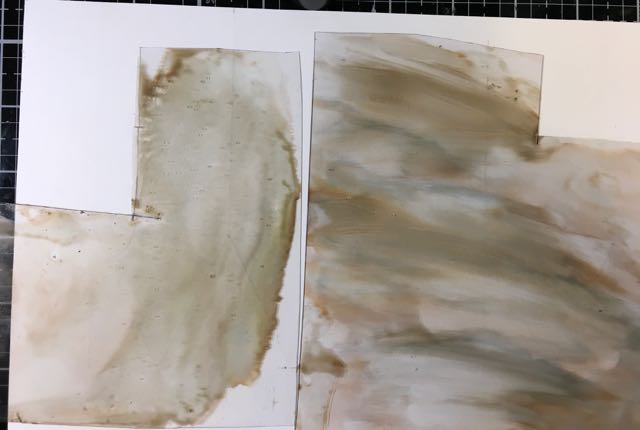
Cover the base with paper. You can wrap it like a gift or cover it with torn strips of paper mâché. That’s what I like to do with my Halloween houses. I just like the rough, wrinkled surface paper mache provides. Paint the color of your choice.
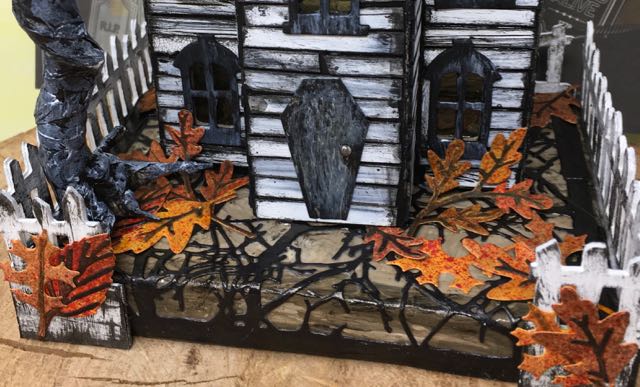
Finally, run a thick bead of glue around the edge of the house and adhere to the house to the base. Now you get to add embellishments. I chose to cover the base with a Sizzix die cut called Tangled Twigs. Then I added some leaves from a Tim Holtz Sizzix die cut called Funky Florals. These leaves have a lot of personality.
And then I had to add a spooky Twisted Tree just for a little extra haunted detail. It’s not glued down yet. I wasn’t sure at first that I wanted it there, but now I know I do.
Happy Crafting.
Lucy
P.S. Be sure to pin this to your favorite Halloween paper craft board.
Leave a Reply