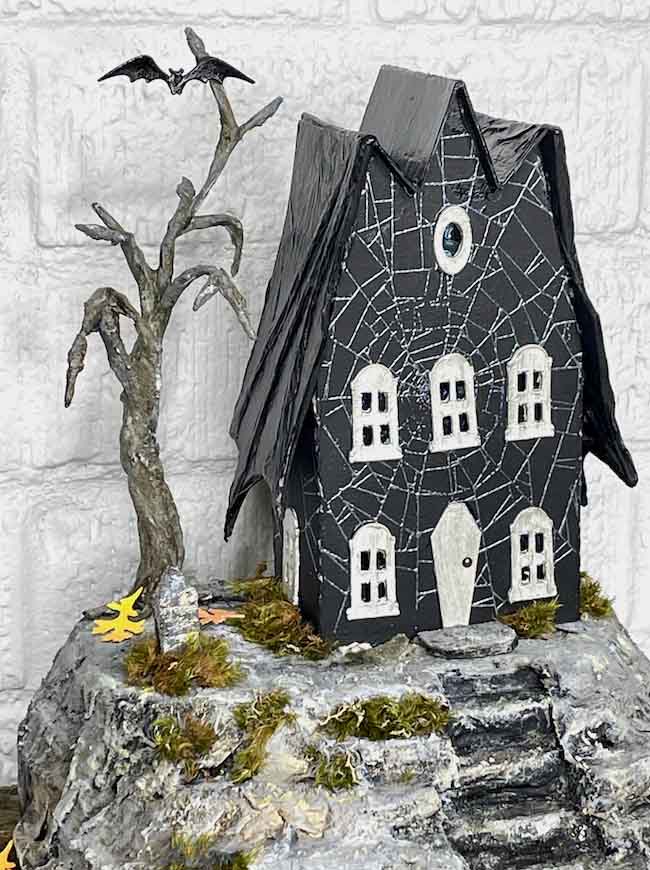
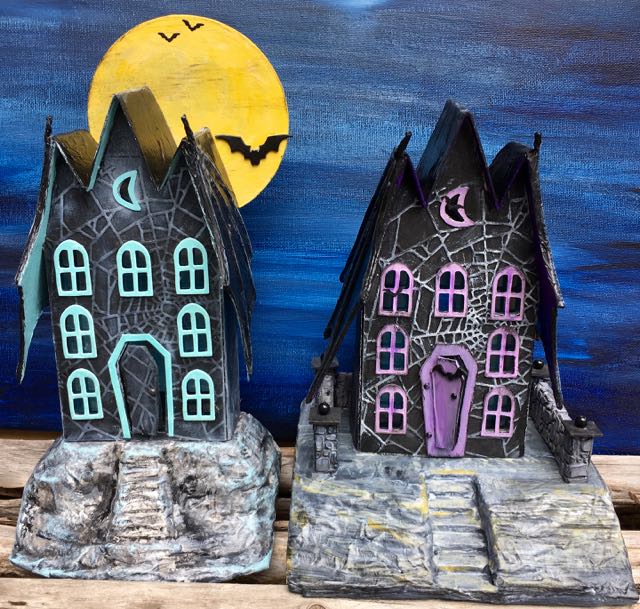
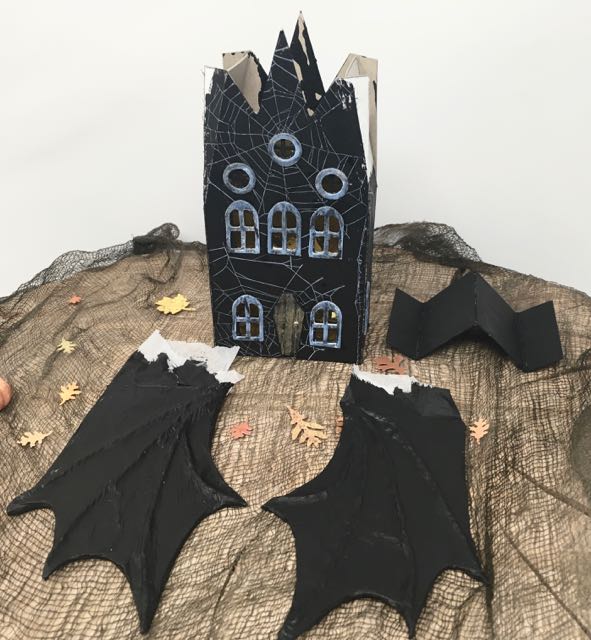
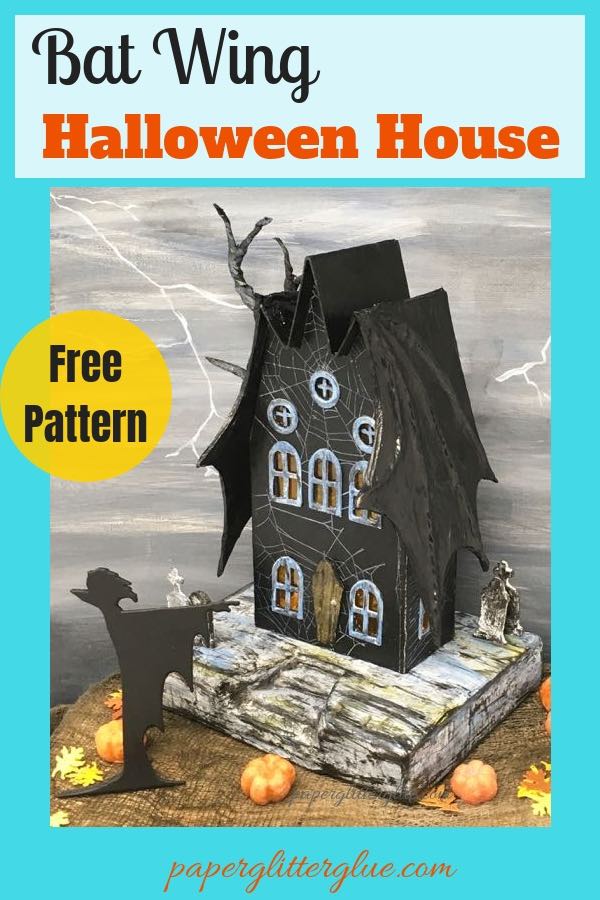
The Count returns this year with a new Bat Wing Halloween House. He is delighted with his newly designed haunted house with its coffin-shaped door and the elegant bat wing roof. And he loves the landscaping - the gravestone and the twisted tree in the back yard. What more could you ask for in a miniature Halloween home?
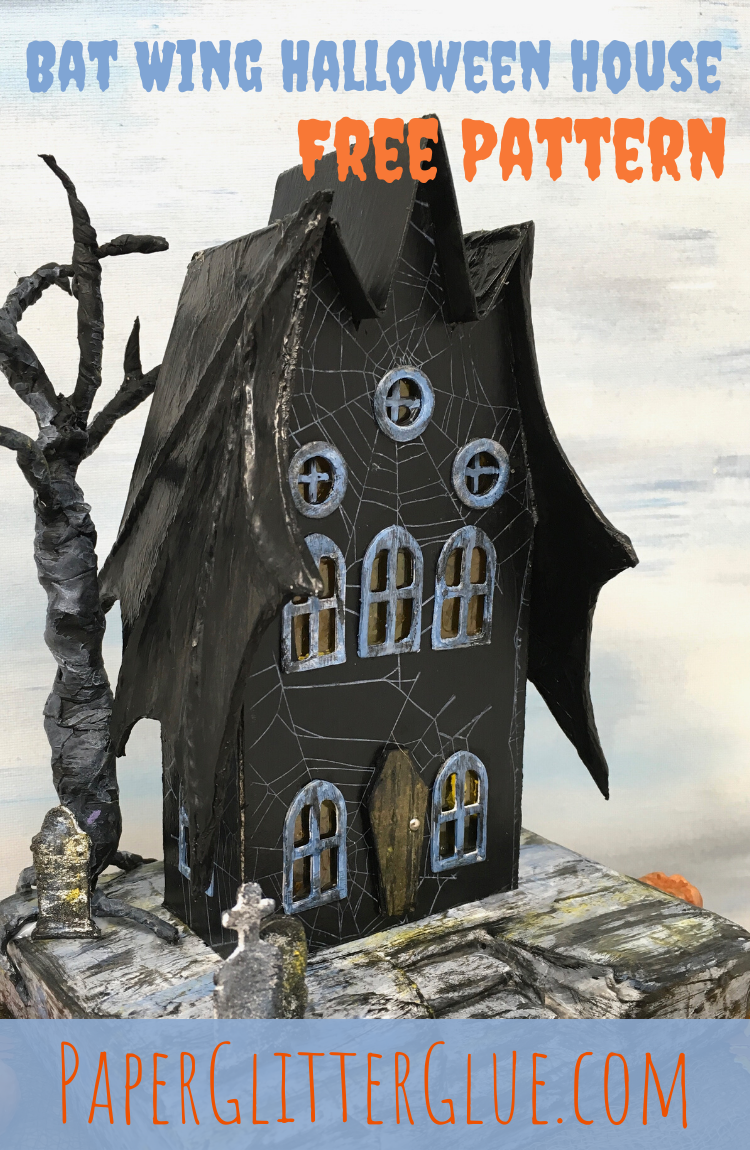
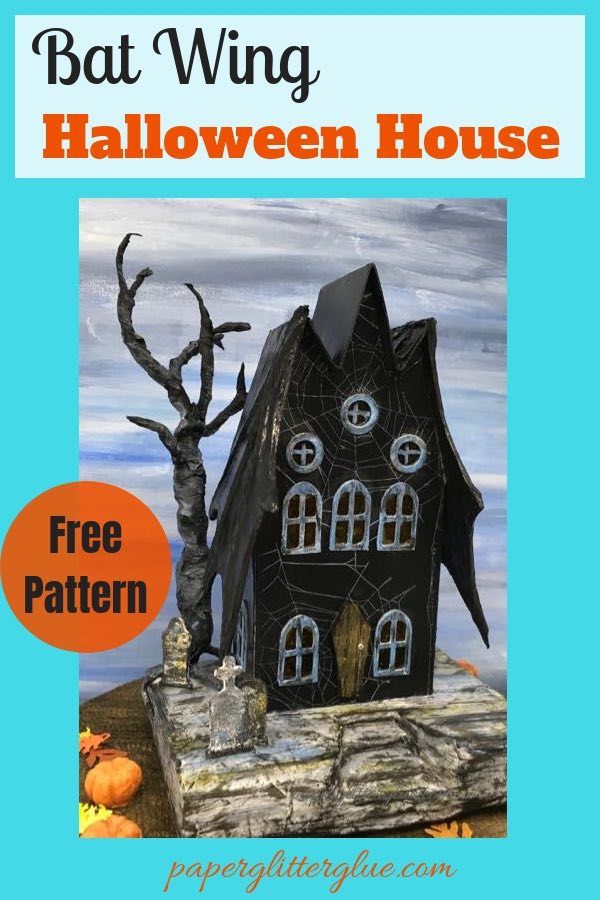
Pattern for the Bat Wing Halloween House
One of my readers asked for a pattern for the Bat Wing house so here it is in the Paper Glitter Glue library in September 2021 and October 2018. It is the same pattern in both sections. Just subscribe to my newsletter to get the password to the library.
Overall, the pattern is not difficult. The main challenge is the roofline, but the instructions are detailed to help you make the fun bat wing roof.
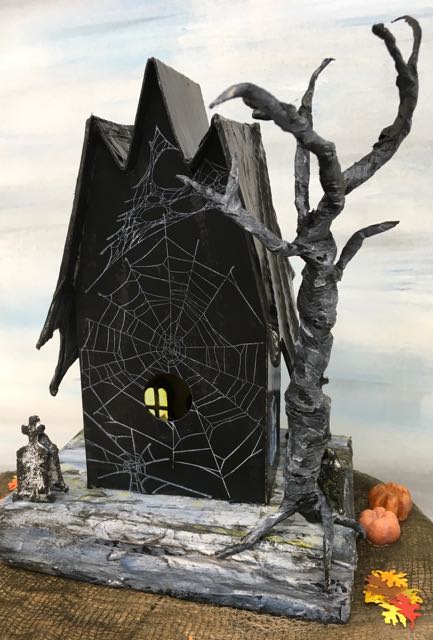
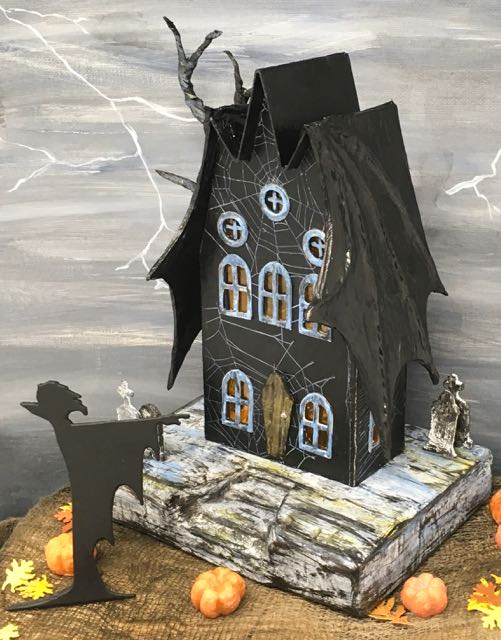
Here are two previous versions of the Bat Wing Houses named "The Count's Keep" and "The Count Awaits". Please pardon the photography. Since then, I've learned to take better photos.
So let's get started.
Here's a video that shows the construction details of the Bat Wing Halloween House
This post contains some affiliate links for your convenience. Click here to read my full disclosure policy.
Materials to make the Bat Wing Halloween House
- Cardboard
- Bat Wing Halloween House pattern from the Paper Glitter Glue Library - Design No. 13
- Carbon Paper if you are cutting the house by hand
- Cricut or other cutting machine if using the SVG pattern
- Tissue Paper to cover the bat wings
- Cutting Mat
- Cutting Tools – Craft knife and scissors
- Metal-edged ruler
- Glue – Aleene’s Fast Grab Glue is my favorite, Quick Dry is good too.
- You may also need a thinner glue like Ranger Collage Medium or Mod Podge
- Ranger Glossy Accents to make window panes
- Sharpie or alcohol ink to color windows
- Stamp - Stampers Anonymous Tangled Web or similar spider web stamp
- Paint, I used Black gesso for the majority of the miniature house
- Permanent stamping ink or embossing powder
- Thin string for the "bones" on the bat wings
- Window dies – I used Village Bell Tower for the original little house though they are discontinued.
- Corrugated cardboard for base
- LED lights or Tiny Lights
- Embellishments
Note: There is now an updated SVG pattern for this house at this time - I've included it in both August 2018 and September 2021 section of the Paper Glitter Glue library. It's the same pattern.
Steps for Making the Bat Wing Halloween House
- Copy the pattern for the Bat Wing Halloween House - Design No. 13 - onto cardboard, score the fold lines, cut out
- Cut out the window openings
- Prime and paint the house and roof piece or add siding or stamp a design on the house
- Cut trim for windows, door
- Cut out bat wings
- Adhere string to the wings to simulate the bones in the bat wing
- Cover wings with tissue paper
- Paint bat wings to match the roof
- Adhere windows and trim before you glue the house together
- Glue house together along the tab in the back
- Glue the middle W-shaped roof piece in place before bat wings
- Adhere the bat wings to each side
- Make base, prime and paint
- Glue house to base and add embellishments
Related Links:
- Previous Bat Wing Houses
- Cutting out Windows
- How to Add Light to Your Little Houses
- Twisted Tree Tutorial
- Miniature Bat Wing House - 13 House for Halloween series
Copy the pattern for the Bat Wing Halloween House onto cardboard, score the fold lines, cut out
Download the pattern from the Paper Glitter Glue library in either October 2018 or September 2021 section of the library (same pattern in both sections). Then print on paper or cardstock. Now transfer the pattern to the cardboard. For this, I use transfer paper (used to be called carbon paper). Score the fold lines first, then cut the pattern out.
Cut out the pattern on a Cricut or other cutting machine
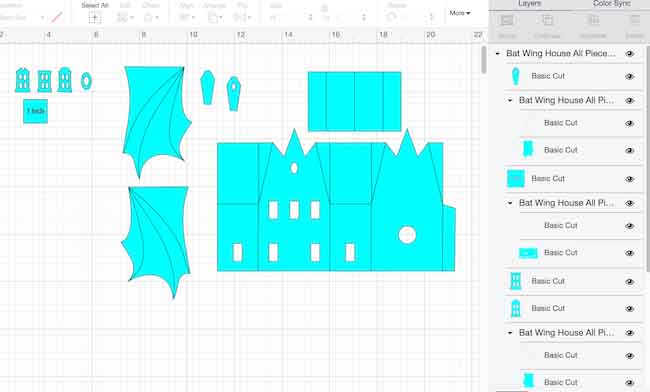
If you have an automatic cutting machine, I have updated the file to include an SVG pattern to make it easier for you to make.
Here is how the file looks in Cricut's Design Space when you first import it. As of this writing, the score lines are not imported as score lines so you have to change them. Wherever you see lines as a part of the pattern, they are score lines.
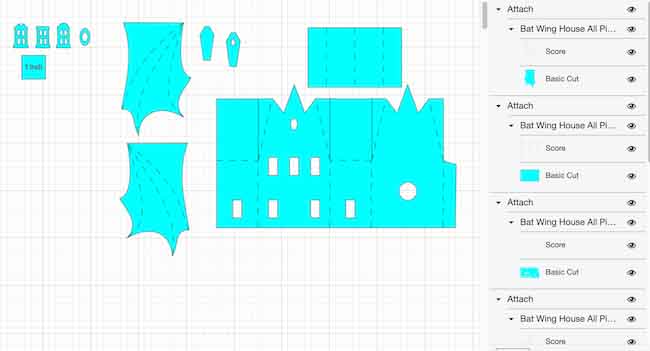
So wherever you see a set of lines, be sure to select in the Operation panel on the upper left hand side of Cricut Design Space. Then be sure to attach the score lines to the piece they are attached to. The photo below show how the pattern should look when you go to cut it out.
Cut out the window openings - if cutting by hand
Here's where I always feel guilty because I don't cut out windows by hand anymore. I have used an arbor press and dies to cut out the windows. You can read about the window technique here.
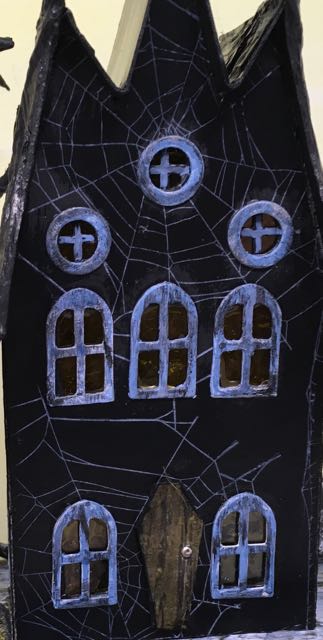
For this Bat Wing house I cut 5 main windows in the pattern and one oval window in the taller front gable, if you are cutting by hand, you can modify the number of windows. Fewer windows are easier.
Because the bat wings cover up much of the side, I only put one window on each side
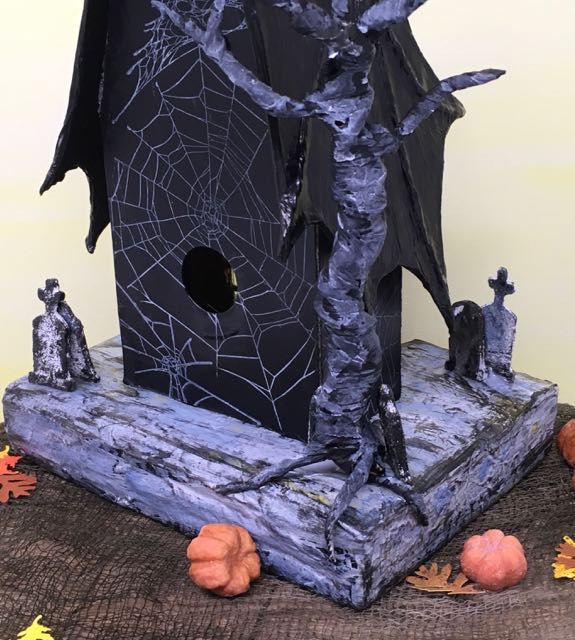
And as always, I include the traditional circular hole in the back because that's what the old timey, real true Putz houses had to light the houses even though I now use LED lights in the base for lighting.
Prime and paint the house and roof piece or add siding or stamp a design on the house
First, decide how you want to decorate the Bat Wing house. To me, a bat wing house has to be black even though bats are not always black. But the bats at the Count's house are black.
Each of my previous versions were embossed with a spider web which was highlighted with white paint.
Tim Holtz came out with this incredibly delicate, detailed spider web stamp set called Tangled Webs which I stamped with embossing ink followed by a clear embossing powder. I love the effect. It's a perfect background for the house, not too prominent, but adds a great, subtle detail to the face of the house.
Cut trim for windows, door for the Bat Wing Halloween House
Now what to do for the window trim? If the house is black, the trim has to be a light color. The two previous houses had blue and purple windows. Since I try to change things up on each house, a light blue or silver for the windows.
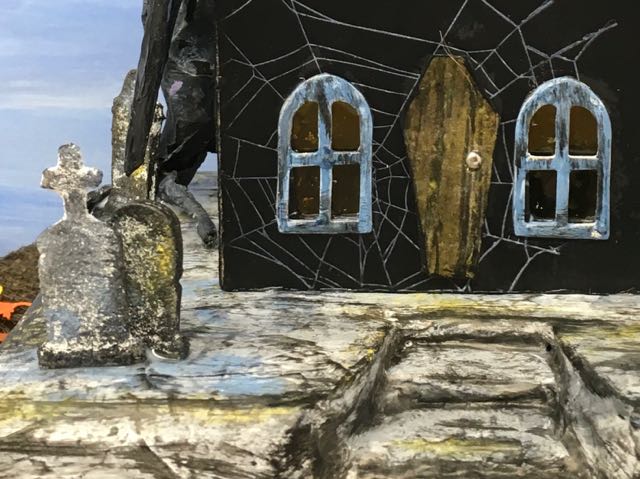
Just like on the two other bat wing houses, I made a coffin-shaped door. It is a necessity on a house for a spooky Halloween Count, don't you think?
Cut out bat wings
First the structure of the bat wings
Now for the bat wings. This is the fun part to me. I had to study the structure of a bat wing before I could draw a pattern. It's kind of interesting because a bat wing is so different from a bird's wing. What we think of as the wing is mostly the bat's hand. The thumb is at the top, but I didn't include it this year because it's hard to convey that idea. So the 4 points you see on the wing are the fingertips.
Cut out the two wings from the pattern. I usually cut out FOUR wings - 2 of each side because the tips of the wings are kind of fragile and I want them to be sturdy and last for many years. If you do that, glue two wings of each side together for a thicker wing. Remember to have 2 different sets of wings. The side with the point that juts out the most is the front of the wing.
Adhere string to each wing to simulate bones in the bat wing
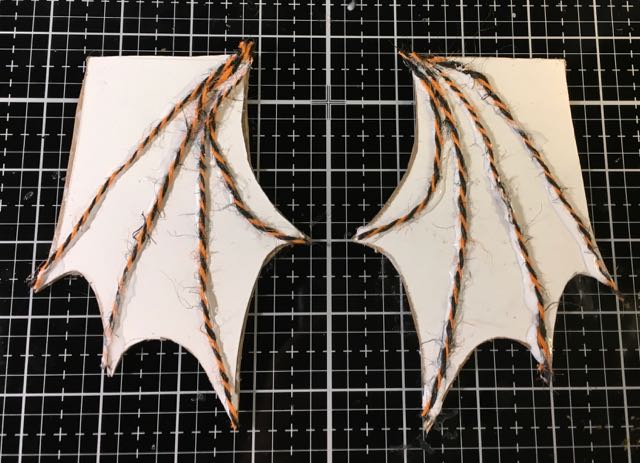
Last time, I struggled with how to simulate the bones you see through the wing of a bat. I tried wire which was difficult to adhere. Finally I came up with the idea of string because it will stick to a bed of glue and is easy to shape. The other option is hot glue, but I didn't think of that until today.
Also the string I used on this house is just a little too thick and hairy, I recommend thinner string like baker's twine if you have some.
Cover wings with tissue paper easing it around the curves and string
I leave extra tissue paper at the top of each wing to fold over the gable so it will adhere better.
Fortunately, the tissue paper makes a nice subtle wrinkly effect that works for the a bat's wing. Adhere the tissue paper with a collage medium or a thin glue like Mod Podge so you can ease the tissue paper around the form. If it tears just make a little patch of tissue paper and adhere that.
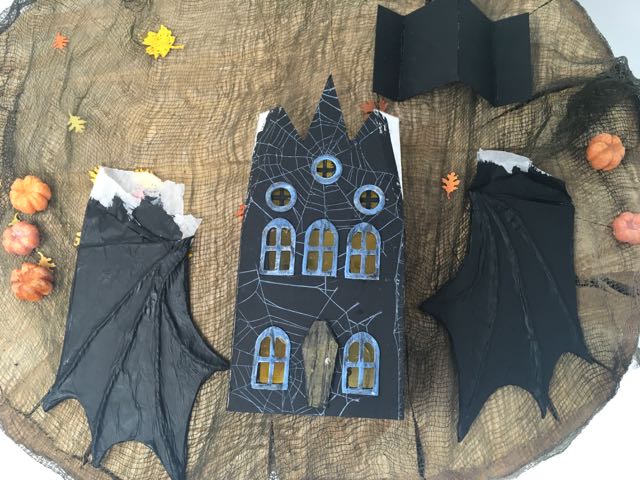
Above the house you can see the W-shaped piece for the roof. It's the same width as the top of the bat wings.
Paint bat wings to match the roof
Because black gesso covers things so well, that's the paint I used here. Later I went back and painted all of the tissue paper black on the photo above because it covers the top of the gable where you attach the bat wing.
Adhere windows and trim before you glue the house together
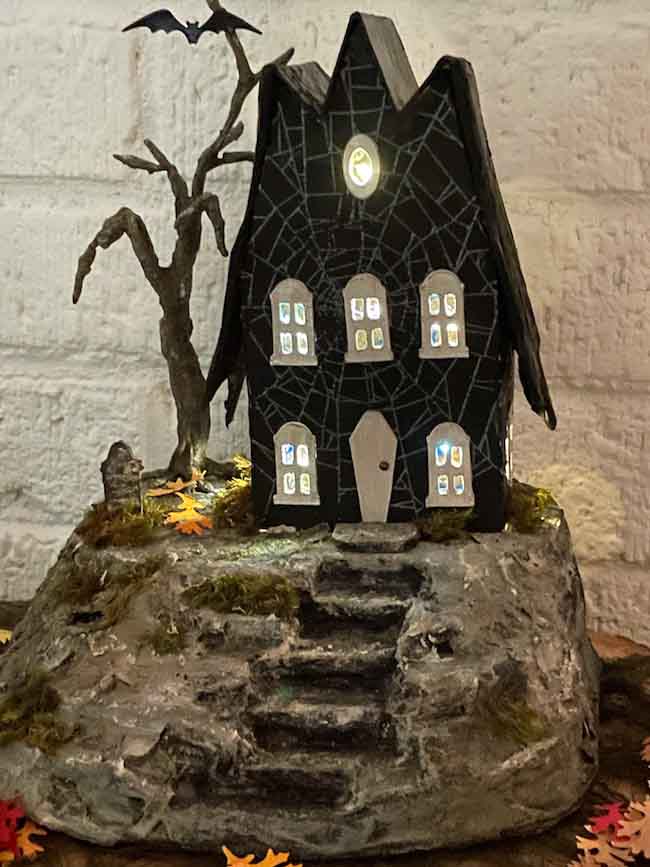
If you are going to make "glass" for the windows which I like to do, stain some leftover plastic package with yellow marker or yellow alcohol ink. Let dry. Then glue to the inside of the house. I like to smear extra glue over the plastic to make it look like wavy glass.
You will find it easier to glue the windows and the door on while the house is still flat. You can apply better pressure that way without bending the house if it is not already glued together.
Glue your Bat Wing Halloween House together along the tab in the back
Since this house fits easily on one 8.5 x 11 inch piece of paper, there is only one glue tab in the back. It's easy to put together. Then glue the roof flaps on the side gables in place.
Glue the middle W-shaped roof piece in place before bat wings
While the previous step was easy, this one is the only fiddly step. Apply glue to the W-shape of the gables on the house. That means the taller sharp angled gable in the middle and then the inside part of the gable. Just balance a thick bead of glue on the edge of the cardboard. This is the main place that the thick Aleene's Fast Grab glue is most important. I add a LOT of glue here. After I've got the roof holding on, then I mop up the excess with a paper towel or a pen tip covered with a paper towel to get in the crevices.
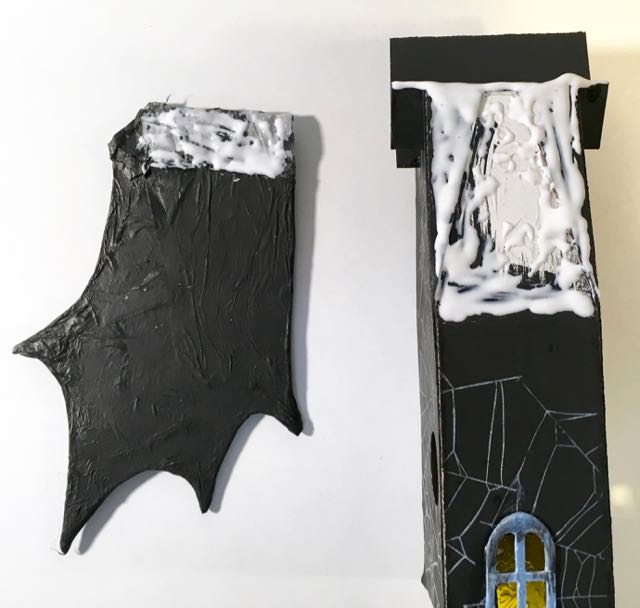
Adhere the bat wings to each side
Once again we get to another fun part, because this is where the house takes wing, literally. The thick Aleene's Fast Grab glue works best here also.
Apply the glue to the roof flap of the house. Then spread it around so it's a thick film but not lumpy like you see in the photo. Also apply glue to the tissue paper flap that will fold over the gable. It's just a nice extra step to make sure the wing is securely attached. I like the wrinkles as well.
Where the wing will try to detach itself is at the bottom of the roof flap. To prevent that I just hold it for a few minutes while it sticks. Usually I sing to Bill, the cat, during these gluing interludes when my hands are full. He loves it. If I sing to him, he won't get in my lap and spread cat hairs into the glue.
Make the Bat Wing Halloween House base, then prime and paint
My favorite base for a Putz house or a little cardboard house is the corrugated base covered with newspaper or brown packing paper. You can find these directions for making a base for your little house here.
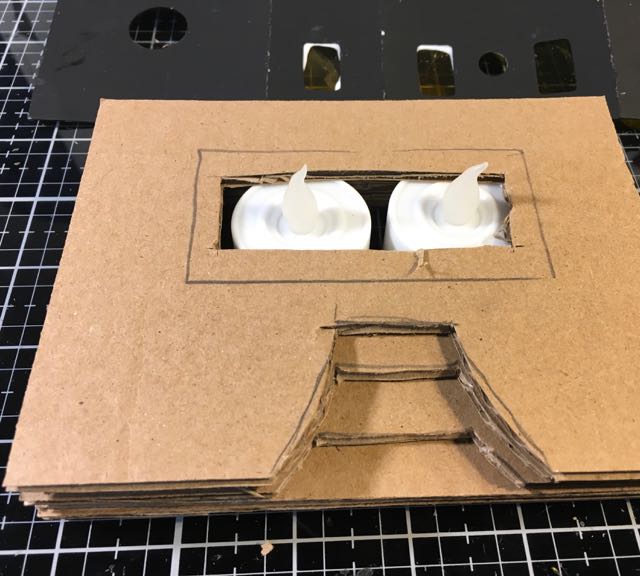
LED tea lights are 1.5 inches wide. I usually cut out a space 1.75 inches wide to fit the lights. But if the house is 1.5 inches or narrower, I usually make a base with 6 layers of cardboard and a smaller cutout on the top layer so the house will fit nicely on top. That's what I did with the Bat Wing Halloween House because it is so narrow.
Important note - in the latest version of the house I used Tim Holtz' Tiny Lights (a small string of LED fairy lights) to light up the inside. It gives a much brighter effect.
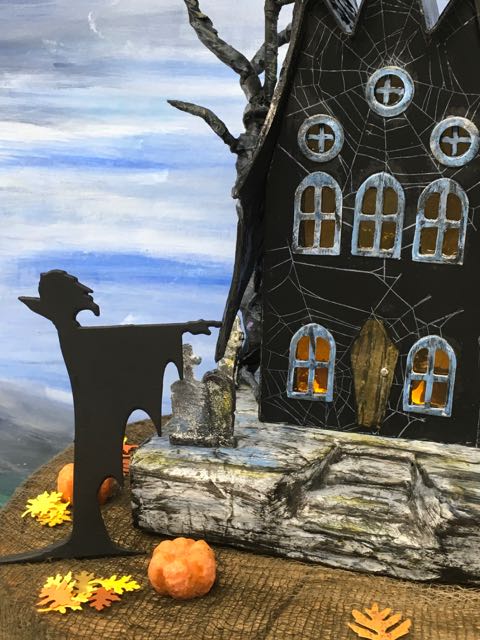
Glue house to base and add embellishments
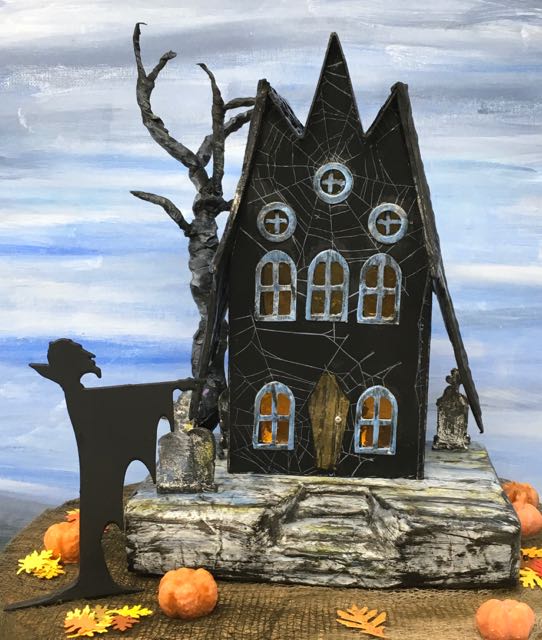
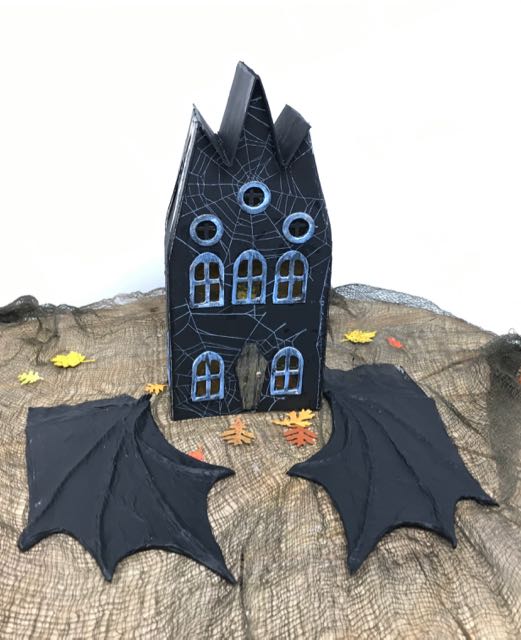
Now for all the people who love to decorate, here is what you have been waiting for - adding embellishments. Because I want the wings to be the focus of the house, I didn't do elaborate embellishments. But you can. I only added a few Tim Holtz gravestones from the Village Graveyard die and a twisted tree made from wire and paper. You can find the twisted tree tutorial here. The twisted tree fits perfectly on this setting without detracting from the wings.
There you've done it. You've finished the Bat Wing Halloween House. This time I am very pleased with this pattern - it's not to big, not too hard to make, and looks really cool. That's exactly what I want in a Putz house or a little cardboard house - especially for Halloween.
Let me know what you think. Happy crafting.
Lucy
Adriane
Parabéns Lucy, sensacional, ameiii tudo, achei interessante a asa de morcego, gostei da idéia, ficou tudo assombroso, perfeito. Beijos.
Lucy
Adriane,
I had to use google translate to read your comment and I was so delighted when I did. Thank you for much for wonderful encouragement.
Muito obrigado!
Lucy
Linda in Texas
These are SO CUTE!!! Thanks!
Lucy
Thank you, Linda. I am so happy that you like it.
Lucy
Laura Gilhuly
This is so freakishly fun and ghoulish! Thank you for joining us at The Funkie Junkie Boutique!
Anne
I love the three circular windows. It gives me that old abandoned(?) church vibe.
Lucy
Thank you. The "old abandoned church vibe" is exactly what I was going for.
Barbara
The house looks great!