Do you want to make a Paper Halloween House or a miniature Haunted House to add to your seasonal decor? What do you need to make one? What gives a Halloween house its personality and a spooky vibe? Well, read on to get ideas to give your little house a delightfully haunted feel.
For the basics of what you need to make a paper house, check out this previous article where I go over all the supplies you need to make one. But there are so many different things you can use for Halloween houses, that's why I want to share these ideas with you.
Next, I'll break down the categories of techniques and supplies I use. I haven't made a list of specific Halloween house patterns available on my Paper Glitter Glue website, but I have included links individual to paper Halloween houses throughout this post.
But first, an important disclaimer - I don't do gory Halloween decor. It's easy to make a Halloween house that is gory and bloody, but it does not appeal to me. For that reason I'm not going to go over those decorating techniques. Still, I think you will be plenty happy with the spooky Halloween ideas outlined below.
- Design Elements for Your Paper Halloween House
- Colors for Making a Paper Halloween House
- Distress Techniques and Texture
- Stamps and Techniques for Halloween Houses
- Spooky Additions
- Base for Halloween House - including fences
This post contains some affiliate links for your convenience. Click here to read my full disclosure policy.
Table of Contents
1. Design Elements for Your Paper Halloween House
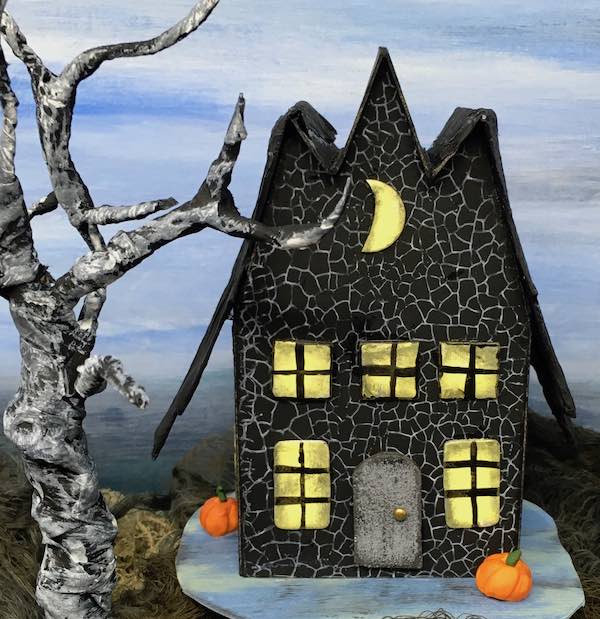
Now this is one of most important the basics for making a paper Halloween house - how to design the Halloween house. Do you want the house to be crooked and falling down? Because a crooked house that looks like it is falling down, it automatically makes a house spookier.
Design Elements of the House Itself
Examples of specific design elements on the house include:
- Crooked shape
- Funky rooflines or even bat wings
- Interesting windows and doors
- Roof shingles - irregular or sharp angles on shingles, distressed roof
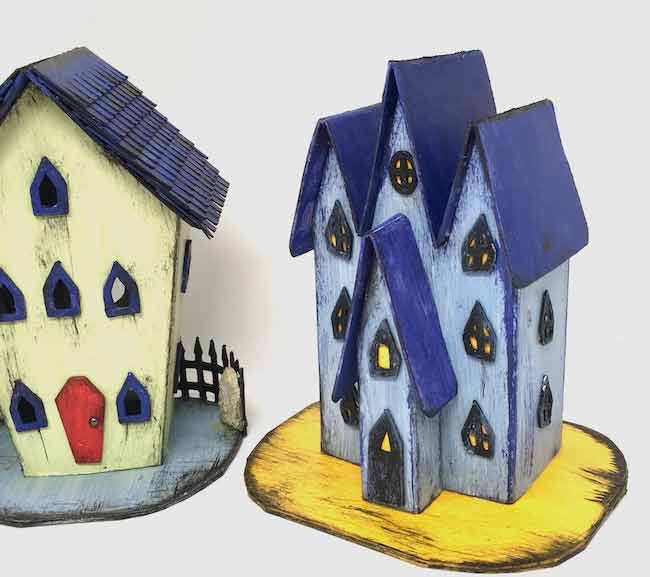
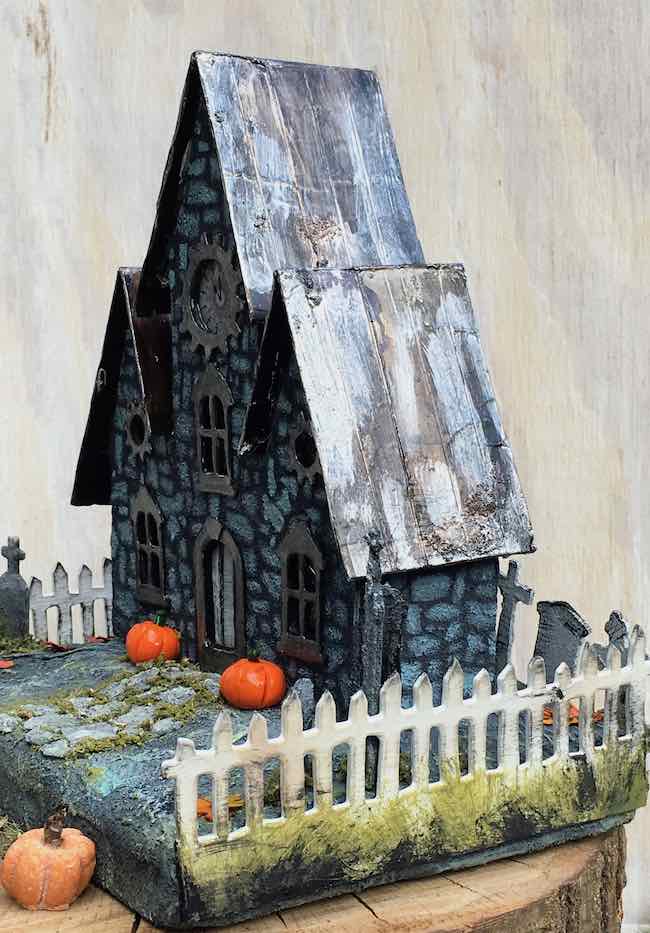
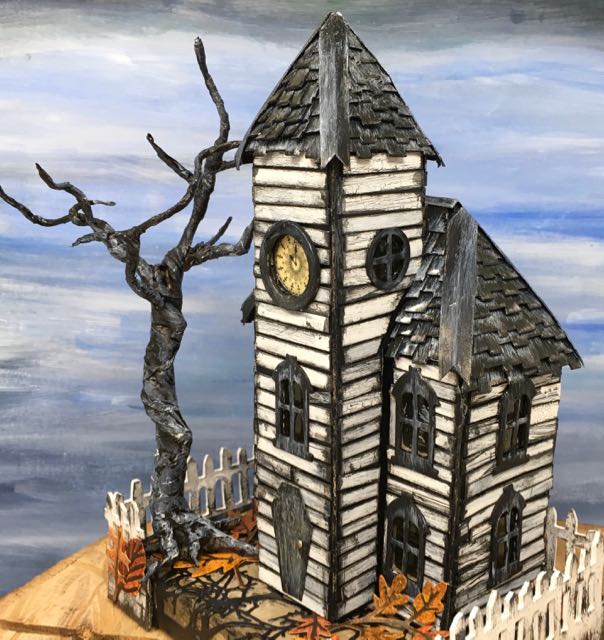
The crooked house below demonstrates this aspect of the design element.
Another really cool design element is the shape of the roof. That's why I LOVE Victorian Houses for my Halloween houses. While they work just as well for Christmas houses, they just work perfectly for paper-based Halloween houses.
For example, the Davenport Green House with the curved roofline demonstrates this so well. Isn't it perfect for Halloween?
Again, I made this house before I was proficient at designing - the shingles, the fence, most of the windows are from Tim Holtz Village Dwelling Dies which are discontinued at this time. But I did update the design in the Thanksgiving Putz House with its own set of windows and door. You can find that pattern in the November 2020 section of the Paper Glitter Glue Library.
Halloween House Windows and Doors
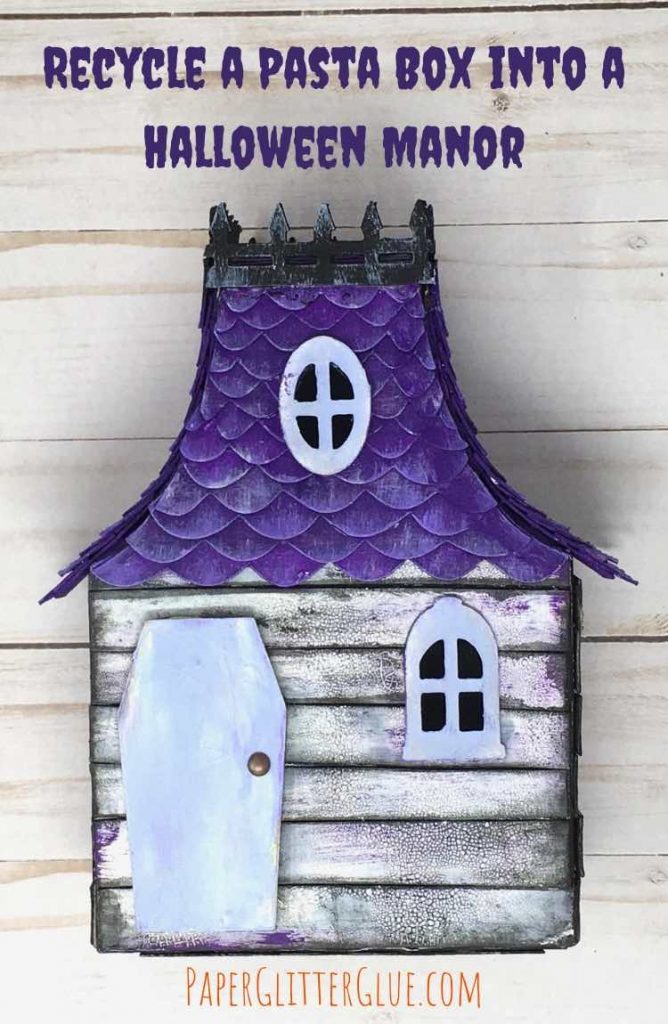
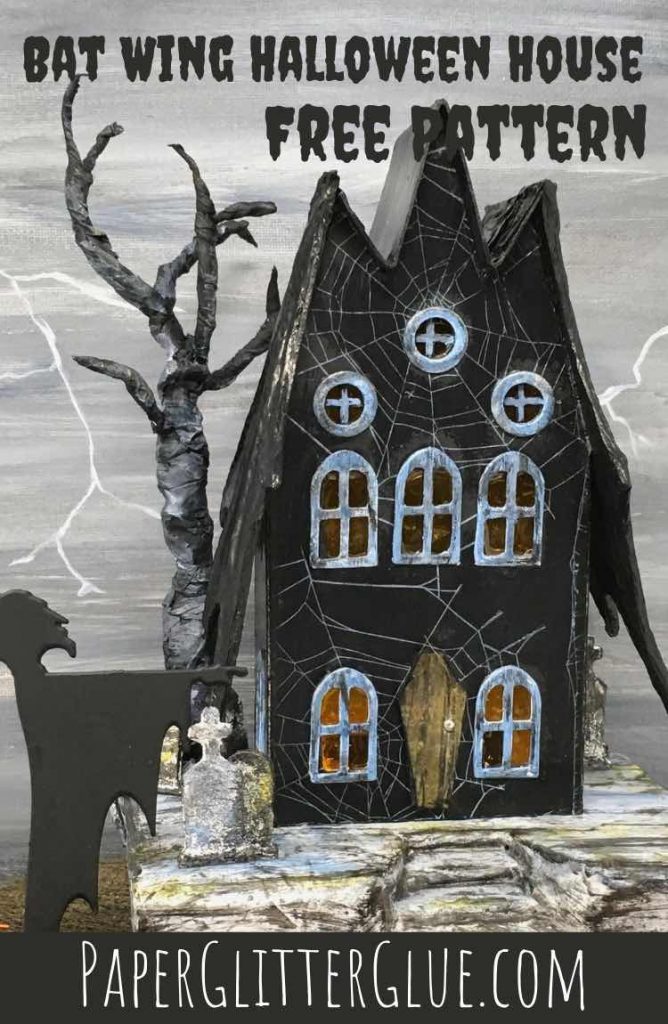
Also, windows and doors add so much to making a haunted house. For example, you can make a coffin door as seen below on the house below. This is the Bat Wing House. The updated Bat Wing House has windows and the coffin door in the pattern.
Until I learned to design my own patterns, I used 2-3 different die cut windows patterns. But now I can design window and door patterns from my imagination that perfectly fit the house. See the funky windows on this Habitat Halloween house.
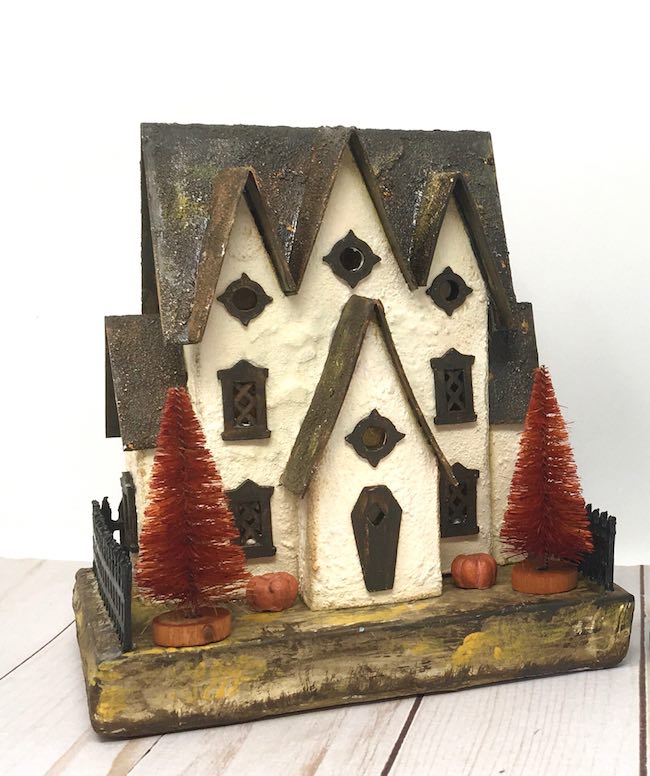
Below the Triple Gable Gothic house from my book, 13 Handcrafted Halloween Houses shows off some creepily arched windows and a steeply arched roofline which also works perfectly for Halloween.
Halloween House Roof Elements
But what about roof shingles or finish? The finish on the roof is one of the most prominent design elements on a little house because it occupies so much of the physical real estate.
To demonstrate, see the Halloween Manor made from a recycled cardboard box. I made the shingles kind of wonky to fit the theme.
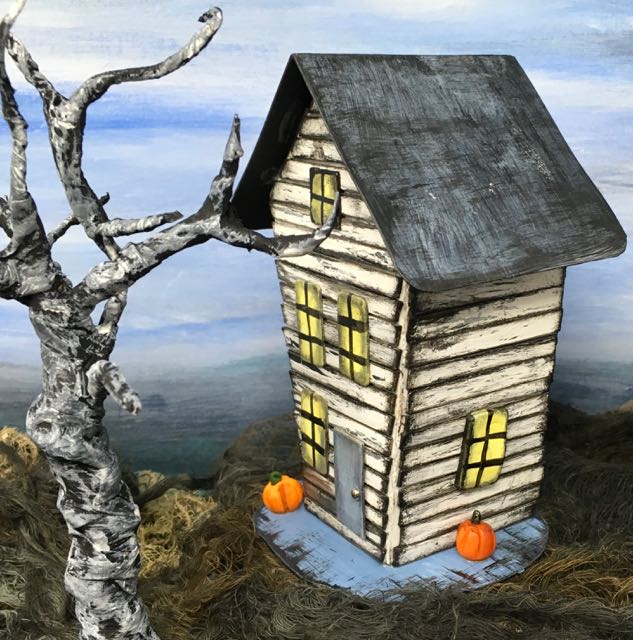
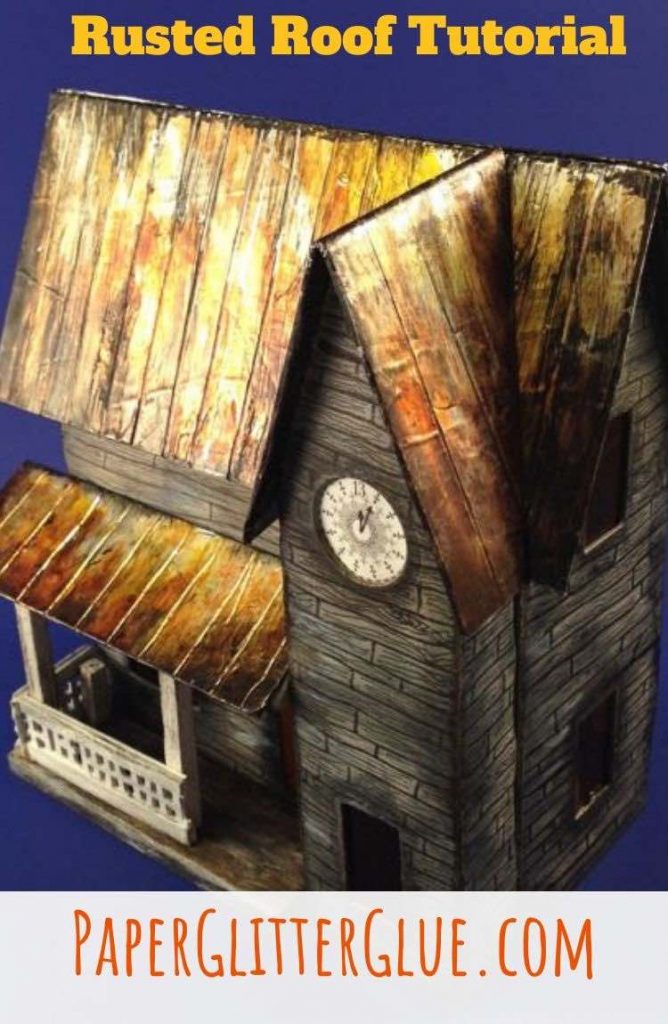
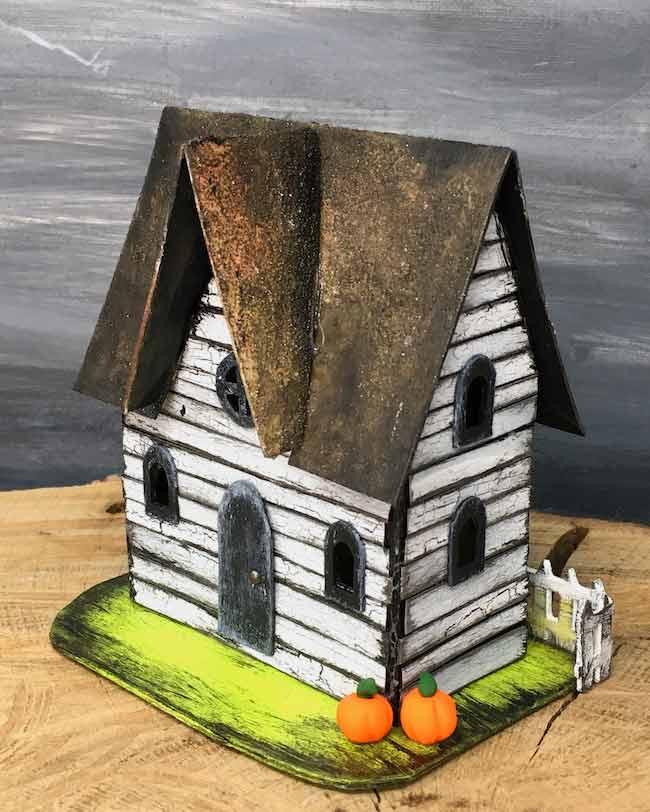
Another great design choice for roofs is a rusted roof made to look like an old house in the country. Really I love this roof option.
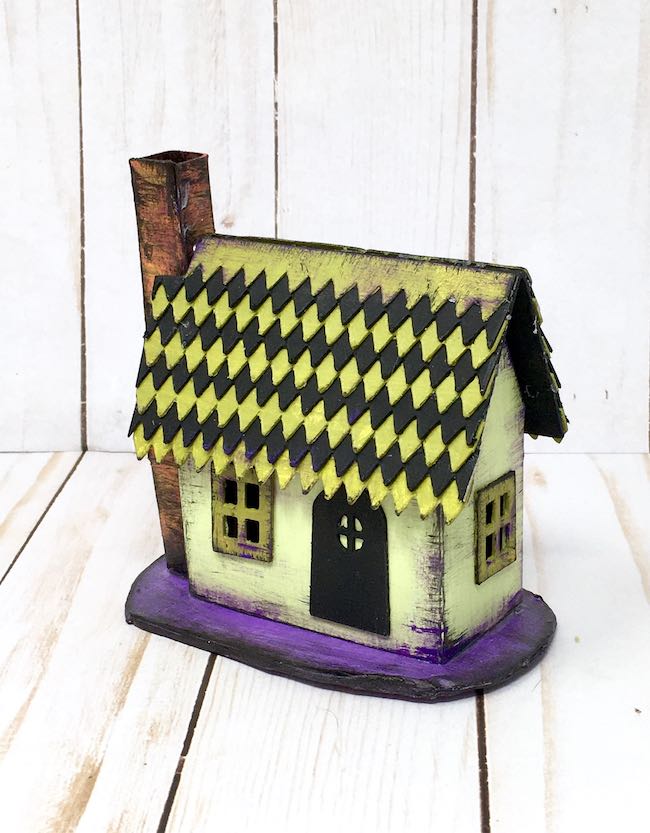
On Hilda's Haunted Abode in my 13 Handcrafted Halloween Houses book, I made a harlequin-type roof that is fun. That shingle pattern is in the book. Another option is to simply cut shingles with decorative-edged scissors. I think this adds a great Halloween dimension to the house.
And then what about Bat Wings for a roof on a Halloween House? I love this roof variation. The updated (and better) pattern is available in the August 2021 section of the Paper Glitter Glue library.
So does that give you some ideas for design elements you can add to your paper Houses to make them fit the Halloween theme?
2. Colors for Making Halloween Houses
Honestly, I think this is one of the most important components of giving a Halloween feel to any little house. And fortunately, I LOVE these colors. I've found that the Tim Holtz Distress Paint line work best for me. Truly, the color options are made for Halloween.
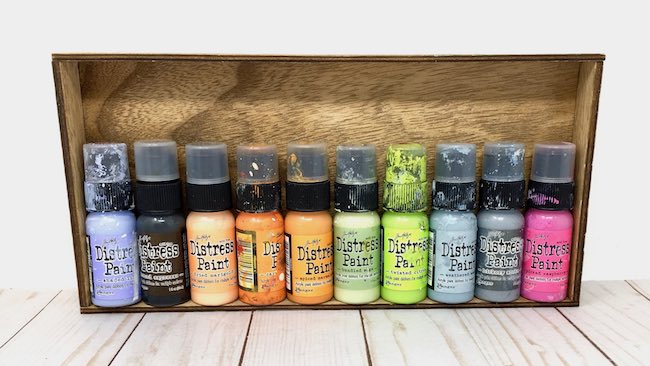
You can see that these Distress paints are well used by how messy the bottles are.
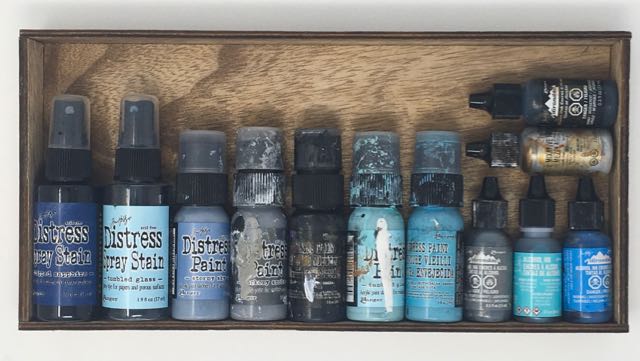
The major disadvantage to the Tim Holtz Distress Paint is the cost. That is why I listed other options for paints in my basic supply article.
Most often, I choose a palette of browns and grey with black to accentuate edges.

But I also like blues with yellow and orange highlights.

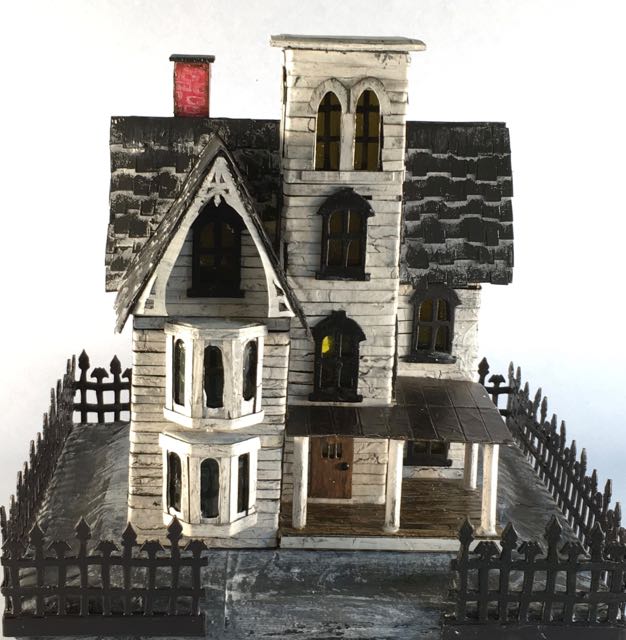
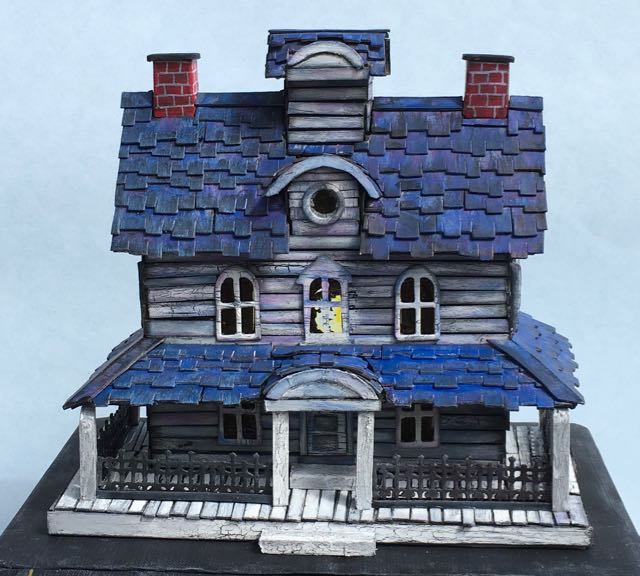
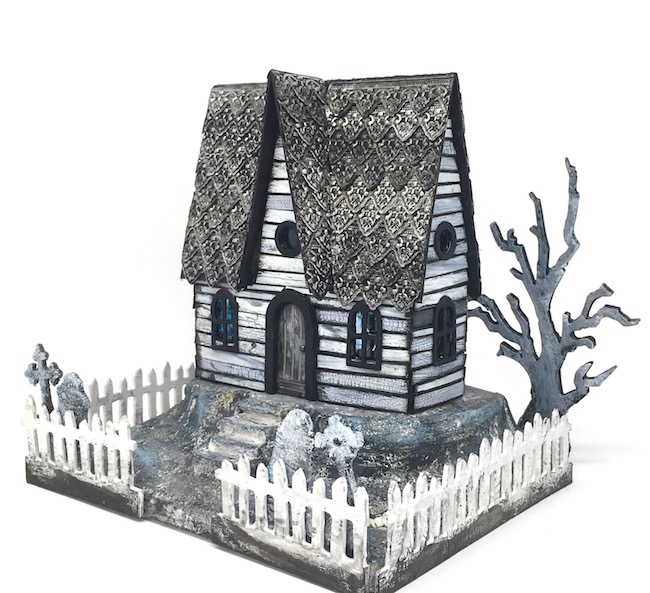
Just using black and white colors primarily makes for a great Halloween house. The Abandoned Italianate Mansion is one of my very favorites. If you would like to make it, the pattern is listed as the Putz House Mansion located in the January 2019 section of the Paper Glitter Glue library.
So I've shown you a number of color palettes for halloween houses, now let's turn to some distress techniques and textures.
3. Distress Techniques and Textures
I'll briefly go over some of the main techniques I use on my Halloween houses because this is what really brings them to life.
- Crackle paint - what could be better than crackle paint on a Halloween house?
- Edging the siding of the house with color
- Layers of color
- Textured paint
- Stencils
Crackle Paint
If you have followed me before, you know I LOVE crackle paint. So many of my best Halloween houses are made with crackle paint on the siding.
As an example, here's the Middle Gable House from the 13 Handcrafted Halloween House book. And here is a link to make the crackle paint the easy way.
Edging the house with color - usually black
There are so many examples in my projects where I use this technique. First, it gives dimension to the paint and outlines the house. Plus it makes the house look old and moldy.
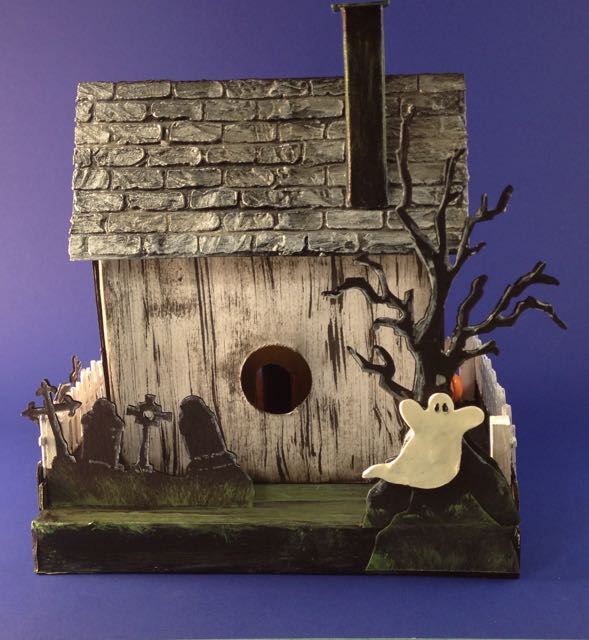
But here is my very favorite use of edging on a Halloween house. It's on Gus the Ghost's house.
What I tried to do is mimic the house colors in the book about Gus the Ghost. It's a delightful book that I bought used on Amazon. Soon I hope to make a pattern for this house, but I don't have one yet.
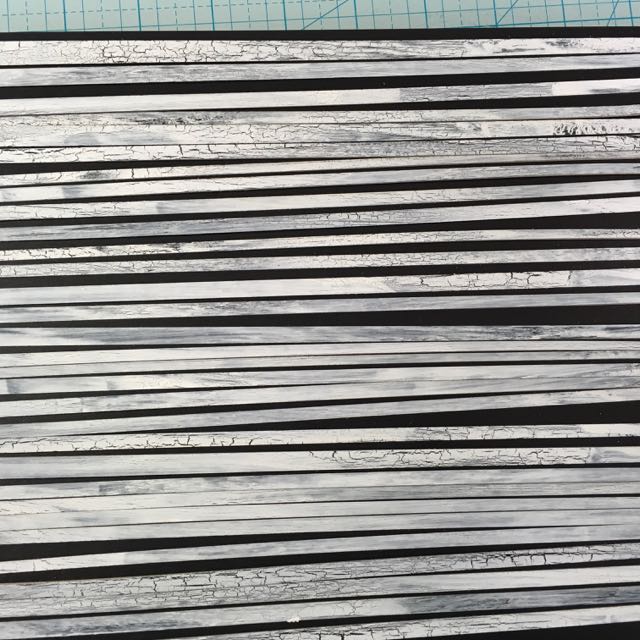
Here are a couple of photos showing how I layered color to get it as close as I could to the house in the book. First, the photo shows the individual strips of siding before I inked each edge of the piece.
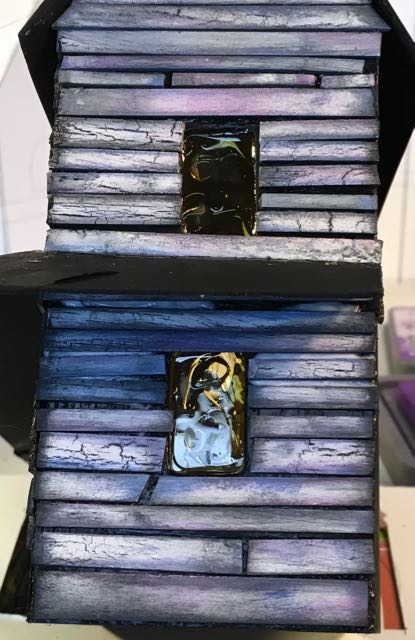
Do you see how much dimension this shading adds to house? Also the colors just work perfectly for a Halloween house.
Layers of Color
This goes hand-in-hand with edging color along a section of the house. But you could see it in the rusted surfaces on some of the roofs I've shown you. It's also visible along the roof and siding of Gus' house. In addition, I use it for giving dimension to the the cardboard bases that the little houses sit on.
Also below, note the layers of color on the rusted roof of this house. It's made with different colors of alcohol ink smeared on metallic tape covering the cardboard roof pieces.
Textured Paint
Besides adding distressing and crackle paint, you can texture the paint as well. There are several ways to do this. You can use a texture paste to the house and then paint it. Or you can mix something with texture to the paint. I like to combine sand (craft sand like this) with paint. I find it gives a great texture to paint.
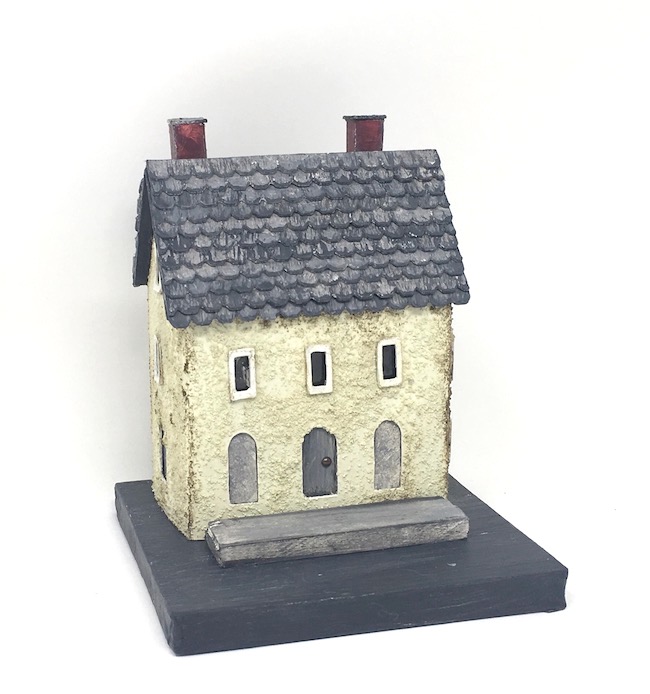
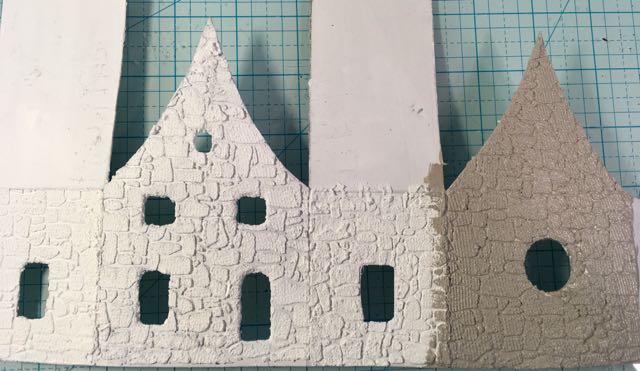
The plaster house below has fine stone granules (kind of like large grains of sand) mixed with the paint.
The Stone House with Three Gables was painted over texture paste.
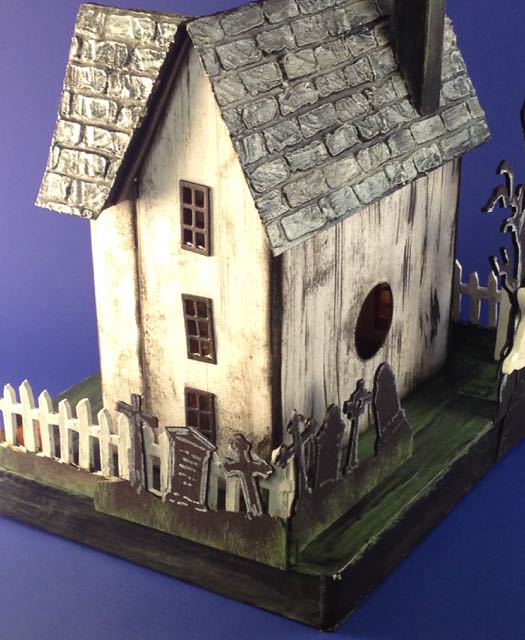
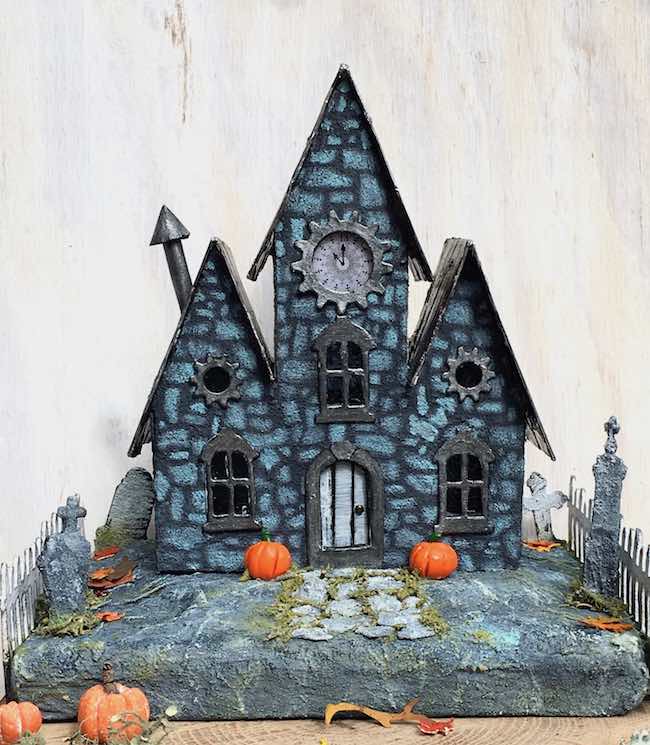
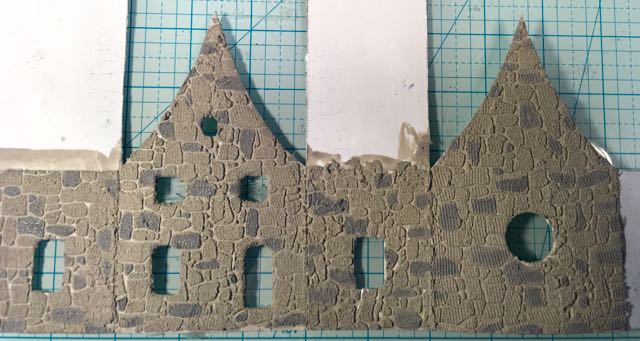
And as the final texture suggestion, you can use a stencil to mimic stone on your paper Halloween House. This is one of my favorite techniques. Jeremiah's house shows ink applied through a stone stencil onto a textured surface.
But you can also use texture paste on a stencil and then paint the stones.
4. Stamping Techniques for Halloween Houses
Initially, I didn't use stamps on my Halloween houses - largely because I just didn't think of a way to use them. Gradually though, I saw more and more places I could use stamps on my houses.
Here are few examples.
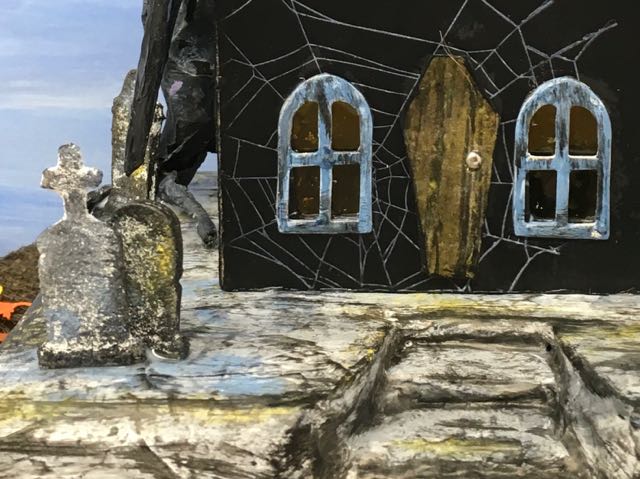
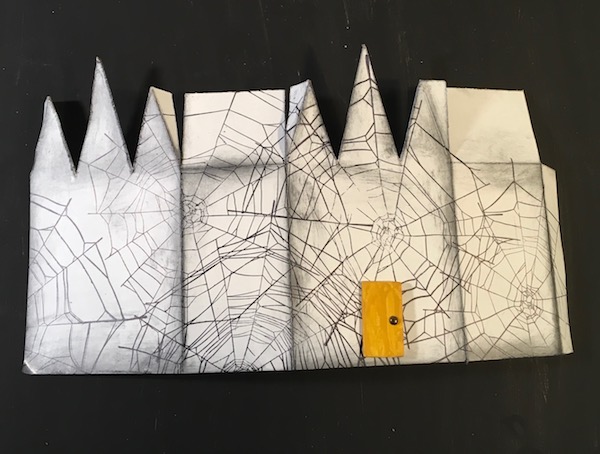
One version of the Triple Gable Gothic house with a spider web stamped surface. I love the effect.
Just stamp your chosen stamp on the painted house. That's all you have to do.
Though I don't have this house finished yet, check out this great background stamp on the wallpaper for my Spooky Dollhouse.
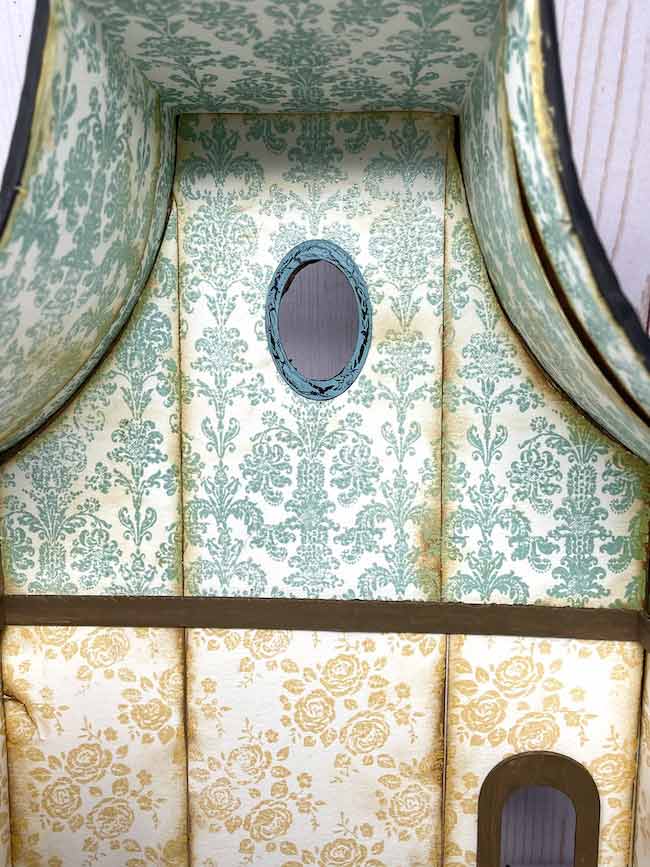
When I finish it, I'll show you more. But instead of stamping with ink, I stamped with embossing ink and sprinkled Tim Holtz embossing glaze on the surface, then heated it with heat tool. What makes embossing glaze so unique is that it is translucent. I just love the effect! Doesn't it look like real flocked wallpaper?
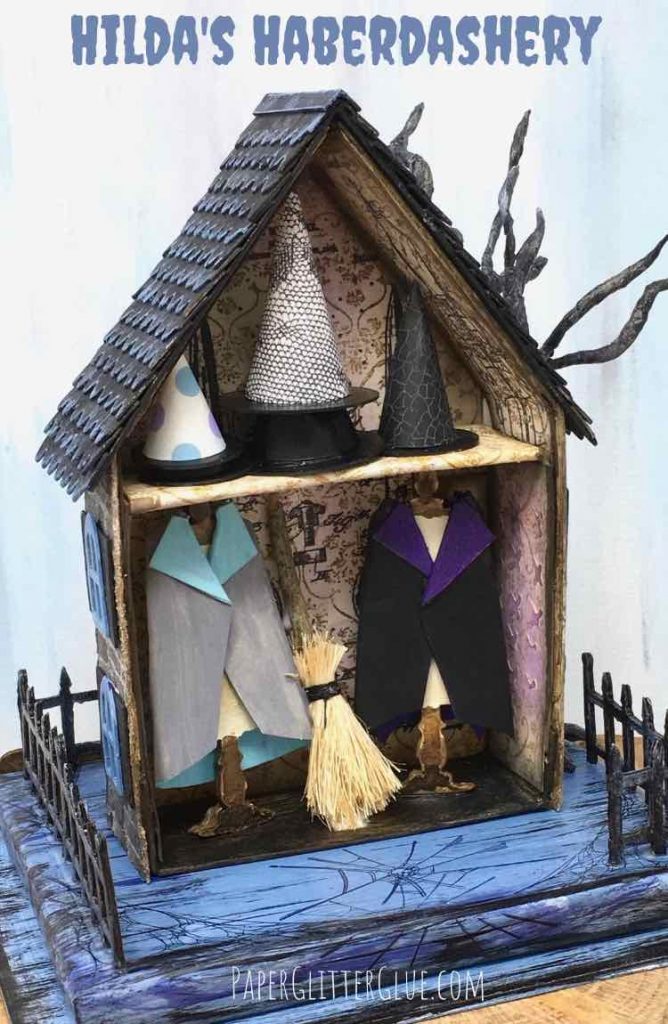
Of course, the stamping technique could still be used on smaller Halloween houses. In fact, I have used it on Hilda's Haberdashery - A Miniature Two-Sided Halloween Shop.
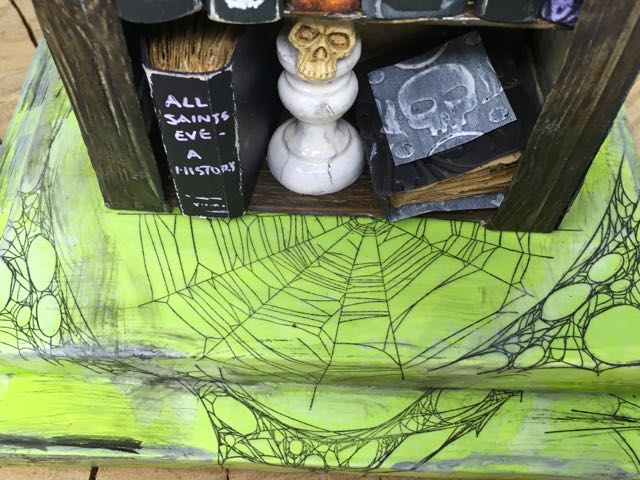
Also, I used stamps on the base of the Harlequin House Used Bookstore.
I hope that inspires you to use stamps when making your own Halloween houses.
5. Spooky Additions
When I say "Spooky Additions" I mean things you can add to the exterior of the house that add to the haunted feel. For me, that means things that aren't gory or gross, but still a little scary. These are just a few examples to get you started.
Examples:
- Tombstones or gravestones
- Pumpkins
- Moss
- Trees
- Figurines
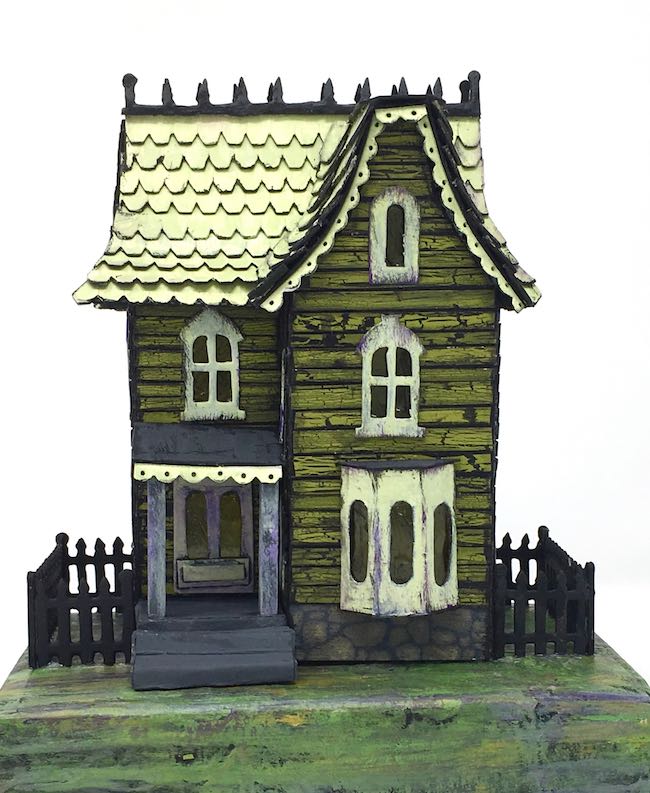
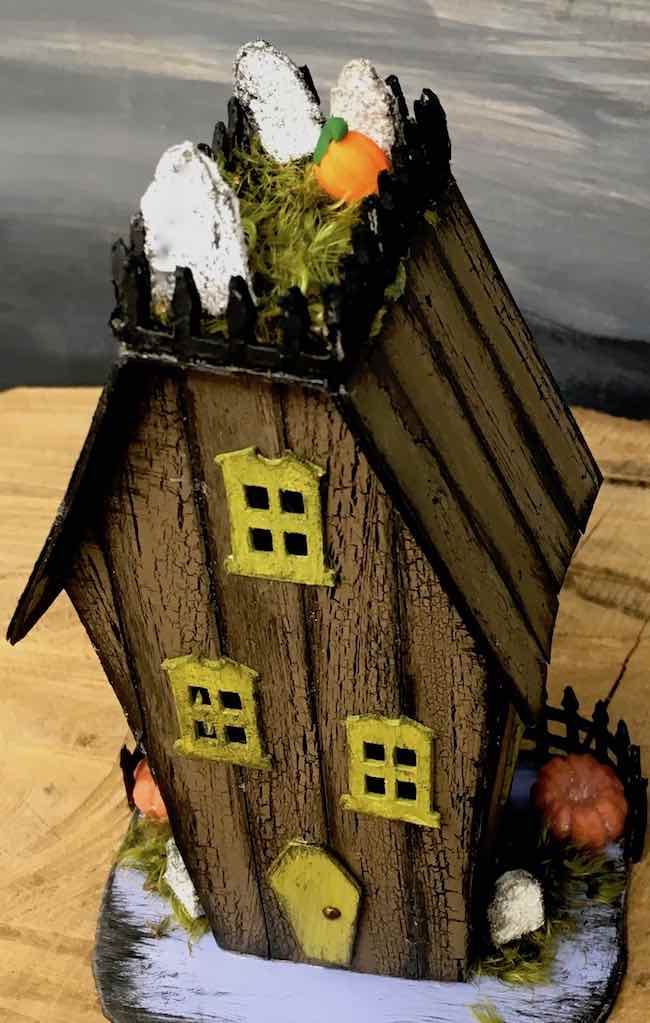
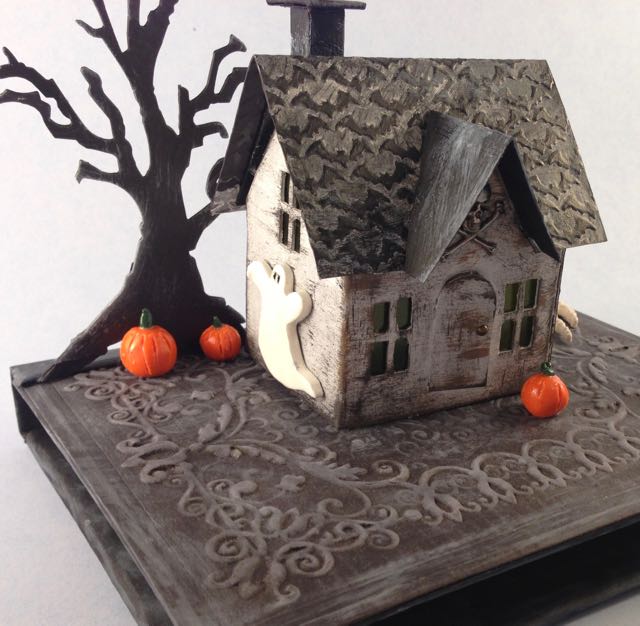
And here is how all those elements look on the Embossed Roof Haunted House.
Tombstones
I love the look of tombstones. They add so much charm to evoke a haunted atmosphere.
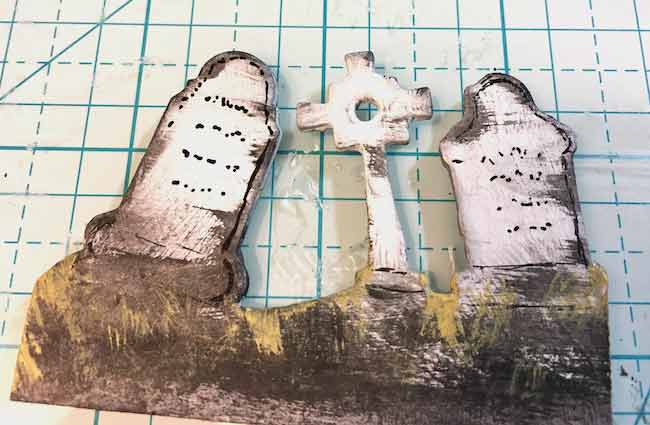
Just for a fun detail, I added a graveyard on top of the coffin house. I embedded the tombstones in moss surrounded by a fence. Of course, a pumpkin had to be there. You can see two tombstones at the base of the house as well.
Pumpkins
Pumpkins are the perfect element for this season. Sometimes I make tiny pumpkins from polymer clay, but sometimes I use store bought pumpkins like these from Tim Holtz.
Moss
Moss works beautifully on Halloween houses. I just gathered moss from the woods near my house, but you can go to your hobby store and purchase a bag of moss if you don't have any growing nearby.
Trees
Even trees add so much spooky ambience. My favorite tree to use is the twisted tree. I wrote a tutorial for making twisted trees so you can make your own with just a few supplies - wire, paper, glue, and paint. Here's an example on the Haunted Schoolhouse.
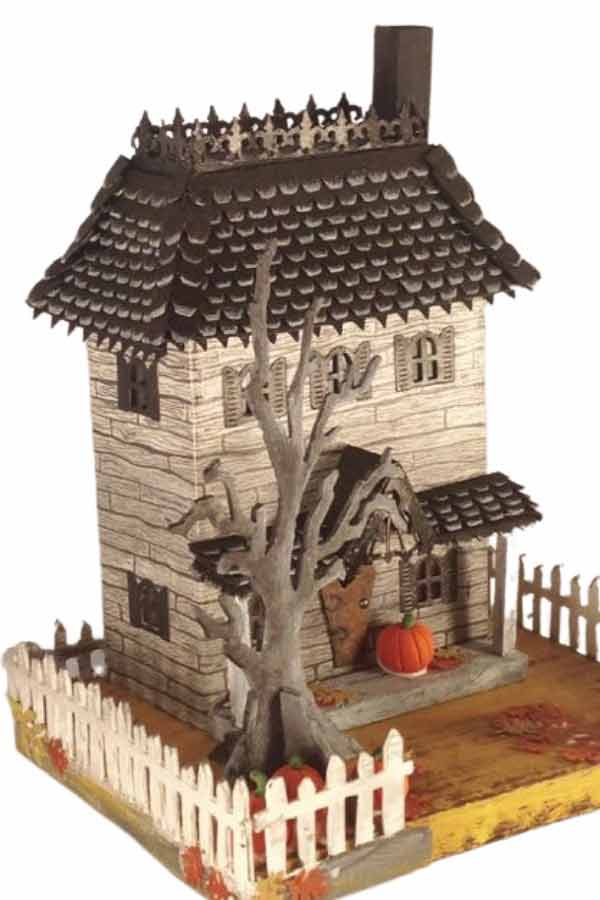
You can even make cardboard trees. The trees below use a discontinued "Branch Tree" die from Sizzix. Unfortunately, it is difficult to find, though sometimes you can find it on eBay.
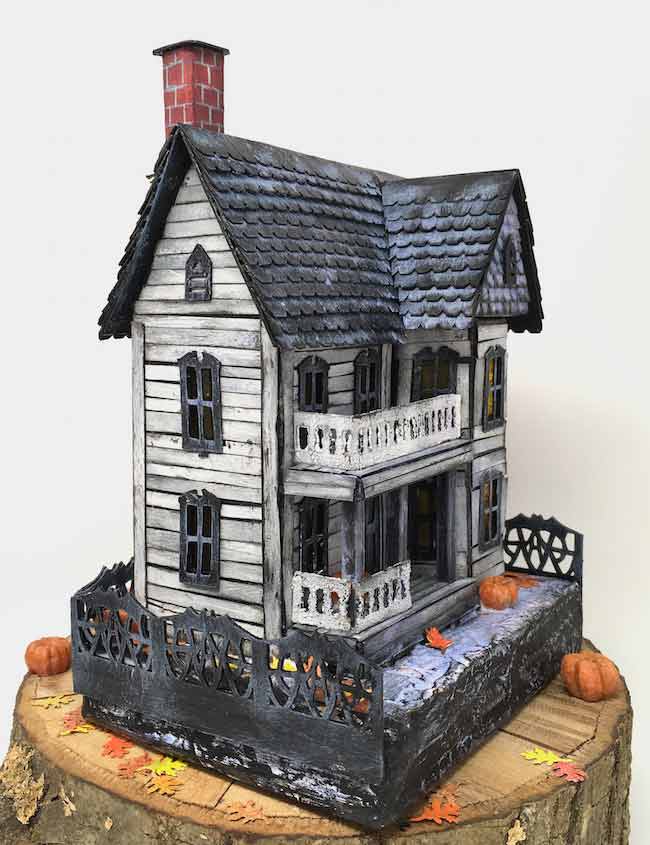
Features you might like on the Widow's Walk house are the distressed roof shingles, a coffin door, pumpkins, and a branch tree in the front yard. For the siding, I drew spooky boards on a piece of copy paper and then adhered it to the house itself.
Figurines
You can also use figurines like the ghost in the above house. I made that one using a cookie cutter and polymer clay.
Here's another example of the same ghost. Also you can see a good example of the branch tree as well.
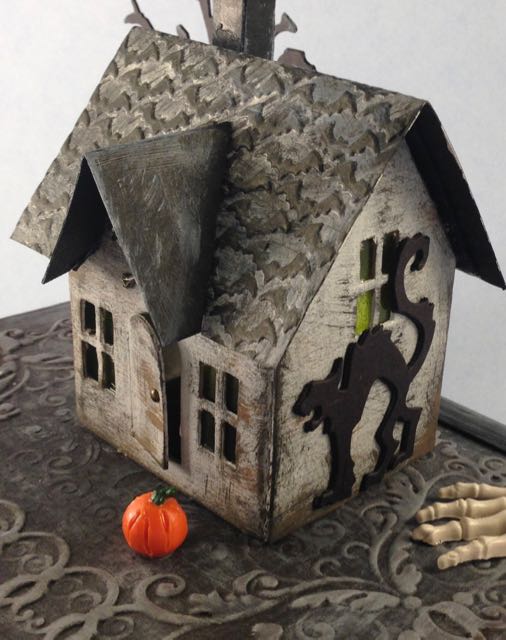
The other side of the house shows a cardboard cat cutout. Also notice the polymer clay skeletal hand. I found a hand mold and use polymer clay to make it.
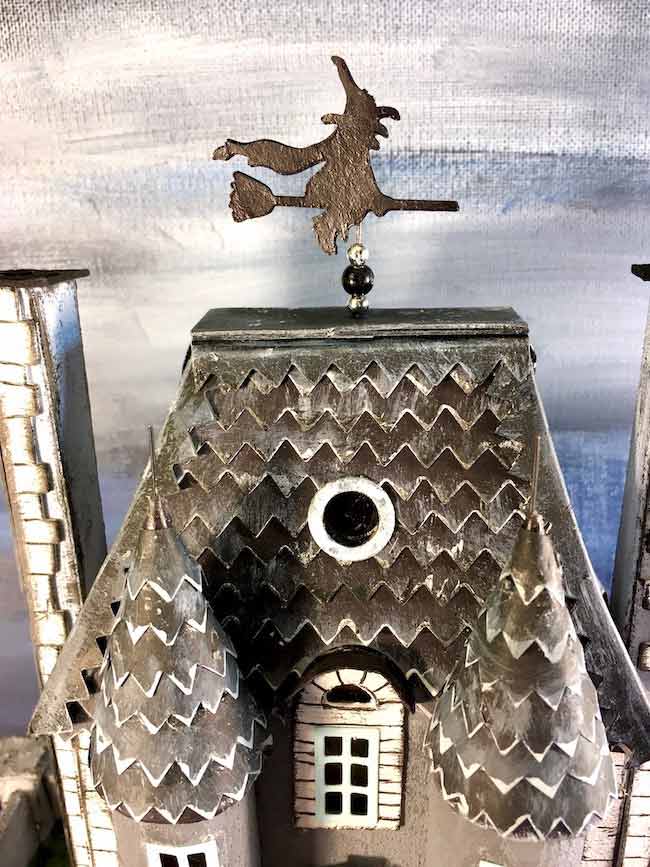
Unfortunately, I don't have many spooky human figures, but you can find some examples at the hobby or dollar store in season. I did make a Witch weathervane for a chateau using a witch punch.
Long ago, I did find some zombie stamps to make some zombie figures. Like I said, I don't do gory so I made them in fall colors so they are bit spooky, but not too scary. The background is a piece of cardboard and glued to a circular base.

Really what I've listed here is just a starting point for using your imagination on your own house.
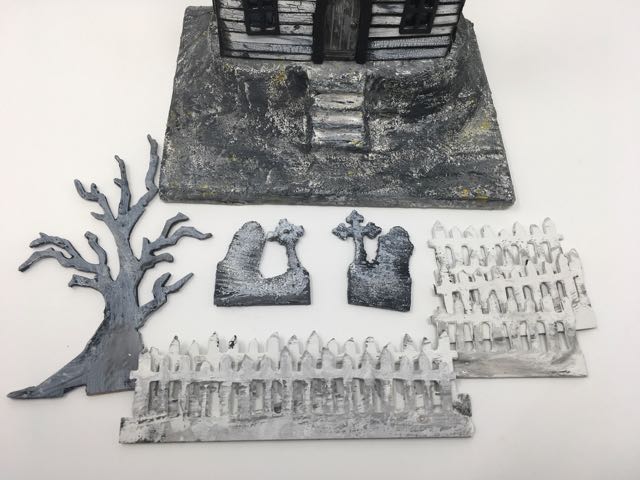
6. Base for Your Paper Halloween House
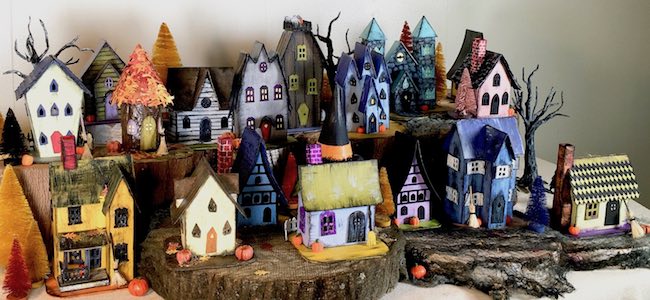
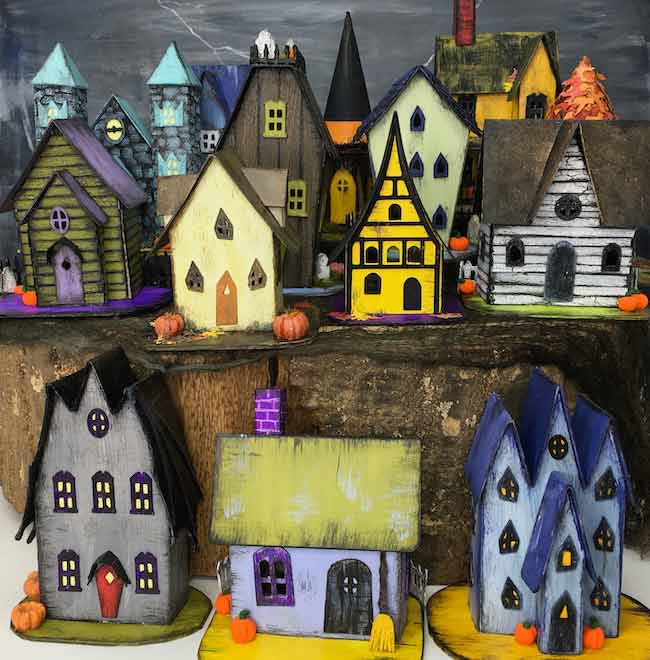
Finally, the base of your Halloween house has so much potential for adding to a haunted effect. You can see so many different examples of bases in the photos above.
There are a number of ways to make a base that screams Halloween:
- Colors and distressed painting
- Shape of the base - adding creepy stairs or a rocky outcropping
- Fences - fences frame the so well
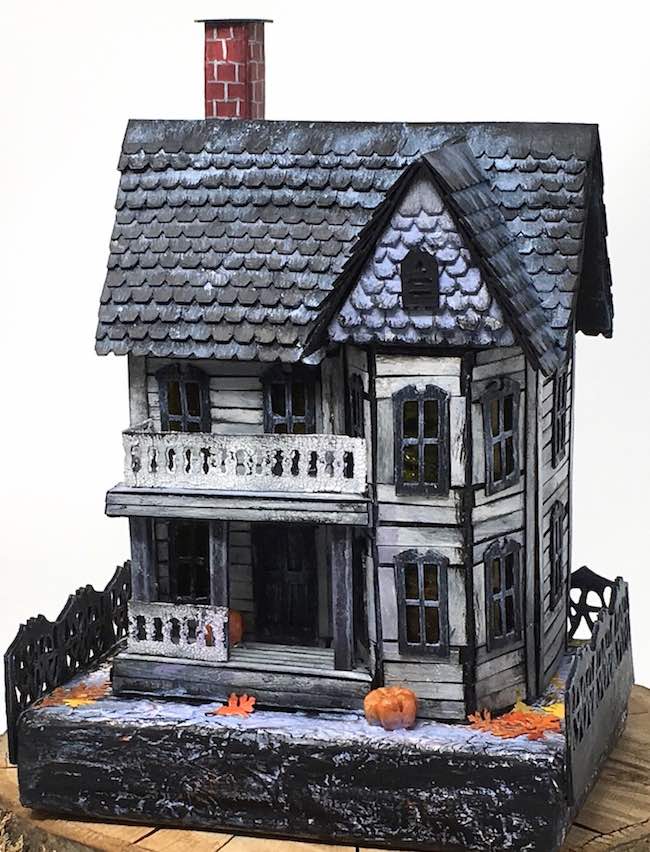
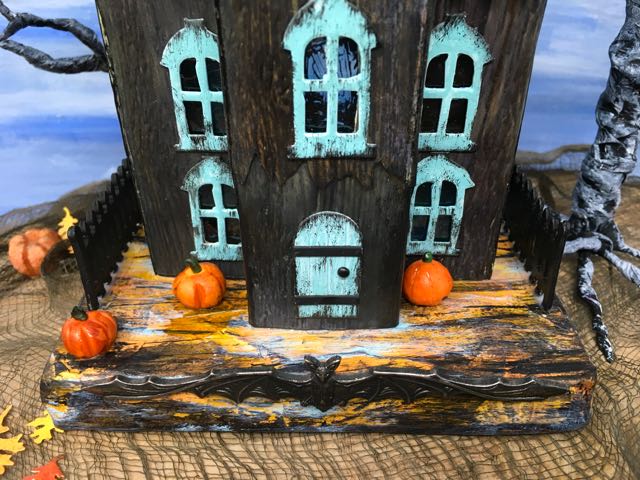
Ebonywood Manor is situated on a colorful base that shows off two of these elements - color and distressed painting as well as fencing.
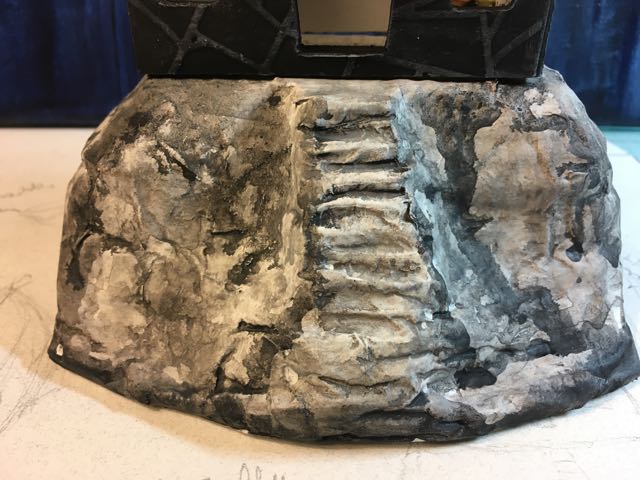
But here is an additional example with the stairs leading to the Bat Wing House. To make the stairs, I cut out a section from the cardboard base to represent stairs, glued layers together, then covered the base with crumpled paper, and finally painted it.
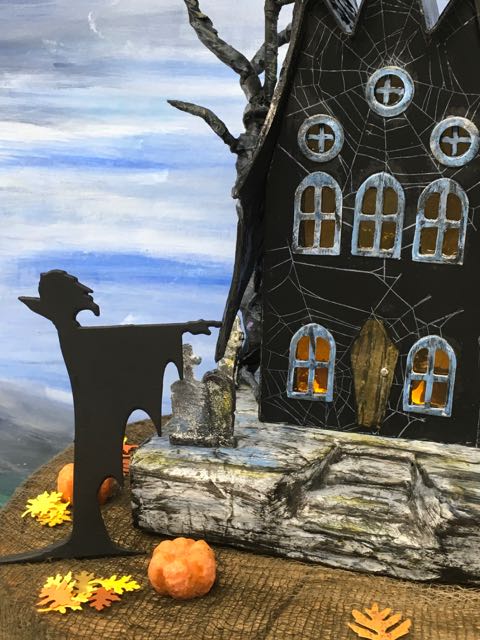
Incidentally, the Dracula figure is from a discontinued Tim Holtz Sizzix die called "Gloulish". If you are interested, sometimes you can find it on eBay.
But I want to talk about it fences here because they are fun to add and frame your Halloween house so beautifully.
Just like making designs for windows, it took me a while to learn to make fence patterns, but I finally did it. Here's an example for the Bat Wing fence used on the Habitat for Humanity 2019 Halloween house.
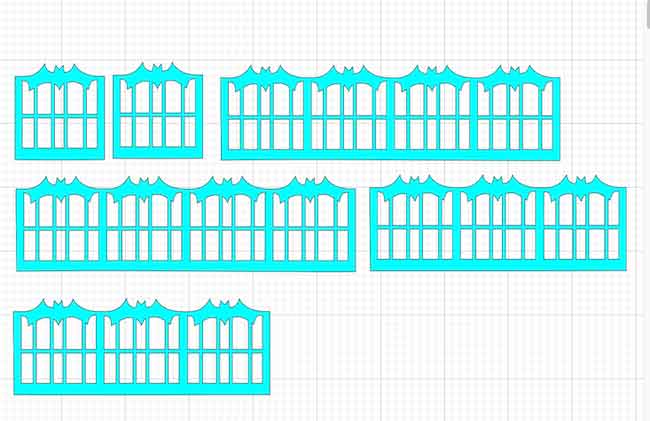
And here is how it looks around the house.
Whenever I make a fence, I always glue at least 2 layers of cardboard together to make it much stronger. I do this because I want my projects to last. If you just have one layer of cardboard, it is prone to getting crunched.
Below are two more fences on smaller Halloween houses from my book, 13 Handcrafted Halloween Houses. Both patterns for the fences are included in the book.


I think that is about it for now. I hope you find some inspiration and ideas from this post. And then go personalize your houses to fit your own imagination.
Please let me know if you have any questions or comments.
Lucy
debra orr
Thank you so much, I am having so much fun with your house patterns. This is my first time to try this. I have made three of the 13 days of Halloween. I started with the candy corn house. You are the best, I cannot wait to see what is next.
Lucy
Debra,
I can't tell you how happy this makes me. I am so glad you like my little houses. I've got some fun ones coming up.
Thank you so much for taking the time to let me know you like my patterns.
Lucy
Jan McIntire
I have a 3-D Christmas "Box" that I made, designed, created from cardboard. It opens up to show the inside of a room with tree, window, presents, fireplace, etc. I would be glad to send you photos and directions if you would like. You could make changes and adaptations as you wish and share with your customers and viewers.
Email me if you would like to see it
Jan
Betsy
Thank you🙂
Lucy
I hope you find good information here.
Lucy