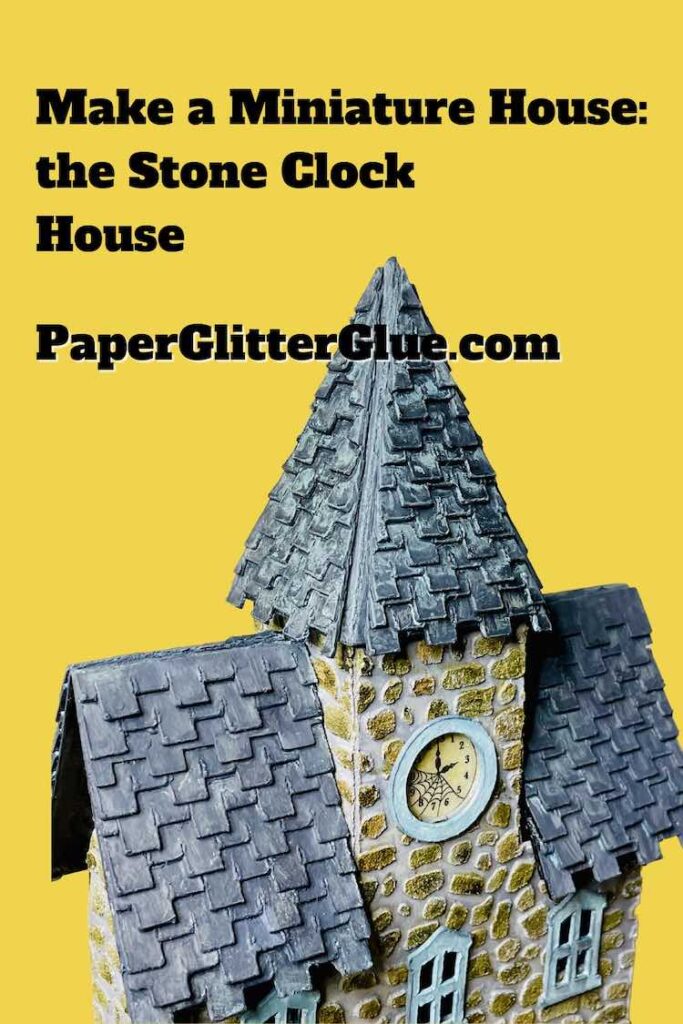
Don't you love to make little houses? And what about making a little house with a stone surface - the Stone Clock House? After studying the stone surfaces on old houses, I decided to make a cardboard house with a stone surface a few years ago. First, I made the Irish Stone Cottage, followed by the Stone house shown below.
Finally, I've got the pattern written up for the Stone Clock House so you can make one for yourself.
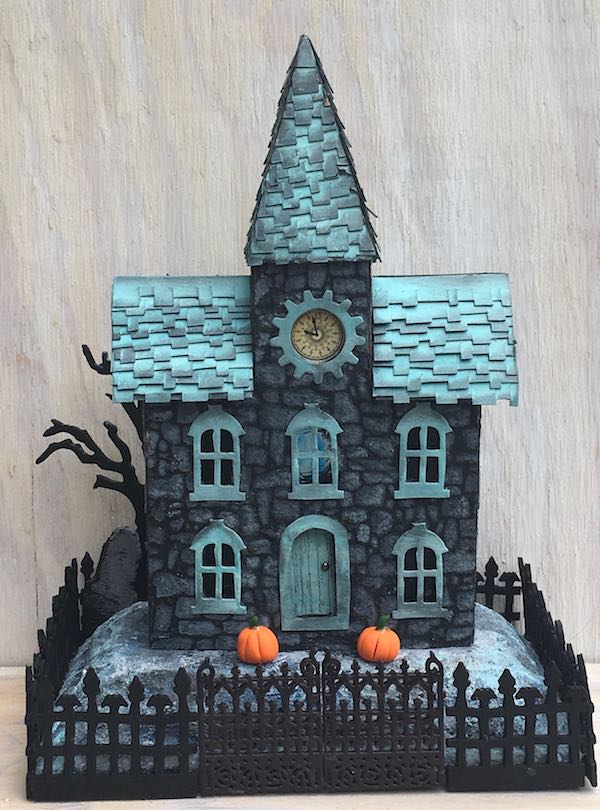
I think the stone stenciled surface makes a great surface for a paper house. Have you tried that technique? After you see this great little Stone Clock House, I hope you do try the technique and make one.
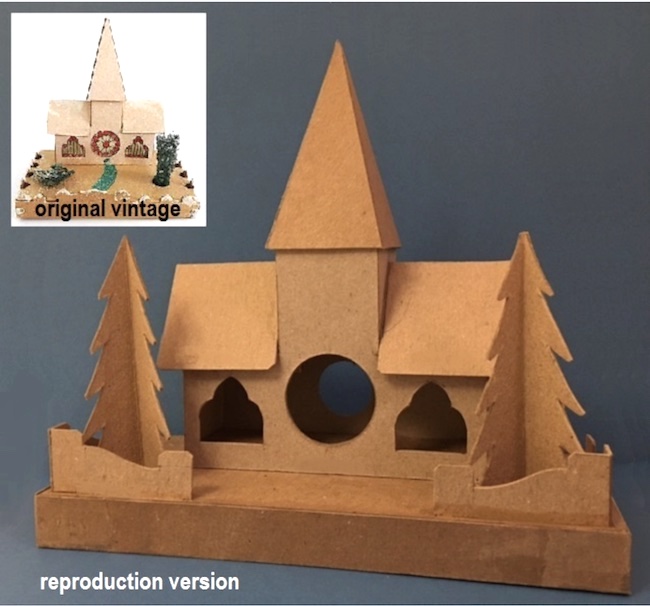
The original pattern came from my friend, Howard, who posts his patterns on the Cardboard Christmas forum. I changed the pattern somewhat - different windows and I made the house taller and the steeple a little shorter. But you can see how the design evolved form the one below.

So let's get started making the Stone Clock House.
This post contains some affiliate links for your convenience. Click here to read my full disclosure policy.
Materials to make the Stone Clock House
- Cardboard - I use 30 pt cardboard - Amazon calls it medium weight chipboard. You can use card stock, but it won't be as sturdy as this cardboard.
- Card stock for the iron fence
- Stone Stencil - you can use the free one in the Stone Clock House pattern or purchase a stone stencil
- Texture paste - my favorite is this Grit Paste from Ranger
- Gesso primer
- Glue - Bearly Art glue for card stock, but Fast Grab Tacky Glue or Turbo Tacky Glue works better for cardboard
- Paint - these are good shades for stone:
- Walnut Stain Distress Paint
- Gathered Twig Distress Paint
- Pumice Stone Distress Paint
- Hickory Smoke Distress Paint
- Fossilized Amber Distress Paint
- Weathered Wood Distress Paint
- Antique Linen Distress Paint
- Glossy Accents Glue for "glass surface"
- Plastic packaging for window glass
- Alcohol ink to color the plastic
- Corrugated cardboard for the base
- Hot glue
- Newspaper or brown packing paper to cover the base
- Mod Podge
- Pattern for the Stone Clock House - Design No. 138 - from the Paper Glitter Glue library
- A way to cut out the pattern - I use my Cricut Maker, but you can use a Cricut Explore Air or other brands of cutting machines
- Miscellaneous decorative items
Steps to Make the Stone House
- Download the free pattern for the Stone Clock House - Design No. 138
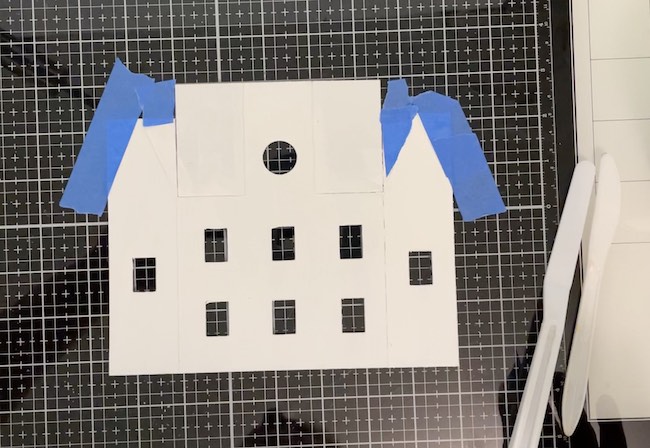
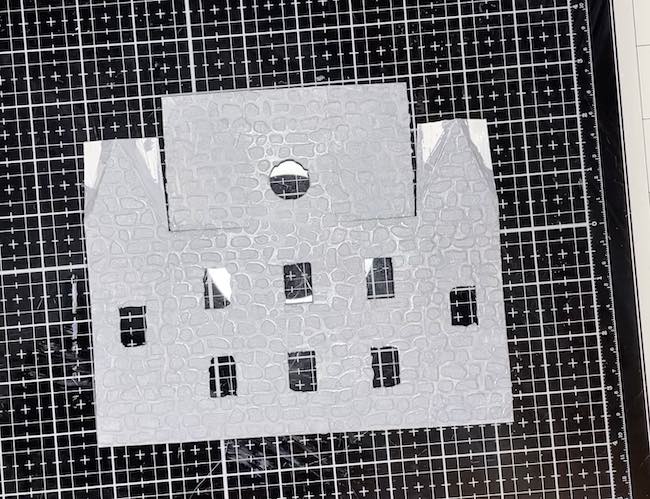
- Cut out the pattern for the house
- Prime the pattern pieces
- Stencil the stone on the surface
- Paint the stone design
- Paint the trim - windows, the door, shingles
- Glue the shingles to the roof and steeple pieces
- Glue the windows, door, roof support, and clock to the front house piece
- Assemble the house by gluing the front and back pieces together
- Glue the roof pieces and the steeple to house
- Make the iron fence, if desired
- Make a base and glue the house to the base
- Landscape the house and enjoy your wonderful project
Construction Video for the Stone Clock House
Here's a short YouTube video showing the construction detail for the Clock House. I used card stock as the example in the video just because it is easier to show how to make the house.
First, Download the Free Pattern - Design No. 138
To download the free pattern for the Stone Clock House, just go to the Paper Glitter Glue library page. Click the link in the middle of the page to go to the password page. Type in the Paper Glitter Glue password that I send you when you subscribe to the newsletter.
If you don't have a password, then simply subscribe to my Paper Glitter Glue newsletter and I will send you the password right away.
This design is number 138 in the library which you will find in the July 2022 section of the library.
The Stone Clock House pattern is available in two formats:
- SVG cut files to use with a cutting machine like the Cricut
- PDF printable patterns.
Also I have separated the pattern into 4 sections:
- The main parts for the house include the iron fence
- Shingles in a separate file
- Stone stencil file
- Iron fence file.
Next, cut out the pattern pieces
To cut out the pattern pieces, I use my Cricut because it is the easiest way to cut detailed pieces. In this section, I'll go over some of the important details in cutting the pattern out with a Cricut.
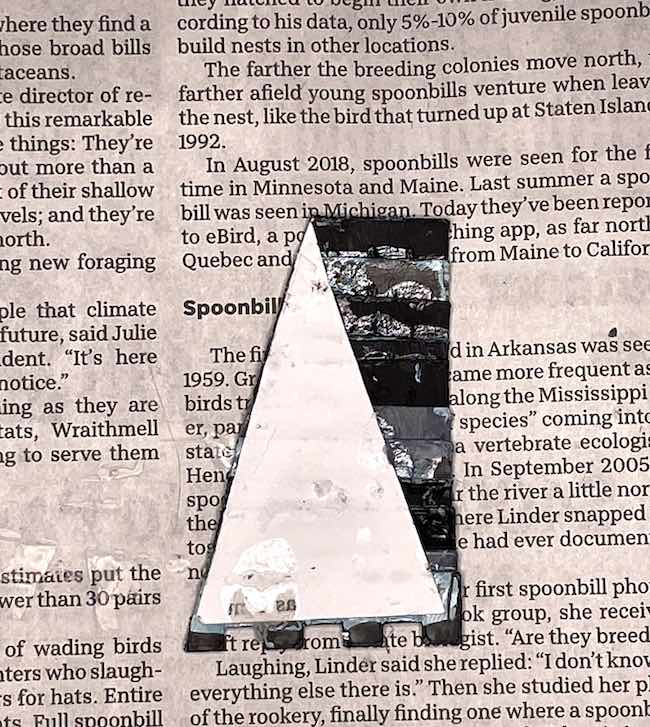
Make extra copies of the roof piece, the roof support piece and the steeple template
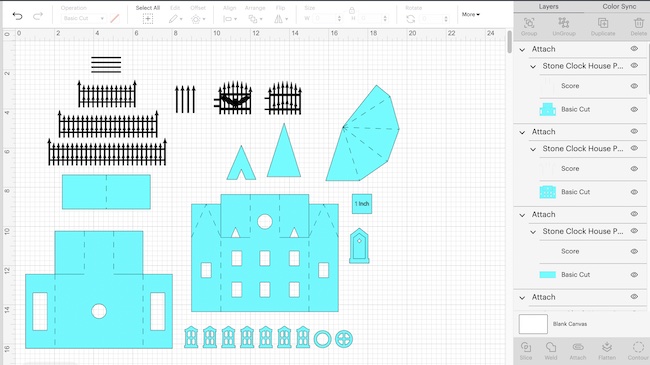
But do remember a few important details. For example, you need to duplicate and make two rectangular roof pieces, 4 triangular steeple templates, and two roof support pieces.
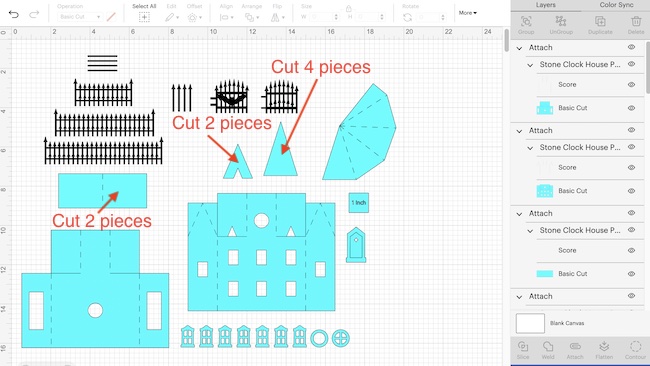
Also remember to designate the score lines and attach them
And the other important thing to remember is to designate the score lines and attach them to the appropriate pieces as shown below.
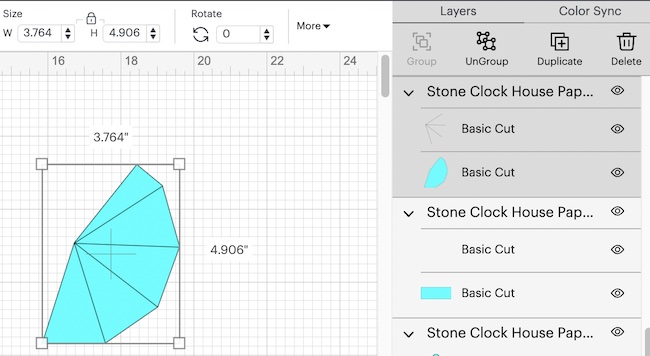
Choose SCORE in the Operations menu on the upper left side of Cricut Design Space.
And then attach the stone lines to the steeple shape. The attach option is the on the lower right side underneath the layers panel.
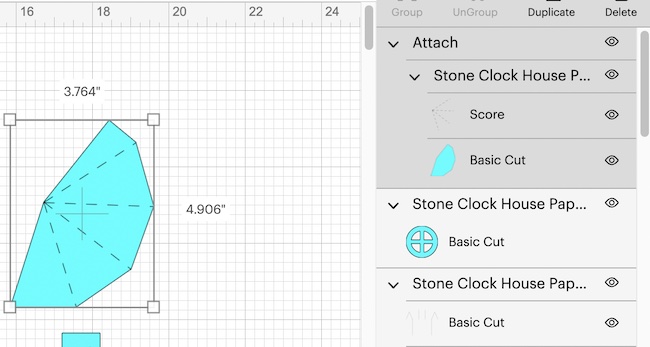
The score line for the roof piece is kind of hard to see under the layers panel on the right. So choose score in operations menu, and then attach.
After you do that, remember to duplicate the roof piece.
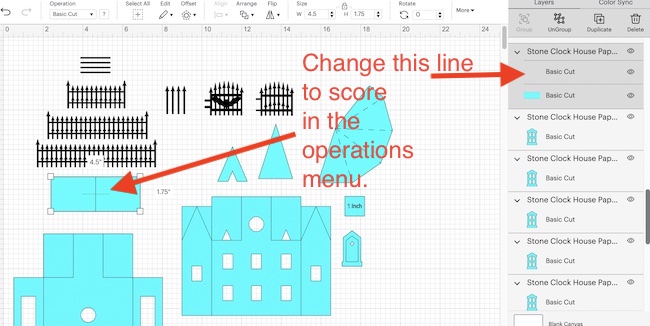
The photo below shows all the Stone Clock House pieces with attached score lines
Finally, the photo below shows all the pieces with the score lines attached.
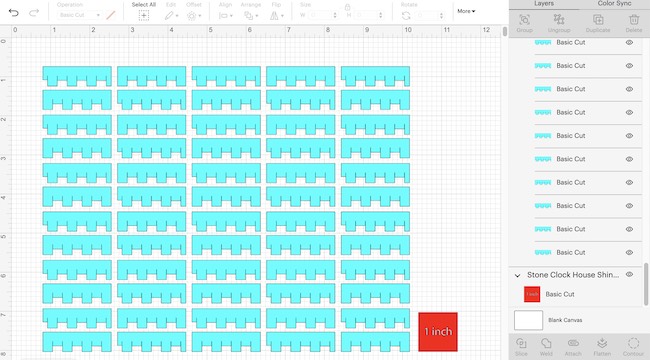
Cut out 2 pages of shingles
If you want to use shingles on the roof, it takes two 8.5" x 11" pages of shingles to cover the roof and the steeple.
Prime the house pieces
When I make a little house out of cardboard, I always prime the pieces with gesso primer so the cardboard takes paint better. But you don't have to do that if you make the house out of card stock.
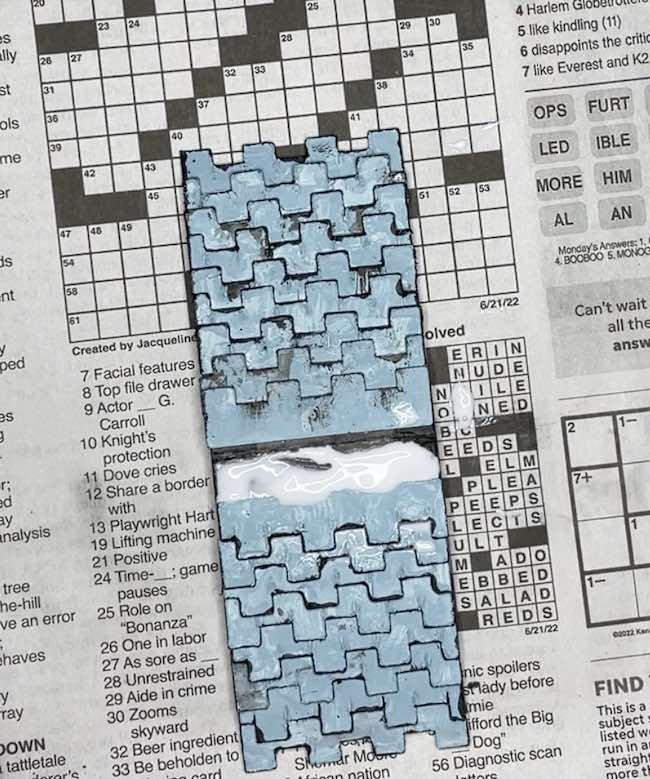
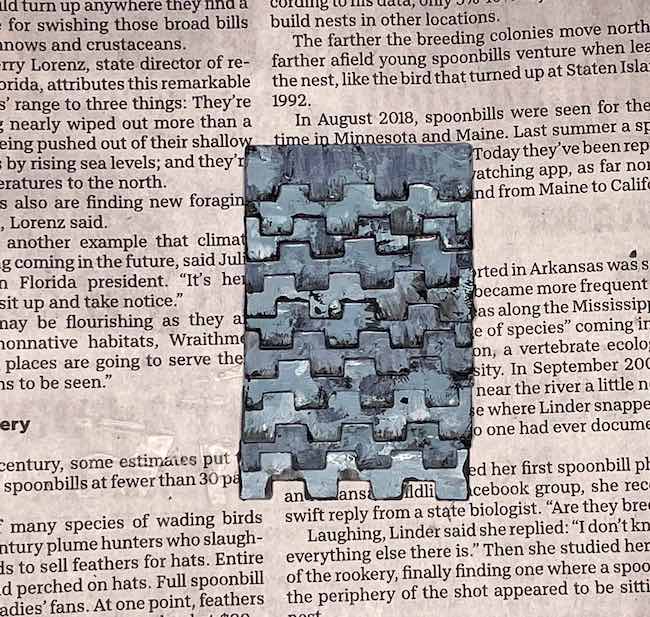
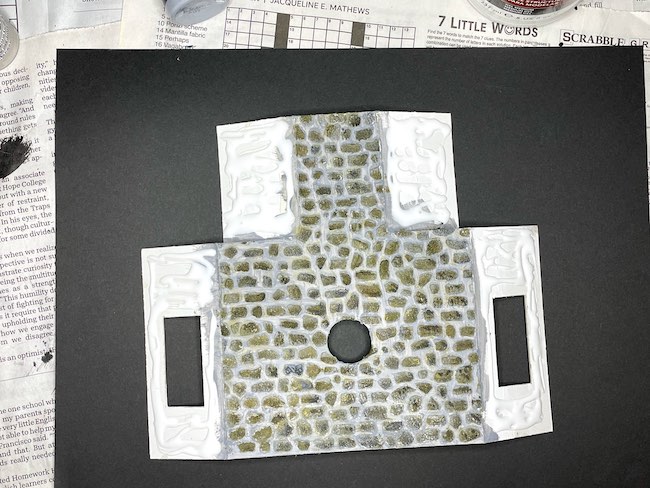
Stencil the body of the house with a stone
If you want a stone surface on the house, stencil it after priming it. I've made a video to show you how to make the stone textured surface.
And here is my written tutorial to help you make the stone texture.
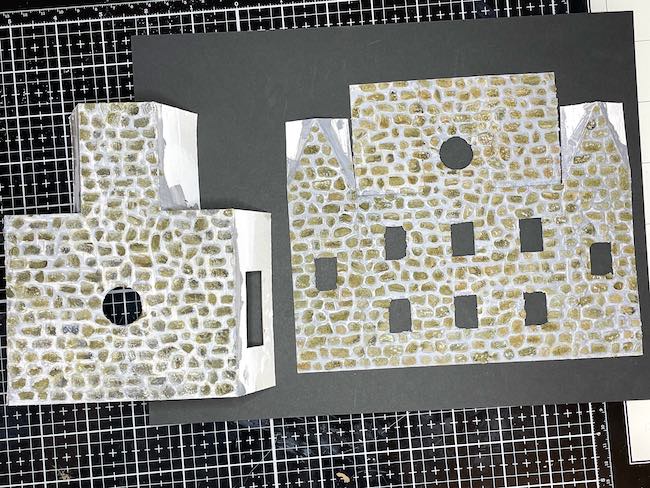
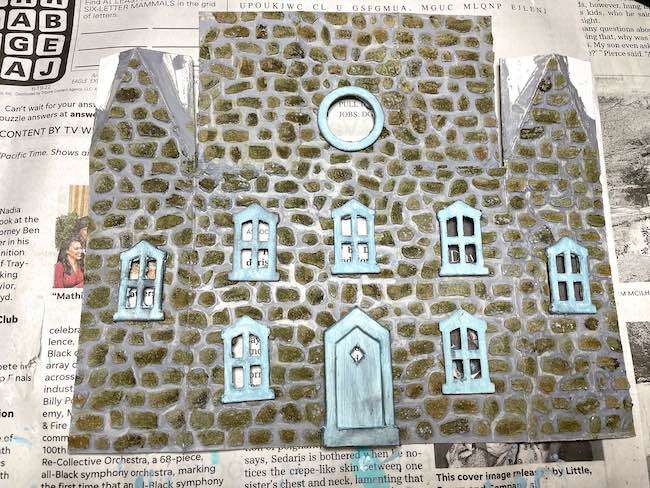
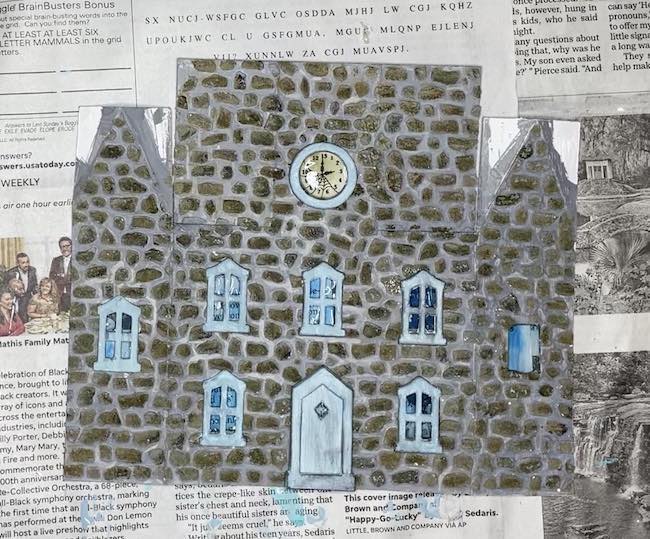
Here's the primed stone surface for the front clock house.
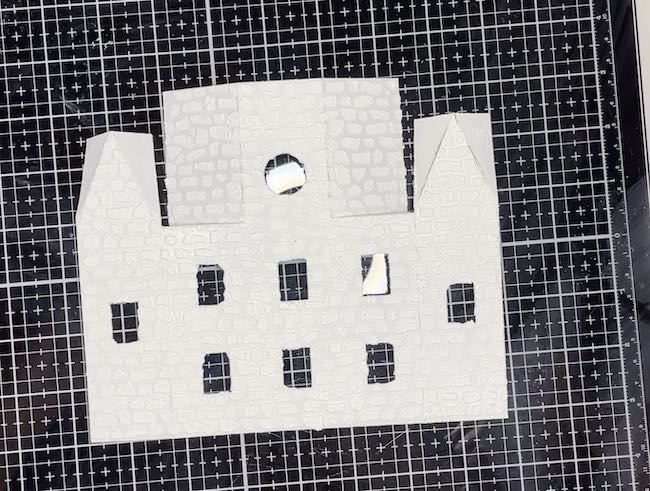
In the photo below, you see the background color on the front piece.
Finally, here is the painted stone sections of the house pieces.
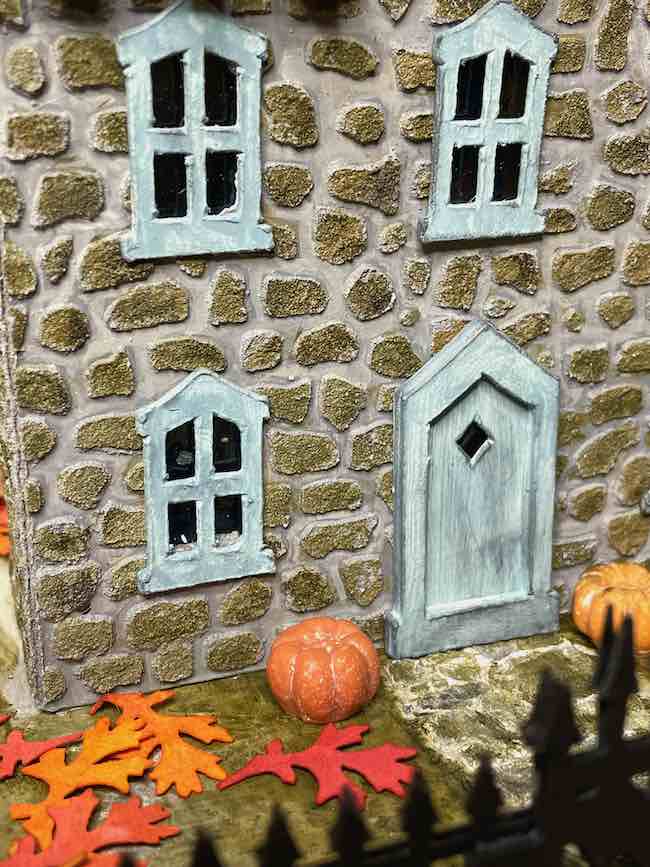
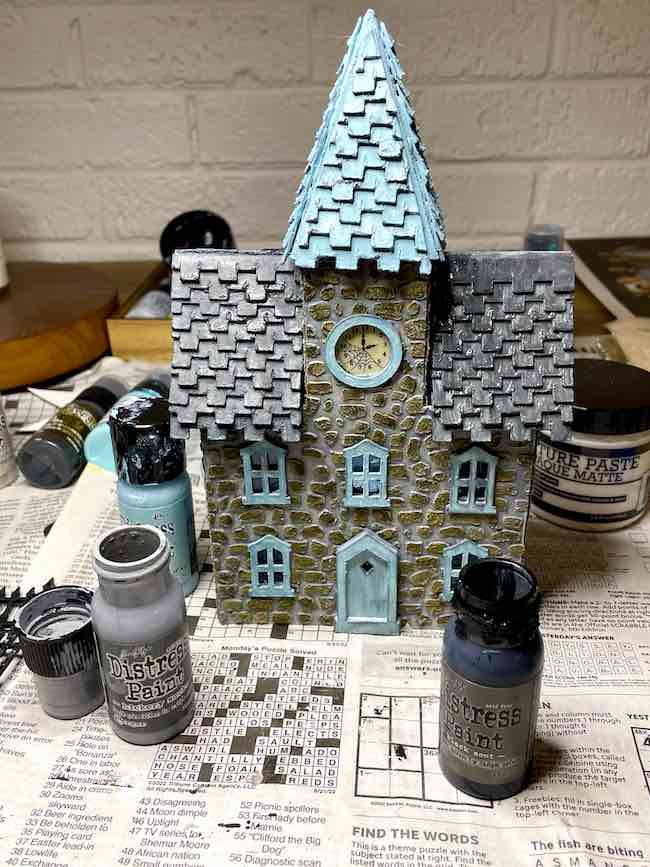
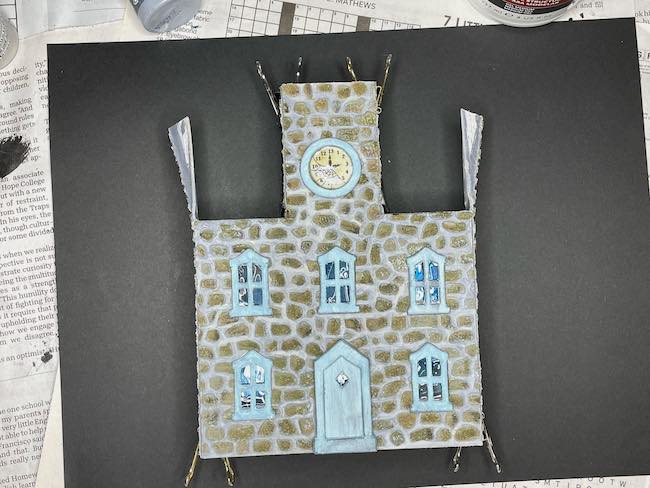
Paint the trim - windows, doors, and shingles
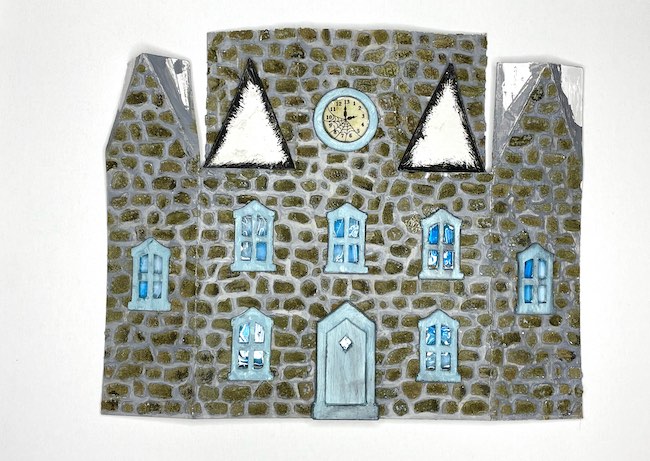
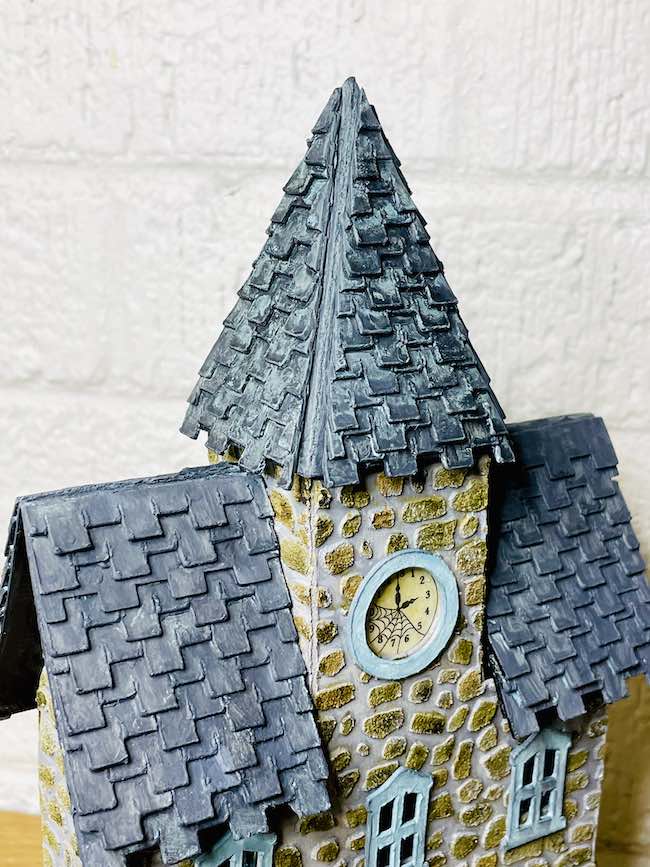
Choose the colors for the house and paint the various pieces. I chose a contrasting blue-grey called Speckled Egg for the windows and the door.
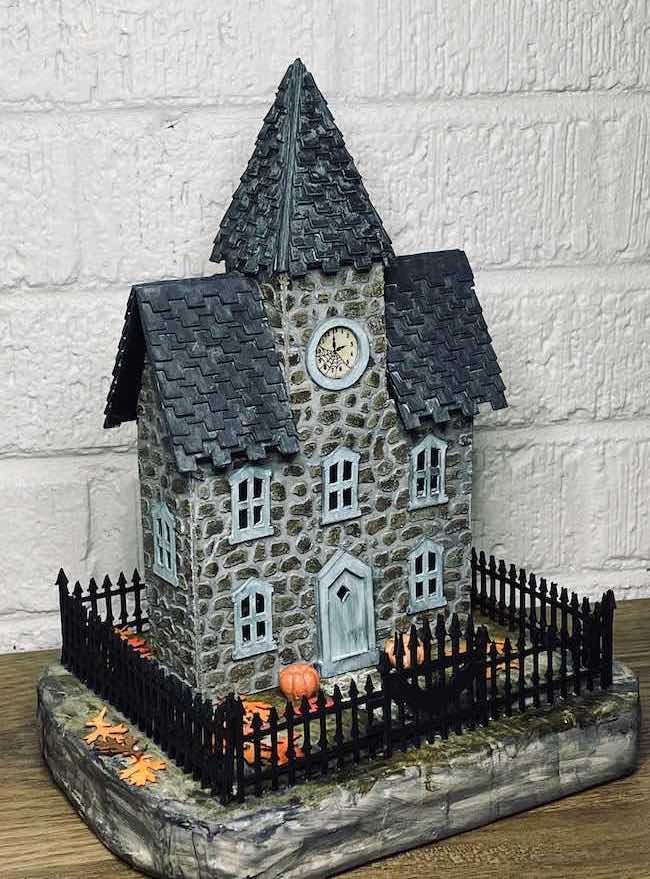
I debated about the color for the roof. Initially I used the blue-grey color, but then repainted it grey. Not sure if this was a good idea or not. i'm making this one as a Halloween house so the darker color works ok.
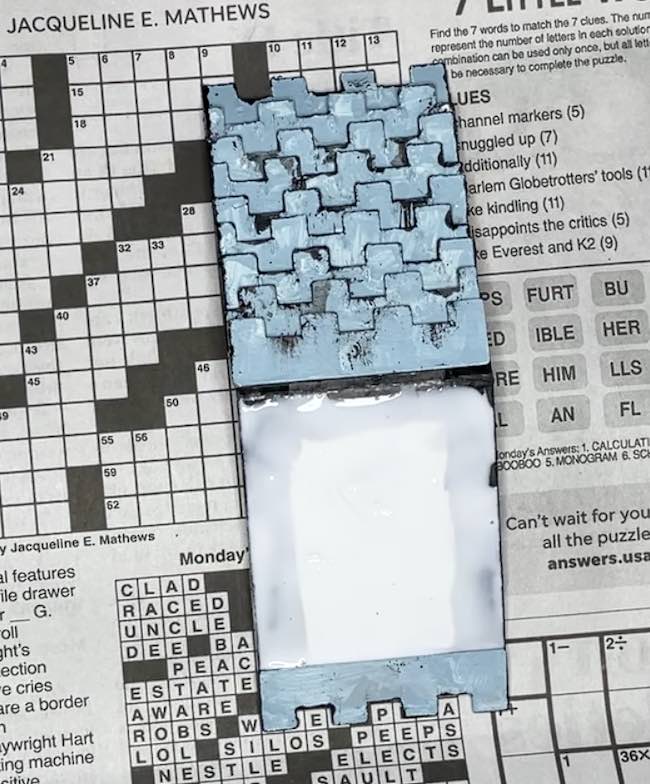
Glue the shingles to the roof and steeple pieces
The shingle pattern includes two different pieces that stagger to make it easy to align the shingles.

See how the stagger goes together.
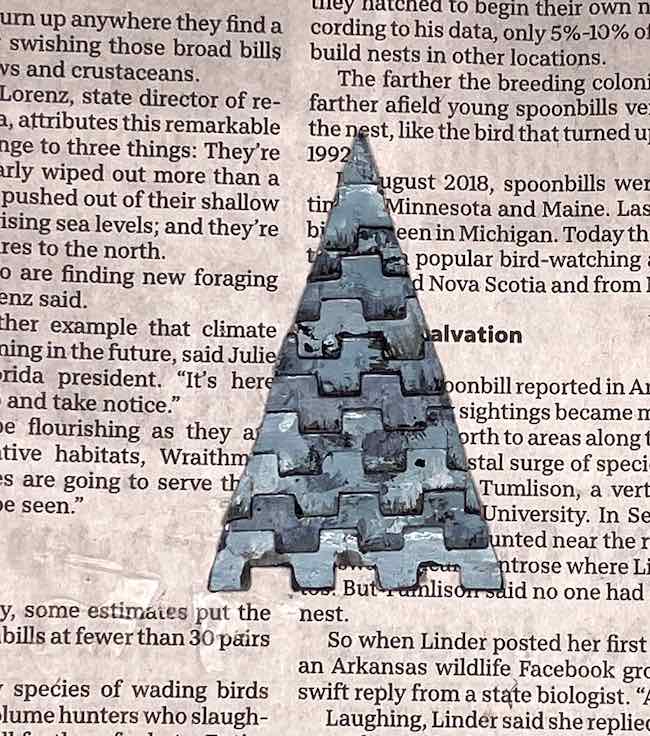
To make it easier to glue the shingles on the angled steeple, I have included a steeple template in the pattern. That way you can glue the shingles to the template easily. Then trim the shingles to fit the triangular shape of each steeple side.
Stagger the shingles on the template.
Here's the completed steeple section.
And below shows the back view of the template.

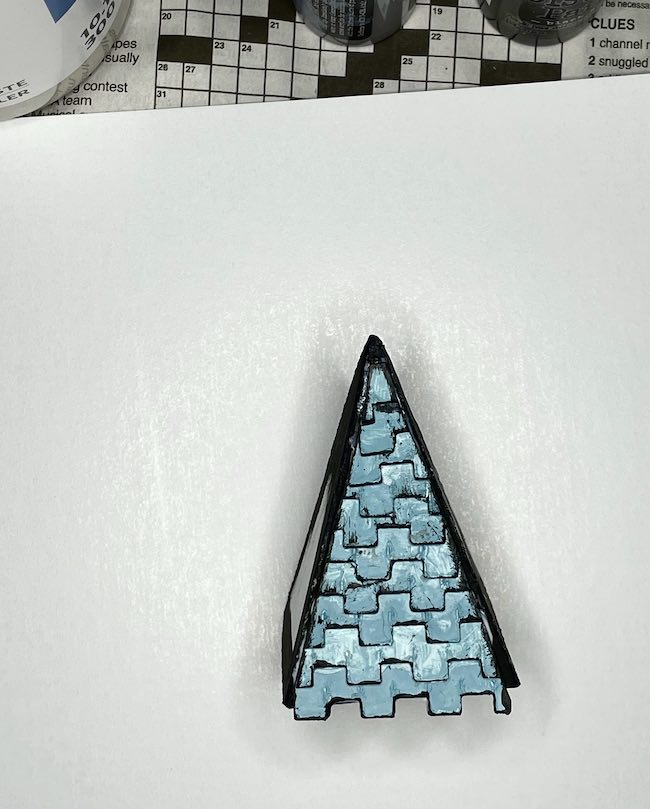
Trim the sides of template.
The photo below shows the completed steeple.
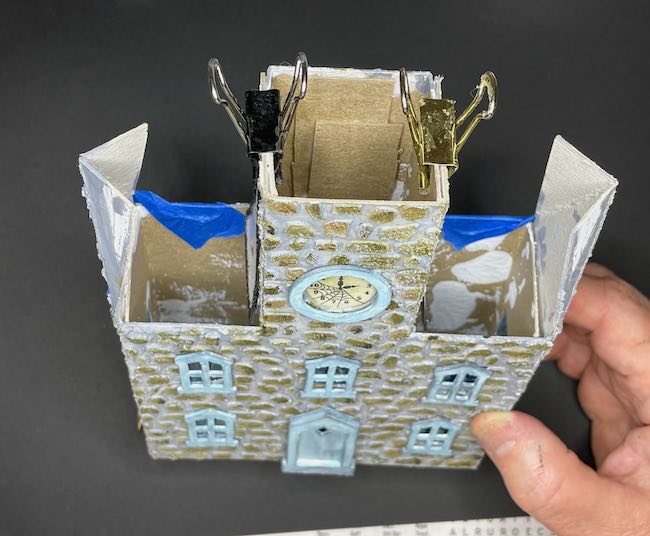
Before you assemble the house, glue the decorative elements to the house pieces
Decorate the house before you complete assembly of the house. That is the easiest way for me to do it anyway. After I pre-paint all the elements, then I assemble the house. Because I am a messy painter, I have difficulty painting these elements once they are glued to the house. As a result, I do it before assembly.
Since the house is a CLOCK HOUSE, I've included a 13 hour clock in the PDF pattern on the same page as the Iron Fence pattern. But I also included a regular round window in case you don't want to use a clock.
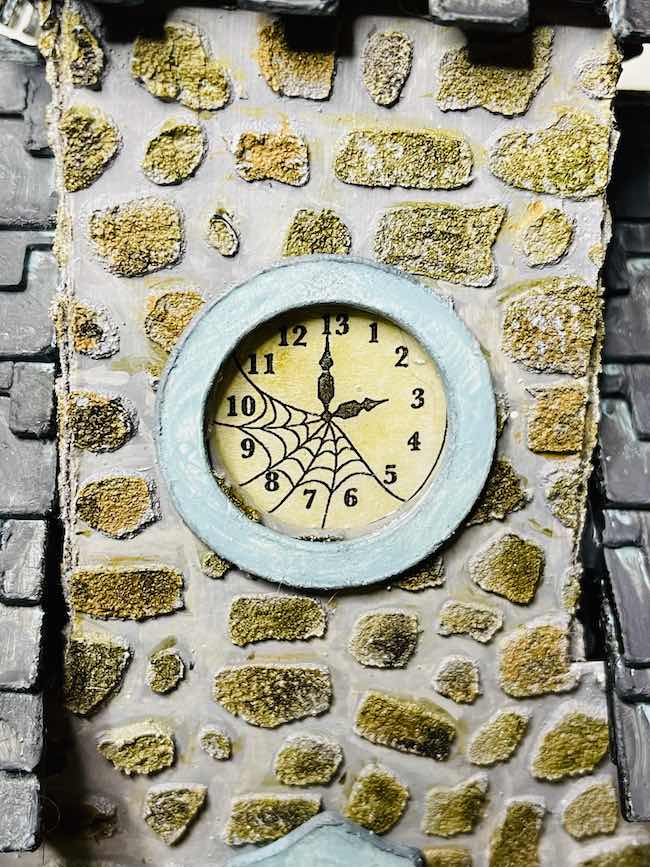
I dipped it in tea to age it a bit. Then covered it with Glossy Accents glue to make it look like it is covered with glass.
If you want to use a more traditional putz house clock, use the printed clocks from the Cardboard Christmas resources page. It's a great resource for all things Putz house-related.
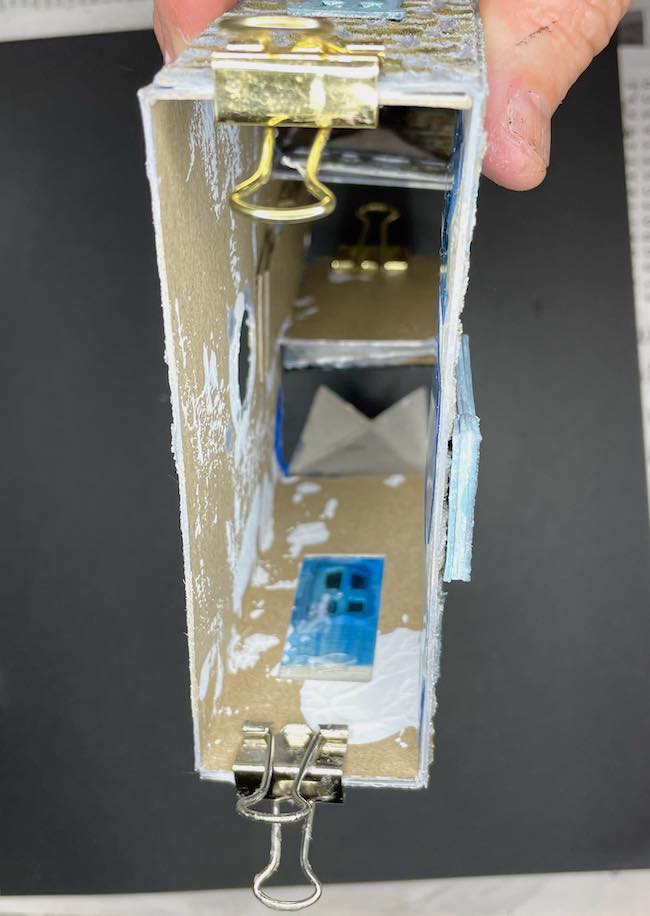
Use plastic packaging for window glass
As a general rule, I cover the back part of the windows with plastic packaging stained with alcohol inks. I just love the way it looks when you light up your little house.
Glossy Accents glue works well to glue the plastic to the cardboard. I usually smear some on the windows to make them look like wavy glass.
See how nice the windows look with the "glass" in place. Oops! Forgot to glue one of the side windows down.
Also remember to glue the roof supports to the front side pieces of the house. Trust me. They make gluing the roof in place so much simpler.
On the pattern, the roof support triangles have a notch in them to help them line up properly with the house piece.
Assemble the house by gluing the front and back pieces together
I call this type of little house, an inset house where the back piece fits inside the front piece. It's an easy way to make a house larger than one sheet of cardboard.
First, apply glue to the side tabs on the back house piece.
I use clips and painter's tape to hold the sides together while the glue dries. You can see that I added a some reinforcement cardboard for the tower.
Glue the roof pieces and steeple to the house structure
After the completion of the house structure, apply glue to the roof tabs and the edge of the roof support piece on the center tower.
Now your house is completed. It's time to make the fence.
Look at the back of Gail's Stone Clock House. You can really see her beautiful stone work on the back view.

Make the Iron Fence to Landscape the Stone Clock House
I think the wrought iron fence is the perfect fence to go around this stone house. At first I tried to cut it out in cardboard, but there is too much detail so it didn't cut well. But when I used card stock, it cut beautifully. To make the iron fence stronger, I glued three layers together.
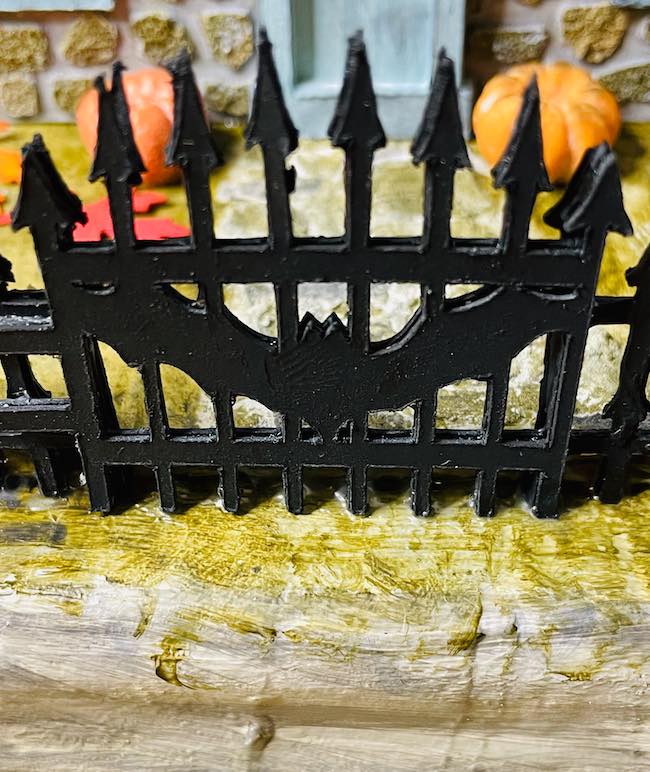
There are two different gates for the fence - one with a bat and one without it.
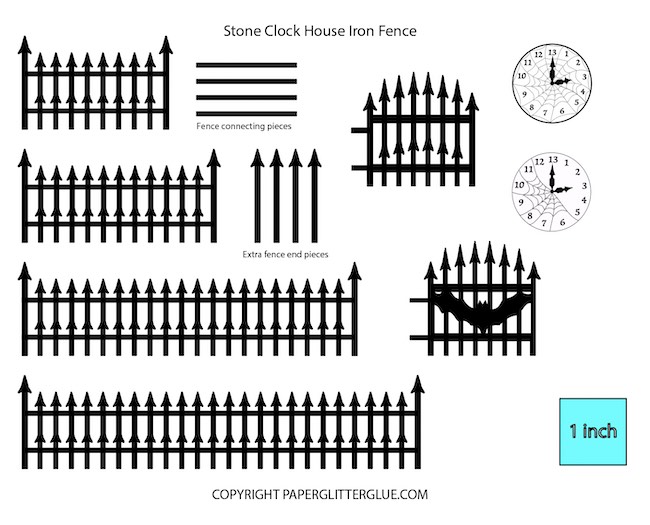
In addition to the two gate options, there are different lengths of fencing and some extra pieces to modify the fencing to your desired length.
Make a base for your Stone Clock House
Here's my tutorial on how to make a base for paper house.
I make very simple bases for my houses. I cut several layers of cardboard larger than the house. In the area where the house is going to sit, I cut a square large enough for an LED light. Then glue the layers together and cover them with newspaper or brown packing paper.
As you can see, my bases are kind of distressed and rustic-looking, but you can make them much neater than that.
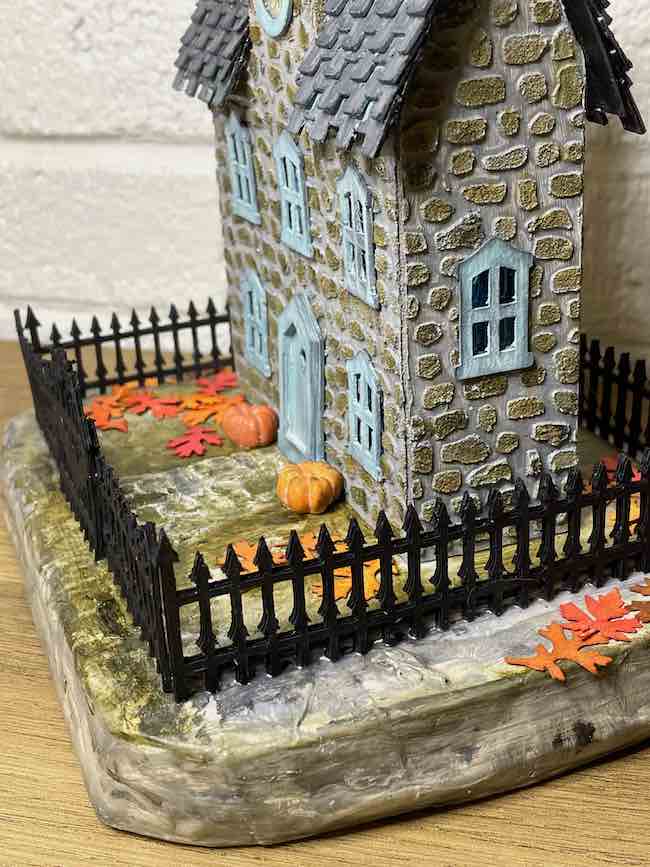
Glue the house to the base and landscape your Stone Clock House
For the final step, glue the house to the base. Apply a thick layer of glue to the bottom of the house and stick it down to the base.
Once the house is secure on the base, decide how you want to decorate your little house.
To adhere the iron fence, I applied a thick line of glue (a strong glue like Fast Grab Tacky Glue, Turbo Tacky Glue or Quick Dry Tacky Glue). Let it sit for just a minute because it gets stickier when you do that. Then embed the fencing in the glue. You do have to prop it up or support it while the glue dries.
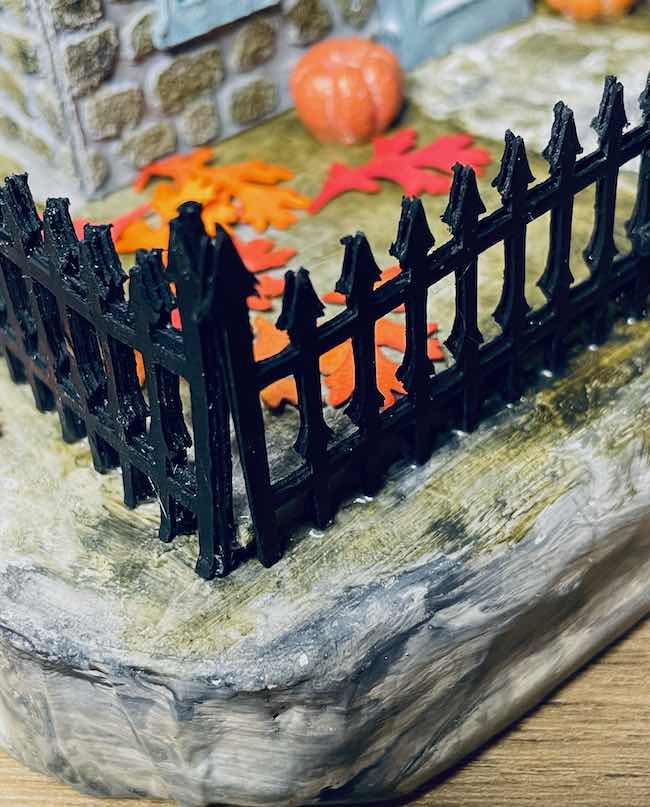
So what else would you like to add to your little house? Since my version is a Halloween house, I wanted some colorful fall leaves. I used a leaf punch and used a spray stain to color them.
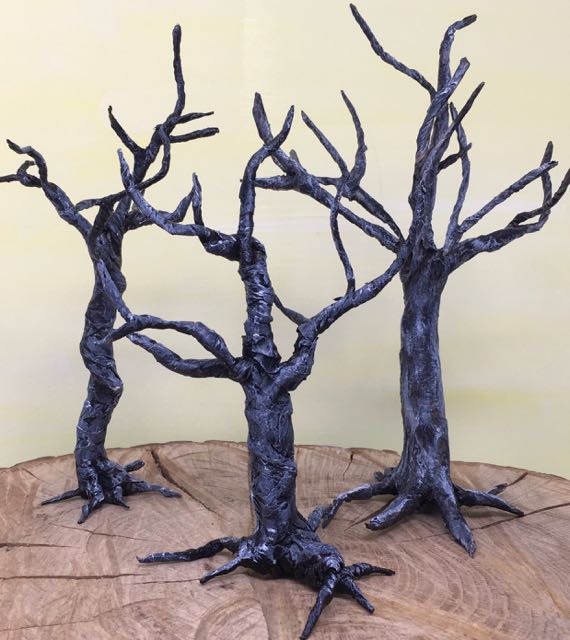
I need to make a twisted tree to go on the base. If you would like to make a twisted tree, follow these directions. They are perfect for Halloween houses.
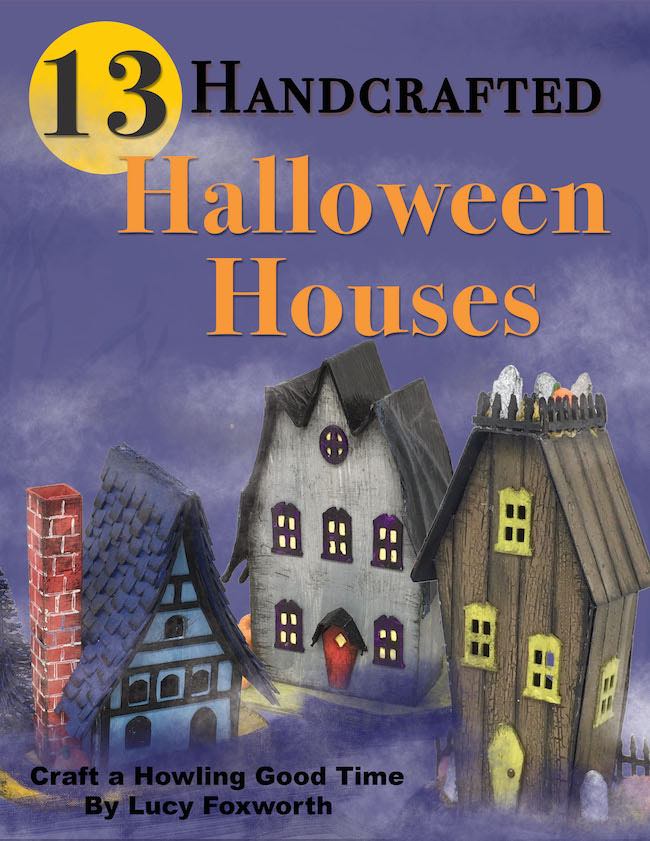
And if you want to make a Halloween Village ...
If you want to make a cute little village, I have a digital book you can purchase called 13 Handcrafted Halloween Houses. It has patterns for 13 adorable different houses with lots of other Halloween decorations.
P.S. Pin to Your Favorite Pinterest Board
If you like this little house, be sure to pin it to your favorite Pinterest board.
And as always thank you for reading.
Lucy
Carol
This is just amazing! The details are perfect and so realistic that it only looks tiny when you are holding it in your hand! You make the stonework look so easy. Thank you, Lucy, for sharing your talents.
Lucy
Carol,
It makes me so happy to hear that. I do hope you will try the stonework because it IS easier than you think.
And thank you so much for the kind words.
Lucy
Kat
Lucy, you have truly outdone yourself on this one! It’s magnificent, my favorite one ever 💕. Thank you again for your generosity in sharing your immense talent with the rest of us. May you have a joyful and blessed rest of July.
Kindest regards,
Katheryn
Lucy
Katheryn,
The nice thing about this house is how easy it is to construct. Please make it and share it with me. I'd love to see it.
Thank you so much.