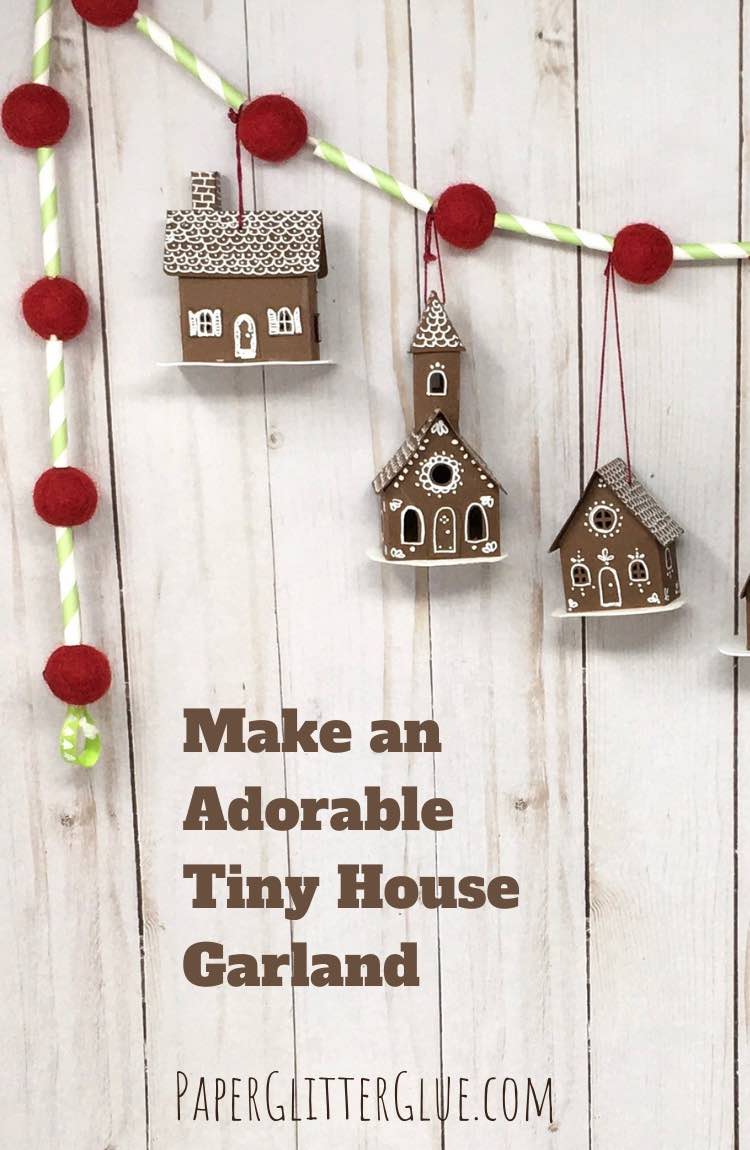
What's next? How about the cutest Tiny House Holiday Garland. After making a series of tiny houses (including the tiny church and tiny barn), it's a perfect way to display them. And what is better than that? It is crazy easy to make.
This is the 6th project in the Holiday 12 Day Craft-Along where I am trying to share easy projects - quick wins - for you to make during the Holiday season.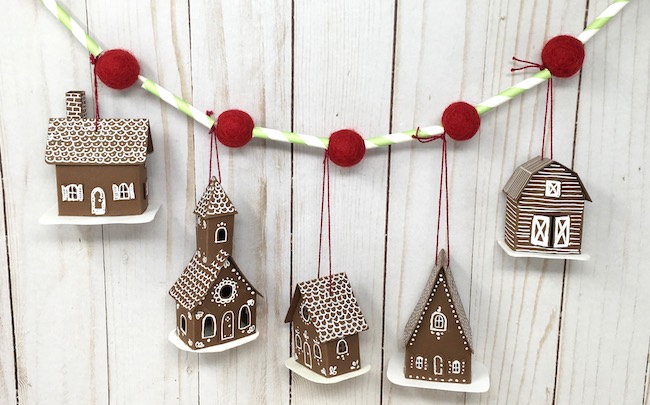
Here are all the 12 Day Craft-Along Projects starting with the Tiny House series:
- Tiny Paper House Ornament
- Easy Tiny Paper Church - Quick Holiday Craft
- Tiny Paper Cottage
- Tiny Paper Barn - Quick and Easy Holiday Craft
- Make a Tiny Paper Swiss Chalet for Your Holiday Decor
- Tiny Birdhouse
- Make the Cutest Tiny House Holiday Garland
- Little Cottage Pop-Up Card - Make One for the Holidays
- Make a Paper Holly and Ivy Wreath
- DIY Christmas Fairy House - Paper Fairy House with Poinsettia Roof
- A Storybook Holiday Cottage for Christmas
- Easy Snowman and Scotty Dog Gift Tags
- Little House Gift Tags - From My House to Yours
This post contains some affiliate links for your convenience. Click here to read my full disclosure policy.
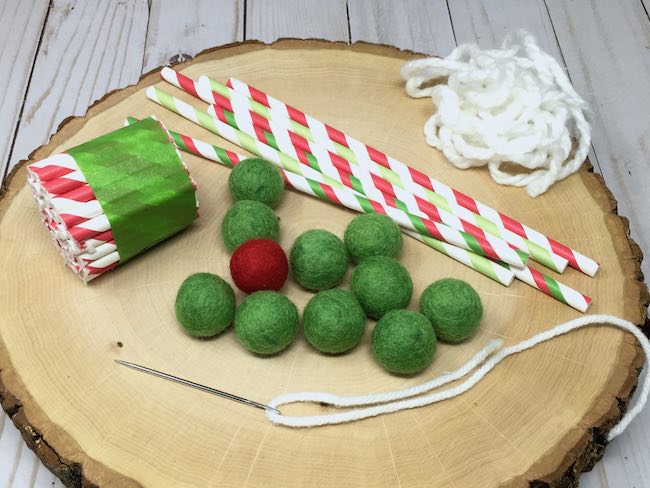
Materials to make the Tiny Holiday House Garland
- Yarn or string or baker's twine
- Large needle (with a large eye)
- Felt balls (or pom poms or wooden beads)
- Paper straws
- Tiny house ornaments
Directions to make the Tiny Holiday House Garland
- Cut the paper straws
- Thread the large needle with yarn or baker's twine
- Thread the cut pieces of straw and felt balls on yarn
- Tie a knot on each end
- Hang the tiny houses on the garland
See? You don't need much to make this adorable garland. But if you would like a little more detail, just read below. There aren't any specific files to download for the garland itself, but if you want to make the little houses you can download them from the Paper Glitter Glue library. They are in the November 2020 section of the library under the 12 Day Craft-Along section.
1. Cut the Paper Straws
One problem with cutting paper straws is that they tend to get squashed when they are cut. To help overcome this problem, tape a bunch of straws together so they support each other while you cut. It helps a lot. Cut them about 2-3 inches long. You can see that in the supply photo above.
2. Thread a large needle with yarn or baker's twine
Next, thread the needle with yarn or baker's twine. I like the yarn because it doesn't tangle quite as easy as baker's twine or string.
3. Now thread the cut pieces of straw and felt balls
I ordered the felt balls because I just love how they look. Fortunately, you can get them easily online. But you have lots of other options - pom poms work. Also you use colored wood beads.
Now, just thread the cut pieces of straw on the yarn alternating with felt balls.
4. Tie a knot on each end
When the garland is as long as you like it, tie a knot on each end and make a loop so you can hang the garland easily. I sewed a bit of ribbon on each end to hang the garland on the wall (or a mantle).
5. Hang the tiny houses on your tiny house holiday garland
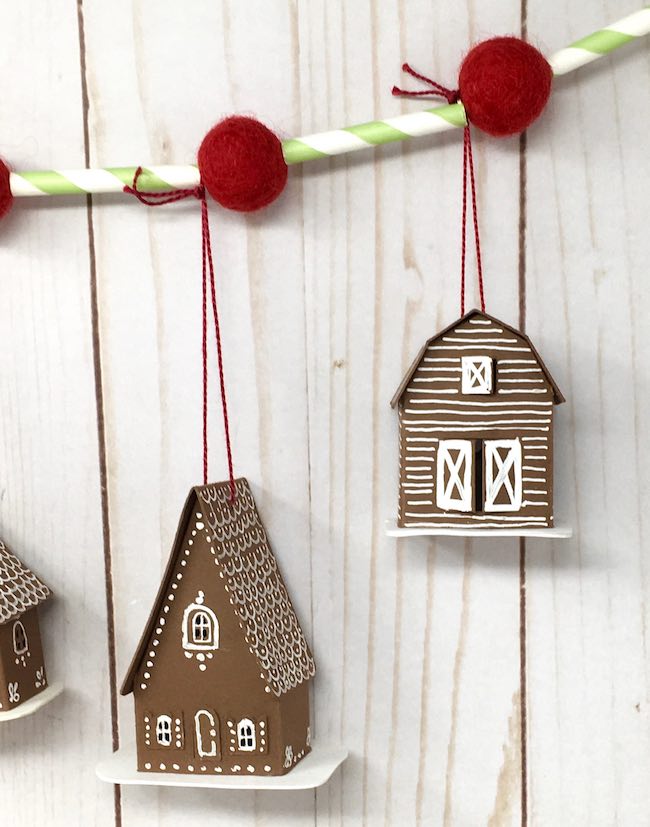
Now just thread the tiny houses on garland. The straws hold them in place so they don't slide along the garland. I decided to use the tiny houses made with brown card stock and decorated with the Uniball white gel pen because they all match so well.
When you thread the string on the little house, make it long enough to easily thread it over the felt balls.
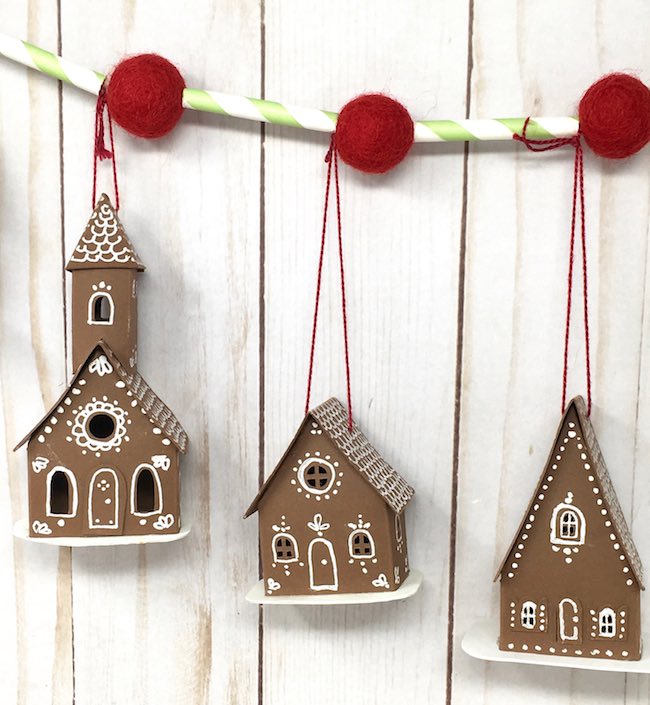
I know this is a quick craft that doesn't require much instruction, but it's a great way to display the tiny houses.
It is always my hope that these posts provide some inspiration for your holiday decor. And have a Happy Holiday season.
Lucy
Leave a Reply