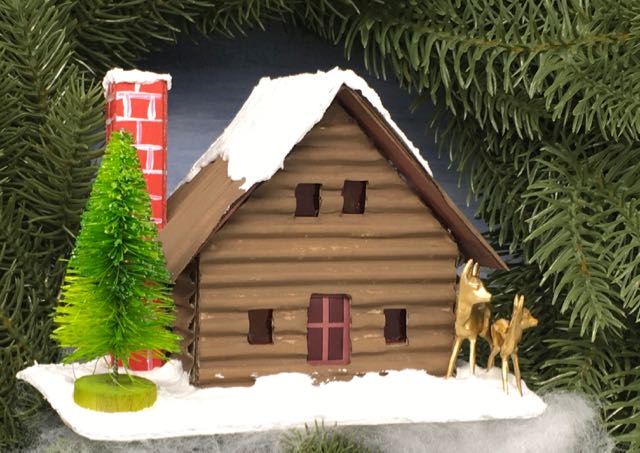
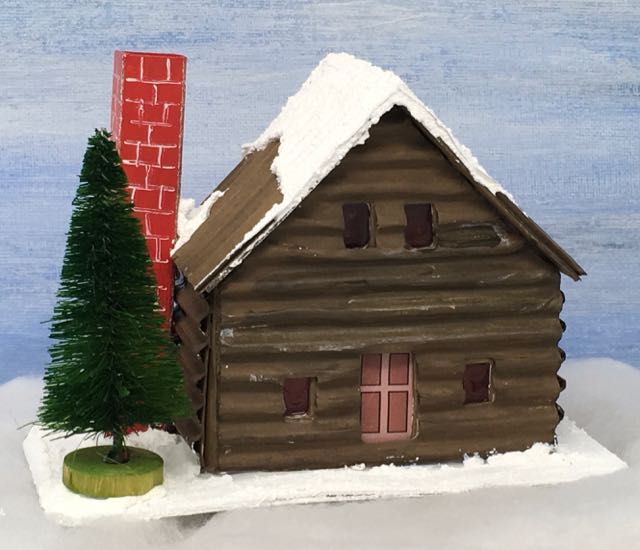
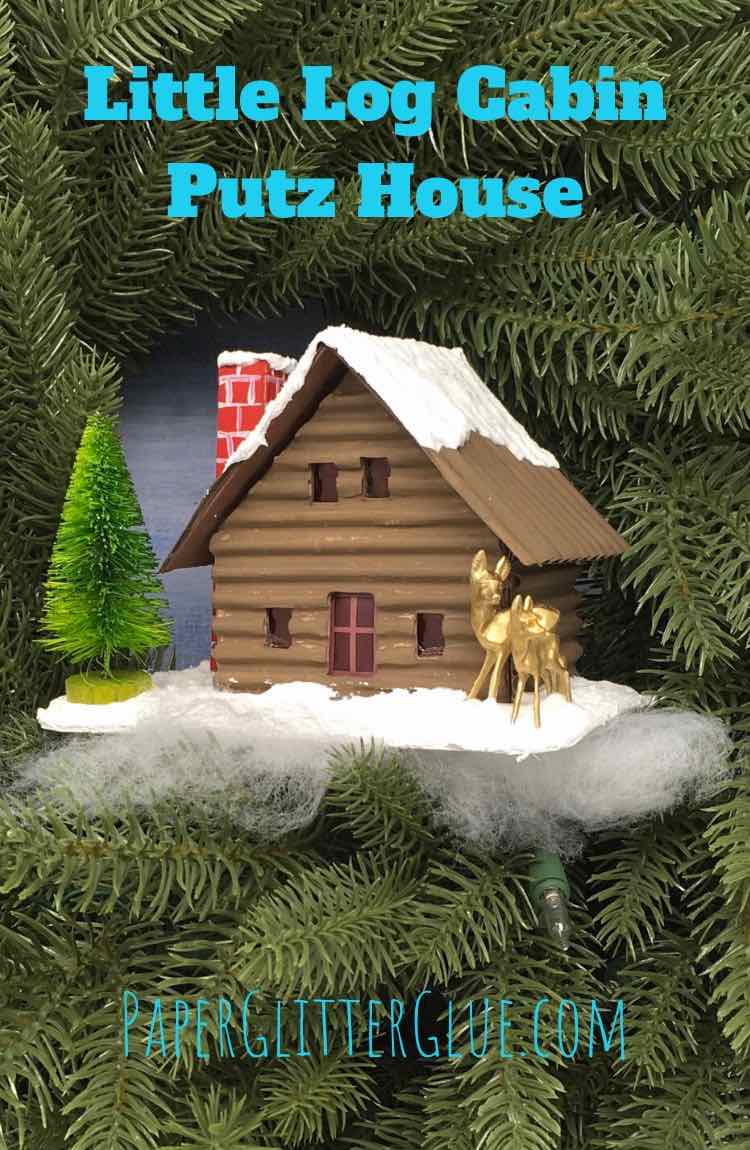
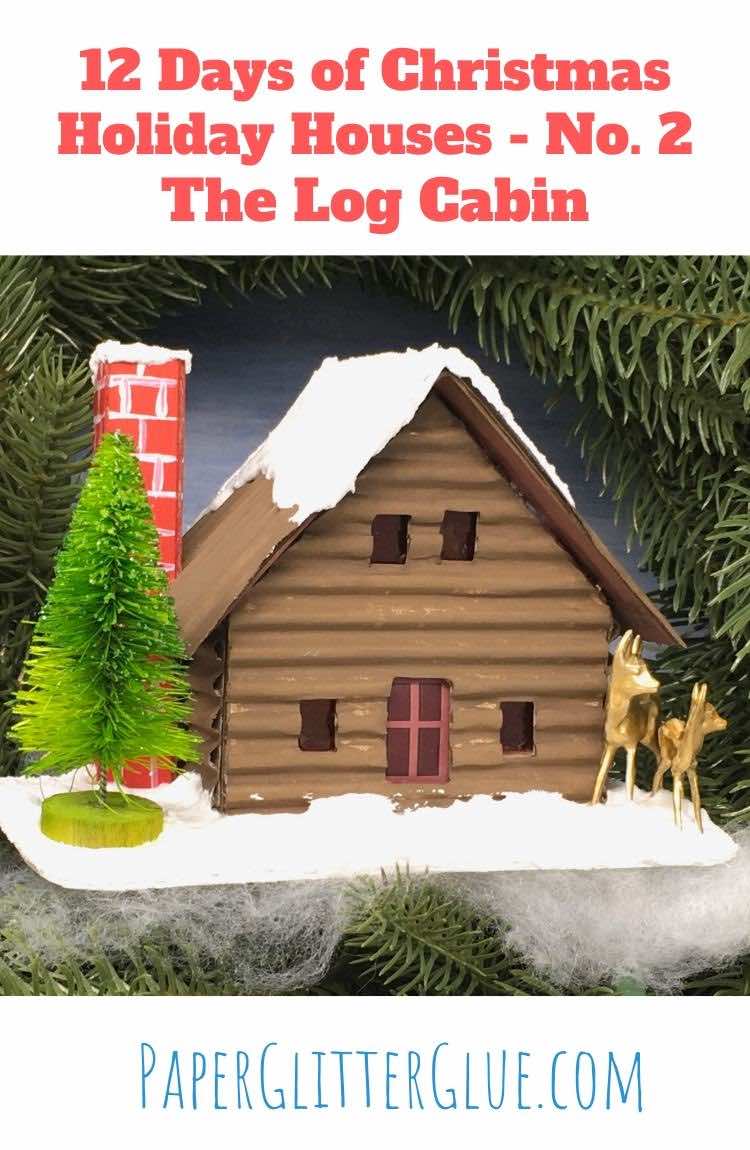
Log Cabin Putz House for your Christmas village. This is Christmas House No. 2 for the 12 Houses of Christmas challenge.
For the second house in the 12 Houses for Christmas Challenge, we're making a miniature log cabin. This house is based on a type of vintage Christmas Putz house called a "Loggie" which has corrugated cardboard on the sides of the house.
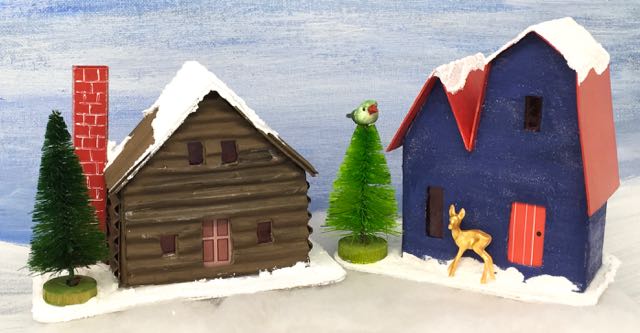
The first two Christmas Putz houses in the 12 Houses for Christmas challenge
The rustic snow-covered roof really appeals to me. Structurally, this little house is easy to make. Really, the first challenge is cutting out the corrugated cardboard without squashing it. Then the next challenge is cutting out a tiny section on the roof so that the chimney sits flush and straight against the house. You may have to trim your roof a bit to get the chimney snugly against the log cabin.
Here are the links to all the other little houses in this series you can make:
- 12 Houses for Christmas Challenge
- Christmas Putz House No. 1
- Christmas Putz House No. 2 – Log Cabin Putz House
- Christmas Putz House No. 3 – Twin Gable Front Putz House
- Christmas Putz House No. 4
- Christmas Putz House No. 5 – Little Church with Side Steeple
- Christmas Putz House No. 6 – Frosty Barn
- Christmas Putz House No. 7 – Round Arch House
- Christmas Putz House No. 8 - Happy Holiday House
- Christmas Putz House No. 9 - Swiss Chalet
- Christmas Putz House No. 10 - Snowy Church
- Christmas Putz House No. 11 - Winter Cottage
- Christmas Putz House No. 12 - Split Level House
- The Winter Village Christmas Wreath - where all the little houses now reside
What do we need to make the Log Cabin - Christmas House No. 2?
This post contains some affiliate links for your convenience. Click here to read my full disclosure policy.
First the Materials:
- Pattern for Christmas Putz House No. 2 for the 12 Houses for Christmas challenge - Design No. 29
- Tracing paper (if you are copying the pattern to cardboard)
- Cardboard
- Corrugated Cardboard Single-face
- Cutting Mat
- Or an Electronic cutting machine like a Cricut
- Metal-edged ruler
- Craft knife and scissors
- Aleene’s Fast Grab Glue or similar glue
- Gesso
- Paint colors of your choice
- Paintbrushes
- Alcohol ink to color the windows
- Rock Candy Glitter
- Snow-Tex or Grit Paste
- Christmas embellishments
Here's a Brief Outline of Steps to make the Log Cabin Putz:
- First download the free pattern - Design No. 29 - and print from the Paper Glitter Glue library
- Copy the pattern for the Christmas Putz House No. 2 onto cardboard, score the fold lines, cut out
- Cut out the corrugated log cabin sides
- Cut out windows and the door
- Prime and paint the house and corrugated cardboard pieces
- Glue the corrugated cardboard log siding to the outside of the house
- Add the door and windows to the inside of the house
- Glue house together along the glue tabs and roof tabs
- Glue underroof to house
- Score and glue corrugated cardboard roof to house
- Cut out cardboard base, prime and paint
- Glue house to base and add embellishments
More detail below. Much more detail. Probably more than you want to know.
-
First download the free pattern and print from the Paper Glitter Glue library
After accessing the Paper Glitter Glue library, download and print out the pattern. To get the password to the library, just subscribe to my newsletter below and you will immediately get the password so you can download the pattern.
The PDF file includes a printable PDF house pattern.
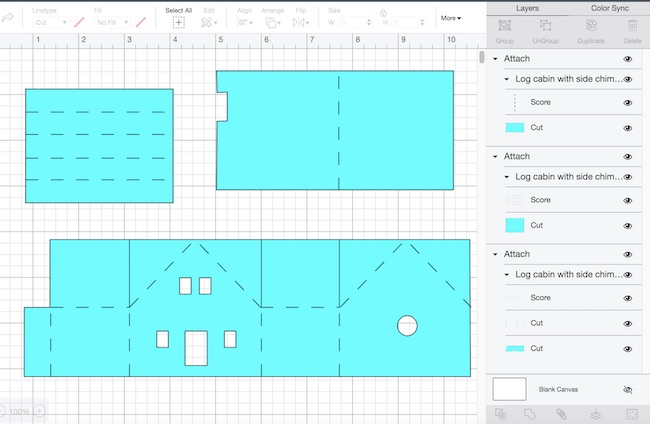
Addendum: Now you can use the SVG pattern to this file so you can make the Little Log Cabin with an automatic cutting machine like a Cricut. Here's how it looks with score lines marked and attached.
-
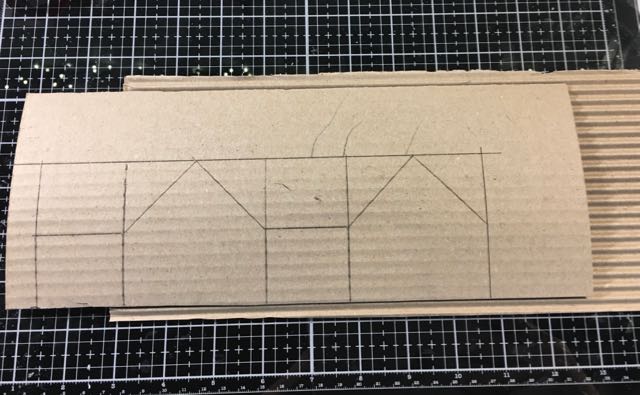
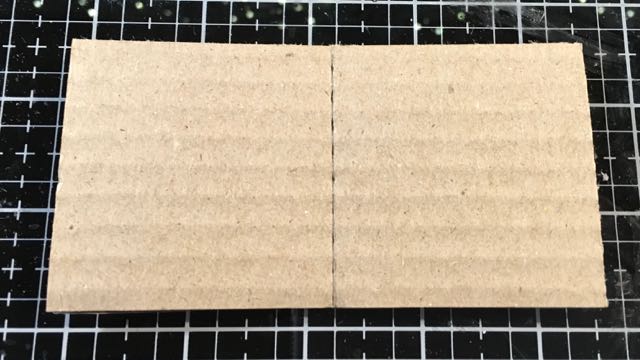
Copy the pattern for the Christmas Putz House No. 2 onto cardboard, score the fold lines and cut out
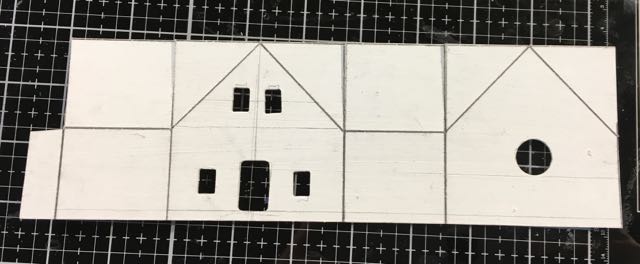
Cardboard pattern cut out for the little Log Cabin Putz house
Now trace the pattern onto cardboard and cut the house structure out. Even though this is the main structure of the house, you are going to cover it with log cabin siding - the corrugated cardboard pieces on each side.
-
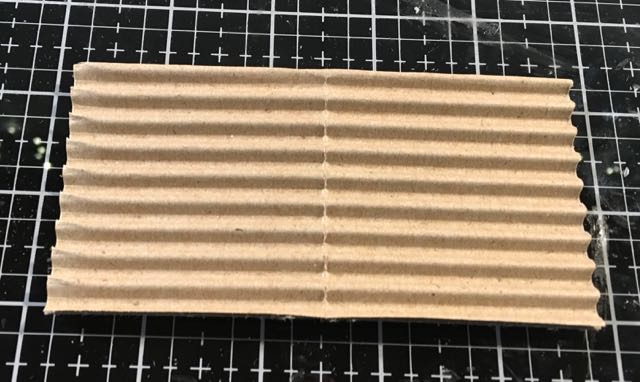
Cut out the corrugated log cabin sides
Here's the easy way to cut out the corrugated cardboard - layer 2 pieces together for support. Then cut.
After you cut out the house structure, you can cut out the log cabin siding. Here is the trick that makes it so much easier. To avoid squashing the corrugations on the cardboard, stack 2 sheets together overlapping so that they are nested together. Place the pattern on the flat back of the pair of sheets of corrugated cardboard. Trace around it, then cut out. How easy is that?
-
Cut out windows and the door
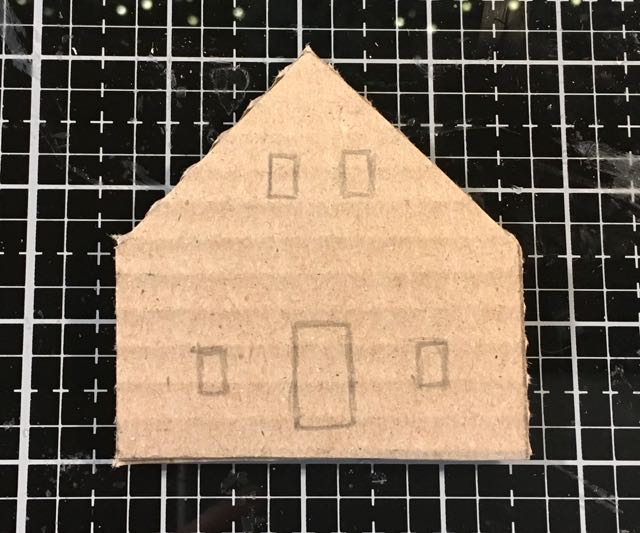
Trace the windows and door on the back side of your log cabin siding
This is a good time to cut out the windows and the door before you paint. When you do paint your little house, the edges of the windows and doors will be the same color as the house itself.
-
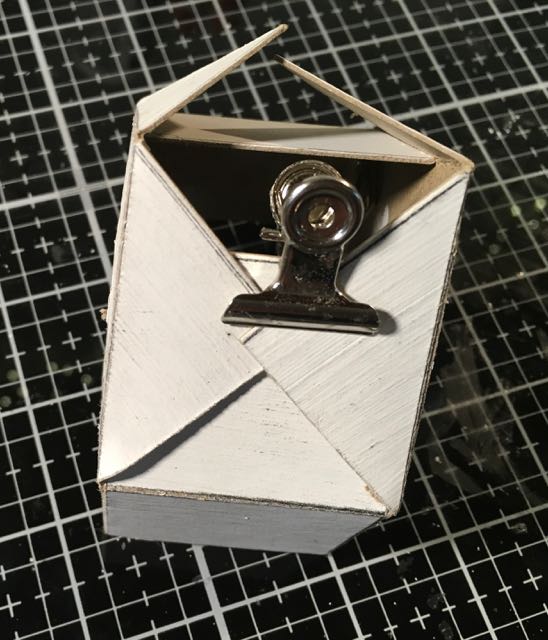
Prime and paint the house and corrugated cardboard pieces
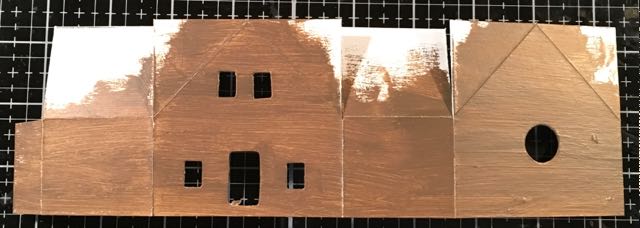
Paint the structural piece of the log cabin the same color you use on the log siding
And paint the roof edges and fold line as well
Paint the main structure of the house and the log cabin siding pieces. Most of the main structure won't be seen but I still paint the whole thing. And pay the most attention to the fold lines because that is what is most visible. Also paint any edges of the roof that show on the underside.
For the chimney, paint it the cheeriest Christmas red which is Candied Apple Distress Paint for me. Then I drew white lines on the first chimney with my Uniball Signo Pen.
-
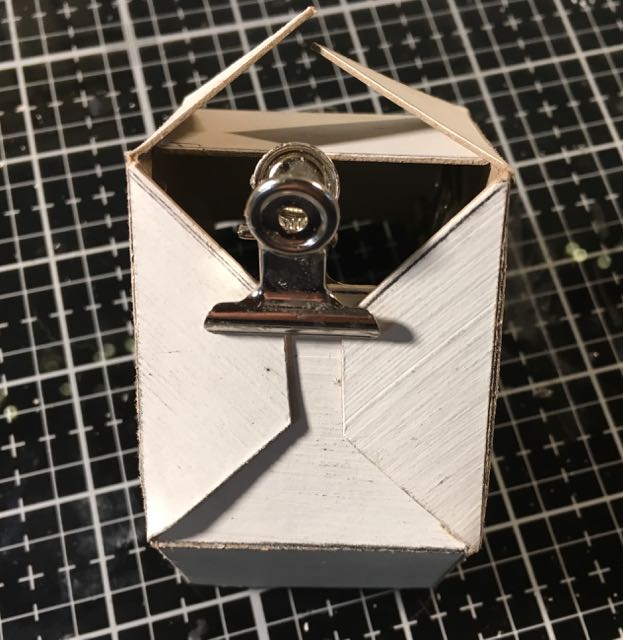
Glue the corrugated cardboard log siding to the outside of the house
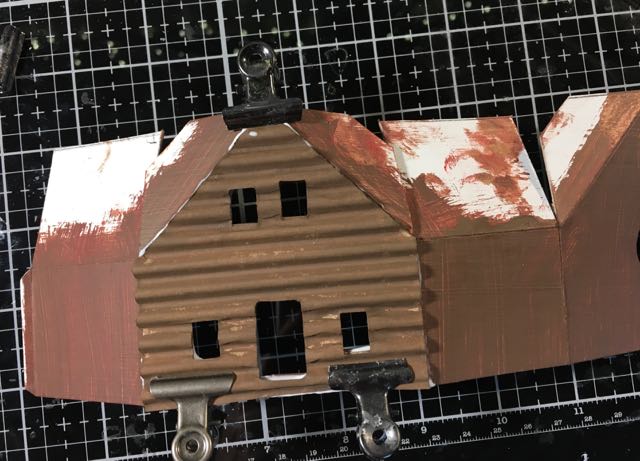
Here's a trick to help you glue the siding to the house. Use these cool little binders because they won't squash the log cabin siding.
For this step, glue your painted siding to your little log cabin.
Now you start seeing the how the house cute your house is going to look when you glue the log cabin siding to the house. Be sure to match up the window and door cut outs. If they don't match perfectly, that's ok because you have painted the cardboard pieces to match. But if you are not happy because they don't match as well as you would like, then slightly enlarge the holes on the underlying cardboard piece.
-
Add the door and windows to the inside of the house
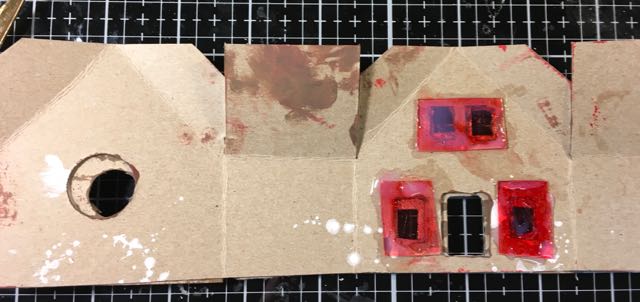
Glue the plastic acetate stained with alcohol ink to the inside of the little putz house. I didn't gut the circle in the back correctly. Fortunately it doesn't show up much.
After the log cabin siding is glued on, then glue the windows and door on. For each of these little windows, I use leftover clear packaging (acetate) stained with alcohol inks. For the doors I drew doors on my computer and glue them in. But you can draw your own door or use one of the three sources I listed in Christmas House No. 1 under Reproduction vintage Putz doors and windows.
-
Glue house together along the glue tabs and roof tabs
Trim the roof tabs a little bit so they lie flush against the house and don't overlap.
If the house is very narrow sometimes the roof tabs overlap the roof flap.
When that happens you have to trim them a little bit.
After trimming the roof tabs they now are flat against the roof
Glue the roof tabs and flaps together.
For this step you just glue the house together like we usually do. Please note that I do trim the roof tabs just a little bit so they don't overlap.
-
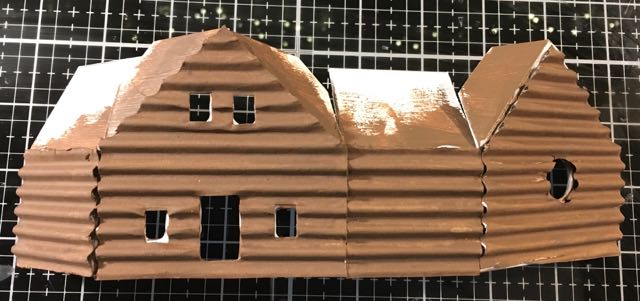
Glue underroof to house
Often I make the roof pattern a little longer and wider than necessary so you can trim it to fit. You may not want the overhangs to be as large so feel free to trim them.
After your house has been glued together, you can glue what I call the under roof on the house. This is the structural support for the corrugated cardboard on the roof. I probably over-engineer the little Putz houses because I want them to last for a long time.
But you must make sure that the cut out for the chimney extends out over the edge of the house. You may have to do some trimming here because cardboard thicknesses vary.
Below is the first log cabin I made. I didn't extend the roof overhang enough and I didn't anticipate how thick the log siding was. But on the pattern and the second log cabin I fixed this problem.
It's a little hard to see but chimney angles a bit because of the log cabin siding
The second log cabin has a better roof overhang where the chimney fits well in the roof cut out
-
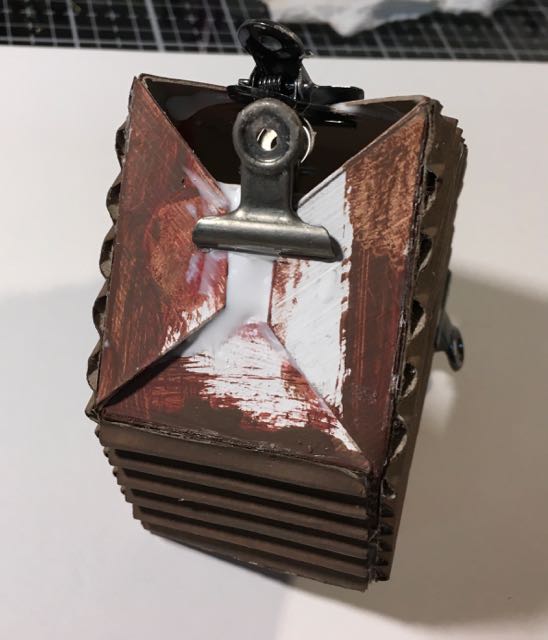
Score and glue corrugated cardboard roof to house
Now glue your corrugated cardboard to the roof. Again make sure the cutout for the chimney lines up. On the first log cabin Putz house I made I didn't notice that the chimney was crooked because of the thickness of the log cabin siding pushing it outward. I did better on the second house.
Below is a series of photos showing how to score the corrugated cardboard for the roof.
Score the back of corrugated cardboard roof piece so it will fold easily
Now flip your cardboard roof piece over and lightly score the front of the roof on the fold line
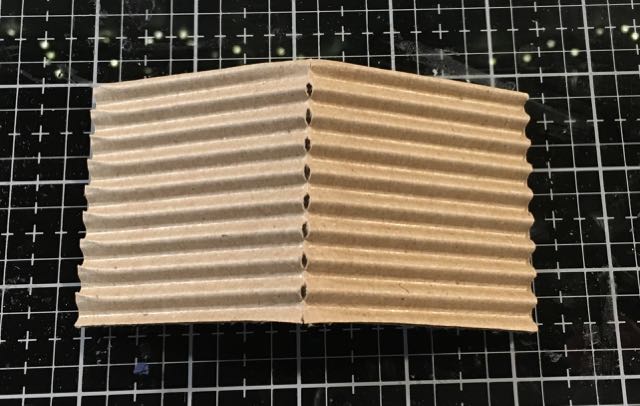
Now you can see how nicely the roof piece folds and preserves the corrugations
-
Fit the Chimney in the Notch on the Roof, then Glue
Test fit the chimney in the notch on the roof. Sometimes you have to do a little more trimming at this stage. And remember snow and glitter covers up any construction flaws. That's a nice thing about these little Christmas houses - you can use the snow and glitter to cover up any mistakes.
Unfortunately I didn't take any photos during this step, probably because it's a little fiddly and took some time so I was engrossed in the task, not documenting the task.
-
Cut out cardboard base, prime and paint
All I am doing for the bases on these tiny houses is gluing 2 layers of cardboard together. Nothing fancy.
Choose the size of the your base and paint it. And for all of these houses I plan to paint the bases white. Each base is about 4-5 inches across and 2-3 inches deep. That's because I hope to decorate a wreath with the houses so I need a small base to fit more on the wreath.
-
Glue house to base and decorate your little Christmas house

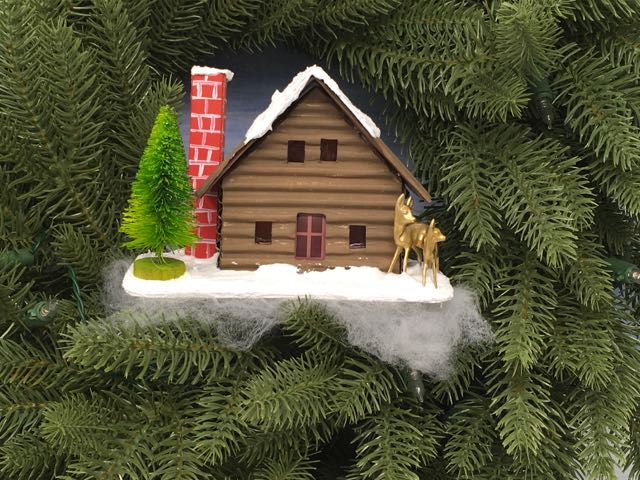
Another view of the little Log Cabin Christmas house nested in a Christmas wreath
Almost done. Glue your little log cabin to the cardboard base. Allow that to dry, then smear snow around the base to cover up any gaps. And now you get to add your fun details - snow and glitter and bottle brush trees and little figures. Really this is the best part of making the houses.
On the second log cabin I made, I remembered to cut a hole in the bottom to fit a light there.
-
Next House? Double Gable Front House - Little Christmas House No. 3
What is the next house? We're going to make what I call a double gable front house based on the first vintage Putz set I linked to.
I hope to see you tomorrow. Thank you for visiting.
Lucy
Pin to your favorite Pinterest board to remember where you found this little Log Cabin Putz house.
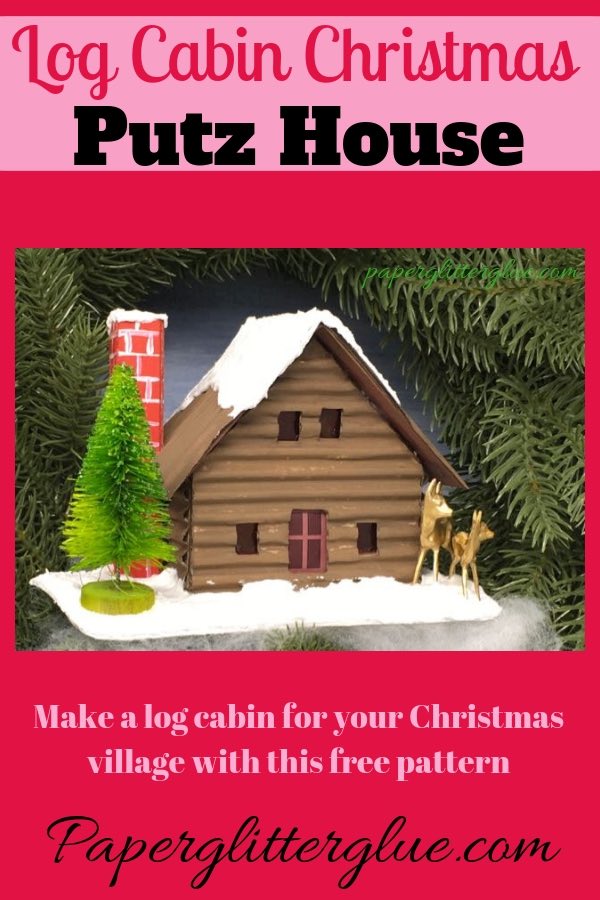
Learn to make a cute little Log Cabin putz house for your Christmas decor or your very own Christmas village.
Learn to make a cute little Log Cabin putz house for your Christmas decor or your very own Christmas village.
Leave a Reply