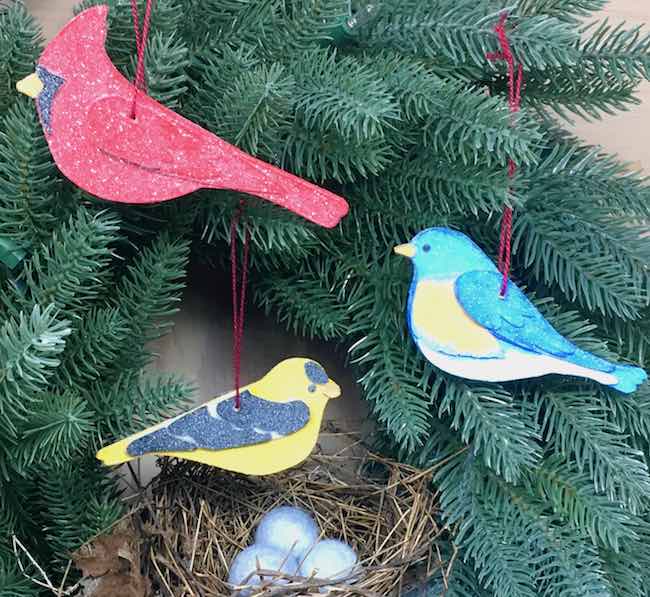
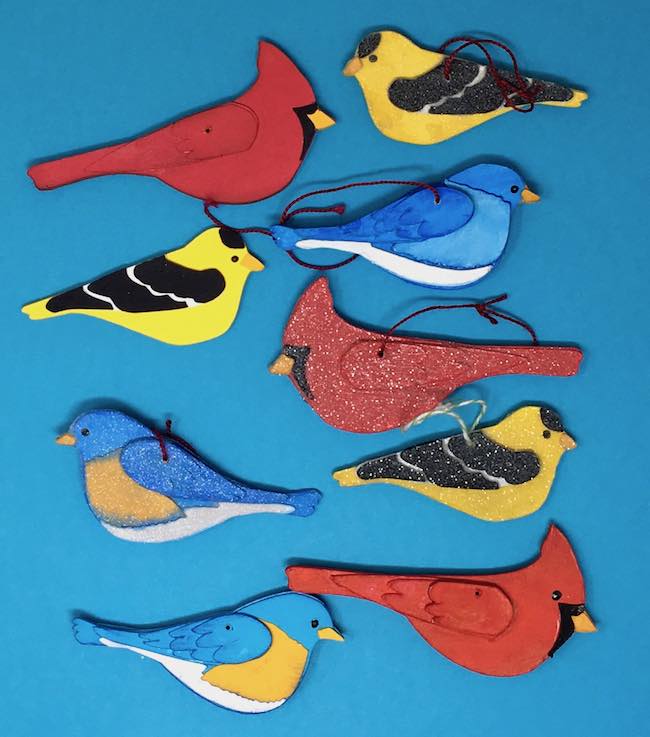
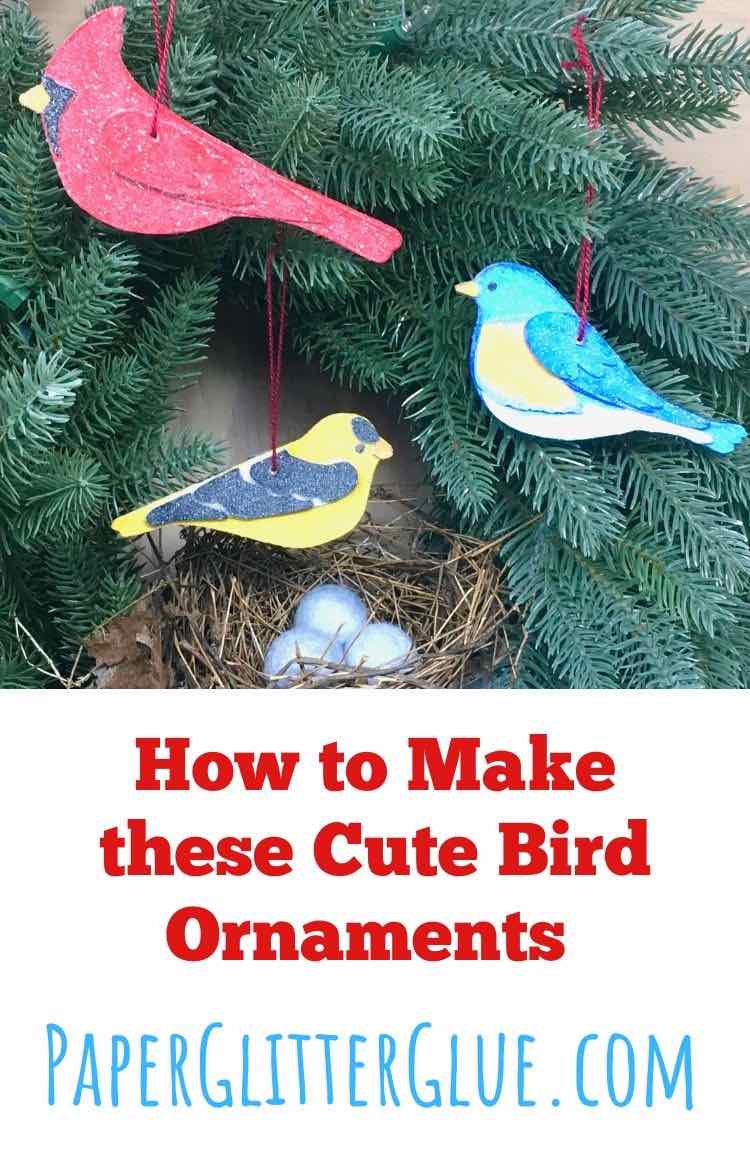
Want to make some cute Bird Ornaments? They're made out of cardboard, paint, glue, and glitter. Or you could use card stock instead of paint. They are just as cute either way.
Inspiration for this Holiday Paper Craft
One morning in December I looked out my window and saw 6 Cardinals flying about my front yard. SIX at one time! That's the moment I decided to make these bird ornaments. Often people believe that cardinals represent lost loved ones so when I saw so many of these beautiful birds I immediately smiled since my brother had passed so recently.
I live in Upstate South Carolina where we see an occasional bluebird which also makes me very happy. In my experience, they aren't very common though.
And in the wintertime we see goldfinches as well, but they are also pretty rare. When I see one, I stop what I am doing so I can enjoy this beautiful little bird.
When I was studying how to draw these birds, I found the Audubon society's page. Now you can get these beautiful downloads of John J. Audubon's Birds of America paintings from the the Audubon society for free. Here are the links for these 3 specific birds:
The design process begins with bird sketches
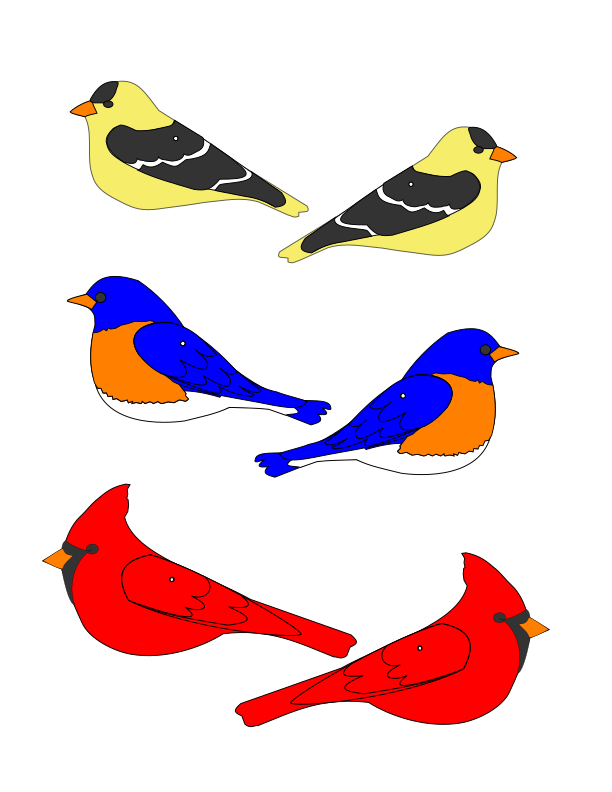
First, I drew some sketches to design the patterns for these bird ornaments. I was trying to get a recognizable shape of each bird. Then I figured out the next most important details to make the bird look similar to the real bird. So the red bird cardinal has the classic crest and the black outline around the beak. And the Easter Bluebird has the white coloring underneath its body and the orange breast in addition to the beautiful blue color. Finally, the little Goldfinch has the black cap and white stripes on the wing. Are they truly accurate representations of the birds? No. But I think they do have the most important features of each beautiful bird.
Now onto the MAKING of the Bird Ornaments.
This post contains some affiliate links for your convenience. Click here to read my full disclosure policy.
What do you need to make these Bird Ornaments?
- Bird Patterns - free download - Design No. 73
- Cardboard - you know I love cardboard
- Card stock, various colors
- Glue - any white PVA glue will do
- Paint
- Gesso
- Candied Apple - an amazing red for the cardinal
- Mustard Seed - nice yellow for the Goldfinch
- Fossilized Amber - for the beaks
- Salty Ocean - a good bluebird blue
- Blueprint Sketch - for the edges of the bluebird
- Black Soot - cardinal markings and goldfinch wings and cap
- Liquid Pearls Dark Grey or Black Dimensional Paint
- Thread
- Tapestry Needle
- Glitter, optional - here's my favorite non-plastic glitter
- Mod Podge, if applying glitter
The drawing below shows the bird ornament patterns. You need to cut out two of each bird to make one complete ornament. Also I drew the eyes on the bird patterns, but I didn't bother cutting them out because they are so tiny and hard to place. It's easier to draw on the eyes using dimensional paint.
And here is a side by side comparison of Glittered and Unglittered versions.
How to Make the DIY Bird Ornaments
First the paint version:
- Copy the free pattern - Design No. 73 - from my Paper Glitter Glue library
- Cut out the bird ornament body pieces in cardboard
- Glue 2 of the cardboard body pieces of each bird together
- Next cut out all the other pieces of the bird
- Prime and paint the pieces
- Glue all the cardboard bird wings together - line up the holes on wings. Also make the wings mirror images for each side.
- Glue the wings and adornments to the bird - again lining up the holes on the wings and body
- Draw on eyes using dimensional paint
- Glitter if you want
- Using the tapestry needle, sew embroidery thread through the hole to hang the ornament
Next, the card stock version:
- Copy the free pattern from my Paper Glitter Glue library
- Cut out 2 pieces of the bird ornament body in cardboard
- Cut out the bird body, bird wings and other parts in colored card stock
- Glue the two cardboard body pieces together
- Paint around the edge of the cardboard bird shape to match the color of the bird
- Glue the main body piece in card stock to the cardboard body of the bird
- Glue the wings pieces together. Make sure to make one of each side - mirror images.
- Adhere the wings and adornments to the body of bird
- Draw on the eyes using dimensional paint
- Glitter if desired
- Using the tapestry needle, sew embroidery thread through the hole to hang the ornament
And below I go into more detail on how to make each little bird ornament.
Also here's a video that shows you how to make these ornaments. In addition to showing you how to make the little birds, I also show you some common mistakes in the hopes that you can avoid them - making 2 left wings for example or smushing the eyes made with the dimensional paint, etc.
First Download the free pattern from the Paper Glitter Glue Library
I keep all of my patterns in this library. They are sorted by year and added chronologically with the most recent pattern first. So you will find the DIY Bird Ornament pattern as the first pattern for 2020.
To get access to the library, go to the first page of the library - the doorway - click the big blue link in the middle of the page which will take you to where you add the password. Type in the password and poof! a whole world of paper crafting awaits.
But what if you don't have a password? Well, that is easy, too. Just subscribe to my newsletter and you will immediately get the password to get you in. And of course, you get my newsletter where I let you know what is new on the blog along with crafty tips and inspiration.
Next download the pattern labeled Bird Ornaments. It's in 2 formats - SVG (scalable vector graphics for automatic cutting machines) and as a PDF (printable version). I also made 2 versions of the pattern - one with holes for hanging the ornament and one without.
Now cut out the bird pattern pieces from cardboard
And below are the directions for cutting out the birds in Design Space
There are no score lines to remember for this set of patterns. And as I mentioned above, I did draw eyes, but I did not cut them out. I deleted them in the design software because they are small and hard to place. It's easier to draw or paint the eyes rather than glue down a tiny piece of paper.
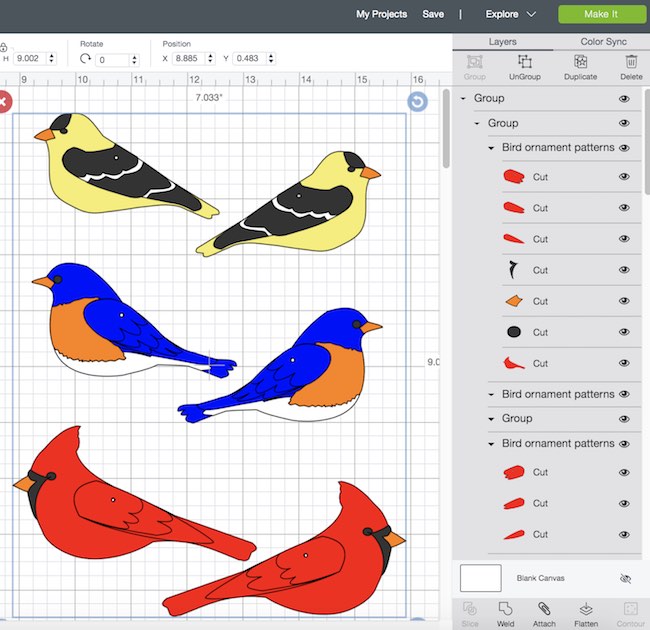
Here's how the pattern looks in Cricut's Design Space:
Each pair of birds is grouped together. Also each wing piece is grouped together with the bill and other pieces. You need two bird cutouts of each bird to make one ornament for the left and right side of the ornament.
Ok, so the first thing you need to do is click ungroup and delete everything but the body of the birds. Now cut out the main body of each bird in cardboard. Here's a quick video of my screen showing how to do that.
Next glue the 2 cardboard body pieces together
Now glue the 2 main body pieces cut from cardboard together. Be sure to align the holes for hanging. Even if you are making the bird ornaments using card stock, paint the edges of the bird body a matching color.
Cut out the rest of the bird pieces
If you are going to paint the bird, then cut them all out of cardboard on the same mat.
If you are going to use card stock which works well, then cut each piece out of the appropriate colored card stock.
Glue the wings together
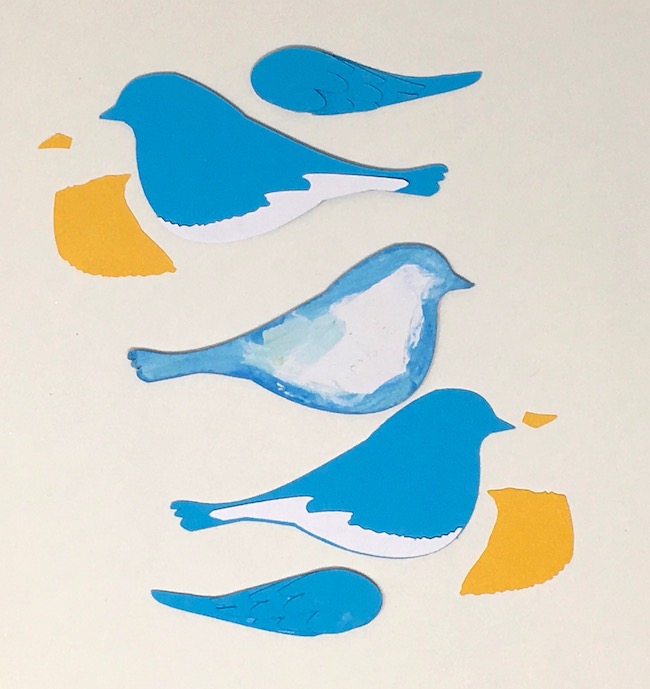
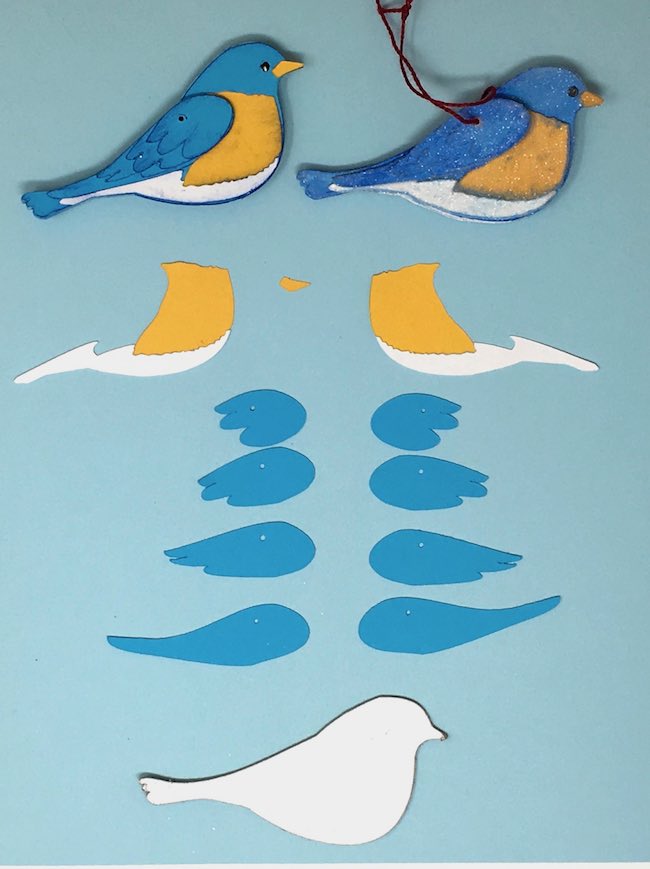
Here is the only tricky step in making the bird ornament. When you glue the wing pieces together be sure to make mirror images - one for the right side and one for the left side. I can't tell you how many times I messed up and kept making the same side wing. The photos below shows all the pieces for a card stock bluebird with both left and right wings.
You might like the card stock version better or perhaps the paint version.
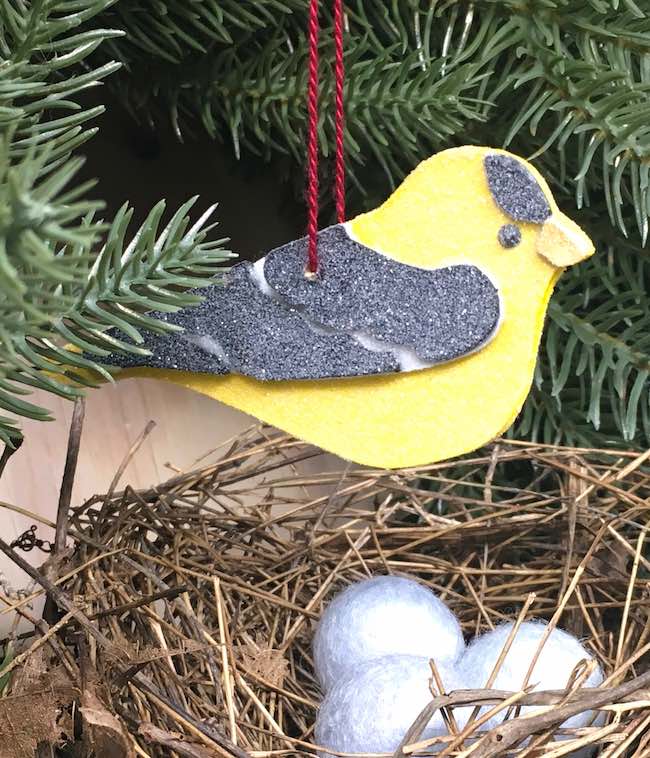
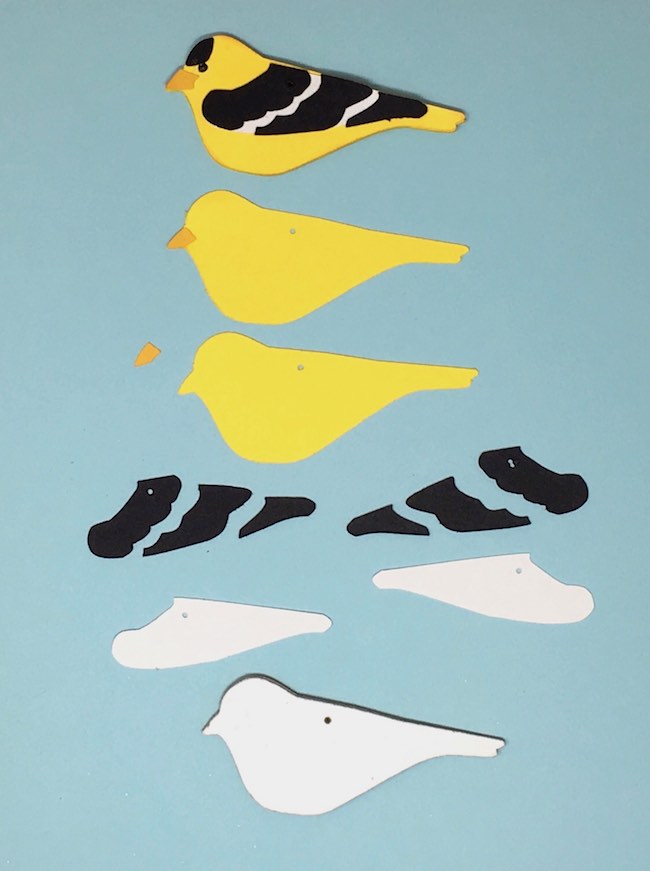
Below is the Goldfinch made with card stock and the card stock pieces you need. Remember to edge the cardboard body with matching paint before you glue the card stock in place.
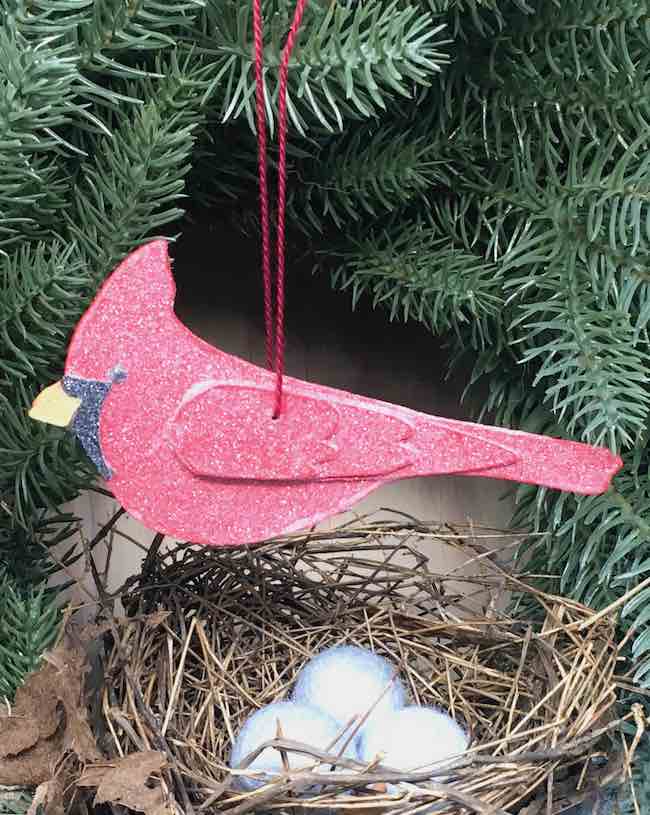
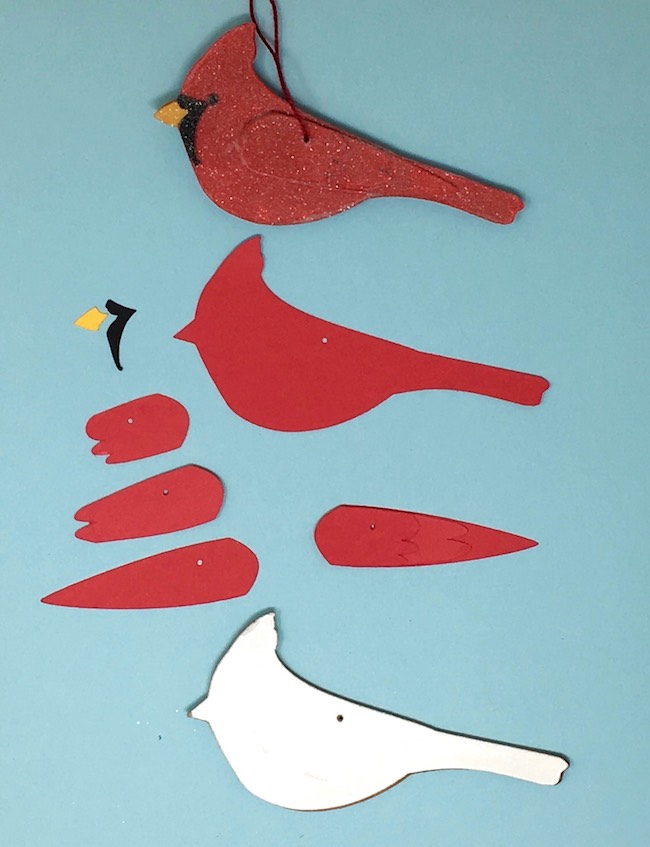
And finally, everyone's favorite - Cardinal. One wing has already been glued together. Be sure to make the other one for the opposite side.
Assemble the bird ornament
If you are painting the bird, I recommend painting the different colors separately before assembly:
- Cardinal beak and black piece
- Goldfinch cap, beak, and wings
- Bluebird chest piece, white underbody, and beak
If you are using card stock just glue the pieces in place. One important bluebird detail is to glue the chest and white underbody on the bluebird before you glue the wings on.
But remember if you are making the birds as ornaments always line up the holes. I use a large pin to line them up before the glue dries.
Draw eyes on the birds with dimensional paint
For this step I used a product called Liquid Pearls from Ranger. It's a nice thick material in a tiny bottle with a small tip that is easy to control. So you can just squeeze gently (maybe practice first on some scrap paper) and get a perfect-sized blob for the eye. But most important - let one side dry before you handle the little bird more. Then make the other eye. I smeared the eyes on a couple of birds even in the video.
Glitter the bird ornaments, if desired
After the dimensional paint for the eyes has dried, you can glitter the ornament if you choose to. My favorite glitter is a mineral-based glitter that has a wonderful shine - Distress Clear Rock Candy Dry Glitter. It doesn't get everywhere like plastic-based glitter does. It's also non-toxic.
If you want to glitter your ornaments, just paint them with Mod Podge and then sprinkle on the glitter.
Finally, use embroidery thread to hang your little bird ornaments
Now all you need to do is thread a tapestry needle (which has a big eye so you can use a thicker thread like embroidery thread) and make the string to hang the ornament.
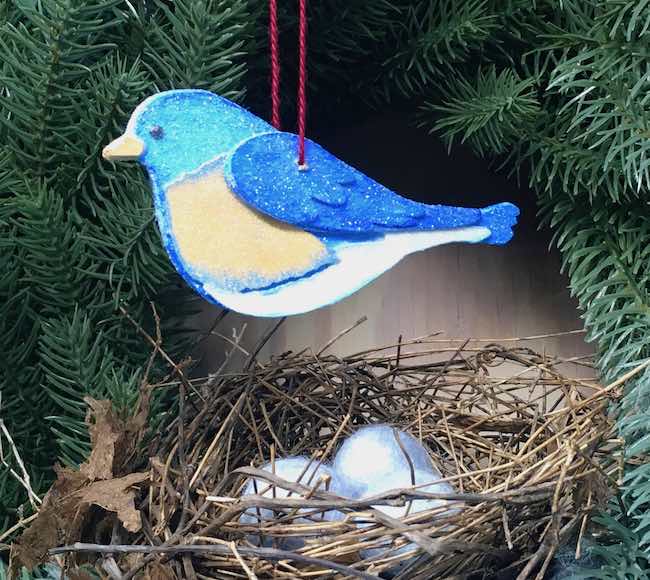
So that's it for your DIY Bird Ornaments. They are easy and fun and a great addition to your Christmas tree or even for Spring decor. These are the last 2 projects for the 15 Days of Holiday Crafts. Yes, I am late. And yes, I am counting these 3 birds as 2 projects.
Here's a list of all of the projects in the 15 Days of Holiday Crafts:
- Red Roof Holiday Cottage
- Merry ChrisMoose Gift Box – DIY Mini Holiday Piñata
- Mini Paper Christmas House with Barn Shaped Gable (the Green Gable house)
- Gingerbread Paper House – made with Gingerbread Paint
- DIY Gnome Gift Box
- Scotty Dog Gift Box
- DIY Paper Wallet for Holiday Gift-Giving
- Paper Gingerbread Ornaments – Scented Gingerbread Men
- Happy Hollydeer Piñata Candy Box
- How to Make a Paper House Ornament for the Holidays
- Easy Gingerbread House Paper Ornament
- DIY Display Gift Box for the Paper House Ornament
- Pull String Piñata - Miniature Firecracker Piñata
- DIY Bird Ornaments - Cardinal, Goldfinch, and Bluebird (counts as 2 projects)
Let me know if you have any questions. You can email me at [email protected] or you could join my Paper Crafting Facebook group where you will see lots of inspiration and it's easy to ask questions and get help.
Lucy
P.S. Pin to your favorite Pinterest board so you can remember where you found this pattern.


Leave a Reply