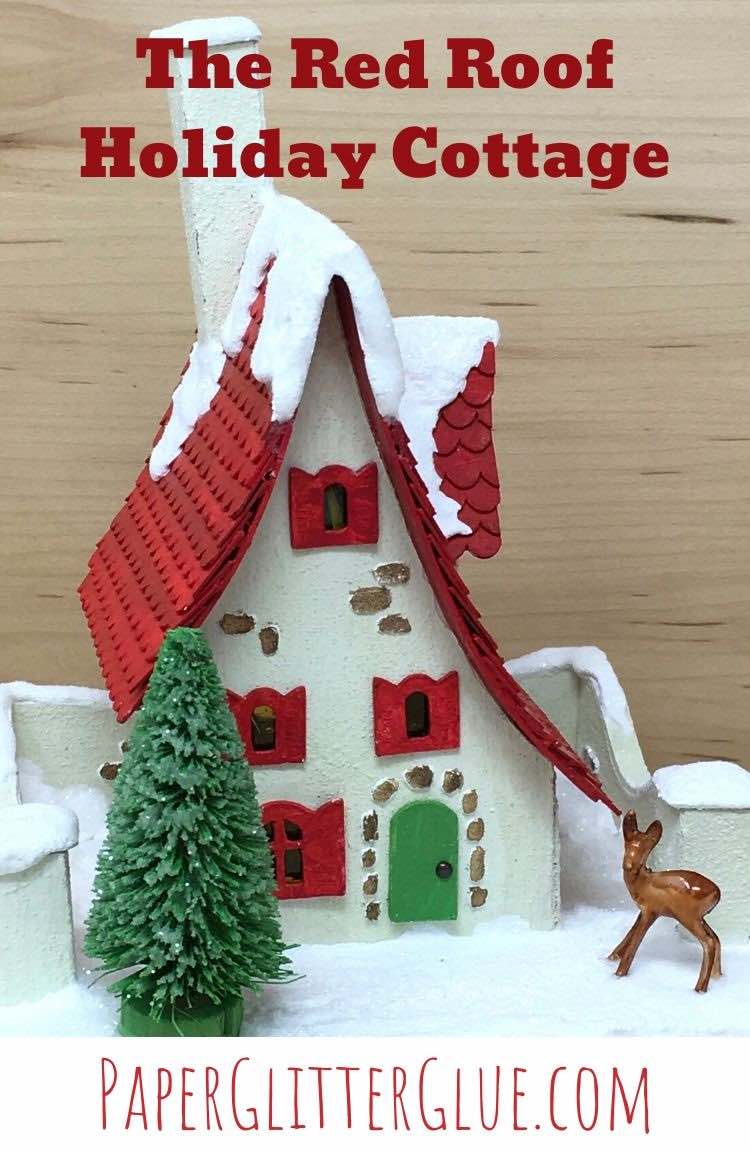
How to make the Red Roof Holiday Cottage
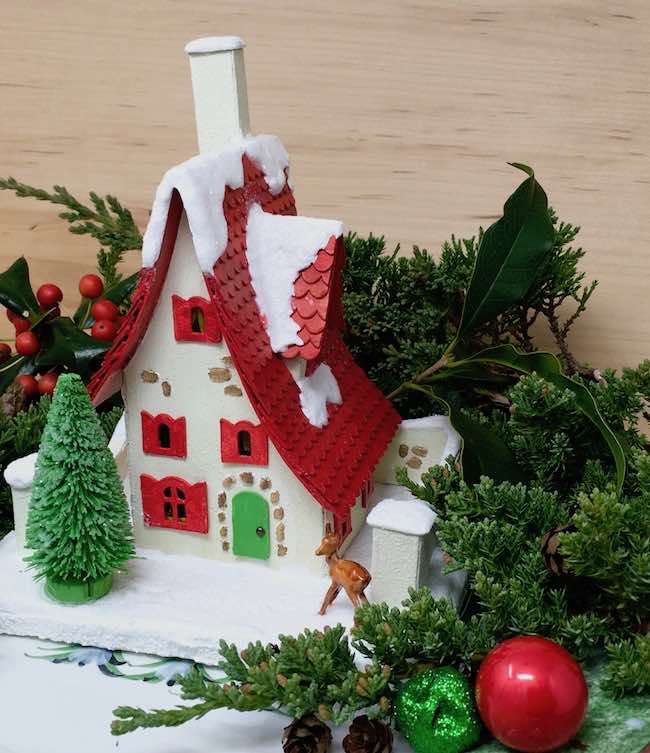
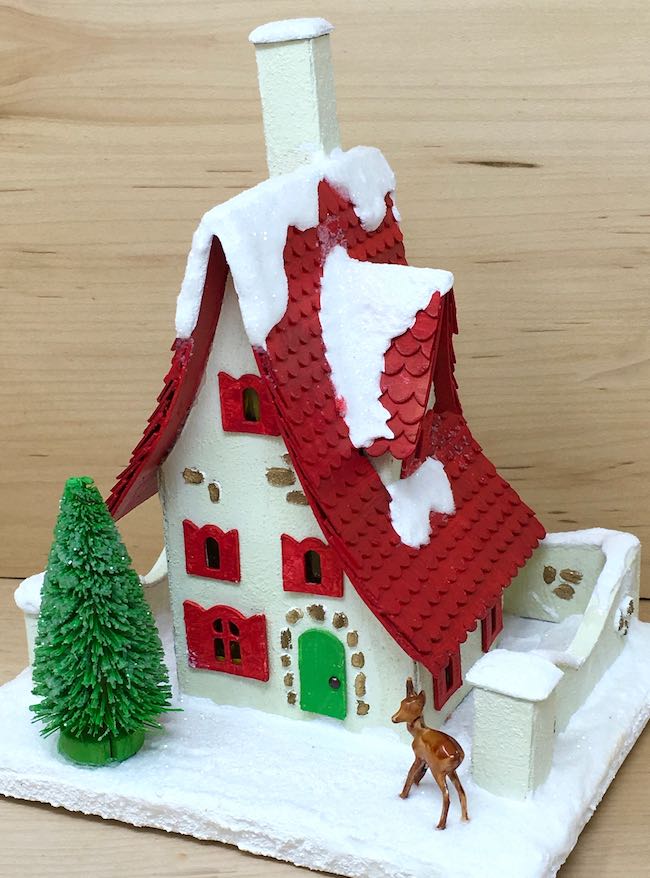
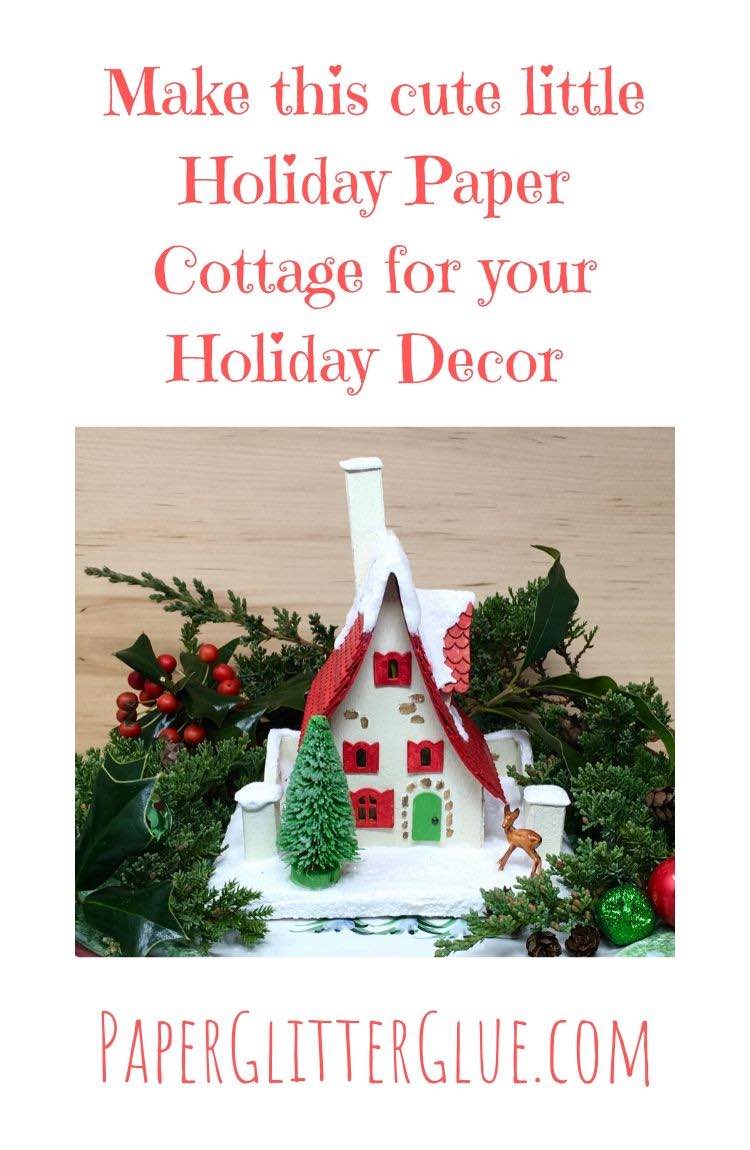
It's time to make another Miniature Paper Holiday House. This little cardboard house is the thrird project in the 15 Days of Holiday Craft series this year. It's the first house in the series. I named it the Red Roof Holiday Cottage. Inspired by the whimsical idea of an Elf cottage, the little paper house has an asymmetrical curved roofline, stone peaking through the plaster and glittery snow everywhere.
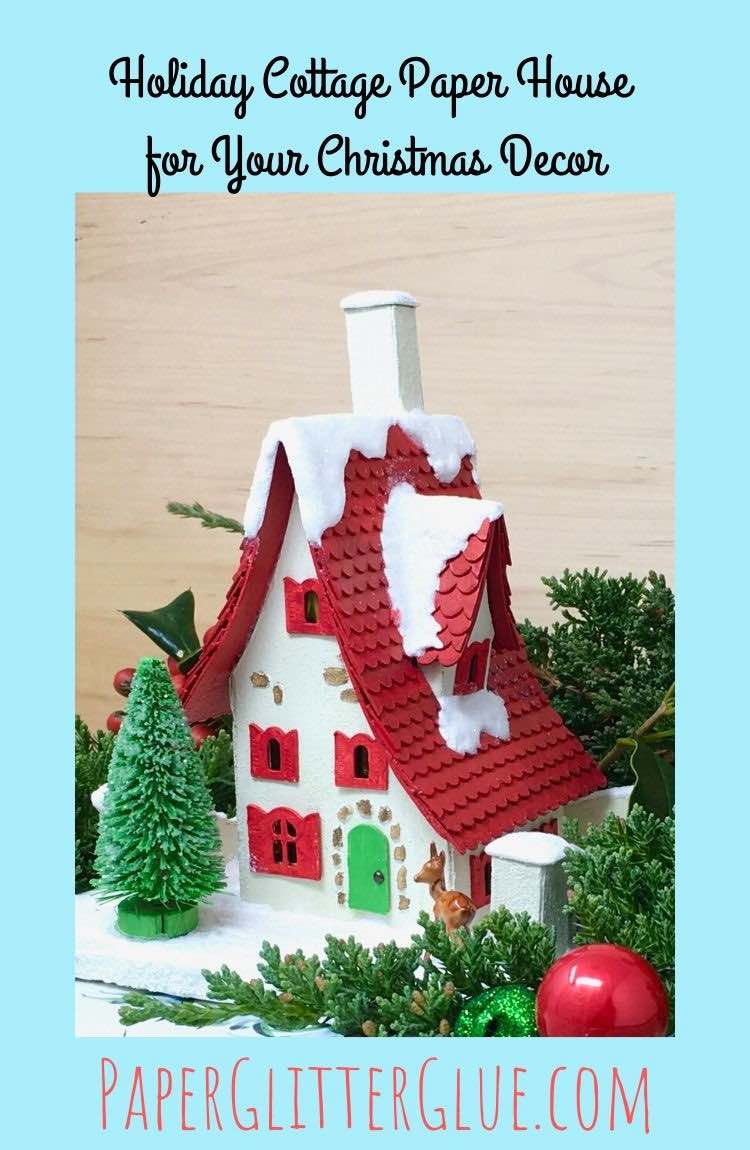
And here's how you make this tiny Holiday Paper Cottage with the bright red roof.
This post contains some affiliate links for your convenience. Click here to read my full disclosure policy.
Materials to make the Red Roof Holiday Cottage Paper House
- Pattern for the little cottage Design No. 63 - free in Paper Glitter Glue Library
- Cardboard - this is similar to what I use
- A way to cut out the pattern - Xacto knife and cutting mat or an automatic cutting machine
- Glue - PVA glue, Aleene's Quick Dry and Glossy Accents
- Mod Podge
- Gesso
- Paint - these are the colors I used:
- SnowTex
- Ranger Grit Paste
- Craft Sand - this is similar to what I used on mine was white
- Window material
- Blank Stencil sheets (optional)
- Tim Holtz Woodland Tree Lot
- Decorative Deer from Tim Holtz
- Ranger Alcohol Ink - Ginger
- Clear Rock Candy Glitter - this is not a plastic product, not one of those aggravating glitters. It's my favorite glitter.
How to Make the Red Roof Holiday Cottage Miniature Glitter House
- Download the pattern from the Paper Glitter Glue library - Design No. 63
- Cut out the little house pattern in cardboard
- Prime the house pieces
- Paint the cardboard your desired colors
- Optional - stencil stone on house and wall
- Glue on the door and windows
- Add window backing if desired
- Glue the house together
- Touch up corners of the house with paint
- Gently curve the roof piece to fit on the roof
- Make the dormer and glue on the roof
- Adhere the dormer and chimney before or after gluing to the roof
- Add shingles, if desired
- Make the stone wall
- Make a cardboard base
- Glue the house to the base
- Glue the wall to the base
- Decorate with snow around the wall (easier before the house is glued on)
- Glue the house to the base
- Add snow and glitter
- Finally, glue on embellishments - the tree and the deer
Related Links to making this Miniature Cardboard Cottage:
- Best Cardboard for your Paper Crafts
- How to make a Cardboard Base
- Irish Cottage - how to make a curved roof
- How to Mark Score Lines for Your Little House
So let's get started with more information to make this fun little Holiday Cottage.
Download the pattern from the Paper Glitter Glue library
First, get the free pattern from my Paper Glitter Glue library. It's Design No. 63. And here's how to do that, but you do need a password. That is how I protect my files. So if you have the password, just go to my library and download the file in the format you like. The files are listed by number and chronological with the most recent patterns first.
If you don't have the password, no worries. Just subscribe to my newsletter with the form below and you will get the password right away. I will never send you any spam - basically I try to share crafting inspiration.
And here are some tips on how to make this miniature Holiday house in a short YouTube video. But read below for the full details.
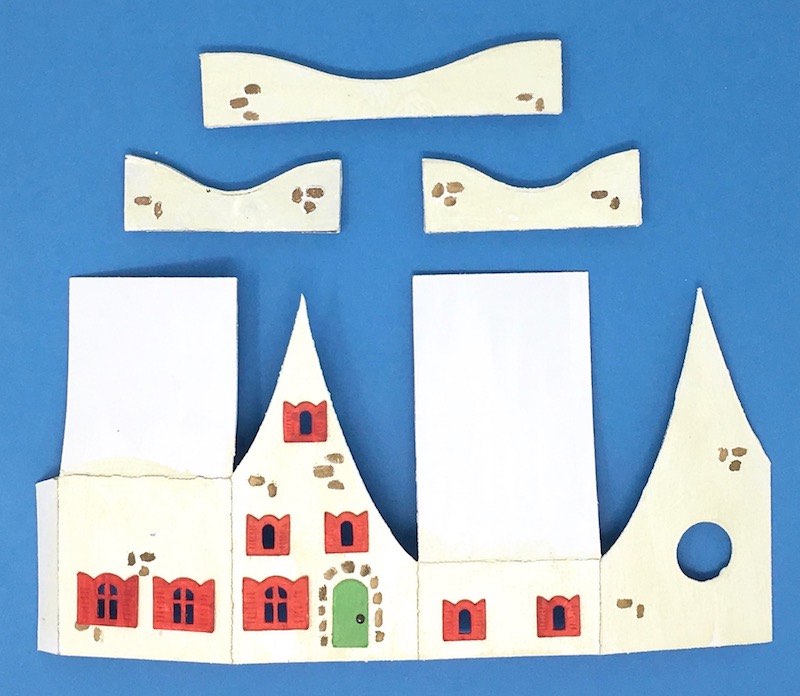
Next cut out the little Red Roof Holiday house pattern in cardboard
After you have the pattern, cut out the house pattern in cardboard. I recommend cardboard over card stock because this little house is seriously cute and you want it to last through the years. The cardboard I use is 8.5 x 11 inches.
Here is my YouTube review of types of cardboard and card stock.
This pattern is not difficult to cut out except for the windows. When I cut by hand, I usually cut out fewer windows just to make it easier. And you can cut square or rectangular windows to make it even easier. I also have a post on how to cut out windows by hand.
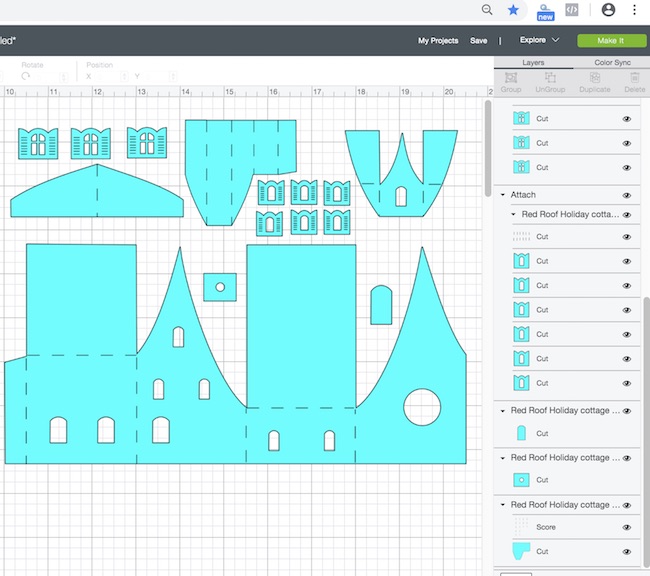
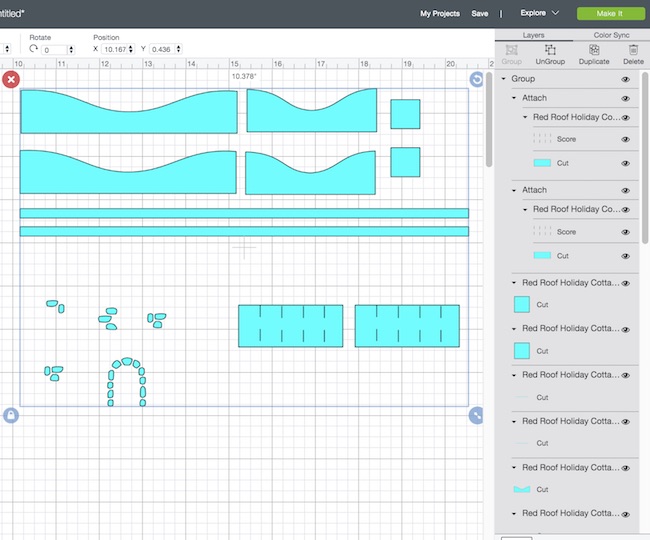
If you use an automatic cutting machine like a Cricut, be sure to mark the score lines and attach to their piece so you don't inadvertently cut the score lines. Here's how the pieces look in Cricut's Design Space.
This is the main body of the little Red Roofed Cottage in Design Space.
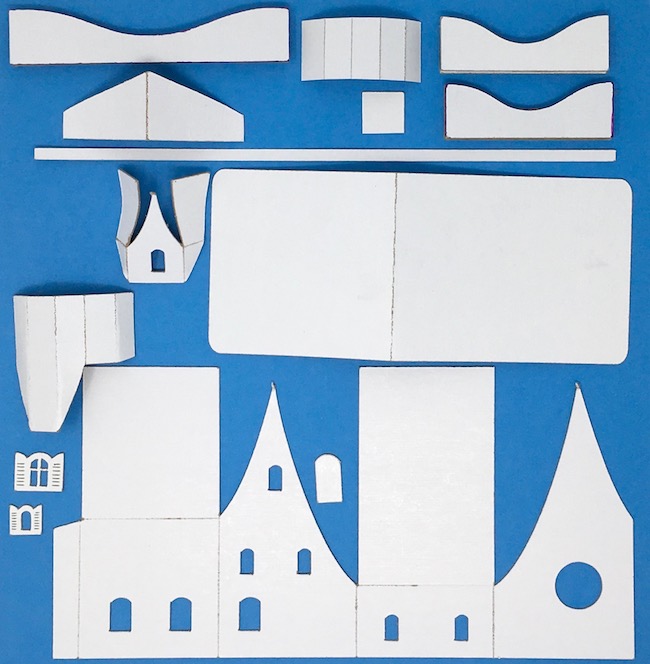
And here is the roof and shingle pieces for the cottage paper house. I think I used about 15-20 strips of shingles. How many you need is based on how closely you space your shingles.
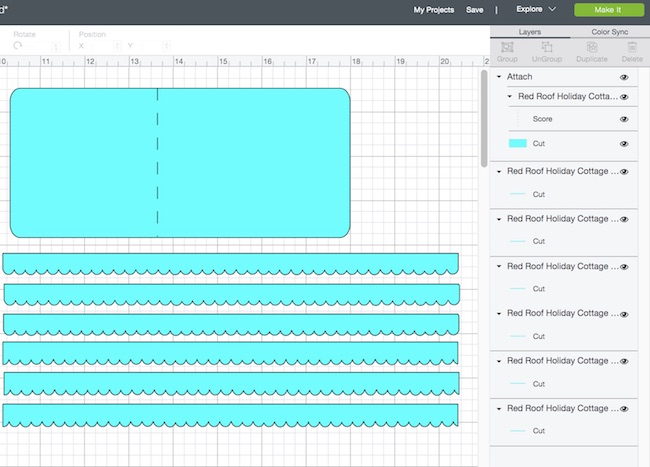
Finally here are the walls and a stencil you can make to stencil pieces of stone on the surface.
Prime the house pieces
Now you have all these house pieces. It's time to prime them. I always do that so the paint will work better on my cardboard. This is kind of a tedious step.
Paint the cardboard your desired colors
Next paint your cardboard house parts the colors you like. Color is not one of my best skill sets, but this simple color scheme is easy. First there's a background Antique Linen color, then Candied Apple Red for a dramatic pop of color. And finally Mowed Lawn (yes, that is what it is called) for the green door and the tree.
To make the paint look more like plaster I mixed about equal parts Mod Podge, Antique Linen Distress Paint and fine craft sand and painted that on the body of the house and on the stone walls.
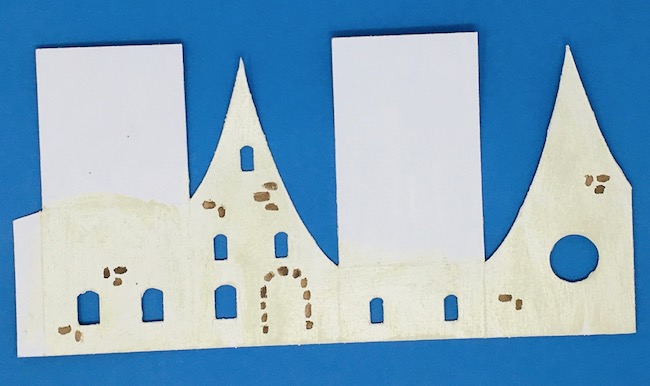
Optional - stencil stone on house and wall
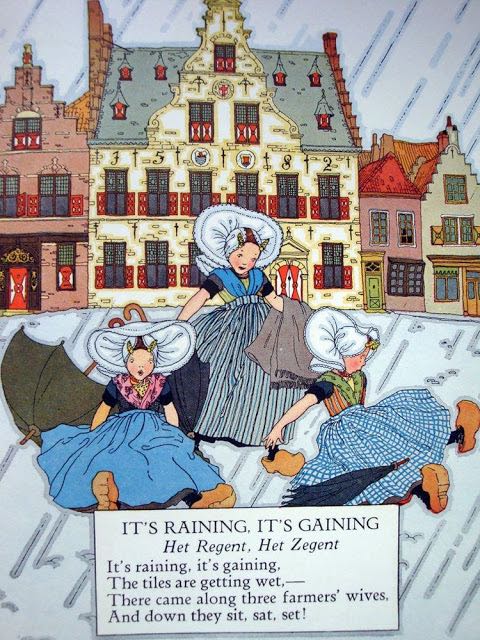
One of my favorite childhood books is Tales Told in Holland illustrated by Maud and Miska Petersham. And my favorite illustration in that book is this photo of a great Dutch building called the St. Joris Doelen Guild house. The illustrators suggested the idea of bricks by just a few outlines which you can see below. That is the concept I borrowed for the stenciled stones on the Holiday Cottage.
So if you want to add some stone accents to your Red Roof Holiday House, then cut out the stone outlines in stencil material. Stencil with texture paste or Grit Paste and paint.
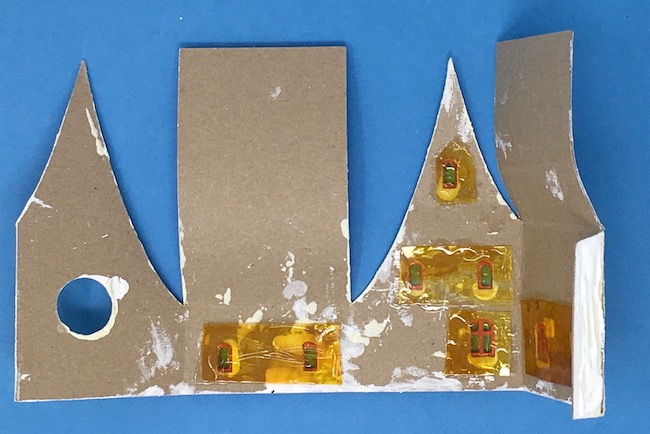
Glue on the door and windows
Next I like to glue on the door and windows while the house is still flat. I seem to be able to glue them on straighter when I glue them on at this stage.
Add window backing if desired
If you want to add window "glass" now is a good time. Again, I find it easier to do it before the house is glued together.
I make my window out of leftover plastic packaging stained with alcohol ink. And when I glue it on the house with Glossy Accents glue, I smear some of the glue on the window to make the window translucent. I use Glossy Accents because it works well with this nonporous material and dries fast.
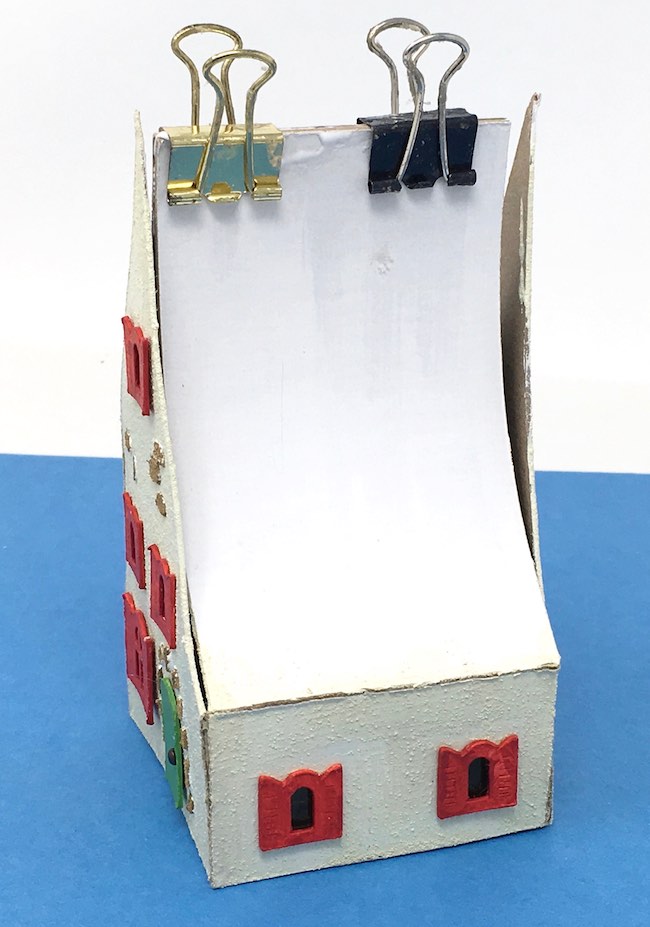
Glue the house together
Now you basically have the main body of the glitter house done, it just needs to be glued together. My technique is to apply Aleene's Quick Dry glue to the glue tab on the side and then stick the sides together. I hold them in place with a binder clip and a piece of painter's tape. Let dry.

After the house is securely glued together, you can glue the roof flaps together. Now you may not be familiar with the concept of roof flaps on a little house, but I find that they help keep my houses so much more square and hold them together better. The function of these flaps is not to support the roof, but rather to support the arched front and rear gables. Those pieces of cardboard tend to flex forward or backward if you don't support them.
First curve the roof flaps gently before you glue them together. Next apply a line of glue to the top of the flaps. Let dry. After the two roof flaps are glued together, then gentle bend the flaps so that they are behind the front and rear gables. Then apply glue to keep the roof flaps in place. Now your gables should be properly situated - not bending forward or backwards. It makes it much easier to glue the roof when the supporting gables are securely in the right place.
Touch up corners of the Holiday Cottage with paint
This is a good time to touch up the corners of the putz house with paint. Some (probably most) glitter and putz house makers paint their houses after they are all constructed. I just can't do it. I get paint on the wrong parts and smear everything. That's why I paint before I glue it together. But when you paint first, often the corners open up and raw cardboard shows. So now is the time to touch up the corners.
Gently curve the roof piece to fit on the roof
Just like you curved the roof flaps before you glued them together, you need to gently curve the roof as well. Test how if fits on your little cardboard house. Curve more if you need to. If you have a good curve that matches the curve of the roof on the gables, you'll have an easier time gluing on the roof.
Now here is another optional step, you can glue the shingles on at least part of the way if you want. I did that because it's easier to get a straight line going before the roof is adhered to the house. But I only glued part of the way because I had not glued on the dormer and the chimney.
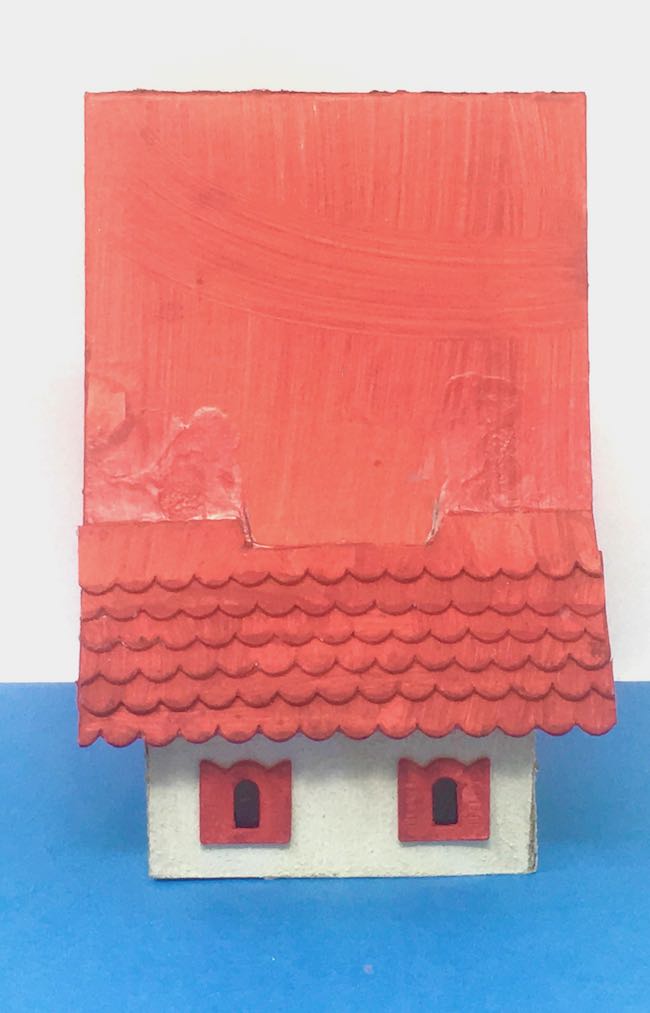
To glue the roof on, apply a bead of glue (I like Aleene's Fast Grab because it truly does hold faster) along the front and back curved gables. Place the roof on the gables, adjust so that the overhang is about the same in the front and the back. And then either use a gentle painter's tape to hold it in place or hold it by hand. Because this is a funky roof, I just held it for 5-10 minutes to make sure the roof fit the curve of the gables ends well.
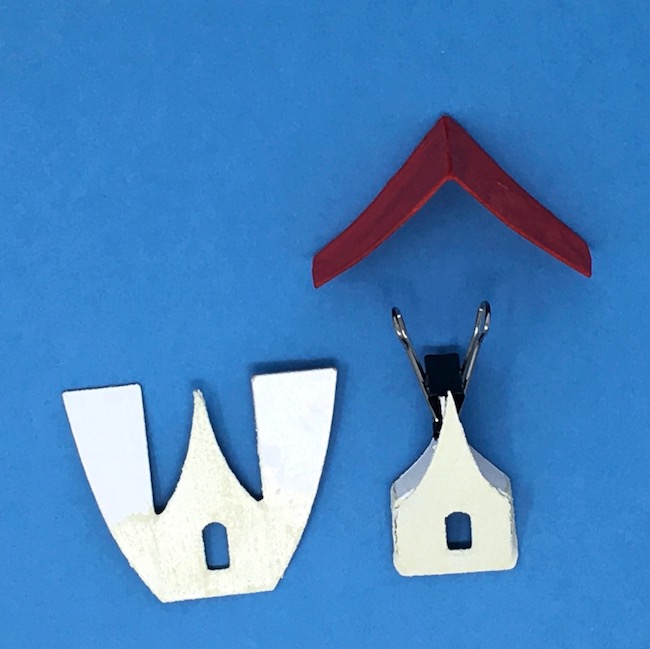
Make the dormer and chimney for your little glitter house
Next up is the dormer. You make it like a miniature version of the house itself. First, fold along the score lines. Then gently curve the roof flaps, glue them together, then adhere to the back of the dormer gable. Glue on the window and window backing. Note: No light gets into this window unless you cut a hole in the roof behind the dormer. I've found that not much light gets in anyway so I don't bother. Just pretend the lights are off in the attic.
The chimney is simple. Just fold along the score lines and glue along the narrow tab. Then glue the rectangle with a hole in on the top of the chimney.
Adhere the dormer and chimney before or after gluing to the roof
Now here you can see my worst mistake on the house. I didn't glue the chimney on the right place on the roof. The curvature of the roof varies. The angle is not the same all along the roofline so the place where the chimney would have fit correctly was lower down. I did not notice it until I was taking photos of the completed house. It bothers me, but that's just the way things happen sometimes.
So try to make sure to glue the chimney and dormer where the angle matches and they stand up correctly.
Add shingles to your little Putz house, if desired
Ok, next add shingles if you want. Just being honest here, it took me over an hour to glue on the shingles. You have to measure each strip and cut to size. Also you have to cut the shingles to match the angles on the dormer. It's challenging. But I do think it's a great effect and worth it. You just need to know that it is time-consuming when you cut and stagger the shingles.
Make the stone wall
Now how to make the stone wall. I cut a piece of corrugated cardboard just a bit smaller than the cut out section of the wall. This gives dimension to the wall. Then glue one piece of the painted outer wall to each side of the corrugated cardboard. Then curve one of the thin strips to match the curve of the top of the wall. Once the sides are glued onto the corrugated cardboard, glue the thin strip to the top of the wall. If needed, touch up the paint on the wall.
Make the corner pillars just like you did the chimney. Glue the square on top. Touch up the pillar corners if needed.
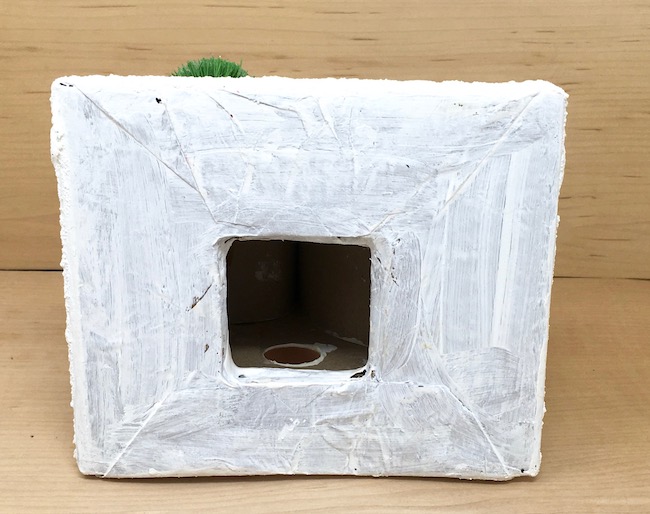
Make a cardboard base
Make a cardboard base for your little house just like I did here. This is my favorite method. Here's how the house looks from underneath. Paint with gesso and then whatever color you want. I just left it white because I cover it with snow. Oh, the base is about 6 inches across and 5 inches deep.
Glue the wall to the base
Now glue the long piece of the wall on the back of your cardboard base. Then glue the side pieces to the long back piece. Try to make sure that each piece fits tightly against the back piece. On my project I left gaps. Another mistake. If I had caught it earlier I would have at least piled up snow there or filled it with some grit paste, but I didn't see it in time.
Decorate with snow around the wall (easier before the house is glued on)
Snow time! For my snow, I mix SnowTex with gesso so it's more spreadable. I like that way better. I smeared it at the base of the wall and at areas on top of the wall.
Glue the Red Roof Cottage to the base
Once the snow is dry, you can glue the finished Red Roof Holiday Cottage to the base. Just apply a thick bead of glue to the base of the house and firmly place on the base.
Add snow and glitter
Now paint snow on the house and along the base of the house. When the snow is dry, paint Mod Podge on the snow and then sprinkle glitter. I know that people have different opinions about glitter. But the glitter I like the best is Ranger's Clear Rock Candy glitter which is not plastic so it doesn't get electrostatic and spread like virus around the house.
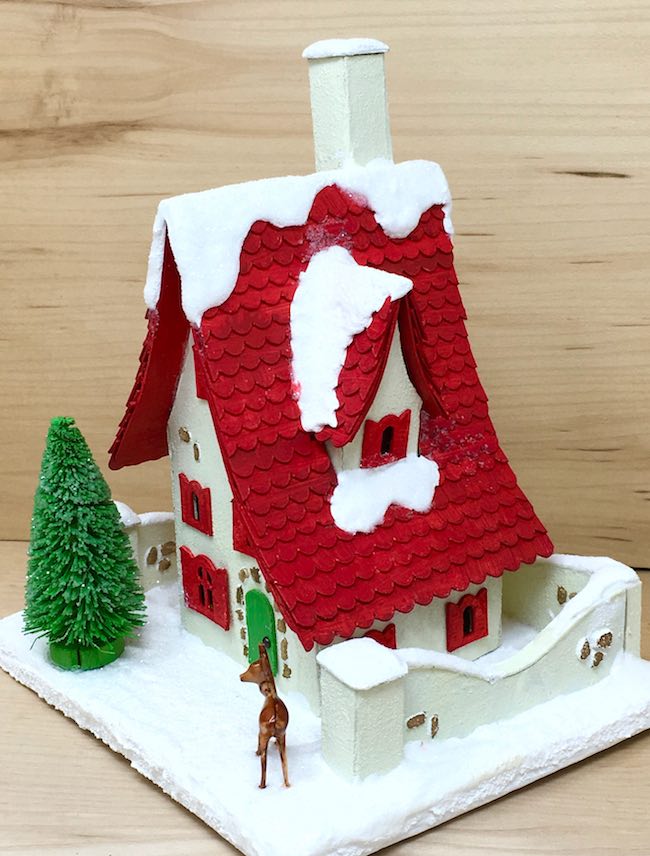
Finally, glue on embellishments to decorate your beautiful Red Roof Holiday Cottage
And last decorate your little Red Roof Cottage using whatever tickles your fancy. I just added a glittered green bottle brush tree and a little deer. The little decorative deer is from Tim Holtz and is stained with a Ranger alcohol ink shade called Ginger.
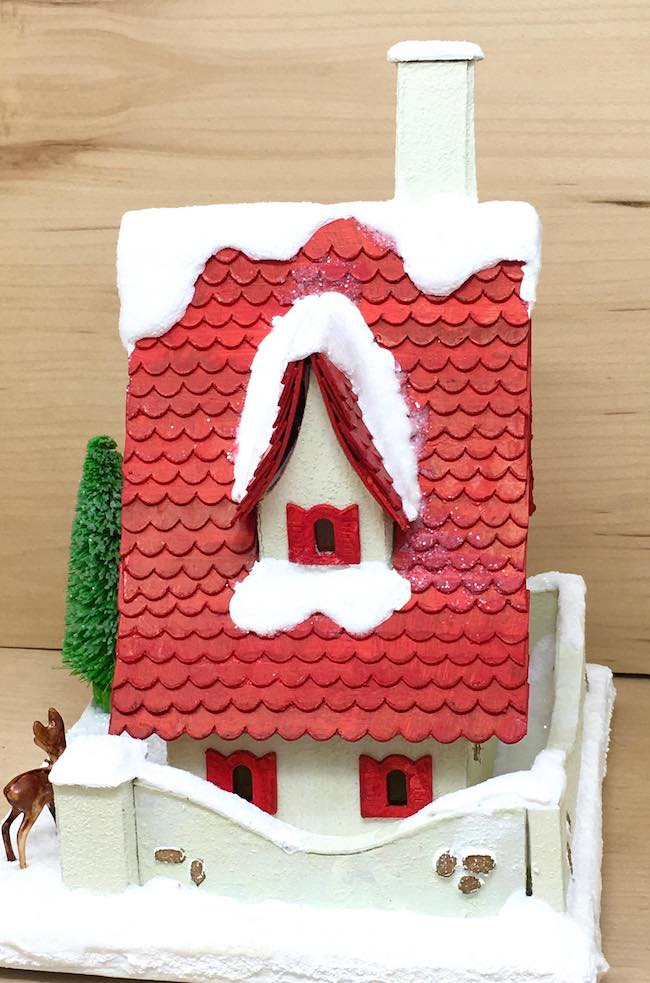
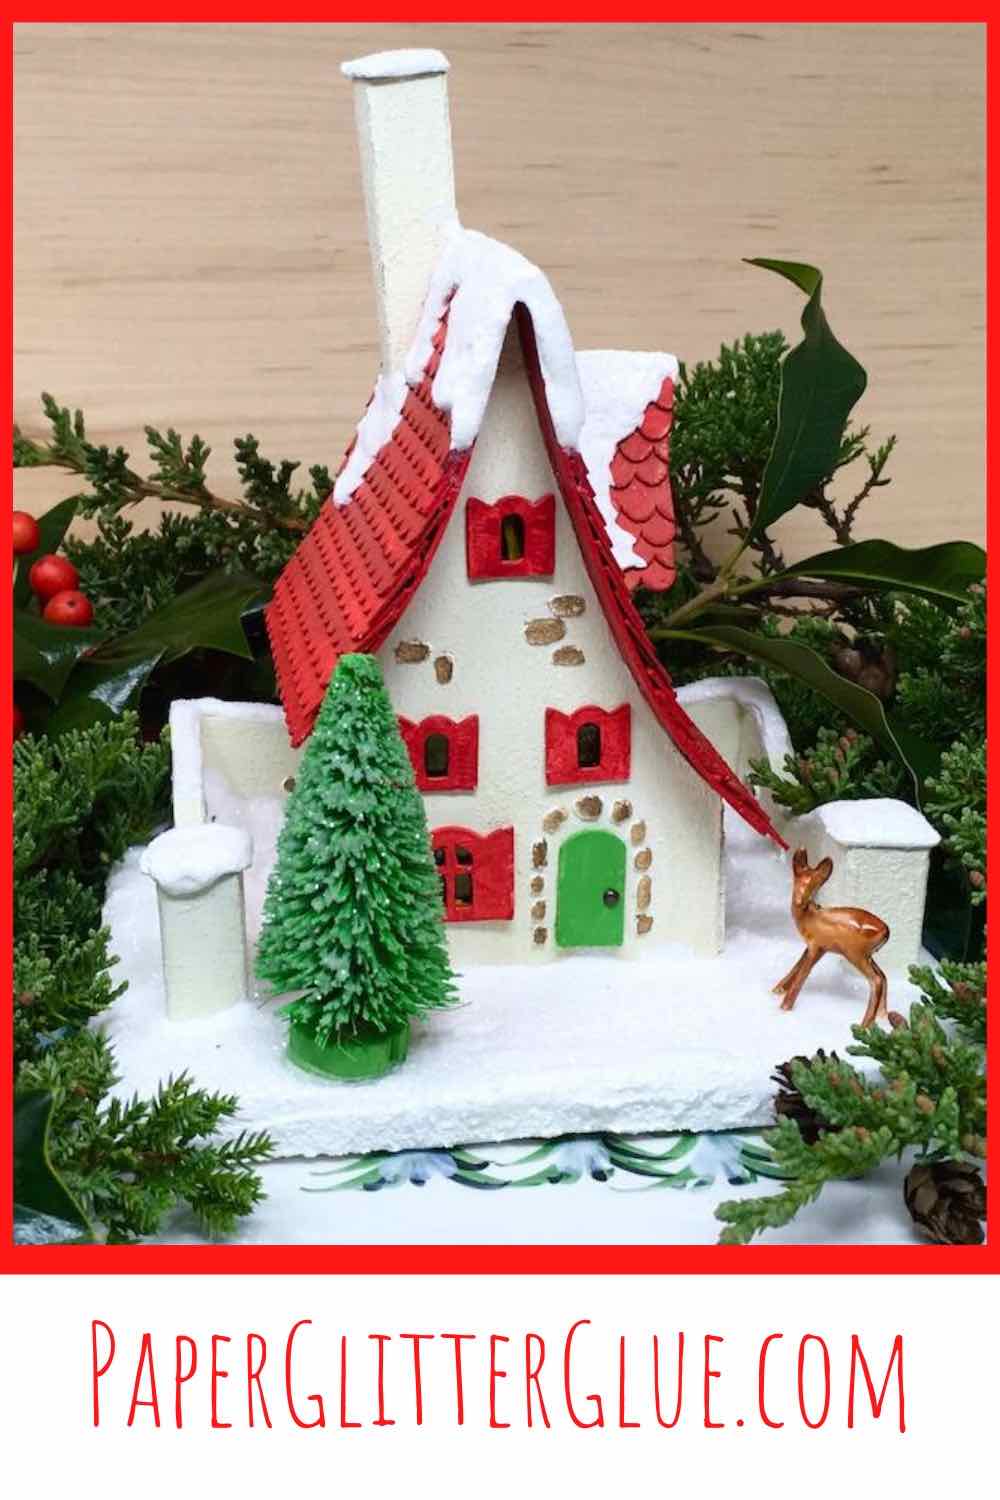
There you have it - the little Red Roof Holiday Cottage to adorn your mantle or tabletop or to add to your Christmas village.
Here are links to the other projects in the 15 Days of Holiday Crafts:
- Red Roof Holiday Cottage
- Merry ChrisMoose Gift Box – DIY Mini Holiday Piñata
- Mini Paper Christmas House with Barn Shaped Gable (the Green Gable house)
- Gingerbread Paper House – made with Gingerbread Paint
- DIY Gnome Gift Box
- Scotty Dog Gift Box
- DIY Paper Wallet for Holiday Gift-Giving
- Paper Gingerbread Ornaments – Scented Gingerbread Men
- Happy Hollydeer Piñata Candy Box
- How to Make a Paper House Ornament for the Holidays
- Easy Gingerbread House Paper Ornament
- DIY Display Gift Box for the Paper House Ornament
- Pull String Piñata - Miniature Firecracker Piñata
- DIY Bird Ornaments - Cardinal, Goldfinch, and Bluebird (counts as 2 projects)
Oh, and one of my very favorite online stores is Simon Says Stamp. Well, this Monday challenge is "Lets Sparkle" so I am going to add this miniature holiday house to the challenge since it does have some sparkle to it.
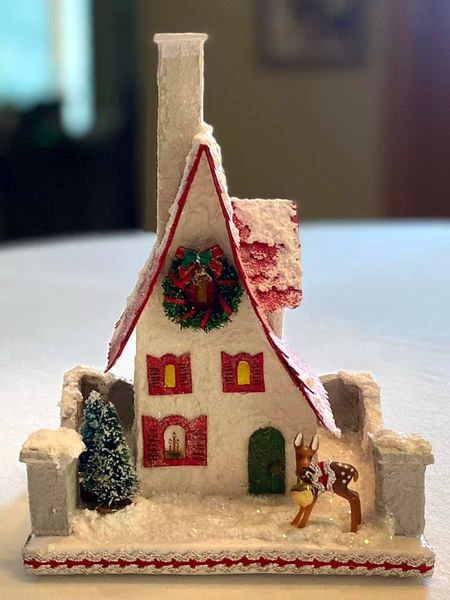
One of my readers made this beautiful version of the cottage. Just look at all the fun details.
If you have any questions, always you can email me at [email protected] or ask questions in the Paper Glitter Glue Facebook group. I love to see your projects there.
Lucy
Also please pin the photos to your favorite Pinterest boards so you can remember where you found this paper craft project.
Iris
So adorable. Cut mine out. Can’t wait to make it.
Sally
Flippin' adorable! Thanks so much for sharing!!
Lucy
Thank you, Sally.
Rhonda
Thank you Lucy, as usual you have out done yourself. This is the BEST elf house I’ve ever seen! The detail is so detailed, lol. I’m in love with it, this will go in my village. No village is complete without a train.
Lucy
Rhonda, I am so glad you like it. Yes, Christmas villages need trains. But a train does require a lot of space, doesn't it?
Gabi
I love it! Once again thanks for being so generous and sharing it with everyone!
Gretchen
Sooooooo cute!!!!
Lucy
Gretchen, thank you so much.
Bette Daoust
Absolutely fantastic and so adorable! Thanks for sharing.
Adriane
Olá Lucy
Achei tudo lindo, obrigada por nos ensinar o passo a passo eo cuidado que você tem dando todas as dicas, parabéns pelo lindo trabalho.
Lucy
Thank you so much. I do appreciate it.
Shirl
Adorable!