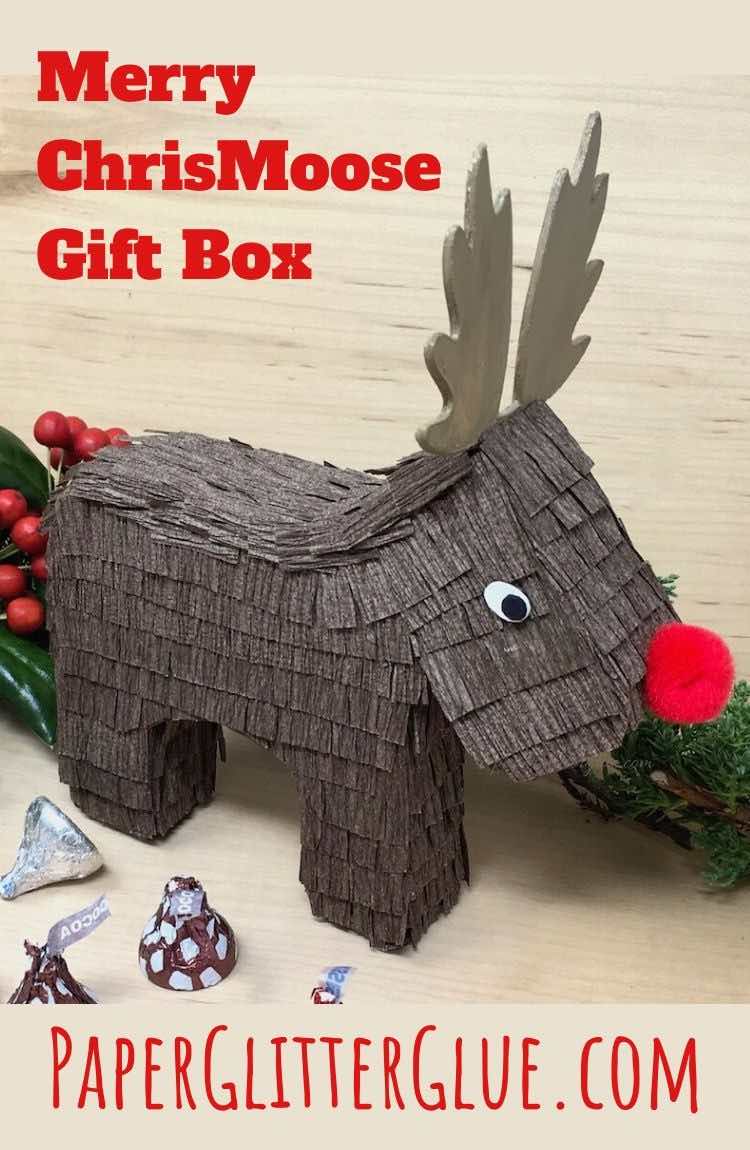
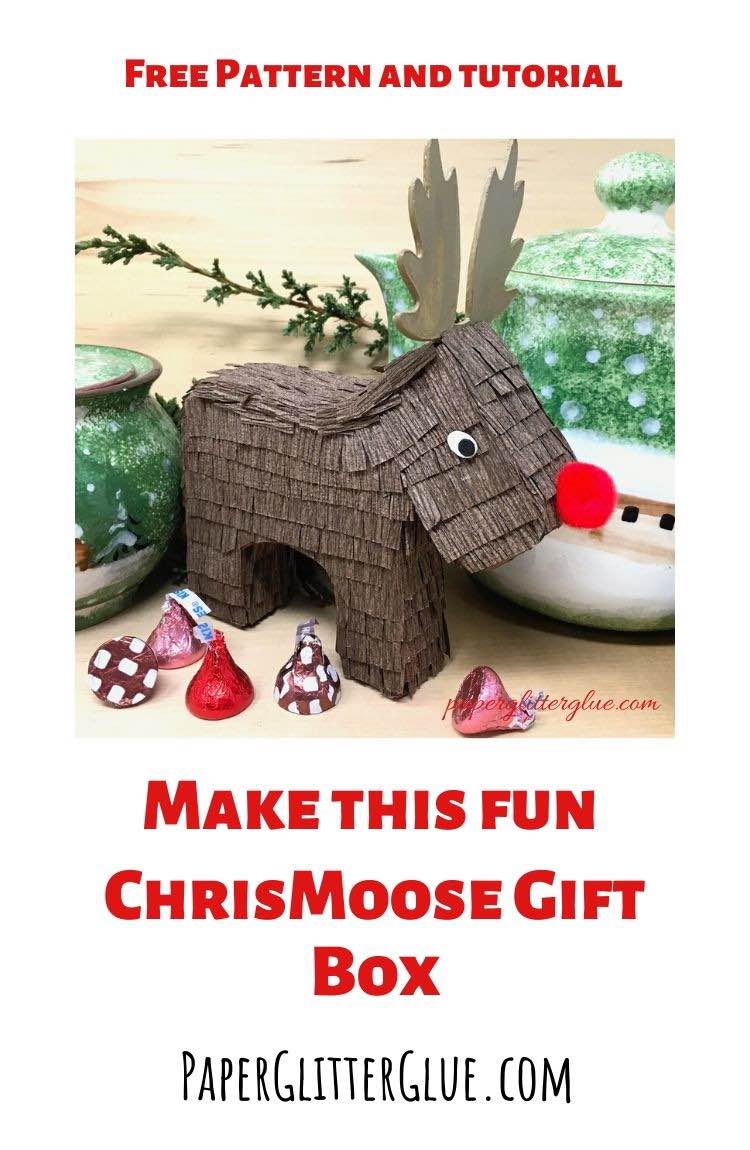
Learn to make this cute Mini Holiday Piñata Gift Box with my free pattern and tutorial.

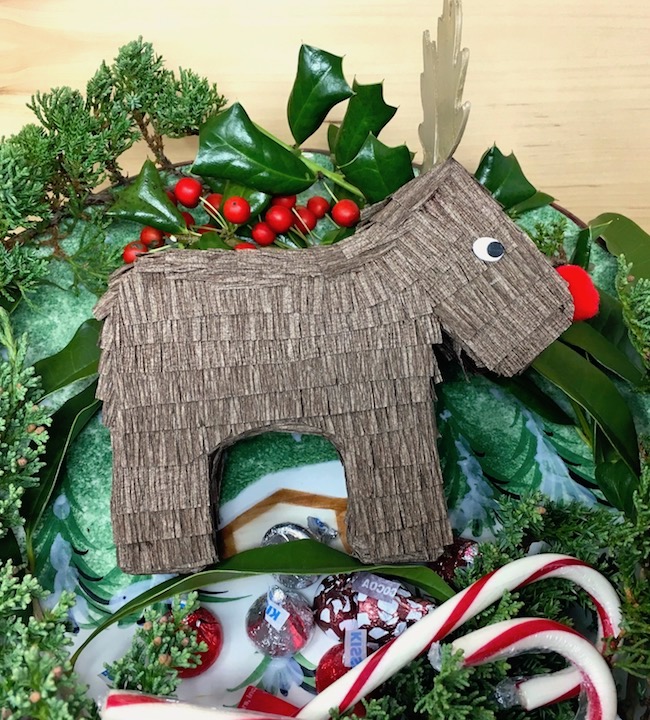
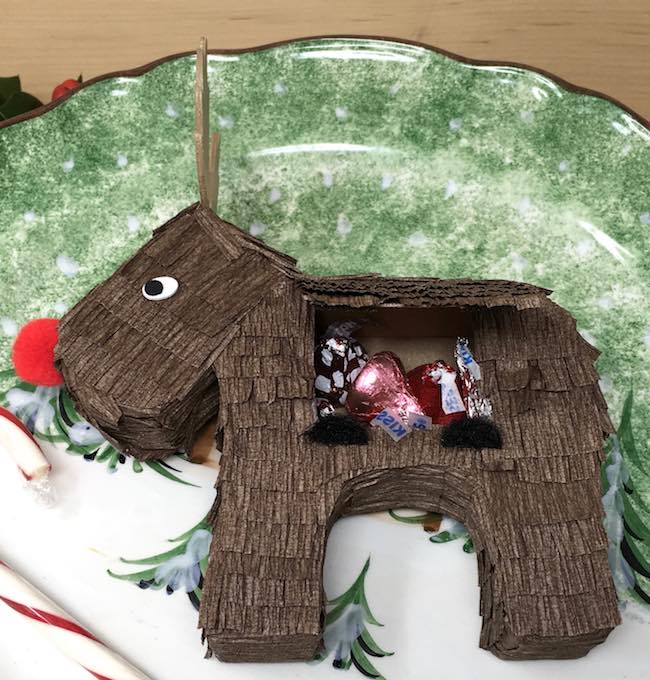
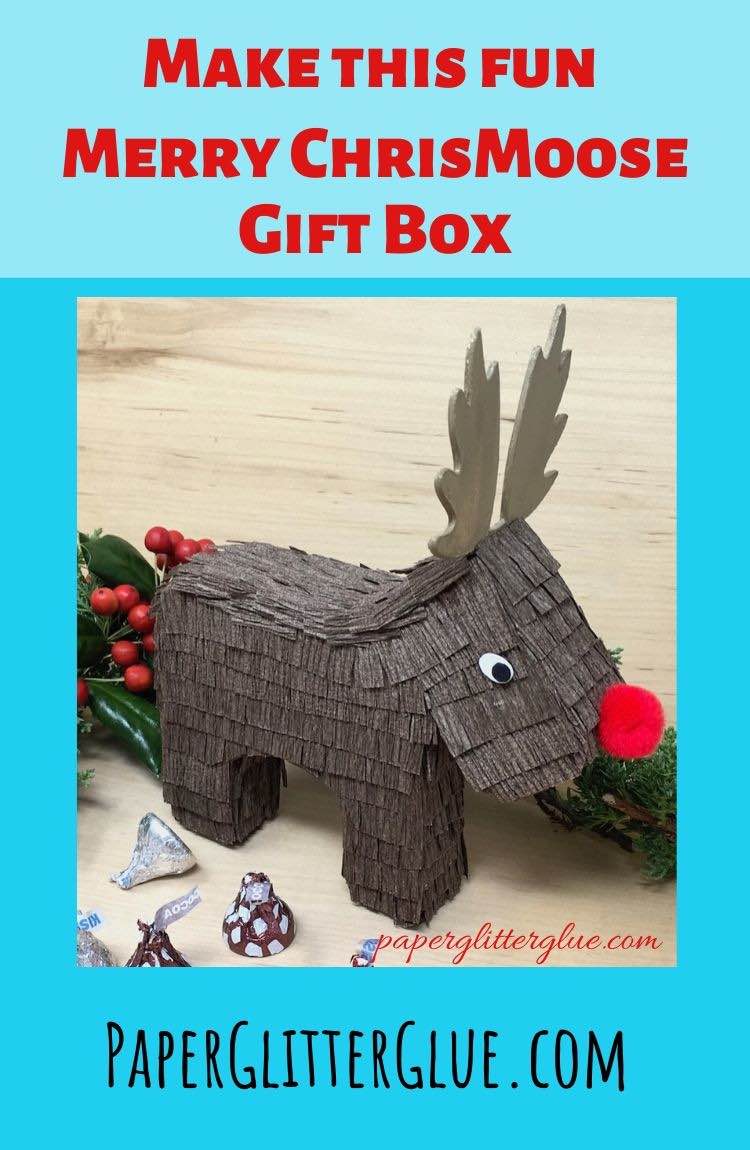
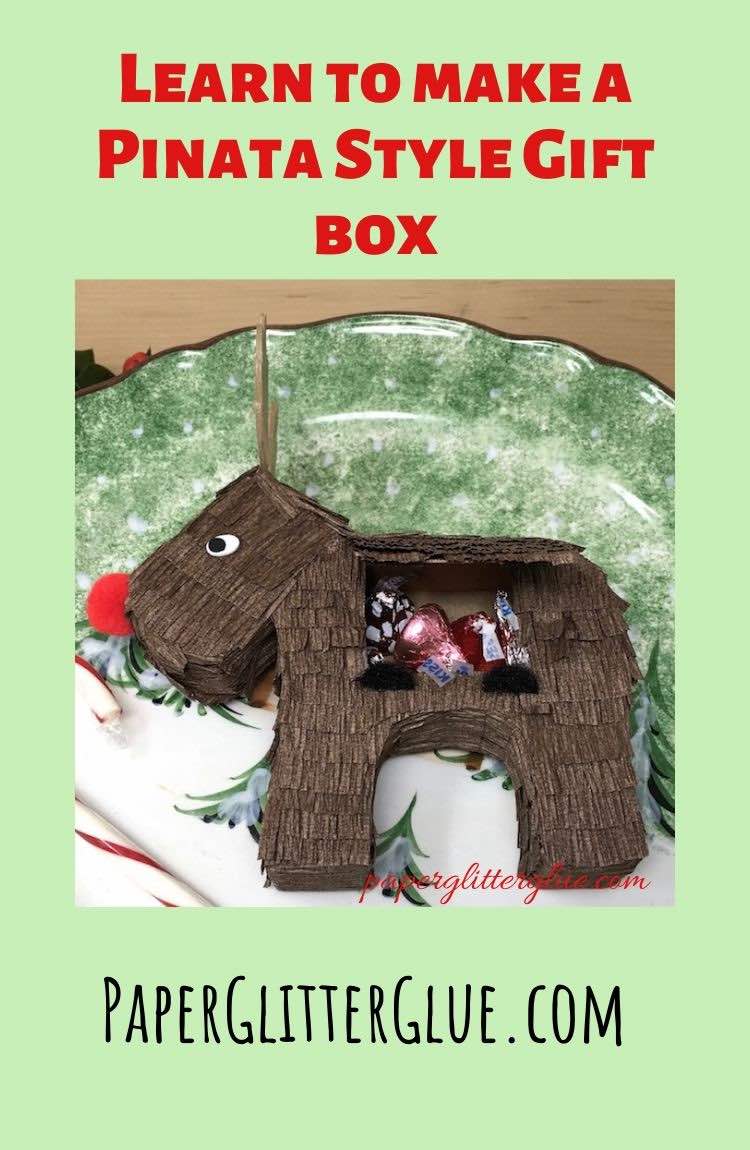
What makes a better holiday gift box than this cute Merry ChrisMoose? I mean, really. It's perfect for a few tiny treats, some candy, or even filled with money. Make this miniature moose gift box just like you make piñatas, but with an opening in the back with a flap that you can open and close it. That way you don't tear up the moose to get to the treats. Then you can use it as an ornament or holiday decor or for another gift next holiday.
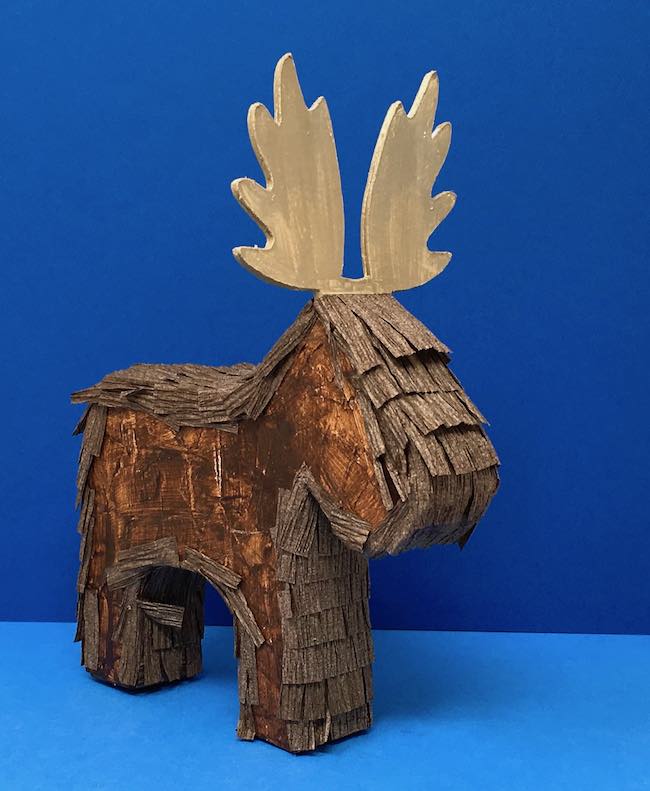
And ya'll, I realize ChrisMoose looks like a reindeer. I tried to make him more moose-like, but it's still difficult to tell that he is a moose, but that's ok. In any case, he is still cute.
So this is the fourth project of the 15 Days of Holiday Craft series. Did you see the Red Roof Holiday Cottage - that's the first Christmas house in the series. Here's the project list:
- Red Roof Holiday Cottage
- Merry ChrisMoose Gift Box – DIY Mini Holiday Piñata
- Mini Paper Christmas House with Barn Shaped Gable (the Green Gable house)
- Gingerbread Paper House – made with Gingerbread Paint
- DIY Gnome Gift Box
- Scotty Dog Gift Box
- DIY Paper Wallet for Holiday Gift-Giving
- Paper Gingerbread Ornaments – Scented Gingerbread Men
- Happy Hollydeer Piñata Candy Box
- How to Make a Paper House Ornament for the Holidays
- Easy Gingerbread House Paper Ornament
- DIY Display Gift Box for the Paper House Ornament
- Pull String Piñata - Miniature Firecracker Piñata
- DIY Bird Ornaments - Cardinal, Goldfinch, and Bluebird (counts as 2 projects)
Ok, what do you need to make the Kris ChrisMOOSE Mini Holiday Piñata Box?
This post contains some affiliate links for your convenience. Click here to read my full disclosure policy.
Materials to make the ChrisMoose Gift Box
- Pattern - Design No. 64 - from the Paper Glitter Glue library
- Cardboard - my favorite crafting material!
- A way to cut your materials - I use a Cricut Explore Air 2 and the Cricut Maker
- Masking tape - just regular inexpensive masking tape
- Gesso
- Crepe paper
- Glue - I like a thinner glue with a small tip for the crepe paper
- Paint for antlers
- Small Red Pom Pom
- Velcro dots
Directions for your DIY Mini Holiday Piñata Gift Box
- Download the pattern - Design No. 64 - from the Paper Glitter Glue library
- Cut out the pattern in cardboard
- Use Masking tape to make the Merry ChrisMoose structure
- Prime and paint your Moose Gift Box if desired
- Cover ChrisMoose with crepe paper
- Glue on the eyes and nose
- Glue Velcro dots on flap
- Decorate your gift box
- Fill with treats
Related Links to More Cute Gift Boxes that you can make:
- Mini Llama Piñata Gift Box
- Scotty Dog Gift Box
- Gnome Gift Box
- Shamrock Candy Box
- Valentine Piñata Candy Box
So let's get started making this fun miniature piñata gift box. This gift box is easier to make the the Scotty Dog Gift Box because the curves are gentler. The moose's nose is rounded and I didn't show the tail. Moose have tails, but the tails are small and usually held close to the body so that is why you can't see the tail.

First download the Merry ChrisMoose Gift Box pattern from the Paper Glitter Glue library
To access the library you need the password which you can get by subscribing to my newsletter if you don't already have it. Use the form below to subscribe. You will get the password right away when you subscribe.
So the pattern for Merry ChrisMoose is in 2 formats in the library. Both in the same folder:
- SVG - scalable vector graphic patterns for most automatic cutting machines
- PDF - the portable document format that you can cut out on your own by hand
For some reason I could not save in a DXF format, but I don't know why. I will be working on that issue.
All of the files are in zipped files which means they are compressed to make them easier to download and protect. Then you have to extract or unzip them to use them.
Next cut out the pattern
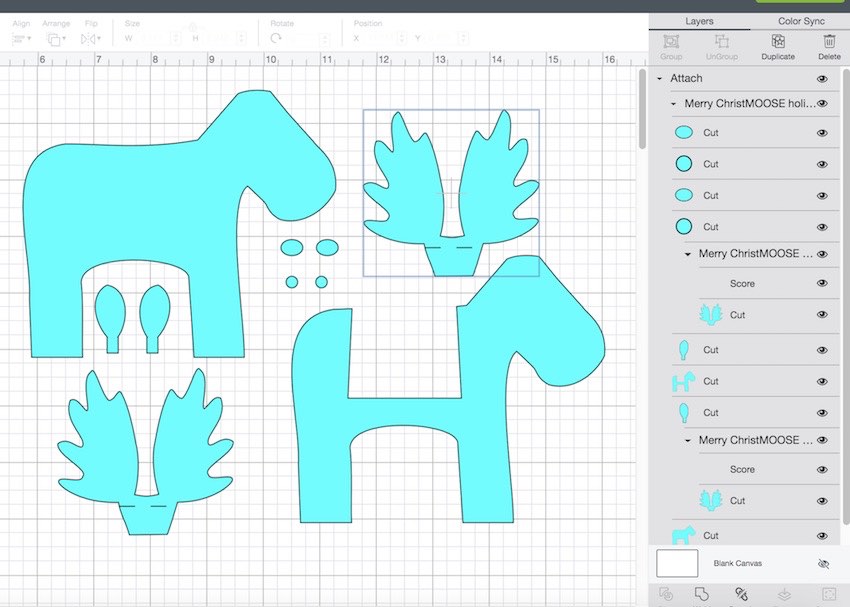
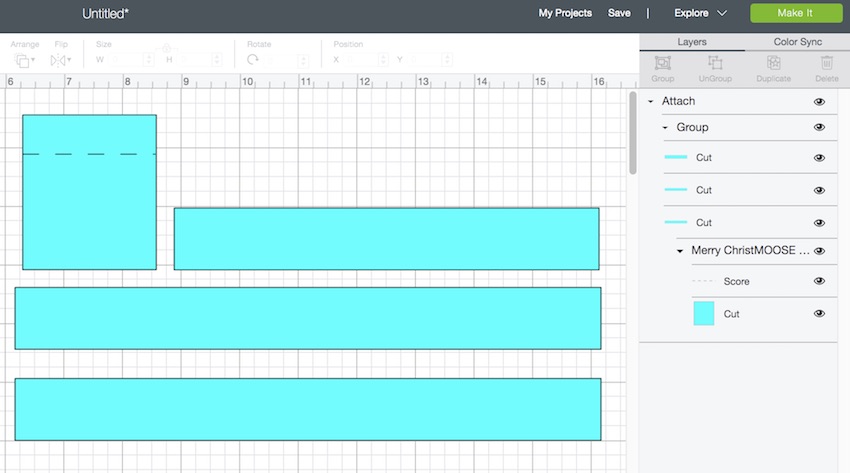
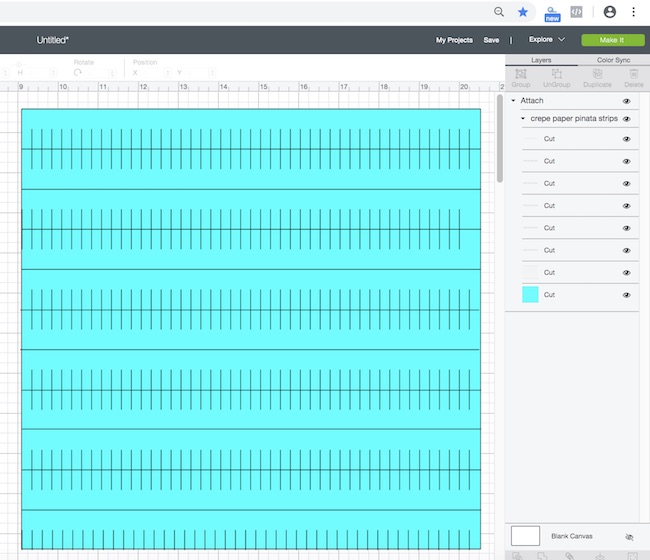
Now cut out the pattern using whatever method that works for you. I used my Cricut Explore Air 2 to cut out the moose shape from a medium weight 8.5" x 11" cardboard. Here's how it looks in Cricut's Design Space. There are 3 sheets to make the Moose Piñata box - the moose page, the gift flap and side strips and finally a pattern to cut out the crepe paper strips.
Please note, you can only cut crepe paper on the Cricut Maker though because you need the rotary blade.
For the pattern page with the moose body, there are only 2 score lines which are at the bottom of the antlers. Be sure to change them so score lines and attach in your design software.
And for the side strips, the only score line is on the flap. Again be sure to change it to a score line and to attach in your design software.
There aren't any score lines on the crepe paper pattern. Just attach all the cut lines in the design software program.
Use Masking tape to make the Merry ChrisMoose structure
Just like we did for the Mini Llama Piñata and the Scotty Dog Gift Box, make the side strips more flexible by running them through the your fingers or on the side of a table. Then pick a place to start on the full moose - the piece without the cut out. I usually pick the bottom of the legs and tape to the bottom of the legs. Work your way around the moose shape taping with the masking tape as you go. It takes about 2 ½ strips to make the moose shape.
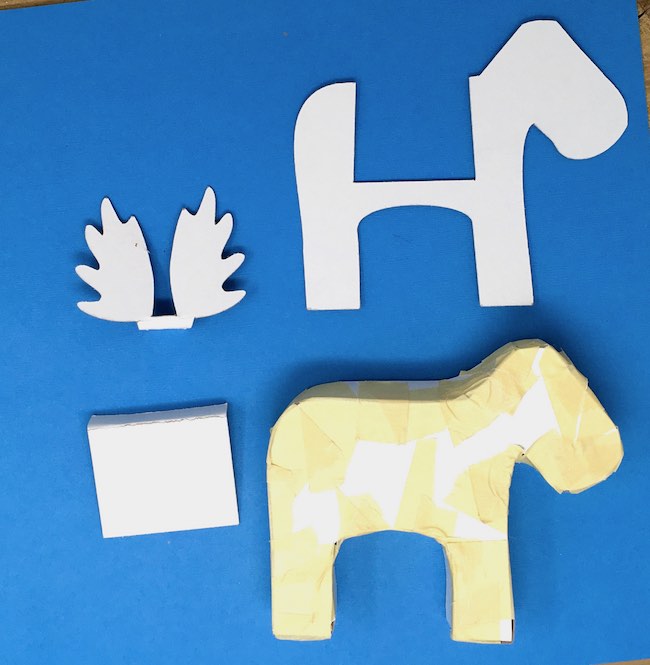
Once you finish taping one side. Put the moose piece with the cut out on top and tape in place. If the cardboard doesn't look like it fits, then just gently bend it and tape in place.
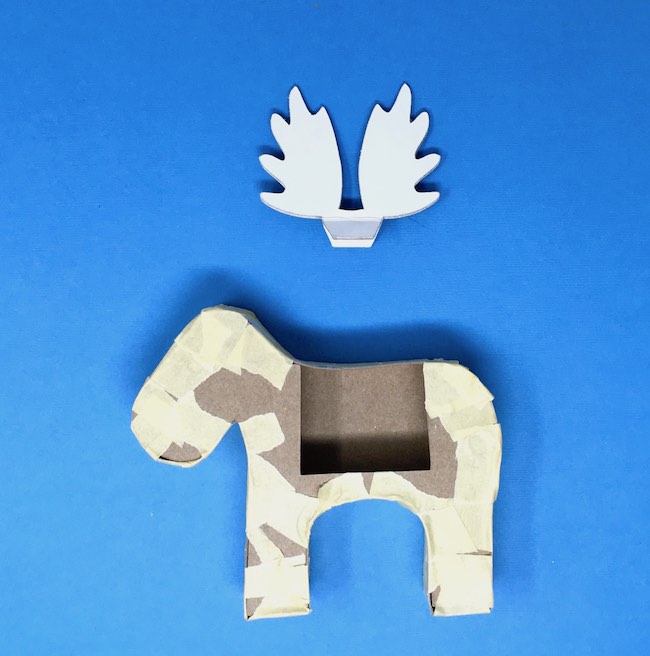
After you have the basic moose shape completed, glue the two moose antlers together leaving the tabs at the bottom open. Next glue and tape the antlers to head of the moose. Try to situate the antlers so that they stand straight up.
Then glue the side flap on and tape it for reinforcement.

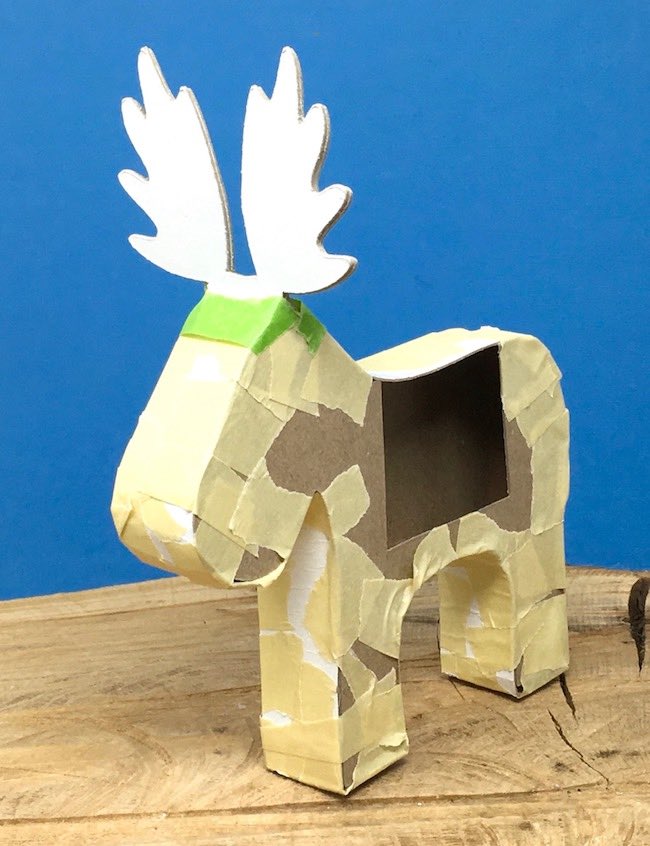
Prime and paint your Moose Gift Box if desired
This is an optional step. Most people don't prime and paint piñatas. But I did because I think it's easier to glue the crepe paper when you don't have to worry about tiny gaps where plain cardboard shows through.
Obviously, my painting is kind of sloppy as you can see.
Also paint the antlers at this step.
The circle and the ellipse are moose eyes. You can cut them out of card stock or just paint them. Or you could use googly eyes.
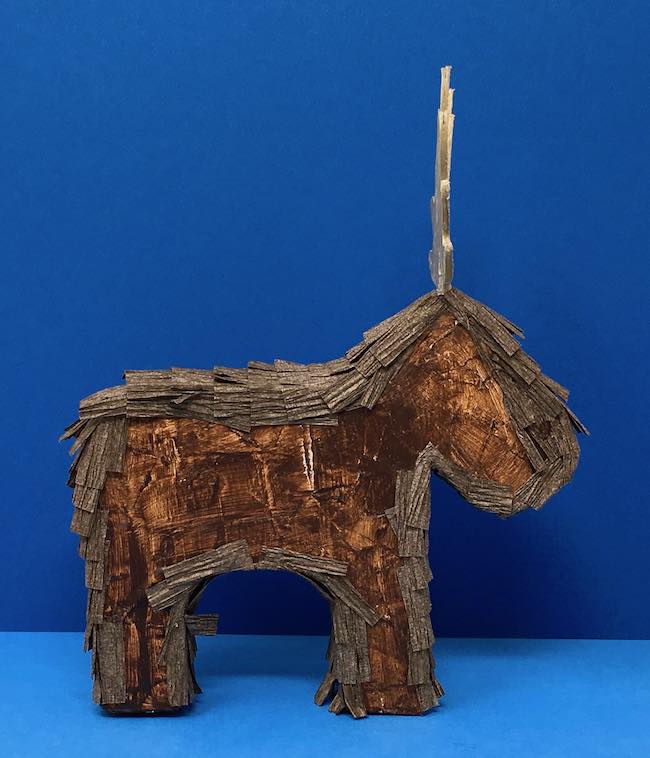
Cover your ChrisMoose Gift Box with crepe paper
Now cover the miniature moose with crepe paper. I generally start on the inner legs and then the back and front of the legs. There is no right or wrong way. Just run a bead of glue in a line, then glue a piece of cut crepe paper starting at the bottom. Overlap each crepe paper layer leaving about ¼ inch visible. Keep working your way upward. You can just experiment on what works to cover the moose with crepe paper.
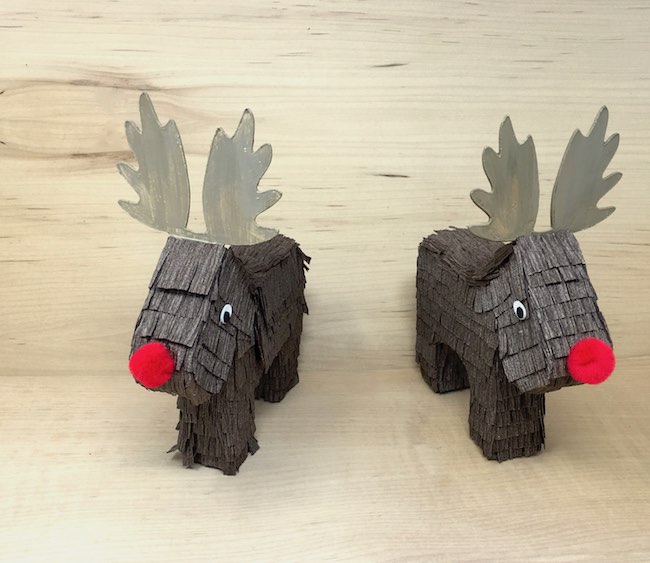
Glue on the eyes and nose
After you've covered the body of the moose with crepe paper, then you can glue a nose and eyes on the gift box.
Just know that if you glue a red pom pom to the nose of a moose he pretty much turns into a reindeer gift box.
Glue Velcro dots on flap
Cut a small Velcro dot in half and glue one side onto to the flap so you know where it fits. And I always add glue to the Velcro dots because I don't trust the adhesive to last over time. Once the velcro dot half is dry, then glue the other side in place. Let it dry before you try to open it.
Fill with treats
Now you get to fill your little holiday piñata gift box with treats - little candies, small gifts, money, jewelry - whatever fits in this cute little space. And if you don't want your tiny gifts to get stuck inside the legs or nose, just stuff a little tissue paper in there.
So that is how you make Merry ChrisMoose - the Mini Piñata Holiday Gift Box. And I hope you have some creative fun today.
Lucy
And I am sending you a Merry Christmas message in song form. That means - don't turn the sound up very loud because I am doing the singing. I hope you are having a happy holiday season.
P.P.S. Let me know if you have any questions. Leave a comment or email me at [email protected]. Oh, and be sure to pin the Merry ChrisMoose to your favorite Pinterest board to remember where you found it.
Judi Markel
Hi Lucy,
The only file for the Merry ChrisMoose SVG file works but the other 2 still don't work. The other 2 give me the same error in Win Zip.
Judi
Lucy
Judi, Once again I think I have it fixed. Please let me know. Thank you so much for your help.
Lucy
Helen Roberts
Hello, Lucy. Love these boxes you are doing. They are too cute. Unfortunately this download is still not working for me as of 12/9/19. Would you please check into it again?
Lucy
Helen,
The file downloads for me. But I have reloaded it with 2 separate files as an Merry ChrisMoose SVG file and a PDF file. Let me know if that works.
Lucy
Judi Markel
Hi Lucy,
Every time I try to open the Merry ChrisMoose file, it won't open. I keep getting this message.
The following invalid folder name was encountered in the archive: ""Merry ChrisMoose Gift Box SVG:PDF\""
This folder and any files in it will not appear in the main WinZip window but you may still be able to extract it by choosing "all files" in the extract dialog.
Well I tried that and it didn't work. Please help as I would like to make some of these for gifts. I love your files.
Lucy
I may not have posted in the library correctly. I will get to work on it right away. Thank you for letting me know.
Lucy
Lucy
Judy, I think I had an illegal element in the name either the semi-colon or slash or something like that. I just downloaded it and it worked. So it should be fixed now. Let me know.
Lucy