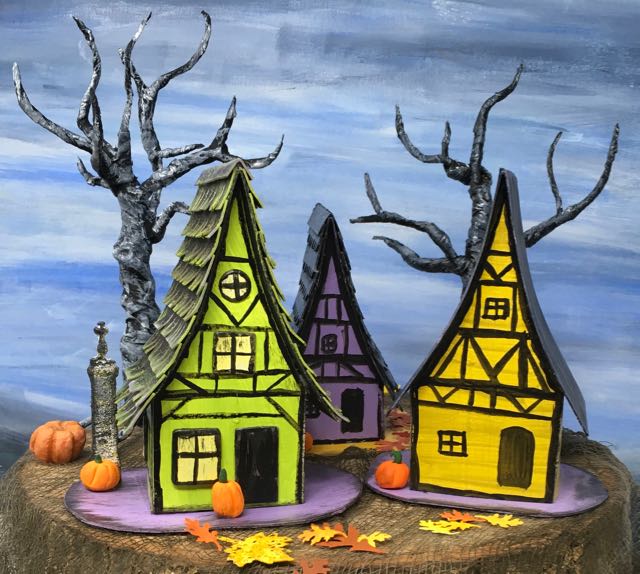
Front view of the Medieval Haunted Houses for the 13 Days of Halloween Challenge
The Medieval Haunted House is the 4th pattern in the 13 Days of Halloween challenge where we make a miniature paper Halloween house each day for 13 days. This little haunted house is inspired by the German Half-timbered houses but with an exaggerated roofline for the Halloween theme.
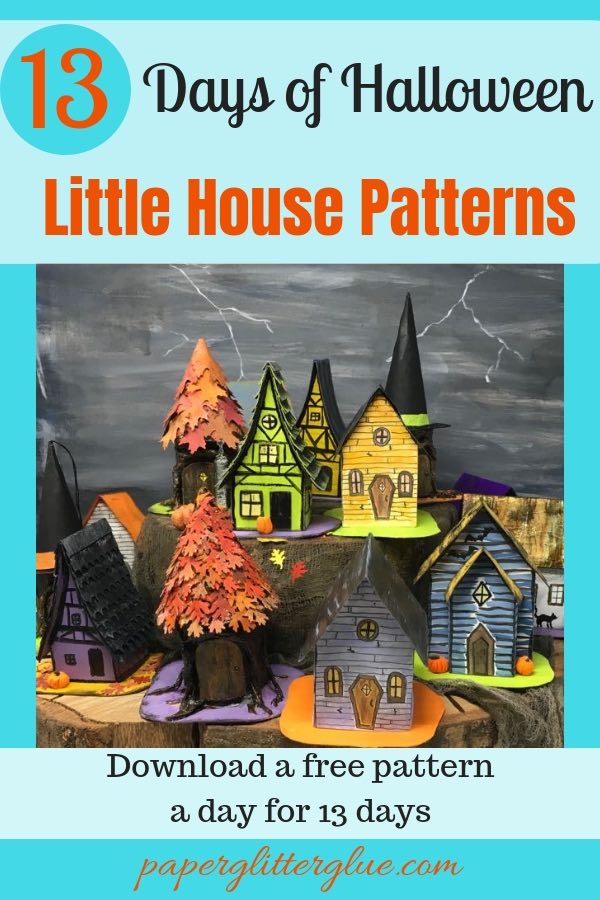
Here's a photo of the paper-based Halloween Village as it stands on Day No. 4 of the Challenge
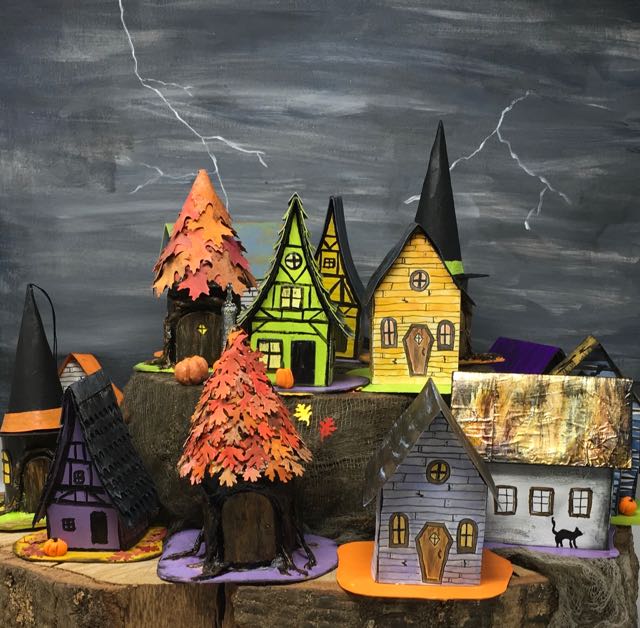
Overview of the houses made so far for the 13 Days of Halloween challenge. Eight more houses in construction.
WHAT DO YOU NEED TO MAKE THE HOUSES?
FIRST, ACCESS THE PAPER GLITTER GLUE LIBRARY
You can find all my free patterns in my Paper Glitter Glue Library. I list the patterns chronologically. So you will find the newest 13 Days of Halloween paper house pattern first at the top of the library.
To get access to the library: simply subscribe to my newsletter with the form below and you will be sent the password immediately so you can download the pattern. Then click on the library link, click to enter the password protected area, type in the password and the poof! the list of free patterns and tutorials will appear.
Additional links to Information related to this tutorial:
- Previous houses with similar patterns to the Medieval Haunted House:
Here are the links to the little houses:
- 13 Days of Halloween Paper House patterns:
- Halloween Paper House No. 1
- Halloween Paper House No. 2
- Halloween Paper House No. 3
- Halloween Paper House No. 4
- Halloween Paper House No. 5
- Halloween Paper House No. 6
- Halloween Paper House No. 7
- Halloween Paper House No. 8
- Halloween Paper House No. 9
- Halloween Paper House No. 10
- Halloween Paper House No. 11
- Halloween Paper House No. 12
- Halloween Paper House No. 13
Materials to make the Medieval Halloween House:
- Halloween House No. 4 - Design No. 17 - Free Medieval Haunted House paper pattern here
- You can use an automatic cutting machine like a Cricut Maker, Cricut Explore Air 2, Silhouette, or ScanNCut
- Carbon tracing paper (if you are copying the pattern to cardboard)
- Cardboard
- Cutting Mat
- Metal-edged ruler
- Craft knife and scissors
- Aleene’s Fast Grab Glue or similar glue
- Gesso
- Paint colors of your choice
- Paintbrushes
- Halloween embellishments
Briefly, these are the steps in making this cardboard house:
- Download the pattern and print - Design No. 17
- Copy the pattern for the Medieval Haunted House onto cardboard, score the fold lines, cut out
- Prime and paint the house
- Paint or cut out windows.
- Glue house together along the glue tab
- Glue roof to house
- Cut out cardboard base, prime and paint
- Glue house to base and add embellishments

View of the shingles on the Medieval Haunted House
Detailed Information to Construct Your Own Miniature Medieval Haunted House
-
Download the pattern and print it
After accessing the Paper Glitter Glue library, download and print out the pattern. I have included it in two main formats – a PDF file and a zip file including the SVG pattern.
The PDF file includes:
- Printable PDF house pattern with directions
The SVG Zip file contains:
- SVG pattern for this house
- PDF pattern for this house
Be sure to change these lines to score lines when you cut out the pattern on your automatic cutting machine.

-
Copy the pattern onto your cardboard, score and cut the pattern

Trace your pattern onto your cardboard
The pattern itself is simple – it is a basic gable house with a steeply curved roofline. You may shrink or enlarge your pattern to whatever size you want depending on your sources of paper and size of cardboard.
Once you have the pattern copied to your cardboard, the score along the fold lines before you cut it out. It is a little easier score before you cut.
-
Prime and paint the house
Next I prime my little houses with gesso (gesso is a white paint primer which prepares your cardboard to hold onto paint better). For this little house, I used white gesso, but often the Halloween houses get primed with black gesso.
And I chose kind of creepy colors for this set of Halloween houses - Dusty Concord, Crushed Olive, and Twisted Citron distress paints. Of all of these colors, my favorite house is painted with Twisted Citron.
-
Paint or Cut out Windows from cardboard
For these houses, I painted the windows directly on the surface of two of the sample houses, but I wanted the windows to show up better than that. So on the third house I cut out cardboard windows, painted them and glued them on. I like that technique so much better. And it's not too hard to do. In fact, if you mess up a window this way you can just paint a new one and not worry about fixing it.
Finally glue the windows on before you glue the house together.
-
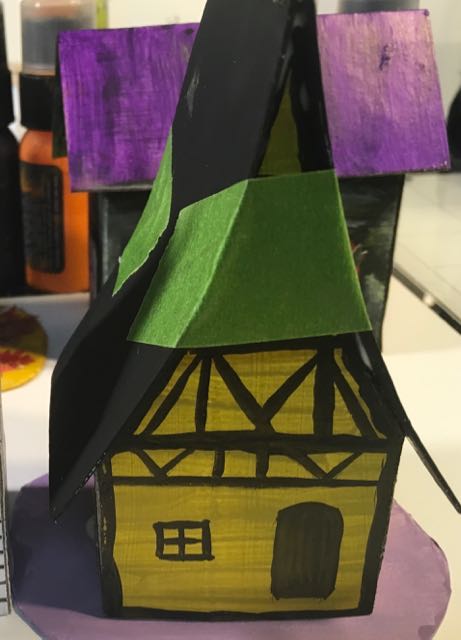
Glue house together along the glue tab
This photo shows the roof flaps glued behind the gables and a binder clip holding the side glue tab together
Structurally, this is a pretty simple house so just glue it along the glue tab. The only thing a little bit tricky is gluing the roof flaps together and then gluing them behind each gable of the house. The roof flaps keep the gables from flexing when you glue the roof on.
-
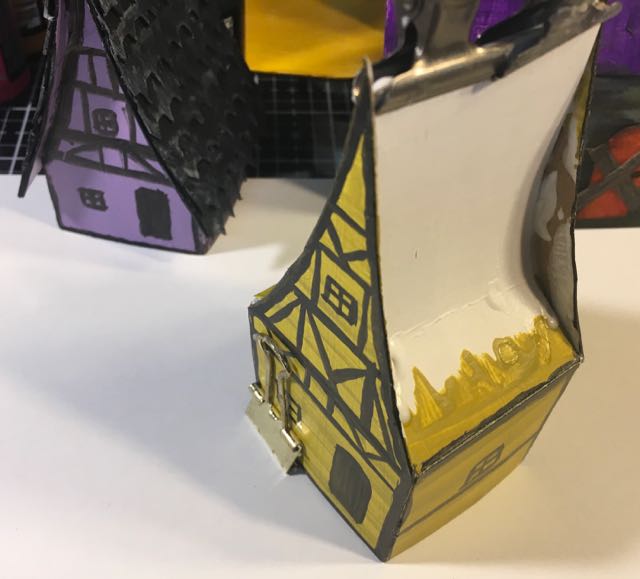
Glue roof to house
After you have glued the house together, you can now adhere the roof to the house. Gently curve the roof so it mimics the curve of the gables. Then run a bead of glue along the gable edges. Hold the roof in place until it is set. I usually hold this roof in place while the glue sets so I can maintain the curve of the roofline.
To hold this curved roof on while the glue set, I used tape to hold it in place. Mostly I hold it for a little while.
-
Cut out cardboard base, prime and paint
Again, this is a simple house with a simple base so all you need to do is cut an irregular piece of cardboard a little larger than the house itself. If you want elaborate landscaping or lots of Halloween embellishments, then cut a bigger base. Since I'm keeping these little paper houses pretty simple, I've been making the bases small.
When painting the base, choose a contrasting color to the house itself.
-
Now glue the house to the base
Just run a bead of glue along the bottom of the house and adhere to the base. These houses are small so they stick pretty easily to your cardboard base.
-
Time to Decorate Your Little Medieval Haunted House
Now you get to use your imagination and decorate the little haunted house however you want. I just added a few pumpkins and a tombstone from the Tim Holtz Village Graveyard die sets. But probably the most effective design element on the house below is the shingles. I just cut cardboard painted black into strips and cut irregular shingles on the each strip. Then each strip was edged in Twisted Citron paint and distressed a little bit with Dusty Concord.

The roofline is one place you can really add a lot of personality to your little paper house.
Tomorrow's 13 Days of Halloween house is a design with a front portico. See you then.
And remember if you have any questions, I will be glad to help. Leave a comment here or email me at [email protected]
Thank you for reading.
Lucy


Leave a Reply