Middle Gable Halloween House - Halloween Paper House No. 9
The 13 Days of Halloween Challenge continues with the Middle Gable Halloween House. What is unique about this little house? It's our first Halloween paper house with a gable addition in the front. I'll show you how to build it below.
Add Halloween Paper House No. 9 to your Halloween village with the free pattern in the Paper Glitter Glue library.
Let’s get started on the Middle Front Gable Halloween house.
How to MAKE THE Middle Gable Halloween HOUSE?
DOWNLOAD THE FREE Middle Gable Halloween House PATTERN AT THE PAPER GLITTER GLUE LIBRARY
You can find all my free patterns in my Paper Glitter Glue Library. I always list the patterns chronologically. That means you will find the newest 13 Days of Halloween paper house pattern first at the top of the library. I mostly list these houses by their number. Today's house is Halloween Paper House No. 9.
There is now an SVG pattern for those of you who have an electronic cutting machine like a Cricut or Silhouette.
To get access to the library, simply subscribe to my newsletter with the form below and you will be sent the password immediately so you can download the pattern. Then click on the library link, click to enter the password protected area, type in the password and then the list of free patterns and tutorials will be available.
Please remember that these patterns are exclusively for your personal use.
MATERIALS
- Halloween House No. 9 Pattern PDF - Design No. 22
- Tracing paper (if you are tracing to the cardboard)
- Cardboard (this house needs to be made of cardboard because of the front gable)
- Cutting Mat
- Metal-edged ruler
- Craft knife and/or scissors
- Aleene’s Tacky Glue or other white PVA glue
- Paint – I use Tim Holtz Distress Paints because these paints work so well for Halloween projects.
- Colored pens, pencils if desired
- Paintbrushes – you need small brushes for details
- Various Halloween Embellishments
BRIEF OUTLINE OF DIRECTIONS
- Download and print your pattern - Design No. 22
- Copy the pattern to cardboard
- Score, cut out the pattern and cut out a small cardboard base
- Prime the Middle Gable Halloween house with the base color
- Paint or decorate the sides of your house
- Add windows and doors
- Fold and glue house together
- Glue the two roof pieces on
- Paint cardboard base
- Glue to base
- Decorate your little house
ADDITIONAL LINKS:
-
- 13 Days of Halloween Paper House patterns:
- Halloween Paper House No. 1
- Halloween Paper House No. 2
- Halloween Paper House No. 3
- Halloween Paper House No. 4
- Halloween Paper House No. 5
- Halloween Paper House No. 6
- Halloween Paper House No. 7
- Halloween Paper House No. 8
- Halloween Paper House No. 9
- Halloween Paper House No. 10
- Halloween Paper House No. 11
- Halloween Paper House No. 12
- Halloween Paper House No. 13
- 13 Days of Halloween Paper House patterns:
MAKE THE Middle Gable Halloween House – HALLOWEEN PAPER HOUSE NO. 9
-
FIRST DOWNLOAD AND PRINT the PATTERN for your little house
First download and print the PDF pattern for Halloween Paper House No. 9 - the Middle Gable Halloween House
-
COPY the Middle Gable Halloween House PATTERN TO CARDBOARD
Use your favorite method copy the pattern to your cardboard.
-
SCORE Your pattern, THEN CUT it out. Also cut out A SMALL CARDBOARD BASE

The cardboard cut out for the Middle Front Gable Halloween Paper House No. 9
For the bases on these little houses, cut out a small piece cardboard a little bit larger than the house. This cardboard doesn't need to be anything fancy. In fact, I think irregular works better for this little Halloween neighborhood.
-
Paint Your HOUSE WITH THE BASE COLOR of your choice

Chipped Sapphire distress paint is the base color of this house, Crushed Olive on the roof
I chose a different color for the house - Chipped Sapphire in the Tim Holtz distress paint line. It's a color that I haven't used much, but I really like it.
-
Paint or decorate the sides of your house
After visiting Washington DC for the past week where there are so many brick buildings, I decided to painted lines to simulate bricks on the sides of this little house. But I do know most brick buildings are not blue. I think it makes a slightly creepy color for the brick.
-
ADD WINDOWS AND DOORS wherever you think they will fit the best.
Before you add the windows and doors, remember the front piece is the one in the middle with side wall on either side of it. The glue tab always goes in the back.
I am still using the easy way to add windows and doors to these little houses. Anyway, I think it's easier than painting windows and doors directly on the house. So cut out squares and rectangles for your windows and doors. Then paint them a brighter color than the houses so that they show up against the walls of your house - mostly I used Squeezed Lemonade or Fossilized Amber distress paints. Also I cut them out of cardboard rather than paper to give more dimension to the windows and doors on the front of the houses.
Generally, I glue the windows and doors onto the little house before I fold and glue the house together. It's just easier to place them accurately at this step.
Another detail that helps with the windows and doors is to distress them with various ink colors - pinks and purples and blues. It varies the light color in the windows. Again, just making them a little spookier.
-
NEXT FOLD along the scored lines and GLUE Your little Halloween HOUSE TOGETHER
Now fold the house along the scored lines and glue the house together with the glue tab in the back. Let dry before you try to glue the roof on.
If you use painter's tape on the painted section of your house, be sure to peel it up carefully because it sometimes will peel up the paint. That's why I only put a tiny bit on the painted section.
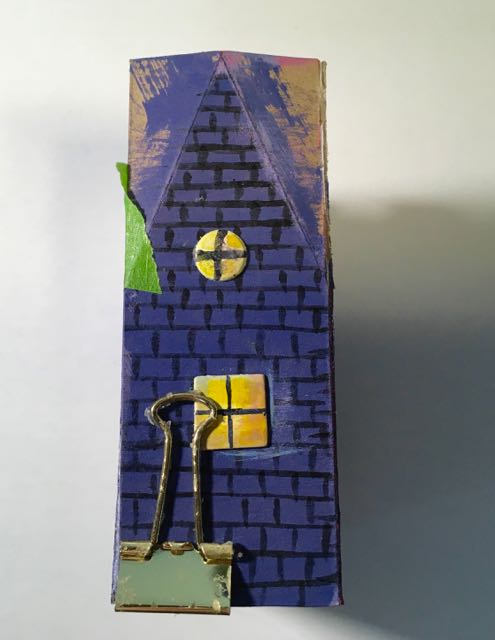
I used a binder clip and just a little piece of painter's tape to reinforce the top of the building during the glue process.
-
GLUE THE Main ROOF TO THE HOUSE, then glue the gable roof to the house
After making the Bat Wing House and the Triple Gable Gothic houses, this roof system is much easier. Fit the main roof around the gable.
Sometimes the space you cut out of the edge of the roof is too small so you have to enlarge it a little bit. And then sometimes there is a bit of a gap around the gable roof which you can hide with a piece of paper or tissue paper or glue or shingles or autumn leaves if you want. But mostly I don't worry about it.
Though I must admit every once in a while I have to cut another roof because the gap is just too big. See the examples of mistakes below. I've worked hard to make sure that the patterns are accurate so that won't happen to you. But still I included this so you would know what to do if you make your own patterns.

Roof mistakes for Halloween House No. 9. On the far right, I didn't make the overhang large enough. On the middle roof piece, I cut out too much to go around the gable and there was a huge hole in the roof. The yellow painted one is just right.
After the main roof is glued on, you add the front middle gable roof. Just score it in the middle, fold and apply glue to the angled seam to the roof so it will adhere to the main roof. Also add a bead of glue to the front of gable so those edges will be glued as well.

Glue the gable roof to the house by adding a bead of glue in the two locations above
-
PAINT CARDBOARD BASE
Now that you have glued both the main roof and the middle front gable roof on, your Halloween paper house No. 9. is basically done. Pick a contrasting color for the base then distress the base to make it spookier. I chose orange for this little Halloween house.
-
GLUE TO BASE
Apply a thick bead of glue onto the bottom of your house and glue it to your painted and distressed cardboard base. Let dry.
-
DECORATE YOUR LITTLE HOUSE

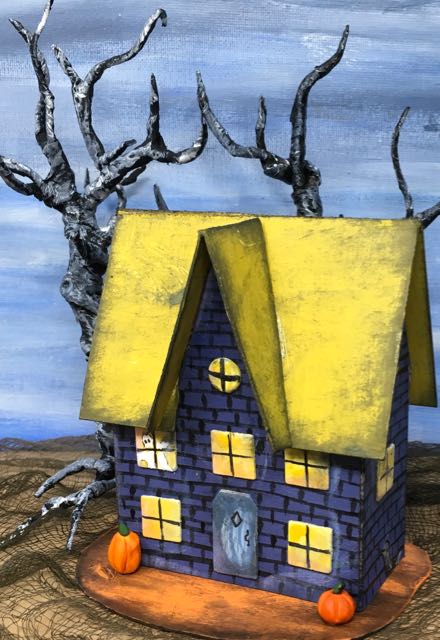
Completed Middle Gable Halloween Paper House No. 9 in the 13 Days of Halloween series
While I've been busy making lots of little Halloween paper and cardboard houses, I have not been very imaginative in decorating them. For this house in addition to the pumpkins, I did draw a ghost with a white pen in one of the front windows, a rat on one side, and glued a spider cut-out on the back roof. My hope is that you will be much more imaginative in this step. On most of the houses, I just add a pumpkin or two, but you can do better, I'm sure.
I am going to enter this one in the Simon Says Stamp Halloween/Spooky challenge as well. Do check out all their incredible designs.
And once again, that is it for this little Halloween Paper House. Tomorrow will bring us a new little house or two. I have to catch up since I skipped a day to post the Fringe Feather tree. So by October 30th we will have made 13 different miniature Halloween houses. Four more patterns to go before the Halloween village is complete.
Lucy


Another little Halloween House in the 13 Days of Halloween Challenge on paperglitterglue.com
Meihsia Liu
This is such a fantastic Halloween project! Thank you so much for sharing with us at Simon Says Stamp Monday Challenge. 🙂