Day No. 2 in the 13 Days of Halloween Challenge

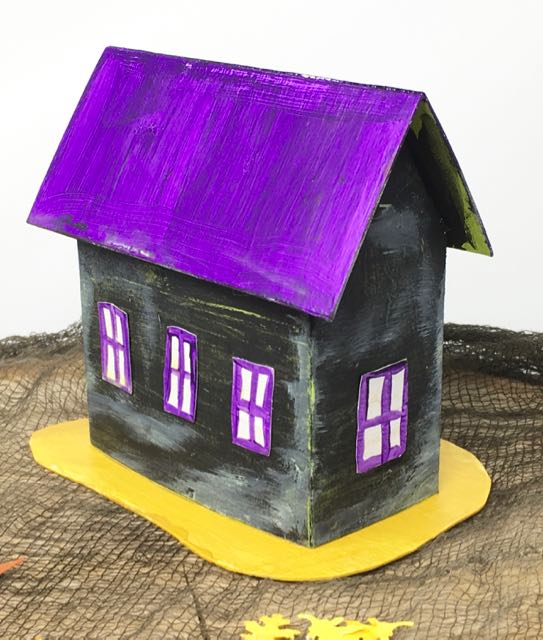
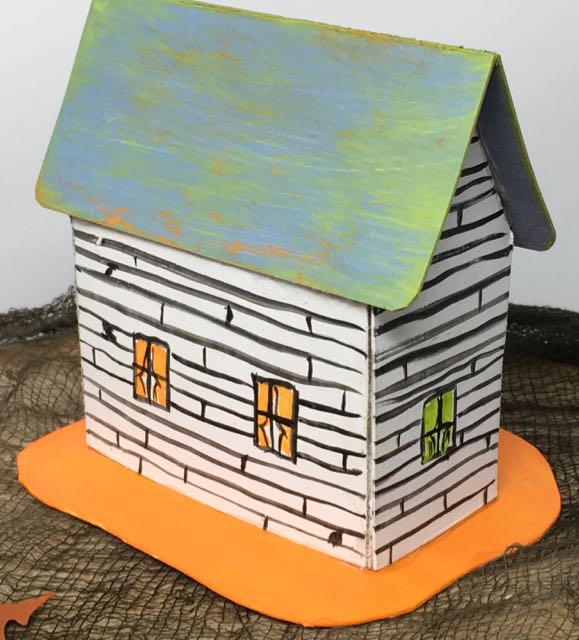
The rusted roof and purple roof versions of Halloween Paper House which is No. 2 out of the 13 patterns of miniature Halloween houses
For day number 2 in the 13 Days of Halloween challenge, here is a spooky little house with the gables on each end. Each day I will post another house and its free pattern until October 30th when the 13 little paper Halloween houses will be complete. Perfect way to start your own miniature Halloween village.
This simple paper Halloween house is also an easy design just like the first house, but the gables are on each end instead of the front. I made 3 paper versions playing around with the colors and siding. My favorite is the house above - the Rusted Roof Halloween House No. 2.
So below are all the instructions for making this fun little Halloween house.
What do you need to make the houses?
First, Access the Paper Glitter Glue Library
You can find all my free patterns in my Paper Glitter Glue Library. I list the patterns chronologically. So you will find the newest 13 Days of Halloween paper house pattern first at the top of the library.
To get access to the library, simply subscribe to my newsletter with the form at the bottom of the post and you will be sent the password immediately so you can download the pattern. Then click on the library link, click to enter the password protected area, type in the password and the poof! the list of free patterns and tutorials will appear.
This post contains some affiliate links for your convenience. That means if you make a purchase after clicking an affiliate link, I will earn a small commission but it won’t cost you a penny more. Click here to read my full disclosure policy.
Materials
- Halloween House No. 2 Pattern PDF - Design No. 15 - (also SVG pattern included)
- Tracing paper (if tracing to the cardboard)
- Cardboard
- Cutting Mat
- Or an electronic cutting machine like a Cricut Maker
- Metal-edged ruler
- Craft knife and scissors
- Aleene's Tacky Glue or other PVA glue
- Various colors of paint - My favorites are the Tim Holtz Distress Paints because I love this range of colors so much. I also use gesso to prime my houses before I paint them
- Alcohol inks if making the Rusted Roof
- Grit paste to add texture
- Crackle paste to add texture
- Metallic DUCT tape (also called aluminum foil tape) from home improvement supply stores for the Rusted Roof
- Colored pens, pencils, markers
- Paintbrushes in different size (small pointy ones for details are my favorite)
- Halloween Embellishments of your choosing
Brief Overview of Directions
- Download and print Halloween Paper House No. 2 pattern - Design No. 15
- Copy pattern to cardboard
- Score, then cut out pattern and cardboard base
- Paint the house and the cardboard base
- Fold and glue house together
- Glue the roof on
- Glue to base
- Decorate with Halloween embellishments
Additional Links that You might like:
- Easy Paper Houses - A Free Printable Pattern
- If you want VERY detailed photos and instructions on making a simple paper house, you can find them in this Easy Paper House post.
- Twisted Tree Tutorial - information on making a twisted paper tree
- Make a Rusted Roof - information on making a rusted roof for your little house
SVG files:
There are two pages in the SVG zip file - the SVG file itself and the PDF pattern.
If you are using the SVG pattern for your automatic cutter, the score lines are in a separate layer from the cut lines. And please note: I just bought a Cricut a few days ago and I haven't had time to get it up and running yet. So I cannot test how well the pattern works yet. Jennifer Maker, who wrote the Cricut Coach Playbook did go over this pattern and helped me with this one.
Note for cutting machine users: There is ONE layer of lines that needs to be converted to score lines. So either convert that layer or remove the layer entirely. If you convert the layer to score lines, you also need to attach them to the house layer.
PDF Files:
The PDF file is not a zip file, but a 4 page booklet with directions and the PDF pattern that you can download.
Let's Get Started Making Halloween Paper House No. 2
Download and print Halloween Paper House No. 2 pattern
Download and print the pattern if you are going to cut out the cardboard by hand. This is a very simple pattern that is easy to cut by hand. There are no complicated, difficult cuts. I do think you need to use cardboard for this house because cardstock is likely too thin to keep the walls from bending.

Front view of the Rusted Roof Halloween Paper House
Copy pattern to cardboard
Tape your pattern to the cardboard and trace over the lines with tracing paper or a dull pencil or pen that has run out of ink. The solid lines are for cutting on the pattern and the dotted lines are for scoring.
Score, then cut out pattern and cardboard base
Score the pattern first before you cut the pattern out. It's just a little easier if you do that first. It doesn't tend to shift on you quite as much.
Paint the house and the cardboard base
First prime the house with gesso. Draw any details first like windows and doors and siding. Then paint your base color.
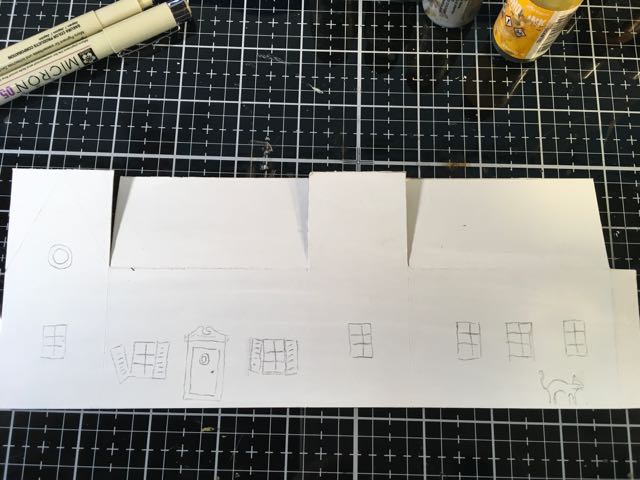
Details drawn in pencil on the rusted roof house before assembly. It works better that way. Then they were outlined with a Micron pen.
Generally, I paint the house before I assemble it. I didn't do that on the purple roof house because I was in a hurry. That's why I painted windows on a piece of watercolor paper and glued them to that house.
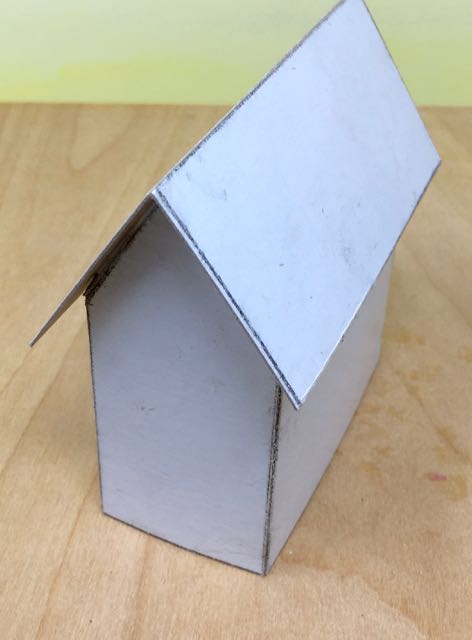
Structure of Halloween paper house No. 2 before painting. This house was painted with the purple roof.

Windows and doors glued on Halloween Paper House No. 2
But I did paint the little house with the curtains in the windows and the rusted roof house first.
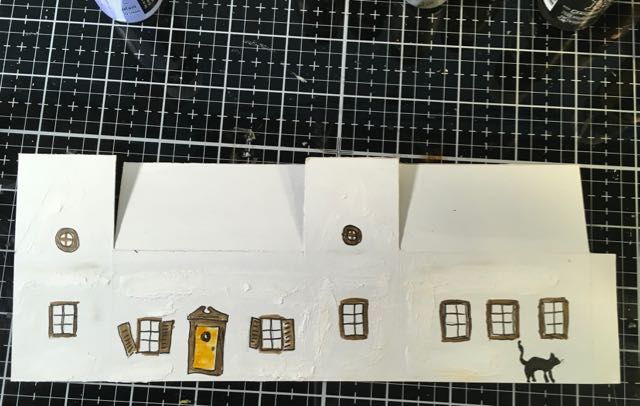
Windows and door painted on the rusted roof version of Halloween House No. 2 before assembly. Crackle paste was added here as well. I distressed it with Black Soot Distress Ink after assembly because I like how the ink catches in the corners when the house is assembled.
For the rusted roof house I added crackle paste after the painting it with gesso.
Fold and glue house together
Assembly time. Fold along the score lines and assemble the house. I always use a binder clip to hold the glue tab on the side together while the glue dries.

I love to use painter's tape to hold down flaps while the glue is drying. See how the Black Soot distress ink highlights the cracks and the corners?
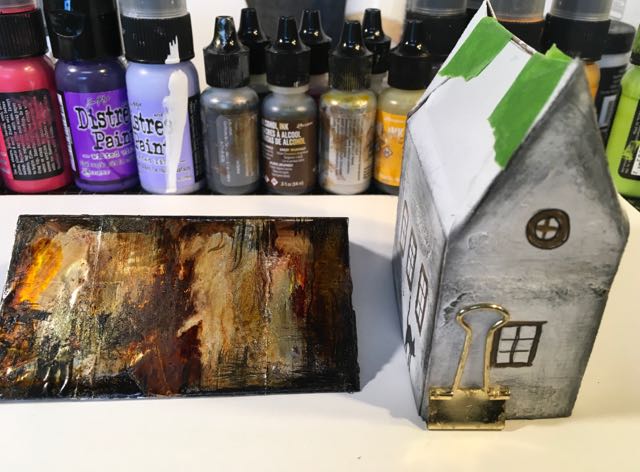
Here you can see the binder clip I use to hold the house glue tab in place. Also the rusted roof is finished and ready to be installed.
Glue the roof on the house
If you want to make a rusted roof on your little house, now is the time. Cover the scored cardboard roof with the metallic duct tape. I always emphasize that it is really an aluminum duct tape for repairing ducts, not the fix everything everywhere duck tape. Add some texture paste or grit paste to make it look really rusty. Then color with alcohol inks in reds, orange, brown, and black. I always distress the rusted roof more with Black Soot distress paint. It ages everything - including my hands.
Windows glued on Halloween Paper House No. 2
Glue the house to the base
For these little houses, the base is simply a small piece of cardboard cut into irregular shapes - kind of like a stepping stone. I just make them a little larger than the house and paint in contrasting colors.
Back view of the Coffin Door Halloween paper house showing orange curtains. A thick bead of glue adheres the miniature Halloween house to its simple cardboard base.
Now you get to decorate the Halloween Paper House
The fun continues when you decorate your little house. You can go overboard and decorate these little houses with whatever Halloween goodies you have available. I've been pretty busy making 13 days of houses so I've kept them relatively simple for design purposes. But you can use all your little bits of Halloween ephemera and die cuts to decorate the miniature houses in your Halloween village.
Well, that's the second house in the 13 Days of Halloween Challenge. I hope you do try it and make this little house. More to come tomorrow.
Here's a list of all thirteen Halloween Houses for you:
-
- Halloween Paper House No. 1
- Halloween Paper House No. 2
- Halloween Paper House No. 3
- Halloween Paper House No. 4
- Halloween Paper House No. 5
- Halloween Paper House No. 6
- Halloween Paper House No. 7
- Halloween Paper House No. 8
- Halloween Paper House No. 9
- Halloween Paper House No. 10
- Halloween Paper House No. 11
- Halloween Paper House No. 12
- Halloween Paper House No. 13
Thank you for stopping by.
Lucy

Halloween Paper House No. 2 for the 13 Days of Halloween Challenge - a little house pattern each day for 13 days
Leave a Reply